
Most, if not all, applications evolve. They sometimes require local or even global changes. During the lifetime of an application, considerable time is spent re-engineering, usually with the objective of improving the code. This sometimes starts as early as the development phase and accelerates as the application matures. This includes—but is not limited to—renaming variables, moving code into methods, changing method signatures, and redesigning classes. Finding and changing a variable in a software system that spans dozens of source files can be challenging. Another task that can be difficult is changing the signature of a commonly used method. When you do this, you must locate and change method calls throughout the application. However, if you make a mistake, these changes might not achieve the desired effects. Worst-case scenario: these changes might introduce bugs into otherwise pristine applications. Refactoring helps developers re-engineer code and removes much of the tedium of maintaining an application. Visual Studio 2008 provides refactoring as a viable, multifaceted tool to help developers. Refactoring assists in renaming variables, changing method signatures, extrapolating interfaces, converting fields to properties, and much more.
The Visual Studio 2008 user interface has a Refactoring menu that provides the operations listed in Table 4-3. The Refactoring menu is also available in the Code Editor using a context menu.
Table 4-3. Refactoring operations
Operations | Description |
|---|---|
Rename | Renames a symbol, such as a variable or method name, throughout an application. |
Extract Method | Creates a new method that encapsulates the selected code. |
Encapsulate Field | Creates a property that abstracts the selected field. |
Extract Interface | Extracts an interface from a type. |
Promote Local Variable To Parameters | Promotes a local variable to a parameter of the current method. |
Remove Parameters | Removes a parameter from the parameter list of a function. Call sites for the function are updated to reflect the removed parameter. |
Reorder Parameters | Reorders the parameters of a function. Call sites for the function are updated for the new sequence of parameters. |
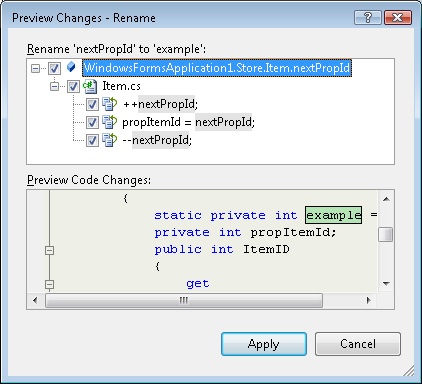
The Preview Changes dialog box, such as the one shown in Figure 4-35, is invaluable because it provides you with an opportunity to preview refactoring changes before applying them.
Refactoring can span multiple projects of the same solution, which occurs with project-to-project references. A project-to-project reference is a reference where the projects for both the referencing and referenced assemblies are in the current solution. The Projects tab of the Add Reference dialog box inserts a project-to-project reference. This was shown in the "Adding References" section, earlier in this chapter.
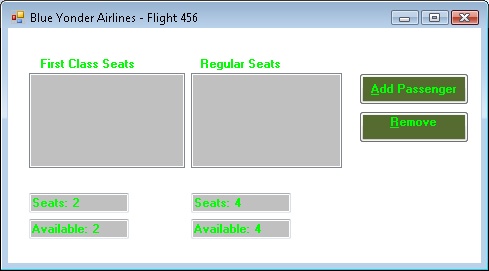
This example demonstrates some of the features of refactoring, including renaming variables and extracting interfaces. On the Web site, this code is in the Refactoring project for Chapter 4. The scenario refactors the Airline Seats application. This application manages the first class and coach standby lists of an airline flight. Figure 4-36 shows the screen presented to the ticket clerk at an airline check-in counter.
The following steps outline this example procedure:
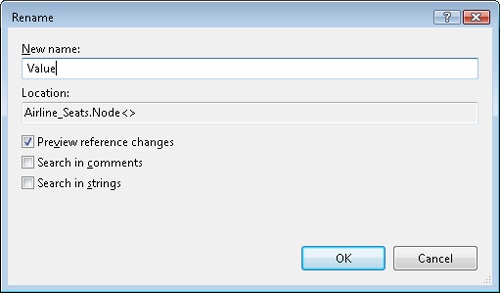
The application defines a Node class, which is a generic collection class in the node.cs file. The value of a node is returned from the Info property. The property should be renamed Value, which is more intuitive. Right-click the Info name in the source file. From the context menu, choose Refactor and then choose the Rename command.
The Rename dialog box appears, as shown in Figure 4-37. The selected text is displayed with its location. Three check boxes are presented. The Preview Reference Changes option provides a preview dialog box before the changes are applied. This option is selected by default. The Search In Comments option searches comments, in addition to code, for the renamed text. The Search In Strings option extends the search to literals, such as string literals. Enter Value in the New Name text box and proceed with the renaming operation by clicking OK.
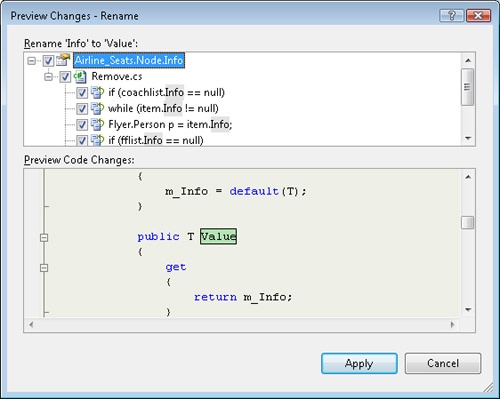
The Preview Changes dialog box appears, as shown in Figure 4-38. You can review the pending changes in this window. Specific changes can be selected or unselected. When acceptable, click Apply, and the specified changes are applied. If necessary, you can undo refactoring changes using the Undo (Ctrl+Z) feature of Visual Studio.
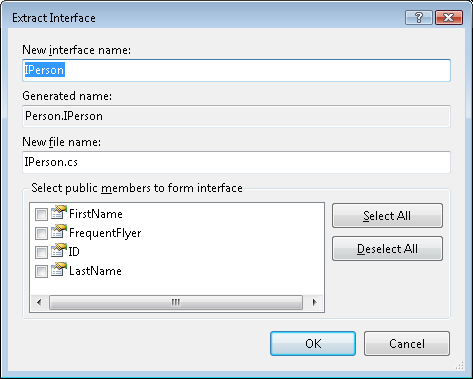
The ability to extrapolate interfaces from classes is another great feature of refactoring. Manually extracting interfaces from types is a time-consuming process for developers, so refactoring can be a great way to speed this task. The Airline Seats application has a Person class that represents the flyer. In the future, other types of people may be added to the application, such as flight attendants. For that reason, you want to extrapolate the Person interface for future use. To do so, right-click anywhere within the class and choose Refactor, then choose the Extract Interface command. The Extract Interface dialog box appears, as shown in Figure 4-39. Enter the new interface name and a new file name. A list of potential members is presented. You can select the members to include in the interface. As a convenience, Select All and Deselect All buttons are provided. Click Select All, and then click OK.
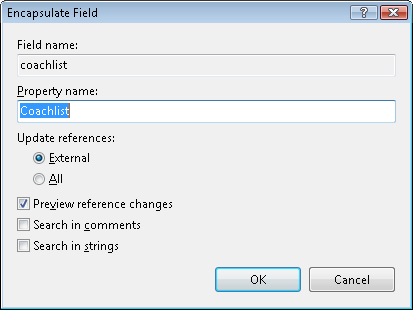
The Passenger class has two public fields. A tenet of object-oriented programming is that fields should be private. Exposing the fields as public properties is more secure. Look at the following code:
public Node<Flyer.Person> coachlist = null;
public Node<Flyer.Person> fflist = null;
Right-click the first field. From the context menu, select Refactor, and then choose the Encapsulate Field command. The Encapsulate Field dialog box appears, as shown in Figure 4-40. Enter the property name and click OK.
The Preview Reference Changes dialog box appears, showing the potential changes. You can accept or reject individual changes.
Repeat Refactoring Example and Refactoring Example to convert the second field to a property.
This is the interface created from the Extract Interface refactoring operation. It is saved to a separate file. In the file, change the namespace containing the interface appropriately. For the sample application, change the namespace to Flyer. Despite the numerous changes in various parts of the application, you now can compile and run the program successfully.
interface IPerson
{
    string FirstName { get; set; }
    bool FrequentFlyer { get; set; }
    string ID { get; set; }
    string LastName { get; set; }
}
Refactoring also updated the Person class to inherit the IPerson interface (and the namespace has been updated to Flyer):
public class Person : Flyer.IPerson
{
     // partial listing
}
This is one of the properties created from refactoring a field in the Passenger class:
private Node<Flyer.Person> coachlist = null;

public Node<Flyer.Person> Coachlist
{
    get { return coachlist; }
    set { coachlist = value; }
}