Problem Overview
Vending machines are great! They help selling goods when personnel is limited, for example at night or in remote, underserviced locations.

An early coin-operated vending machine
Since then, vending machines have increased in complexity. Nowadays, they are used to sell almost anything, from iced drinks to underwear. According to a report by the Food and Agriculture Organization of the United Nations (FAO), in 2012 there were about 60 million vending machines in the world. The top four countries in terms of vending machines are Japan, China, United States, and Russia. The global vending machine industry was worth $41 billion in 2014 and is expected to reach $52 billion by 2019, with a CAGR of 4.4 percent.
Candy and snack vending machines
Coffee vending machines
Fuel vending machines
Redemption vending machines
Vending kiosk vending machines
As a business owner, you might need a specific type of vending machine or even a customized design. In this chapter, you learn how to use the Raspberry Pi Compute Module to process the orders and control the hardware of the machine. Furthermore, since the compute module cannot be used standalone without a carrier board, you learn how to interface the Raspberry Pi Compute Module with a customized carrier board for the specific hardware application.
Business Impact
As mentioned, vending machines can serve customers in times and locations where allocating full-time personnel is not economically viable. The main economic benefit of vending machines is their very low upkeep, especially as compared to human workers. The only things needed are electricity and regular maintenance/restocking services, thus they reduce labor costs in retail establishments. For example, a grocery store may want to have an employee restocking the shelves, but the cost of employing a worker is not justified by the extra revenue generated. Employing a vending machine allows the store to determine how much labor is needed to keep the shelves stocked.
Vending machines can also help a company have a more positive image with its customers and increase the coverage of its business. For example, a sandwich shop may want to offer delivery, but it would be too expensive to employ full-time delivery drivers. A vending machine could be placed in the lobby of the shop and the sandwiches could be delivered by a company that already delivers mail or packages.
Vending machines have the potential to increase employee productivity. Because cashiers are not needed, more registers can be opened without having to hire more employees. This leads to shorter lines and faster service.
Also, vending machines can provide a good level of privacy and security, as there is no direct human contact involved. This is especially true for coin-operated vending machines, as they don't have touchscreens or any other ways to identify the customer.
Seeing all the benefits vending machines can provide for retail businesses, you might be wondering if you can leverage Raspberry Pi 4 hardware to utilize this technology. The answer depends on the scale of your operations and the exact nature of services/products sold. Unlike with the project described in Chapter 2, creating/customizing a vending machine is a task only suitable for medium-to-large scale enterprises. Smaller companies might find it is more cost-effective to use existing products. On the other hand, if your company sells a product that is not very well covered by existing options, building your own vending machine might make a lot of sense from an economic perspective. With Raspberry Pi 4 Compute Module as the hardware backbone, it is not too complicated to do so!
Related Knowledge
Vending machines rely on a number of different technologies to perform their functions. They typically use electricity to power the lights and the refrigeration. Some of the more advanced machines may use computerized systems that are capable of monitoring inventory levels and can ensure that the product is available when the customer wants it. Vending machines are a good example of the interplay between technology and business. The business requirements of a company will determine which technologies are best suited for that application.
A screen to interact with customers
A computer to process requests and receive payments
A controller for the mechanical system
A card reader for accepting purchases with plastic cards
A WiFi/4G module for Internet connection
A stock-monitoring system, such as one using computer vision
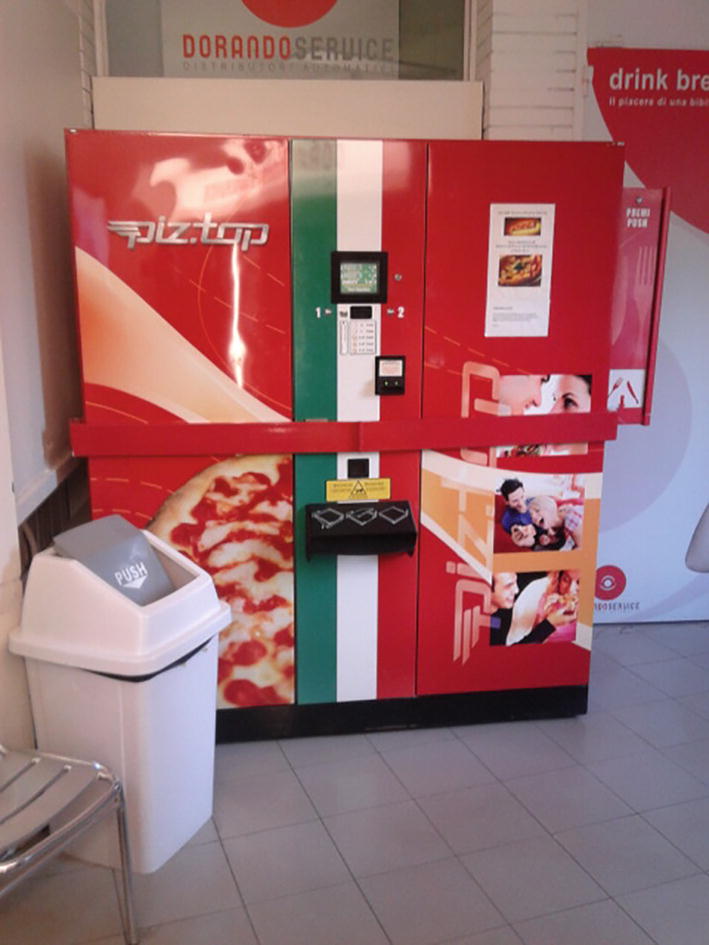
The regular Raspberry Pi 4 has too many unnecessary components that won’t be useful for this application, such as USB ports, Ethernet ports, and HDMI connectors. On the other hand, it lacks a touchscreen and for mechanical systems control, an extension board must be used. All of that makes it impractical to use the standalone Raspberry Pi 4 board. Fortunately, there is a better solution—the Raspberry Pi 4 Compute Module (hereinafter referred to as Raspberry Pi 4 CM for brevity). It has a compact form factor for deeply embedded applications.
A hardware overview of the Raspberry Pi 4 Compute Module
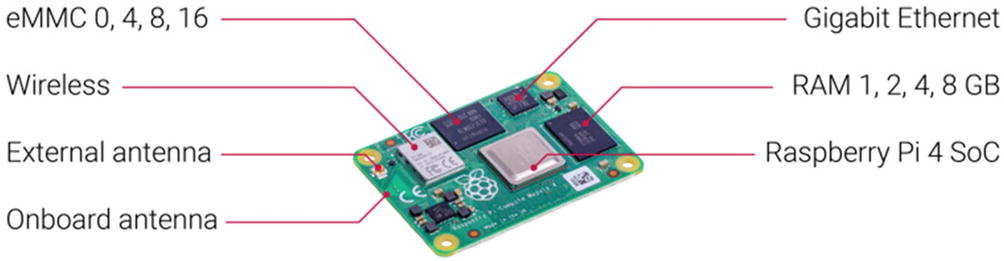
Reference carrier board for the Raspberry Pi 4 CM
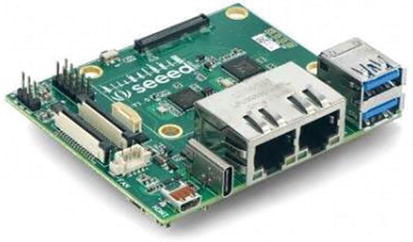
Seeed Studio’s Dual Gigabit Ethernet carrier board
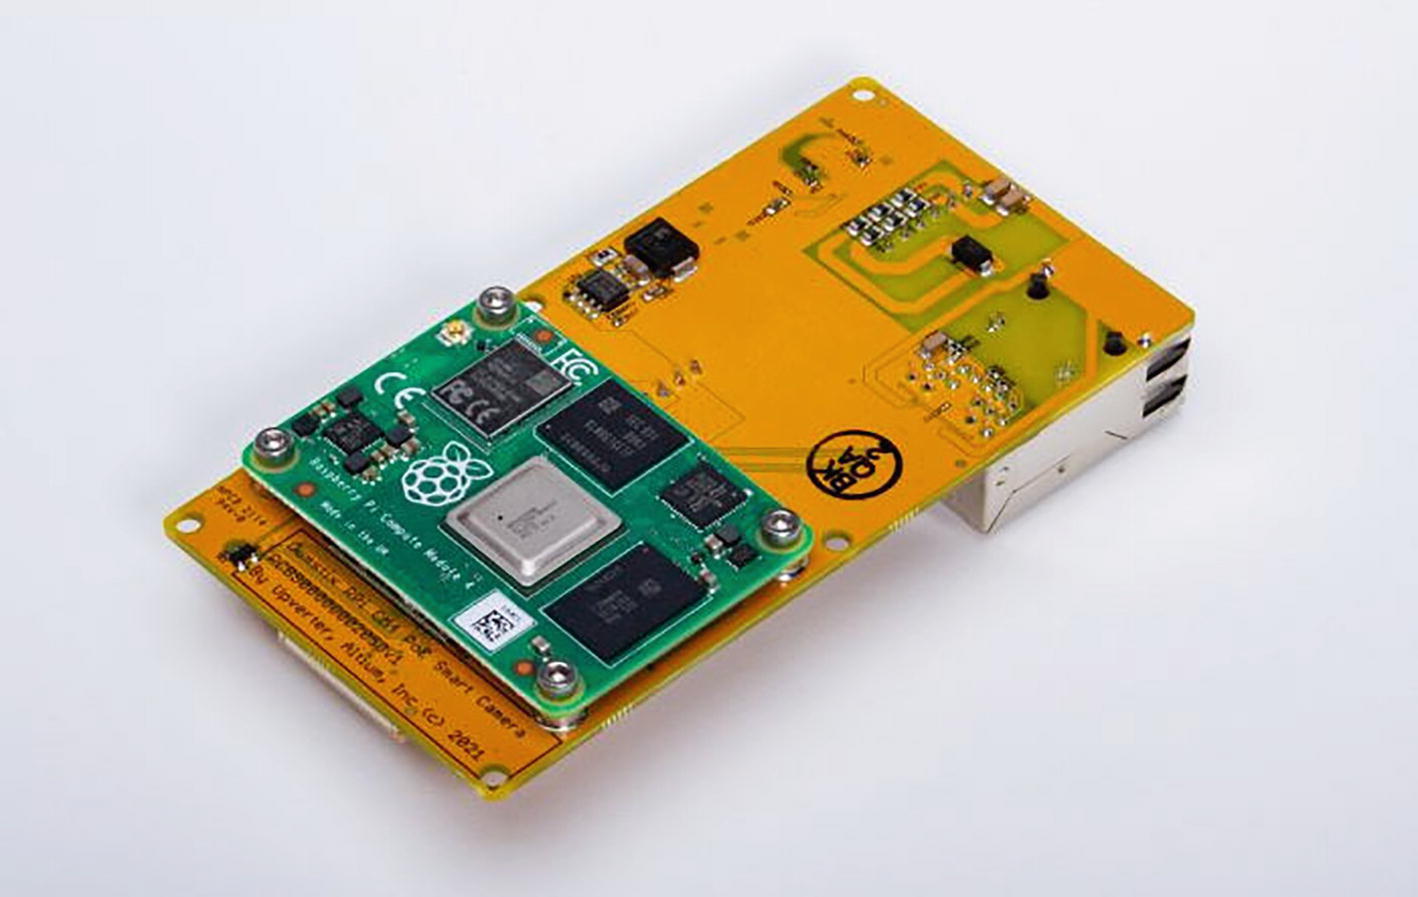
Gumstix Raspberry Pi CM4 PoE smart camera
There are dozens of carrier boards available at the moment of writing this book and this list will only expand in the future.
Display/touchscreen connector
I2C/SPI/UART interfaces
LTE module integration/support
RTC (real-time clock) module and battery for it
If there is no board on the market that completely satisfies your product requirements, designing one is not a difficult task. Since this book focuses on use case analysis and software layer examples, we don’t providing a complete step-by-step guide to designing a carrier board. Instead, we walk you through the important details and know-hows of the process, so that you know how to explain your requirements to the board designer.
Decide on PCB Manufacturer Beforehand

Logo of OSHPARK, a prominent PCB manufacturer
Of course, there are many more. Very likely, your designer—be it a freelancer specialist or a company—has contacts with the PCB manufacturing service their clients use most often.
Determine the Interfaces You Need
Prototyping a PCB can be a time-consuming process, especially if you ship the PCB or PCBA from manufacturing facilities overseas. So it is very important to decide what elements you need on the carrier board and create a working prototype, which includes the hardware and software, to make sure you’re not missing anything in the requirements to the carrier board design. With a working prototype, it is also easier to present the project to the PCB designer.
Look at Third-Party Open Source Designs for Your elements
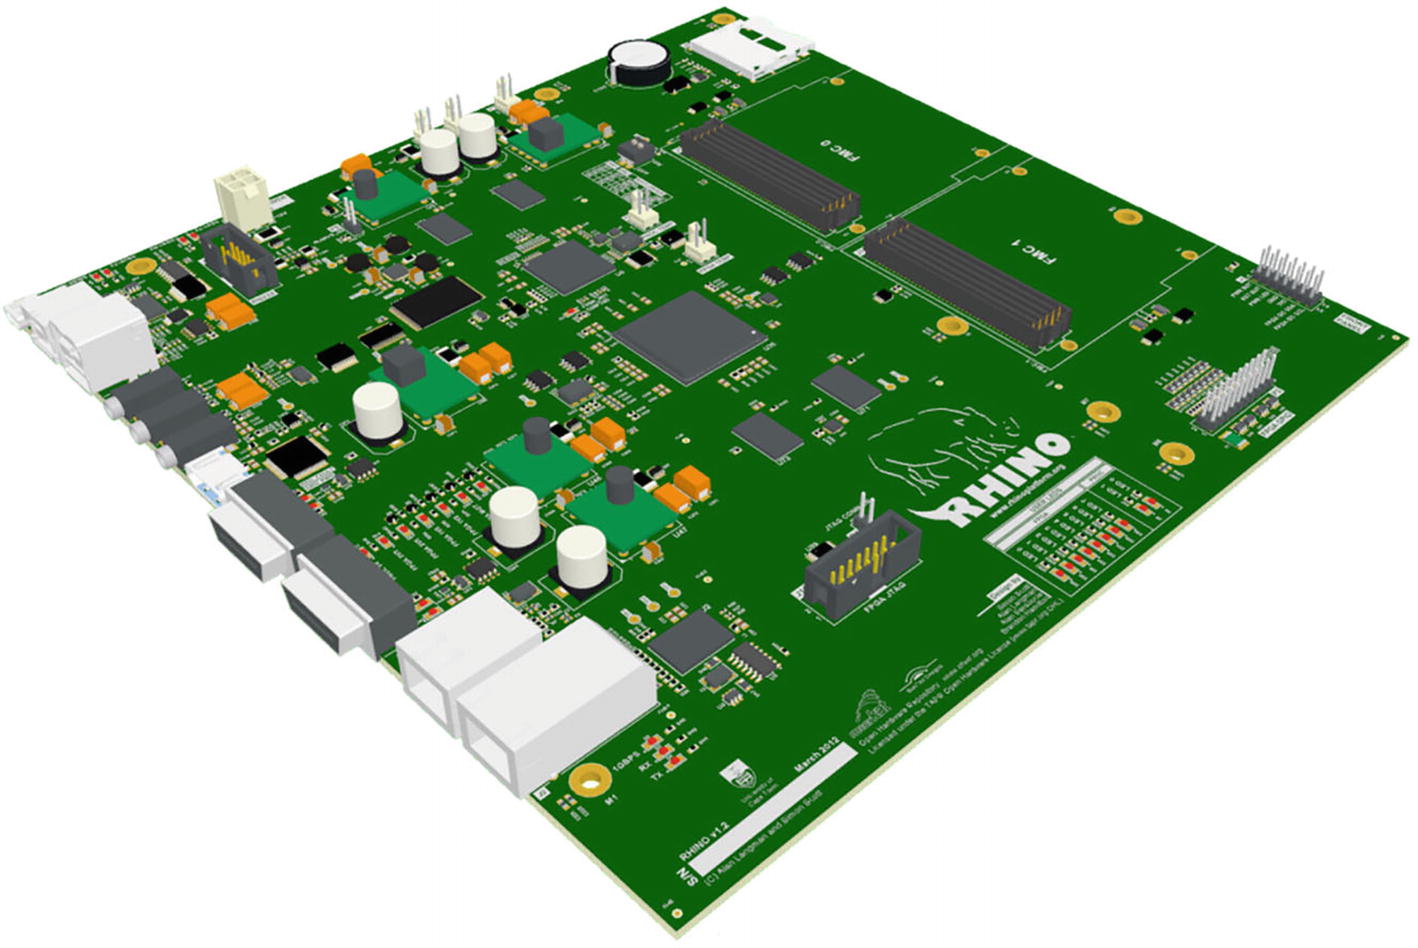
RHINO, Reconfigurable Hardware Interface for Computing and Radio, is a relatively large platform for developing software-defined radio applications
If you’re building a consumer electronics device, you look at the Open Source Hardware page on the Element 14 community.
Look at How Other People Have Solved the Same Problem
At the very least, you might get some inspiration from what others have done before you. This is especially helpful if you have a very specific problem and there are no open source projects addressing this issue directly. OSHPARK has a great page with various open source projects for PCB designs.
Decide on Your Form Factor
Another very important decision is to decide what form factor to use for the carrier board, i.e. what will be the dimensions of the carrier board and how it will fit into the vending machine. If you plan to use a touchscreen for customer interaction, you should also keep that in mind when designing a board, so that the screen can be integrated with the carrier board for easier maintenance.
Determine the Location of Connectors and Headers
There are many different ways to place elements on the carrier board. You can put them on the front panel, on both sides of the board, or even under the board. It is very important to think about how you will place these elements and make sure you won’t be blocking any connectors or headers with other elements.
Take Special Care of Heatsinks and Cooling Elements
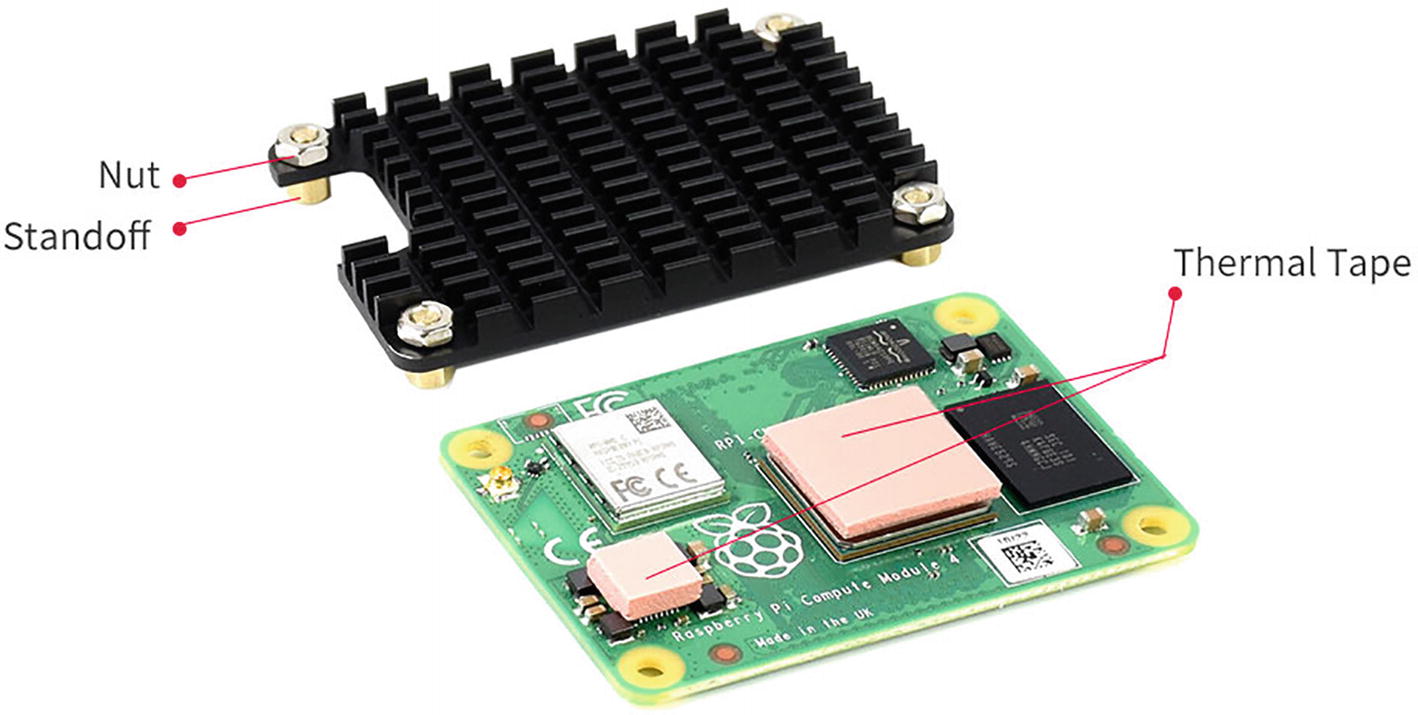
A heatsink for Raspberry Pi 4 CM
The last thing you want is a thermal runaway because of insufficient cooling while operating or an overheat while soldering the board, which is even more dangerous.
Implementation
- 1)
Implement servo control with Raspberry Pi 4.
- 2)
Implement a simple web server that can be accessed on a local network and can be used to “buy” things from the vending machine.
- 3)
Add a PayPal payment processor.
Implement Servo Control with Raspberry Pi 4
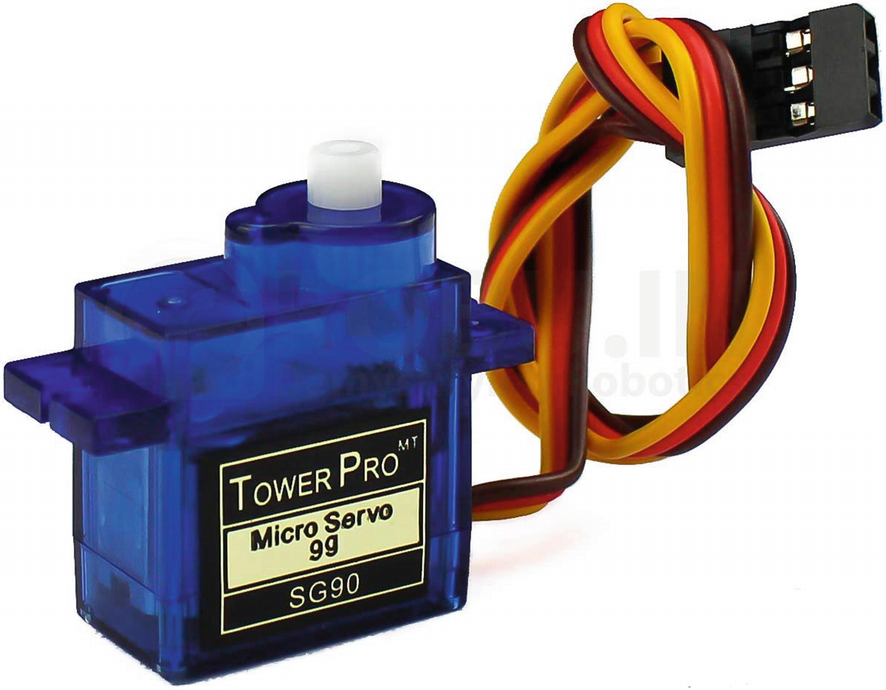
Very common 9g micro-servo from TowerPro
Usually, the input signal is pulse-width modulated (PWM) and its frequency doesn’t change over time. Instead, the servo motor rotates to a certain angle when the duty cycle of the PWM input signal changes. The servo used in this example can turn 180 degrees in total (90 degrees in each direction). When the duty cycle is 5% (a one-millisecond long, high pulse), the servo rotates to its minimum position. If the duty cycle changes to 10% (which is a two-millisecond long, high pulse), the servo rotates all the way to the right. Duty cycles in between correlate to different angles between -90° and +90°. However, these numbers might vary for different servos and between manufacturers. Therefore, it’s always necessary to consult the datasheet of the servo.
Note that the Raspberry Pi shouldn’t supply the voltage to the servo. Instead, employ an external power supply to drive the servo motor, because the Raspberry Pi’s GPIO pins might be unable to supply enough power to make the motor turn at an acceptable rate.
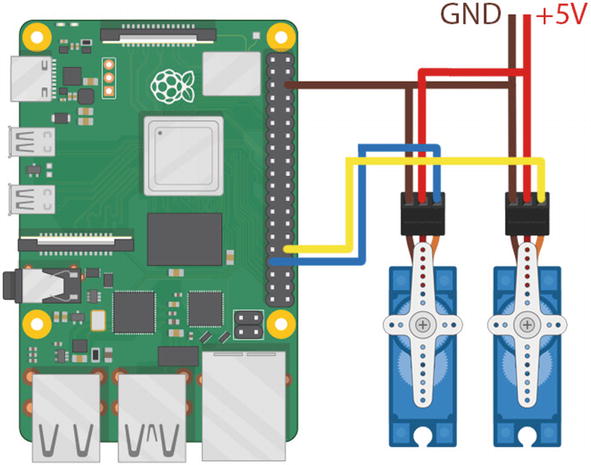
Connection schematic for Raspberry Pi 4 and two servos
Don’t forget to connect any GND pin of the Raspberry Pi to the ground of the power supply as well.
As mentioned, servos typically expect a PWM signal that tells them where to turn. Therefore, there are several methods to rotate a servo to a specific angle. One method is to use the gpiozero library that contains a servo module.
You can use 64-bit image of Raspberry Pi OS as a starting point, the same one you flashed on the SD card in Chapter 2.
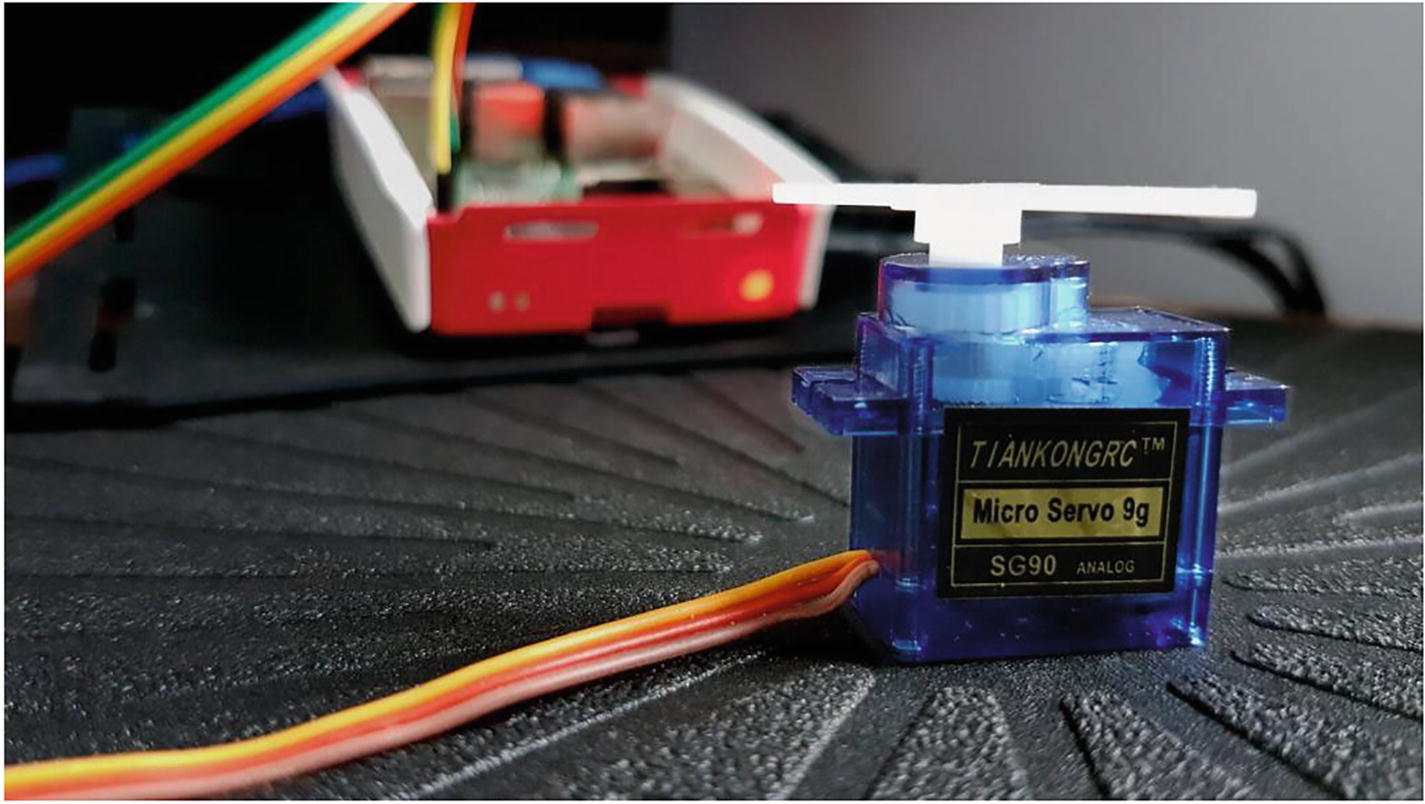
A 9g servo connected to Raspberry Pi 4
Since servos are essentially just DC motors with a potentiometer and a control chip that allows them to turn to a certain angle, you can instruct the servo to turn to a precise angle with the help of the AngularServo class in the gpiozero library.
Now that you know how to control a servo, it is time to work on the second element of the vending machine—user interaction.
Implement a Simple Web Server with Flask
In order to create the web server, you will be using a Python microframework called Flask. Flask is a web framework. It’s a Python module that lets you easily develop web applications. It has a small and easy-to-extend core and allows for implementing features like URL routing and template engine. It’s easy to get started with Flask, because it doesn’t have a huge learning curve.
On top of that, it’s very explicit, which increases readability. To create the “Hello World” app, you only need a few lines of code.
It then starts a web server that’s available only on your computer. In a web browser, open localhost on port 5000 (the URL) and you’ll see “Hello World” show up.
These two lines are responsible for creating the Flask web server.
These two routes display a payment success or failure message. The success route function will also trigger servo movement, which is supposed to push the goods the customer purchased out of the shelf.
The <meta http-equiv="refresh" content="10; URL=/" /> command will cause the user's browser to automatically go back to the server's main page after ten seconds.

An interface that can be seen from a mobile phone browser after scanning the QR code
We discuss how to implement a more scalable variant in the “Pro Tips” section of this chapter.
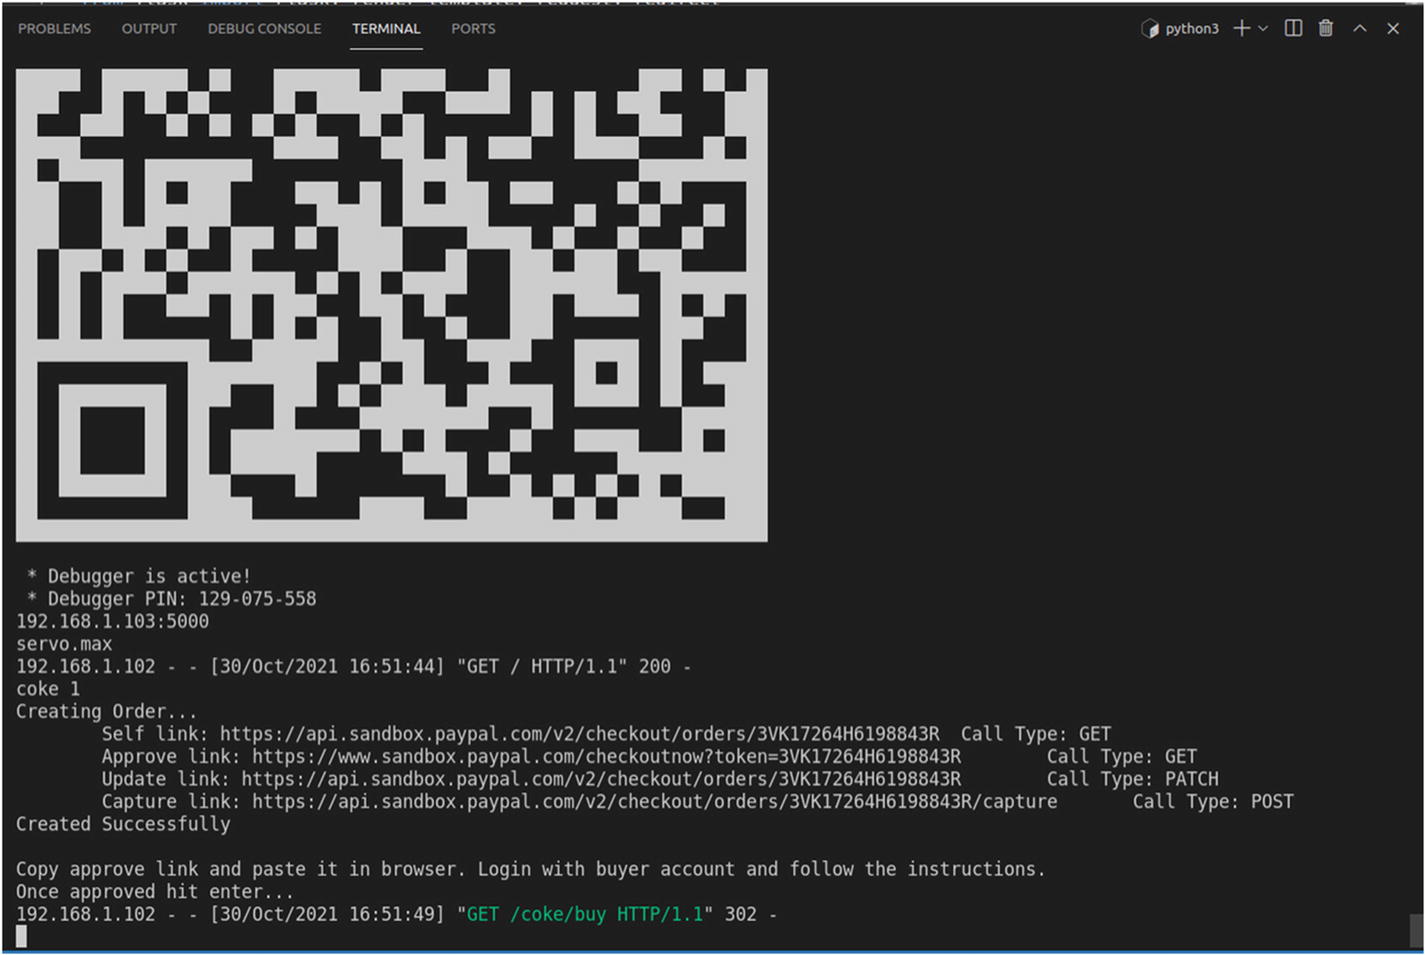
You can now make “purchases” from the vending machine with your phone.
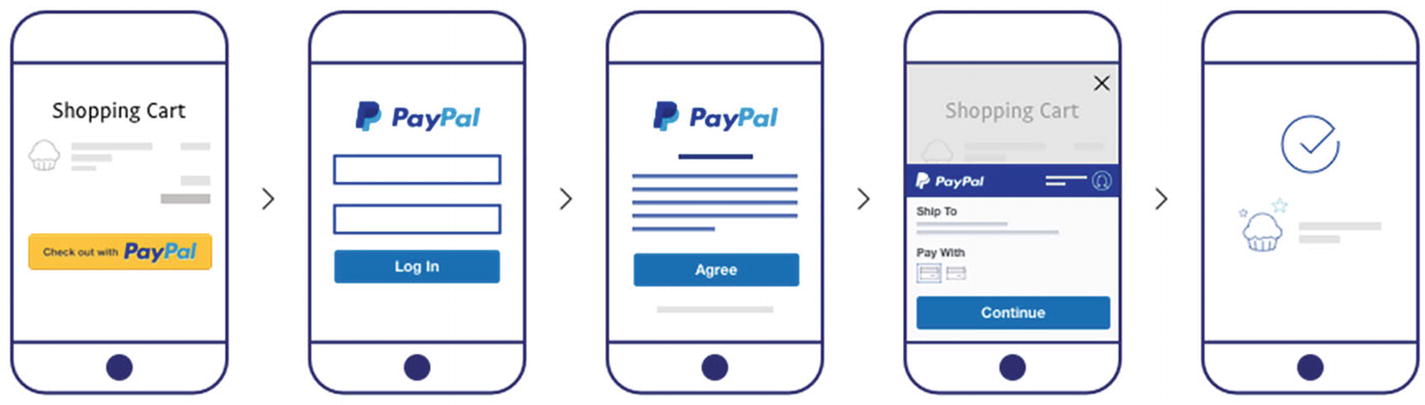
PayPal Checkout SDK usage
For illustrative purposes, we’re going to use the PayPal payment SDK here, since PayPal is a globally available payment system. Your actual solution might handle the notes, tokens, or even cryptocurrency!
Add a PayPal Payment Processor
To get started with processing PayPal payments , you need to download and install the latest version of PayPal Python SDK. If you installed Python3 libraries from the requirements.txt file in the Chapter_3 folder, you should already have PayPal Python SDK installed.
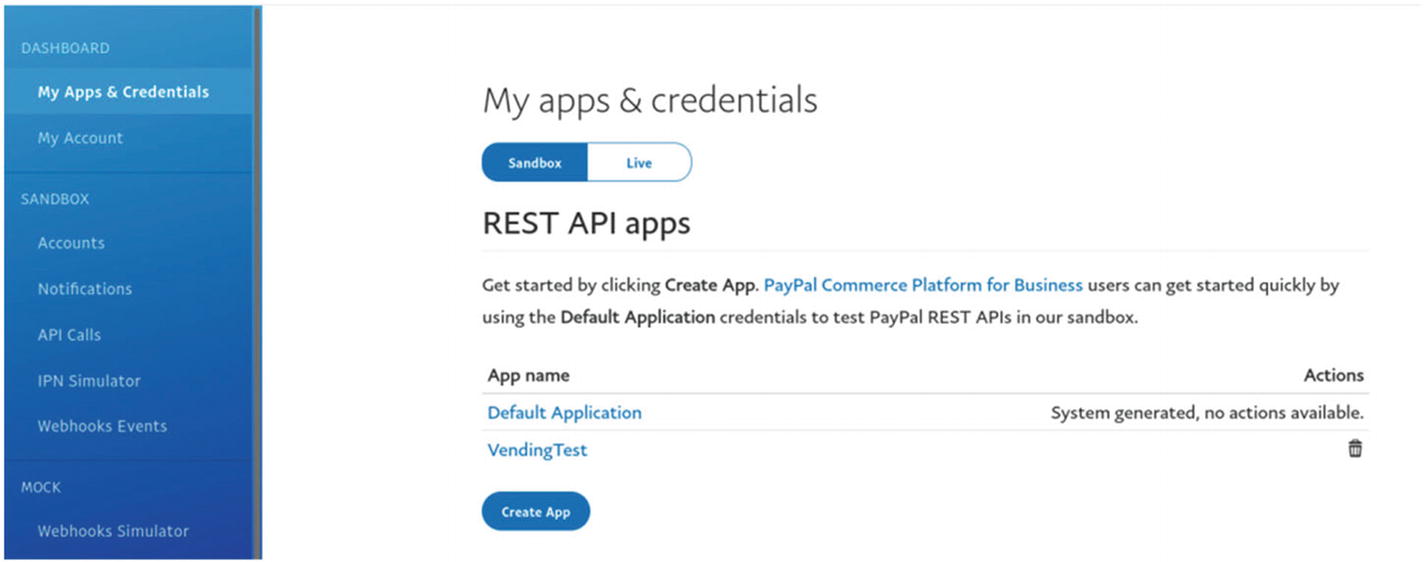
PayPal app creation interface in the dashboard
Fill in the details for the new app and then create it. A new screen will open. On the next page, you can see your PayPal client ID and secret.
You will find the sandbox app settings and credentials on the same page.
Environmental variables do not persist between sessions, so you need to set them up if you open another terminal. Alternatively you can add these variables permanently to a .bashrc file on your Raspberry Pi 4. Needless to say, that solution only works during development and not for actual production, because of the security risks associated with storing CLIENT_ID and PASSWORD in an unencrypted file.
The result of clicking one of the items on the web page from Figure 3-13
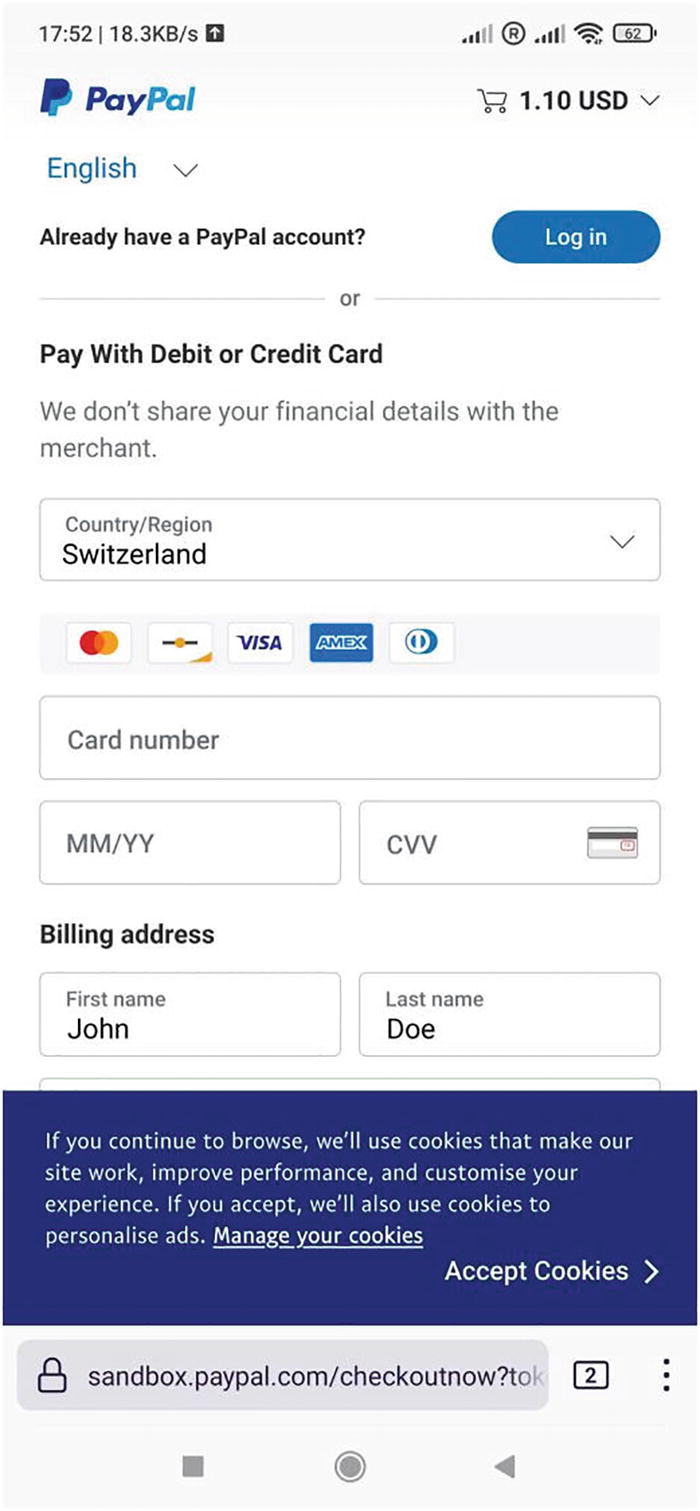
PayPal mobile Checkout page
Pro Tips
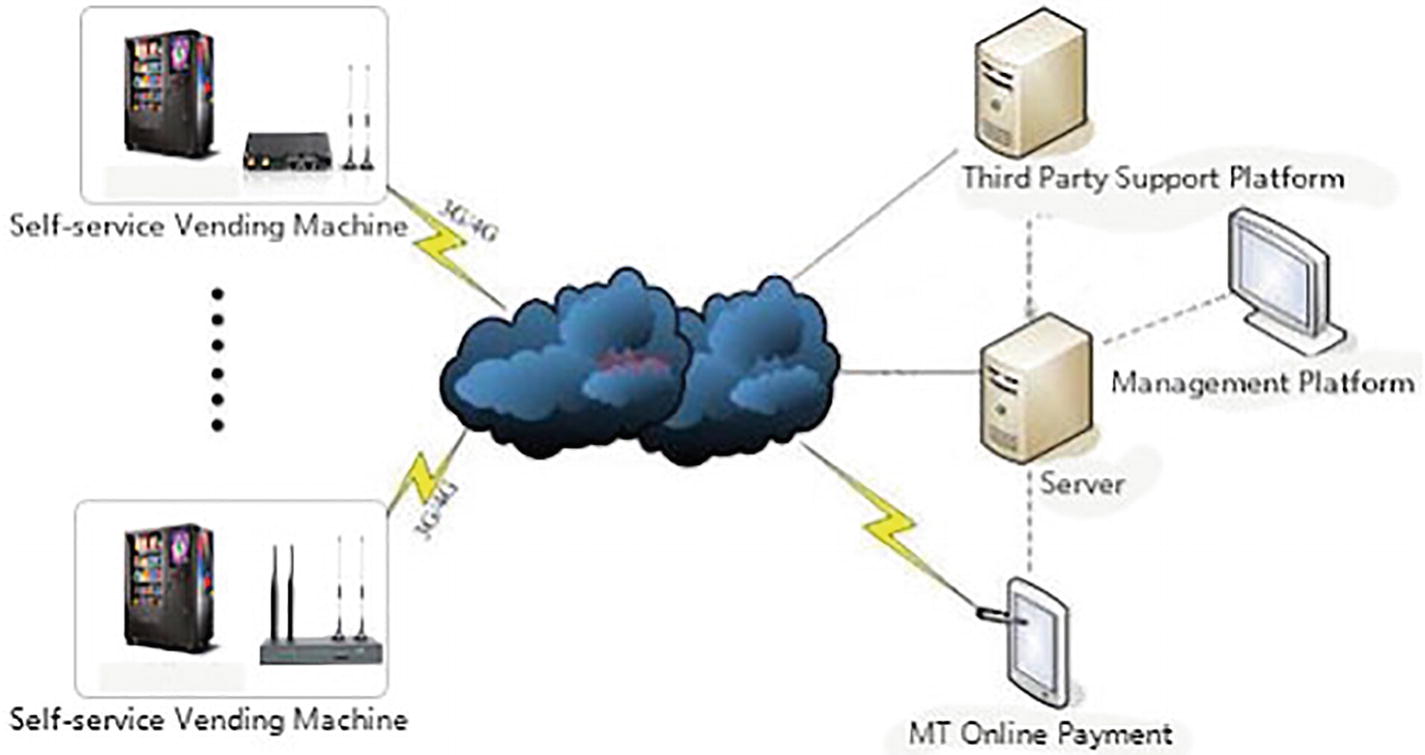
A possible schematic for implementing a production-ready vending machine payment system
The difficulty of implementing the central server approach depends on how many machines are involved and how geographically distant they are from the main server. In the case of a dozen vending machines in a local area, a central server can be implemented using a Raspberry Pi or a low-end computer along with a touchscreen. In the case of a larger-scale project, a server farm will be required. Another consideration is the time required for each vending machine to receive the signal from the server. A vending machine on the other side of the globe may take a while to receive the signal from the server. In order to reduce latency, a local server can be implemented on top of the central server.
The system can be upgraded to support multiple levels of security, from a simple PIN code to fingerprint recognition. It can also be extended to include other products, such as newspapers, lottery tickets, and food. Other types of vending machines could also be created, such as snack vending machines, drink vending machines, and ice cream vending machines, all of which require more operations. Additional elements, such as a bio-sensor to measure the temperature of the cold storage to prevent the food from going bad, could be added in the framework described in the chapter.
Summary
Important points to pay attention to when creating a customized carrier board
How to use the Python Flask framework to build a web application
How to use the PayPal Checkout SDK to provide a payment gateway for vending machine purchases