

An artist can have a collection of the best paints and brushes, but those tools aren’t worth much unless the artist has a canvas to paint on. Likewise, all the powerful tools and functions in Adobe Illustrator CS4 are meaningless until you have a document open on your screen. In the traditional sense, you can choose different types of paper to paint or draw on, all of which affect the overall appearance of the final result. With Illustrator, the settings you specify for your document also control your final result.
With the multiple artboards feature in Illustrator, creating and managing documents takes on new meaning. No longer limited to a single “page” metaphor, Illustrator documents can now manage overall concepts or even entire campaigns. Even more so than in previous versions, you have to strategize in advance to plan the best way to set up your document—a little bit of planning or forethought before you get started can have a huge impact later in your workflow. So, before learning how to use all the powerful drawing features in Illustrator, you’ll learn everything you need to know about setting up and managing your documents.
The artwork featured throughout this chapter comes from Julie Felton (iStockPhoto; username: jfelton).
Upon launching Illustrator, you are greeted with the welcome screen (Figure 1.1) that offers several options. You can either choose to open files you’ve recently worked on or choose to quickly create new documents by clicking a variety of new document profiles that are already set up for certain workflows (you’ll learn more about document profiles in just a bit). At the bottom of the welcome screen, you’ll find a collection of helpful links. The bottom-right corner of the welcome screen is dynamic, and if you’re connected to the web, the content will vary.
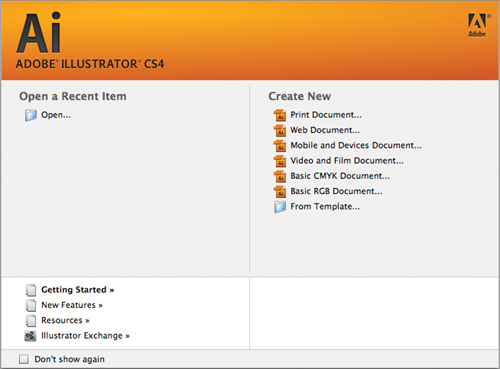
Selecting the “Don’t show again” check box in the lower-left corner keeps the welcome screen from popping up every time you open Illustrator. You can always access the welcome screen from the Help menu.
Note
You can also open templates from the welcome screen. Templates are covered in detail later in the chapter.
When it was first introduced several versions ago, the welcome screen wasn’t too useful. However, with the ability to quickly access recently used documents and the capability to add your own custom new document profiles, the welcome screen actually serves as a wonderful time-saver to just about any workflow.
You can create a new document by clicking any of the new document profiles that appear in the Create New section of the welcome screen. A new document profile stores several important document attributes, artboards, size, orientation, measurement units, color mode, raster effects, and Preview mode, making it easy to get started working on a new document for a specific workflow with one click of the mouse. New document profiles can also contain content, such as swatches, brushes, symbols, and graphic styles.
Tip
Hold the Option (Alt) key when choosing a new document profile to quickly create a new file, skipping the New Document dialog box altogether. Alternatively, press Command-Option-N (Ctrl-Alt-N) to quickly create a new document based on the same settings as the last document created.
The New Document dialog box is “sticky,” which means it remembers the last settings you used. So if you create an RGB file to create a web graphic, the next time you create a new document, the dialog box will be set to RGB.
In addition to basic CMYK and RGB profiles, Illustrator features four new document profiles:
Print. The Print profile is optimized for quickly creating artwork that will be used for print purposes. The Color Mode option is set to CMYK, and the Raster Effects option is set to 300 ppi.
Web. The Web profile, optimized for web graphics, has Color Mode set to RGB, Raster Effects set to 72 ppi, and Units set to pixels.
Mobile and Devices. The Mobile and Devices profile is optimized for developing content that will appear on cell phones and handheld devices. Color Mode is set to RGB, Raster Effects is set to 72 ppi, and Units is set to pixels.
Video and Film. The Video and Film profile, used for creating documents that will be used in video and film applications, includes an additional option to set Illustrator’s transparency grid. This makes it easier to preview the alpha settings. This profile sets Color Mode to RGB, Raster Effects to 72 ppi, and Units to pixels.
When you choose a new document profile from the welcome screen, Illustrator presents you with the New Document dialog box (Figure 1.2 on the next page). You can also bypass the welcome screen altogether and create a new document simply by choosing File > New or by pressing the keyboard shortcut Command-N (Ctrl-N). Clicking the Advanced arrow button reveals additional options that you can set as you create your new document. Although choosing a new document profile will automatically adjust some of these settings as necessary, you can always change them to suit your particular needs.

Although you can adjust any of the settings you find in the New Document dialog box even after you’ve already created a document, it’s always better to get them right before you get started. Here’s an overview of what each setting means:
Name. The Name field simply lets you name your file before you even create it. Note that this setting doesn’t save your file yet but merely saves you one step later.
New Document Profile. The New Document Profile pop-up menu allows you to choose from a variety of preset profiles. Choosing a setting can serve as a starting point to adjust other settings in the New Document dialog box.
Number of Artboards. The Number of Artboards setting allows you to specify how many artboards your document will contain. A single Illustrator document may contain up to 100 artboards. A row of icons that appears to the right of this setting also allows you to control how artboards appear within your document (you’ll learn more about artboards and their specific settings later in this chapter).
Spacing. The Spacing setting is available only when you have chosen to create more than one artboard; it determines the amount of space that is added between each artboard on the overall canvas.
Rows. The Rows setting allows you to specify the number of rows your artboards have. This setting is available only when specifying more than one document and using a setup option that uses rows.
Size. The Size pop-up menu is populated with standard sizes that are appropriate for the chosen new document profile.
Width, Height, and Orientation. The Width and Height settings allow you to customize the size of the document’s artboard. You can also choose between portrait (tall) and landscape (wide) orientations.
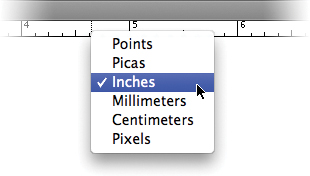
Units. The Units setting determines the default general measurement system used in the document. You can choose to use points, picas, inches, millimeters, centimeters, or pixels.
Bleed. The Bleed setting allows you to specify an area to extend artwork beyond the artboard boundary where necessary. Bleed settings are applied universally to all artboards in a single document (two artboards within a single Illustrator document cannot have two different bleed settings).
Color Mode. Illustrator supports two color modes: CMYK, which is used for artwork that will appear on the printed page, and RGB, which is used for artwork that is destined to be displayed on a TV or computer screen. Refer to the “CMYK or RGB?” sidebar in this chapter for important information on the differences between these two color modes.
Raster Effects. The Raster Effects setting controls the resolution used when applying special effects such as soft drop shadows, glows, and Photoshop filters (such as the Gaussian Blur filter). Although you can change this setting within your document at any time, it’s important to understand the consequences of doing so. For detailed information about the Raster Effects setting, refer to the “Massaging Pixels in Illustrator” section and the “Illustrator Effects and Photoshop Effects” sidebar, both in Chapter 7, “Working with Live Effects.”
Transparency Grid. The Transparency Grid setting is available only when you choose the Video and Film new document profile. The grid is a checkerboard pattern that appears on your artboard to help you better identify the Opacity values of objects in your document. This makes it easier to understand how artwork in Illustrator will composite with other art or video content later in your workflow. Refer to the section “Setting Up Your Document” later in this chapter for more information.
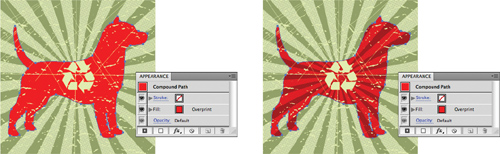
Preview Mode. The Preview Mode setting lets you to specify the initial preview setting that Illustrator uses when the new document is created. You can leave it set to Default (which is Illustrator’s normal preview setting), Pixel (for better representation of web and video graphics), or Overprint (for better representation of print graphics and spot colors).
The New Document dialog box also has a Templates button. Clicking this button will direct you to a folder containing all the prebuilt templates that come with Illustrator. For more information on templates, refer to the section “Working with Templates” later in this chapter.
CMYK or RGB?
CMYK stands for cyan, magenta, yellow, and black (black is called K because some printers refer to the black plate as the key plate). Mixing these colors creates a gamut (range) of colors. It’s easier to think of colors in CMYK because the mode seems to follow the rules we all learned in preschool. Mixing cyan and magenta (blue and red) makes purple, mixing yellow and magenta makes orange, and so on. Today’s printing presses use the four CMYK inks to produce printed material in color. For jobs you want printed, you should choose the CMYK color mode.
RGB stands for red, green, and blue and is used to display color on TV screens, computer monitors, and other electronic devices such as digital cameras. Unlike CMYK where you start out with a white sheet of paper and then add colors to get to black, RGB works in reverse. For instance, when your TV screen is off, it’s dark, and when you turn it on and add red, green, and blue, the cumulative effect is white. The RGB color mode has a significantly larger gamut of colors than CMYK does, especially in the area of bright fluorescent colors. For jobs you want displayed on the web or in video, RGB is the color mode you should choose.
When creating a new document in Illustrator, you can choose between the two color modes in the New Document dialog box. Illustrator conveniently indicates the document’s color mode in the Document title bar. Since version 9, the artboard in all Illustrator documents is restricted to the use of only one color mode (previous versions allowed both CMYK and RGB elements to appear on the same artboard). For example, if you copy and paste an object from an RGB document into a CMYK document, Illustrator will convert the object to CMYK as soon as you paste it onto the artboard.
In contrast, panels in Illustrator (Swatches, Color, Symbols, Brushes, Styles, and so on) can contain both CMYK and RGB content. Content from a new document profile is copied into each new file you create, so if you create a new web document, your Swatches panel will be filled with RGB colors. Although you can switch color modes at any time by choosing File > Document Color Mode, it’s important to realize you’re changing the color mode only of the document artboard—not the content that already exists in your Swatches or Symbols panel.
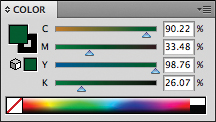
In a real-world workflow, it’s possible that you may create an RGB document but convert the document to CMYK at a later point in time. If that happens, each time you apply a swatch color from your Swatch panel (which still contains RGB colors), Illustrator will be converting that RGB swatch to CMYK. If you ever see CMYK percentages with odd decimal values instead of whole numbers (Figure 1.3), there’s a good chance that your document either is set to RGB or started out as RGB and was converted to CMYK. Remember that each time you make a color conversion, color shifts can occur.
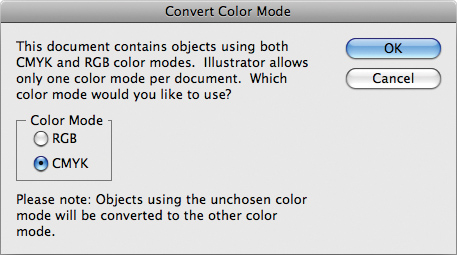
When opening Macromedia FreeHand files or older Illustrator files, you might see a dialog box telling you the file contains mixed color modes (Figure 1.4), and you can choose what color mode to convert to when opening the file.
The six profiles in Illustrator are quite generic, so you may find it useful to create your own new document profiles to suit your own needs. The good news is that it’s easy to do—just follow these steps:
Create a document using an existing new document profile. If you want your profile to include the Transparency Grid setting, make sure you start with the Video and Film profile.
Once the new file is open, adjust your document settings to match your desired profile. For example, use the View menu to choose the Preview setting, choose Effect > Document Raster Effects Settings to adjust the Raster Effects value, and use the Artboard tool to adjust your artboard(s).
Add any desired content to the Swatches, Brushes, Symbols, or Graphic Styles panels. You can also remove content you don’t want or need from these panels.
Choose File > Save, choose Format > Adobe Illustrator Document, and save the file in the following location on your computer (for U.S. English versions of Illustrator):
Mac: Username/Library/Application Support/Adobe/Adobe Illustrator CS4/en_US/New Document Profiles
Windows: C:Documents and SettingsUsernameApplication DataAdobeAdobe Illustrator CS4 Settingsen_USNew Document Profiles
New document profiles work on all platforms and can be easily distributed among an entire design group or company.
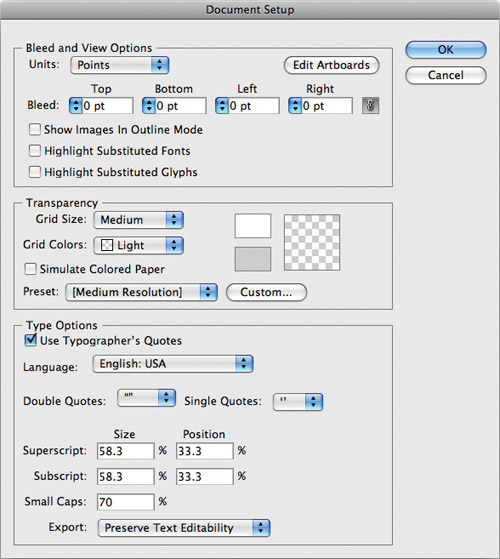
There was a time when the Document Setup dialog box was accessed quite frequently, but since most of the page and printing settings have been moved to the Print dialog box or into the Artboard tool itself, you don’t have to go to Document Setup nearly as often. That being said, it’s still helpful to know what options you have when working with a document. The Document Setup dialog box (Figure 1.5), which you can access by choosing File > Document Setup or by clicking the Document Setup button that appears in the Control panel when there is no active selection, is split into three groups of settings.
Note
In previous versions, changing settings for the artboard, such as portrait and landscape, were found in the Document Setup dialog box. Those settings are now changed with the Artboard tool.
Bleed and View Options. This pane allows you to change some of the settings you saw in the New Document dialog box, such as measurement units and bleed. To make changes to individual artboards, you can click the Edit Artboards button, which closes the Document Setup dialog box and puts you into Artboard Edit mode (see the section “Using Multiple Artboards” later in this chapter). Additionally, there’s a setting for how raster-based images appear when you’re in Outline mode. By default, images appear only as empty boxes in Outline mode for performance reasons, but with the Show Images In Outline Mode option activated, raster images are visible (in black and white) in Outline mode.
You can choose to have Illustrator highlight substituted fonts or glyphs, which can be helpful when opening files that other designers created. With these options activated, Illustrator highlights missing fonts in pink and missing glyphs in yellow so that you can quickly find where these problem areas are in a file.
Transparency. This pane allows you to specify settings for the transparency grid (which you can turn on by choosing View > Show Transparency Grid). Similar to the transparency grid found in Photoshop, this checkerboard pattern makes it easy to identify transparent areas in a file. If your file is going to be printed on colored paper, you can also have Illustrator simulate that color onscreen by using the Simulate Colored Paper option.
In Chapter 15, “Prepress and Printing,” you’ll learn more about transparency and how it prints. For now, it’s important to know that a process called transparency flattening has to occur to correctly process artwork with transparency in it. This flattening process has many different options, all controlled by choosing from several different presets. Specifying a preset in the Transparency section sets a default preset for your document that you use when copying art with transparency to the clipboard or when exporting files to formats that don’t support transparency.
Type Options. This pane contains several important settings for how text is used in Illustrator. You can specify the language for the file and how double and single quote marks should appear when you type them in your document. There’s also an option to use typographer quotes, which means the correct curly quotes are automatically used instead of straight marks. Illustrator also allows you to define the size and position percentages for creating superscript, subscript, and small-cap characters. However, if you’re using OpenType fonts, you can take advantage of the built-in support for these specific features, which we’ll cover extensively in Chapter 8, “Working with Typography.”
The final option in the Type Options pane is for specifying how text is exported when you are saving to legacy file formats (any version prior to Illustrator CS). When you choose the Preserve Text Editability option, text is broken up into individual type objects. When you choose the Preserve Text Appearance option, all type objects are converted to vector outlines.
It took 14 versions, but finally the number-one feature request of all time—multiple pages—has arrived in Illustrator. Actually, Adobe refers to them as multiple artboards, not multiple pages, and for good reason. Unlike dedicated page-layout applications such as Adobe InDesign or QuarkXPress, Illustrator isn’t meant to be used for long publications or documents. In fact, anything that suggests the word page is not part of the Illustrator lexicon at all. Later in this chapter, we’ll discuss when it’s best to use Illustrator or when it’s best to use a dedicated page-layout application.
Before we get into the details of how to use multiple artboards, it’s important to get a grasp of the capabilities and limitations of multiple artboards within Illustrator:
Every Illustrator document consists of an overall canvas, measuring 227.54 inches square. Artboards can live anywhere within this canvas area.
A single Illustrator document can contain anywhere from 1 to 100 artboards.
Each individual artboard can be of any size (within the limits of the overall canvas) or orientation (portrait or landscape).
Artboards can be moved and positioned anywhere within the canvas and can also overlap each other.
You can choose to print and export any specific artboard or a range of artboards. You can also instruct Illustrator to “ignore artboards,” treating all artboards as a single cumulative large one.
Illustrator does not feature master pages, although you could use symbols to manage repeating artwork across multiple artboards.
Each Illustrator document supports a single color mode (RGB or CMYK). You cannot have some artboards that use CMYK and others that use RGB.
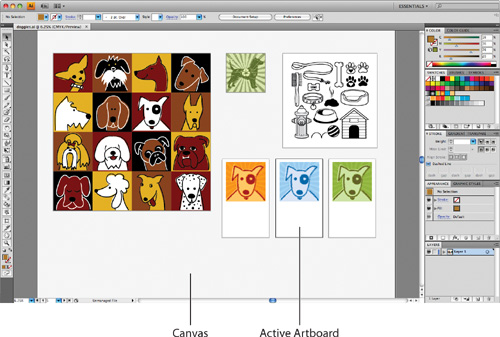
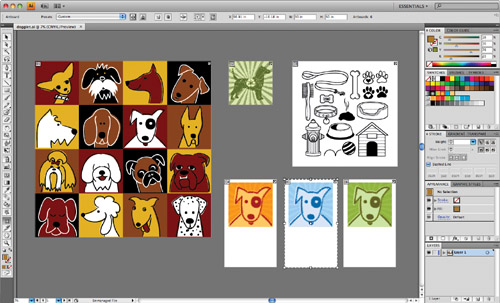
A single Illustrator document can contain up to 100 artboards, but only one artboard can be active at any one time. To make it easier to navigate within your documents, you’ll notice the overall canvas is shaded a very light gray and that each artboard features a white background and a small drop shadow. Artboards are outlined with a gray border, and the active artboard can be easily identified with a black border (Figure 1.6).
Although it’s important to understand that there’s a concept of an active artboard, you don’t really have to do anything specifically to make an artboard active, simply because Illustrator handles that for you. Whenever you click within the boundary of an artboard (or for example, when you click to select an object that sits on an artboard), that artboard automatically becomes active.
Having a single active artboard is necessary in order for some core Illustrator functions to work as you might expect them to work. For example, when you choose Window > Fit Artboard in Window (or press Command-0 [Ctrl-0]), Illustrator adjusts the zoom level so that the active artboard fills the screen. Likewise, when you choose File > Save for Web & Devices, just the artwork on the active artboard is exported.
Tip
You can choose View > Fit All in Window (or press Command-Option-0 [Ctrl-Alt-0]) to adjust your view so that all artboards are visible.
In previous versions of Illustrator, you spent your time panning and zooming around a single page within a document. With Illustrator CS4, you now might find yourself struggling to navigate across many artboards within a single document. Fortunately, you can quickly move from one artboard to another in two ways:
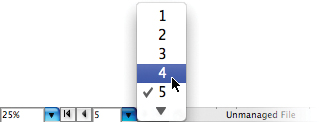
At the bottom of the document window, just to the left of the status bar, is an Artboard Navigation pop-up menu, which lists the numbers for each artboard in the document (Figure 1.7). You can either choose to jump directly to an artboard or use the First, Previous, Next, and Last buttons to move between artboards. When using any of these methods, Illustrator automatically changes the zoom level to Fit Artboard in Window and makes the requested artboard active.
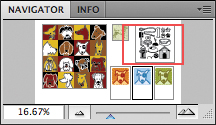
Choose Window > Navigator to open the Navigator panel (Figure 1.8). In the Navigator panel, you can drag the red box around to quickly pan around the entire document. You can also adjust the zoom slider at the bottom of the panel to zoom in and out. The Navigator panel gives you a great bird’s-eye view of all the artboards on your canvas and even displays the active artboard with a black outline.
Naturally, you can always use the Hand and Zoom tools to navigate within your document. You can also use custom views in Illustrator to save and return to specific zoom settings. The custom views feature is covered later in this chapter.
Although you can specify the number of artboards at the time you create a new document, you can also modify the number, the position, and the size of artboards at any time with the use of the Artboard tool (Shift-O). When the Artboard tool is active, Illustrator switches into Artboard Edit mode.
By default, artboards are highlighted, the rest of the canvas is darkened in Artboard Edit mode, and the active artboard appears with a dashed outline. Each artboard is identified with a number, found in the upper-left corner of the artboard (Figure 1.9). Numbers are automatically assigned to artboards in the order in which you create them, and you can’t renumber artboards after they’ve been created, other than the tedious method of deleting and re-creating them in the order that you need.
When you’re in Artboard Edit mode, you can modify the active artboard by moving it or by resizing it using any of the handles that appear along its perimeter. Add new artboards by clicking and dragging any empty area on the artboard, or hold the Shift key while dragging to create a new artboard within the boundaries of an existing one. As with regular objects in Illustrator, you can also hold the Option (Alt) key while dragging an existing artboard to duplicate it. To delete an active artboard, simply press Delete on your keyboard.
Note
The artboard number is used when navigating within a document, when printing, and also when placing native Illustrator content into other applications, including InDesign and Adobe Flash CS4 Professional.
In Artboard Edit mode, the Control panel offers a range of settings to help you modify the artboards on the canvas. One of the most important settings is the Move/Copy Artwork with Artboard option (Figure 1.10). With this setting turned on (which is the default), any artwork that appears within the bounds of an artboard will move along with the artboard. Likewise, if you duplicate an artboard, the new artboard will also contain a copy of the associated artwork. Turning the Move/Copy Artwork with Artboard option off lets you reposition artboards on the canvas without moving any artwork.

Warning
If artwork is locked or hidden, that artwork will not move with its artboard, even if you have the Move/Copy Artwork with Artboard option turned on.
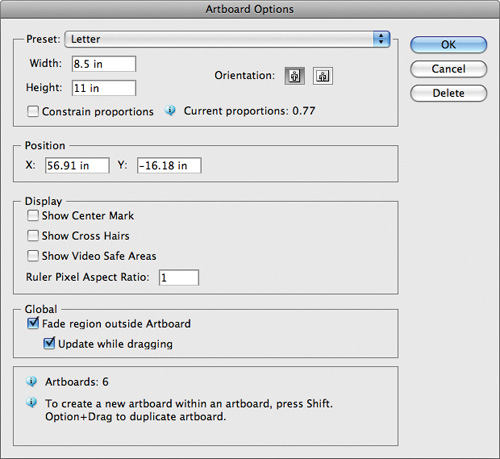
Another important setting in the Control panel is the Artboard Options button, which opens the Artboard Options dialog box (Figure 1.11). The following settings are present in this dialog box:
Preset. The Preset pane of the Artboard Options dialog box allows you to choose from a list of preset artboard sizes (unfortunately, the list isn’t customizable), including the ability to automatically generate an artboard size to match the artwork bounds of all art within the document or the bounds of any currently selected art. In addition, you can adjust the width, height, or orientation of the active artboard.
Position. The Position pane of the Artboard Options dialog box enables you to specify the x and y coordinates for the active artboard. The coordinates represent the exact center of the artboard, not the upper-left corner, so it may be somewhat difficult to position artboards precisely in this manner without the help of a calculator and some elementary mathematics skills.
Display. The Display pane of the Artboard Options dialog box enables you to hide or show an artboard’s center mark, crosshairs, and video safe areas. In addition, you can set a ruler pixel aspect ratio. These settings are useful if you’re working in video workflows.
Global. The Global pane of the Artboard Options dialog box enables you to choose whether the canvas turns a dark gray when you’re in Artboard Edit mode and whether artboards are highlighted in a lighter color while you’re dragging them around on the canvas.
Some of the options in the Artboard Options dialog box are also listed directly in the Control panel when Illustrator is in Artboard Edit mode. Keep in mind that the X and Y coordinates, as well as the Width and Height values, all reference the center of each artboard. Unfortunately, there is no nine-point proxy (like that found in the Transform panel, for example) that lets you use values from a specific corner or edge of the artboard. You can, however, use the arrow keys on your keyboard to nudge an artboard’s position.
Tip
If precise positioning of artboards is important, you may find it easier to skip the Artboard tool altogether. Use the Transform panel to accurately position regular rectangles, select the shapes, and choose Object > Convert to Artboards.
To exit Artboard Edit mode, simply press the Escape key on the keyboard or select any tool other than the Artboard tool.
Adding Bleed
To print art all the way to the edge of a sheet, also known as bleeding, a printer uses a larger-sized sheet than the finish size (trim size), and after printing, the printer cuts the paper down to size. Printers can’t print all the way to the edge of a page because a certain amount of space is needed for gripper space (space for the printing press to grab the sheet of paper). Additionally, if this space weren’t there, the ink could run off the sheet and onto the press, causing smudging on other sheets.
When a printer trims the paper to the final size, the paper may shift while being cut, and if your image comes only up to the border of the trim size, you might end up seeing a bit of white near the edge of the paper. To avoid this, printers need bleed, or extra image space. If the artwork extends beyond the edges of the trim size, even if the cutter is off a bit, you’ll still get color all the way to the edge of your sheet.
As a designer, it’s important to leave enough room when you’re cropping photos or backgrounds to allow for bleed (Figure 1.12). You should speak to your printer if you have questions, but most printers ask for anywhere from .125 to .25 inch of bleed. If printers don’t have enough image space to add bleed, they may need to trim the paper to a slightly smaller size.
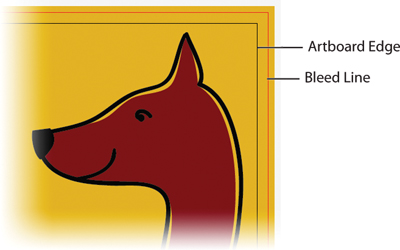
Figure 1.12. When a bleed value is specified, Illustrator identifies the bleed area with a red border.
The Bleed setting is a document-wide setting and is not artboard-specific. In other words, all artboards within a single file all share the same bleed setting—individual artboards cannot feature different bleed settings. You can adjust a document’s bleed settings by choosing File > Document Setup or by using the New Document dialog box when creating a new file. Bleed settings are honored when printing from Illustrator or when saving and exporting most file types.
It’s true that Illustrator CS4 is the first version to support multiple artboards. But in previous versions of Illustrator, designers employed a variety of work-arounds to simulate multiple pages. For example, many designers used the Page Tiling feature in the Print dialog box to simulate multiple pages in Illustrator. Some also used FreeHand, which has had support for multiple pages for the longest time. Wouldn’t it be nice if Illustrator could open all of those FreeHand and Illustrator files (Adobe refers to older Illustrator files as legacy files) and convert them to multiple artboards? Great news—that’s exactly what Illustrator does.
Tip
Illustrator can open native FreeHand files directly, so you don’t need to export them as Illustrator or EPS files from FreeHand.
If Illustrator senses any kind of multiple page–compatible setting when opening legacy Illustrator files, the Convert to Artboards dialog box appears (Figure 1.13), offering the following options:
Legacy Artboard. The artboard from the legacy document is converted to a single artboard.
Crop Area(s). Any crop area defined in the file is converted to an artboard. If the file is an Illustrator CS3 file and multiple crop areas are present in the file, each crop area is converted to an artboard.
Artwork Bounding Box. The bounding box of the artwork in the file is converted to a single artboard.
Page Tiles. If the document has page tiles defined, each page tile is converted to an artboard.
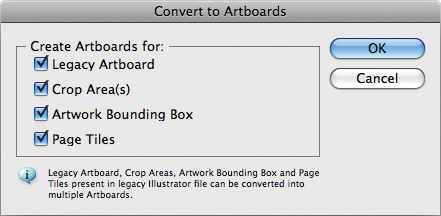
Illustrator disables those options that aren’t applicable to the file you are opening, so you may find that not all four options are available for every file.
Just because an Illustrator document can contain up to 100 artboards doesn’t mean it should. Taking a few moments to think about your task or project before you start will always help you make the right choice about how to build your document in the most efficient manner. Now that you have a strong understanding of the multiple artboards feature in Illustrator, you can make informed decisions about when it’s best to work on a project in Illustrator and when it might be better to look toward a dedicated page layout application, such as InDesign.
Overall, two main factors will come into play when you decide how to best choose how to build your documents. Illustrator supports artboards that can be of any size or orientation. If you’re working on a project that requires assets of multiple sizes, Illustrator might be the right choice. On the other hand, InDesign maintains a significant edge in the form of performance and long-document features. Remember that it’s always beneficial to think of ways to use all the tools at your disposal to get your work done—you don’t always have to force one application to do everything.
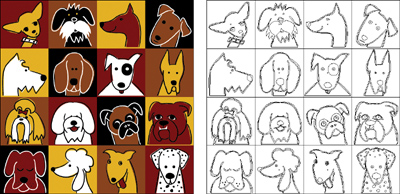
As you’re working in Illustrator, you can choose to view your artwork in different ways, each offering different benefits. The most common view mode, Preview mode, allows you to create and edit art while seeing a close representation of what your art will look like when printed. In Outline mode, Illustrator hides all the pretty colors and effects and shows you just the vector geometry of the shapes in your document. Although it may be difficult to visualize what your file is going to look like when actually printed, Outline mode gives you the ability to easily see whether shapes are aligned correctly, and it gives you a better idea of the structure of the file (Figure 1.14). Think of Outline mode as an X-ray film that a doctor reads. Although just black and white, an X ray reveals what’s going on behind the scenes. Just like a doctor reads an X ray, an experienced Illustrator user can sometimes get a better idea of how an Illustrator file is constructed when in Outline mode. You can toggle between Preview and Outline modes by pressing Command-Y (Ctrl-Y).
For those in the print business, Illustrator has a special preview mode called Overprint Preview that you can access by choosing View > Overprint Preview. Overprinting is a process you use when creating color separations to control how certain colors interact with each other (we’ll cover overprinting in detail in Chapter 15, “Prepress and Printing”). Because overprinting is an attribute applied only in the print process, designers traditionally struggle with proofing files that specify overprints. Illustrator’s Overprint Preview mode simulates overprints so that you can see how they will print (Figure 1.15). In truth, Overprint Preview is far more accurate than the regular Preview mode in Illustrator, especially when your file uses spot colors (you’ll learn more about that in Chapter 6, “Coloring Artwork”). While Overprint Preview gives you the best possible representation of what your final art is going to look like when printed, it is slower in redraw performance than normal Preview mode.
Not to leave web designers out in the cold, Illustrator has another preview mode called Pixel Preview, which you can also access via the View menu. Illustrator, as a vector-based application, produces resolution-independent art. Most of today’s printers have high-resolution settings, and modern imagesetters use resolutions upward of 2500 dots per inch (dpi). For that reason, print designers aren’t worried about how good their artwork looks on their screen, because they know when output at high resolution, everything will be perfect. Web designers, however, care very much about how their artwork appears on a computer screen because that’s exactly how people view their designs. Pixel Preview renders artwork to the screen as pixels and shows how antialiasing affects the art (Figure 1.16). We’ll cover Pixel Preview and these web-specific issues in Chapter 13, “Designing for Web and Mobile Design.”

Even though you can scale Illustrator artwork to virtually any size, it’s still important to be able to create artwork using exact and precise measurements. Package designers and technical illustrators are always careful about creating artwork to scale, and even designers need to know what size a logo or an illustration has to be.
Choose View > Show Rulers to display vertical and horizontal rulers along the left and top edges of your document window. You can Control-click (right-click) a ruler to change its measurement system (Figure 1.17). Although the rulers can help identify the coordinates of objects that appear in a document, rulers also serve another function. You can click a ruler and drag a guide onto your artboard. A guide is a line that’s visible on your screen but not on the printed or exported art. Guides have “magnetic personalities,” and objects that are moved or drawn near them stick to them, helping align objects and create consistent art and layouts. Hold the Option (Alt) key while dragging to toggle between horizontal and vertical guides, and hold the Shift key to have a guide snap to the tick marks that appear on the ruler.
You can lock and unlock guides by choosing View > Guides. Unlocked guides act just like regular objects do, and you can reposition them to your liking. You can even use the x and y coordinates in the Control panel to precisely position guides. In addition, you can convert any path into a guide by choosing View > Guides > Make Guides (or by pressing Command-5 [Ctrl-5]).
In addition to normal guides, Illustrator has a useful feature called smart guides; these guides, which are turned on by default, offer a variety of onscreen feedback options while you work. You can toggle smart guides on and off by choosing View > Smart Guides (or by pressing Command-U [Ctrl-U]). As you move your cursor around on the screen and as you create and modify artwork, different smart guides appear and assist you as you work.
Illustrator features six types of smart guides, and each offers assistance in a specific way (Figure 1.18). Admittedly, when all six smart guides are being used, the “information overload” may be distracting or too much to bear. Thankfully, Illustrator allows you to keep things in your control via a dedicated Preferences panel that you can find by choosing Illustrator > Preferences > Smart Guides (Edit > Preferences > Smart Guides).

Smart guides work just about everywhere in Illustrator—even in Artboard Edit mode. As you get used to smart guides, you’ll get a better feel for which of the six types are more important for the kind of work you do most often. Remember that you can always quickly toggle the feature on and off as you need it. The six kinds of smart guides in Illustrator are as follows:
Alignment guides. Alignment guides appear when you move your cursor, helping you align objects in context while drawing, moving, or editing objects. In this way, you don’t have to perform additional align functions.
Object highlighting. Object highlighting identifies the underlying Bézier paths or original text or artwork when you mouse over objects that have live effects or envelopes applied to them.
Transform tools. Transform tools are guides that appear when using any of Illustrator’s transform functions, such as Rotate or Scale.
Construction guides. Construction guides appear as you’re drawing new shapes and identifying similar planes or angles with other objects. You can specify which angles are identified using the pop-up menu, or you can choose Custom Angles and specify up to six custom angles.
Anchor/path labels. Anchor/path labels identify anchor points and paths as you mouse over them.
Measurement labels. Measurement labels help you identify the dimensions of objects as you draw or modify them. They also identify an anchor point’s coordinates, if the Anchor/Path Labels option is also on.
Sometimes you work on a document and then never see it again. Other documents contain artwork you constantly revisit. If those documents are complex or have many layers, you may find you’re constantly panning and zooming to different parts of the document or that you’re always hiding and showing layers.
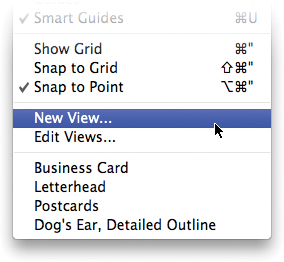
To navigate more easily, you can define custom views, which allow you to save the view state of a document. To do so, use your Hand and Zoom tools to adjust your document to the desired view. Then, toggle the visibility of the layers to your liking. Finally, choose View > New View. Assign a name to the view, and click OK. You can repeat this as many times as you’d like to add multiple view settings to your document (Figure 1.19). Each view you create will appear listed at the very bottom of the View menu, and you can quickly “jump” to a view by choosing it from that menu.
Custom views are saved with the document, so they will be available even after you’ve saved, closed, and reopened the document. Likewise, those views will also be available to anyone else who opens the file on their own computer.
For repetitive work, use templates that allow you to set up a file with certain settings and attributes—even actual artwork and layers—to create more consistent files in less time. Illustrator templates are really just regular Illustrator files with one difference—you can’t save them. You can only perform a Save As function with them (so you don’t overwrite the template).
Note
If you’re a professional designer, you might not want to use any of Illustrator’s prefab templates, but it’s helpful to open the files and explore them to see how they were created. One of the best ways to learn is by reverse-engineering what someone else has done. One of the techniques you’ll learn in this book is how to pick apart an Illustrator file; Illustrator’s template files are perfect for this because they employ many different features and techniques.
To create a template file, start by creating a new Illustrator document. Draw guides, add content, place artwork on the artboard, add layers, and adjust your document settings as you’d like them to appear in the template. When you’re ready to save your template, choose File > Save As, and specify the Illustrator Template (AIT) format in the dialog box. Template files contain a flag in them so that when they are reopened in Illustrator, they open as untitled documents.
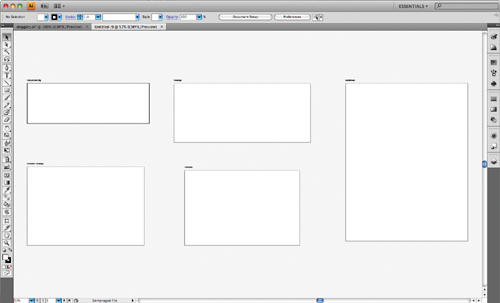
Illustrator actually ships with hundreds of professionally designed templates, which you can access by choosing File > New from Template. The templates are stored in the Adobe Illustrator CS3/Cool Extras/en_US/Templates folder. You can also browse the template files using Adobe Bridge CS4 so you can see previews of what the templates contain. Before you wrinkle your nose about using “clip art,” you’ll be happy to know that Illustrator also includes an entire folder of blank templates (Figure 1.20). These blank templates have everything you need to quickly create print- or web-ready work.
If you go to any popular stock photo website, you can enter a keyword or a description for the kind of image you’re looking for and instantly see a list of images matching your criteria. Have you ever wondered how this works? How does a search engine know what the contents of a photograph are? The answer is metadata.
Tip
Using Adobe Bridge, you can even add metadata to a file without having to open the file. Simply highlight a file in Adobe Bridge, and choose File > File Info. You can add metadata to multiple files simultaneously by highlighting several files and then choosing File > File Info.
Metadata is information that describes a file, and it can be just about anything. The creation date, author, creation application, keywords, and copyright information are all examples of metadata. Adobe applications use an XML-based standard called Extensible Metadata Platform (XMP) to store this metadata inside files. The metadata resides in an XML header at the top of each file, and Adobe applications can read this data.
In Illustrator, you can choose File > File Info to open the File Info dialog box, where you can enter a variety of metadata for your file (Figure 1.21). When you save the file, the metadata is embedded within the file.
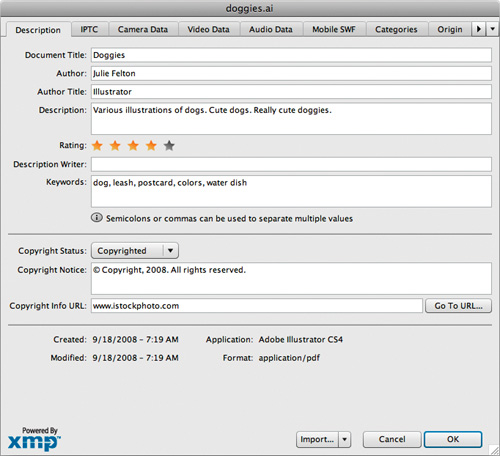
Illustrator takes metadata a step further, because certain information is automatically added to each file as you save it. For example, each time you save your file, Illustrator adds a list of fonts, swatches, color groups, and color separation plates in the file’s metadata for you.