
CHAPTER 5
CAPTIVATING LID AND CAP ACTIVITIES

We are a household overflowing with lids, and if you have young kids, you can relate. Food pouch lids are some of the most recognizable ones in many homes with young children. Save those lids and learn the alphabet by adding lid letters on top of a rainbow (here) or transform them into amazing bottle cap mazes (here). Screwing lids on and off is also a fantastic fine motor activity for little kids (here).
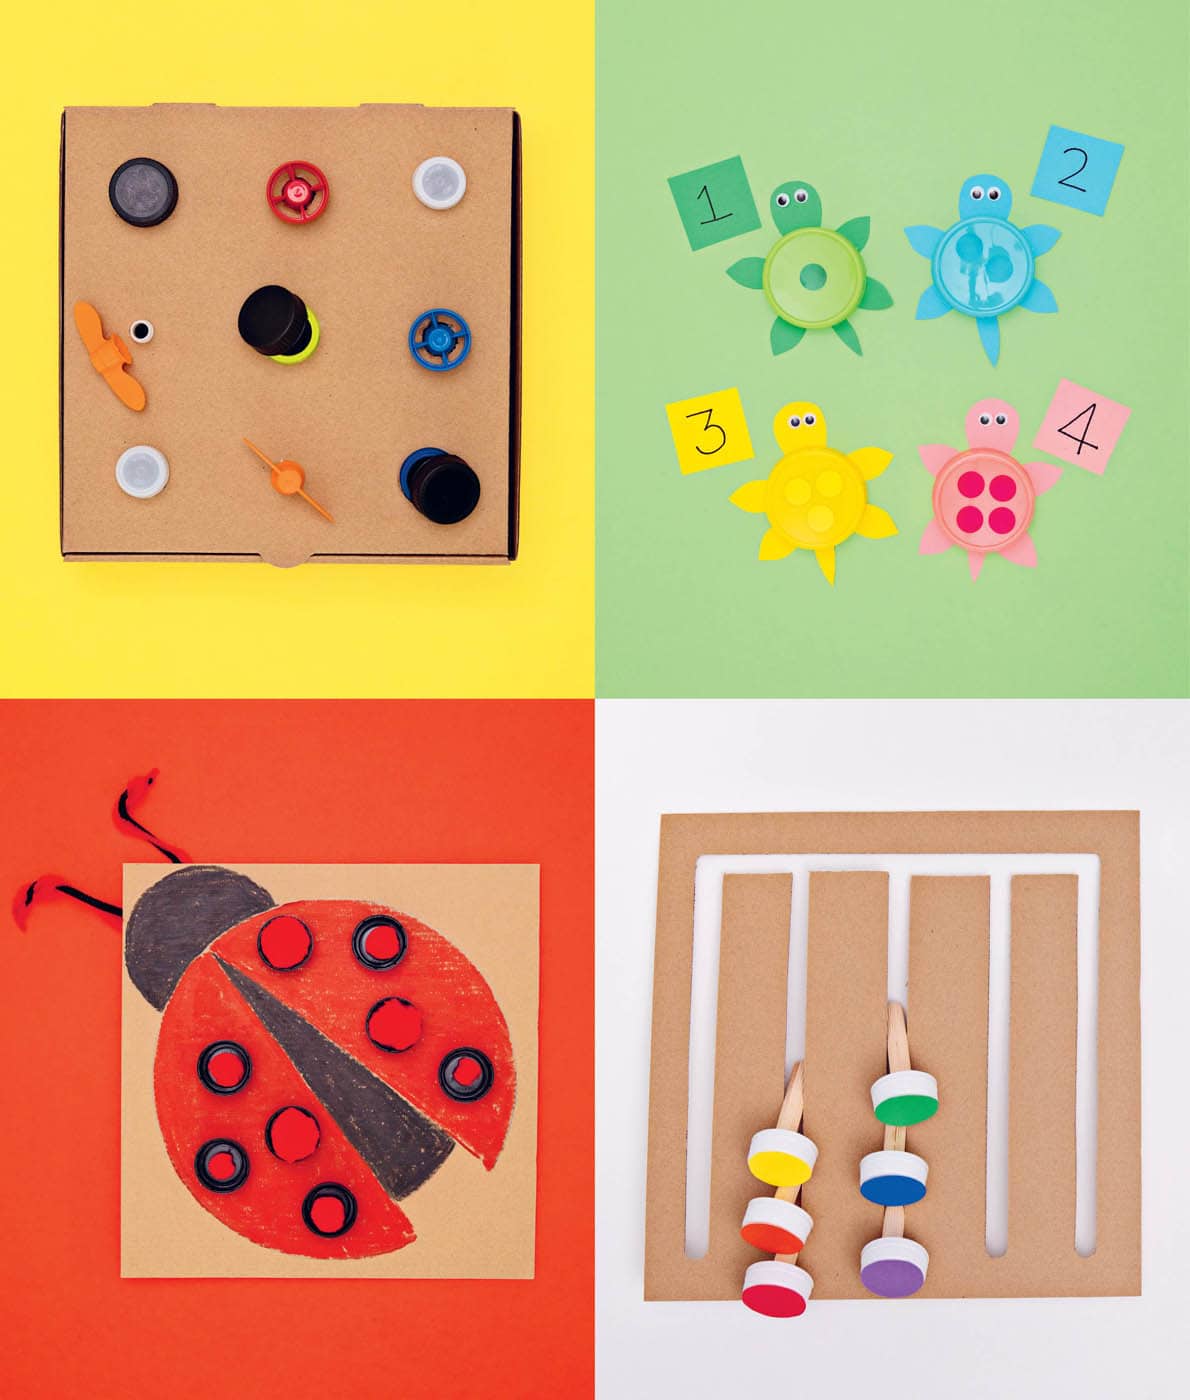
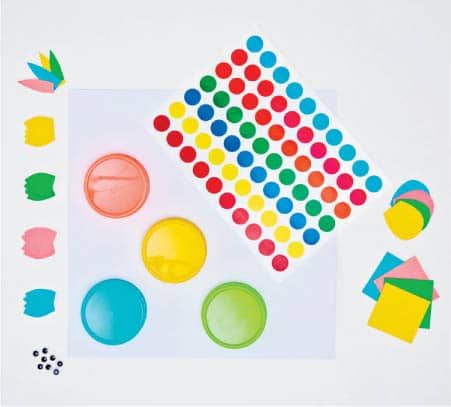
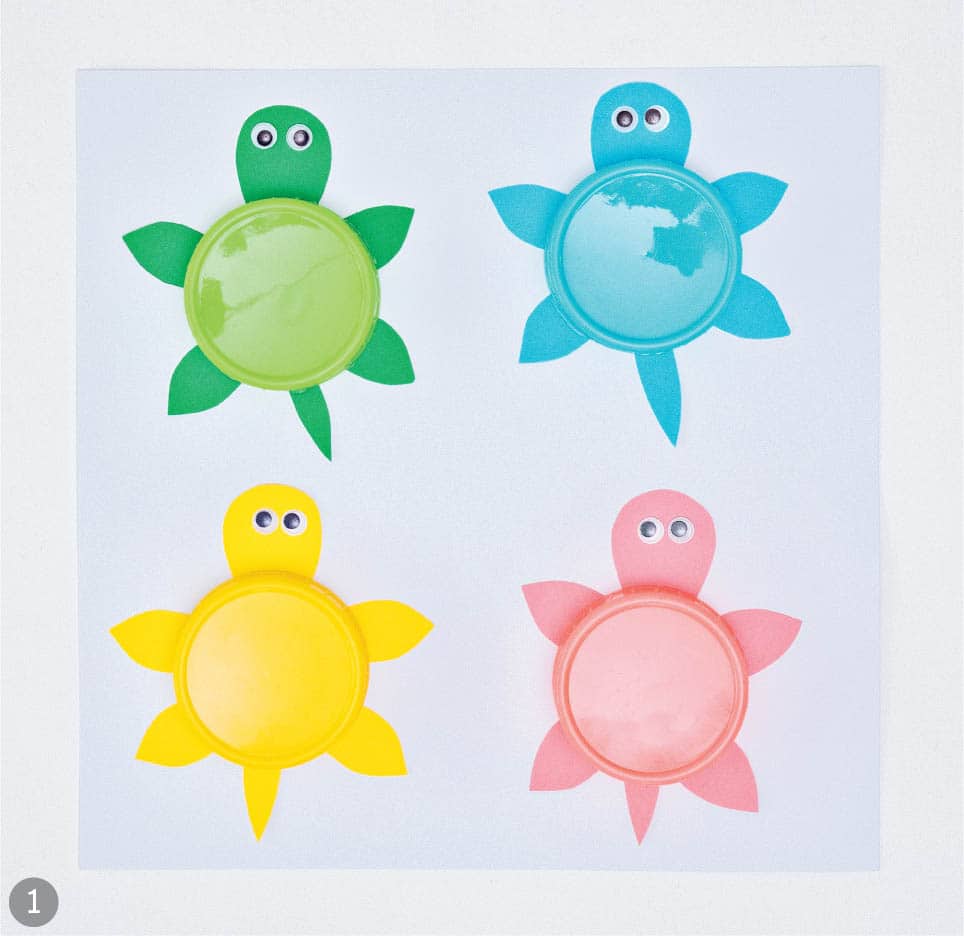
How many lids do you have just lying around the house? Don’t let them go to waste. Use them for this fun turtle activity instead. Turn the lids into turtle shells that are bright and colorful. Then, add on the colored dots to help the kids match up the colors and also work on their counting skills. Slow and steady is a good mantra when working with the kids on counting. Colored lids (or you can paint your own lids) Colored cardstock that coordinates with the lid colors Craft glue or hot glue gun and hot glue sticks Googly eyes Marker Removable dot stickers
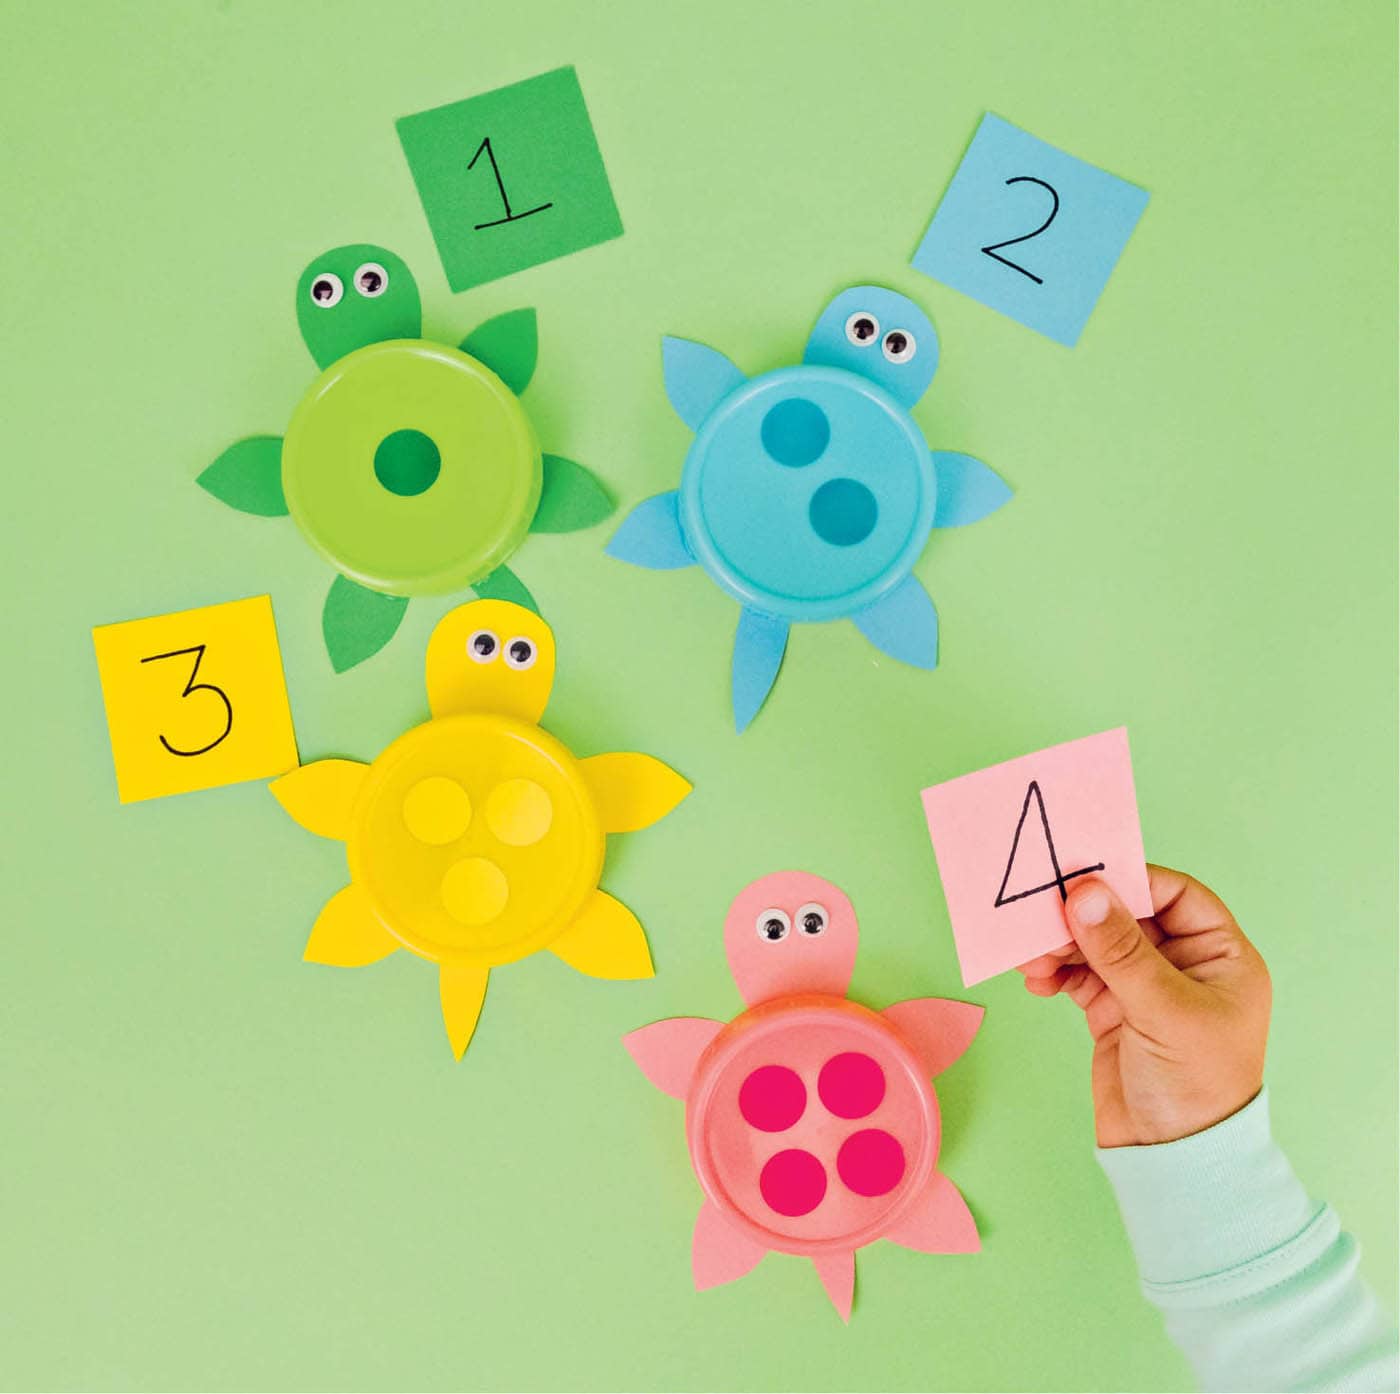
Place the right number of dot stickers that is on the piece of paper on the turtle. Learning Skills Tips to Extend Play◁ TURTLE LID ANIMAL COUNTING

MATERIALS
PROCEDURE
HOW TO PLAY
![]() Early math, numbers, color recognition
Early math, numbers, color recognition![]() You can write letters or numbers on the dot sticker. Place them on the turtles and simply ask your child to identify the right letter as you call them out.
You can write letters or numbers on the dot sticker. Place them on the turtles and simply ask your child to identify the right letter as you call them out.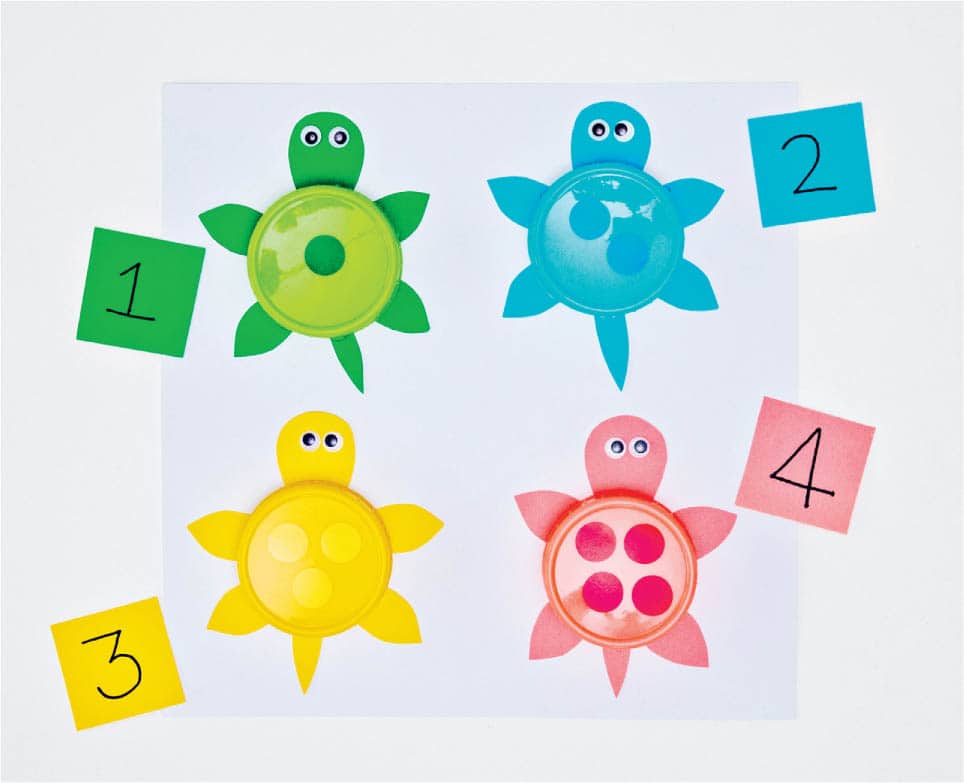
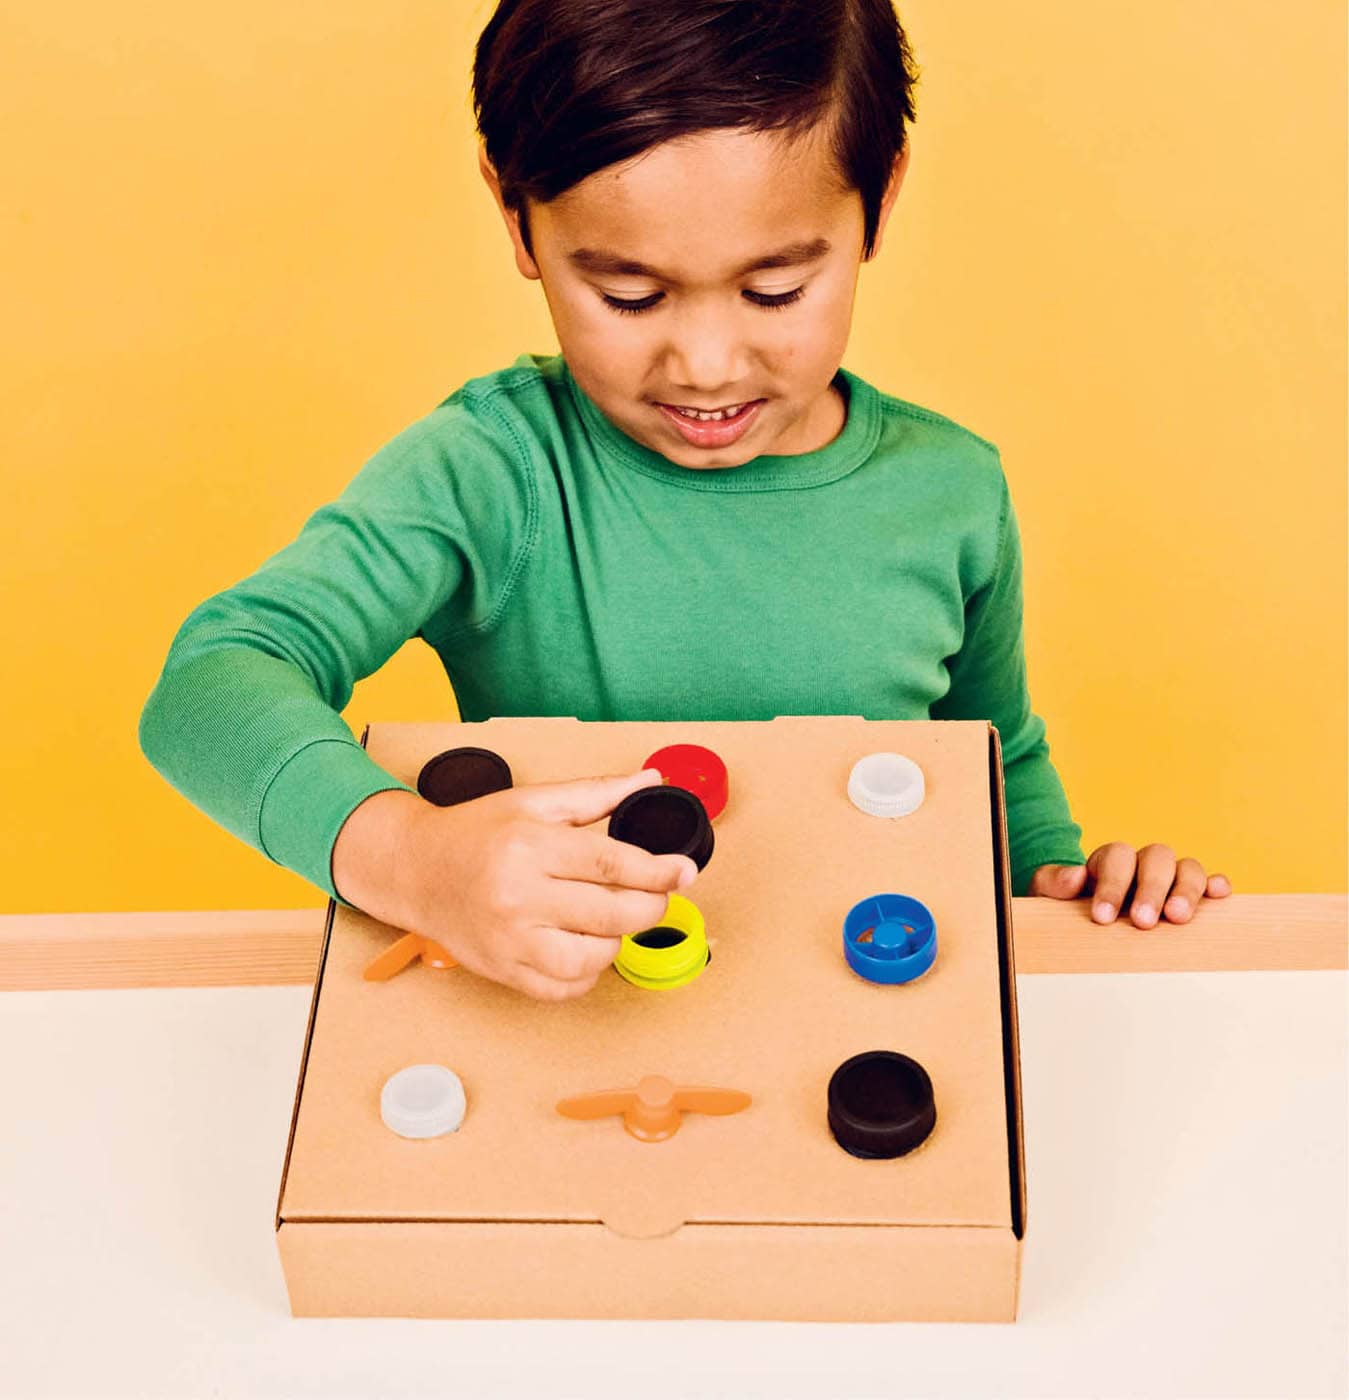
Working on fine motor skills with the kids is important, so doing it in a fun way is key. This is why this box lids activity is perfect. All you need are a few different types of lids. Have the kids work on holding and screwing them down into the box. As their hands turn the lids on the opening, they will feel how the screws and lids work, fine-tuning their hand muscles. Box Lids and caps with the bottom portions cut off Craft knife Craft glue or hot glue gun and hot glue sticks
Match the right lids to the bottoms and screw them on the box. Learning Skills Tips to Extend Play◁ BUSY BOARD LID ACTIVITY
MATERIALS

PROCEDURE
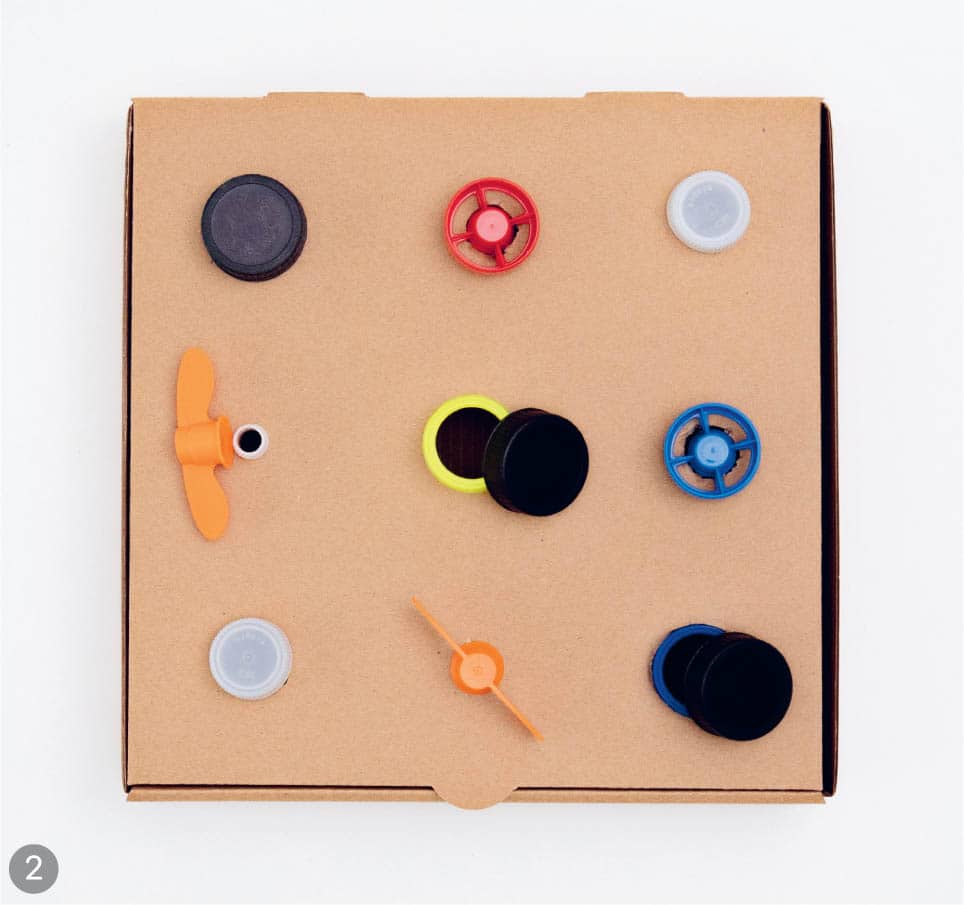
HOW TO PLAY
![]() Fine motor skills, cognitive skills
Fine motor skills, cognitive skills![]() Call out lid colors to practice color recognition. What else can you add to the box to practice fine motor skills? What about learning how to tie knots with string or gluing on various tactile items to create a sensory busy board?
Call out lid colors to practice color recognition. What else can you add to the box to practice fine motor skills? What about learning how to tie knots with string or gluing on various tactile items to create a sensory busy board?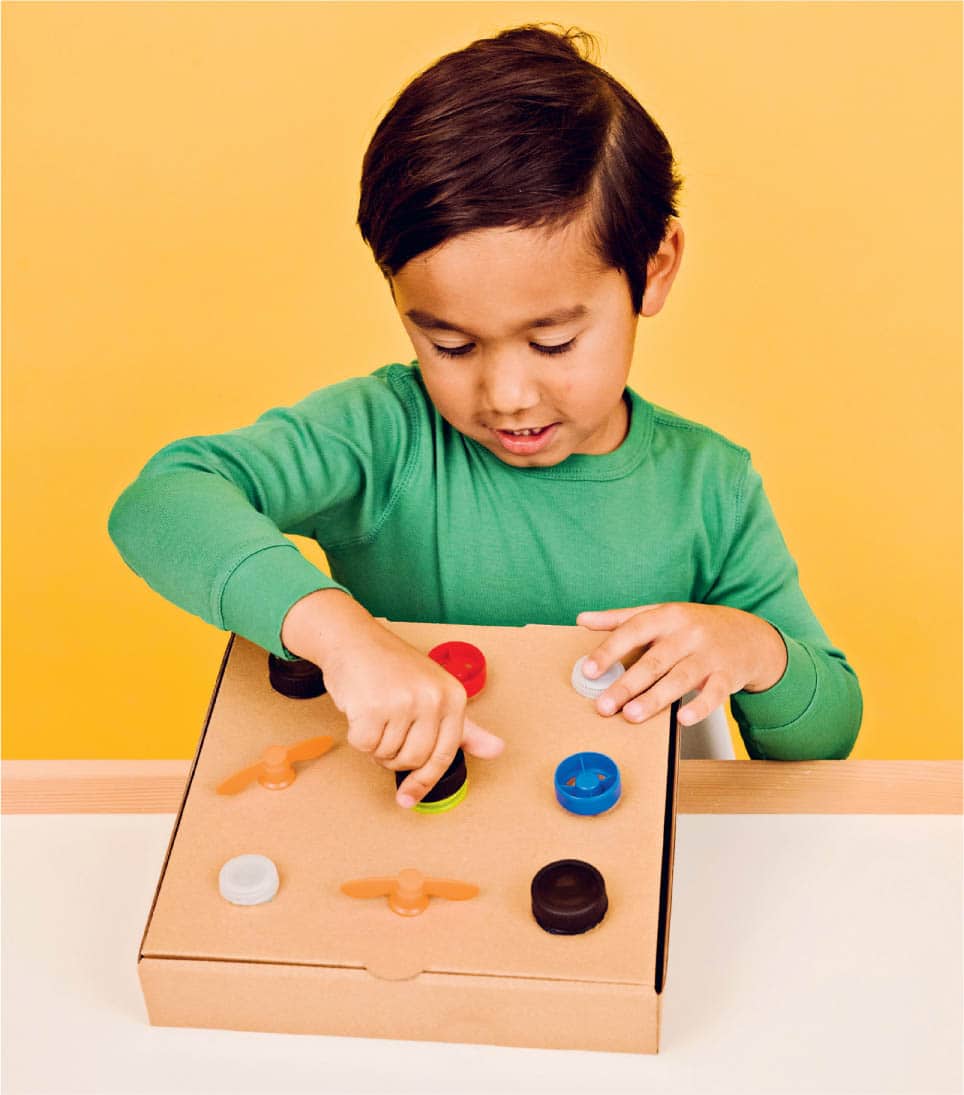
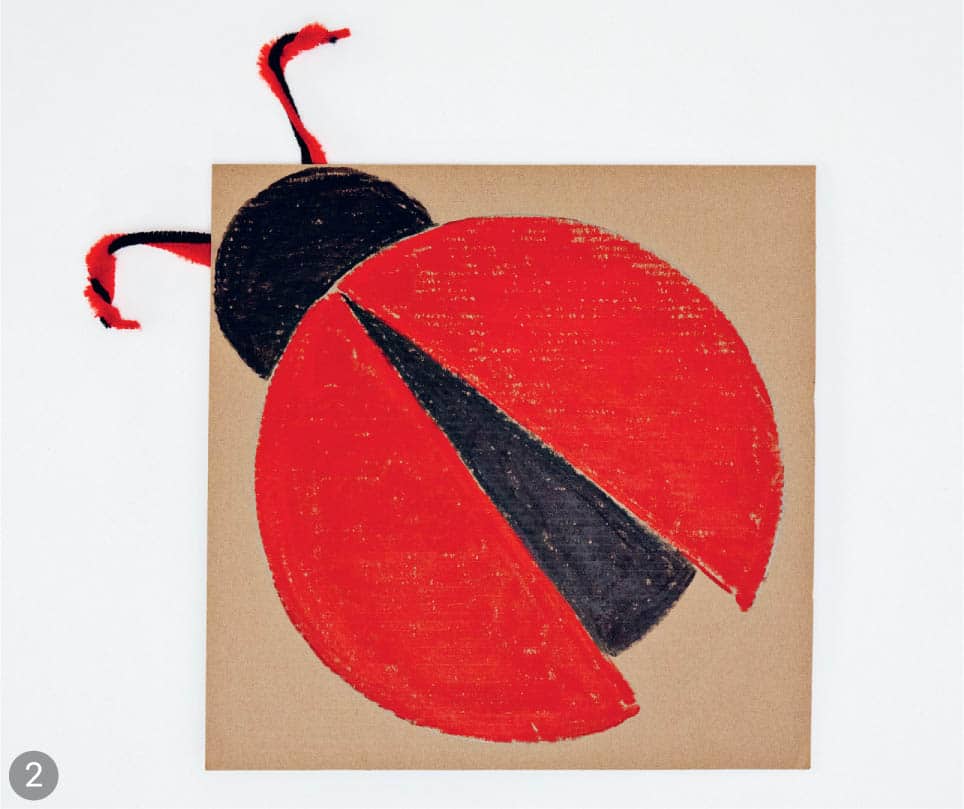
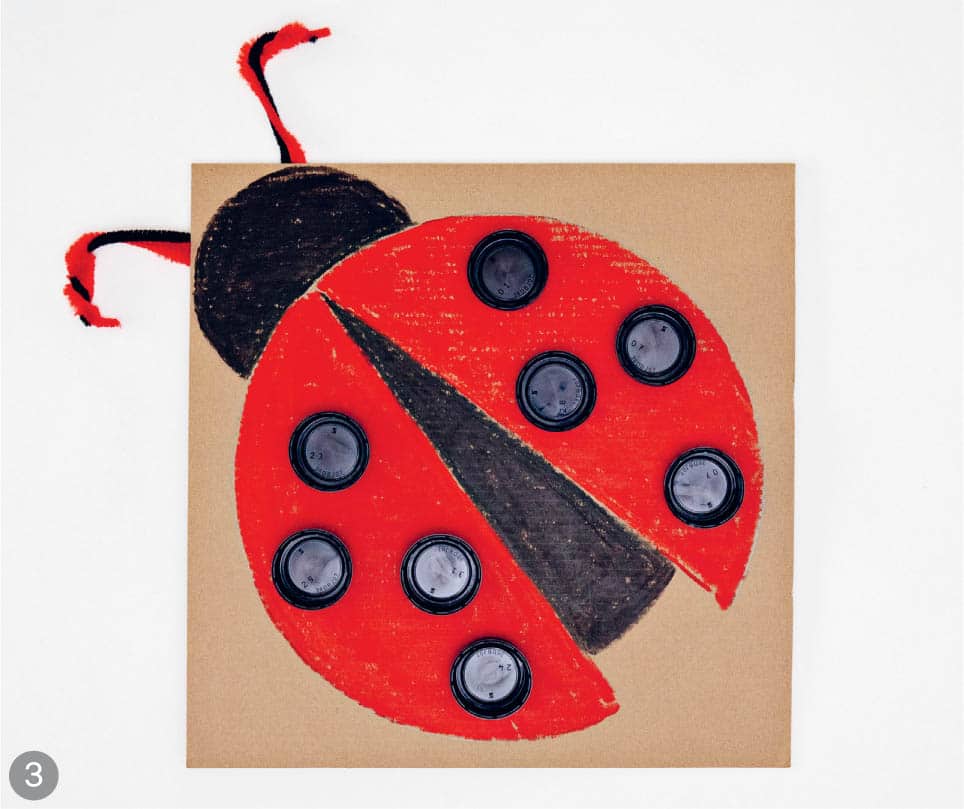
Not only are ladybugs super fun to create, they’re great for working on counting skills, too. Once the kids create this adorable cardboard ladybug using lids, they’ll get to focus on counting and adding the pompom dots. This is a great way to work on number recognition and counting. Pencil Cardboard Black and red paints or paint sticks Black and red pipe cleaners Scissors Craft glue or hot glue gun and hot glue sticks Black lids Red pompoms
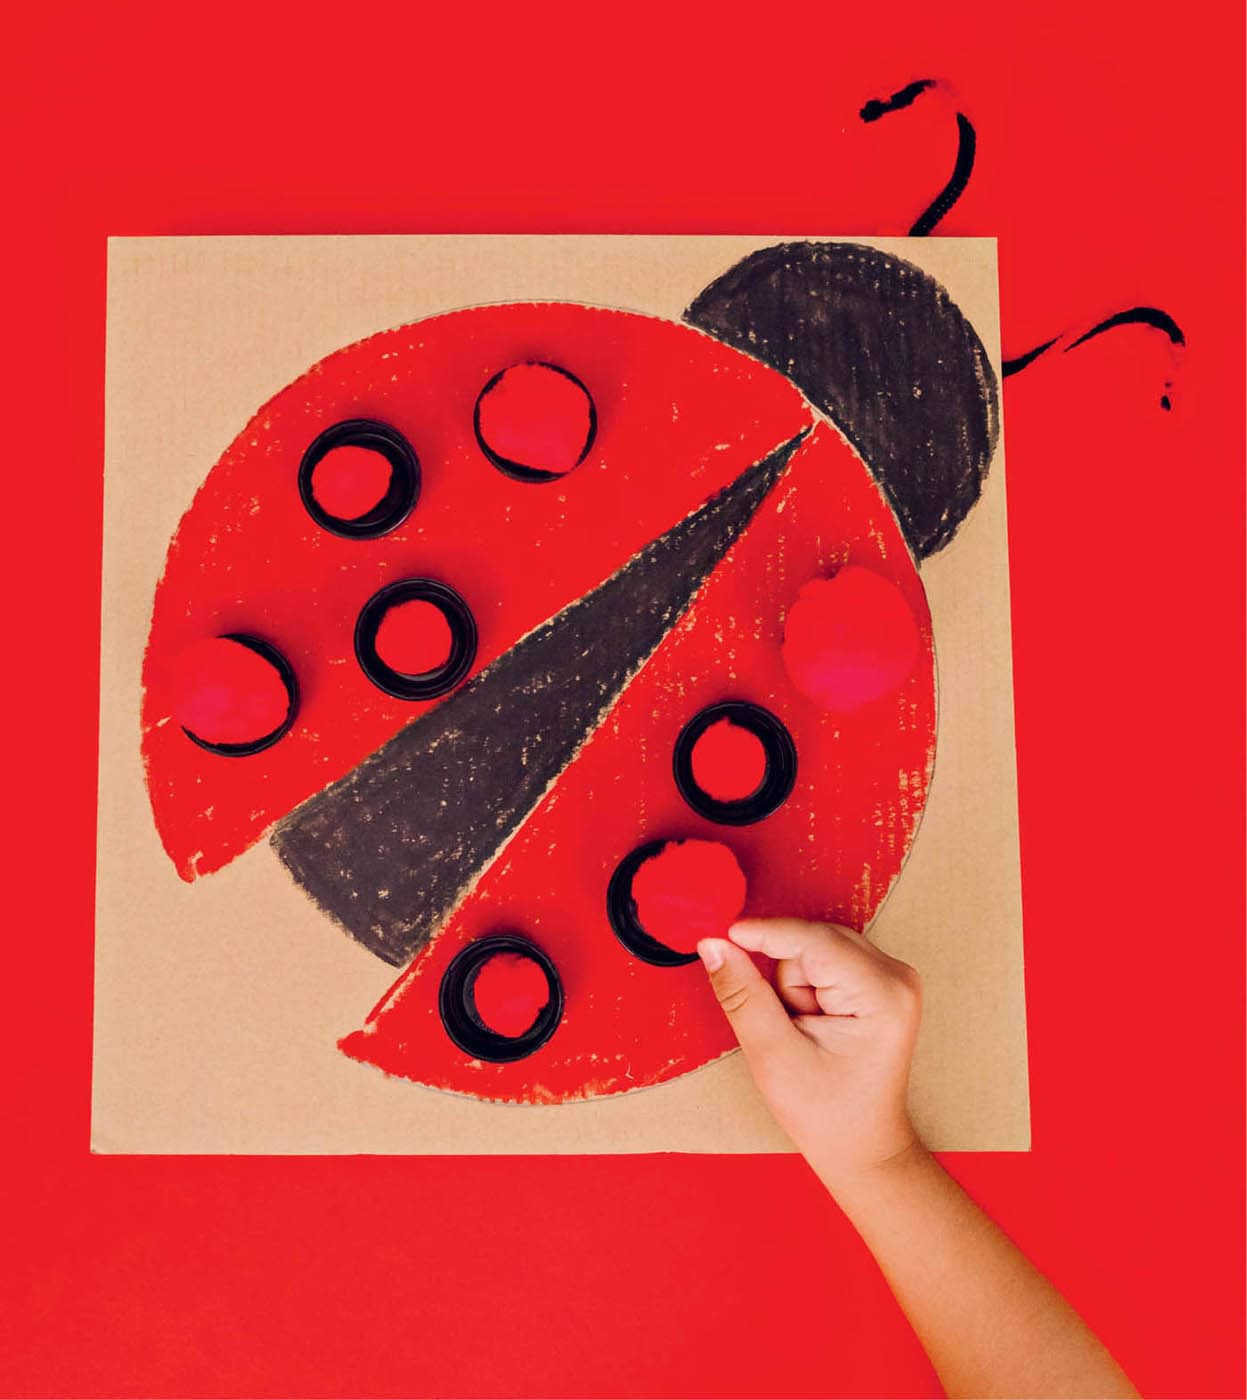
Drop the pompoms inside the lids. You can play various math games by counting lids and/or the pompoms. You can take away lids and ask your child to add a certain number on the ladybug. Learning Skills Tips to Extend Play◁ LADYBUG LID COUNTING
MATERIALS
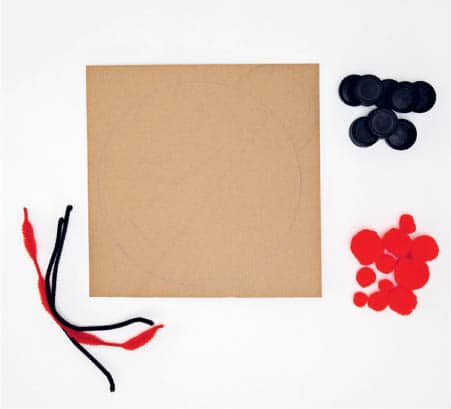
PROCEDURE
HOW TO PLAY
![]() Fine motor skills, early math, numbers, counting
Fine motor skills, early math, numbers, counting![]() Add letters or numbers inside the lids instead of pompoms. Use small tongs and practice fine motor skills by picking up pompoms from one lid to another.
Add letters or numbers inside the lids instead of pompoms. Use small tongs and practice fine motor skills by picking up pompoms from one lid to another.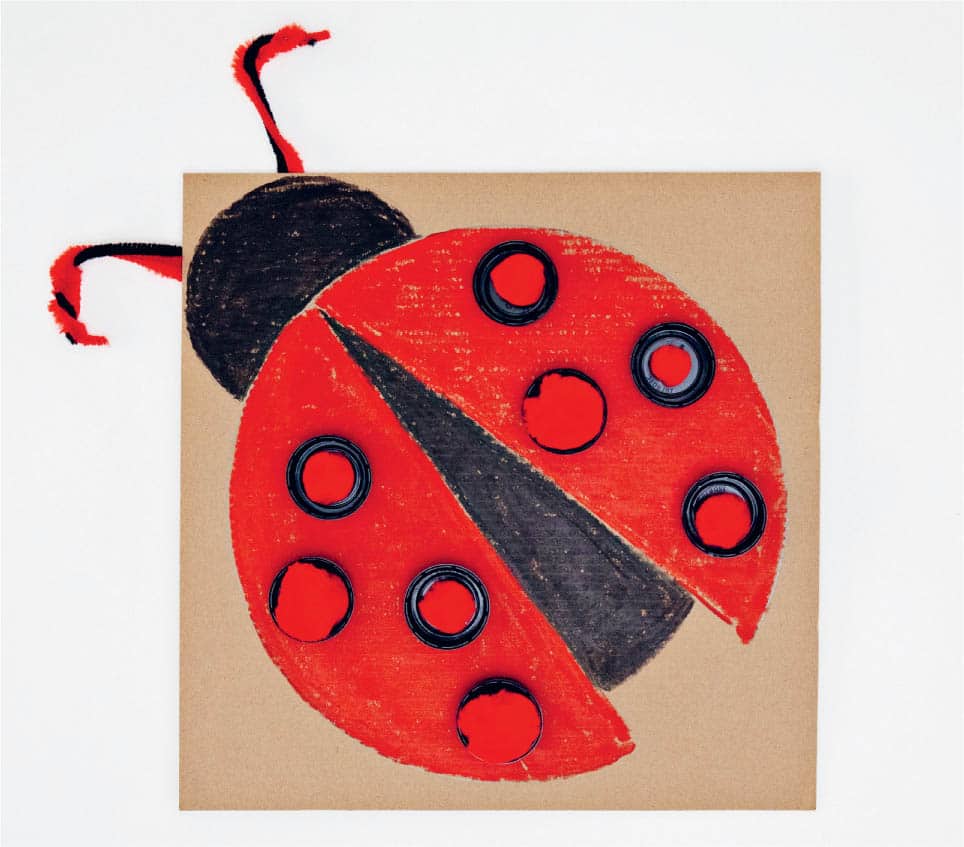
Have you and the kids ever stepped outside at night and tried to see any shooting stars? If you’re patient enough, you just might have seen a few. But if not, don’t worry. Just grab up simple recycled materials such as bottle caps and let the kids create their very own rainbow shooting star. It’s full of colors, super bright, and a beautiful art activity. Glitter paper Scissors Craft glue or hot glue gun and hot glue sticks White cardstock Paint sticks or markers in rainbow colors (red, orange, yellow, green, blue, purple) 26 bottle caps Black marker
Line up the caps in alphabetical order on the rainbow lines. Learning Skills Tips to Extend Play
◁ RAINBOW SHOOTING STAR ALPHABET
MATERIALS
PROCEDURE


HOW TO PLAY
![]() Letters and the alphabet
Letters and the alphabet![]() Instead of letters, you can write numbers. For early math, you can also make a +, -, and = bottle cap and do simple math equations on the rainbow. Or add dot sticks on top of the lid and match the coordinating rainbow line.
Instead of letters, you can write numbers. For early math, you can also make a +, -, and = bottle cap and do simple math equations on the rainbow. Or add dot sticks on top of the lid and match the coordinating rainbow line.
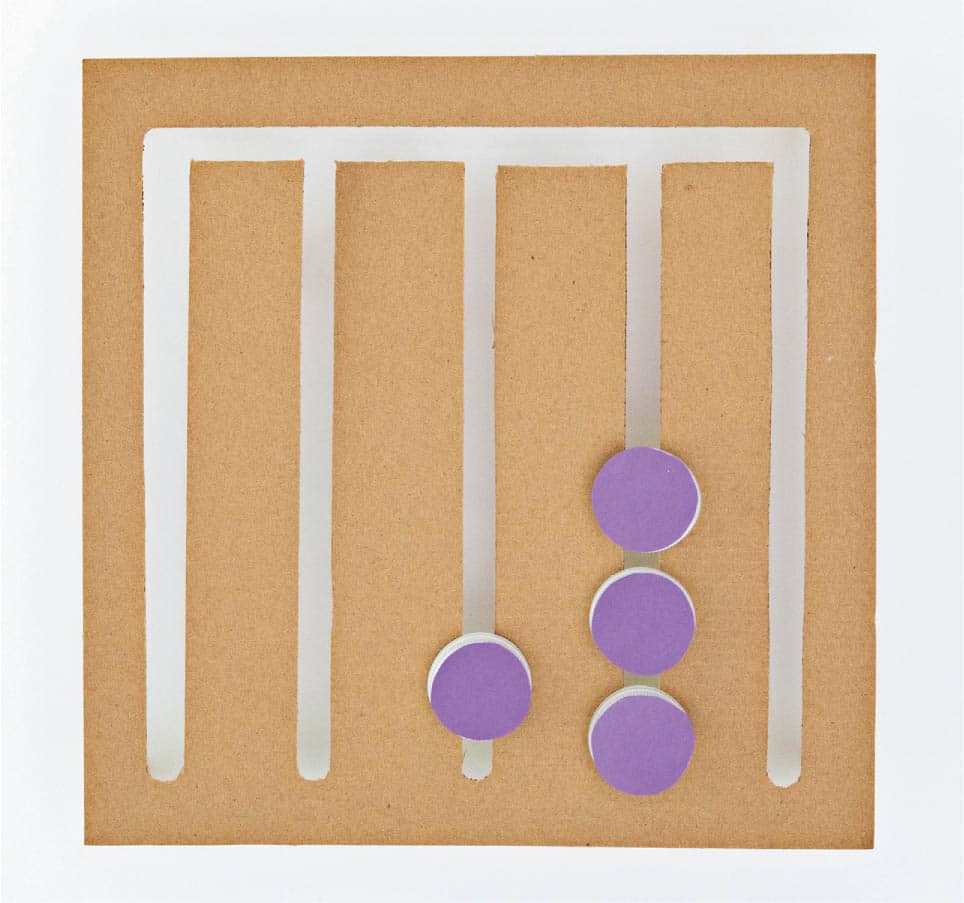
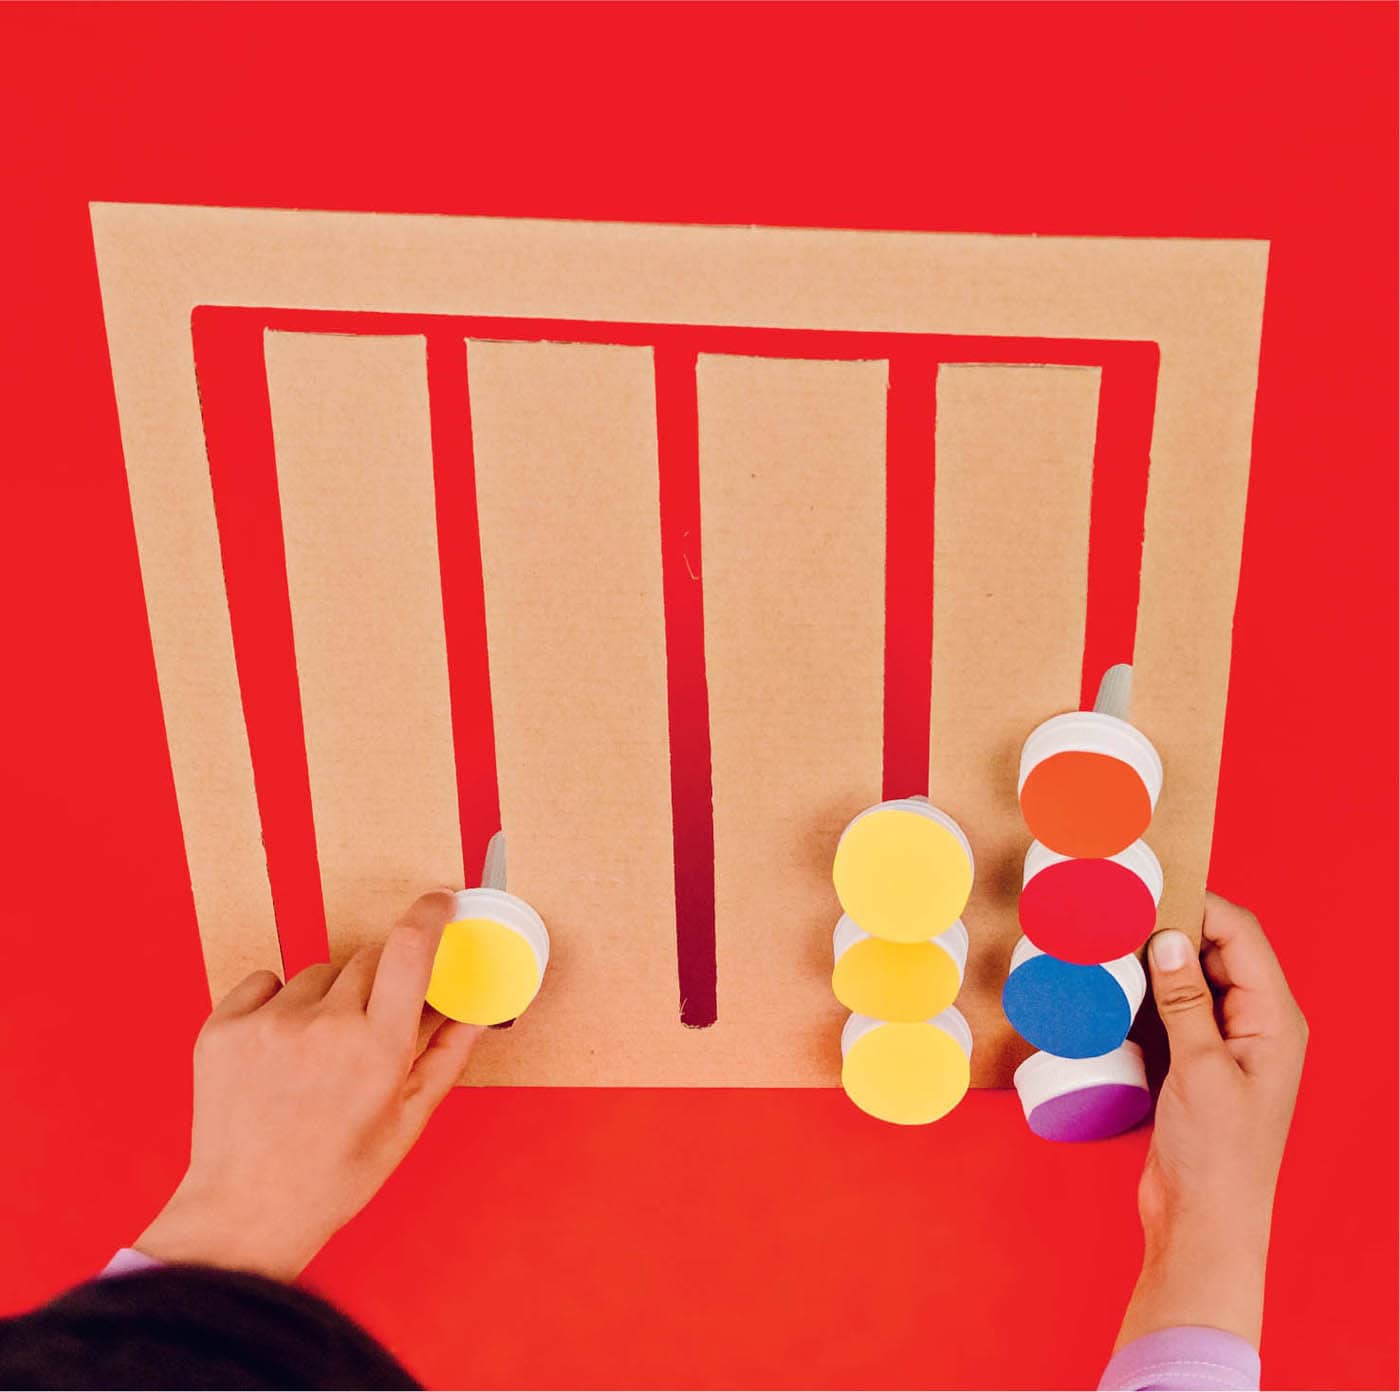
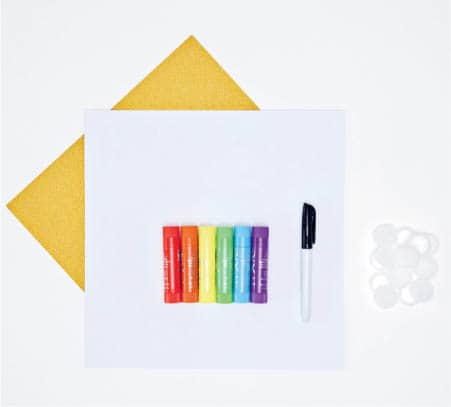
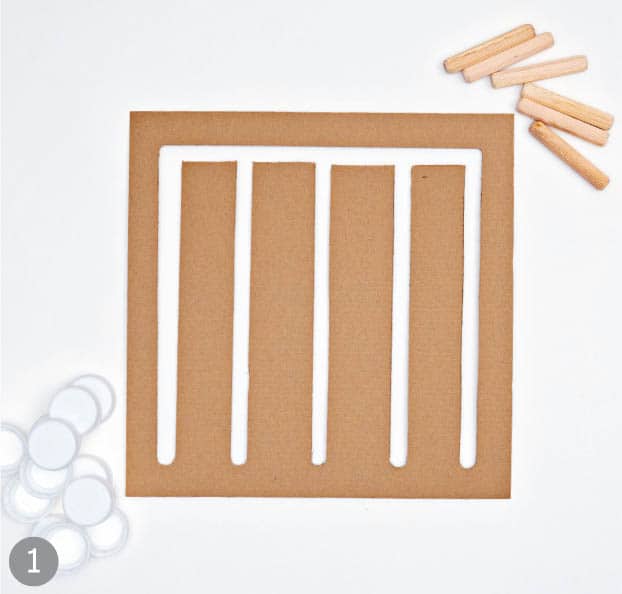
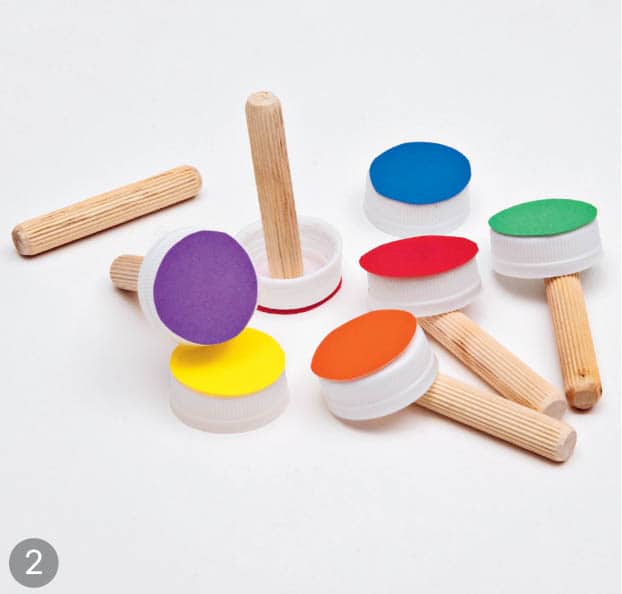
Mazes are always a great idea. Preschoolers and early learners love to solve problems, too. Covering used caps with colored paper and using a simple dowel rod on the opposite side gives the kids the freedom to move the lids around and match them up with the colors. This is a great activity for learning colors and enhancing fine motor skills. 1 12" (30.5 cm) cardboard square Craft knife Scissors Craft glue or hot glue gun and hot glue sticks Colored paper 3" (7.6 cm) dowel sticks, at least 4 per cap color Plastic caps
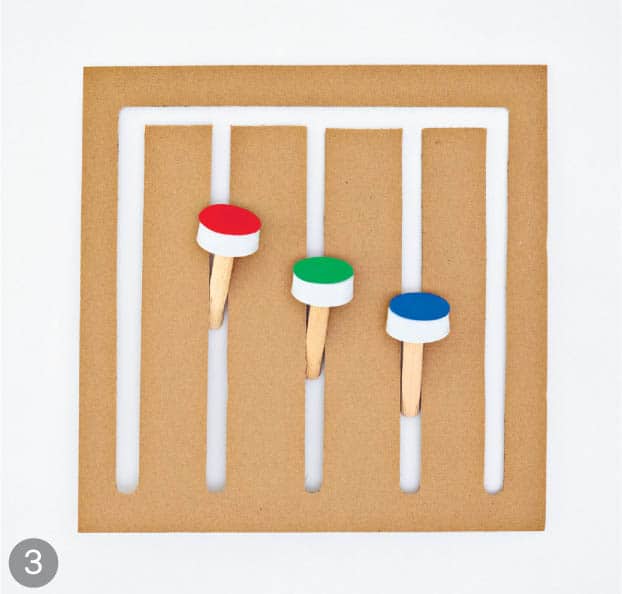
The object of the game is to move the caps by holding the dowel stick behind the cardboard and sorting the caps by color. Learning Skills Tips to Extend Play◁ BOTTLE CAP MAZE
MATERIALS
PROCEDURE
HOW TO PLAY
![]() Fine motor skills, color recognition, cognitive skills
Fine motor skills, color recognition, cognitive skills![]() Add letters to the bottle caps and try to spell out simple words or sight words.
Add letters to the bottle caps and try to spell out simple words or sight words.