An offline wallet can help you set up a Ripple account without storing any records digitally. Since the keys are generated offline, you can be assured that the generated keys don't leave your machine. Offline wallets can provide high security because no one can hack something that doesn't exist digitally. However, they are prone to physical theft. This section is only for your reference.
Navigate to Exarpy, as shown in the following screenshot, to generate an offline wallet. It would be better to use private browsing mode, where plugins are generally disabled. This is to prevent browser plugins spying on you:

Click on Create your first wallet; you will be asked to go offline. If you are given additional recommendations, please follow them to make the process safer. Ensure that you disconnect yourself from the internet.
Once you are offline, you are given a brief about your PIN. Your PIN is the recovery phrase of your Ripple wallet. If you lose your secret key, you will still be able to regenerate it using your PIN. However, if you lose your recovery phrase, you will lose your funds forever. Once you agree to the terms, click on Choose your Pin.
You will be taken to another screen, where you will be asked to select 16 numbers, as shown in the following screenshot. Make sure you finish this process:

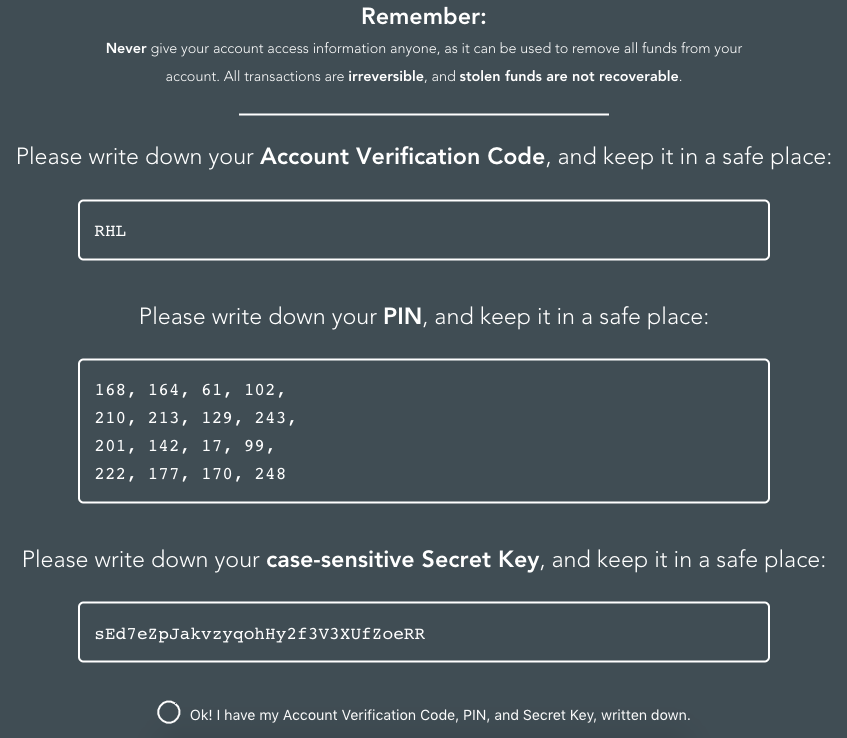
After you complete the PIN generation process, you will be shown your account credentials.
Please note that this is the first and the last time you are shown these credentials. No records are stored online or in your computer, so make sure you write them down.
The Account Verification Code and Pin are required for you to log in through Exarpy. They also provide you with a secret key. Hence, if Exarpy shuts down, you can continue using your Ripple account through other wallets by using the secret key. Once you write them down, check the radio button and click on Great, let's log in and activate your wallet. Please don't go online yet. The following screenshot explains the same:

You will be asked to provide your PIN and account verification code. Once you input those values, click on Login. Now, Exarpy will request you to go online. You would be then requested to activate your wallet. We covered this topic earlier in this chapter in the "Activating the Ripple account" section.
To see your wallet address, just click on the skip these tutorials,... link on the bottom of the page. You will be shown your Ripple account's dashboard. Check the radio button and agree to the terms. You will then be shown your wallet's public address, as shown in the following screenshot. You can send 20 XRP to this public address and activate your account:

