
If you, like many other readers, have been looking forward to getting your hands dirty and starting to work with using ESXi on your Pi, this is the chapter you’ve been patiently waiting for. You may have even jumped ahead to this chapter if you are really anxious to get started using the hardware. Regardless of which camp you fall into, in this chapter I will walk you through the process of installing ESXi on a Pi.
VMware did a good job documenting the process of installing ESXi on Arm on a Pi, but I found a few parts of their documentation a little bit confusing, and they didn’t include many screen captures. To help guide you through this process in an easy-to-understand manner, I will include many screen captures and keep the walk-through as streamlined as possible.
Before outlining the installation process, I am going to take a bit of a flyer and address a question I get asked a lot.
Redirecting the Screen
Before getting started with discussing how to Install ESXi on a Pi, I would like to address one question I get asked a lot: how I get the screenshots I use in my articles, blogs, and books and how can I view with my ESXi host with a laptop or single monitor. This seems like a simple question, as I have found screen captures are essential to the articles that I write as they allow readers to follow along with what I am describing or seeing on my end.
In the past I have tried to take manual photos of screens using everything from USB cameras to cell phones. I have even tried using a high-end digital camera on a tripod, but the results were just not that good. I would get flare and glare or miss time when I took the photos.

USB Capture Device
Software is required to display and capture the output that is being streamed. After trying a few different software packages like Windows Camera, VLC, and Camtasia, I found Open Broadcaster Software (OBS) to perform the best. It is a free, widely used open source cross-platform streaming and recording program. It is truly a multiplatform software – there are currently versions of OBS Studio available for Microsoft Windows, macOS, and Linux.
In the past I used a couple low-end, low-cost ($20–$50) USB capture cards and found the output range from fuzzy to pretty good. Occasionally they would fail or stop working, and I would need to disconnect and reconnect them to get them working again.

NUC 11 System

Back of NUC 11 CE

HDMI Capture Card Ports

NUC 11 CE and Pi

OBS
I have run the capture card on the NUC 11 for hours at a time and captured GBs of streamed video without any issues.
Not only can you use a capture card for documentation, but you can also use it as a Pi’s monitor when installing and working with it. You will, of course, need to connect a separate keyboard to the Pi. As a sidenote, I have found more than once that I try to interact with the streamed image using the keyboard attached to the system it is displaying on rather than the keyboard attached to the Pi.
Using an inexpensive USB HDMI capture card is OK for the occasional screen capture, but if you have a lot of content to capture, I highly recommend using a high-end capture card.
Installation Overview
I have said it before, and I will reiterate it here – VMware, at the time of me writing this, clearly and irrevocably states that this product is unsupported and should not be used for production. That said, thousands of users (including myself) have been using it for months and have found it surprisingly solid. The license for it is free, but acquiring one does require you to create a MyVMware account. The license will expire 180 days after installation, at which point you will need to reinstall it. Your VMs, however, will still be viable.
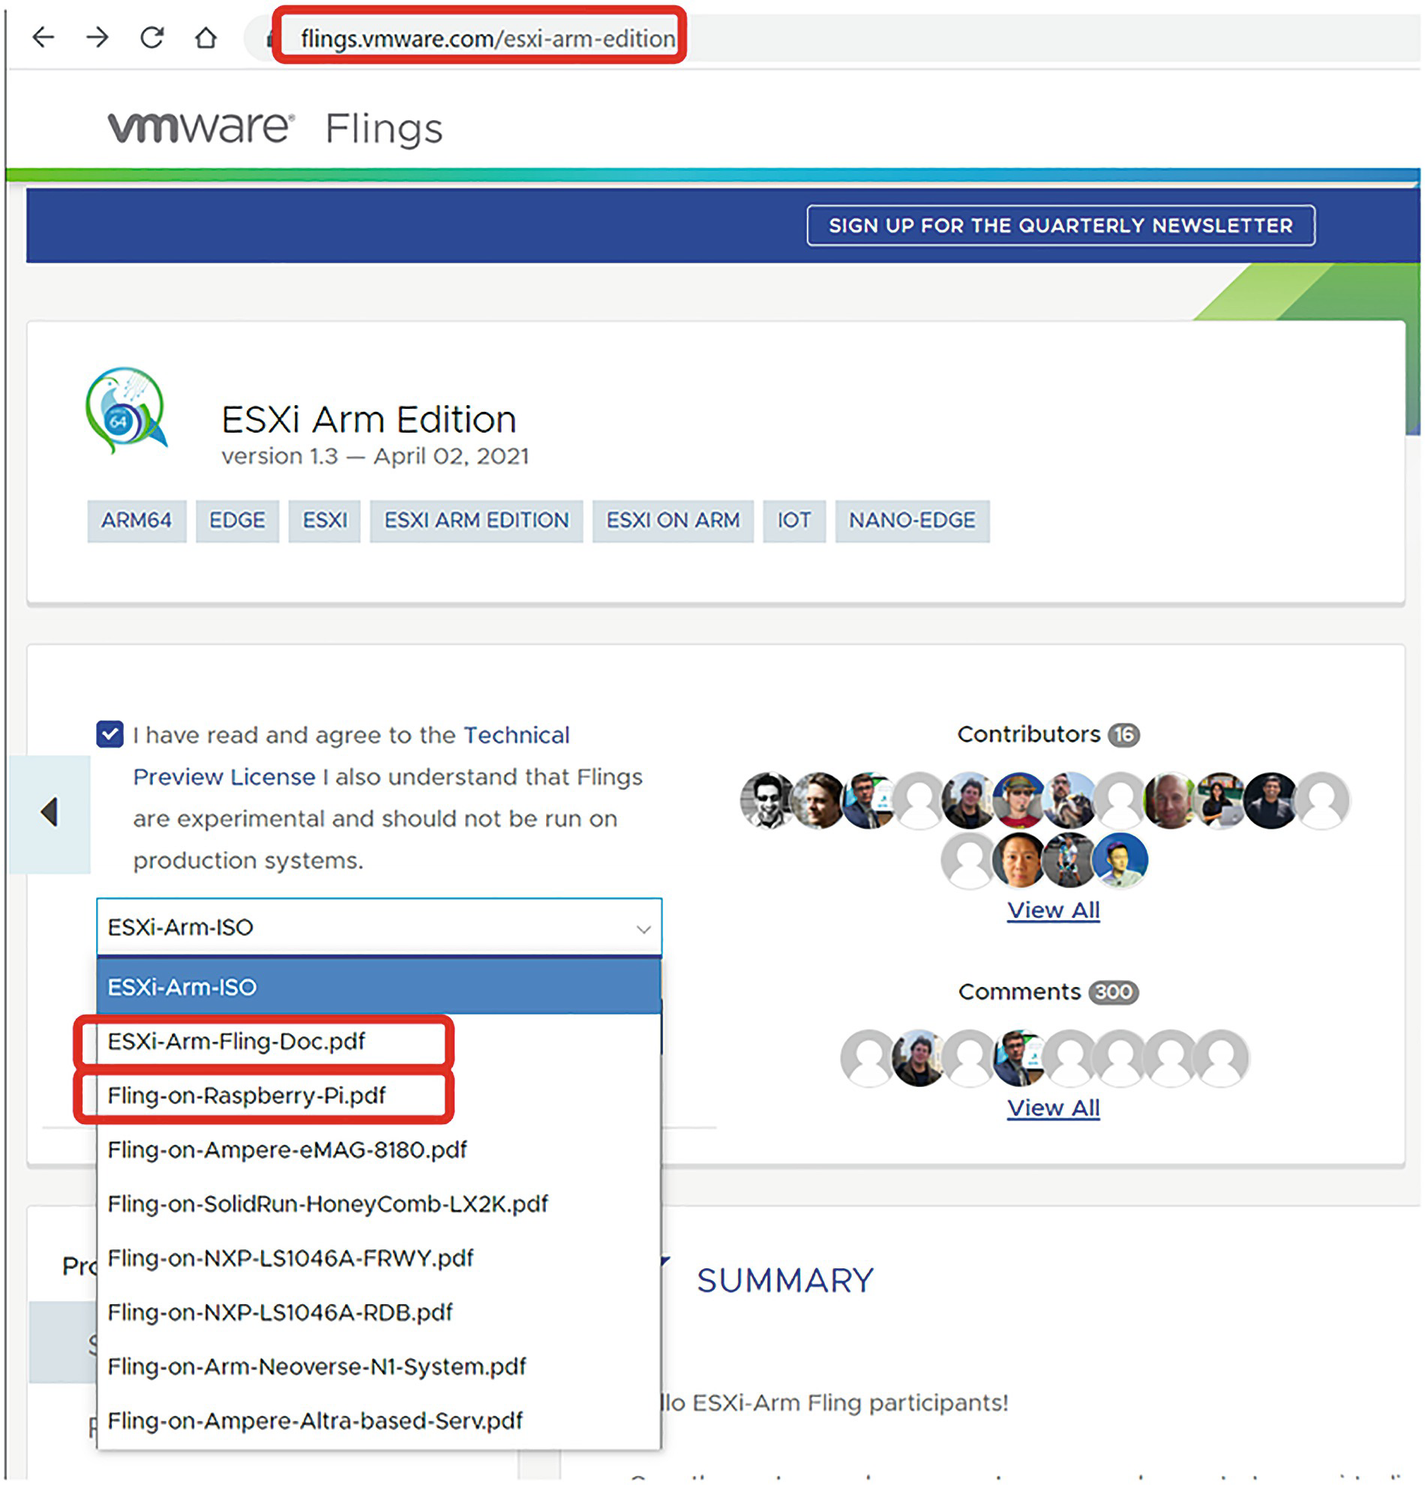
ESXi on Arm Fling Web Page
Verifying the EEPROM running on the Pi and updating it if needed
Writing the installation ISO to a thumb drive
Installing ESXi on the Pi
Setting the Pi to boot off ESXi
Configuring the ESXi host
To simplify the process, I will be showing just one way to install ESXi on the Pi. There are other, more advanced options to install it, but for the vast majority of users, this is the way that will best suit their needs.
Hardware and Software Preparation
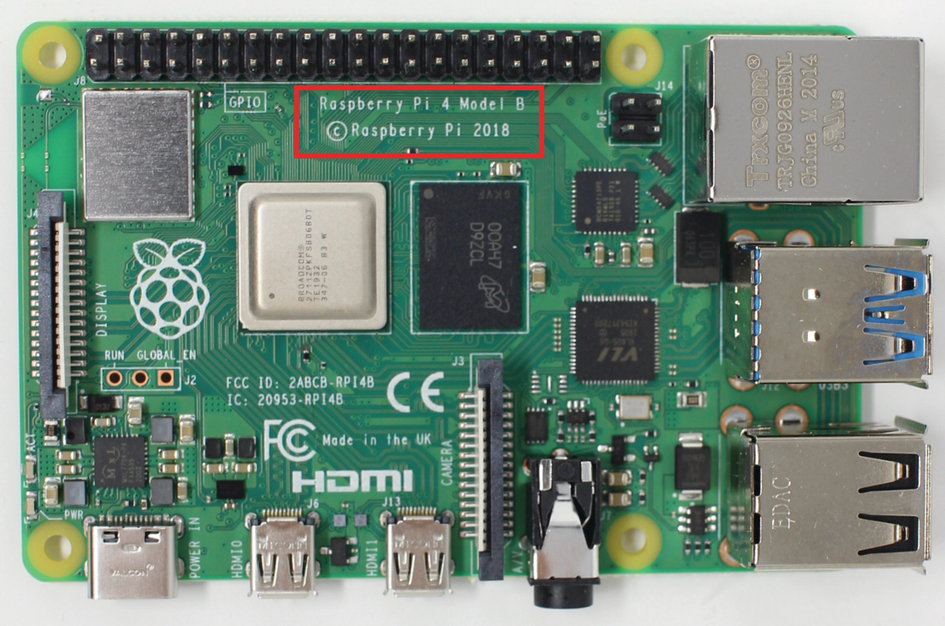
Pi Markings
When I do my initial installation, I leave the Pi outside of the case; heat will not be a problem, and this is just one less variable to consider if something goes wrong when installing it.
Install Pi on a Micro-SD Card
To make sure the Raspberry Pi microcode is up to date, you will need to install Pi OS onto your micro-SD card and then boot it. This is all Pi OS is used for. After checking the microcode, we will use the micro-SD for the EEPROM. The following instructions show how to do it on a Windows system. It can be done on a system running Linux or macOS. However, it is beyond the scope of this book.
- 1.
Download and install the Raspberry Pi Imager tool for Windows (www.raspberrypi.org/blog/raspberry-pi-imager-imaging-utility) to a Windows system. Imager is free, open source, and 20MB in size. If your Windows system does not have a micro-SD slot, you will need to use an adapter to write to it.
- 2.
Run Imager on your Windows system (see Figure 5-9).

Imager Tool
- 3.
From the Choose OS drop-down menu (see Figure 5-10), select Raspberry Pi OS (32-bit).

Select OS
- 4.
From the Choose SD Card drop-down menu, select your SD card and click Write. Imager will download the image and write it to your micro-SD card.
- 5.
Figure 5-11 shows the message that you will receive when the image is written. Click Continue, remove the micro-SD card from your Windows system, and close Imager.
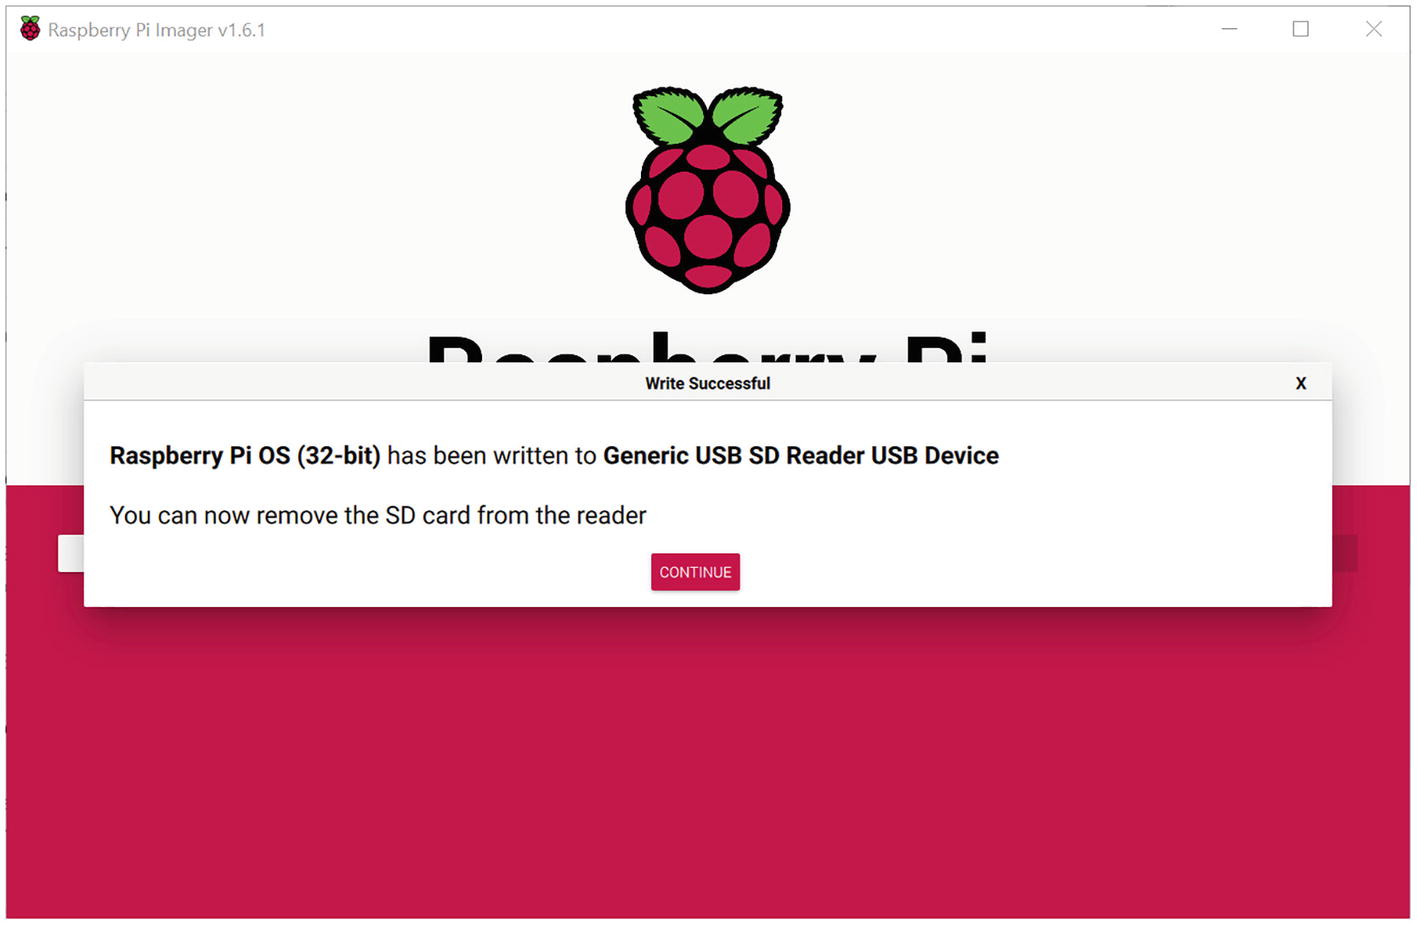
Imager Finished
Using Pi OS to Check the Pi’s EEPROM
- 1.
Place the micro-SD card into the Pi. Plug the power supply, a keyboard, your network, and an HDMI monitor into the Pi.
- 2.
Power the Pi on by plugging it in. It will take a minute or two for the system to boot up. You will be greeted with a Raspberry Pi setup screen. Follow the prompts to set up your system.
- 3.
From the top left of the screen, select the terminal icon. Check if your EEPROM is up to date by entering
- 4.
The display will show if the Pi’s EEPROM is up to date (see Figure 5-12) or not.

Check EEPROM
- 5.
If your EEPROM is not up to date by entering
- 6.
Once the system has shut down, remove the micro-SD card from it and place it back in the Windows machine.
Prep Micro-SD with UEFI
- 1.
Download the latest Pi firmware and RPi 4 UEFI firmware from
https://github.com/raspberrypi/firmware/archive/master.zip
https://github.com/pftf/RPi4/releases/download/v1.20/RPi4_UEFI_Firmware_v1.20.zip
- 2.
Extract the contents of the zip files to separate folders: one called master and the other called UEFI.
- 3.
In the master/boot folder, delete all the files that start with kernel (see Figure 5-13).

master/boot Folder
- 4.
Copy all files within the UEFI directory into the master/boot directory. Allow duplicate files to be overwritten as shown in Figure 5-14.

Overwriting Files in the master/boot Folder
- 5.
Format the micro-SD card with a FAT32 file system (see Figure 5-15).

Format Micro-SD
- 6.
Copy all the files from the master directory to the micro-SD card. This may take a few minutes.
- 7.
Eject the micro-SD card from the Windows system.
Create an ESXi on Arm Install Device
- 1.
Go to the ESXi on Arm Fling web page https://flings.vmware.com/esxi-arm-edition and log in using your MyVMware account.
- 2.
From the Download drop-down menu, select the ESXi-Arm-ISO (see Figure 5-16).
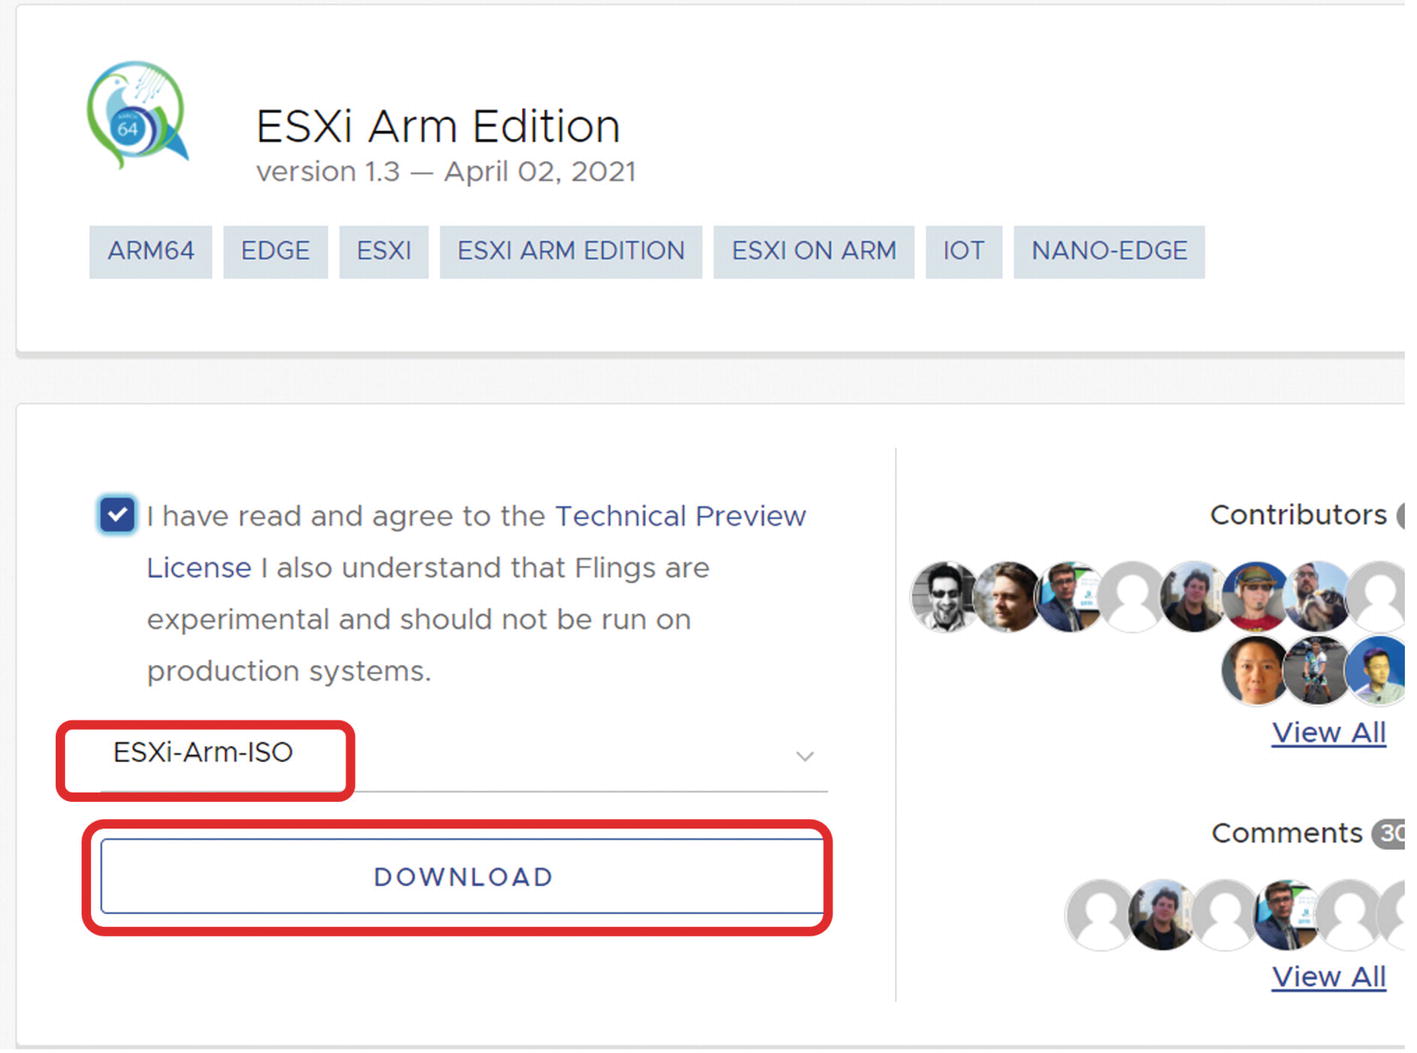
Download ESXI on Arm Fling
- 3.
This will redirect to the VMware download site (see Figure 5-17). Select Download Now for the ESXi for Arm ISO image (no VMware Tools). The ISO will be about 130MB.

ISO Download
- 4.
Place the thumb drive that you want to use to install ESXi from in your Windows system.
- 5.
Download Rufus from https://rufus.ie/en_US/ to your Windows system.
- 6.
Launch Rufus.
- 7.
In Rufus select your ESXi on ARM ISO image and the thumb drive and click Start (see Figure 5-18).

Rufus
- 8.
When it has written the ISO image to the drive, click Close and remove the thumb drive.
Installing ESXi on the Pi
- 1.
Place the micro-SD and the thumb drive in the Pi.
- 2.
Power on the Pi.
- 3.
Repeatedly press the Esc key while the Pi boots up.
- 4.
From the Pi UEFI configuration screen, use the keyboard to select Device Manager (see Figure 5-19).

Pi configuration screen
- 5.
Select Raspberry Pi Configuration ➤ Advanced Configuration.
- 6.
Disable Limit RAM to 3 GB (see Figure 5-20).

RAM Limit
- 7.
Press F10 and confirm your selection.
- 8.
Press Esc three times and select Continue (see Figure 5-21).
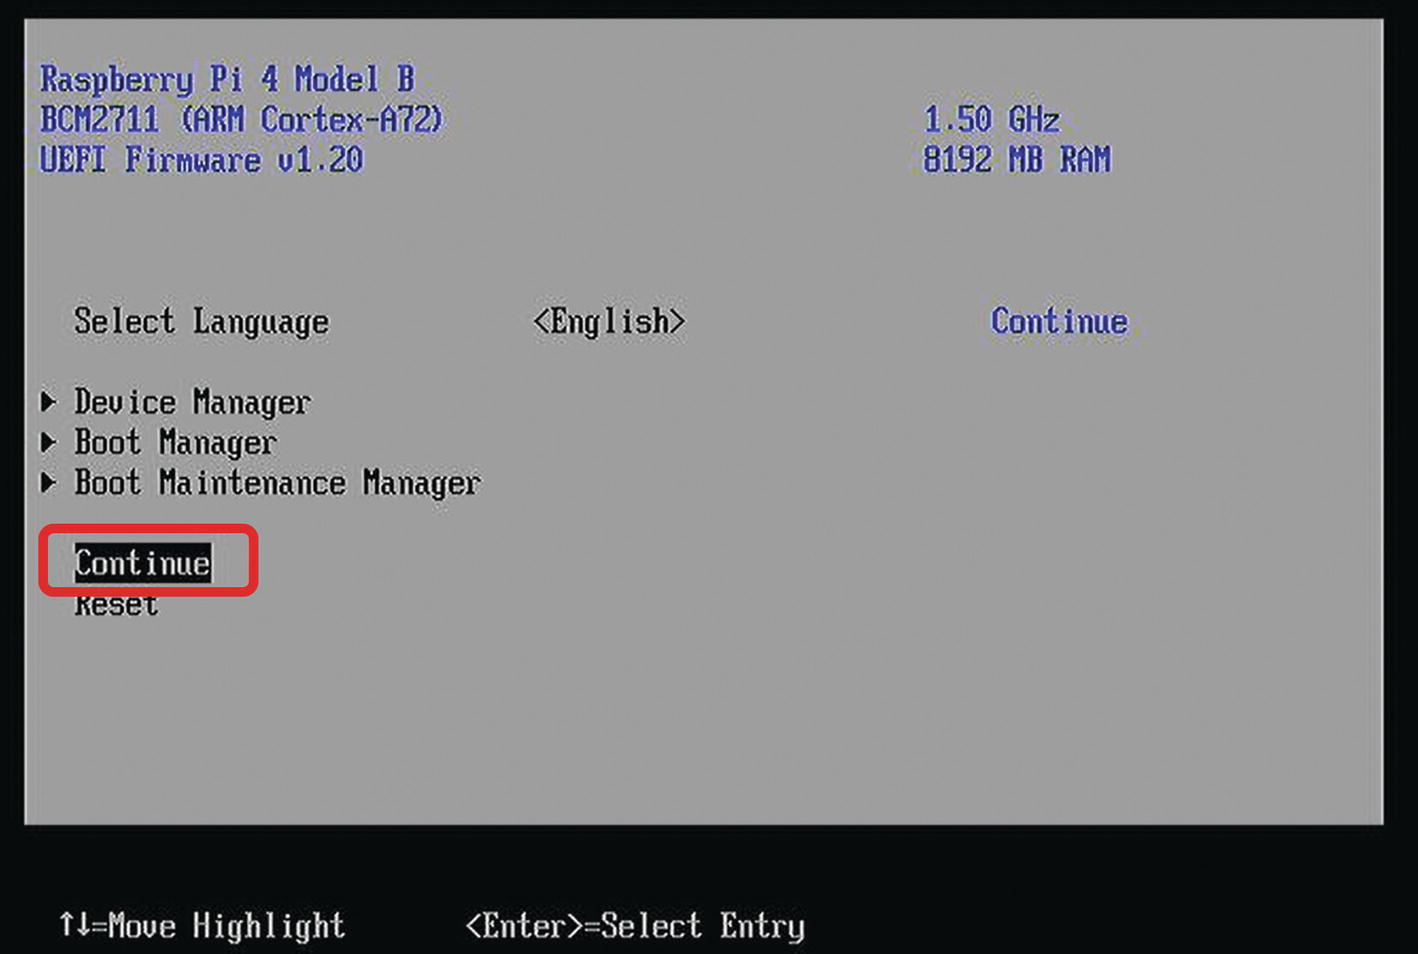
Exit Pi Configurator
- 9.
This will start ESXi ISO to boot.
Installing ESXi on the Pi RPi
- 1.
While the ESXi installer is booting, you will see a yellow screen. It will take a few minutes for ESXi to fully boot.
- 2.
At the ESXi install screen (see Figure 5-22), press Enter.

Welcome Screen
- 3.
Select the drive that you want to install ESXi on (see Figure 5-23). I find it easiest to have two different brands or sizes of drives so I can tell the install thumb drive from the drive I want to install on.

Selecting Drive to Install On
- 4.
Accept the installation defaults.
- 5.
When instructed, remove the installation media and press Enter to reboot the system.
- 6.
If your system shows Figure 5-24 for more than a few minutes, power the Pi off manually.

Installation Reboot
Modify RPi Boot Order
- 1.
Power on the Pi.
- 2.
Repeatedly press the Esc key while the Pi boots up.
- 3.
From the Pi UEFI configuration screen, use the keyboard to select Boot Maintenance Manager ➤ Boot Options ➤ Change Boot Order (see Figure 5-25).

Change Boot Order
- 4.
Select the thumb drive that you installed ESXi on as the first boot device.
- 5.
Press F10, confirm your selection, and then press Esc three times and then select Continue.
Post-installation Configuration: ESXi Console
After ESXi has finished installing, you will need to configure its networking from the ESXi console.
- 1.
After the system boots, you will see the ESXI screen.
- 2.
Press F2, enter root in the Login Name text box and the password that you set when you installed ESXi in the Password text box, and press Enter (see Figure 5-26).

ESXi Log-On
- 3.
Select Configure Management Network.
- 4.
Set your hostname and change your networking if needed.
- 5.
Press Esc. Select yes to Apply changes and restart management network.
- 6.
Select Troubleshooting Options.
- 7.
Enable ESXi shell and SSH.
- 8.
Press Esc. Select yes to Apply changes and restart management network.
- 9.
Press Esc to log out of the ESXi console.
Post-installation Configuration: VMware Host Console
Having accurate time on your ESXi is critical.
- 1.
In a web browser, enter the IP address of your ESXi system prefixed with https://. This will bring you to the VMware Host Client.
- 2.
Enter root in the User name text box and the password that you set when you installed ESXi in the Password text box and click Log in (see Figure 5-27).
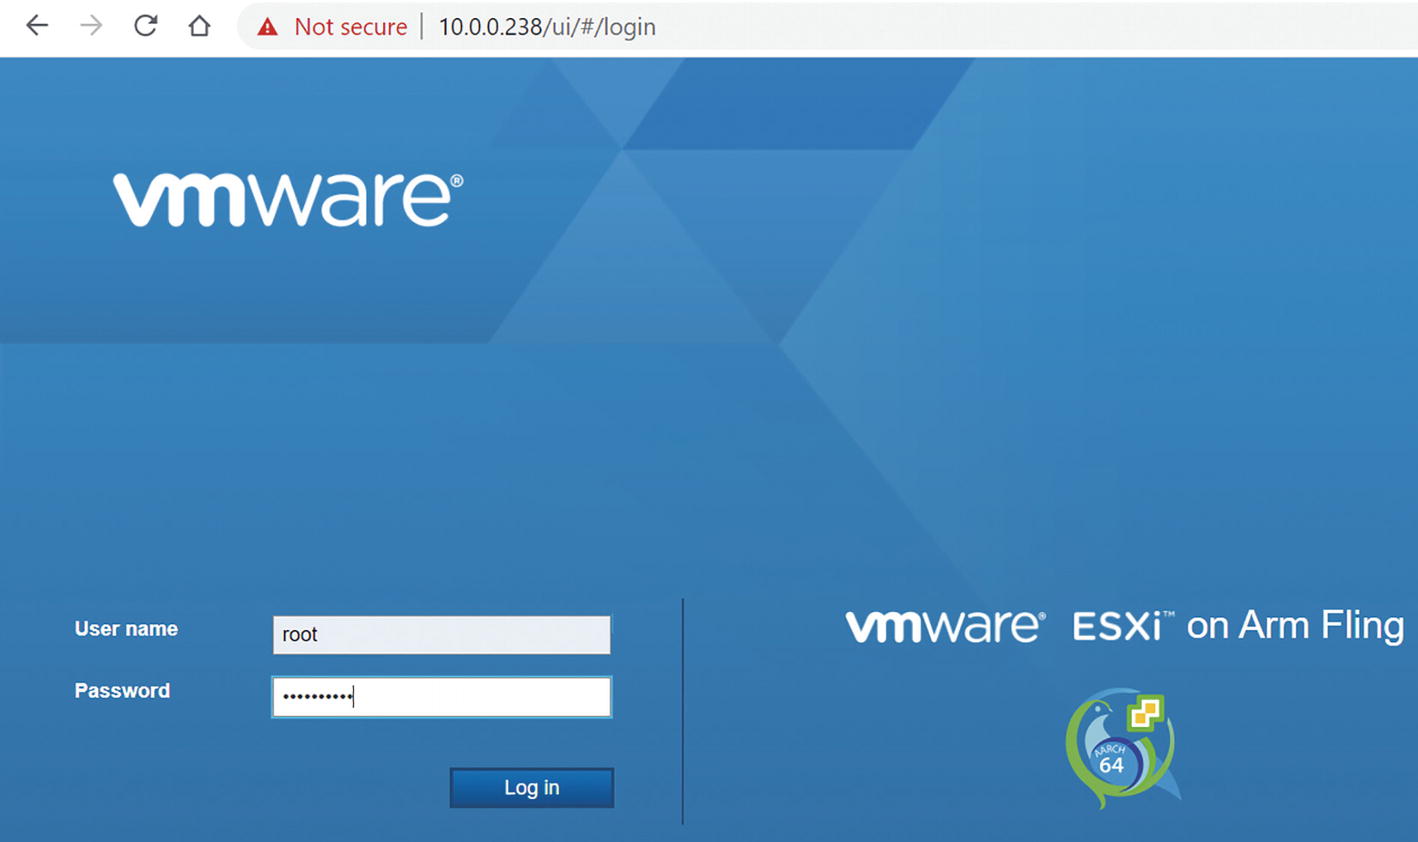
Log In to the VMware Host Console
- 3.
On the home screen, verify that you are running the ESXi on ARM Fling on a Raspberry Pi (see Figure 5-28).

VMware Host Console Home Page
- 4.
From the Navigator pane, select Manage, select the System tab, and select Time & date (see Figure 5-29).

Time and Date Settings
- 5.
Click Edit NTP Settings.
- 6.
Select Manually configure the date and time on this host, set the date to the current UTC time, and click Save (see Figure 5-30).

Manual Time Settings
- 7.
Click Edit NTP Settings.
- 8.
Select Use Network Time Protocol, select Start and stop with host, enter 0.pool.ntp.org, 1.pool.ntp.org, and click Save (see Figure 5-31).

NTP Server Settings
- 9.
Select the Services tab, right-click ntpd, and select Start.
- 10.
Click Refresh and verify that the NTP daemon is running (see Figure 5-32).

Services
- 11.
From the user drop-down menu, select Log out (see Figure 5-33).

Log Out
Summary
There are many more steps involved when installing ESXi on an Arm platform than on an x64 system that only requires you boot off the install medium and install it.
It may take you an hour or so the first time you install ESXi on an Arm system, but if you follow the preceding instructions, it should go smoothly. In the next chapters, we will work more with the VMware Host Console and add storage and VMs to the ESXi host.