
Chapter 23
A JavaScript Library for Ajax
What You’ll Learn in This Chapter:
![]() An Ajax Library
An Ajax Library
![]() Reviewing
Reviewing myAHAHlib.js
![]() Implementing Our Library
Implementing Our Library
![]() Using the Library
Using the Library
In this chapter you will learn how to encapsulate some of the techniques studied up to now into a small JavaScript library that you can call from your applications.
An Ajax Library
Through the chapters and code examples up to now, we have developed a number of JavaScript code techniques for implementing the various parts of an Ajax application. Among these methods are
![]() A method for generating an instance of the
A method for generating an instance of the XMLHTTPRequest object, which works across the range of currently popular browsers
![]() Routines for building and sending
Routines for building and sending GET and POST requests via the XMLHTTPRequest object
![]() Techniques for avoiding unwanted caching of
Techniques for avoiding unwanted caching of GET requests
![]() A style of callback function that checks for correct completion of the
A style of callback function that checks for correct completion of the XMLHTTPRequest call prior to carrying out your wishes
![]() Methods of providing user feedback
Methods of providing user feedback
![]() Techniques for dealing with text data returned in
Techniques for dealing with text data returned in responseText
![]() Techniques for dealing with XML information returned in
Techniques for dealing with XML information returned in responseXML
In addition, you saw in Chapter 20, “AHAH—Asynchronous HTML and HTTP,” how some of these methods could be abstracted into a small JavaScript “library” (in that case containing only two functions).
This chapter extends that idea to build a more fully featured library that allows Ajax facilities to be added simply to an HTML page with minimal additional code.
Of necessity, our Ajax library will not be as complex or comprehensive as the open source projects described later in the book; however, it will be complete enough to use in the construction of functional Ajax applications.
Reviewing myAHAHlib.js
Listing 23.1 shows the code of myAHAHlib.js, reproduced from Chapter 20.
Listing 23.1 myAHAHlib.js
function callAHAH(url, pageElement, callMessage) {
     document.getElementById(pageElement).innerHTML = callMessage;
     try {
     req = new XMLHttpRequest(); /* e.g. Firefox */
     } catch(e) {
       try {
       req = new ActiveXObject(“Msxml2.XMLHTTP”);
       /* some versions IE */
       } catch (e) {
         try {
         req = new ActiveXObject(“Microsoft.XMLHTTP”);
         /* some versions IE */
         } catch (E) {
           req = false;
         }
       }
     }
     req.onreadystatechange = function() {responseAHAH(pageElement);};
     req.open(“GET”,url,true);
     req.send(null);
  }

function responseAHAH(pageElement) {
   var output = ‘’;
   if(req.readyState == 4) {
      if(req.status == 200) {
         output = req.responseText;
         document.getElementById(pageElement).innerHTML = output;
         }
      }
  }
Let’s consider how we may extend the capabilities of this library:
![]() There is currently support only for HTTP
There is currently support only for HTTP GET requests. It would be useful to be able to support at least the HTTP POST request, too, especially if you intend to build applications using the REST protocol (as described in Chapter 22).
![]() The library currently only deals with text information returned via
The library currently only deals with text information returned via responseText and has no means to deal with responseXML.
Implementing Our Library
Having identified what needs to be done, we’ll now put together a more capable Ajax library.
Creating XMLHTTPRequest Instances
Let’s turn our attention first to the routine for creating instances of the XMLHTTPRequest object.
Currently this function is coupled tightly with the routine for constructing and sending HTTP GET requests. Let’s decouple the part responsible for the creation of the XMLHTTPRequest instance and put it into a function of its own:
function createREQ() {
try {
    req = new XMLHttpRequest(); /* e.g. Firefox */
    } catch(err1) {
      try {
      req = new ActiveXObject(“Msxml2.XMLHTTP”);
      /* some versions IE */
      } catch (err2) {
        try {
        req = new ActiveXObject(“Microsoft.XMLHTTP”);
        /* some versions IE */
        } catch (err3) {
          req = false;
        }
      }
    }
    return req;
}
We can now create XMLHTTPRequest object instances by simply calling the following function:
var myreq = createREQ();
HTTP GET and POST Requests
We’ll start with the GET request because we already support that type of request:
function requestGET(url, query, req) {
myRand=parseInt(Math.random()*99999999);
req.open(“GET”,url+’?’+query+’&rand=’+myRand,true);
req.send(null);
}
To this request we must pass as arguments the URL to which the request will be sent and the identity of the XMLHTTPRequest object instance.
We could exclude the query argument because, in a GET request, it’s encoded into the URL. We keep the two arguments separate here to maintain a similar interface to the function for making POST requests.
The query argument must be suitably encoded prior to calling the function, though the cache-busting random element is added by the function.
Next, the POST function:
function requestPOST(url, query, req) {
req.open(“POST”, url,true);
req.setRequestHeader(‘Content-Type’, ’application/x-www-form-urlencoded’);
req.send(query);
}
The Callback Function
How do we deal with the callback function? We are going to add a further function:
function doCallback(callback,item) {
eval(callback + ‘(item)’);
}
This function uses JavaScript’s eval() function to execute another function whose name is passed to it as an argument, while also passing to that function an argument of its own, via item.
Let’s look at how these functions might interact when called from an event handler:
function doAjax(url,query,callback,reqtype,getxml) {
// create the XMLHTTPRequest object instance
var myreq = createREQ();
myreq.onreadystatechange = function() {
if(myreq.readyState == 4) {
   if(myreq.status == 200) {
      var item = myreq.responseText;
      if(getxml==1) {
         item = myreq.responseXML;
        }
      doCallback(callback, item);
      }
   }
}
if(reqtype==’post’) {
requestPOST(url,query,myreq);
} else {
requestGET(url,query,myreq);
}
}
Our function doAjax now takes five arguments:
![]() url—The target URL for the Ajax call
url—The target URL for the Ajax call
![]() query—The encoded query string
query—The encoded query string
![]() callback—Identity of the callback function
callback—Identity of the callback function
![]() reqtype—’post’ or ‘get’
reqtype—’post’ or ‘get’
![]() getxml—1 to get XML data, 0 for text
getxml—1 to get XML data, 0 for text
Listing 23.2 shows the complete JavaScript source code.
Listing 23.2 The Ajax Library myAJAXlib.js
function createREQ() {
try {
     req = new XMLHttpRequest(); /* e.g. Firefox */
     } catch(err1) {
       try {
       req = new ActiveXObject(“Msxml2.XMLHTTP”);  /* some versions IE */
       } catch (err2) {
         try {
         req = new ActiveXObject(“Microsoft.XMLHTTP”); /* some versions IE */
         } catch (err3) {
           req = false;
         }
       }
     }
     return req;
}

function requestGET(url, query, req) {
myRand=parseInt(Math.random()*99999999);
req.open(“GET”,url+’?’+query+’&rand=’+myRand,true);
req.send(null);
}

function requestPOST(url, query, req) {
req.open(“POST”, url,true);
req.setRequestHeader(‘Content-Type’, ‘application/ x-www-form-urlencoded’);
req.send(query);
}

function doCallback(callback,item) {
eval(callback + ‘(item)’);
}

function doAjax(url,query,callback,reqtype,getxml) {
// create the XMLHTTPRequest object instance
var myreq = createREQ();

myreq.onreadystatechange = function() {
if(myreq.readyState == 4) {
   if(myreq.status == 200) {
      var item = myreq.responseText;
      if(getxml==1) {
         item = myreq.responseXML;
      }
      doCallback(callback, item);
   }
 }
}
if(reqtype==’post’) {
requestPOST(url,query,myreq);
} else {
requestGET(url,query,myreq);
}
}
Using the Library
To demonstrate the use of the library, we’re going to start with another simple HTML page, the code for which is shown here:
<html>
<head>
</head>
<body>
<form name=”form1”>
<input type=”button” value=”test”>
</form>
</body>
</html>
This simple page displays only a button labeled “Test”. All the functionality on the form will be created in JavaScript, using our new Ajax library.
The steps required to “Ajaxify” the application are
1. Include the Ajax library myAJAXlib.js in the <head> area of the page.
2. Write a callback function to deal with the returned information.
3. Add an event handler to the page to invoke the server call.
We’ll start by demonstrating a GET request and using the information returned in the responseText property. This is similar to the situation we faced when dealing with AHAH in Chapter 20.
Including the Ajax library is straightforward:
<head>
<script Language=”JavaScript” src=”myAJAXlib.js”></script>
Next, we need to define our callback function to deal with the value stored in the responseText property. For these examples, we’ll simply display the returned text in an alert:
<head>
<script Language=”JavaScript” src=”myAJAXlib.js”></script>
<script Language=”JavaScript”>
function cback(text) {
alert(text);
}
</script>
Finally, we need to add an event handler call to our button:
onClick=”doAjax(‘libtest.php’,’param=hello’, ’cback’,’get’,’0’)”
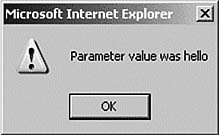
Our server-side script libtest.php simply echoes back the parameter sent as the second argument:
<?php
echo “Parameter value was “.$param;
?>
Meanwhile the remaining parameters of the function call declare that the callback function is called cback, that we want to send an HTTP GET request, and that we expect the returned data to be in responseText. Listing 23.3 shows the complete code of our revised HTML page.
Listing 23.3 HTML Page Rewritten to Call myAJAXlib.js
<html>
<head>
<script Language=”JavaScript” src=”myAJAXlib.js”> </script>
<script Language=”JavaScript”>
function cback(text) {
alert(text);
}
</script>
</head>
<body>
<form name=”form1”>
<input type=”button” value=”test”onClick= ”doAjax(‘libtest.php’,’param=hello’, ’cback’,’get’,’0’)”>
</form>
</body>
</html>
Figure 23.1 shows the result of running the program.
FIGURE 23.1 Returning text following an HTTP GET request.
To use the same library to retrieve XML data, we’ll once again use the server-side script of Chapter 13, “Our First Ajax Application,” which you may recall delivers the current server time in a small XML document:
<?php
header(‘Content-Type: text/xml’);
echo “<?xml version=”1.0” ?><clock1><timenow>” .date(‘H:i:s’).”</timenow></clock1>”;
?>
Our callback function must be modified because we now need to return the parsed XML. We’ll use some DOM methods that should by now be familiar:
<script>
function cback(text) {
var servertime = text.getElementsByTagName(“timenow”)[0] .childNodes[0].nodeValue;
alert(‘Server time is ‘+servertime);
}
</script>
The only other thing we need to change is the call to our doAjax() function:
onClick=”doAjax(‘telltimeXML.php’,’’,’cback’,’post’,’1’)”
Here we have decided to make a POST request. Our server-side script telltimeXML.php does not require a query string, so in this case the second argument is left blank. The final parameter has been set to ‘1’ indicating that we expect the server to respond with XML in the property responseXML.
Figure 23.2 shows the result of running the program.
FIGURE 23.2 Returning the server time in XML via a POST request.

Summary
This chapter combined many of the techniques discussed to date to produce a compact and reusable JavaScript library that can be called simply from an HTML page.
The code supports both HTTP GET and HTTP POST requests and can deal with data returned from the server as text or XML.
Using such a library allows Ajax to be introduced to web pages using relatively small additions to the HTML markup. This not only keeps the code clean and easy to read but also simplifies the addition of Ajax facilities to upgrade legacy HTML.
In Chapter 24, “Ajax ‘Gotchas,’” the last chapter of Part V, we’ll discuss some potential problems and pitfalls awaiting the programmer in developing Ajax applications.