Lesson 3. Creating a Google+ Page for Your Business
In this lesson, you learn how to create a Google+ page for your business, brand, or organization.
Understanding Google+ Pages Versus Google+ Profiles
At first, the difference between a Google+ page and a Google+ profile seems pretty clear. A profile is for an individual person and a page is for a business, brand, or organization. In addition, Google+ identifies pages with the Google+ Pages icon, which displays to the right of the page name, as shown in Figure 3.1.
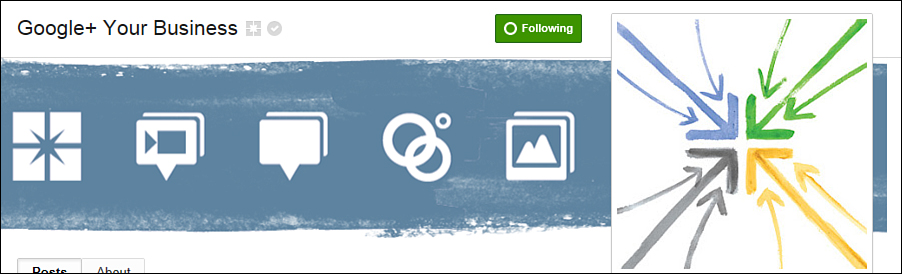
Figure 3.1. Google identifies pages with a square icon.
When you pause your mouse over the square gray icon, it changes color and displays the word “page” next to it.
There are other more important differences between pages and profiles, however. Table 3.1 offers a quick overview of these differences.
Table 3.1. Differences Between Google+ Profiles and Google+ Pages
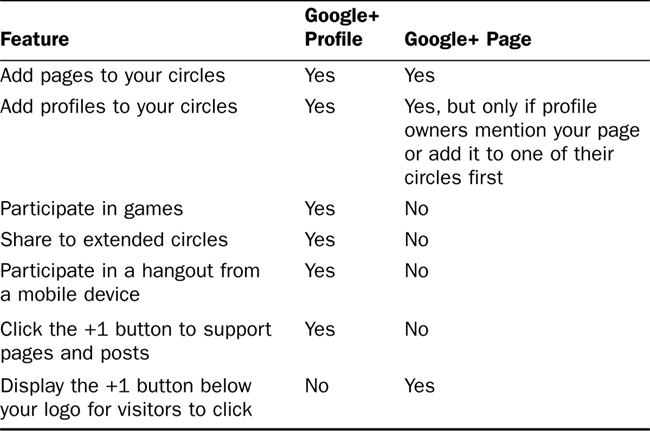
Understanding what you can—and can’t—do with a Google+ page is critical to your page’s success. This knowledge makes it easier to develop a solid Google+ page strategy and to integrate your page with your profile—and the profiles of those who work for your company.
Creating a Google+ Page
To create a Google+ page, follow these steps:
1. Sign into Google+ using the account of the person you want to be the owner of this page.
Tip: Choose Your Page Owner Wisely
If you’re creating a Google+ page for your own business, you’ll most likely use your own Google account. If you’re creating a page for a larger organization, consider carefully who the page owner should be. Although you can add other page managers later or transfer page ownership to another person, it’s important to choose your initial page owner wisely and give this responsibility to someone with the professionalism and insight required to represent your organization to the world.
2. Click the Pages icon on the Google+ ribbon. If this icon doesn’t display on the ribbon, click the More icon and select Pages from the pop-out menu.
3. On the right side of the page, click the Create New Page button. Optionally, navigate to https://plus.google.com/u/0/pages/create.
4. On the Create a Google+ Page page, select a category for your Google+ page. Your options include: Local Business or Place; Product or Brand; Company, Institution, or Organization; Arts, Entertainment, or Sports; or Other.
5. Google+ displays additional fields on the right side of the page, which vary based on your category selection. For most category types, Google+ asks for a page name, website URL, subcategory, and the age range of your intended audience. If you want to create a page for a local business or place, you’re prompted to enter your phone number. Figure 3.2 shows an example of the fields that display for the Company, Institution, or Organization category. Enter the fields required for your category type.
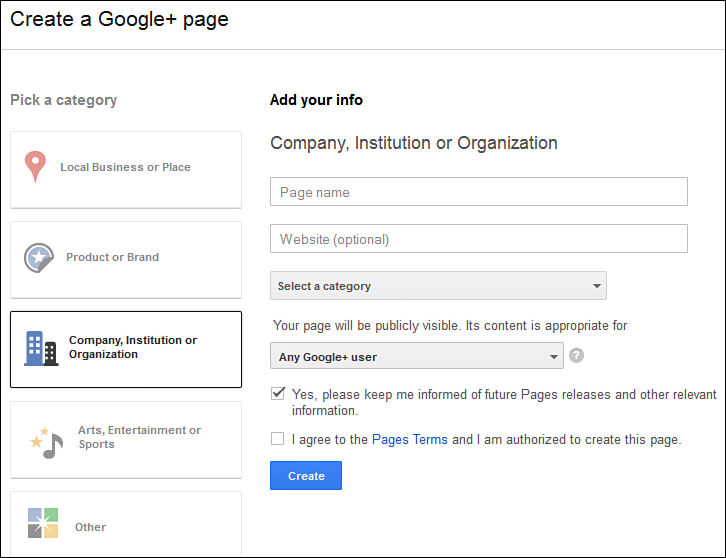
Figure 3.2. Complete the fields required for the category type you choose.
6. Click the Pages Terms link to review Google’s Terms of Service for pages and then click the check box to verify that you understand these terms.
7. Click the Create button to create your page. Figure 3.3 displays a new Google+ page.
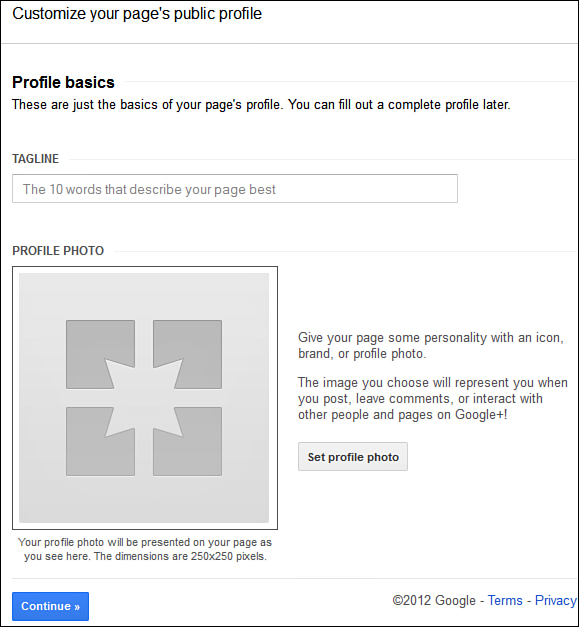
Figure 3.3. Your new Google+ page is a blank canvas.
8. Enter a tagline for your business of up to 10 words. You can use the tagline from your website or create a phrase using keywords relevant to your page.
9. Click the Set Profile Photo button to open the Select Profile Photo dialog box where you can upload a logo or other image to represent your page (see Figure 3.4). Google+ sizes this image at 250 by 250 pixels.
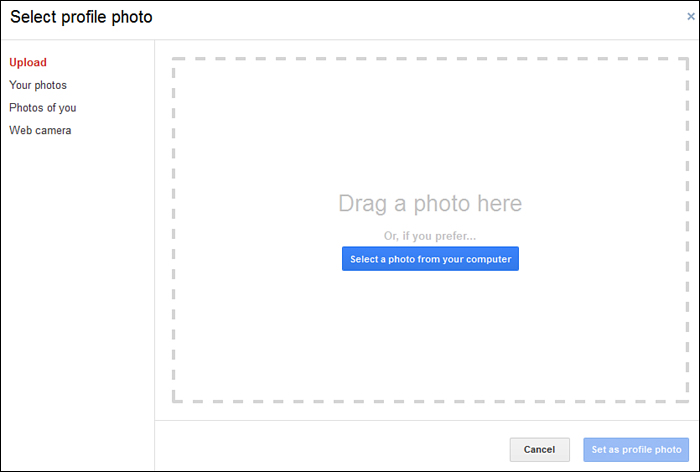
Figure 3.4. Select a photo to display on your Google+ page.
10. Click the Select a Photo from Your Computer button.
11. In the File Upload dialog box, select the photo you want to upload and click the Open button. Depending on your browser and operating system, this dialog box and button could have different names.
12. In the Select Profile Photo dialog box, shown in Figure 3.5, drag the four white squares that surround your photo to crop it to the desired size.
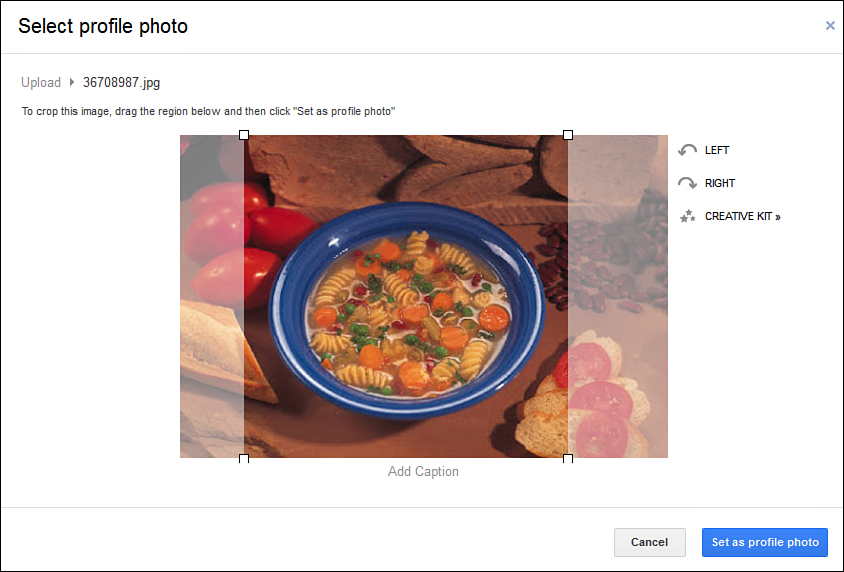
Figure 3.5. Crop your photo to fit in the space provided.
Tip: Quickly Fix Problems with Your Photo
Optionally, you can click the Left or Right buttons next to your photo to fix rotation problems. If you need to fix cosmetic issues, such as red eye or color contrast, click the Creative Kit button.
13. Click the Set as Profile Photo button. Google+ returns to the Customize Your Page’s Public Profile page where your photo now displays.
14. Click the Continue button to continue to the Get the Word Out page, which prompts you to tell your circles about this page. Instead, I recommend that you wait to notify the world about your page until it contains additional content.
15. Click the Finish button to complete your page. Google+ opens the Get Started page, as shown in Figure 3.6.
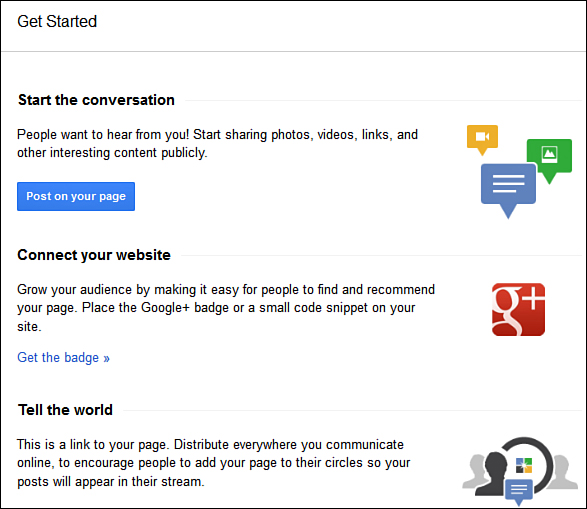
Figure 3.6. Google+ offers many choices after you create a basic page.
From this page, you can do the following:
• Add page profile content. Click the Profile icon on the Google+ ribbon to open the Profile page. Here you can add content to your page’s About tab and create a photo scrapbook that brands your business. Adding content to your page’s profile content is very similar to adding content to your personal profile. See Lesson 2, “Working with Google+ Profiles,” for more information.
Tip: Maximize the Potential of Your Page’s Cover Photo or Scrapbook
To make the most of the opportunity that a cover photo or scrapbook provides, get creative and select photos that best match the business image and message you want to convey. Depending on the type of business you have, you could display photos of your products, text-based images that describe your services, photos of key personnel, and so forth. See Lesson 2 for more information about adding a cover photo or scrapbook (the process is nearly identical for both pages and profiles).
• Create circles and add pages and people to them. Click the Circles icon on the Google+ ribbon to open the Circles page. Although Google+ offers different default circles for pages (Following, Customers, VIPs, and Team Members), they work in much the same way as circles for profiles. Remember, however, that you can add profiles to one of your circles only if the profile owners mention your page or add it to one of their circles first. There are no limits for adding other pages to your circles. See Lesson 4, “Managing Your Network with Circles,” for more information about Google+ circles.
• Start posting content on your page. Click the Post on Your Page button to go to your stream where you can post your own content. Optionally, click the Promote Your Page link to the right of your page’s share box to create a post on your personal profile, letting others know about your new page. See Lesson 6, “Sharing Content on Google+,” for more information about posting content on Google+.
• Connect your Google+ page to your website. Click the Get the Badge link to open the Link Your Google+ Page to Your Site page, which provides the code for several badge styles, including one that displays a +1 button encouraging site visitors to recommend your site.
Using Google+ as a Page
When you manage your own profile as well as one or more pages on Google+, it’s important to distinguish whether you’re posting content as yourself or as a page you manage. The easiest way to post as a page is to sign in to Google+ and navigate directly to your page. If you’re currently using your Google+ profile, pause your mouse over the Pages icon on the Google+ ribbon and select the page you want to use from the Pages pop-out menu that displays (see Figure 3.7).

Figure 3.7. Selecting a Google+ page from your profile.
You can also click your name or photo in the upper-right corner of the page to select your page.
Tip: Gain Quick Access to Multiple Pages
If you manage multiple Google+ pages, click the Pages icon on the Google+ ribbon to open the Manage Your Pages page, which gives you easy access to all your pages. You can also access this page by clicking the All Your Google+ Pages link on the pop-up box that displays when you click your name or photo in the upper-right corner of any Google+ page.
After opening your Google+ page, a notification at the top of the screen informs you that you’re using Google+ as a page, and anything you post will list that page as the post author.
Managing Your Google+ Page Settings
To manage your Google+ page settings, select Settings from the drop-down menu in the upper-right corner of your page. The Google+ Settings tab displays by default, as shown in Figure 3.8.

Figure 3.8. Specify the settings for your Google+ page.
On this page, you can specify who can interact with your posts, add email addresses for notification delivery, customize what Google+ includes in the Your Circles option, and specify photo settings.
Specifying Who Can Interact with You and Your Posts
The Who Can Interact with You and Your Posts section enables you to control exactly who can send you notifications and comment on your public posts. Your choices include: Anyone, Your Circles, Only You, or Custom (this gives you the option of selecting specific circles or people). By default, Google+ allows anyone to send you notifications and to comment on your public posts.
Specifying Your Notification Delivery Preferences
The Notification Delivery section lists the email address associated with the person who created your page. To add another email address, click the Change link, enter a new email address in the text box, and click the Add button.
If you prefer receiving notifications via text message, click the Add Phone Number link to enter your mobile phone number.
Managing Your Email Subscriptions
By default, Google+ sends you occasional updates about top content from your circles, Google+ activity, and friend suggestions. If you don’t want to receive these updates, remove the check marks in the Manage Email Subscriptions section.
Specifying Notification Preferences
The Receive Notifications section enables you to specify which actions trigger a Google+ notification and how to send this notification: by email, via SMS text message, or both. This section displays the events that trigger notifications, such as when someone mentions your page in a post, adds your page to a circle, tags your page, comments on one of your posts, and so forth.
For each event, you can select your preferred notification method. If you don’t want to receive any notifications, remove the check marks from all check boxes.
Note: Why Can’t I Select the Phone Check Box?
You must select the SMS option button in the Notification Delivery section at the top of this tab to activate the Phone column.
Customizing Your Circles
By default, when you choose to share content with Your Circles, Google+ shares with all your circles except the Following circle. To customize this, click the Customize button in the Your Circles section. In the pop-up box that opens, you can select the specific circles you want to include in Your Circles.
Managing Photo Settings
Optionally, Google+ enables you to:
• Show your photos’ geographic location in newly uploaded albums and photos.
• Allow viewers to download your photos.
• Find your face in photos, prompt people in your circles to tag you, and specify whose tags to approve automatically.
To enable any of these options, place a check mark in the associated check box.
Deleting a Google+ Page
If you no longer want to keep your Google+ page, you can delete it. Note that deleting a page does not delete the Google+ profile of the person who created it. Only page owners can delete a page; page managers cannot.
To delete your Google+ page, click the Delete Page link at the bottom of the page and click the Yes button to confirm page deletion.
Google+ suggests transferring ownership of a page as an alternative to deletion. To learn more about transferring ownership of your Google+, see “Transferring Ownership of a Google+ Page” later in this lesson.
Adding Google+ Page Managers
If you want to share the responsibility of managing your Google+ page with others in your organization, you can add one or more page managers. Although having a backup plan for your Google+ page is a good idea, I recommend limiting access to your page to just a few selected individuals who have the knowledge and professionalism to represent your organization publicly. To add another manager to your page, follow these steps:
1. Select Settings from the drop-down menu in the upper-right corner of your page.
2. Select the Managers tab.
Tip: Page Managers Don’t Have the Same Access Rights as Page Owners
Although the people you designate as managers have the right to post content, edit circles, and take other actions on behalf of a page, only the page owner (the person who created the page) can transfer ownership or delete the page. For more information about the roles and capabilities of page managers, click the Learn More link on the Managers tab.
3. Enter the email address of the person you want to add as a page manager, as shown in Figure 3.9.
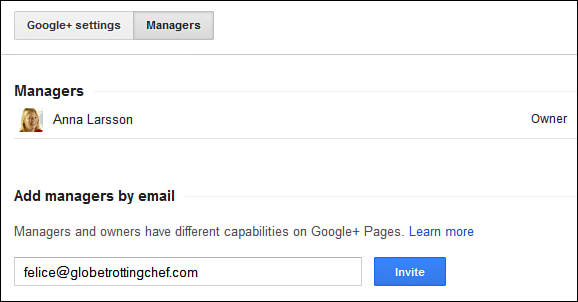
Figure 3.9. Invite other people to become a Google+ page manager.
4. Click the Invite button.
5. In the pop-up box that opens, click the Invite button to confirm your invitation.
Google+ sends an email that prompts this person to click the Become a Manager button in the invite and accept the terms and conditions for Google+ pages. Note that a page manager must already have a Google+ account or sign up for one to become a page manager.
The person you invited displays on the Managers tab with the status of Invited until accepting this email invite. After that, the Invited status disappears and the page manager can begin managing the page.
Removing a Google+ Manager
If a Google+ page manager leaves your company or no longer needs access to your page, you can remove this person as a manager.
To remove a Google+ manager, follow these steps:
1. Select Settings from the drop-down menu in the upper-right corner of your page.
2. Select the Managers tab.
3. Click the Remove button (x) to the right of the manager you want to delete.
4. In the pop-up box, click the Remove button to permanently remove this person as a page manager.
Note: What Happens to a Deleted Manager’s Posts?
When you delete a Google+ page manager, this person can no longer post content or comments on behalf of that page. All of a previous manager’s content remains on the page, however. If you want to delete this person’s posts and comments, you must do so manually.
Transferring Ownership of a Google+ Page
The role of a page owner is an important one. The page owner is the only person who can transfer ownership or delete a page. If you need to change ownership of a page to another person, however, you can do so. For example, if a page owner leaves your company, you might want to transfer ownership to one of your other page managers.
To transfer ownership of a Google+ page, follow these steps:
1. Select Settings from the drop-down menu in the upper-right corner of your page.
2. Select the Managers tab.
3. Click the Transfer Ownership link in the upper-right corner of the page. This link doesn’t display unless you have at least one page manager (in addition to the page owner).
4. In the pop-up box, select the manager to whom you want to transfer ownership and click the Continue button (see Figure 3.10).
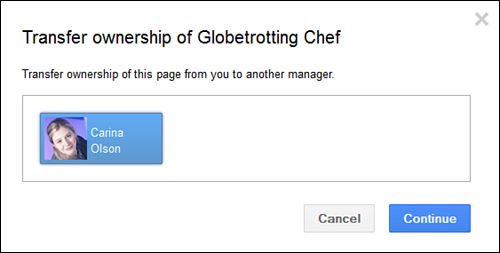
Figure 3.10. Transfer ownership of a Google+ page to another page manager.
5. Click the OK button to confirm the transfer.
After transferring page ownership, the prior owner becomes a manager. You also can remove this person as a manager if he or she is no longer involved with your company. See “Removing a Google+ Manager” earlier in this lesson for more information.
Summary
In this lesson, you learned how to participate, create, and manage a Google+ page. Next, it’s time to start using Google+ circles.