Hour 11. Prefabs
What You’ll Learn in This Hour:
► The basics of prefabs
► How to work with custom prefabs
► How to instantiate prefabs in code
A prefab is a complex object that has been bundled up so that it can be re-created over and over with little extra work. In this hour, you’ll learn all about them, starting with what they are and what they do. From there, you’ll learn how to create prefabs in Unity. You’ll learn about the concept of inheritance. You’ll finish the lesson by learning how to add prefabs to a scene both through the editor and through code.
Prefab Basics
As mentioned earlier, a prefab is a special type of asset that bundles up game objects. Unlike normal game objects that exist only as a part of a single scene, prefabs are stored as assets. As such they can be seen in the Project view and reused over and over across many scenes. You can, for example, build a complex object, such as an enemy, turn it into a prefab, and then use that prefab to build an army. You can also create copies of prefabs with code. This allows you to generate a nearly infinite number of objects at runtime. The best part is that any game object or collection of game objects can be put in a prefab. The possibilities are endless!
Prefab Terminology
You need to know some particular terminology related to working with prefabs. If you are familiar with the concepts of object-oriented programming, you may notice some similarities:
► Prefab: The prefab is the base object. It exists only in the Project view. Think of it as the blueprint.
► Instance: An instance is an actual object of the prefab in a scene. If the prefab is a blueprint for a car, an instance is an actual car. If an object in the Scene view is referred to as a prefab, it is really a prefab instance. The phrase instance of a prefab is synonymous with object of a prefab or even clone of a prefab.
► Instantiate: Instantiation is the process of creating an instance of a prefab. Instantiate is a verb, used like this: “I need to instantiate an instance of this prefab.”
► Inheritance: With prefabs, inheritance is not the same as standard programming inheritance. In this case, the term inheritance refers to the nature by which all instances of a prefab are linked to the prefab itself. This is covered in greater detail later in this hour.
Prefab Structure
Whether you know it or not, you have already worked with prefabs. The FPS Controller we’ve used is a prefab. To instantiate an object of a prefab into a scene, you only need to click and drag it into place in the Scene view or Hierarchy view (see Figure 11.1).

FIGURE 11.1
Adding a prefab instance to a scene.
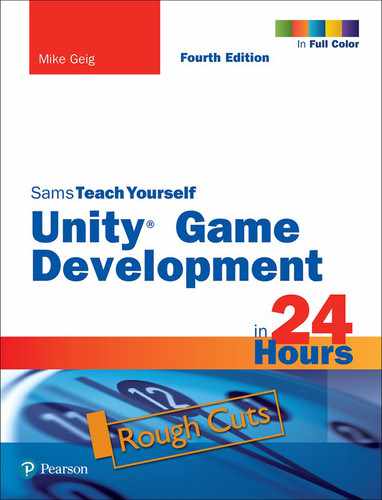
When looking at the Hierarchy view, you can always tell which objects are instances of prefabs because they appear blue. This can be a subtle color difference, so note that you can also tell that an object is a prefab by looking at the top of the Inspector (see Figure 11.2).
Just as with non-prefab complex objects, complex instances of prefabs also have an arrow to the left of its name that, when clicked, will expand to show all child objects. Modifying these child objects can be a little tricky and the process of doing so is outlined more below.
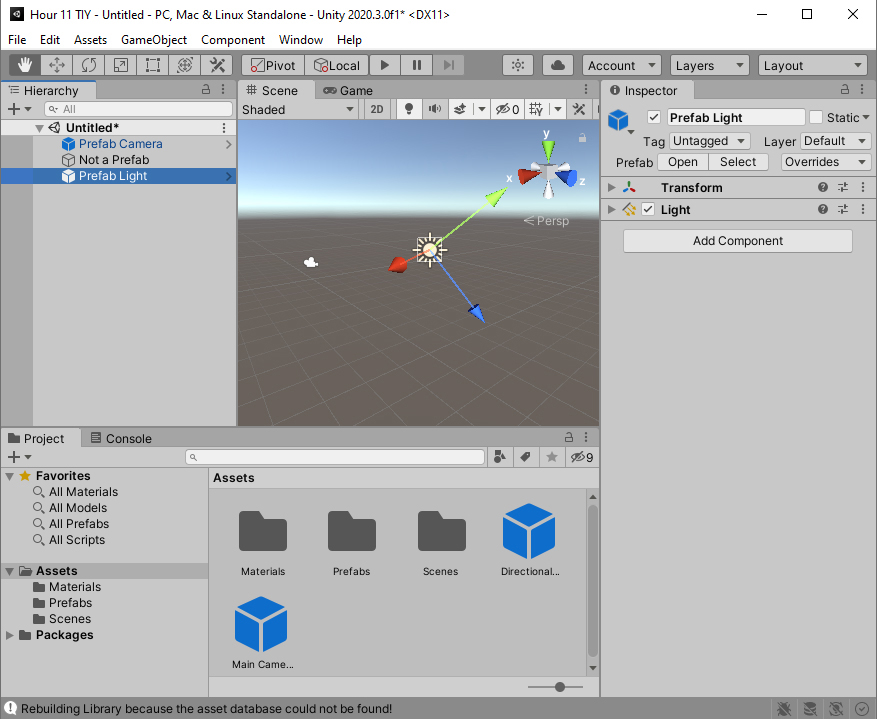
FIGURE 11.2
The appearance of prefab instances in the Inspector.
Working with Prefabs
Prefabs are a great way to work with game objects (as explained above), however you are likely going to want to create your own prefabs in projects. Once these prefabs are created, you are probably going to want to add them to your scenes and even modify them (I know, crazy!).
Creating New Prefabs
Using provided prefabs is nice, but often you want to create your own. Creating a prefab is a two-step process. Doing this is very easy. You simply need to drag any game object from the Hierarchy view down into the project view. Doing so creates the prefab, names it, and fills it—all at the same time (see Figure 11.3).
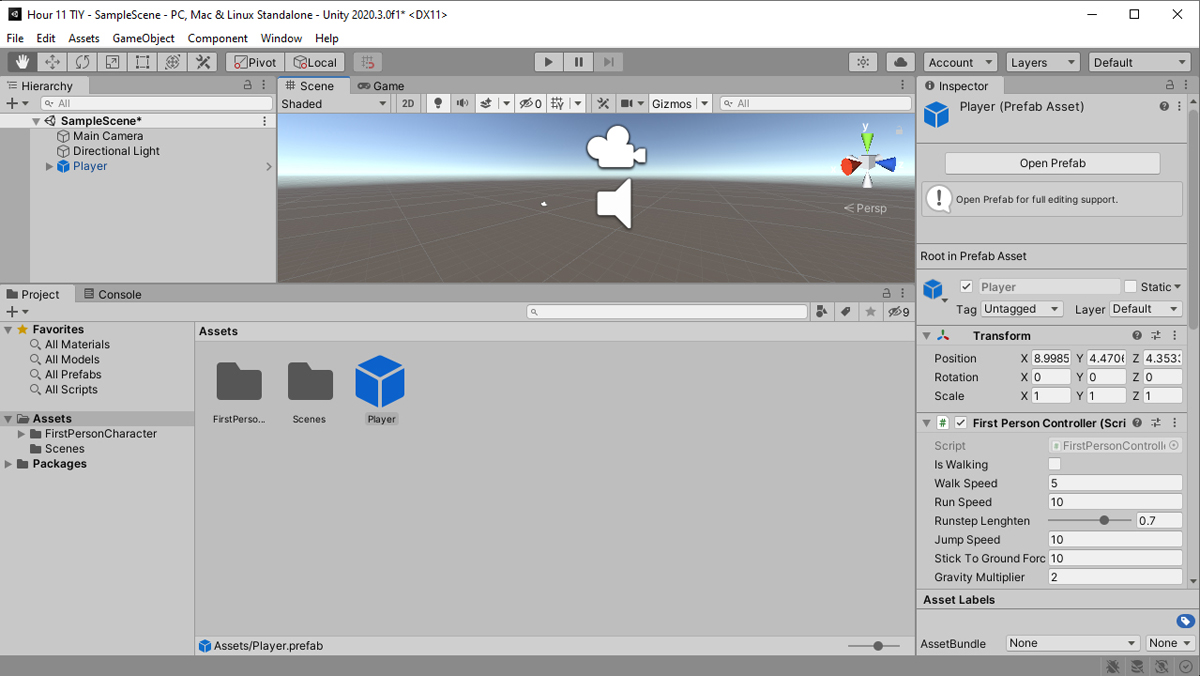
FIGURE 11.3
Creating a prefab from a game object.
If you are creating a prefab out of a game object that either already is another prefab or has other prefabs as children objects (a.k.a, nested prefabs mentioned above), you will be asked if this is a completely new prefab object or a prefab variant of the original prefab object
Try it Yourself
Creating a Prefab
Follow these steps to create a prefab of a complex game object, which you will use later in this hour (so don’t delete it!):
1. Create a new project or scene. Add a cube and a sphere to the scene. Rename the cube Lamp.
2. Position the cube at (0, 1, 0) with a scale of (.5, 2, .5). Add a rigidbody to the cube. Position the sphere at (0, 2.2, 0). Put a point light component on the sphere.
3. Click and drag the sphere in the Hierarchy view onto the cube to nest the sphere under the cube (see Figure 11.4).
FIGURE 11.4
The sphere nested under the cube.
4. Create a new folder under the Assets folder in the Project view. Name the new folder Prefabs.
5. In the Hierarchy view, click and drag the Lamp game object (which contains the sphere) into the Project view. Notice that this creates a prefab that looks like a lamp. Also notice that the cube and sphere in the Hierarchy view turn blue. At this point, you can delete the cube and sphere from the scene because they are now contained in the prefab.
Adding a Prefab Instance to a Scene
Once a prefab asset is created, you can add it as many times as you want to a scene or any number of scenes in a project. To add a prefab instance to a scene, all you need to do is click and drag the prefab from the Project view into place in the Scene view, or Hierarchy view. We’ve done this many times already, but now we are aware of exactly what it is we are doing.
If you drag into the Scene view, the prefab is instantiated where you drag. If you drag into a blank part of the Hierarchy view, its initial position is whatever is set in the prefab. If you drag onto another object in the Hierarchy view, the prefab becomes a child of that object.
Try it Yourself
Creating Multiple Prefab Instances
In the Try It Yourself “Creating a Prefab,” you made a Lamp prefab. This time, you will be using that prefab to create many lamps in a scene. Be sure to save the scene created here because you will use it later in this hour. Follow these steps:
1. Create a new scene in the same project used for the Try It Yourself “Creating a Prefab,” and call this scene Lamps.
2. Create a plane and ensure that it is positioned at (0, 0, 0). Rename the plane Floor. Optionally, give the floor a gray material so that shadows appear more clearly on it.
3. Drag your Lamp prefab onto the floor in the Scene view. Notice how the lamp tracks to the collider of the floor.
4. Drag three more Lamp prefabs onto the floor and position them near the corners (see Figure 11.5). Note that you can also right click a prefab instance already in your scene and choose to duplicate it. The new game object will also be an instance of the original prefab.
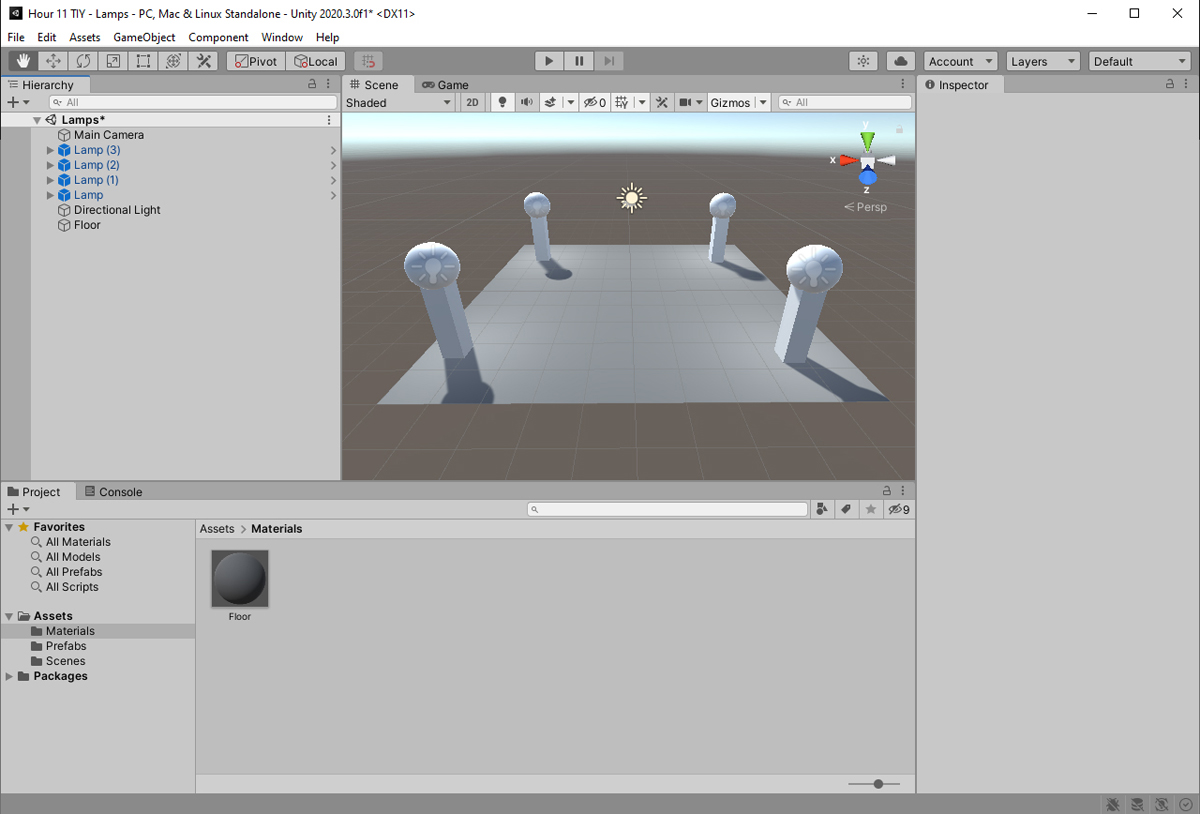
FIGURE 11.5
Placing lamps in the scene.
Modifying Existing Prefabs
When the term inheritance is used in conjunction with prefabs, it refers to the link by which the instances of a prefab are connected to the actual prefab asset. That is, if you change the prefab asset, all objects of the prefab are also automatically changed. This is incredibly useful. You would be like many other game programmers if you put a large number of prefab objects into a scene only to realize that they all need a minor change. Without inheritance, you would have to change each one individually. You can edit a prefab in one of two ways: you can edit an instance in the scene and then apply the changes to the prefab object or you can open the prefab object itself in the Project view and make changes.
When you make changes to an instance of a prefab in a scene, that instance will be unique. Other instances of the prefab, and the prefab object itself, will not reflect these changes. If you would like these changes to affect the prefab object, and thus all prefab instances, you need to tell Unity to apply them. You do this by clicking the Overrides button in the inspector with the instance selected (see Figure 11.6). From there you can choose to apply all of the changes, revert all of the changes, or click on each change individually and choose which to apply and which to revert.
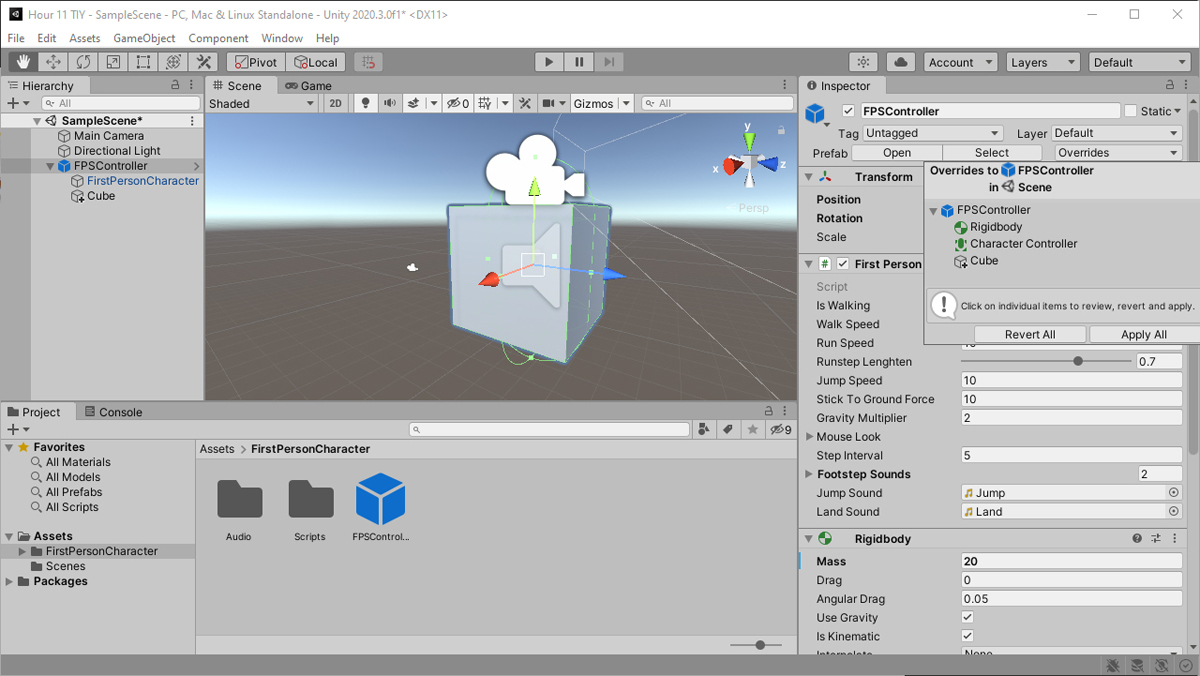
FIGURE 11.6
Applying or reverting prefab changes.
This works for applying changes to game object components or adding new game objects to a prefab. If you would like to remove child objects from a prefab or reorder those child game objects, however, you will need to open the prefab and edit it that way. You can do this by clicking the right facing arrow to the right of the prefab’s name in the Hierarchy view or by opening the prefab for editing. To open a prefab for editing, select the prefab object in the Project view and click Open Prefab in the Inspector view (see Figure 11.7). This loads the prefab into a special view for editing without distractions (see Figure 11.8).
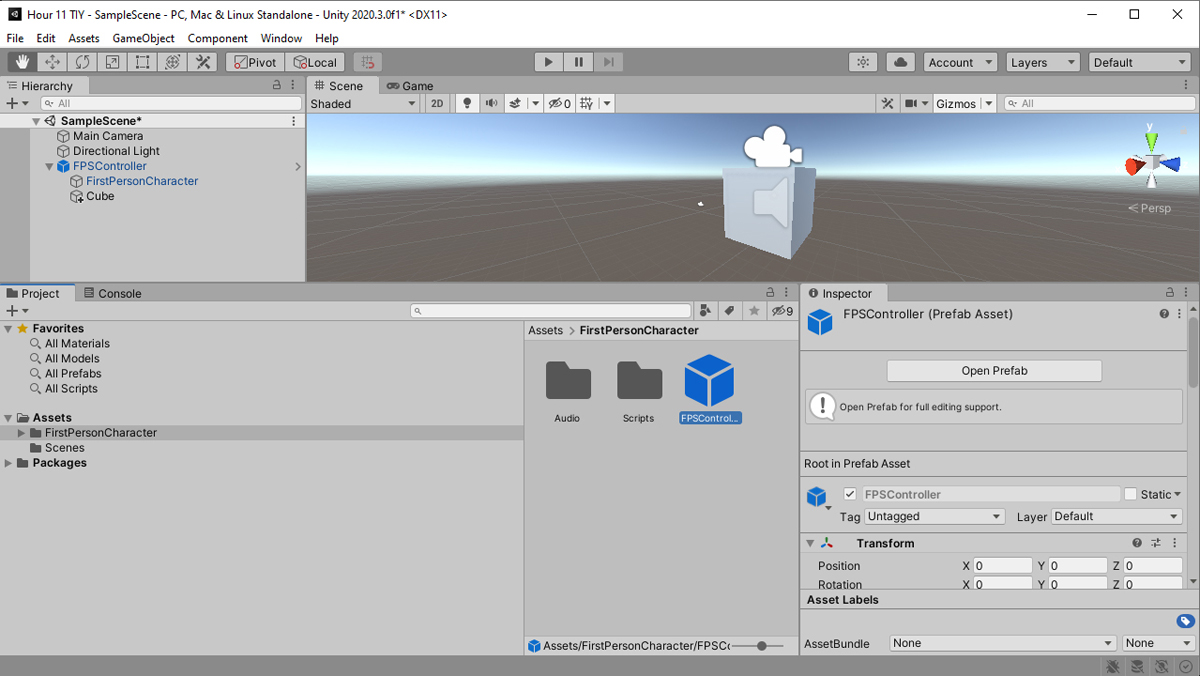
FIGURE 11.7
Opening a prefab object for editing.
When you are done editing the prefab, you can click the “back” arrow at the top of the Hierarchy view or the Scenes breadcrumb at the top of the Scene view. If you made any changes, you will be prompted to save or discard them (see Figure 11.8)
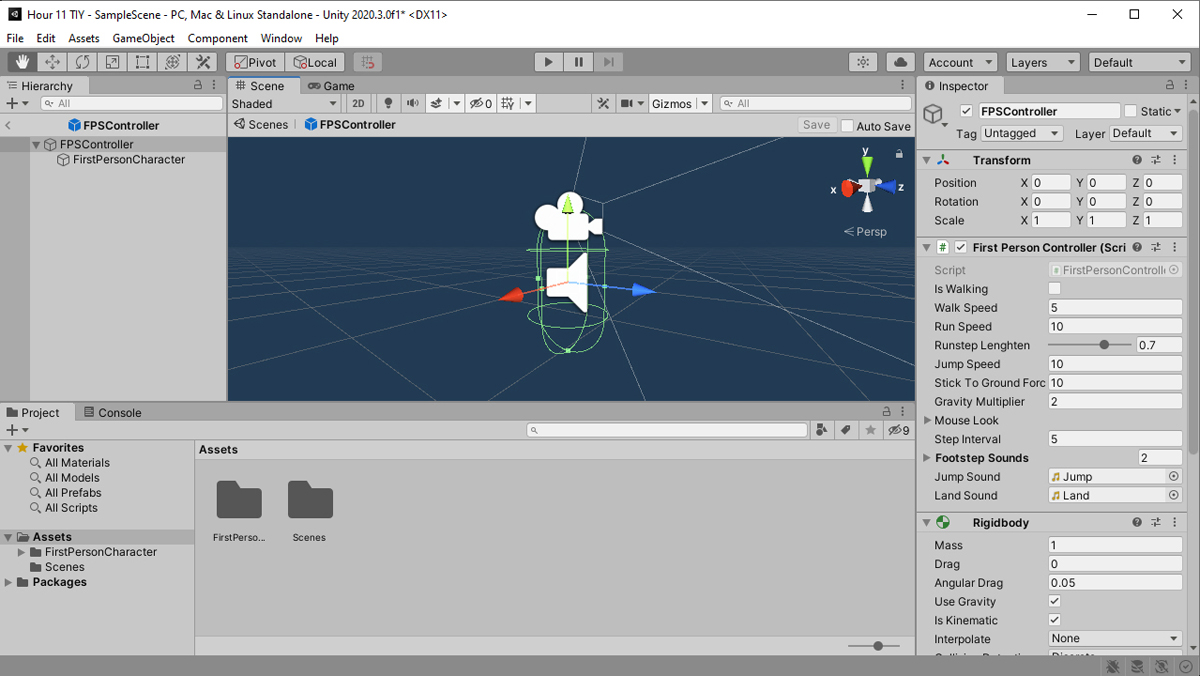
FIGURE 11.8
Opening a prefab object for editing.
Try it Yourself
Updating Prefabs
So far in this hour, you have created a prefab and added several instances of it to a scene. Now you have a chance to modify the prefab and see how it affects the assets already in the scene. For this exercise, you should use the scene created in the Try It Yourself “Creating Multiple Prefab Instances.” If you have not completed that one yet, you need to do so before following these steps:
1. Open the Lamps scene from the Try It Yourself “Creating Multiple Prefab Instances.”
2. Select the Lamp prefab from the Project view and open it (by clicking Open Prefab in the Inspector). Select the Sphere child game object. In the Inspector, change the color of the light to red.
3. Close the prefab and save the changes when prompted (see Figure 11.8 for a hint on how to close the prefab). Notice how the prefabs in the scene automatically change (see Figure 11.9).
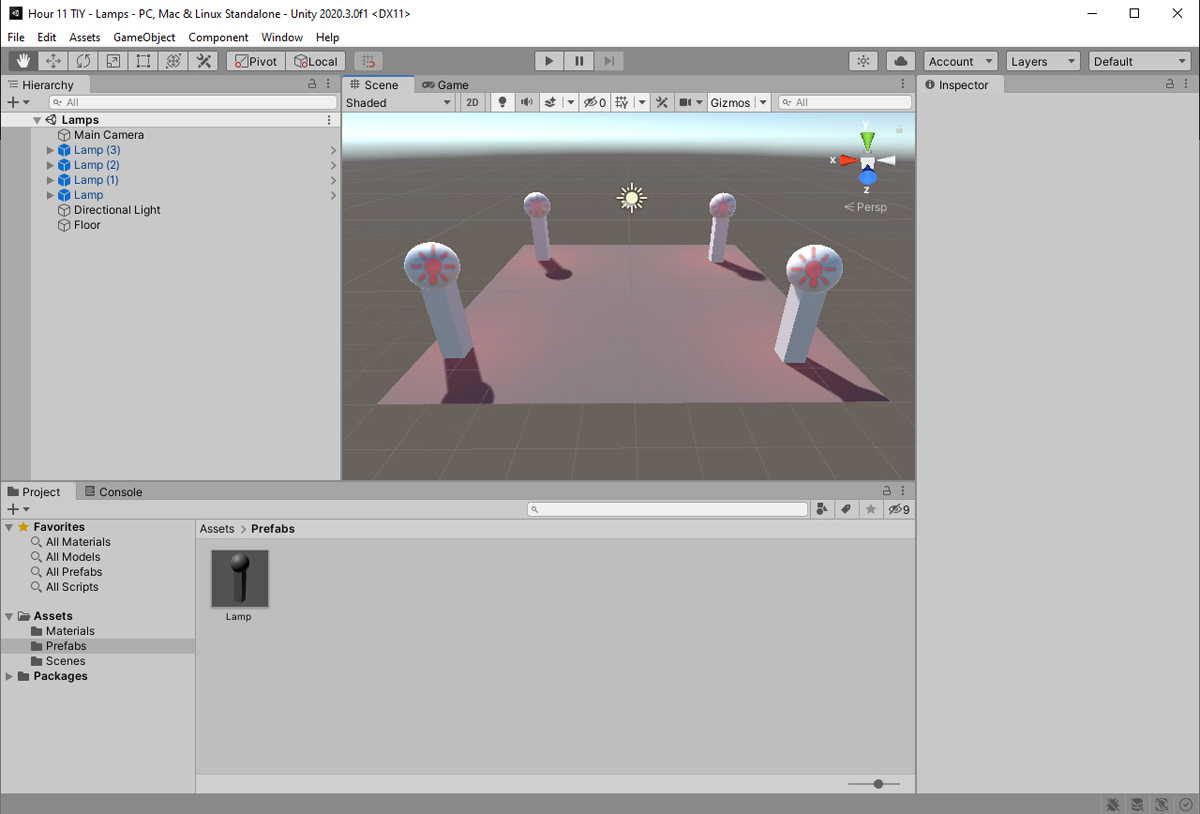
FIGURE 11.9
The modified lamp instances.
4. Select one of the lamp instances in the scene. Expand it by clicking the arrow to the left of its name in the Hierarchy view and then select the Sphere child object. Change the sphere’s light to blue. Notice that the other prefab objects don’t change.
5. With the Lamp parent game object selected, click Overrides > Apply All to update the prefab asset with the modified lamp instance’s changes. Notice that all the instances change to a blue light.
Breaking Prefab Links
Sometimes you need to break a prefab instance’s link to the prefab asset. You might want to do this if you need an object of the prefab but you don’t want the object to change if the prefab ever changes. Breaking an instance’s link to the prefab does not change the instance in any way. The instance still maintains all its objects, components, and properties. The only difference is that it is no longer an instance of the prefab and therefore is no longer affected by inheritance.
To break an object’s link to the prefab asset, simply right click the object in the Hierarchy view and select Prefab > Unpack. Additionally, if you want to break the prefab instance and all prefabs that are children of the game object you can right click and select Prefab > Unpack Completely. The game object does not change, but its name turns from blue to black.
Instantiating Prefabs Through Code
Placing prefab objects into a scene is a great way to build a consistent and planned level. Sometimes, however, you want to create instances at runtime. Maybe you want enemies to respawn, or you want them to be randomly placed. It is also possible that you need so many instances that placing them by hand is no longer feasible. Whatever the reason, instantiating prefabs through code is a good solution.
There are two ways to instantiate prefab objects in a scene, and they both use the Instantiate() method. The first way is to use Instantiate() like this:
Instantiate(GameObject prefab);
As you can see, this method simply reads in a GameObject variable and makes a copy of it. The location, rotation, and scale of the new object are the same as those of the one being cloned. The second way to use the Instantiate() method is like this:
Instantiate(GameObject prefab, Vector3 position, Quaternion rotation);
This method requires three parameters. The first is still the object to copy. The second and third parameters are the desired position and rotation of the new object. You might have noticed that the rotation is stored in something called a quaternion. Just know that this is how Unity stores rotation information. (The true application of the quaternion is beyond the scope of this hour.)
The exercise at the end of this hour shows an example of the two methods of instantiating objects in code.
Summary
In this hour, you have learned all about prefabs in Unity. You started by learning the basics of prefabs: the concept, terminology, and structure. From there, you learned to make your own prefabs. You explored how to create them, add them to a scene, modify them, and break their links. Finally, you learned how to instantiate prefab objects through code.
Q&A
Q. Prefabs seem a lot like classes in object-oriented programming (OOP). Is that accurate?
A. Yes. There are many similarities between classes and prefabs. Both are like blueprints, objects of both are created through instantiation, and objects of both are linked to the original.
Q. How many objects of a prefab can exist in a scene?
A. As many as you want. Be aware, though, that after you get above a certain number, the performance of the game will be impacted. Every time you create an instance, it is permanent until it is destroyed. Therefore, if you create 10,000 instances, there will be 10,000 of them just sitting in your scene.
Workshop
Take some time to work through the questions here to ensure that you have a firm grasp of the material.
Quiz
1. What is the term for creating an instance of a prefab asset?
2. What are two ways to modify a prefab asset?
3. What is inheritance?
4. How many ways can you use the Instantiate() method?
Answers
1. Instantiation
2. You can modify a prefab asset through the Project view or by modifying an instance in the Scene view and applying the changes in the Inspector.
3. It is the link that connects the prefab asset to its instances. It basically means that when the asset changes, the objects change as well.
4. Two. You can specify just the prefab or you can also specify the position and rotation.
Exercise
In this exercise, you’ll work once again with the prefab you made earlier in this hour. This time, you will instantiate objects of the prefab through code and hopefully have some fun with it:
1. Create a new scene in the same project where you’re storing the Lamp prefab. Click the Lamp prefab in the Project view and change its position to (–1, 0, –5).
2. Delete the Directional Light game object from the scene.
3. Add an empty game object to the scene and rename it Spawn Point. Position it at (1, 1, –5). Add a plane to your scene and position it at (0, 0, –4) with a rotation of (270, 0, 0).
4. Add a script to your project. Name the script PrefabGenerator and attach it to the spawn point object. Listing 11.1 shows the complete code for the PrefabGenerator script.
Listing 11.1 PrefabGenerator.cs
using UnityEngine;

public class PrefabGenerator : MonoBehaviour
{
      public GameObject prefab;

      void Update()
      {
          // Whenever we hit the B key we will generate a prefab at the
          // position of the original prefab
          // Whenever we hit the space key, we will generate a prefab at the
          // position of the spawn object that this script is attached to
          if (Input.GetKeyDown(KeyCode.B))
          {
               Instantiate(prefab);
          }

          if (Input.GetKeyDown(KeyCode.Space))
          {
               Instantiate(prefab, transform.position, transform.rotation);
          }
      }

}
5. With the spawn point selected, drag the Lamp prefab onto the Prefab property of the Prefab Generator component. Now run the scene. Notice how pressing the B key creates a lamp at its default prefab position and how pressing the spacebar creates an object at the spawn point.