In this appendix, we will lead you through two examples of how the advice given in this book has been successfully used to build and deploy two software products, with Scrum teams as small as five people and Sprints as short as one week.
In order to better understand the examples, which are a subset of the actual applications, it is recommended that you know a bit of Ruby on Rails. If you have no previous experience with Ruby on Rails but have used other web frameworks, like Django or CakePHP, feel free to skip on to the case studies. If you have no experience, no problem! We will explain Ruby, Ruby on Rails, and all the code examples as we present them.
In order to provide you with some knowledge about Ruby if you happen not to be a Ruby developer, we are going to review the fundamental Ruby syntax in the following pages. While it is by no means a complete introduction, it will help you understand the examples written in Ruby later in this appendix.
Ruby syntax is extremely simple yet versatile—meant to be adopted by the programmer in the way she prefers. For example, while in other languages you would always have semicolons to terminate a statement, Ruby lets you leave them off. However, if you want, Ruby lets you terminate each line with a semicolon. It all depends on your personal programming style. We will go through syntax and constructs simultaneously because they are not mutually exclusive topics.
Since Ruby is primarily an object-oriented programming language, we will delve into the topic of objects and how to create them in Ruby. Object-oriented languages allow us to structure our programs in terms of real-world objects, which many argue makes it easier to organize code and develop in general.
First, it is important to understand the relationship between classes and objects in all object-oriented languages, not just Ruby. A class acts as a blueprint from which an object is created. An often-used analogy is that a class is a blueprint for a house, and each object is an actual house created from that blueprint. Classes are important because they allow us to set up the state (attributes) and behavior of each object instantiated (created) from it.
So as an example, let us create an empty class that will model a person, and we will fill in as we go along in the chapter.
class Person
end
That’s it! Now we have a class Person that we can fill in to truly model a person with its attributes and behaviors. If we wanted to create an actual object from this class, it would be simple in Ruby. All you have to do is use the new method like so:
Person.new
Now, we can begin to fill in the attributes of a person. In order to do so, however, we need to first learn about variables in Ruby.
Variables are ways for programs to hold data and manipulate it throughout the program’s life. However, variables in Ruby are different from typed languages such as Java because you do not need to explicitly state the kind of data you expect it to hold beforehand. For example, to create a variable in Java that will hold a number, you must do this:
int variableInJava = 10;
String variableInJava = "This is a string";
Array variableInJava = {1, 2, 3, 4, 5};
In Ruby, all you have to do is this:
variableInRuby = 10;
variableInRuby = "This is a string"
variableInRuby = [1, 2, 3, 4, 5];
Although this is an extremely simple example, this ability lets you create or change variables easily during runtime (when a program is running) which is very useful as your programs increase in complexity.
Now, let’s add some attributes to the Person class.
class Person
    # This is a comment - this line is ignored by the interpreter.
    attr_accessor :name, :age, :weight, :height
end
Now the Person class has the ability to create Person objects, each with a name, age, weight, and height. There are a couple of new things introduced in the previous example, namely, the attr_accessor method (and methods for that matter) and the strange ‘:’ syntax.
attr_accessor is a method (we’ll explain more about what methods are later) that essentially creates instance variables with names corresponding to the list of names we give it (in this case, we gave them the names name, age, weight, and height). Because our class has this declaration, each instance (object) of our class will have those instance variables available. The ‘:’ is a literal constructor of Ruby’s Symbol class. It is essentially a way of identifying something immutably. With that in mind, let’s go on to talk about data types in Ruby.
Ruby has many different data types represented by the classes String, Array, Hash, Fixnum, Symbol, and more.
Strings are essentially ways for Ruby to represent letters, words, sentences, or anything similar. To create a string in Ruby, you can do this:
@string = "This is a string"
This will create an instance variable that holds the string "This is a string.”
Arrays are used to hold collections of objects in Ruby. For example, this would be similar to the concept of a family—a family is merely a collection of people related to one another. To create an array in Ruby, you can do this:
@family = ['John', 'Mary', 'Adam', 'Susan']
To get ‘John’ from the array, you use an index like so:
@family[0] # This will give you 'John'
Hashes are similar to arrays except you can identify each value with a unique key for retrieval later. For example, going back to the previous example, instead of having to use a number-based index to get ‘John’, you could create a hash like this:
@family = {'Dad' => 'John', 'Mom' => 'Mary', 'Son' => 'Adam', 'Daughter' => 'Susan' }
And then you could get ‘John’ from the hash by doing this:
@family['Dad']
Whole numbers in Ruby are commonly represented by Fixnums. Creating a whole number is simple; all you have to do is this:
@number = 1
This will give you an instance variable with a value of 1.
Symbols are similar to strings but are usually used to identify other things—just like the definition of symbol itself. They are commonly used in hashes to act as a key for a value. So like the example before, you could create a hash for a family like this:
@family = { :dad => 'John', :mom => 'Mary', :son => 'Adam', :daughter => 'Susan' }
Methods are ways of introducing behavior into programs. Typically, you would call a method in an object in order to make it do something. For example, let’s add a greet method to the Person class.
class Person
    # This is a comment - this line is ignored by the interpreter.
    attr_accessor :name, :age, :weight, :height

    def greet
        puts "Hello, my name is #{self.name}."
end
end
If we create a new Person and give him the name ‘John’, and then call greet, this will happen:
@person = Person.new
@person.name = "John"
@person.greet
=> Hello, my name is John.
As you can see from the introduction above, Ruby stresses simplicity and ease; therefore, many programs written in Ruby can usually be read and understood by non-programmers, since the syntax is meant to reflect natural language as much as possible. While it is often considered simple, Ruby is also a very versatile language with the ability to combine many simple constructs to create programs that accomplish extremely complex goals.
Let’s now examine the Ruby on Rails framework while simultaneously explaining the Ruby code used within each example.
Ruby on Rails is a web framework used in conjunction with Ruby by David Heinemeier Hansson. The term “web framework” in the real-world usually refers to software that enables you to write better programs by giving you specific or recommended ways of organizing your code. It also gives you much reusable code, which prevents you from wasting development time re-creating the wheel.
Two oft-stated principles of Ruby on Rails are don’t repeat yourself and convention over configuration. Don’t repeat yourself simply means that you should structure your program in such a way that you can reuse code as much as possible, not wasting time coding the same thing over and over again. Convention over configuration means that Ruby on Rails comes with a predefined configuration that is often well-suited for the creation of most web applications. You won’t have to waste time tweaking the software to match your need. Of course, if you absolutely have to, you still have the option of tweaking the software. These principles make Ruby on Rails a good candidate as a web framework for Scrum teams hoping to create a web application.
One of the biggest advantages of Ruby on Rails comes in the form of how it recommends (essentially forces) you to organize your code. This three-tiered structure is typically referred to as MVC or Model-View-Controller. Three-tiered simply means that there are three different related layers of code that work together to produce a desired effect in an application. In the following sections, we will explain what each part of the MVC architecture does, but in a different order than is often shown in different books.
The View is what the user sees. When you go to a website, the page that shows up on your screen is called the View. It usually comprises HTML, CSS, and embedded Ruby, which structure, style, and populate the View, respectively.
What is typically shown in the View? Data that is most relevant to the user—but where does that come from? Here’s where the model comes in....
The Model is the way data in your application is stored, retrieved, and manipulated. Often, the Model is described as the part that contains business logic and data.
In Rails, the Model is a class that typically uses ActiveRecord to access data in the database. The use of ActiveRecord is what creates an object-relational mapping between your objects and database-backed data. What that means is that each row in the database has the potential to be interacted with as an object (instead of long, complex SQL statements), leading to more simplistic and comprehensible data manipulation within your application. As an example, say you have a Computer model. The Computer model has a few properties such as speed, memory, and hard drive. With ActiveRecord, you would have a table in your database called Computers with columns labeled Speed, Memory, and Hard drive. Now, when you want to add a row to the Computers table, you would declare and instantiate a new computer somewhere in your application (usually in the controller or model) with the following code:
@computer = Computer.new
Then you would define the properties of the computer to your liking (see how ActiveRecord automatically maps these property names to columns in your database without you having to ever declare it?):
@computer.speed = "2"
@computer.memory = "1024"
@computer.hard_drive = "320"
This is where the beauty of the ActiveRecord component in Rails comes in—if you want to save this new computer object to the database, all you have to do is:
@computer.save
That’s it! Now your computer is saved to the database. But what if you want to retrieve it later to inspect its properties? All you have to do is (assuming this computer is the first computer in the Computers table):
@computer = Computer.find(1)
Now, you can inspect its properties with:
# This is a comment
# puts simply prints out whatever you ask it to, to the console - in this case,
# "speed", "memory", and "hard_drive"
puts @computer.speed
puts @computer.memory
puts @computer.hard_drive
In case you ever want to delete a computer, all you have to do is (if you know the ID of the computer in the database):
@computer.destroy
ActiveRecord certainly makes developers’ lives easier when it comes to accessing, manipulating, or deleting data in a database by acting as a more intelligent layer between your classes and the database.
The last question is, how does the application know what View to show and, correspondingly, what data to retrieve, from the Model to show in the View?
The controller acts like a middleman between the view and model. When you type a URL in your browser, you are sending a request to the servers the website is located or hosted on. There is a controller-like structure that receives that request and sends the view you want back to you while also retrieving the data from the model to be shown in the view.
A summary of how RoR will fit into an MVC framework is presented in Figure A.1 below, taken mainly from what you saw in Chapters 6 and 7.
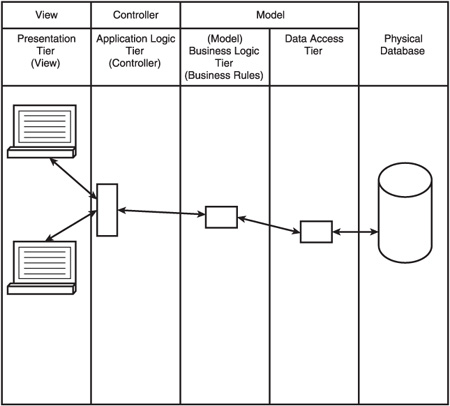
The MVC architecture allows you to organize your code in such a way that, for example, changing how parts of it look to users only requires you to modify a certain part of the application as opposed to having to dig through the entire application to find different parts to change, which often takes hours or days.
This means that under real-world constraints and conditions in which change is imminent and inevitable, you can easily be flexible and move with the flow without incurring large development costs.
To develop the case studies which are presented in this appendix, we used Ruby on Rails in conjunction with Git for version control, and Test::Unit for testing, both of which helped create an environment very conducive to better development for reasons we will soon be explaining.
Git is an open-source and free version control system that was created as an alternative to Subversion, Mercurial, and CVS. A version control system allows you to essentially store all of your code into one central place in the form of snapshots. This means, if you begin working on a part of the application and you realize that you just messed up the entire application, you can easily get the last working code you stored in the version control system and start over on a clean slate.
However, the real benefits of a version control system such as Git are the collaboration capabilities. Since all the code is stored in a central location, this means that several developers can work together in parallel on different or the same parts of the application (an important tenet of this book) and “push” the code they worked on back into the repository while Git merges all of the code together to produce a copy of code that integrates all of the changes made in parallel by the different developers (another important tenet of this book).
While the decision of which version control system to use depends on the needs of your application, we decided to use Git because it is easy-to-use, simple to set up, and free (because it is open-source software).
Testing is important not only in that it ensures that your application functions as expected without much effort (and therefore allows for more flexibility in development because changing the application has a lower cost since you have tests to ensure it still works), but also in that it ensures that the application fulfills the needs of the client, specifically with user acceptance tests.
Test::Unit is a testing framework for Ruby and Ruby on Rails that, despite its name, can do unit, functional, and integration testing. It is a very straightforward and simple testing framework with much of the testing done through assertions—which are programmatic ways of saying, “The result this code produces should match this expected outcome.”
There are three major types of tests that you can run using an automated testing tool such as Test::Unit on a RoR project:
Unit tests: Testing individual, atomic parts (can no longer be broken down into a smaller part) of your application—usually for errors in logic with strict inputs and outputs.
Functional tests: Testing the coordination of individual, atomic parts of your application without the interface (which is often the view).
Integration tests: Testing the coordination of individual, atomic parts of your application along with the interface (which is often the view).
As we explained in Chapter 9, automated testing differs from manual testing in that a software program runs all your code tests, instead of requiring you to go through and manually test each part of the code yourself, which could take hours, even days, depending on your code base. But in order to do automated testing, you must do a little more work and create tests using one of the testing frameworks available, such as Test::Unit, which we used and which we will be demonstrating in our case studies later on. However, the payoff in doing a little extra work allows you to greatly minimize the cost of changing your code and adding features since, if you’re ever worried about breaking another part of your application after changing a part of it, you can simply run a command and have all of your tests run to ensure nothing is broken.
Regression testing seeks to ensure that with every change to the code, no other parts of the code are broken, which could lead to the loss of functionalities. Regression testing can easily be done by doing automated testing, which can run all the tests automatically. Having good automated testing (meaning that it tests all of your code in different scenarios) is the same as having good regression testing. This is very important to have since it reduces the cost of changing already coded parts of an application—which will inevitably happen. The reason it reduces the cost of changing already coded parts is because if you change a part of an application, you can simply run the automated tests to ensure that nothing was broken. Therefore, you will have fewer reservations about changing parts of your application since all of the uncertainty of new code is taken out.
User acceptance testing is one of the most important processes that is usually performed at the finish of a project. It involves designating a person, other than the person who created the automated tests, to design scenarios to be performed in reality by your client. Doing this allows you to ensure that the application meets the needs of the client and satisfies them. User acceptance testing is very crucial since, while the application may function as expected, it may not necessarily fulfill the user’s needs. Doing user acceptance testing makes sure that it does.
Test::Unit is a testing framework for Ruby and Ruby on Rails that, despite its name, can do unit, functional, and integration testing. It is a very straightforward and simple testing framework with much of the testing done through assertions—which are programmatic ways of saying, “The result this code produces should match this expected outcome.”
Noshster is a worldwide social network for foodies to blog about the dishes they’ve eaten and share and review the restaurants where they ate them.
The product vision of Noshster is to create a social network for foodies that can be simply and intuitively used to track the dishes they’ve eaten, discover new foods by following other Noshster members they find interesting, and share reviews of the restaurants where they’ve eaten different dishes.
The overall goal of Noshster is to give the user the ability to satisfy a craving by helping them find the best restaurant that serves a particular dish.
Using the approach we recommended in Chapter 8 for the Product Owner to identify product vision, Noshster’s vision can be summarized as follows:
Who: Foodies
Why: Find the best dishes around the world
What: Dishes rated, rather than restaurants
Where: Best food by looking at rating of dishes in all regions of the world
When: 24 x 7
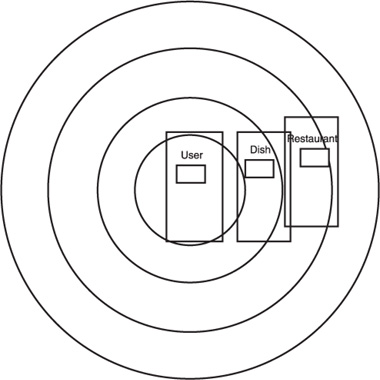
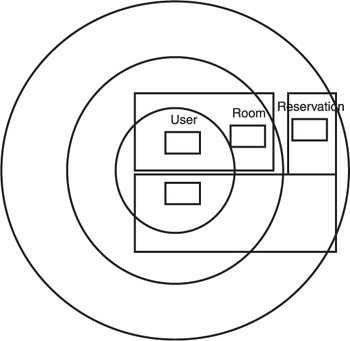
Using the visual requirements gathering technique in Chapter 4, the team was able to identify the following requirements using the tree and forest analogy (Figure A.2).
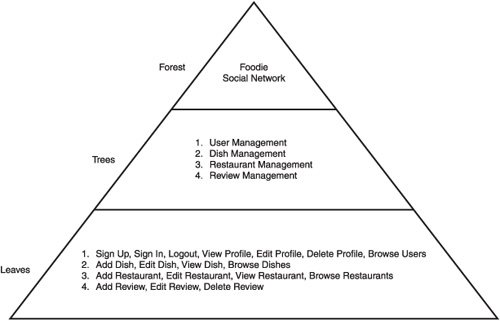
With Noshster, as an example for this book, we decided to vertically slice the application. That is, instead of working on the same “tree” of features in different Sprints, we worked on and finished the same tree within one Sprint. We will go through an example where we horizontally slice the application in the next case study.
Whether you vertically slice or horizontally slice the application depends on several factors such as:
What foundation of features do you need in order to develop the rest of the application efficiently without having to redesign? Do you need to have each “tree” of features completely developed before moving on to the next, or do you only need a subset?
Which organization of features allows you to provide the most business value to the product owner or the business as you progress through development?
But first let’s get back to the process and see how we were able to see things more clearly using the recommendations that were given in this book. At first, we were presented with several requirements, which, when thrown together, looked quite overwhelming as in Figure A.3 below.
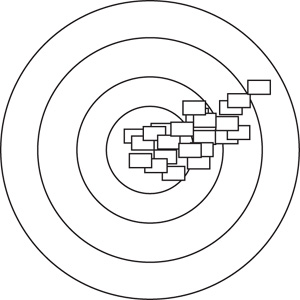
Using the approach we learned in Chapter 6, we were able to quickly see more clearly, as in Figure A.4 below.

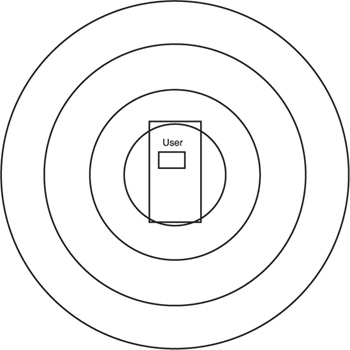
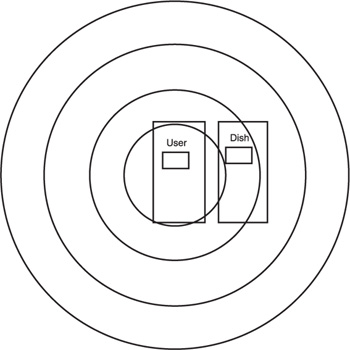
In discussions with the CEO, the Scrum team suggested and got the CEO to agree to get the team to focus on the user concept first to make sure that all different types of users around the world were identified as part of the foundation for this worldwide application. After that, they will get to the dish, then to the restaurant, and finally, to the review. In other words, they were building the software by working vertically around its common data elements. They did this because having all of the user characteristics first would allow the company to ensure that the software be really worldwide. This is to say that their architecture vision looked like that shown in Figure A.5.
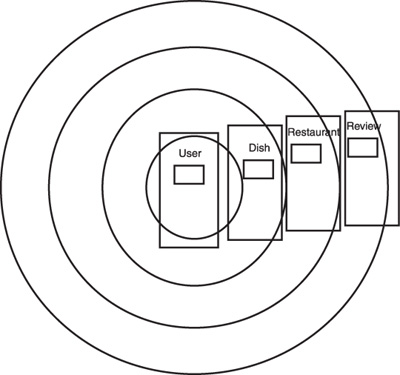
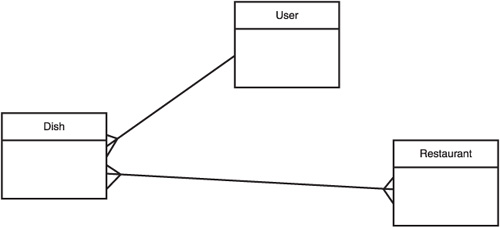
By looking at the business data elements, the team envisions that the application data architecture will look like that shown in Figure A.6, at least at a high level.
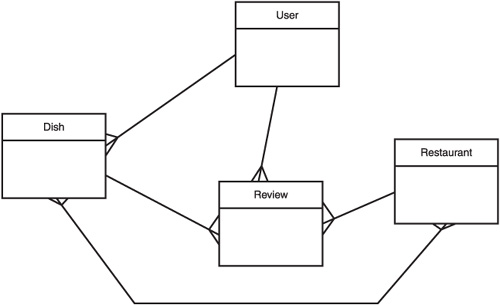
Table . Noshster Release and Sprint Planning
Forest | Trees | Leaves | ||
|---|---|---|---|---|
Social Foodie Network | ||||
Release 1 | ||||
Sprint 1 | ||||
User Management | Sign up, Sign in, Logout, View Profile, Edit Profile, Delete Profile, Browse Users | |||
Sprint 2 | ||||
Dish Management | Add Dish, Edit Dish, View Dish, Browse Dishes | |||
Sprint 3 | ||||
Restaurant Management | Add Restaurant, Edit Restaurant, View Restaurant, Browse Restaurants | |||
Sprint 4 | ||||
Review Management | Add Review, Edit Review, Delete Review |
The chart below is a summary of the points estimated for each story within each Sprint using the objective criteria technique presented earlier in the book. You can find the formulas used to calculate each column in Chapter 5.
| Characteristics | ||||||||||
|---|---|---|---|---|---|---|---|---|---|---|
PBIs (Story) | Interaction Type | Business Rules | Entities | Data Manipulation Type | Total UP (Unadjusted Points) | Coefficient | AP (Adjusted Points) | ED (Environment Dimensions) | PPS (=(AP* ED)/36) | |
Release 1 | ||||||||||
Sprint 1 | ||||||||||
Sign up | 3 | 1 | 1 | 2 | 7 | 1 | 7 | 18 | 3.5 | |
Sign in | 3 | 1 | 1 | 2 | 7 | 1 | 7 | 18 | 3.5 | |
Logout | 3 | 1 | 1 | 1 | 6 | 1 | 6 | 18 | 3 | |
View Profile | 3 | 1 | 1 | 1 | 6 | 1 | 6 | 18 | 3 | |
Edit Profile | 3 | 1 | 1 | 3 | 8 | 1 | 8 | 18 | 4 | |
Delete Profile | 3 | 1 | 1 | 1 | 6 | 1 | 6 | 18 | 3 | |
Browse Users | 3 | 1 | 1 | 1 | 6 | 1 | 6 | 18 | 3 | |
Sprint 2 | ||||||||||
Add Dish | 3 | 1 | 1 | 2 | 7 | 1 | 7 | 18 | 3.5 | |
Edit Dish | 3 | 1 | 1 | 3 | 8 | 1 | 8 | 18 | 4 | |
View Dish | 3 | 1 | 1 | 1 | 6 | 1 | 6 | 18 | 3 | |
Browse Dishes | 3 | 1 | 1 | 1 | 6 | 1 | 6 | 18 | 3 | |
Release 2 | ||||||||||
Sprint 3 | ||||||||||
Add Restaurant | 3 | 1 | 1 | 2 | 7 | 1 | 7 | 18 | 3.5 | |
Edit Restaurant | 3 | 1 | 1 | 3 | 8 | 1 | 8 | 18 | 4 | |
View Restaurant | 3 | 1 | 1 | 1 | 6 | 1 | 6 | 18 | 3 | |
Browse Restaurants | 3 | 1 | 1 | 1 | 6 | 1 | 6 | 18 | 3 | |
Sprint 4 | ||||||||||
Add Review | 3 | 1 | 1 | 2 | 7 | 1 | 7 | 18 | 3.5 | |
Edit Review | 3 | 1 | 1 | 3 | 8 | 1 | 8 | 18 | 4 | |
Delete Review | 3 | 1 | 1 | 1 | 6 | 1 | 6 | 18 | 3 | |
Now, we will begin going through the code that makes up each Sprint in each release for the example application and show how we integrated them.
The goal of the first Sprint of release 1 was to create a solid foundation of user management features upon which the second Sprint will be built.
The stories that will be developed during release 1—Sprint 1 are:
Sign up
Sign in
Logout
View profile
Edit profile
Delete profile
Browse users
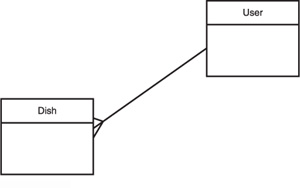
In Figure A.7, you will find the organization of data models for Release 1—Sprint 1.
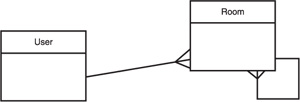
In Figure A.8, you will find a more detailed description of the data models for Release 1—Sprint 1.
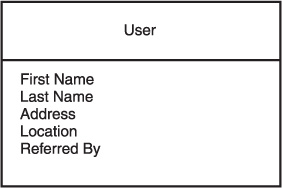
The User model enables the Noshster application to store user registration information. It uses the Authlogic plugin and specifies that a potential user does not need to type in a password confirmation (only a username, password, email, etc.) to sign up. The Authlogic plugin is a great user management plugin that adds user registration and authentication capabilities to an application. It abstracts away some details so that you don’t have to worry about coding this often-used and often-constant part of an application. Some of the details that it abstracts away are the user validation (ensuring the user provides input for certain fields like a username, password, or email) and password encryption (manipulating the password so that it is stored in the database in such a manner that if the database were hacked, no one would be able to sign in with your password because it’s encrypted).
class User < ActiveRecord::Base
  acts_as_authentic do |c|
    c.require_password_confirmation = false
  end
end
The UserSession model enables the Noshster application to authenticate user signins against user registration information stored in the database. Therefore, when a user tries to sign in with invalid credentials that don’t match what is in the database, the application puts out a friendly error. Otherwise, it lets the user go into what is normally a restricted area. This model abstracts a lot of details out and that’s okay in this case because signing in to an application is typically the same across all applications and doesn’t require much customization. It allows you to worry about the parts of your application that can actually provide unique value.
class UserSession < Authlogic::Session::Base
  def to_key
    new_record? ? nil : [ self.send(self.class.primary_key) ]
  end
end
Sign up
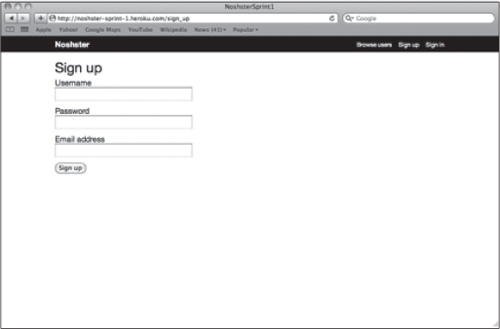
This view takes the above sign up form and adds extra information like a title, etc.
<h1>Sign up</h1>
<%= form_for @user do |f| %>
    <%= f.error_messages %>
    <%= render :partial => 'form', :object => f%>
    <%= f.submit 'Sign up' %>
<% end %>
Form partial (a form used in both sign up and edit profile pages)
This is a reusable form that shows the user a sign up form, which they can then use to fill in their user registration information. It is used on the line <%= render :partial => ’form’, :object => f %> in the Sign up code.
<p>
    <%= form.label :username %><br/>
    <%= form.text_field :username %>
</p>
<p>
    <%= form.label :password %><br/>
    <%= form.password_field :password %>
</p>
<p>
    <%= form.label :email_address %><br/>
    <%= form.text_field :email_address %>
</p>
Sign in

This view takes the sign up form, but gears it towards allowing users to use the form to sign in to the web application.
<h1>Sign in</h1>
<%= form_for @user_session do |f| %>
    <%= f.error_messages %>
    <p>
        <%= f.label :username %><br/>
        <%= f.text_field :username %>
    </p>
    <p>
        <%= f.label :password %><br/>
        <%= f.password_field :password %>
    </p>
    <%= f.submit 'Sign in' %>
<% end %>
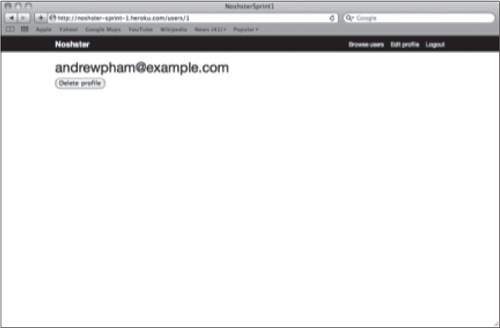
Logout page
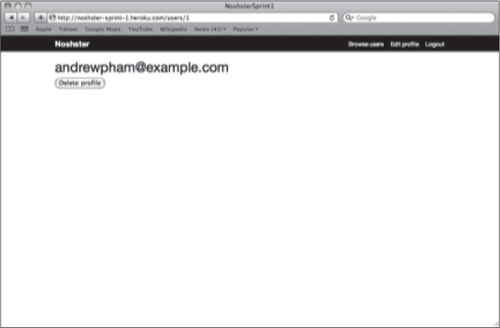
This view shows the user pertinent profile information and presents a button that allows users to delete their accounts.
<h1><%= @user.email_address %></h1>
<% if @user == current_user %>
    <%= button_to 'Delete profile', @user, :method => :delete %>
<% end %>
Edit profile
This view presents an edit user form so that the user can update his profile.
<h1>Edit Profile</h1>
<%= form_for @user do |f| %>
    <%= f.error_messages %>
    <%= render :partial => 'form', :object => f %>
    <%= f.submit 'Update profile' %>
<% end %>
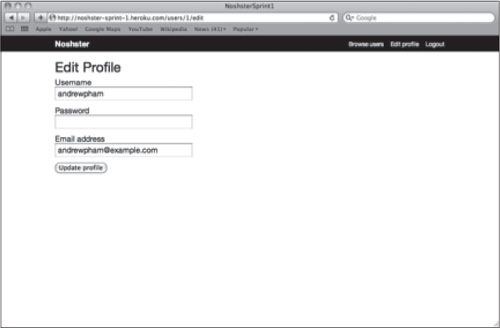
Form partial (a form used in both sign up and edit profile pages)
This is a reusable form that shows the user a sign up form, which he can then use to fill in his user registration information. It is used on the line <%= render : partial => ’form’, :object => f %> in the Edit Profile code.
<p>
    <%= form.label :username %><br/>
    <%= form.text_field :username %>
</p>
<p>
    <%= form.label :password %><br/>
    <%= form.password_field :password %>
</p>
<p>
    <%= form.label :email_address %><br/>
    <%= form.text_field :email_address %>
</p>
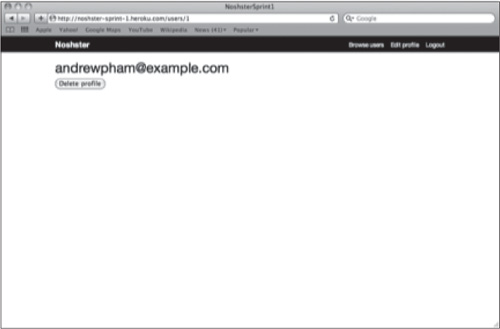
This view shows the user pertinent profile information and presents a button that allows her to delete her account.
<h1><%= @user.email_address %></h1>
<% if @user == current_user %>
     <%= button_to 'Delete profile', @user, :method => :delete %>
<% end %>
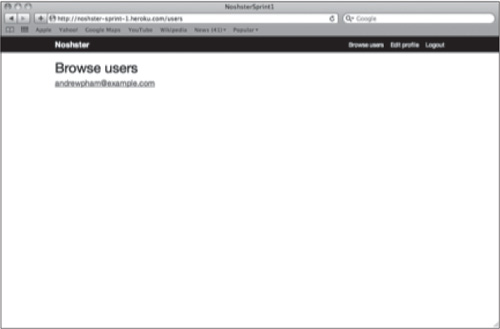
Browse users
This view takes all of the users returned from the database in the controller and displays them.
<h1>Browse users</h1>
<%= render @users %>
User partial (to reuse showing user details on browse user’s page)
This is the reusable view partial that is used in the above page on the line <%= render @users %> to display user information in a specific way.
<div class="user">
    <%= link_to user.email_address, user %>
</div>
Controllers
The UserController controller takes in the request from the browser and returns the proper view and necessary data. For example, if a user goes to the sign up page, the UserController controller returns the sign up page along with an empty User object to be filled in later. In another example, when a user actually clicks the sign up button, the controller receives the information typed into the form, puts it into the empty User object, and tells the object to save itself (this is when the model takes over and validates the data).
class UsersController < ApplicationController
  before_filter :require_no_user, :only => [:new, :create]
  before_filter :require_user, :only => [:edit, :update]

  # the index action asks the User model to query the "users" table in the
database and get all the users in order of alphabetical email addresses.
  def index
    @users = User.order('email_address ASC').all
  end

  # the new action instantiates a new User object, but it isn't created and saved
to the database just yet.
  def new
    @user = User.new
  end

  # the create action instantiates a new User object, populates it with user in-
putted values (params[:user]), and then attempts to save it. This may fail if the
user did not provide all the values required by the model in its validations or
provided incorrect data. If it saves successfully, then it creates a notice that
will be displayed to the user and redirects them to a new page. If not, it will
render the new action, which is typically a page a form, so that they can retry.
  def create
    @user = User.new(params[:user])
    if @user.save
      flash[:notice] = 'Sign up successful!'
      redirect_to @user
    else
      render :new
    end
  end

  # the show action asks the User model to query the database for a specific user so
that in the view, it can display a user's details.
  def show
    @user = User.find(params[:id])
  end

  # the edit action uses some of the functionality provided by the Authlogic
plugin which stores the currently signed-in user in the @current_user object.
Then it creates a new variable to hold that user. The view for the edit action
typically contains a form with the user's details already filled in, for easier
updating.
  def edit
    @user = @current_user
  end

  # the update action takes in the form values (params[:user]) and then attempts
to update the current user's details in the database. This may fail if the user did
not provide all the values required by the model in its validations or provided
incorrect data. If it succeeds, then a notice is created that will be shown to the
user and then it will redirect the user to another page. If it fails, the user will
be shown a form to retry.
  def update
    @user = @current_user
    if @user.update_attributes(params[:user])
      flash[:notice] = 'Profile updated!'
      redirect_to @user
    else
      render :edit
    end
  end

  # the destroy action takes the current user and deletes their information from
the database - therefore making them no longer a user.
  def destroy
    @user = @current_user
    current_user_session.destroy
    @user.destroy
    redirect_to root_path
  end
end
The UserSessionsController controller takes in credentials provided by the user in the sign in form, puts it into an empty UserSession object, and then tells it to save itself. It will then take the necessary action depending on whether the model object was able to save itself (meaning it was authenticated successfully). It also has the capability to log users out of the system and return them to the homepage.
class UserSessionsController < ApplicationController
  before_filter :require_no_user, :only => [:new, :create]
  before_filter :require_user, :only => :destroy

  # the new action instantiates a new UserSession object
  def new
    @user_session = UserSession.new
  end

  # the create action instantiates a new UserSession object and fills it with
input from the user (params[:user_session]). It then tries to save it, which will
authenticate the credentials provided by the user and try to match it to the values
stored in the database. If this succeeds, it will create a notice to show the user
and redirect them to their user page. If it fails, it will show a page with a form so
that they may retry.
  def create
    @user_session = UserSession.new(params[:user_session])
    if @user_session.save
      flash[:notice] = 'Sign in successful!'
      redirect_back_or_default @user_session.user
    else
      render :new
    end
  end

  # the destroy method takes the current user session and deletes it from stored
values, essentially logging out the currently signed in user.
  def destroy
    current_user_session.destroy
    flash[:notice] = 'Logout successful!'
    redirect_to root_path
  end
end
The goal of the second Sprint of release 1 is to build the dish management features on top of the user management foundation of features developed in the preceding Sprint.
The stories that will be developed during this Sprint are:
Add dish
Edit dish
View dish
Browse dishes
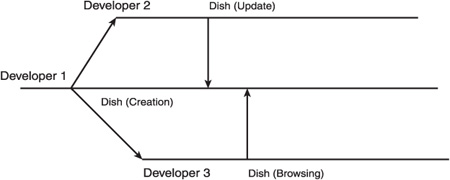
As mentioned in the book, one of the benefits of organizing development work around common core business data elements is to allow teams to work in parallel, as we also did here with Noshster, in splitting the developers into three separate groups to work concurrently on the view dish and edit dish after we were almost done with implementing the add dish user story.
In Figure A.16, you will find the organization of data models for Release 1—Sprint 2.
In Figure A.17, you will find the relationship of the data models for Release 1—Sprint 2.
As indicated in Chapters 6 and 7, one of the numerous advantages of designing and developing software around common data elements is the fact that after the entity is created, we can have two or more teams work in parallel (concurrent) with one another. And that was done for Noshster Sprint #2, as can be seen in Figure A.18. Parallel software development is made very easy with the use of a version control system, such as Git, since developers can simply work on different parts of an application and have them be automatically merged together when they put them in the version control system.
The Dish model allows the Noshster web application to store dish information that is provided by the user. It ensures that a dish name and description is provided and that the dish name is unique. It also accepts a file and stores it onto Amazon S3 while connecting it to the dish record in the database so that it can be retrieved later.
class Dish < ActiveRecord::Base
  validates :name, :presence => true, :uniqueness => true
  validates :description, :presence => true

  has_attached_file :picture, :styles => { :medium => '350x350#', :small =>
'150x150#', :thumb => '75x75#' }, :storage => :s3, :s3_credentials =>
"#{Rails.root}/config/s3.yml", :path => ":attachment/:id/:style.:extension"

  validates_attachment_presence :picture
end
Add dish

This page allows the user to add a dish by taking the following partial and adding extra information like a title, etc.
<h1>Add a dish</h1>
<%= form_for @dish, :html => { :multipart => true } do |f| %>
    <%= f.error_messages %>
    <%= render :partial => 'form', :object => f %>
    <%= f.submit 'Add dish' %>
<% end %>
Form partial (a form reused across add dish and edit dish pages)
This reusable form partial presents a form, which allows a user to input dish information to add a new dish or edit dish information. It is called on the line <%= render :partial => ’for’, :object => f %> in the Add Dish code.
<p>
    <%= form.label :name %><br/>
    <%= form.text_field :name %>
</p>
<p>
    <%= form.label :description %><br/>
    <%= form.text_area :description, :rows => 5, :cols => 50 %>
</p>
<p>
    <%= form.label :picture %><br/>
    <%= form.file_field :picture %>
</p>
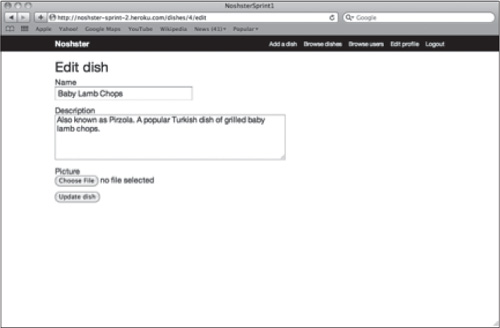
Edit dish
This page allows the user to edit a dish by taking the preceding partial and adding extra information like a title, etc.
<h1>Edit dish</h1>
<%= form_for @dish, :html => { :multipart => true } do |f| %>
    <%= f.error_messages %>
    <%= render :partial => 'form', :object => f %>
    <%= f.submit 'Update dish' %>
<% end %>
Form partial (a form reused across add dish and edit dish pages)
This reusable form partial presents a form, which allows a user to input dish information to add a new dish or edit dish information. It is called on the line < %= render :partial => ’for’, :object => f %> in the “Edit Dish” code.
<p>
    <%= form.label :name %><br/>
    <%= form.text_field :name %>
</p>
<p>
    <%= form.label :description %><br/>
    <%= form.text_area :description, :rows => 5, :cols => 50 %>
</p>
<p>
    <%= form.label :picture %><br/>
    <%= form.file_field :picture %>
</p>
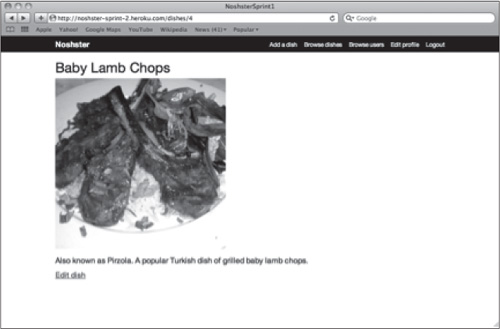
This page allows the user to view dish information by taking the dish object returned from the database and displaying it in a structured format on the page.
<h1><%= @dish.name %></h1>
<p>
    <%= image_tag @dish.picture.url(:medium), :alt => @dish.name %>
</p>
<p>
    <%= @dish.description %>
</p>
<% if signed_in? %>
     <p>
         <%= link_to 'Edit dish', edit_dish_path(@dish) %>
     </p>
<% end %>
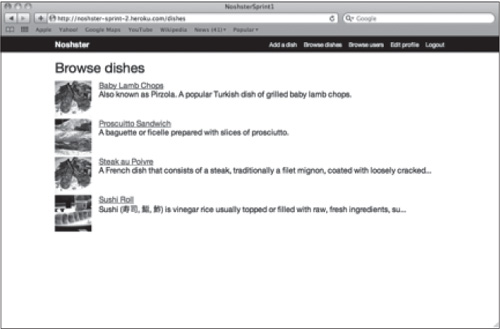
This page takes all the dishes returned from the database and presents them to the user.
<h1>Browse dishes</h1>
<%= render @dishes %>
Dish partial (to reuse showing dish details on browse dishes page)
This partial is used in the preceding page to display a single dish’s information. It is called on the line <%= render @dishes %>.
<div class="dish">
    <div class="picture">
        <%= link_to image_tag(dish.picture.url(:thumb), :alt => dish.name),
dish %>
    </div>

    <p class="details">
        <%= link_to dish.name, dish %><br/>
        <%= truncate dish.description, :length => 100 %>
    </p>
</div>
The DishesController controller takes a request from the user and returns the corresponding view and data from the database. For example, if a user goes to the browse dishes page, the DishesController controller finds all the dishes in the database and returns it along with the corresponding browse dishes view.
class DishesController < ApplicationController
  before_filter :require_user, :only => [:new, :create, :edit, :update]
  before_filter :get_dish, :only => [:show, :edit, :update]

  # the index action asks the Dish model to query the database and retrieve all of
the dishes in alphabetical order by name.
  def index
    @dishes = Dish.order('name ASC')
  end

  # the new action instantiates a new Dish object
  def new
    @dish = Dish.new
  end

  # the create action instantiates a new Dish object and fills it with data from
the user (params[:dish]). It then tries to save it. This may fail if the user did
not provide all the values required by the model in its validations or provided
incorrect data. If it succeeds, it will create a notice that will be shown to the
user and redirect them to a new page with dish details. If it fails, it will show
them a page with a form to retry.
  def create
    @dish = Dish.new(params[:dish])
    if @dish.save
      flash[:notice] = 'You have successfully added a dish!'
      redirect_to @dish
    else
      render :new
    end
  end

  # the show action is special in this controller. In the DishesController at the
top, there is a line "before_filter :get_dish, :only => [:show, :edit, :update]".
This is called a filter which, for the show, edit, and update actions, will execute
the get_dish action. The get_dish action retrieves a specific dish from the da-
tabase for presentation.
  def show
  end

  # the edit action is essentially the same as the show action.
  def edit
  end

  # the update action takes the dish retrieved from the get_dish action and
attempts to update it with data provided by the user (params[:dish]). This may
fail if the user did not provide all the values required by the model in its
validations or provided incorrect data. If it succeeds, it will create a notice
that will be shown to the user and redirect them to a new page with dish
details. If it fails, it will show them a page with a form to retry.
  def update
    if @dish.update_attributes(params[:dish])
      flash[:notice] = "You have successfully updated #{@dish.name}!"
      redirect_to @dish
    else
      render :edit
    end
  end

  private
  # the get_dish action is created to promote reusability. Since several actions
in this controller require a dish to be retrieved from the database, it can be
created in a separate place instead of being copied multiple times.
  def get_dish
    @dish = Dish.find(params[:id])
  end
end
The goal of the second Sprint of release 1 is to build the restaurant management features on top of the dish and user management foundation of features developed in the preceding Sprint.
The stories that will be developed during this Sprint are:
Add restaurant
Edit restaurant
View restaurant
Browse restaurants
Developing these features first will help us in the last Sprint, which must have the dish and restaurant management features already created in order to function properly.
In Figure A.23, you will find the organization of data models for Release 1—Sprint 3.
In Figure A.24, you will find the relationship of data models for Release 1—Sprint 1.
The Restaurant model allows the Noshster web application to store restaurant information and ensures that there is a name, address, city, state, and zip code passed to the database. It also ensures that the zip code is a number and that the restaurant is not a duplicate.
class Restaurant < ActiveRecord::Base
  validates :name, :presence => true
  validates :address_1, :presence => true
  validates :city, :presence => true
  validates :state, :presence => true
  validates :zip_code, :presence => true, :numericality => true

  validate :restaurant_is_not_duplicate

  private
  def restaurant_is_not_duplicate
    if Restaurant.where(:name=>self.name,:address_1=>self.address_1).count>0
      errors[:base] << 'That restaurant already exists.'
      return false
    end
  end
end
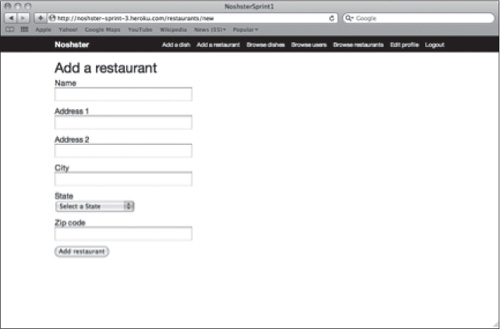
This page allows the user to add a restaurant by taking the above partial and adding extra information like a title, etc.
<h1>Add a restaurant</h1>
<%= form_for @restaurant do |f| %>
    <%= f.error_messages %>
    <%= render :partial => 'form', :object => f %>
    <%= f.submit 'Add restaurant' %>
<% end %>
Form partial (a form reused across add restaurant and edit restaurant pages)
This reusable form partial presents a form, which allows a user to input restaurant information to add a new restaurant or edit restaurant information. It is called on the line <%= render :partial => ’form’, :object => f %> in the Add Restaurant code.
<p>
    <%= form.label :name %><br/>
    <%= form.text_field :name %>
</p>
<p>
    <%= form.label :address_1 %><br/>
    <%= form.text_field :address_1 %>
</p>
<p>
    <%= form.label :address_2 %><br/>
    <%= form.text_field :address_2 %>
</p>
<p>
    <%= form.label :city %><br/>
    <%= form.text_field :city %>
</p>
<p>
    <%= form.label :state %><br/>
    <%= select :restaurant, :state, ['[List of states]'] %>
</p>
<p>
    <%= form.label :zip_code %><br/>
    <%= form.text_field :zip_code %>
</p>
Edit restaurant
This page allows the user to edit a restaurant by taking the preceding partial and adding extra information like a title, etc.
<h1>Edit restaurant</h1>
<%= form_for @restaurant do |f| %>
    <%= f.error_messages %>
    <%= render :partial => 'form', :object => f %>
    <%= f.submit 'Update restaurant' %>
<% end %>
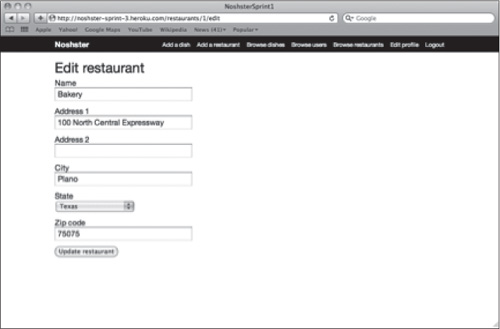
Form partial (a form reused across add restaurant and edit restaurant pages)
This reusable form partial presents a form, which allows a user to input restaurant information to add a new restaurant or edit restaurant information. It is called on the line <%= render :partial => ’form’, :object => f %> in the Edit Restaurant code.
<p>
    <%= form.label :name %><br/>
    <%= form.text_field :name %>
</p>
<p>
    <%= form.label :address_1 %><br/>
    <%= form.text_field :address_1 %>
</p>
<p>
    <%= form.label :address_2 %><br/>

    <%= form.text_field :address_2 %>
</p>
<p>
    <%= form.label :city %><br/>
    <%= form.text_field :city %>
</p>
<p>
    <%= form.label :state %><br/>
    <%= select :restaurant, :state, ['[List of states]'] %>
</p>
<p>
    <%= form.label :zip_code %><br/>
    <%= form.text_field :zip_code %>
</p>
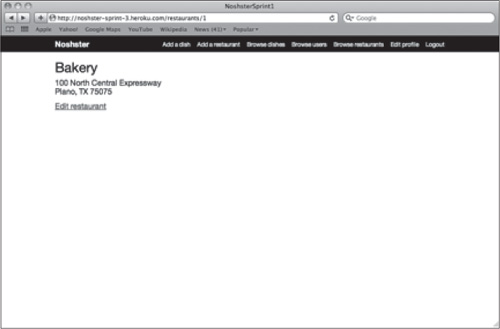
This page allows the user to view restaurant information by taking the restaurant object returned from the database and displaying it in a structured format on the page.
<h1><%= @restaurant.name %></h1>
<p>
    <%= @restaurant.address_1 %><br/>
    <% unless @restaurant.address_2.empty? %>
        <%= @restaurant.address_2 %><br/>
    <% end %>
    <%= @restaurant.city %>, <%= @restaurant.state %> <%= @restaurant.zip_code %>
</p>
<% if signed_in? %>
     <p>
         <%= link_to 'Edit restaurant', edit_restaurant_path(@restaurant) %>
     </p>
<% end %>
Browse restaurants
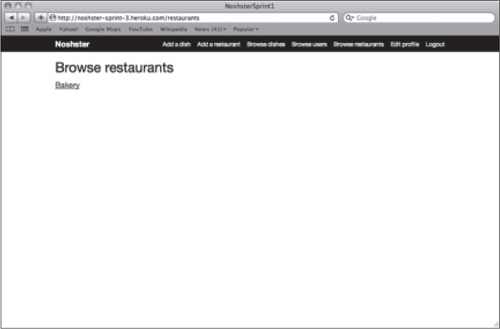
This page takes all the restaurants returned from the database and presents them to the user.
<h1>Browse restaurants</h1>
<%= render @restaurants %>
Restaurant partial (to reuse showing restaurant details on browse restaurants page)
This partial is used in the preceding page to display a single restaurant’s information. It is called on the line <%= render @restaurants %>.
<div class="restaurant">
    <%= link_to restaurant.name, restaurant %>
</div>
The RestaurantsController controller takes a request from the user and returns the corresponding view and data from the database. For example, if a user goes to the browse restaurants page, the RestaurantsController controller finds all the restaurants in the database and returns them along with the corresponding browse restaurants view.
class RestaurantsController < ApplicationController
  before_filter :require_user, :only => [:new, :create, :edit, :update]
  before_filter :get_restaurant, :only => [:show, :edit, :update]

  # the index action asks the Restaurant model to query the "restaurants" table in
the database and get all the restaurants in order of alphabetical name.
  def index
    @restaurants = Restaurant.order('name ASC')
  end

  # the new action instantiates a Restaurant object
  def new
    @restaurant = Restaurant.new
  end

  # the create action instantiates a new Restaurant object, populates it with
user inputted values (params[:restaurant]), and then attempts to save it. This
may fail if the user did not provide all the values required by the model in its
validations or provided incorrect data. If it saves successfully, then it
creates a notice that will be displayed to the user and redirects them to a new
page. If not, it will render the new action, which is typically a page a form,
so that they can retry.

  def create
    @restaurant = Restaurant.new(params[:restaurant])
    if @restaurant.save
      flash[:notice] = 'You have successfully added a restaurant!'
      redirect_to @restaurant
    else
      render :new
    end
  end

  # the show action is special in this controller. In the RestaurantsController at
the top, there is a line "before_filter :get_restaurant, :only => [:show, :edit,
:update]". This is called a filter which, for the show, edit, and update actions,
will execute the get_restaurant action. The get_restaurant action retrieves a
specific restaurant from the database for presentation.
  def show
  end

  # the edit action is essentially the same as the show action
  def edit
  end

  # the update action takes the dish retrieved from the get_restaurant action and
attempts to update it with data provided by the user (params[:restaurant]). This
may fail if the user did not provide all the values required by the model in its
validations or provided incorrect data. If it succeeds, it will create a notice
that will be shown to the user and redirect them to a new page with restaurant
details. If it fails, it will show them a page with a form to retry.
  def update
    if @restaurant.update_attributes(params[:restaurant])
      flash[:notice] = "You have successfully updated #{@restaurant.name}!"
      redirect_to @restaurant
    else
      render :edit
    end
  end

  private
  # the get_restaurant action is created to promote reusability. Since several
actions in this controller require a restaurant to be retrieved from the database,

it can be created in a separate place instead of being copied multiple times.
  def get_restaurant
    @restaurant = Restaurant.find(params[:id])
  end
end
The goal of the second Sprint of release 2 is to build the review management features on top of the restaurant management foundation of features developed in the preceding Sprint.
The stories that will be developed during this Sprint are:
Add review
Edit review
View review
After developing all of the other features in the preceding Sprints, we are now able to develop the last “tree” of features.
In Figure A.29, you will find the organization of data models for Release 1—Sprint 4.

In Figure A.30, you will find the relationship of the data models for Release 1—Sprint 1.

The Review model allows the Noshster web application to store review information in the database that is connected to a user, dish, and restaurant for later reporting. It ensures that there is a body, rating, and restaurant attached to the review.
class Review < ActiveRecord::Base
  validates :body, :presence => true
  validates :rating, :presence => true
  validates :restaurant_id, :presence => true

  belongs_to :user
  belongs_to :dish
  belongs_to :restaurant
end
------------------------
The User model is modified to form a relationship between users and reviews—that is, a user has many reviews so that when a review is displayed, we can tell the viewer who wrote the review.
class User < ActiveRecord::Base
  acts_as_authentic do |c|
    c.require_password_confirmation = false
  end

  has_many :reviews
end
------------------------
The Dish model is modified to form a relationship between dishes, reviews, and restaurants so that by retrieving a dish from the database, you can also see all the related reviews and restaurants.
class Dish < ActiveRecord::Base
  validates :name, :presence => true, :uniqueness => true
  validates :description, :presence => true

  has_attached_file :picture, :styles => { :medium => '350x350#', :small =>
'150x150#', :thumb => '75x75#' }, :storage => :s3, :s3_credentials =>
"#{Rails.root}/config/s3.yml", :path => ":attachment/:id/:style.:extension"

  validates_attachment_presence :picture

  has_many :reviews
  has_many :restaurants, :through => :reviews
end
------------------------
The Restaurant model is modified to be connected to reviews and dishes for the same reasons as the Dish model.
class Restaurant < ActiveRecord::Base
  validates :name, :presence => true
  validates :address_1, :presence => true
  validates :city, :presence => true
  validates :state, :presence => true
  validates :zip_code, :presence => true, :numericality => true

  validate :restaurant_is_not_duplicate

  has_many :reviews
  has_many :dishes, :through => :reviews

  private
  def restaurant_is_not_duplicate
    if Restaurant.where(:name => self.name, :address_1 => self.address_1).count > 0
      errors[:base] << 'That restaurant already exists.'
      return false
    end
  end
end
Add review
This page allows the user to add a review by taking the preceding partial and adding extra information like a title, etc.
<% content_for :head do %>
    <%= javascript_include_tag '/restaurants' %>
    <script type="text/javascript">
        $(document).ready(function() {
            $('#restaurant_name').autocomplete(data, {
                matchContains: true,
                mustMatch: true,
                formatItem: function(item) {
                    return item.name + '<br/>' + item.address;
                },
                formatMatch: function(item) {
                    return item.name;
                },


                formatResult: function(item) {
                    return item.name;
                }
            }).result(function(event, item) {
                $('#review_restaurant_id').attr('value', item.id);
            });
        });
    </script>
<% end %>
<h1>Add a review for <%= @dish.name %></h1>
<%= form_for [@dish, @review] do |f| %>
    <%= f.error_messages %>
    <p>
        <%= label_tag "Where did you eat #{@dish.name}?" %><br/>
        <%= text_field_tag :restaurant_name, params[:restaurant_name] %><br/>
        <%= link_to 'Add a new restaurant', new_restaurant_path %>
        <%= f.hidden_field :restaurant_id %>
    </p>
    <%= render :partial => 'form', :object => f %>
    <%= f.submit 'Add review' %>
<% end %>
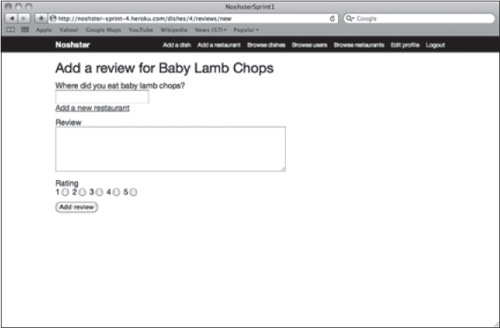
Form partial (a form reused across add review and edit review pages)
This reusable form partial presents a form, which allows a user to input review information to add a new review or edit review information. It is used on the line <%= render :partial => ’form’, :object => f %> in the “Add Review” code.
<p>
<%= form.label :body, 'Review' %><br/>
<%= form.text_area :body, :rows => 5, :cols => 50 %>
</p>
<p>
<%= form.label :rating %><br/>
1 <%= form.radio_button :rating, 1 %>
2 <%= form.radio_button :rating, 2 %>
3 <%= form.radio_button :rating, 3 %>
4 <%= form.radio_button :rating, 4 %>
5 <%= form.radio_button :rating, 5 %>
</p>
Edit Review
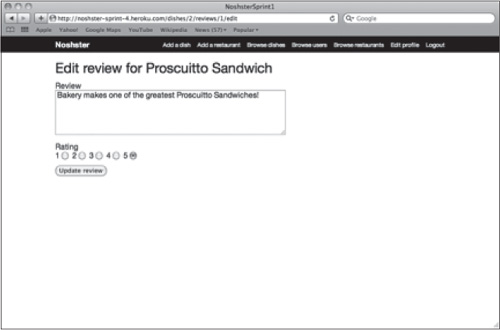
This page allows the user to edit a review by taking the preceding partial and adding extra information like a title, etc.
<h1>Edit review for <%= @dish.name %></h1>
<%= form_for [@dish, @review] do |f| %>
    <%= f.error_messages %>
    <%= render :partial => 'form', :object => f %>
    <%= f.submit 'Update review' %>
<% end %>
Form partial (a form reused across add review and edit review pages)
This reusable form partial presents a form, which allows a user to input review information to add a new review or edit review information. It is used on the line <%= render :partial => ’form’, :object => f %> in the Edit Review code.
<p>
<%= form.label :body, 'Review' %><br/>
<%= form.text_area :body, :rows => 5, :cols => 50 %>
</p>
<p>
<%= form.label :rating %><br/>
1 <%= form.radio_button :rating, 1 %>
2 <%= form.radio_button :rating, 2 %>
3 <%= form.radio_button :rating, 3 %>
4 <%= form.radio_button :rating, 4 %>
5 <%= form.radio_button :rating, 5 %>
</p>
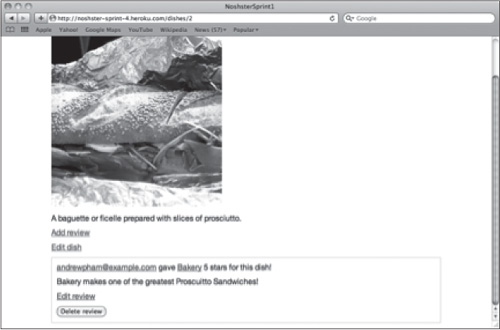
Review partial/delete review
This partial presents reviews in a specific format along with a delete review button that allows a user to delete their own review.
<div class="review">
    <p>
        <%= link_to review.user.email_address, review.user %> gave <%= link_to
review.restaurant.name, review.restaurant %> <%= review.rating %> stars for
this dish!
    </p>

    <p>
        <%= review.body %>
    </p>
    <p>
        <% if signed_in? %>
            <% if review.user == current_user %>
                <%= link_to 'Edit review', edit_dish_review_path(review.dish,
review) %>
                <%= button_to 'Delete review', dish_review_path(review.dish,
review), :method => :delete %>
            <% end %>
        <% end %>
    </p>
</div>
The ReviewsController controller takes a request from the user and returns the corresponding view and data from the database. For example, if a user goes to the add a review page, the ReviewsController controller finds the relevant dish and restaurant in the database and an empty review object to be filled in later and returns it along with the corresponding add a review view.
class ReviewsController < ApplicationController
  before_filter :require_user, :only => [:new, :create, :edit, :update, :destroy]
  before_filter :get_dish
  before_filter :get_review, :only => [:edit, :update, :destroy]
  before_filter :authorize_user, :only => [:edit, :update, :destroy]

  # the new action gets the signed-in user using Authlogic's built-in
current_user action which retrieves a signed-in user and instantiates a Review
object.
  def new
    store_location
    @user = current_user
    @review = @user.reviews.build
  end

  # the create action gets the signed-in user and instantiates a Review object
while populating it with data provided by the user (params[:review]). It then
sets the parent object of that Review object to the dish retrieved by the
database in the get_dish action. It then tries to save it. This may fail if the
user did not provide all the values required by the model in its validations or
provided incorrect data. If it succeeds, it will create a notice that will be
shown to the user and redirect them to a new page with the dish details and all
of its reviews. If it fails, it will show them a page with a form to retry.
  def create
    @user = current_user
    @review = @user.reviews.build(params[:review])
    @review.dish = @dish
    if @review.save
      flash[:notice] = "You have successfully reviewed #{@dish.name}!"
      redirect_to @dish
    else
      render :new
    end
  end

  # the edit action uses the before_filter which runs get_review in order to
provide a Review object to the view.
  def edit
  end

  # the update action uses the before_filter which runs get_review to get a review
which it then attempts to update with user provided values. It then tries to save
it. This may fail if the user did not provide all the values required by the model
in its validations or provided incorrect data. If it succeeds, it will create a
notice that will be shown to the user and redirect them to a new page with dish
details. If it fails, it will show them a page with a form to retry.
  def update
    if @review.update_attributes(params[:review])
      flash[:notice] = 'You have successfully updated your review!'
      redirect_to @dish
    else
      render :edit
    end
  end

  # the destroy action also uses the before_filter which runs get_review in order
to retrieve a specific review before attempting to delete it from the database.

def destroy
    @review.destroy
    flash[:notice] = 'You have successfully deleted your review!'
    redirect_to @dish
  end

  private
  def get_dish
    @dish = Dish.find(params[:dish_id])
  end

  def get_review
    @review = Review.find(params[:id])
  end

  def authorize_user
    unless @review.user == current_user

    flash[:notice] = 'You do not have permission to perform this action.'
    redirect_to current_user
   end
  end
end
An example unit test for our Dish model was:
class DishTest < ActiveSupport::TestCase
  test 'Dish is successfully created' do
    old_count = Dish.count
    Dish.create(:name => 'Example', :description => 'Example', :picture =>
'Example.jpg')
    new_count = Dish.count
    assert_equal(new_count, old_count + 1) # Make sure that there is 1 more dish
in the database than before
  end
end
The test itself ensures that you can successfully add a dish to the database given it has all the necessary properties such as a name, description, and picture.
An example functional test for our Dish controller was:
class DishControllerTest < ActiveSupport::TestCase
  test 'Dish is successfully created through the controller' do
    post :create, :dish => { :name => 'Example', :description => 'Example',
:picture => 'Example.jpg' }
    assert :redirect # Make sure the POST request to the create action was
successful
  end
end
This ensures that the controller properly accepts dish information and saves a new dish to the database and responds by redirecting the user to the right page.
An example integration test for our Add a dish feature was:
class DishFlowsTest < ActionController::IntegrationTest
  test 'Sign in and add a dish' do
    get '/sign_in'
    assert_response :success

    post_via_redirect '/sign_in', :username => 'example', :password =>
'example'
    assert_equal '/welcome', path

    post :create, :dish => { :name => 'Example', :description => 'Example',
:picture => 'Example.jpg' }
    assert :redirect # Make sure the POST request to the create action was
successful
  end
end
This test ensures that a given certain user flow (going to the sign in page, signing in, being redirected to the sign in page, and then creating a dish) works properly.
An example user acceptance test for the Noshster sign up feature would be:
Feature: Sign up
    In order to use Noshster
    As a non-member
    I want to be able to register

    Scenario: Sign up
    Given I have filled in all the form's fields username, password, and email
address with andrewpham, password, [email protected]
    When I click sign up
    Then I should be redirected to my newly created profile page

Given /^I have filled in all the form's required fields username, password, and
email address with (.+)$/ do |inputs|
    user_fields = inputs.split(', )
    @user = User.new
    @user.username = user_fields[0]
    @user.password = user_fields[1]
    @user.email_address = user_fields[2]
end

When /^I click sign up$/ do
    @user.save!
end
Then /^I should be redirected to my newly created profile page$/ do
  assert_response :redirect
  assert_redirected_to @user
end
This test emulates a real-world user and ensures that if a real-world user were to use the web application, it would work as expected.
Conferous is an online conference call management web application that allows teams and groups to easily collaborate by making the setting up of conference calls simple.
The product vision of Conferous is to create an extremely simple and easy-to-use online conference call management web application that can be used to create easily accessible and easily remembered conference calls that are recorded for later reference for teams and groups.
The overall goal of Conferous is to make hosting conference calls simple.
Who: Corporate conference users
Why: Make conference calls easy to use and remember
What: Conference calls
Where: Limited to the U.S.A. only
When: 24 × 7
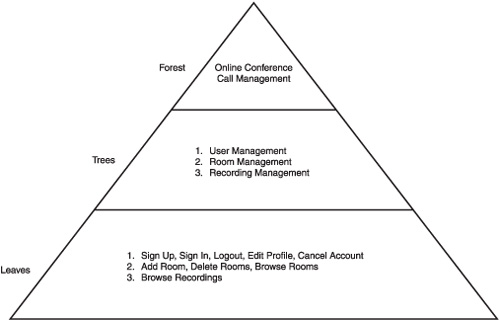
Using the visual requirements gathering technique in Chapter 4, the team was able to identify the following requirements using the tree and forest analogy (Figure A.34).
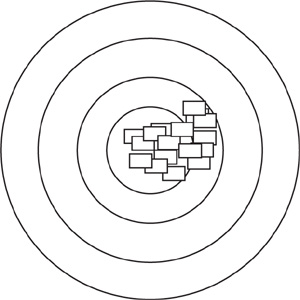
At first, we were presented with several requirements, which, when thrown together, looked quite overwhelming as shown in Figure A.35.
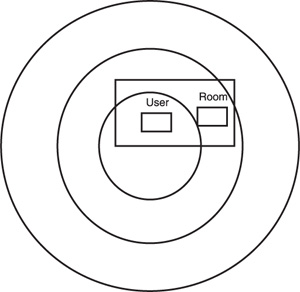
Using the approach we learned in Chapter 6, we were able to quickly see more clearly, as shown in Figure A.36.

With Conferous, we decided to horizontally slice the application; that is, instead of developing entire trees of features within the same Sprint, we decided to develop more than one tree subset of features in one Sprint, and to expand progressively into other features as we moved into subsequent Sprints.
The reason for this was that we needed the user to be able to sign up for the basic features of a teleconference room to start using our application right away rather than having to wait for us to finish all the features of a room. And as it turned out, our calculation was correct.
The chart below is a summary of the points estimated for each story within each Sprint using the objective criteria technique presented earlier in the book. You can find the formulas used to calculate each column in Chapter 5.
| Characteristics | ||||||||||
|---|---|---|---|---|---|---|---|---|---|---|
Interaction Type | Business Rules | Entities | Data Manipulation Type | Total UP (Unadjusted Points) | Coefficient | AP (Adjusted Points) | ED (Environment Dimensions) | PPS (=(AP* ED)/36) | ||
Sprint 1 | ||||||||||
Sign up | 3 | 1 | 1 | 2 | 7 | 1 | 7 | 18 | 3.5 | |
Sign in | 3 | 1 | 1 | 2 | 7 | 1 | 7 | 18 | 3.5 | |
Logout | 3 | 1 | 1 | 1 | 6 | 1 | 6 | 18 | 3 | |
Add Room | 3 | 1 | 1 | 2 | 7 | 1 | 7 | 18 | 3.5 | |
Delete Rooms | 3 | 1 | 1 | 3 | 8 | 1 | 8 | 18 | 4 | |
Browse Rooms | 3 | 1 | 1 | 1 | 6 | 1 | 6 | 18 | 3 | |
Sprint 2 | ||||||||||
Edit Profile | 3 | 1 | 1 | 3 | 8 | 1 | 8 | 18 | 4 | |
Cancel Account | 3 | 1 | 1 | 2 | 7 | 1 | 7 | 18 | 3.5 | |
Browse Recordings | 3 | 1 | 1 | 1 | 6 | 1 | 6 | 18 | 3 | |
The goal of the first Sprint is to develop only the necessary features needed for the development of the later application-centric features.
The stories that will be developed during this Sprint are:
Sign up
Sign in
Logout
Add Room
Delete Room
Browse Rooms
In Figure A.37, you will find the organization of data models for Release 1—Sprint 1.
In Figure A.38, you will find the relationship of the data models for Release 1—Sprint 1.
The User model enables the Conferous application to store user registration information. It uses the Authlogic plugin and specifies that a potential user does not need to type in a password confirmation (only a username, password, email, etc.) to sign up.
class User < ActiveRecord::Base
  acts_as_authentic do |c|
    c.require_password_confirmation = false
  end

  has_many :rooms
end
--------------------
The UserSession model enables the Conferous application to authenticate user sign ins against user registration information stored in the database. Therefore, when a user tries to sign in with invalid credentials that don’t match what is in the database, the application will put out a friendly error. Otherwise, it will let the user go into what is normally a restricted area.
class UserSession < Authlogic::Session::Base
  def to_key
    new_record? ? nil : [ self.send(self.class.primary_key) ]
  end
end
--------------------
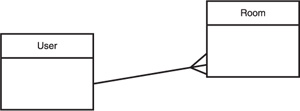
The Room model enables the Conferous application to store room information. It ensures that a name and description for the room is provided and that the name for the room is unique. It also establishes a connection between the user who created it and the room itself for later reporting.
class Room < ActiveRecord::Base
  validates :name, :presence => true, :uniqueness => true
  validates :description, :presence => true

  belongs_to :user
end
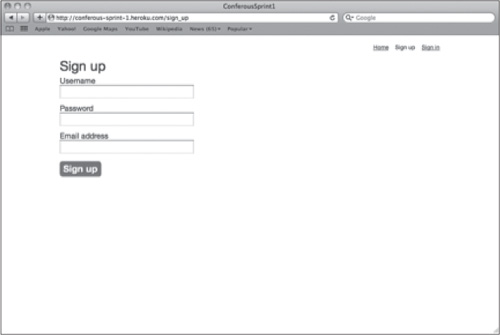
Sign up
This view takes the following sign up form partial and adds extra information such as a title, etc.
<h1>Sign up</h1>
<%= form_for @user do |f| %>
    <%= f.error_messages %>
    <%= render :partial => 'form', :object => f %>
    <%= f.submit 'Sign up' %>
<% end %>
Form partial—(for use in sign up and edit profile—in the future—pages)
This is a reusable form that shows users a sign up form, which they can then use to fill in their user registration information. It is called on the line <%= render : partial => ’form’, :object => f %> in the Sign up code.
<p>
    <%= form.label :username %><br/>
    <%= form.text_field :username %>
</p>
<p>
    <%= form.label :password %><br/>
    <%= form.password_field :password %>
</p>
<p>
    <%= form.label :email_address %><br/>
    <%= form.text_field :email_address %>
</p>
This view takes the sign up form, but gears it towards allowing users to use the form to sign in to the web application.
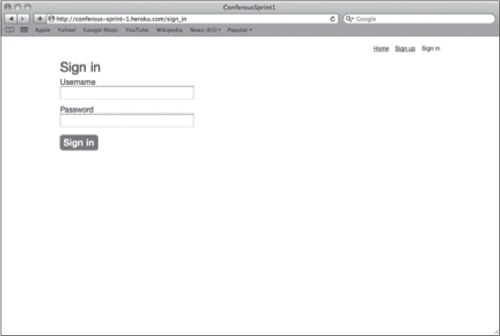
<h1>Sign in</h1>
<%= form_for @user_session do |f| %>
     <%= f.error_messages %>
     <p>
         <%= f.label :username %><br/>
         <%= f.text_field :username %>
     </p>
     <p>
         <%= f.label :password %><br/>
         <%= f.password_field :password %>
     </p>
     <%= f.submit 'Sign in' %>
<% end %>
This view presents the add a room form and allows it to accept user input to create a room.

<h1>Add a room</h1>
<%= form_for [@user, @room] do |f| %>
    <%= f.error_messages %>
    <p>
        <%= f.label :name %><br/>
        <%= f.text_field :name %>
    </p>
    <p>
        <%= f.label :description %><br/>
        <%= f.text_area :description, :rows => 5, :cols => 50 %>
    </p>
    <%= f.submit 'Add room' %>
<% end %>
This view presents a delete room button, which allows the user to delete a specific room.

<div class="room">
<p>
<span class="bold">Name:</span> <%= room.name %>
</p>
<p>
<span class="bold">Description:</span> <%= room.description %>
</p>
<p>
<%= button_to 'Delete room', user_room_path(@user, room), :method => :
delete %>
</p>
</div>
This view takes all of the rooms returned from the database in the controller and displays them.
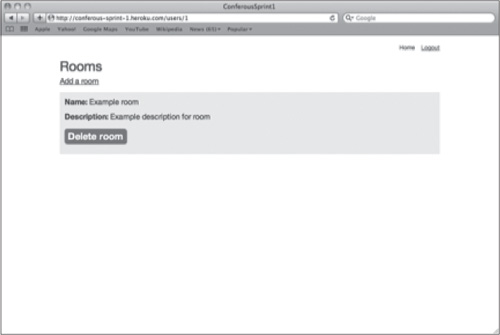
<h1>Rooms</h1>
<%= link_to 'Add a room', new_user_room_path(@user) %>
<div id="rooms">
    <%= render @user.rooms %>
</div>
Room partial—(to reuse showing room details)
This is the reusable view partial that is used in the preceding page to display room information in a specific way.
<div class="room">
<p>
<span class="bold">Name:</span> <%= room.name %>
</p>
<p>
<span class="bold">Description:</span> <%= room.description %>
</p>
<p>
<%= button_to 'Delete room', user_room_path(@user, room), :method => :
delete %>
</p>
</div>
The UserController controller takes in the request from the browser and returns the proper view and necessary data. For example, if a user goes to the sign up page, the UserController controller returns the sign up page along with an empty User object to be filled in later. In another example, when a user actually clicks the sign up button, the controller receives the information typed into the form, puts it into the empty User object, and tells the object to save itself (this is when the model takes over and validates the data).
class UsersController < ApplicationController
  before_filter :require_no_user, :only => [:new, :create]

  # the new action instantiates a new User object.
  def new
    @user = User.new
  end
  # the create action instantiates a new User object and fills it with user-
provided values (params[:user]). It then tries to save it. This may fail if the
user did not provide all the values required by the model in its validations or
provided incorrect data. If it succeeds, it will create a notice that will be shown
to the user and redirect them to a new page with user details. If it fails, it will
show them a page with a form to retry.
  def create
    @user = User.new(params[:user])
    if @user.save
      flash[:notice] = 'Sign up successful!'
      redirect_to @user
    else
      render :new
    end
  end

  # the show action takes the currently signed-in user through an Authlogic-
provided method and puts it into the @user variable.
  def show
    @user = current_user
  end
end
-------------------
The UserSessionsController controller takes in credentials provided by the user in the sign in form, puts it into an empty UserSession object, and then tells it to save itself. It then takes the necessary action depending on whether the model object was able to save itself (meaning it was authenticated successfully). It also has the capability to log the user out of the system and return her to the homepage.
class UserSessionsController < ApplicationController
  before_filter :require_no_user, :only => [:new, :create]
  before_filter :require_user, :only => :destroy

  # the new action instantiates a new UserSession object
  def new
    @user_session = UserSession.new
  end

  # the create action instantiates a new UserSession object and fills it with
user-provided values (params[:user_session]). It then tries to save it. This may
fail if the user did not provide all the values required by the model in its val-
idations or provided incorrect data. If it succeeds, it will create a notice that
will be shown to the user and redirect them to a new page with user details. If it
fails, it will show them a page with a form to retry.
  def create
    @user_session = UserSession.new(params[:user_session])
    if @user_session.save
      flash[:notice] = 'Sign in successful!'
      redirect_back_or_default @user_session.user
    else
      render :new
    end
  end

  # the destroy method takes the current user session and deletes it from stored
values, essentially logging out the currently signed in user.
  def destroy
    current_user_session.destroy
    flash[:notice] = 'Logout successful!'
    redirect_to root_path
  end
end
-------------------------
class RoomsController < ApplicationController
  before_filter :require_user
  before_filter :get_user

  # the new action takes the currently signed-in user through the get_user
filter, and instantiates a Room object.
  def new
    @room = @user.rooms.build
  end


  # the create action instantiates a Room object and fills it with user-provided
values (params[:room]). It then tries to save it, which will authenticate the
credentials provided by the user and try to match it to the values stored in the
database. If this succeeds, it will create a notice to show the user and redirect
them to their user page. If it fails, it will show a page with a form so that they
may retry.
  def create
    @room = @user.rooms.build(params[:room])
    if @room.save
      flash[:notice] = 'You have successfully created a room!'
      redirect_to @user
    else
      render :new
    end
  end

  # the destroy action takes a specific room and attempts to delete it from the
database.
  def destroy
    @room = @user.rooms.find(params[:id])
    @room.destroy
    flash[:notice] = 'You have successfully deleted a room!'
    redirect_to @user
  end

  private
  def get_user
    @user = current_user
  end
end
The goal of the second Sprint is to build upon the foundation of the first Sprint and develop valuable application-centric features.
The stories that will be developed during this Sprint are:
Browse recordings
Edit profile
Cancel account
In Figure A.44, you will find the organization of data models for Release 1—Sprint 2.
In Figure A.45, you will find the relationship of data models for Release 1—Sprint 2.
The Recording model allows the Conferous web application to store recording information for each conference call made in a specific room.
class Recording < ActiveRecord::Base
  belongs_to :room
end
-----------------
The Room model is modified to create a connection between itself and corresponding recordings so that when a user tries to look at the recordings made in a specific room, they can easily be found in the database.
class Room < ActiveRecord::Base
  validates :name, :presence => true, :uniqueness => true
  validates :description, :presence => true

  has_many :recordings

  belongs_to :user

  after_create :setup_test_data

  private
  def setup_test_data
    1.upto(3) do
      self.recordings.create
    end
  end
end
Browse recordings
This view takes all of the rooms returned from the database in the controller and displays them along with all of their recordings.
<% content_for :head do %>
    <script type="text/javascript">
        $(document).ready(function() {
            $('#view_recordings').click(function() {
                $('.recordings').slideToggle();
                return false;
            })
        });
    </script>
<% end %>
<h1>Rooms</h1>
<%= link_to 'Add a room', new_user_room_path(@user) %>
<div id="rooms">
    <%= render @user.rooms %>
</div>

Room partial—(to reuse showing room details)
This is the reusable view partial that is used in the preceding page to display room information in a specific way. It is modified from the previous Sprint to show recordings that are attached to the room. It is used in the line <%= render @user.rooms %> in the Browse Rooms code.
<div class="room">
<p>
<span class="bold">Name:</span> <%= room.name %>
</p>
<p>
<span class="bold">Description:</span> <%= room.description %>
</p>
<p>
<%= button_to 'Delete room', user_room_path(@user, room), :method =>
:delete %>
</p>
<p>
<%= link_to 'View recordings', nil, :id => 'view_recordings' %>
</p>
<p class="recordings">
<%= render room.recordings %>
</p>
</div>
This view takes the following edit profile form partial and adds extra information such as a title, etc.
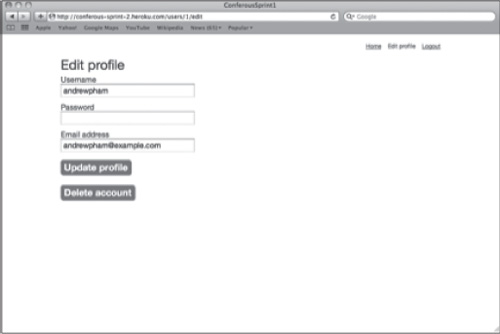
<h1>Edit profile</h1>
<%= form_for @user do |f| %>
    <%= f.error_messages %>
    <%= render :partial => 'form', :object => f %>
    <%= f.submit 'Update profile' %>
<% end %>
Form partial—(for use in the sign up and edit profile pages)
This is a reusable form that shows users an edit profile form, which they can then use to update their user registration information. It is called on the line <%= render :partial => ’form’, :object => f %> in the Edit profile code.
<p>
    <%= form.label :username %><br/>
    <%= form.text_field :username %>
</p>
<p>
    <%= form.label :password %><br/>
    <%= form.password_field :password %>
</p>
<p>
    <%= form.label :email_address %><br/>
    <%= form.text_field :email_address %>
</p>
Cancel account
This view takes the current user in the database and displays a form for him to edit his information. At the same time, it also allows him to cancel his account with a Delete account button.
<h1>Edit Profile</h1>
<%= form_for @user do |f| %>
    <%= f.error_messages %>
    <%= render :partial => 'form', :object => f %>
    <%= f.submit 'Update profile' %>
<% end %>
<%= button_to 'Delete account', @user, :method => :delete %>
Form partial—(for use in sign up and edit profile—in the future—pages)
This is a reusable form that shows the user a sign up form, which he can then use to fill in his user registration information. It is called on the line <%= render :partial => ’form’, :object => f %> in the Cancel account code.
<p>
    <%= form.label :username %><br/>
    <%= form.text_field :username %>
</p>
<p>
    <%= form.label :password %><br/>
    <%= form.password_field :password %>
</p>
<p>
    <%= form.label :email_address %><br/>
    <%= form.text_field :email_address %>
</p>
The UserController controller is modified to allow for the Cancel account feature.
class UsersController < ApplicationController
  before_filter :require_no_user, :only => [:new, :create]

  # the new action instantiates a new User object.
  def new
    @user = User.new
  end

  # the create action instantiates a new User object and fills it with user-
provided values (params[:user]). It then tries to save it. This may fail if the
user did not provide all the values required by the model in its validations or
provided incorrect data. If it succeeds, it will create a notice that will be shown
to the user and redirect them to a new page with user details. If it fails, it will
show them a page with a form to retry.
  def create
    @user = User.new(params[:user])
    if @user.save
      flash[:notice] = 'Sign up successful!'
      redirect_to @user

    else
      render :new
    end
  end

  # the show action takes the currently signed-in user through an Authlogic-
provided method and puts it into the @user variable.
  def show
    @user = current_user
  end

  # the destroy action finds the specified user and deletes it from the database,
thereby canceling the account.
  def destroy
    @user = User.find(params[:id])
    @user.destroy
    flash[:notice] = 'You have successfully canceled your account!'
    redirect_to root_path
  end
end