
Recover a Lost or Stolen Mac
Your Mac is a desirable item for thieves, particularly if it’s a laptop. Macs resell for decent amounts, even when years old, and there’s a huge online market for used models.
Without freaking you out about theft, I want to tell you how you can protect your data when your Mac has disappeared, make it impossible for a thief to use your Mac, and potentially find your Mac if it’s stolen or lost but is online or powered up.
Before we get started, however, I want to give you all the advice necessary that you can carry out before you lose a Mac or have one stolen. Follow these steps to lessen your pain.
Safeguard Yourself and Your Mac
While a determined thief can always figure out how to steal something, you can reduce the opportunity to do so and the pain if it happens.
Keep Your Mac Obscured and Locked
Although it seems obvious, it’s less likely your Mac will be stolen if it can’t be seen! In your home or place of work, find a location for your computer that can’t be casually seen by someone walking by or even casing your house.
You might add a “bottom-up” blind to a window, that lets you lower or raise the blinds from the top, making it harder to see into a room. Or, you can add frosted security film or a thin sheet of security glass that prevents people from seeing in, but which lets light pass.
When life returns to a normalcy that includes gathering regularly with strangers in places like coffeeshops, keep your Mac out of sight when it’s not in use and don’t leave your bag behind. I’ve taken my laptop with me to the bathroom on more than one occasion, leaving a magazine and my jacket to mark my spot. Those have never been stolen.
You can also consider a security lock for your laptop or desktop. A special slot used to be built into every Mac and most other computers. Kensington licensed and popularized the design, and Apple supported it. Modern computers aren’t as lock oriented, but Kensington, Belkin, and other firms still sell clever add-on locks for desktop and laptops.
These locks typically require breaking part of a computer or using heavy-duty wire cutters to sever a cable, and many come with insurance that applies if the product fails and you meet stringent terms of proof, that include a police report and that you installed their lock correctly.
Protect Against the Potential of Loss
I have some additional advice about things you can do in advance that will help you tremendously if your Mac were stolen or lost:
Insurance: Make sure your Mac is insured against theft, loss, and destruction (as in a fire or flood). Your homeowner’s or renter’s policy may cover this (perhaps with an extra rider).
Backups: Back up your Mac’s data, but don’t keep your backup drive with your Mac. Preferably make multiple kinds of backups, including keeping all your documents at a secure online backup service. Get Joe Kissell’s Take Control of Backing Up Your Mac for all the necessary advice; it will soon be updated to cover Big Sur, which poses some new and thorny backup challenges.
FileVault: Use FileVault to make it impossible to access your notebook Mac’s data without a valid account’s password. While Macs with a T2 Security Chip or that have M-series processors encrypt their drives at all times, FileVault makes sure someone can’t boot a machine without a password. See FileVault Protection for details.
Shut down at night or during long idle periods: Along with using FileVault, shut down your Mac when not in use for a period of time when you’ll be away, or you consider it at risk of theft. FileVault works best on data at rest; when your Mac is running and logged in, there’s less protection.
These mostly easy ideas make recovering your data and recouping your financial loss feasible.
Get To Know Find My
You can find the last reported position of any Mac, iPhone, or iPad via Find My, which is linked to your iCloud account. If your device is online, even briefly, you can see its location, play a sound on it, lock it or mark it lost, or erase it! You can also enable Find My for an Apple Watch, AirPods, and AirPods Pro, but they are more dependent on other devices being nearby.
With Family Sharing turned on, anyone in the group can see where any member’s device is, unless the owner has disabled letting that person or anyone see their current location. With that user’s password, all Find My features are available through other Family Sharing members’ accounts.
How Find My Sends Its Location Normally
The feature relies on Macs, iPhones, and iPads connected to the internet sending Apple’s servers a regular update of location information derived from picking up the broadcasts of network names from nearby Wi-Fi routers.
iPhones and cellular iPads with an active plan also add in cellular and GPS signals and data for more precision and offline location pinpointing. Cellular networks pinpoint their tower locations with a high degree of precision for management purposes, and this can be used quite well to aid in location finding, too. GPS and other satellite systems supported by iPhones and iPads can provide a quite exact location, but in cities and indoors, these satellite signals are often too faint to receive.
Find My uses each operating system’s location service framework, which combines all the positioning data they have on hand to perform trilateration to determine an approximate location. Because Macs lack GPS, their locations are almost always coarser than cellular-linked mobile devices.
Also, because a Mac may often lack a connection to the internet—particularly after it’s misplaced or stolen—it may not be able to find its current location. When you tether a Mac to an iPhone or iPad as a mobile hotspot, it appears to pass along its more precise location information, though Apple doesn’t seem to document this feature.
However, if a Mac doesn’t have an internet link, it can’t directly transmit its location to Apple, making it less necessary to know where it is. (The company has added a way around a lack of internet access that I discuss immediately next in How Find My Discovers Disconnected Devices.)
Whenever your Mac is online, though, Find My is a two-way connection: your Mac reports its location on a regular basis, and through Find My on one of your other devices or via iCloud.com, you can push a sound and message, as well as lock or erase the hardware.
Using Find My also tells your remote devices you’re looking for them, and when they receive that message, they update their position more regularly, typically even if they’re in a standby mode.
How Find My Discovers Disconnected Devices
What if you’ve lost your Mac and it’s in a place where it can’t reach a Wi-Fi network? What if it’s stolen, and the thief has disabled Wi-Fi? With an iPhone or cellular iPad, what if it can’t reach a cell network or cellular networking is disabled?
Apple came up with a fiendishly clever solution for this scenario that relies on Bluetooth. To use this feature, you have to have previously paired at least two of your devices that use the same iCloud account, much like setting up iCloud Keychain.
This pairing exchanges encryption information between your devices without Apple or a third party knowing those secrets or having access to them. That’s particularly critical with location-based data.
While Apple has never released detailed information about the process, it’s possible to infer how it works:
Whenever one of your devices can’t make a connection to the internet, it transmits a Bluetooth beacon that incorporate an encrypted device identifier.
Any Apple device owned by anyone in the vicinity with an internet connection—running at least macOS 10.15 or iOS 13/iPadOS 13—picks up the broadcast and relays it to Apple, appending location information the other person’s device has obtained or inferred.
Apple stores this information, but doesn’t do anything with it.
If you mark your device as lost or lock it, any of your existing paired devices can make a very particular sort of query using shared encrypted information to Apple, and Apple provides matching results.
Your device then decrypts the data and shows you where it has been spotted.
It’s a beautiful system, in that neither Apple, the owner of other equipment, nor anyone sniffing in the area around your device can determine who owns the hardware or what’s in the broadcast.
This is a one-way system, though: you can’t send a signal to the device, so it can’t be locked or erased.
Use Find My for Tracking
Find My requires an active Apple ID associated with iCloud. You likely set up Find My when upgrading or setting up your Mac, iPhone, or iPad. You can also enable Find My for a Watch or AirPods.
To enable Find My on a Mac that’s logged in to an iCloud account:
With 10.14 Mojave or earlier: open System Preferences > iCloud and select Find My Mac in the services list.
With 10.15 Catalina or later: open System Preferences > Apple ID > iCloud, and select Find My.
You can disable Find My by deselecting the box next to its service and entering the password for the associated Apple ID account. In Catalina and later, you can also click Options and click Turn Off.
Catalina and later also offer a toggle for the expanded Bluetooth-based device-finding service described above: click Options, click Turn Off next to Find My Network, and click Disable. However, I recommend leaving this on, as there’s no good reason to not make use of it.
View Your Device’s Location
To view your device’s location, you can choose between two similar tools: the Find My web app at iCloud.com or the Find My app in macOS Catalina or later, iOS, or iPadOS. The web app, desktop app, and mobile app have similar interfaces and nearly identical features.
Find My App
Find My works via an app of the same name, which is included with every Apple operating system. By activating Find My, you’re also automatically logged in to the app on all your devices that share the same iCloud account.
In the Mac app in Big Sur, click the Devices tab, and you see all your hardware; in a Family Sharing group, you also see all the devices registered by people in that group unless they have disabled sharing their location (Figure 46). The map is zoomed in or out to show all the devices in one view. Each device appears as an icon of its model.

The screen has a variety of typical map actions. You can click the location ![]() icon to center on the current set of devices across the map, and then click it again to toggle between a close and not-so-close zoom. You can also switch map overlays, shift to 3D view, and click plus
icon to center on the current set of devices across the map, and then click it again to toggle between a close and not-so-close zoom. You can also switch map overlays, shift to 3D view, and click plus ![]() and minus
and minus ![]() to zoom in and out.
to zoom in and out.
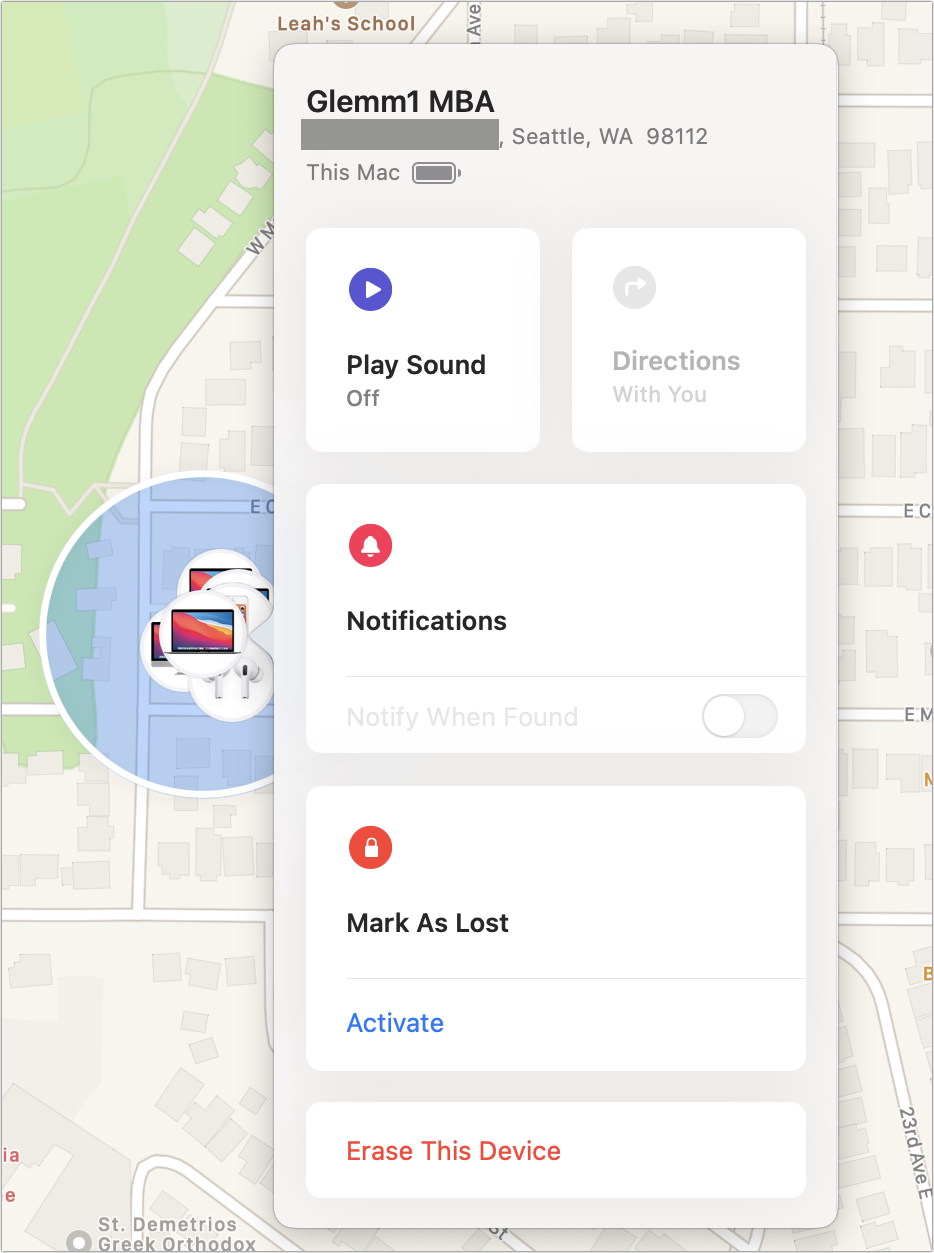
Tap a device in the list and it’s selected and centered on in the map. Click the info ![]() button, and a popover reveals a set of actions (Figure 47). Click anywhere else to dismiss the popover. Some of the actions are also available by Control-clicking or right-clicking the item in the Devices list, like Mark As Lost and Play Sound.
button, and a popover reveals a set of actions (Figure 47). Click anywhere else to dismiss the popover. Some of the actions are also available by Control-clicking or right-clicking the item in the Devices list, like Mark As Lost and Play Sound.
 button on a selected device, and a popover offers up actions.
Find My shows the location of the device on the map as an icon dot is the center of a blue shaded area if a device can be pinpointed. The diameter of the shaded area indicates the amount of confidence in the precision of the location: a smaller radius means a more exact position than a larger one.
A device offline for more than 24 hours displays as No Location Found. It may take Find My up to three minutes to fix a precise location for a device.
Find Me may list an exact street address beneath the device’s name. It also tells you how recently the location information was updated (how long ago, “Now,” or “Updating Location”), and displays a nifty battery indicator—handy for knowing how much juice is left in a lost device!
Find My iPhone on the Web
You can also use the Find My iPhone web app, which is both an alternative to the app and the only way for someone without one of their other devices to log in and track their devices. You can use the Find My iPhone web app only on a desktop computer or non-Apple mobile device.
Follow these steps:
Go to https://icloud.com/#find.
Log in with the correct Apple ID.
Choose a device from the All Devices menu (Figure 48). With Family Sharing, you can also select family member’s devices.

In the All Devices list, the dot beside each device name indicates the status: gray ![]() means trying to connect or offline; green
means trying to connect or offline; green ![]() means online, and it shows the last time it was located.
means online, and it shows the last time it was located.
To select a device, choose its name from the All Devices list, and it’s centered in a zoomed-out view of the map, while a set of actions appears in an upper-right corner box with the device name. This box includes battery and charge for devices with batteries, and the last time the device was located.
With All Devices selected, you can also click any dot that appears on the map, and the map shows its radius of location confidence and its name in a pop-up dialog. Click the info ![]() icon in that dialog display the action box as above.
icon in that dialog display the action box as above.
Take Remote Action
You can now take action on your remote device, with several options that vary in utility based on whether your device is under a pile of magazines, or has been misplaced or stolen. Whatever action you take, iCloud sends an email message to your Apple ID address.
Notification and Driving Directions
For any device that can’t currently be located, you can enable the Notify When Found button and be alerted via email when it comes back on the radar. (In Find My iPhone for the web, the label is Notify Me When Found.)
In a native app, tap Directions, and the operating system opens the Maps app in directions mode with the device’s current location as the destination.
Play Sound
When you can’t find a device but think it may be nearby, the Play Sound option should help you locate it. Tap or click Play Sound, or Control-click or right-click the device in the macOS app and select Play Sound, and for two minutes either a loud pinging noise will play (if sound is active) or the device will vibrate (if muted).
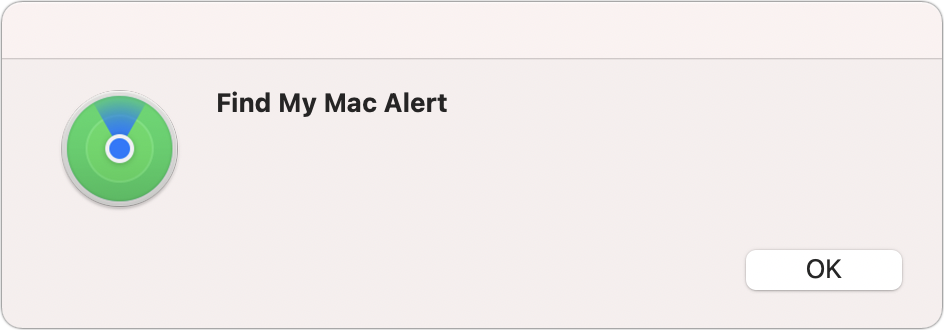
If it’s unlocked, a notification appears on the targeted device that reads “Find My Device Alert” (Figure 49). On a Mac, the dialog can be dismissed at a login screen. If an iPhone or iPad is locked, it has to be unlocked to disable the ping or vibration.
Mark as Lost
This option helps you recover a lost or stolen device by locking it down. Under the Mark as Lost section, or Control-click or right-click the device in the macOS app, you click or tap Activate. The path splits for devices with a Secure Enclave processor, including Macs, and older Macs that lack a T2 Security Chip or M-series Apple silicon.
Macs Without a Secure Enclave
The first step for older Macs is a prompt at which you set and confirm a six-digit code that can be used to unlock it (Figure 50).

Once you’ve entered the code the second time to confirm it, you’re prompted to enter a message. You can offer a reward and provide your phone number. It also puts the finder on notice that you know approximately where it is. (“I’m a block away. There’s a reward.”) Were your hardware stolen, this is a way to tell a thief that you have her location and other data, and advise them to give it up.
Finally, click Lock. Instead of just performing the equivalent of Lock Screen on a Mac, which would require a password to regain access instantly freezes the interface, shuts it down invisibly, then restarts it using the Recovery partition in a special locked mode. If the Mac isn’t connected to the internet, it happens the next time it is.
To unlock, you enter that code at the unlock screen (Figure 51).

Your Mac now restarts as normal. macOS will almost certainly prompt you to re-enter your iCloud-associated Apple ID password to resume syncing and provide access to iCloud-protected resources.
Macs with a Secure Enclave (and Other Devices)
The PIN method was a workaround for Macs before the Secure Enclave became a part of newer model. With one of these newer Macs, the lock and unlock process is quite similar to an iPhone, iPad, or iPod touch. (Apple seems to call this Lock Mode in some places, but not consistently; it used to be “Lost Mode.”)
The first step after clicking or tapping Activate under Mark As Lost brings up the prompt to enter a message. Enter something useful, potentially including a phone number, and click Lock. (With iPhones and iPads, there’s a separate step in which you can optionally enter a phone number, that device will allow a call to—if it’s able to place phone calls—even in this mode.)
The device restarts immediately if connected to the internet, or the next time it’s connected.
If Apple Pay is enabled and cards have been added, all associated cards are disabled.
Macs that are locked show a window that reads Activate Mac, and offers user selections (Figure 52). To reactivate your Mac, click a user and click Next. You then enter the password for that user and click Continue. (On an iOS/iPadOS device, you enter the device passcode.)
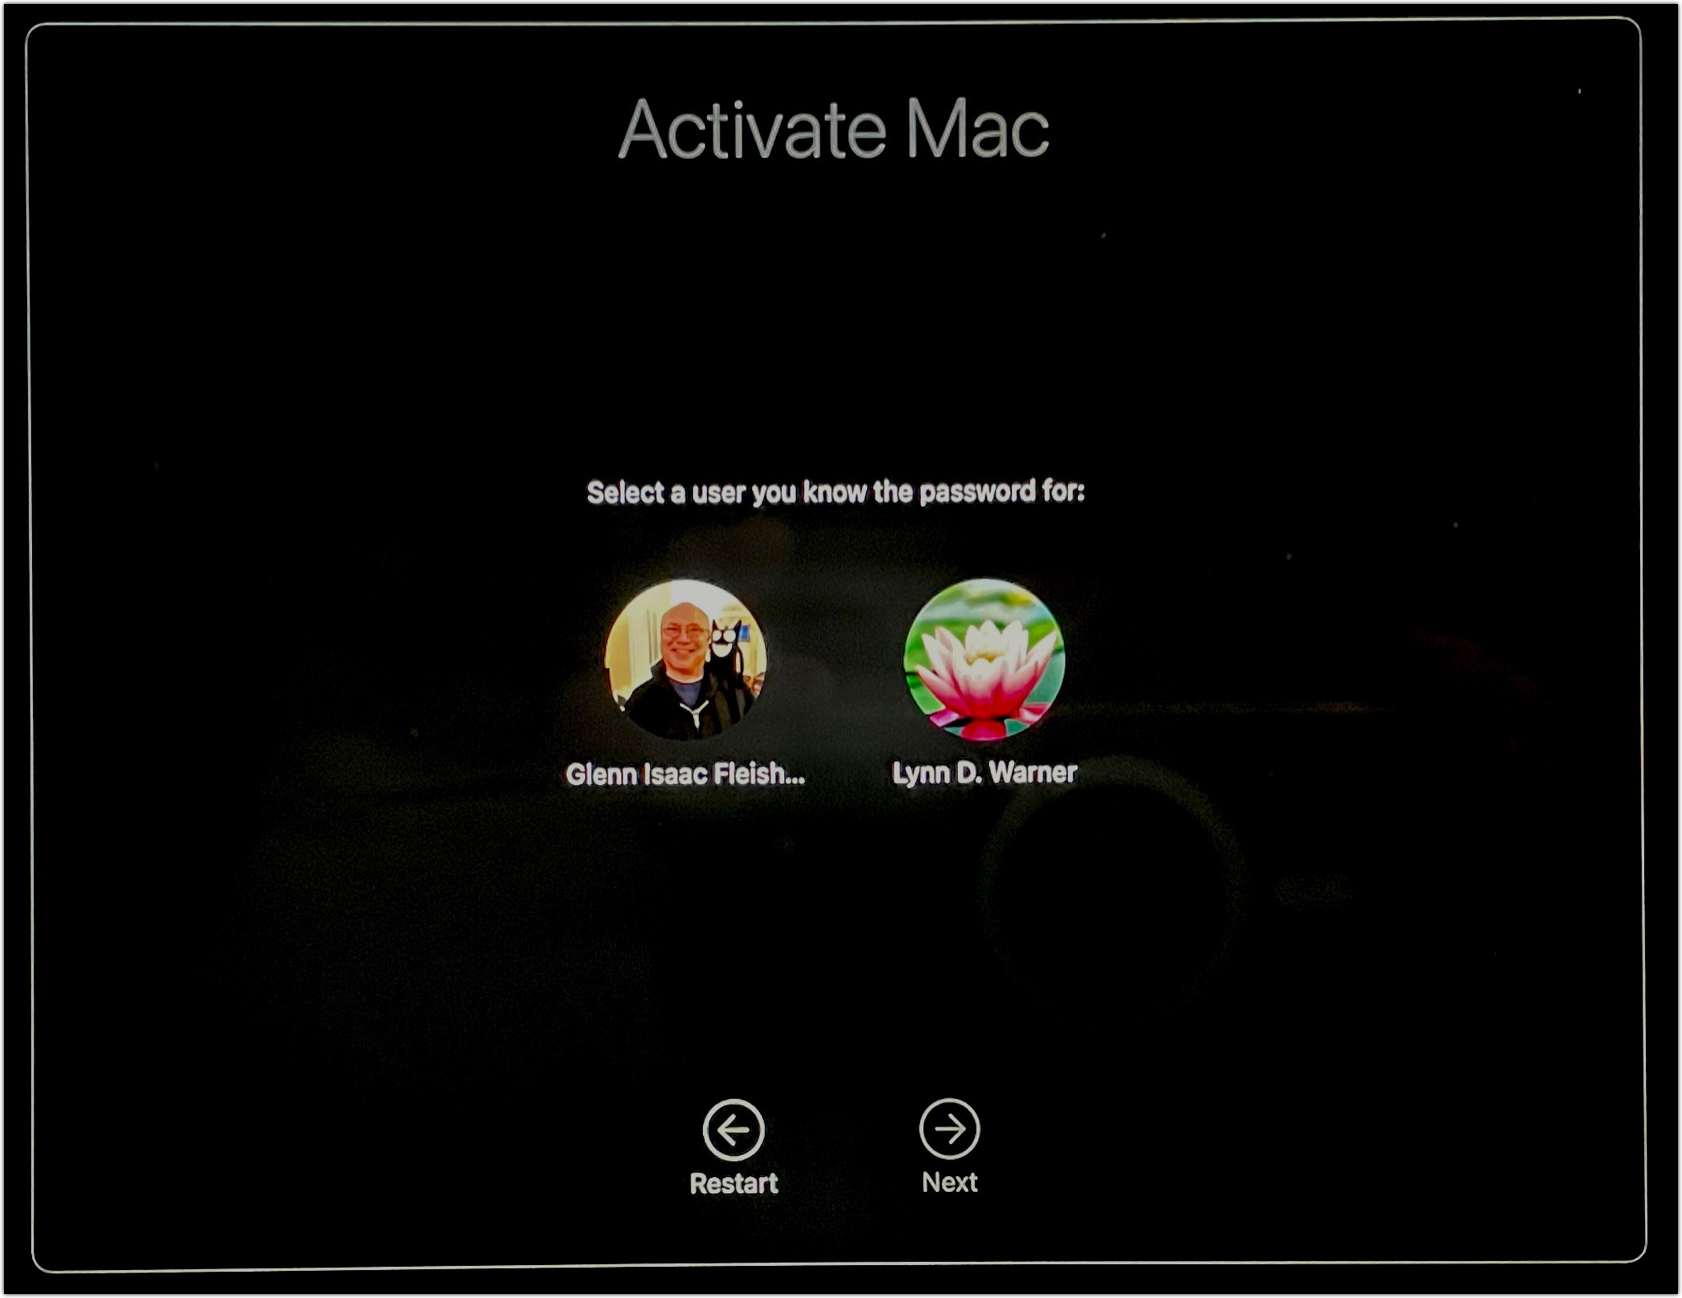
You’re next prompted to enter the Apple ID account name and password that you use for iCloud on the device (Figure 53). Click Next to proceed. It may take a moment for Apple to finish the Apple ID/iCloud stage, after which it tells you “Your Mac is activated” and offers a Restart button you can click. You then log in as normal.

Erase This Device
The last resort in some cases (or first in others) is Erase This Device, which remotely wipes all the user data on the Mac. It can also be used to erase an iPhone, iPad, iPod touch, or Watch.
An erased device with a Secure Enclave processor with Find My enabled before erasure and remains associated with an Apple ID cannot be unlocked by someone who has it in their hands without the account password, due to the Activation Lock feature mentioned earlier.
The erase option also lets you display a message on a Mac (plus a phone number on mobile devices that can be called without unlocking) so the person with your device can get in touch. The device is essentially useless without the password.
It’s a multi-step process to prevent accidental erasure; you can cancel at any stage until step 6:
In the Find My app, tap Erase This Device.
Everything will be erased! Tap or click Continue (Figure 54).

Figure 54: This step seems like you’re about to erase your device immediately, but there are more steps ahead. On Macs without a Secure Enclave processor, you’re prompted to enter and confirm a lock code, because the erase operation may not happen instantly.
For an iPhone or iPad, optionally enter a phone number at which you can be reached after it’s erased, and tap Next.
On any device, enter a message you want to appear after the device is erased (and during the erasure process) and tap Erase.
Enter your Apple ID password. If this is another person’s device, accessible via Family Sharing, enter their Apple ID password.
Tap Erase, and the remote device is erased—there’s no going back!
As with locking a device, Apple Pay is suspended for that device if it has a Secure Enclave processor and any cards activated on it.
If the device is online, the Erase action immediately wipes all your data off it. If it’s offline, the erase begins as soon as it next comes online through any networking method.
The erasure can happen slowly or quickly:
With FileVault enabled or on a Mac with a T2 Security Chip or that uses the M-series Apple silicon, the encryption key that protects your device at a hardware level is thrown away and a few other settings rewritten. Everything is now completely unrecoverable.
The equivalent happens in all iPhones and iPads that can run any of the last few versions of iOS or iPadOS.
On Macs that don’t meet the above criteria, Find My has to restart in recovery mode and run a slower erasure process that’s effective, but is more capable of being interrupted. This may leave data exposed for a period of time.
If you erase your device, and then either recover it or when you obtain a new device, you can restore from your most recent backup.