Explore the Lock Screen
The Lock screen is the first thing you see when you power on or wake up your iOS device, and it contains a wealth of functionality.
Lock and Unlock Your Device
iOS and iPadOS 13 devices are all equipped with either Touch ID or Face ID:
Face ID (iPhones without Home buttons and newer iPad Pro models): Lift the device or tap the screen to wake it and then look directly at the “notch” in the screen.
Note the big lock at the top of the screen. It “unlocks” when your face is recognized, granting full access. After your device is unlocked, swipe up from beneath the bottom of the screen to go to the Home screen. (See Hone the Home Screen.)
If your face isn’t recognized, you are prompted to enter your passcode. You can tap Cancel and swipe up from beneath the bottom of the screen to try Face ID again, but it will be disabled after five attempts.
Touch ID: Lightly rest your finger on the Home button. This takes you straight to the Home screen. If the scan fails, you’ll be prompted to enter your passcode.
To lock your device again, press the Sleep/Wake button. Otherwise, your device locks automatically after the amount of time chosen in Settings > Display & Brightness > Auto-Lock.
Manage Notifications
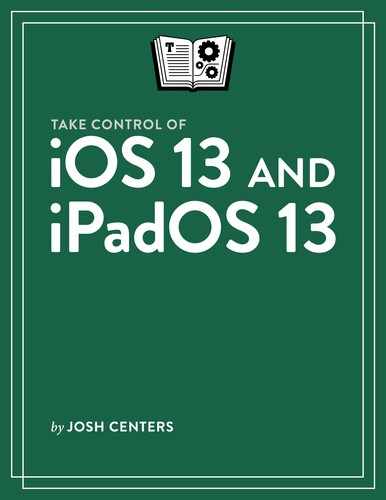
Notifications give you snippets of key status information. While your device is locked, notifications gather on the Lock screen, in the order they are received—assuming you haven’t set them to deliver quietly. To view all notifications, swipe up on the Lock screen to bring up Notification Center.
Notifications from the same app thread group together by default. Tap the group to reveal individual notifications. Tap Show Less to collapse the notifications back into a single group (Figure 8).
Here’s how to work with individual notifications:
Open the notification in its app: Tap the notification or swipe it from left to right to open it in its associated app. For example, tap a message notification to open that thread in Messages.
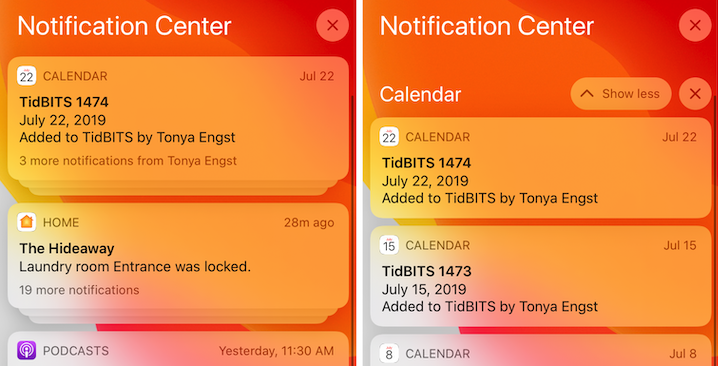
Reveal notification actions: Press and release the notification to reveal quick actions (Figure 9).
Figure 9: Press and release an individual notification to reveal quick actions. Clear a single notification: With quick actions exposed, tap the X
 icon.
icon.Clear all notifications from a single app: Tap the group to expand it and tap the X
icon adjacent to the group’s name.Clear all notifications: Tap the X
icon next to the Notification Center heading.Manage notifications for that app: Press and release a group or individual notification and tap the ellipsis
 . After unlocking your device, you’re shown three options:
Deliver Quietly: Tap this to make it so that notifications from that app appear in Notification Center, but not on the Lock screen. That app’s notifications also won’t cause your phone to buzz, make noise, or light up. If Deliver Quietly is already enabled, this options appears instead as Delivery Prominently, which reverts to the default behavior.
Turn Off: This turns off all notifications from that app. You’re asked to verify before the setting takes effect.
Settings: Tap this to go to the notification settings for that particular app. You can access these at any time in Settings > Notifications > App Name.
Do Other Stuff on the Lock Screen
There are a number of other things you can do directly from the Lock screen.
Check Date, Time, Timers, and Device Status
The current time appears in big type at the center of the Lock screen with the day and date below. If you’ve set a timer with Apple’s Clock app or by using Siri, the day and date is replaced by the remaining timer time. Similarly, if you have snoozed an alarm, you see the remaining snooze time here.
There’s a variety of icons along the top of the screen—on “notched’ devices like the iPhone XS, you open Control Center to see them all. Apple offers a full guide to status bar icons.
Control Media from the Lock Screen
While the screen is locked, you may see playback controls for any media that is playing (Figure 10). If you’re unfamiliar with these controls, see the section on Control Center’s Media Platter.
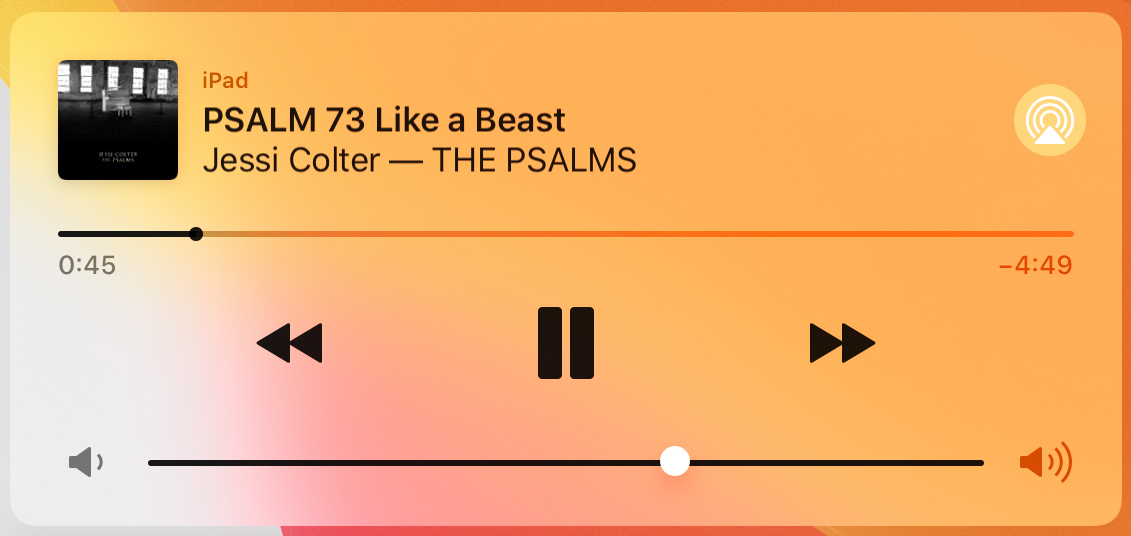
These controls make it easy to pause playback or change the volume without having to unlock the device.
Access Control Center
Control Center offers quick access to common iOS settings and functions. On iPhones with a Home button, access it by swiping up from below the screen. On iPhones without a Home button and iPads, swipe down from the upper-right corner of the screen. See Take Control of Control Center.
Open Camera from the Lock Screen
Control Center gives you Lock screen camera access, but you can access it more quickly by swiping from right to left anywhere on the Lock screen.
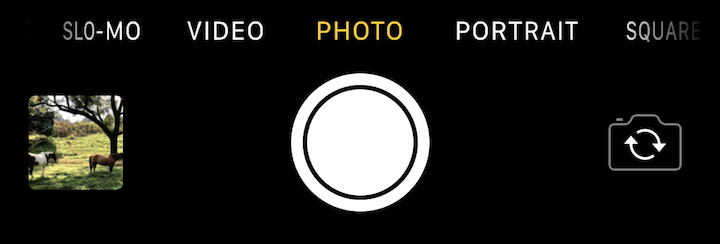
While using the Camera app from the Lock screen, you can see previews of pictures you’ve taken during the current session by tapping the Photo and Video Viewer button. (It looks like a preview of the most recent photo—Figure 11.) However, to view any other image in your photo library, you must unlock the device.
Talk to Siri
While the device is locked, you can talk to and use Siri as usual, but if a passcode is set there are a few limitations (see Set a Passcode). For example, you can still ask Siri for the time or instruct Siri to call your significant other, but you can’t have Siri read your new email messages or open apps without unlocking the device.
Wrangle Widgets
Widgets reside in Today View as well as the first Home screen—see Hone the Home Screen. To access widgets from either of these screens, swipe from left to right.
Add a Widget
It’s easy to add a widget:
On the Widgets screen, scroll to the bottom and tap Edit.
If prompted, scan your finger with Touch ID or your face with Face ID, or enter your PIN.
Scroll to the bottom of the screen to see the More Widgets list and find the widget you want to add.
Tap that widget’s green plus
 button.
The widget’s entry moves into the top portion of the list.
If you like, adjust the widget’s position by dragging the grab handle
 at the right of its entry. Drag the handle up or down.
In the upper-right corner, tap Done.
Delete a Widget
Removing a widget is equally easy:
On the Widgets screen, scroll to the bottom and tap Edit.
Tap the widget’s red delete
 button. Tap Remove.
In the upper-right corner, tap Done.
Make Payments from the Lock Screen
To bring up Apple Pay on iPhones with a Home button, double-press the Home button on the Lock screen. On iPhones without a Home button, double-press the Sleep/wake button. To disable this feature, go to Settings > Wallet & Apple Pay > and turn off the switch for Double-Click Home Button or Double-Click Side Button. Once Apple Pay is on screen, hold your iPhone near the payment terminal to make your payment. See Organize Your Wallet.