TIVOLI GARDENS
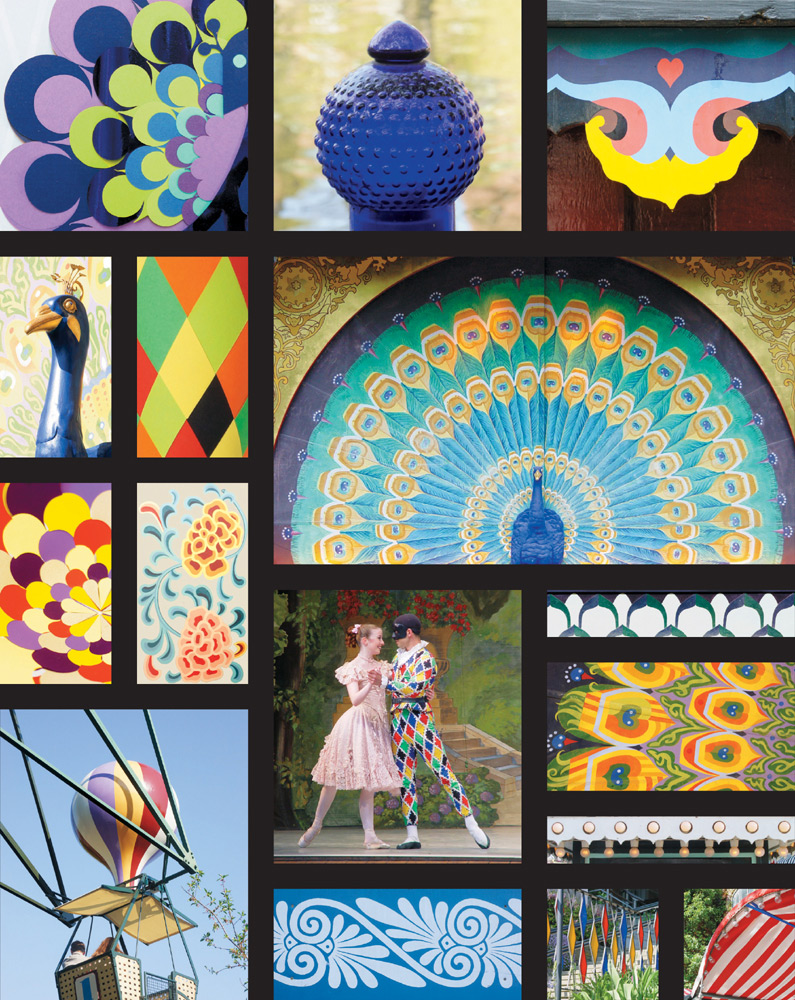
Tivoli in Copenhagen is a world-famous amusement park. The name Tivoli originated in a small, ancient Italian town just outside Rome. The town’s reputation as a stylish resort and the fame of the gardens of the Villa d’Este from the 16th century has inspired the naming of other sites. Among these was the Jardin de Tivoli in Paris (1795–1842) that inspired Georg Carstensen to open the Tivoli Gardens in Copenhagen in 1843. The Danish park features garden styles from throughout history as well as a variety of attractions, including carousels, roller coasters, and carnival games such as the wheel of fortune. This rich visual feast is topped off by the magnificent Chinese-style Pantomimeteatret, or the Pantomime Theatre, which is inhabited by a Danish version of the traditional Italian commedia dell’arte characters and guarded by a beautiful peacock on the stage’s curtain. Renowned Danish author Hans Christian Andersen visited the park on October 11, 1843. Inspired by the Chinese gardens, he immediately returned to his lodgings and wrote the fairy tale “The Nightingale” in only two days. We find Tivoli, now more than 170 years old, with its amazing collection of decorative ornaments and attractions, to be as inspiring as ever.
PEACOCK
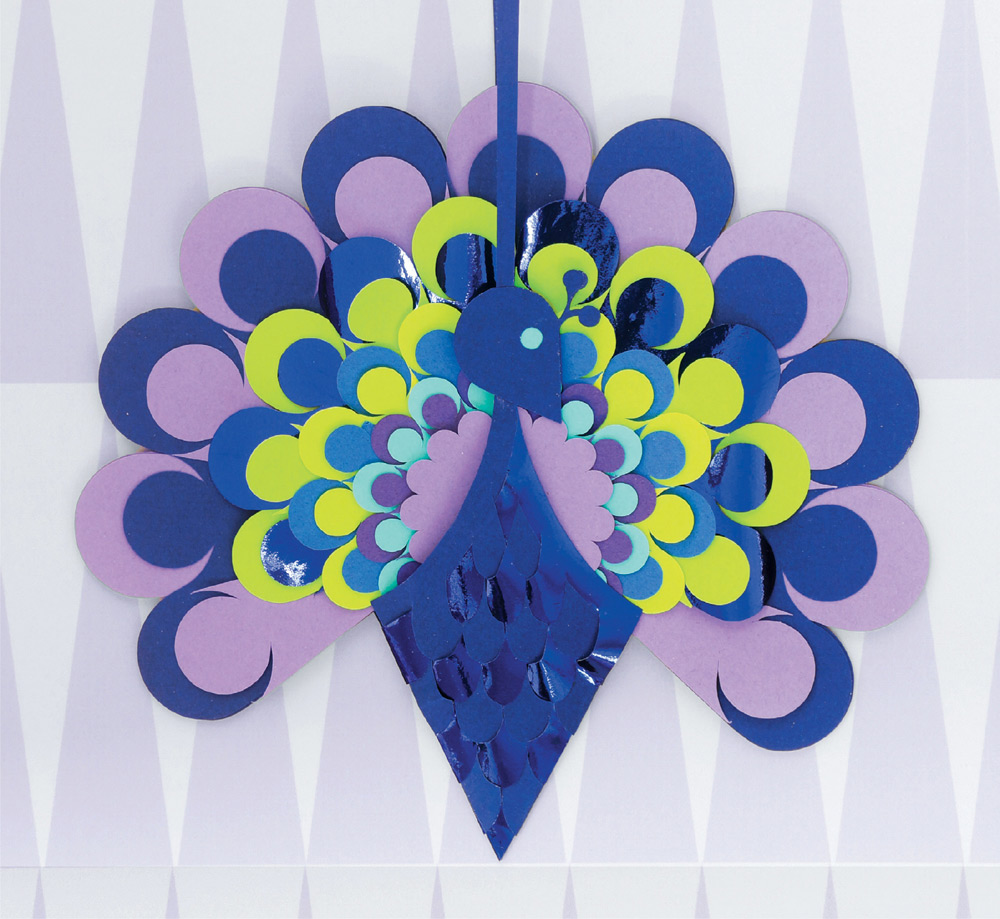
When planning the Peacock, you have the option of using small remains of beautiful paper you didn’t have the heart to throw away. Plan the colors so that you do not use the same color for pieces that will be adjacent to each other in the finished bird. A dark body makes this peacock look like a real peacock; one piece of the woven basket is lovely when made from shiny metallic paper.
The Peacock is made in two parts. One part is a basket consisting of the peacock’s head, body, and a handle. The other part is the peacock’s tail that is dropped into the basket.
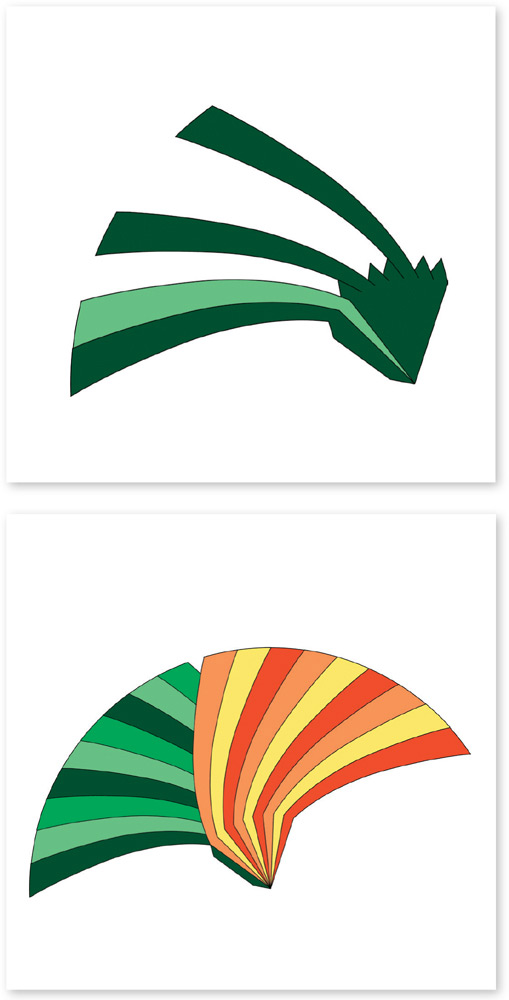
The tail of the Peacock is made from fans slid together in the same way as you prepare the third Basic Triangle Bunting (see page 17), though in this case the stripes radiate from a center.
BASKET
1 Weave the basket from the two D10 pieces following the instructions for the Basic Woven Heart (see page 18).
2 Fix the handle with glue near the top ends so that the edges of the basket and the handle are aligned.
3 For both sides of the basket, fix a D11 head to the handle where it meets the basket. (Note: When you vary the angle of the head, you change the expression of the bird.)
4 Fix a mirrored head to the back side of the head and handle; if you prefer a colored eye (instead of the plain eyehole), glue a small piece of paper in the desired color between the two layers of the head to show inside the eye.
TAIL FAN
1 Slide the following pieces together: both D1s and D2, both D3s and D4, both D5s and D6, and both D7s and D8.
2 Crease all the double fans created in step 1 along the dashed line of symmetry.
3 Pack the fans according to size: the largest D1/D2 fan should be at the innermost position and the smallest D9 should go outside.
4 Align the center of the fans to show the desired pattern (see photo above) and fix the pieces with a little glue on an area somewhat below the center of the fans so that they remain in place. This location will later be covered by the basket, so if the glue makes the paper buckle, it will not be visible.
5 Drop the peacock’s tail in the basket and align it. You may want to secure the tail inside the basket with a little glue.
HARLEQUIN CONE
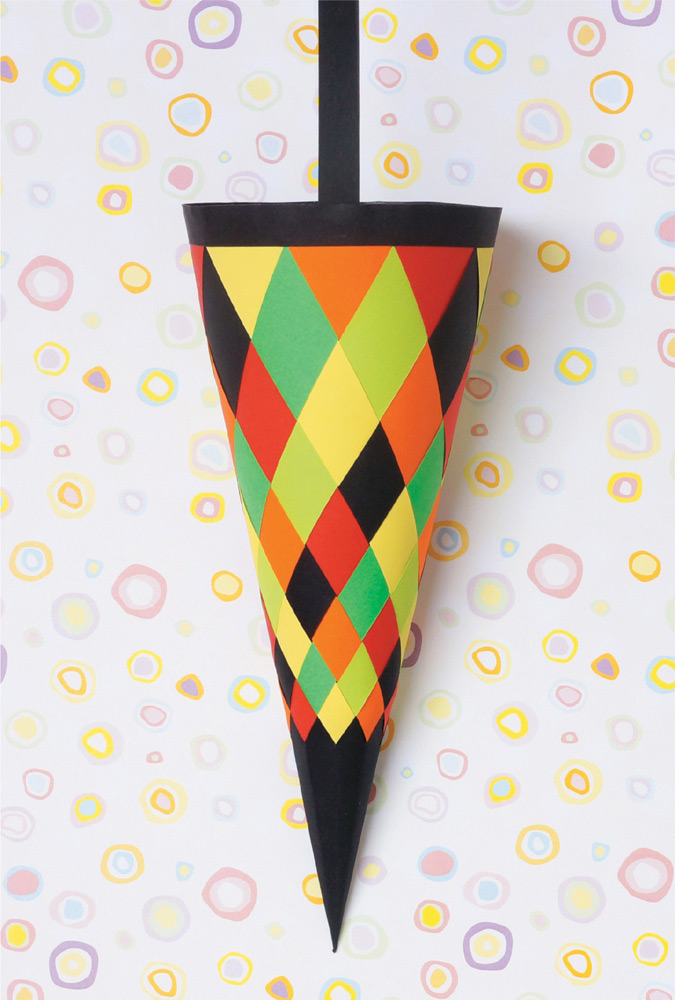
Combine six of your favorite colors to get a Harlequin Cone. The cone is made just like the Basic Cone (see page 28) except that you prepare the parts from individual arms.

1 Make a full cone piece with nine arms by attaching the six O5 pieces one by one, all swirling in the same direction, to the back side of the large O4 piece. Place the O5 pieces between the arms of the O4 piece, alternating colors.
2 Add the next layer of mirrored arms, now swirling in the opposite direction and alternating colors. Form, weave, and finish the cone as explained in steps 3–23 for the Basic Cone (see page 29–31).
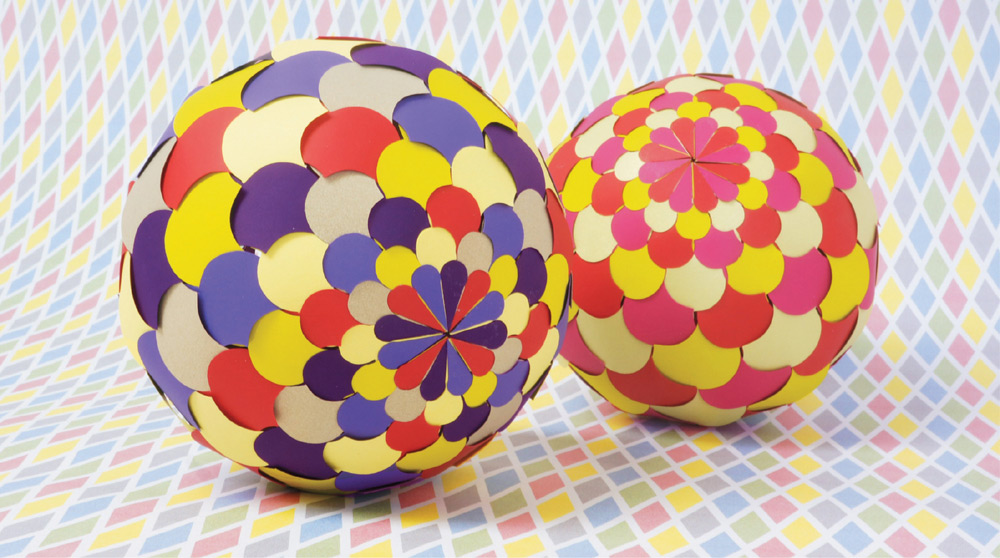
SCALLOPED SPHERE
The Scalloped Sphere may be woven freestyle like the Basic Sphere (see page 32), or you may use a polystyrene (Styrofoam) sphere, 4 inches (10 cm) in diameter, as an inner form. (Note: Scale the pattern accordingly to use any other size sphere.) Using a form inside the finished project is the easiest option for a beginner or if you want a more-perfect sphere.
For freestyle weaving, follow steps 1–7 for the Basic Sphere (see page 32). Consider that the colors of the W/X and Y/Z arms will alternate when you start the sphere.
If you use a polystyrene sphere as a form, start as for the Basic Sphere and then tighten the weaving to follow the shape of the sphere. Fix the project to the polystyrene sphere with straight pins as you weave along but do not perforate the arms; instead pin through the small spaces where the strips meet. After weaving, fix the arms with glue where they meet. You may cover the closure with a circular piece. Finally, remove the pins. The polystyrene sphere remains enclosed in the paper sphere.
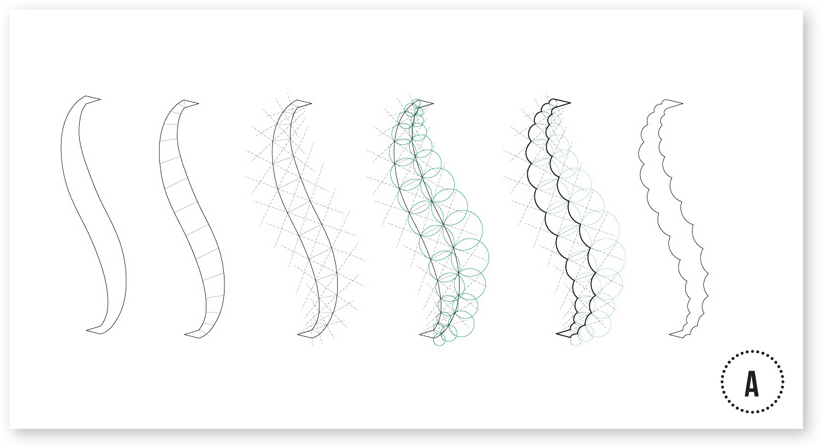
Transforming the Basic Sphere pattern into the Scalloped Sphere pattern requires several steps. First, the pattern is divided into squares, which resemble the finished pattern on a sphere. Diagonals are then drawn; they serve as tangents to the circles that generate the pattern. Using one-fourth of the circles produces the final scalloped sphere pattern (A).
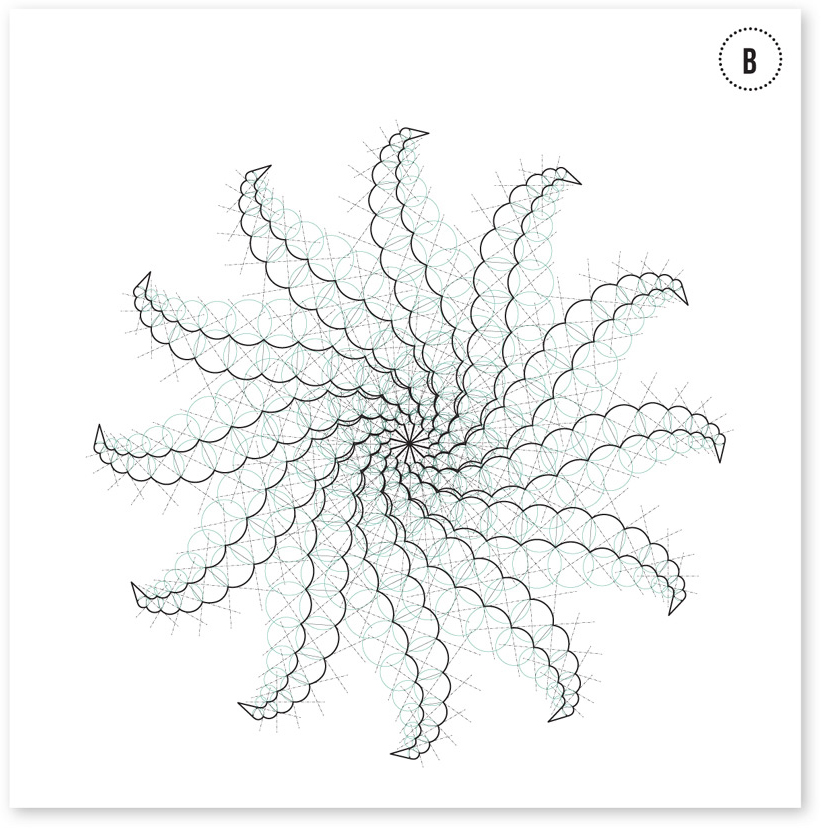
One might think this is a drawing of an amoeba with tentacles surrounding it, but no, this is the Scalloped Sphere when flattened. The lines and circles are the underlying pattern for generating the geometry (B).
LAMPSHADE
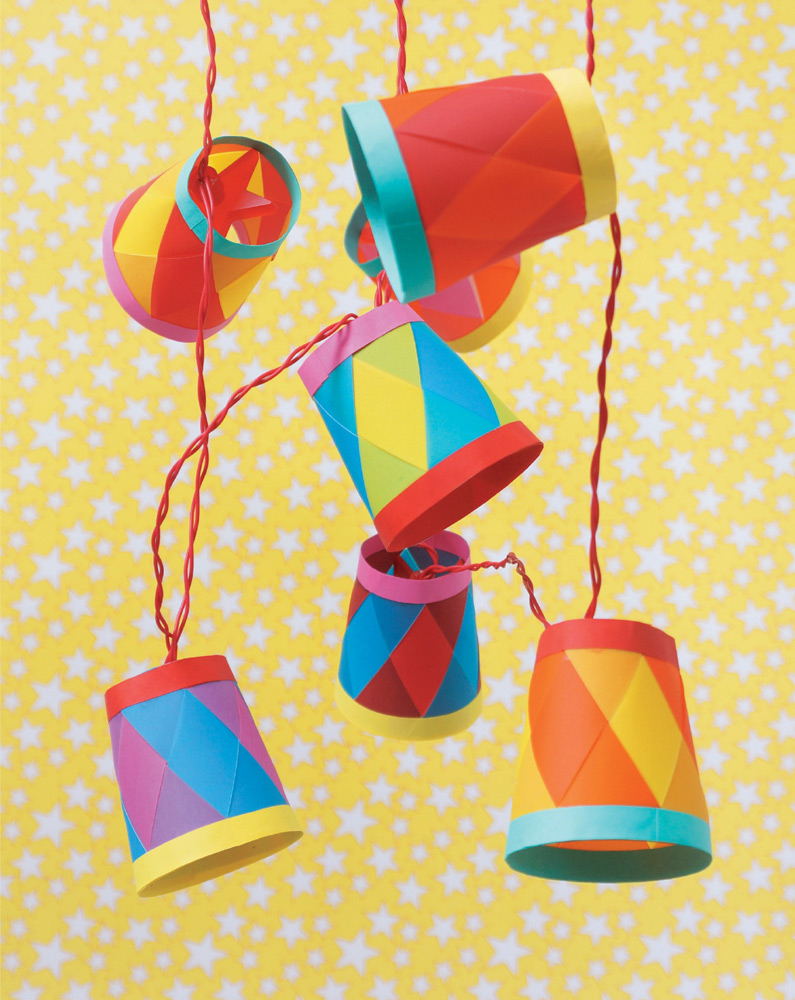
These small lampshades are designed as an embellishment for a string of LED lights. The process is simple and it is perfectly possible to produce ten or even twenty within a few hours. Make them from transparent paper.
1 Place one L8 upper strip flat on the table and fix six L6 arms to this, colors alternating and all arms swirling in the same direction. It is crucial to be very precise in this.
2 Fix the second layer of arms on top of this, arms swirling in the opposite direction and colors alternating so that the same color meets in the large diamonds. The arms must be offset and slid along the edge so that the upper point of each large woven diamond shape starts just below the curved L8 strip (see photo).
3 Add the other curved L8 strip on top of the arms where they are glued and aligned with the first L8 strip.
4 Shape this into a ring and secure with glue on the extra paper of the L8 strips. There must be no gap where the arms meet.
5 Pull out the arms from the inner layer to the front through the closest slit in the outer layer. Fix each arm temporarily with a paper clip. Weave one more row, still fixing the arms with paper clips. Align and tighten the weaving. Secure the woven arms with glue.
6 Glue the L7 strips inside and outside along the lower edge of the lampshade guided by the points of the large, fully woven diamonds.
7 Trim the edges of the lampshade if necessary.
8 Inspect your string of lights and figure out how to attach the lampshade. If the light fixture is not large enough to keep the lampshade in place by itself, make two small holes in the upper rim of the shade and tie it to the wires with a piece of string.
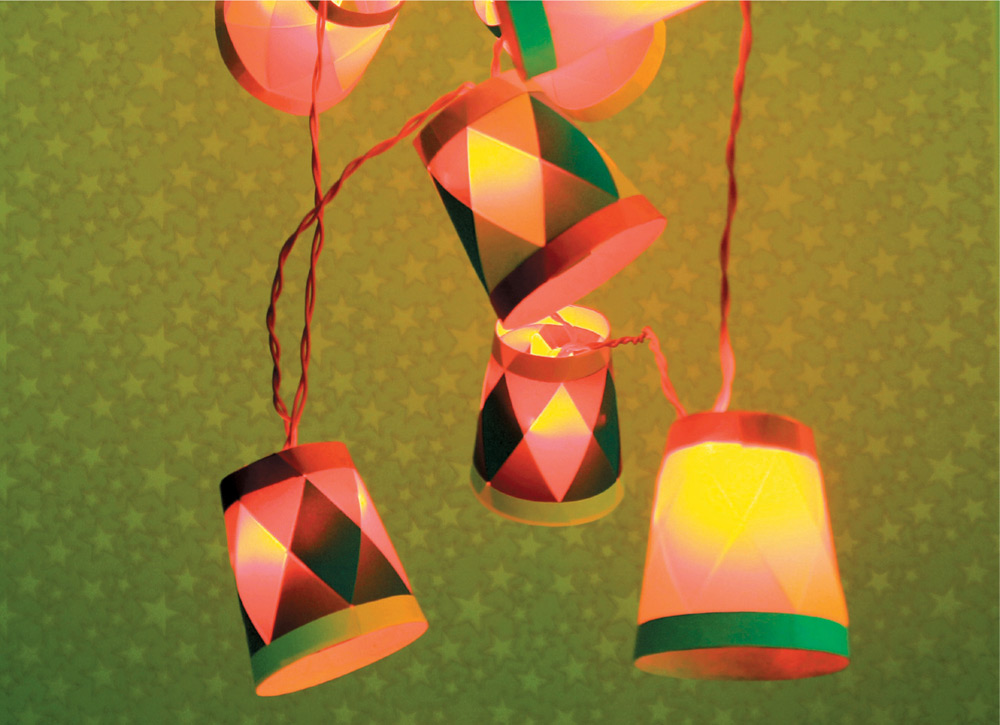
The lit lamps will look most colorful if the transparent-paper arms are woven with same-color arms in the large diamonds. If not, the lampshade will present the same color all over when the light is turned on. Consequently, the colors of the L6 arms must alternate in the large parts to be woven. The L6 arms are the same shape as the upper part of a cone; they are woven following a simplified process like the one for the Basic Cone (see page 28).
ZEPPELIN
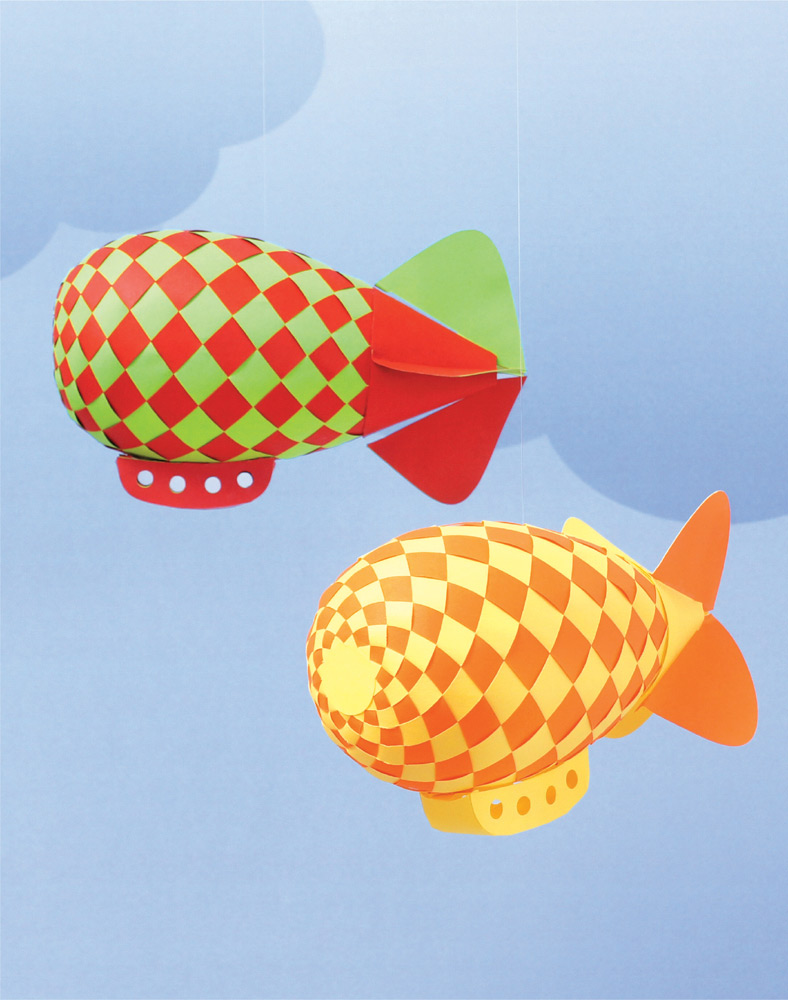
The Zeppelin may fly on its own or be accompanied by other zeppelins in vivid colors.
1 Fix the two T18 pieces in color × with glue at the circular center part to form one swirling piece with twelve arms. Do the same for the two mirrored pieces in color Y.
2 Weave the Zeppelin as indicated in steps 3–6 for the Basic Sphere (see page 32). The form will bend so that the visible central star at the front end will be color X. Weave as much as possible. When everything is woven and lined up, the end of the arms should make an exact overlap and fit two by two. Fix them with glue.
3 Using glue, fix the arched S10 strip into a conical band or ring. The size of the overlap is marked with a small notch. Fix the ring to the open end of the project following the shape of the body. The strip should start just above the points in color Y.
4 Crease the small flaps on the T20 gondola sides up on both sides. Shape T20 to follow the curved lower edge of the T21 gondola bottom piece. Using glue, fix the T21 pieces on T20’s flaps to form the gondola.
5 Glue the gondola to the belly of the zeppelin using the four flaps on the top and ends of the gondola.
6 Form the S11 piece into a cone shape and secure it by applying glue to the flap.
7 Strengthen the T19 tail fins by gluing two together in different colors. Crease the small triangular flap at one corner of the fin as indicated by the short notches. Color Y must face the outside.
8 Find the two sets of four small notches at the two edges of the completed tail cone (S11).
9 Next, add the T19 fins to the tail cone one by one. Smear glue on each fin’s small triangular flap. Insert the long narrow strip of the fin into the tail cone’s top using the small notch in S11 to keep it in place. Press down the small triangular flap onto S11 using the notch in the wider edge of S11 as a guide.
10 Smear glue on the arched strip at the zeppelin’s tail. Smear glue along the inside of the tail cone’s edge. Place the tail cone so that it covers the arched strip, align the fins, and hold the pieces in place until the glue dries.
11 To hang the Zeppelin, thread the needle with a length of string. The string must be secured at the exact point of balance, which is along the line of diamonds in color × running on top of the Zeppelin. Count six diamonds from the front end; the point of balance will be between the sixth and seventh diamonds. Insert the needle and string into the Zeppelin at the point of balance and pull it out through the center hole in the tail cone. Remove the needle and tie the small bead to the string. Pull the bead into the Zeppelin at the point of balance by pulling on the other free end of the string. Tie a loop on the string to hang the Zeppelin. Now you are ready to fly.