
When you are building a chatbot with Dialogflow, you might notice that at some moment, you will reach the point that your chatbot performs less and becomes hard to maintain. If you have 1500 intents in one agent, likely you will have intents with training phrases that are quite similar to each other. The way you can solve this is in the Dialogflow settings panel, the ML Settings tab, to change the Machine Learning threshold for the confidence score. If the returned value is less than the threshold value, then a fallback intent will be triggered, or if there are no fallback intents defined, no intent will be activated. This might solve your problem for then, but what if your agent has more than 2000 intents?
And how would you maintain that, especially when working with large teams?
Imagine you would work for a large enterprise, such as a bank. The chatbot needs to address Bank Accounts, Mortgages, and General Banking questions. When you add all these intents to one Dialogflow agent, you will likely have intents colliding with each other. In fact, at a traditional bank, people work in teams. There is a team working on chatbots for Bank Accounts vs. Mortgages and so on. These teams don’t know about the existence of each other’s Dialogflow intents.
Data governance is essential. The mega-agent feature could solve these problems because each team can work on their own chatbot. This means rapid changes without breaking the training phrases from other teams, better debugging, version control, and agent reviews. But for the end user, it looks like one single chatbot which can address many features through one interface.
As with all Dialogflow agents, you can only create only one agent per Google Cloud project, so each sub-agent and the mega-agent will be associated with its own Google Cloud project. The small talk feature won’t work, but you can include Knowledge Base Articles per sub-agent. A mega-agent can have at most ten sub-agents. Each Dialogflow agent can have 2000 intents. So this will give you a maximum of 20k intents.
Creating a Mega-Agent
The mega-agent feature allows you to connect various sub-Dialogflow agents to one single Dialogflow agent connected to your integration channels, so your users can interact with one chatbot interface instead of many.

An architectural overview of how a mega-agent works
- 1.
Create a new agent from the dropdown menu under the logo. (See Figure 9-2.)
You will give the new agent a name such as mega-agent-media-retailer and then flip the switch, Set as mega-agent, then hit save.

Setting up a mega-agent
- 2.After you have created the mega-agent, you will see a new menu item, Sub Agents, in your Dialogflow menu. Additionally, if your mega-agent name doesn’t take too many characters, you will see the word “MEGA” next to the agent name. (Notice Figure 9-3.)
 Figure 9-3
How a mega-agent is shown in the menu
When it’s your first time setting up the mega-agent, you will need to assign the sub-agents. Click No sub-agents yet. Add the first one.
You will get in a new screen (Figure 9-4), and you can start to select other agents (from Google Cloud projects) that are available to your Dialogflow user account (Google identity). While doing so, you can also see the Google Cloud project name, select the Dialogflow environment, or include/exclude the knowledge base feature. Hit save.

Defining the sub-agents
- 3.
The mega-agent will need to get access to each sub-agent, and we can do this via the IAM roles page in the Google Cloud Console (Figure 9-5) by adding the service account email address to each sub-agent. Here’s how we do this.
While in Dialogflow, make sure the mega-agent is still active. Click the settings cog icon next to the mega-agent name, which will open the settings panel. When you scroll down in the General tab, you will see the project ID, which you can click. This will open the Google Cloud console. Navigate to the IAM & Admin ➤ Service Accounts page.
Copy or make a notation of the mega-agent service account address, for example: Figure 9-5
Find the mega-agent service account address in the Google Cloud console
dialogflow-<somecode>@mega-agent-media-retailer-<some code>.iam.gserviceaccount.comFor what’s worth, this project will need to have the Dialogflow API enabled. If it’s correct, it’s already enabled by default, but it’s better to double-check this. First, you select the project in the blue top bar (Figure 9-6) and use the search form to search for Dialogflow API . When you see the blue Disable API link, you will know it’s enabled. Figure 9-6
Make sure the Dialogflow API is enabled
- 4.
We will repeat step 4 for each sub-agent by clicking the Project ID in Dialogflow to open the Google Cloud console for the sub-agent projects. But now, we will navigate to the IAM & Admin ➤ IAM page.
Click the Add button at the top.
In the next slide-out screen, you can paste the service account email address (from step 4, see Figure 9-7) as a member. As a role, use the filter to search for Dialogflow API Client . (Project Owner, Project Editor, or Dialogflow Admin roles would work as well, but for security reasons, it’s always best to give the least/absolute necessary permissions to your service accounts.)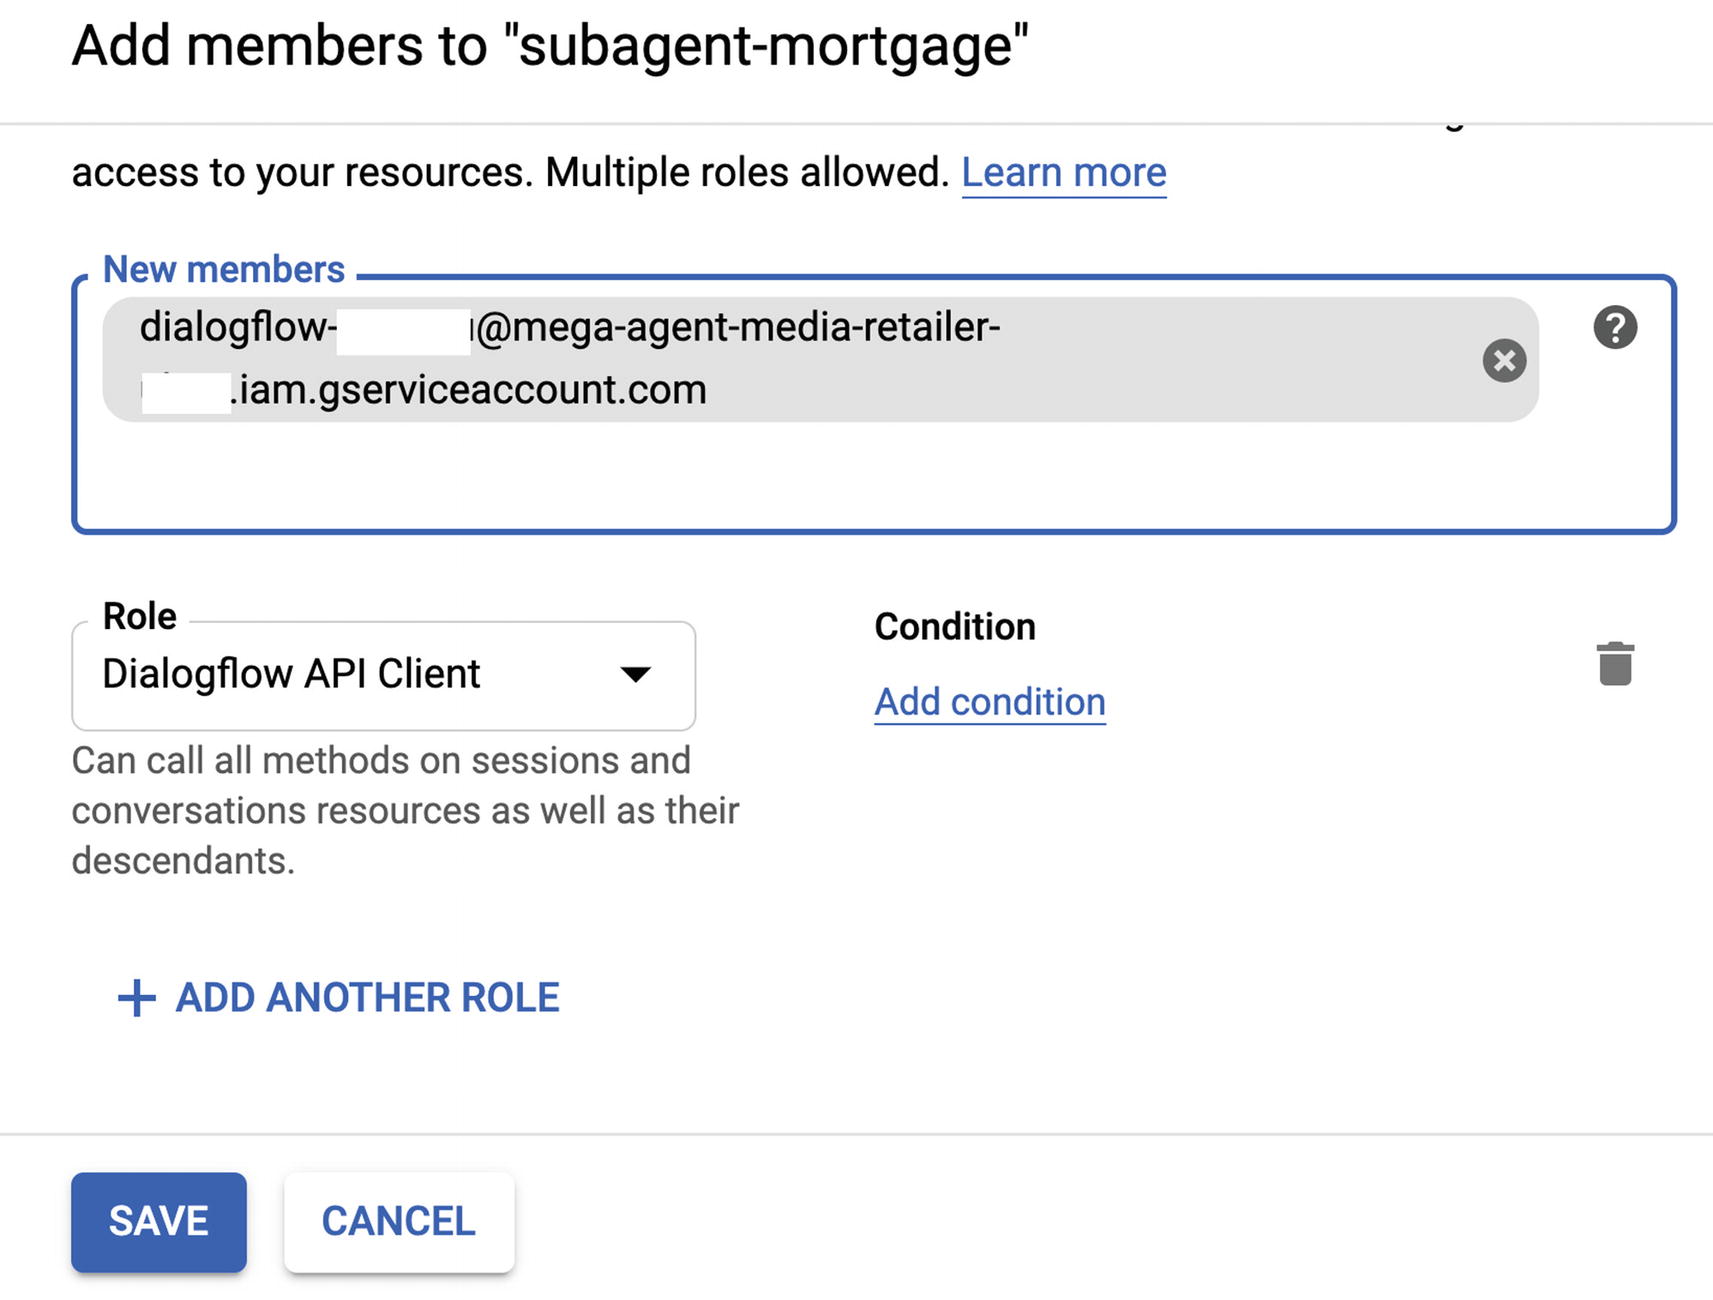 Figure 9-7
We add the mega-agent’s service account address to each sub-agent’s IAM settings, with the Dialogflow API Client role
Repeat this step for each sub-agent and hit Save.
- 5.
From here, you can test your mega-agent in the Dialogflow simulator. However, if you want to integrate this into a real application, you will likely need to download the service account to your local drive. (See Chapter 10.)
To test the mega-agent feature in Dialogflow, make sure you are still in the mega-agent project. You can start typing questions in the simulator like“What’s your favorite videogame?” It will return the response from the video games sub-agent.
“What movies are out on DVD?” It would return an answer from the movies sub-agent.
If you want to use the mega-agent feature while working with integrations such as the Google Assistant, you will need to add the IAM role Dialogflow Service Agent to the Service Account of each agent (mega and subs).
Using the SDK
When you detect an intent via the SDK, you would make a detectIntent call and use the mega-agent’s project ID. Dialogflow will consider all of the sub-agents, and the best response from the sub-agents is returned.
How Billing Works
The pricing is based on the number of intents used to fulfill a user request. If a request explicitly specifies sub-agents, this is the sum of all intents for the supplied sub-agents. If a request does not specify sub-agents, this is the sum of all intents for the mega-agent’s sub-agents. Thus, when any request is made with the potential for any one of N intents as a match, all N intents need to be examined. Dialogflow has to search through all N of those intents, so when N is large, the price will be increased.
Summary
This chapter contains information about mega-agents. Imagine you are working in a large team, and you want to orchestrate multiple chatbots through one chatbot interface. With the mega-agent feature, you can create sub-agents and link them all together. This is great for data governance, but also you can 10x your intent limit.
The source code is available on GitHub via the book’s product page, located at www.apress.com/978-1-4842-7013-4.
_mega-agent-media-retailer
_sub-agent: movies
sub-agent: dialogflowcookbook (videogames) (_dialogflow-agent)
Further Reading
Dialogflow documentation on mega-agents