
C H A P T E R 9
![]()
iOS Development with SQLite
You might be a seasoned SQLite user or developer, or perhaps you're reading this book as your first foray into the SQLite world. Regardless of your background, you've almost certainly been using SQLite every day without even realizing it. That's because SQLite is one of the most popular database facilities used in a huge range of mobile devices, from iPhones and iPods to the latest tablets, iPads, media players, and more.
In this chapter, we'll take a slightly different angle on developing with SQLite. We'll focus our coverage on Apple's implementation and support for SQLite across its entire fleet of mobile devices. Where previously we might have referred to this as “iPhone development,” Apple has unified the naming for its operating system on mobile devices under the name iOS.
Yet another chapter on showing how one API maps to another would likely leave you feeling a little underwhelmed, because by now you're probably able to pick up many aspects of SQLite wrappers quickly and easily. We will instead provide both coverage of the iOS SQLite technology stack and also focus our examples on building a real, working iOS SQLite-based application. You will be the envy of trivia night and quiz show aficionados when you arrive sporting your very own personally coded Seinfeld food trivia iOS app! We'll call it iSeinfeld…what else?
We'll also cover some of the developer considerations required for successfully maintaining iOS applications on a device over time.
Prerequisites for SQLite iOS Development
To do any development work with SQLite for iOS, you'll need to equip yourself with the necessary tools. These tools aren't strictly speaking solely for the benefit of SQLite development: once completed, you'll have a full iOS development environment for building both SQLite-focused and other Objective-C applications for iPhones, iPods, and iPads.
The three broad steps you need to complete are as follows:
- Sign up for the Apple Developer program.
- Download and install Xcode and the Apple IDE.
- Download and install the iOS SDK.
We'll cover each of these very briefly so that the SQLite work can begin!
Signing Up for Apple Developer
To develop and publish applications for the iPad, iPhone, or any other future “i” devices, you need to sign up to Apple's developer program. Ordinarily, we'd just mention this in passing and leave you to your own devices to get signed up. However, it's worth pointing out one nuance of the sign-up process that might, at first glance, appear to dissuade many budding iOS developers.
Depending on which page you read on the Apple Developer web site, it can appear that you need to sign up for a $99 iOS Developer Program membership. Notably, this is displayed prominently on the iOS Developer home page, http://developer.apple.com/programs/ios/. Although it is true that you need to buy such a membership to eventually distribute applications via the iTunes store (and jump the various hurdles of application approval), you only need to register as an Apple developer in order to gain access to the tools, SDKs, and so on, for iOS development.
Simple registration as a developer is free! It can be a little confusing when following the links on the Apple site, but at the time of writing this book, if you head straight to http://developer.apple.com/programs/register/, you'll have no problems signing up.
Naturally, if you come to love building SQLite-based iOS apps, you can upgrade your registration at any time to qualify for distributing your applications via iTunes.
Downloading and Installing Xcode and the iOS SDK
Once you've signed up as an Apple developer, you need to download Apple's integrated development environment, known as Xcode, and the iOS SDK. In another of Apple's quirks, the iOS SDK includes Xcode. That means you don't need to download Xcode and a separate SDK. The iOS SDK includes bundled versions of SQLite, which we'll discuss shortly, so you also can avoid downloading and maintaining separate versions of SQLite libraries if you choose. However, this bundled approach can also can trick first-timers to Apple's iOS development world, because one's instinct is to download Xcode as the IDE you plan to use and then add in the iOS SDK. You'll find yourself needlessly downloading a few extra gigabytes of software if you take this approach.
Apple makes downloading the iOS SDK (with the included Xcode) straightforward. Once you log in with your developer credentials, follow the download link on the developer home page, and choose the option Xcode 3.2.4 and iOS SDK 4.1. This should download a file named xcode_3.2.4_and_ios_sdk_4.1.dmg, which is approximately 3.3GB in size.
![]() Note The current 3.2.x releases of Xcode and 4.x releases of the iOS SDK will only work on Apple machines running Snow Leopard or newer releases of OS X. For those of you still running Leopard (10.5.x) or older, Apple does make available earlier compatible versions of Xcode and iPhone SDKs (as they were called). Searching for these can be a hit-and-miss affair. If you have difficulty finding them on the Apple site, we suggest a Google search of the Apple forums, where avid developers keep track of where Apple moves the older
Note The current 3.2.x releases of Xcode and 4.x releases of the iOS SDK will only work on Apple machines running Snow Leopard or newer releases of OS X. For those of you still running Leopard (10.5.x) or older, Apple does make available earlier compatible versions of Xcode and iPhone SDKs (as they were called). Searching for these can be a hit-and-miss affair. If you have difficulty finding them on the Apple site, we suggest a Google search of the Apple forums, where avid developers keep track of where Apple moves the older *.dmg files for earlier SDK releases.
With the iOS SDK downloaded, you can now proceed to installation. Open the .dmg file, and you will be presented with three items, as shown in Figure 9-1. These are an informative “About” file, the SDK installer itself, and a packages directory.
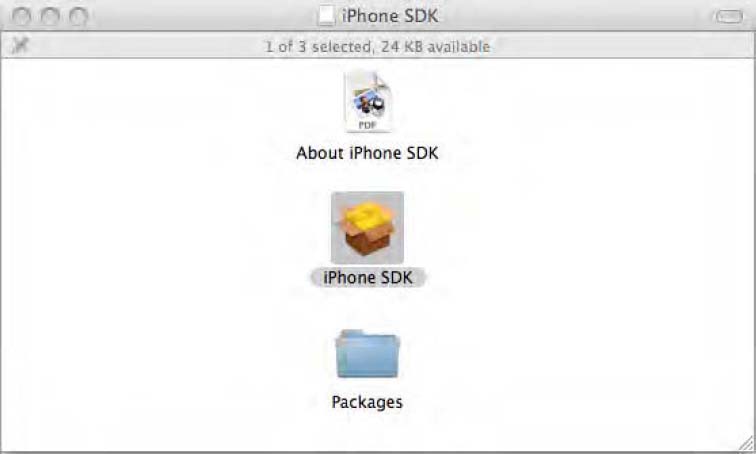
Figure 9-1. Your iOS SDK package contents
Run the iOS SDK installer now (or iPhone SDK installer, depending on the version you used). After a few moments of disk activity, you should see the installer's welcome page, shown in Figure 9-2.
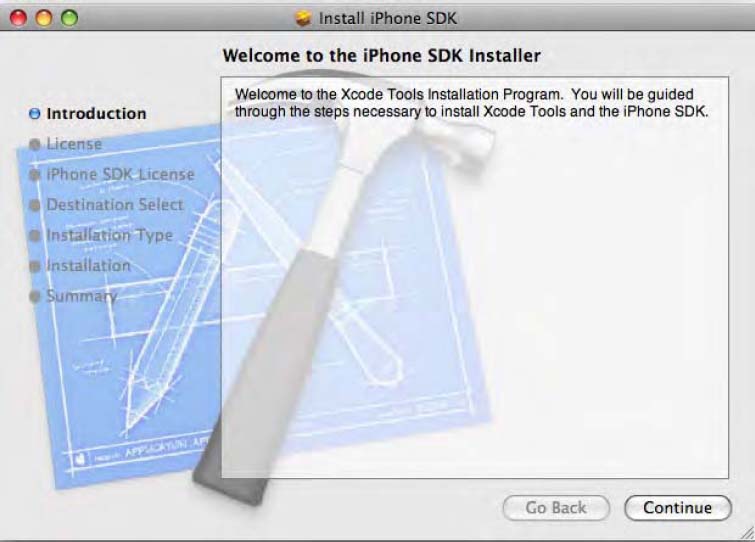
Figure 9-2. iOS SDK package installation welcome
With one exception, there's no need to walk you through the various installation screens. Go ahead and choose the defaults, or add additional options as you see fit throughout the installation. However, it's worth noting some of the options when you reach the Installation Type screen, shown in Figure 9-3.
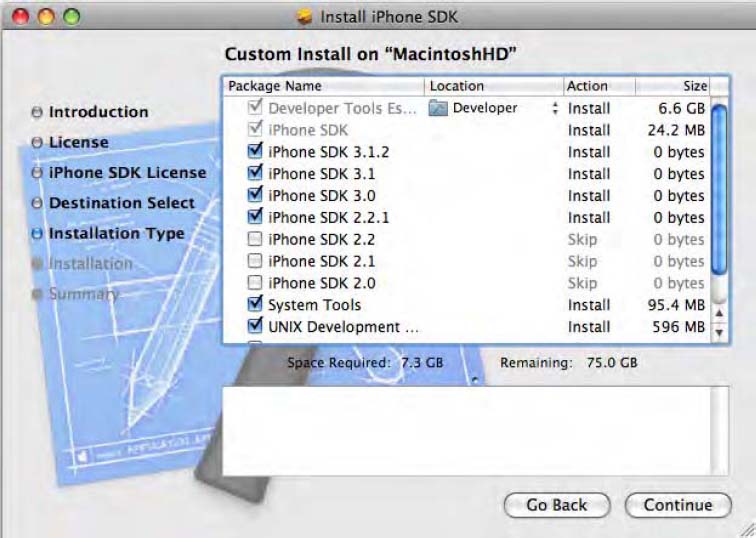
Figure 9-3. iOS SDK installation types
Here, the iOS SDK installer is prompting for historic versions of the SDK to include in the installation. As well as always including the most current version of the SDK, you have the choice of targeting older versions. Why would you want to do this? For the purposes of our SQLite development throughout the rest of the chapter, the defaults are fine. But if you might be doing future development where you need to target older iPhones and iPads, you might want to include the older SDKs. Although this is probably a rare occurrence, people developing for corporate or enterprise environments where the latest iPads are still a future promise might well find they need to target the original iPhone to meet their users' hardware specifications.
Continue from here to the end of the installation, and you should see a satisfying and quite large success message, as shown in Figure 9-4.
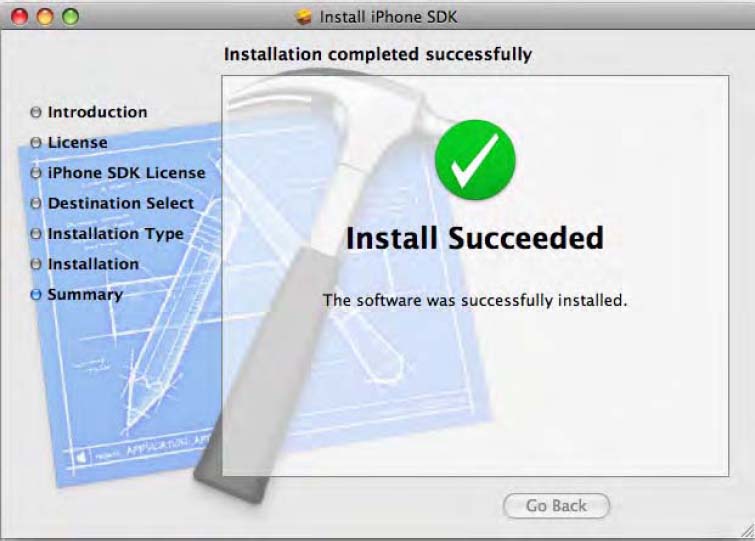
Figure 9-4. A green check mark shows a successful iOS SDK installation.
With your installation complete, you are ready to code your first iOS SQLite-based application.
Alternatives to Xcode
For those brave, experienced, or both, there are alternatives to Xcode for iOS development in general and SQLite-based iOS development in particular. Feel free to use any or all of these if you're already comfortable with iPhone development and prefer them to Xcode.
PhoneGap: An open source development framework for building cross-platform mobile applications.
www.phonegap.comAppcelerator Titanium: Another open source cross-platform framework for mobile applications.
www.appcelerator.com
Each of these has excellent support for SQLite development for iOS and other platforms. Note that Apple have just relaxed their notoriously strict and some would say capricious application rules that penalized coding in different languages or environments and cross-compiling or translating to target Objective-C and iOS. So, you have some more leeway to explore these tools and launch the next great SQLite-based iOS application.
Building the iSeinfeld iOS SQLite Application
With a working development environment now in place, you are ready to build your SQLite-based iOS application. Like all good developers, we'll need some idea of our application's requirements in order to properly design our application and know when it is finished. Here are our very succinct iSeinfeld requirements:
Build an iOS application for iPhones and iPads that shows the foods mentioned in Seinfeld by order of popularity.
For any popular food, show how often the food is mentioned over all shows of Seinfeld.
Indicate the show in which a food first appeared.
That seems pretty simple. The code we develop will cover the core aspects of working with SQLite on iOS systems. We'll cover opening databases, or creating them if they don't already exist; manipulating data within the database; and the all-important UI elements of bringing your SQLite data to the attention of the user!
Here are the steps we will cover in this chapter. We'll try to keep the Objective-C and Cocoa touch–specific aspects to a minimum and highlight the all-important SQLite dimension of the work wherever possible.
- Create a new project in Xcode.
- Add the SQLite framework to the project.
- Prepare our foods database for inclusion in the iOS application.
- Define the classes that map our food data from SQLite to our code and that present that data on the screen for users to see.
- Access and query the SQLite database.
- Put on the final polish before publishing the application.
Let's get started.
Step 1: Creating a New Xcode Project
Launch Xcode to get started. If this is the first time you've started Xcode (or if you haven't changed the defaults), you'll see a Welcome to Xcode splash screen on top of the Xcode environment. Dismiss this for now—in fact, if you don't want to see this again, also uncheck the “show at launch” option.
With Xcode running, choose File ![]() New Project. For our iSeinfeld application, we want to use a navigation-based application as the project template. This is because we'll be using master and detail screens for various representations of our SQLite foods data. Figure 9-5 shows the new project options in Xcode.
New Project. For our iSeinfeld application, we want to use a navigation-based application as the project template. This is because we'll be using master and detail screens for various representations of our SQLite foods data. Figure 9-5 shows the new project options in Xcode.
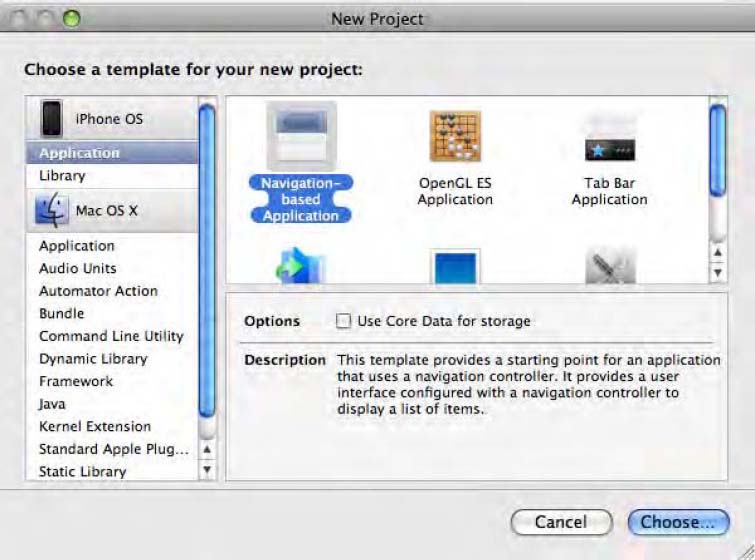
Figure 9-5. Creating a new navigation-based application for our SQLite project
Choose a meaningful name for your project. We've called ours iSeinfeld, but feel free to adopt any memorable or meaningful name. By default, this will be the name displayed for your application on the home screen of iOS devices (though this can be changed later). Your freshly created project should look similar to our project shown in Figure 9-6.
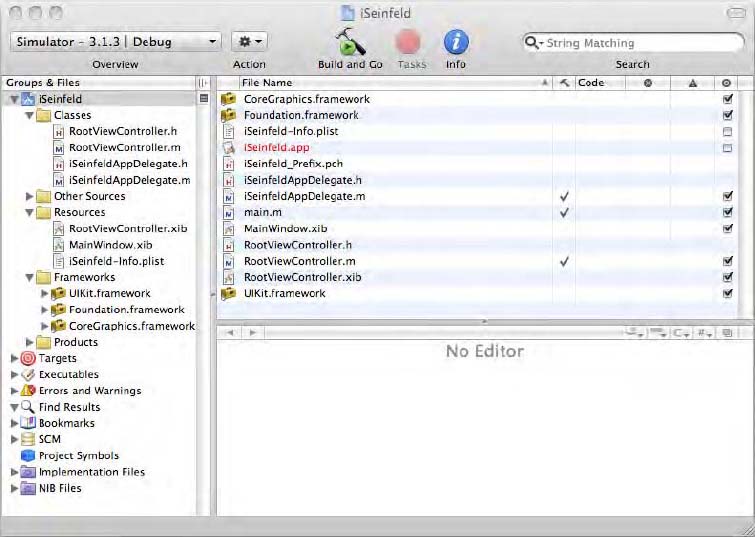
Figure 9-6. The new iSeinfeld project in Xcode
Step 2: Adding the SQLite Framework to Your Project
With your blank iSeinfeld project in place, we now need to add the SQLite library to the list of frameworks so our future code can benefit from, and use, the SQLite API.
From the left pane of your Xcode project, open the Frameworks folder. Ctrl+click and choose Add ![]() Existing Frameworks. In the dialog box, navigate to the directory
Existing Frameworks. In the dialog box, navigate to the directory /Developer/Platforms/
iPhoneOS.platform/Developer/SDKs/iPhoneOSx.y.z.sdk/usr/lib/, where x.y.z is the version number of the iPhone firmware version your Xcode and iOS target. Depending on the options you choose at Xcode and iOS SDK installation time, you may see multiple versioned directories. Our recommendation is to choose the latest (highest) version.
![]() Note If you're using the latest iOS version 4 releases, those directories may change to read
Note If you're using the latest iOS version 4 releases, those directories may change to read iOS in place of iPhone. Don't worry, the underlying library is the same.
From that directory, choose the libsqlite3.dylib entry. You will likely also see a libsqlite3.0.dylib or similar file. The libsqlite3.dylib entry is a soft link to the latest version of the dylib file, in this case libsqlite3.0.dylib. We recommend always choosing the soft link to avoid unnecessarily specific version choices.
Choose this file, and you'll be presented with an options dialog box asking for reference type and text encoding. We don't need any of the alternative behavior offered here, so it's safe to just click Add to continue with the defaults. You should now be returned to your Xcode project. Under the Frameworks folder on the left pane, you should now see the libsqlite3.dylib entry, as shown in Figure 9-7.
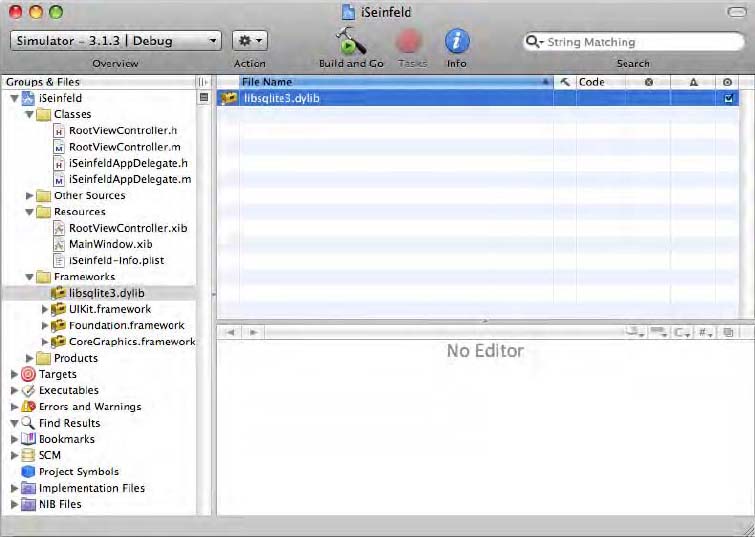
Figure 9-7. The SQLite libsqlite3.dylib library added to the iSeinfeld project in Xcode
Step 3: Preparing the Foods Database
We have two options for getting a working database in place for our project. We can step through the process of creating a new database, creating tables, and inserting data; or we can deploy an existing database for use with our iSeinfeld application.
Creating everything fresh by hand would see us walk through the SQLite API for sqlite3_open_v2(), sqlite3_prepare(), and so on, and countless iterations of sqlite3_exec() and so forth. Because of the very close similarities between C and Objective-C, this would basically be a repeat of Chapter 6. We think that would be a waste of the chapter. More importantly, when you build and release the next great iOS application yourself, you almost certainly will package it with an existing database (though you might well provide features to add new data and work with existing data). We'll adopt this second approach, but we'll also cover the options of creating a fresh database, as well as the typical SQL statements you'd expect for data manipulation within SQLite. We are going to add our foods.db SQLite database to our project so we can get working with our data faster!
If you're following the default directory layout for Xcode, you'll find your iSeinfeld SQLite project in the /Users/user_name/Documents/iSeinfeld directory (where user_name is your username). Copy your foods.db file to this directory in order to keep all of your project data, code, and resources together. On the left pane of your Xcode project, open the Resources folder. Ctrl+click, and choose Add ![]() Existing files. In the Add File dialog box, navigate to the
Existing files. In the Add File dialog box, navigate to the /Users/user_name/Documents/iSeinfeld directory, and choose the foods.db file, as shown in Figure 9-8.
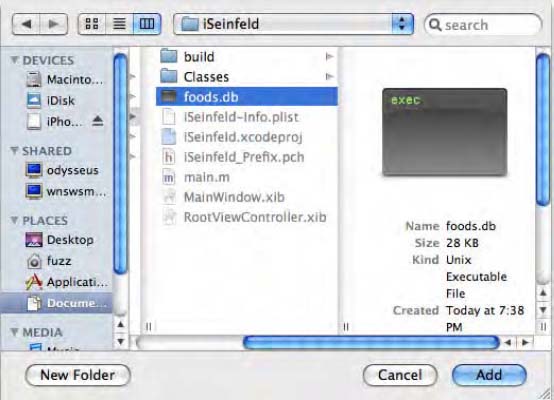
Figure 9-8. Adding an existing SQLite database to your Xcode project
Once again, Xcode will prompt with several options for this file's inclusion in the project. We only need the default behavior here, so click Add to have the foods.db file added to your project. Your Xcode resources folder should now list the foods.db SQLite database, as shown in Figure 9-9.
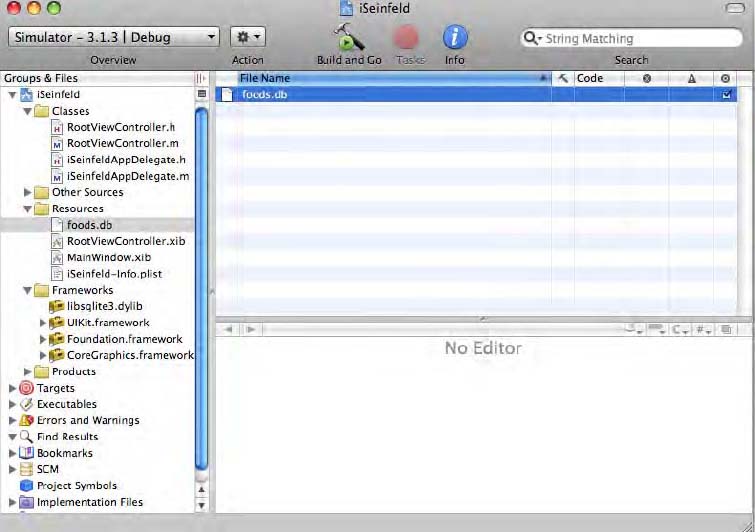
Figure 9-9. The iSeinfeld project with foods SQLite database included as a resource
Your iSeinfeld iOS application now has the SQLite libraries in place and a populated database included in the project. It's time to start coding!
Step 4: Creating Classes for the Food Data
In addition to the default classes created with our new project, we will need two classes to represent the data from our SQLite database as objects within the application. Well need a Food class to represent one kind of food and the data we want to use from foods within our application. We'll also need a view controller class to manage the interaction of our interface (the view) with the model that represents our foods.
IOS ANDMODEL-VIEW-CONTROLLER DEVELOPMENT
The Food Class
Within your iSeinfeld project in Xcode, Cmd+click the Classes folder, and choose Add ![]() New File. Call your new class
New File. Call your new class Food. We want to derive Food from the base Objective-C class and use the NSObject subclass. We'll provide three data members: Name, Popularity, and First Episode. We'll also use a custom init function (think constructor for those familiar with other object-oriented languages) to create a Food instance more easily. Listing 9-1 shows the Food.h header.
Listing 9-1. Food.h
//  Food.h

//  iSeinfield

//

//  Created by Grant Allen on 9/9/10.

//  Copyright 2010 __MyCompanyName__. All rights reserved.

//


#import <Foundation/Foundation.h>


@interface Food : NSObject {

  NSString *first_episode;

  NSString *popularity;

  NSString *name;

}


@property (nonatomic, retain) NSString *first_episode;

@property (nonatomic, retain) NSString *popularity;

@property (nonatomic, retain) NSString *name;


-(id)initWithName:(NSString *)n first_episode:(NSString *)f popularity:(NSString *)t;


@end
At this point, there's no sign of our SQLite API calls, but you can probably already see where the Food class will fit in. Rows returned from our particular SQLite queries will be used as seed data in the initWithName function to create instances of the Food object.
With our header in place, we actually need an implementation. Open the Food.m file, as shown in Listing 9-2, and flesh out the initWithName function to assign the parameters n, f, and t to the instance variables.
Listing 9-2. Food.m
//  Food.m

//  iSeinfield

//

//  Created by Grant Allen on 9/9/10.

//  Copyright 2010 __MyCompanyName__. All rights reserved.

//


#import "Food.h"


@implementation Food

@synthesize first_episode, popularity, name;


-(id)initWithName:(NSString *)n first_episode:(NSString *)f popularity:(NSString *)t {

  self.name = n;

  self.first_episode = f;

  self.popularity = t;


  return self;

}


@end
Pretty simple stuff, even if you've never coded in Objective-C before. For those of you new to Objective-C, you'll notice a @synthesize directive, followed by each of the member variables for our class. That's an Objective-C trick to automatically create getters and setters on your behalf, saving you from the effort of writing six dull methods to do the same thing.
The FoodViewController Class
Our mini-specification for the iSeinfeld application asked us to display detailed information for a given food held in our SQLite database. From our Food class, you can guess that the details will be popularity and first_episode. We need a new class to manage the view of these details (in the MVC sense) and act as the controller with the model. Enter the FoodViewController class. Create a new class as before, but this time choose the UIViewController subclass. Name it FoodViewController. We also will need a View XIB file to act as our canvas for the detail view. Under Resources, choose Add ![]() New File, and from the User Interfaces group choose View XIB. Call this XIB
New File, and from the User Interfaces group choose View XIB. Call this XIB FoodViewController.xib to give you a mental reminder that this UI element is used with the FoodViewController UIViewController class.
Our FoodViewController class needs to define two outlets for the detail data to interface with the View XIB. Listing 9-3 shows the definition of FoodViewController.h and these required outlets.
Listing 9-3. FoodViewController.h
//  FoodsViewController.h

//  iSeinfield

//

//  Created by Grant Allen on 9/9/10.

//  Copyright 2010 __MyCompanyName__. All rights reserved.

//


#import <UIKit/UIKit.h>


@interface FoodViewController : UIViewController {

  IBOutlet UITextView *first_episode;

  IBOutlet UITextView *popularity;

}


@property (nonatomic, retain) IBOutlet UITextView *first_episode;

@property (nonatomic, retain) IBOutlet UITextView *popularity;


@end
We've chosen UITextView as the outlet modifier, because we know we'll be displaying textual data and numbers. The implementation of this class in FoodViewController.m contains a few pages of default methods and many commented-out extras. We won't waste paper showing those. Simply ensure that you import the header file, and in the FoodViewController implementation you synthesize the two member variables, like this:
#import "FoodViewController.h"


@implementation FoodViewController


@synthesize foodID, typeID;


// more template methods etc.

// ...
Your choice for layout for FoodViewController.xib is entirely up to your artistic desire. As a guide, we've created a simple screen with two Text Field elements and two Label elements and wired them up in Interface Builder to the outlets defined earlier. Figure 9-10 shows our finished XIB layout.

Figure 9-10. The iSeinfeld food detail screen in Xcode Interface Builder
Your iSeinfeld iOS application now has the ability to show data from SQLite, but we've yet to actually access the data and use our SQLite API. We can't keep up the suspense any longer. Let's get to the database!
Step 5: Accessing and Querying the SQLite DB
When our iSeinfeld application starts, we want it to find and open our foods.db database. At that point, we can then exercise all our SQLite C APIs to query, control, and otherwise use the database. To find and open the database at launch time, we want to extend the iSeinfeldAppDelegate class that was automatically created with our project. Listing 9-4 shows the changes we've made to the iSeinfeldAppDelegate.h file.
Listing 9-4. iSeinfeldAppDelegate.h File
//  iSeinfeldAppDelegate.h

//  iSeinfeld

//

//  Created by Grant Allen on 9/9/10.

//  Copyright __MyCompanyName__ 2010. All rights reserved.

//


@interface iSeinfeldAppDelegate : NSObject <UIApplicationDelegate> {


  UIWindow *window;

  UINavigationController *navigationController;


    // Details of your database

    NSString *databaseName;

    NSString *databasePath;


    // Our iSeinfeld food array, for storing our foods

    NSMutableArray *foods;


}


@property (nonatomic, retain) IBOutlet UIWindow *window;

@property (nonatomic, retain) IBOutlet UINavigationController *navigationController;

@property (nonatomic, retain) NSMutableArray *foods;


@end
We've outlined the member variables that will house the path and name of our SQLite database. We've also defined an NSMutableArray for holding our collection of foods. The interface definition is straightforward. The devil is in the detail.
We'll extend our applications behavior in the iSeinfeldAppDelegate.m file. Open the file, and you'll see a healthy number of automatically generated methods that have names such as applicationWillTerminate and so on. We want to inject behavior into our application once it has launched, so we'll modify the applicationDidFinishLaunching function.
// ... lots of code above here

- (void)applicationDidFinishLaunching:(UIApplication *)application {


  // Set up our foods database as the databaseName

  databaseName = @"foods.db";


  // Get the path to the documents directory and append the database name

  NSArray *documentPaths = NSSearchPathForDirectoriesInDomains(

                             NSDocumentDirectory, NSUserDomainMask, YES);

  NSString *documentsDir = [documentPaths objectAtIndex:0];

  databasePath = [documentsDir stringByAppendingPathComponent:databaseName];


  // Check for existing database and create if necessary

  [self checkAndCreateDatabase];


  // Query the database for all foods and populate the array

  [self readFoodsFromDatabase];


// ...more code follows
We use several built-in features to find the foods.db SQLite file in the project. NSSearchPathForDirectoriesInDomains, NSDocumentDirectory, and NSUserDomainMask are all constants provided by the iOS SDK to find the paths within the running environment. In this case, these lines are effectively a shortcut to the current application's location, wherever that may be. We end up with the location of the foods.db file in the databasePath variable.
Our logic then splits into code that handles locating the database (or creating it afresh from the project) and code to query our database. The code for locating the database is not really SQLite specific, covering simple file-handling operations. See the iSeinfeldAppDelegate.m file included with the source code for how this works.
Opening the database and using our SQLite APIs to query the data is where the action is at. Our readFoodsFromDatabase function does this work, so let's review it in detail.
-(void) readFoodsFromDatabase {

  // Setup the database object

  sqlite3 *database;


  // Initialize the foods Array

  foods = [[NSMutableArray alloc] init];


  // Open the database

  if(sqlite3_open_v2([databasePath UTF8String], &database) == SQLITE_OK) {

    // Setup the SQL Statement and compile it for faster access

    const char *sqlStatement =

      "select

       count(foods_episodes.episode_id) popularity,

       min(foods_episodes.episode_id) first_seen,

       foods.name

       from foods inner join foods_episodes on foods.id = foods_episodes.food_id

       group by foods.name

       order by popularity desc, name

       limit 50 ";
    sqlite3_stmt *compiledStatement;

    if(sqlite3_prepare_v2(database, sqlStatement, -1, &compiledStatement, NULL)

      == SQLITE_OK) {

      // Loop through the results and add them to the foods array

      while(sqlite3_step(compiledStatement) == SQLITE_ROW) {

        // Read the data from the result row

        NSString *aFreq = [NSString stringWithUTF8String:

          (char *)sqlite3_column_text(compiledStatement, 0)];

        NSString *aPop = [NSString stringWithUTF8String:

          (char *)sqlite3_column_text(compiledStatement, 1)];

        NSString *aName = [NSString stringWithUTF8String:

          (char *)sqlite3_column_text(compiledStatement, 2)];


        // Create a new food object with the data from the database

        Food *food = [[Food alloc] initWithName:aName

                       first_episode:aFreq popularity:aPop];


        // Add the food object to the foods Array

        [foods addObject:food];


        [food release];

      }

    }

    // finalize the statement

    sqlite3_finalize(compiledStatement);


  }

  sqlite3_close(database);


}
Working through that code, you can see some familiar API calls. We start with defining a sqlite3 object named database:
sqlite3 *database;
After defining an array for our foods, we the try to open our database using the sqlite3_open_v2() API call.
if(sqlite3_open_v2([databasePath UTF8String], &database) == SQLITE_OK)
The if construct should be familiar to you regardless of your preferred programming language. And we're looking for the return value SQLITE_OK from the sqlite3_open_v2() call. This example could be straight from Chapter 5, 6, or 7. But note the odd handling of the databaseName variable, which we'd previously defined in iSeinfeldAppDelegate to contain our database's full path and file. Because Objective-C uses NSString as the base string class but SQLite's C API uses standard C-style strings/chars, we need to cast the NSString databaseName to a C string so that the SQLite API understands the database name that it should open. The built-in UTF8String option performs this conversion for us.
With our database open, we then create a sqlite3_stmt object called compiledStatement. This is assigned our query text.
Again, that's eerily like straight C syntax: the differences with Objective-C are not that large once you start working with it. We use sqlite3_prepare_v2 to prepare the statement and sqlite3_step to step through the results.
As we step through the results, we retrieve the column data with statements of the following form (note this is one line of code, split here for clarity):
NSString *aName = [NSString stringWithUTF8String:

          (char *)sqlite3_column_text(compiledStatement, 2)];
You'll notice an old friend here. The sqlite3_column_text() API call is used here to retrieve the text of the “name” column in our results. We can use any of the sqlite3_column_xxx() functions as appropriate. We then perform a conversion from the base C char* data to an Objective-C NSString using the complement of the technique we described for databaseName. stringWithUTF8String will convert our char* to an NSString, and we then assign the result to the aName variable. A similar process occurs for our other results rows.
From here, each Food object is added to our Foods array, and the process continues until our results are exhausted. We clean up by finalizing the compiled statement with sqlite3_finalize() and closing the database with sqlite3_close(). Note that we're only closing the database because we've completed the work we need to perform for our example. In a more complicated or featureful application, you may well leave the database open for further querying and choose to close it only under the applicationWillTerminate event.
Step 6: Final Polish and Wiring for iSeinfeld
There are several final wiring and configuration steps to have our main application launch the FoodView as required when viewing the details of our foods. Rather than include yet more code that isn't SQLite-specific, we'll refer you to the files in the included source code. We've liberally sprinkled comments through these files so you can see the changes we've made. You can also diff them against your vanilla files in Xcode to see these changes.
iSeinfeld in Action!
The suspense is over! We've written the code, worked with our SQLite database, and built a gorgeous user interface to show off at the next Seinfeld trivia night. You can now run your new application in the iOS simulator by choosing Build ![]() Build and Run. This will launch the device simulator, such as the iPhone Simulator shown in Figure 9-11.
Build and Run. This will launch the device simulator, such as the iPhone Simulator shown in Figure 9-11.

Figure 9-11. The iSeinfeld SQLite-based application icon in the iOS device simulator
Go ahead...click your new application to run it, and see for yourself what happens. Our main screen is shown next, in Figure 9-12.
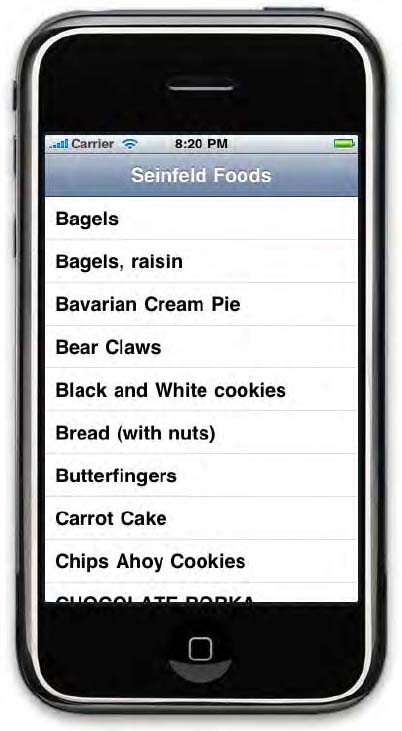
Figure 9-12. iSeinfeld main screen, showing foods from our foods.db SQLite database
![]() Tip If you want to watch the previous SQLite API calls step through their various tasks, set some breakpoints in the
Tip If you want to watch the previous SQLite API calls step through their various tasks, set some breakpoints in the readFoodsFromDatabase function within iSeinfeldAppDelegate.m.
Choose any one of the foods listed, and the FoodView will kick in, controlled by our FoodViewController, to display the details of the food in question. In Figure 9-13, we see the details for Hot Dog—did you know it was the most popular food shown throughout the history of Seinfeld?
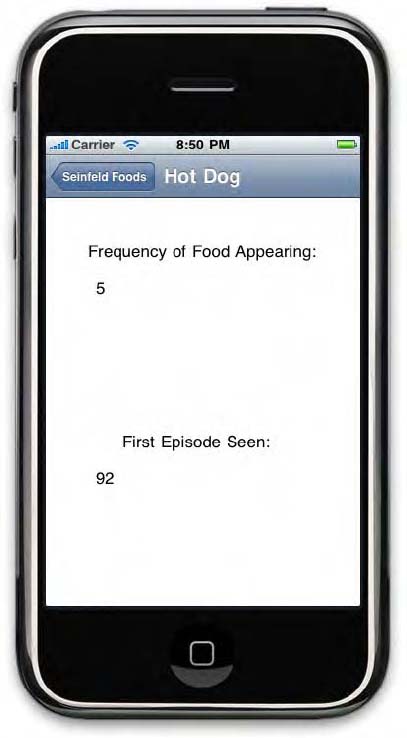
Figure 9-13. iSeinfeld FoodView screen, showing the details for Hot Dog from the database
Now, we'll be the first to admit that our graphic design skills don't set the world on fire. But the key to this application is you can see the data from your SQLite database brought to life through devices like the iPad and iPhone. Our journey with iSeinfeld is at an end. Go ahead and see how many enhancements you can make to your version of the application.
LEARNING ABOUT CORE DATA
Working with Large SQLite Databases Under iOS
The eagle-eyed will have noticed that the query that derives our food frequency for the iSeinfeld app includes the following clause:
limit 50
Why limit this result set? We did this to simplify our application and avoid dealing with operating large SQLite databases and datasets in our very first example under iOS. If we'd attempted to do large database operations during the applicationDidFinishLaunching event, we ran the risk of incurring the wrath of the Watchdog Timer. The job of the Watchdog Timer is to ensure that all applications running on the iPad, iPhone, or iPod behave themselves. This includes preventing poorly performing applications from appearing to hang the device or consume too much processing time for a given action.
Apple describes the role of the Watchdog Timer in the Apple iOS Developer documentation as a system monitor that checks to see how long an application takes to complete its initial startup (among other things). If the application takes too long, the Watchdog Timer will terminate the offending application with exception code 0x8badf00d (get it, “bad food”). Related information will be written to the crash report for the incident.
When you launch your code in Xcode, the Watchdog Timer is disabled so as to compensate for the various overheads that our OS X system will incur, such as invoking debuggers, and so on. This means you may not notice the effect of the Watchdog Timer under Xcode simulation. It's always best to test on real devices to see whether you're running into long-running action issues.
This really boils down to a few common-sense management approaches for working with SQLite applications under iOS:
Don't perform time-consuming queries, or load large databases, during an startup event such as
applicationDidFinishLaunching.When running queries that return large results sets or that will take considerable time, consider breaking them up into digestible pieces of work
Explore the more advanced iOS API features for managing long-running tasks.
At the end of the day, if the Watchdog Timer decides to intervene, you'll see the following (or similar) error:
The application iSeinfeld quit unexpectedly


Mac OS X and other applications are not affected
Under a real iPad or iPhone, instead of this error message, you will see the application attempt to load the main view and abort partway through. You will usually be returned to the home screen. Armed with this knowledge, you should be able to keep the Watchdog Timer a happy hound.
Summary
You've now experienced the trials and tribulations of creating your first (or latest) SQLite-based iOS application. We know your friends and family will be amazed at your newfound trivia knowledge. In all honesty, they'll probably be interested in just how easy it is to build your own iPad or iPhone application with SQLite.
If you do decide to make it big with your iSeinfeld application, be sure to let us know. We'd love to buy a copy of the application from iTunes to add to our collection of iSeinfeld variants.