Chapter Five. Shooting Sports Like a Pro
Better Bring Your Checkbook
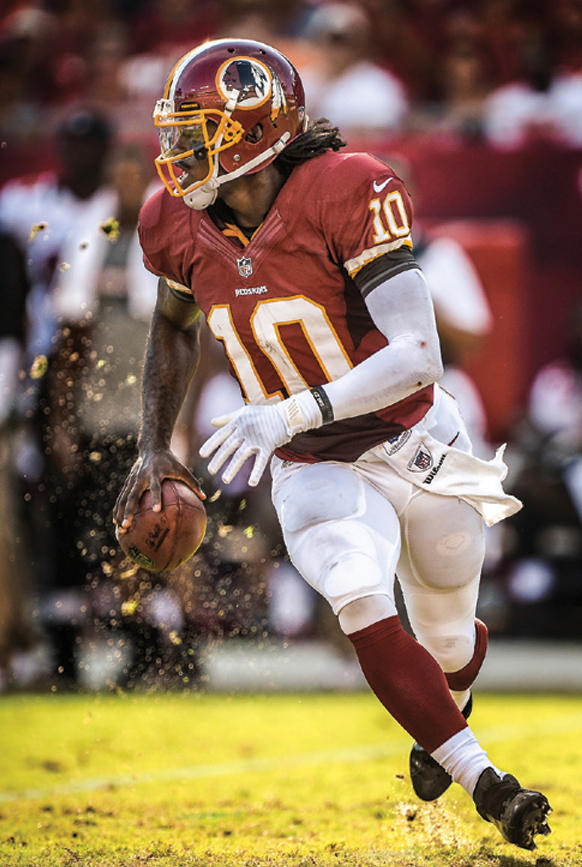
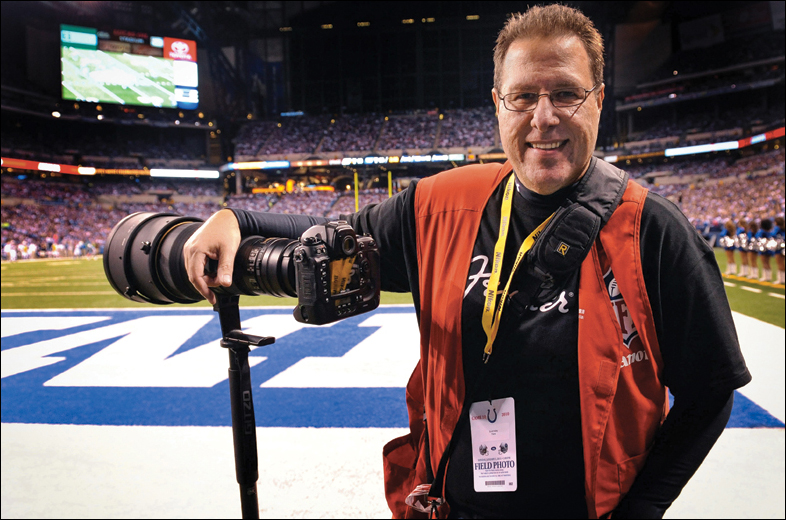
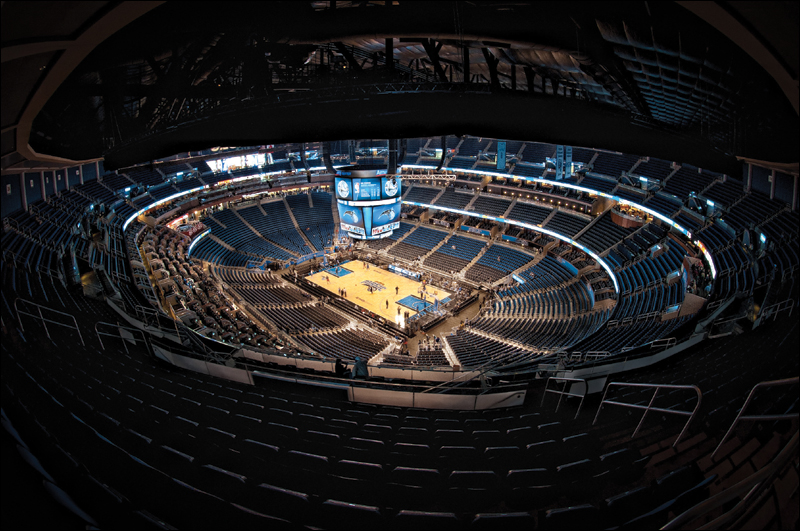
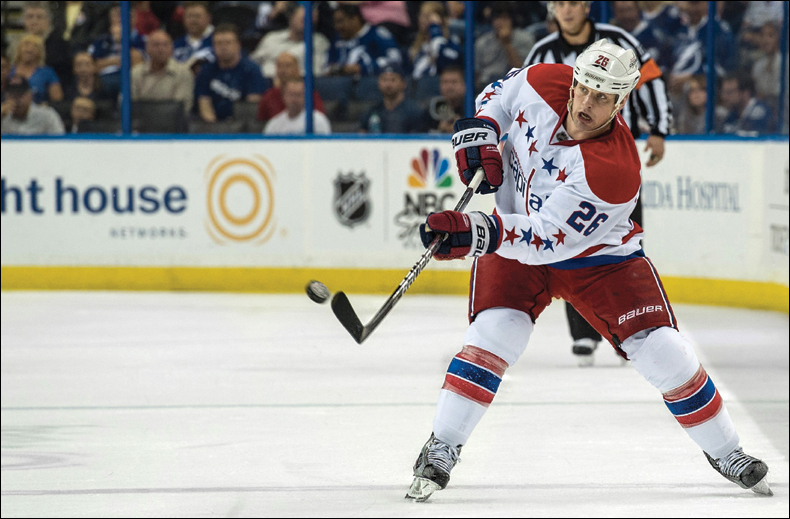
SHUTTER SPEED: 1/1600 SEC F-STOP: F/2.8 ISO: 200 FOCAL LENGTH: 400MM | PHOTOGRAPHER: SCOTT KELBY

This is the one chapter in the book where you have a choice. Do you want to get much better at shooting sports using the tips the pros use, but pretty much use your own existing gear? Or, do you want to seriously shoot sports for a living? Here’s why I mention this: we’re going to conduct a brief, totally scientific test which will quickly determine which path you should take. Ready? Let’s begin. Question 1: This book retails for $24.99. When you turned the book over to look at the price, how did you react? You thought: (a) $24.99, that’s cheap enough—I think I’ll buy it; (b) I dunno, it’s $24.99—I hope this is worth it; (c) $24.99, that’s pretty steep, but I really need to learn this stuff; or (d) $24.99! $24.99! I can’t believe they’re charging $24.99! Well, I’m not happy about it, but I have to have this book. Answer: If you answered a, b, c, or d, you’re not ready to enter the world of professional sports photography, because professional sports photographers spend so much on their equipment that they would never even think of looking at the price of anything. Ever. They see something they want and they just take it to the checkout counter and buy it, never questioning its price, because they figure they’ve spent so much on their photography equipment, there’s no way any book, or flat screen TV, or luxury car could ever cost anything close. So what are we mere mortals to do? We use the tricks in this chapter to get better shots with what we’ve got. Of course, a few accessories wouldn’t hurt, right?
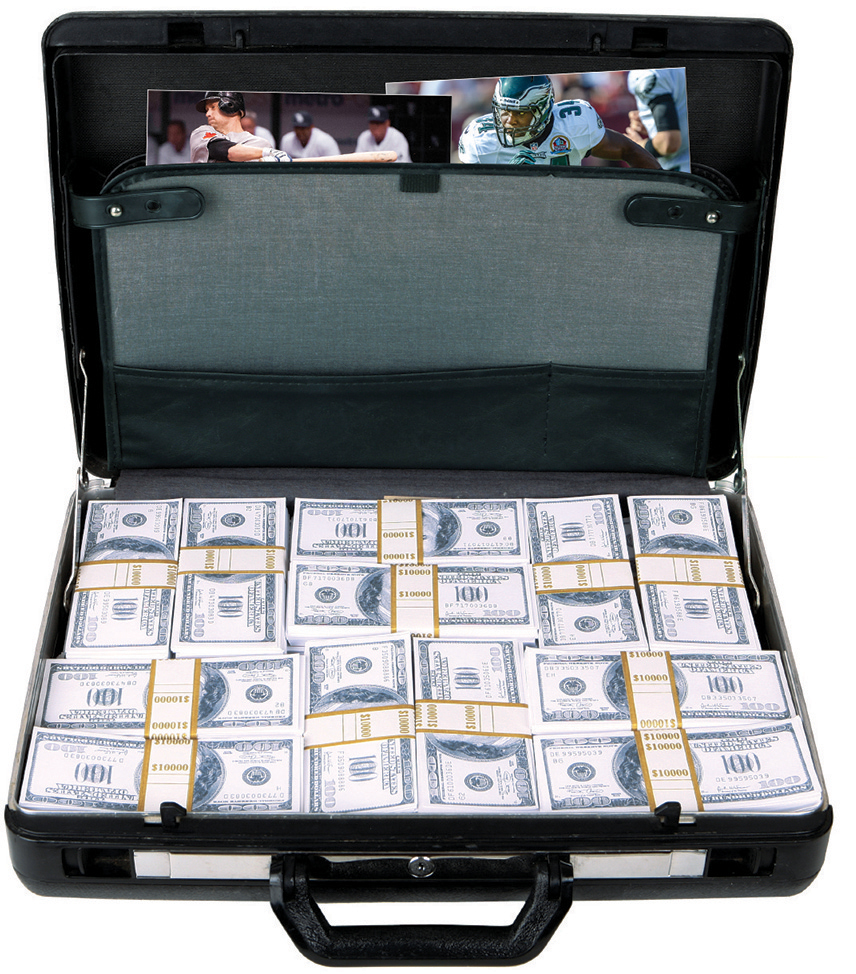
Of all the photographic professions, professional sports photography is probably the most expensive, so if you think you want to go this route, better bring your checkbook. The main reason it’s so expensive is because many sporting events are held indoors (or in domed stadiums) or at night, so you’ll need the most expensive (fastest) lenses money can buy (well, only if you want to shoot at a professional level). For example, you’re going to need some long telephoto lenses (ideally, a 400mm) and since you’ll generally be shooting in lower-light situations, they’ll need to be f/2.8 to f/4 lenses. If you haven’t priced a 400mm f/2.8 lens lately, they’re around $11,500 (Canon) and $9,000 (Nikon). Plus, you’ll need a monopod (those lenses are too heavy to hand-hold), so figure another $300 for that. Also, you’ll need at least two camera bodies, which both have to be able to shoot at high ISOs indoors with very low noise and, ideally, shoot at least 10 or more frames per second (which means, as a Canon shooter, you’re going to spend around $6,800 for an EOS-1D X or, as a Nikon shooter, you’re going to spend around $6,000 for a D4. Did I mention you need two?). By the time you add up two camera bodies, a fast long lens, a fast shorter lens (like a 70–200mm f/2.8), a monopod, a 1.4x tele-extender (to get your zoom in even closer), lots of very fast memory cards (plan on shooting well over 1,000 photos for a typical baseball or football game), and rolling cases to move all this gear, you’re in the $25,000 and up range, just for starters.
When you’re shooting sports, carrying a load of lenses and a big camera bag (even a camera backpack) will strain your back and just add to your frustration. Instead, go light with just two lenses:
(1) A wide-angle zoom lens (something that goes at least 24mm wide, like a 24–70mm). You’ll need these wide angles to capture full stadium shots, full court shots, close-up group shots, etc.
(2) A 300mm or 400mm telephoto lens (or a 200–400mm zoom). At the very least, you’ll need a 200mm lens, but plan on doing a lot of running because if the players aren’t right in front of you, they’ll be too far away to make pro-quality shots.
You’re not going to want to change lenses, so ideally you’d put one lens on one camera body, and one lens on the other (more on this coming up). The only other thing you’ll need to carry (besides extra memory cards and a backup battery) is a 1.4x teleconverter to get you even closer to the action (these magnify the amount of zoom, turning a 300mm telephoto into a 450mm). Note: Some pros advise against 2x teleconverters because they feel 2x photos are not as sharp and you lose up to two f-stops of light (it turns your f/2.8 into an f/5.6), making it harder to get the fast shutter speeds you need indoors. To move all this stuff around with the greatest of ease, try a Manfrotto Pro Photo Vest or a Think Tank Photo belt system, which is very popular with pro sports shooters.

If you’re just starting out shooting sports, I’ve got a great lens you might want to consider and both Canon and Nikon now make their own versions of this lens: it’s the 70–200mm f/4. What’s so great about this lens is (a) it has a great range for your first lens, and if you get a longer lens one day (like a 300mm or a 400mm), you can still use this lens on your second camera body, or when the play action gets close to you. Since it’s an f/4 lens, rather than f/2.8, (b) the price is much better (the Canon 70–200mm f/4 IS is around $1,350 and the Nikon is around $1,400 [Sony doesn’t make a 70–200mm f/4 at this time]. If that sounds kind of expensive, consider how much the same lens costs for the f/2.8 model—the Canon is $2,500 and the Nikon is around $2,400). Believe it or not, in the world of shooting sports, spending $1,400 for a good lens is actually considered a bargain. Don’t shoot the messenger. Finally, (c) these weigh much less than their f/2.8 counterparts, which are fairly heavy (at least, that’s what people always tell me when I hand them an f/2.8 lens to try). Tip: If you’re primarily shooting in daylight, then you might want to also buy a 1.4x tele-extender to turn your 200mm reach into a 280mm (nearly a 300mm), but besides the price of it, there’s another price you pay: you lose one stop of light (so your f/4 lens only lets you open it up to f/5.6 now). This is why I really only recommend getting a tele-extender for daylight sports shooters using an f/4 lens—at f/5.6 at night or indoors with that tele-extender, you’ll have to crank your ISO a bunch (see page 99). Not that big a deal if you have an f/2.8 lens (because it becomes an f/4), but it kinda crosses the line for a lens that’s already f/4.
Sports photographers don’t generally use tripods for a number of reasons: (1) they’re not mobile enough for the fast-action shooting that typifies sports photography, (2) many professional sports won’t allow the use of tripods, and (3) having a tripod set up near the playing field (in football, basketball, etc.) has the potential to injure a player. That’s why sports shooters, especially those shooting with long lenses, use monopods instead. These one-legged versions of tripods generally wind up supporting those long lenses (the lens attaches directly to the monopod itself for support and to keep the lens and camera still during the low-light situations many sporting events are played under). Monopods are easy to move (or to quickly move out of the way if need be), and many professional sports that ban tripods allow monopods. Carbon fiber monopods are the most popular because, while they can hold a lot of weight, they are surprisingly lightweight. Now, not surprisingly, they’re not cheap (nothing in sports photography is).
Scott’s Gear Finder
![]() Oben ACM-1400 4-Section Aluminum Monopod (around $40)
Oben ACM-1400 4-Section Aluminum Monopod (around $40)
![]() Manfrotto 680B Compact Monopod (around $70)
Manfrotto 680B Compact Monopod (around $70)
![]() Manfrotto 695CX Carbon Fiber 5-Section Monopod (around $180)
Manfrotto 695CX Carbon Fiber 5-Section Monopod (around $180)

Now, don’t read this headline to mean you only need one lens for sports photography. It means just what it says, don’t plan on changing lenses—plan on changing cameras. That’s right, if you’re really into sports photography, you’ll miss “the shot” if you have to change lenses. That’s why the pros have multiple camera bodies hanging around their necks—so they can change from a 400mm telephoto to a wide-angle lens in an instant. If they didn’t do this, while they were changing lenses, the guy next to them would be getting “the shot” (which winds up on the cover of the magazine). If you want to compete with the big boys, you’ll be hanging more than one camera body around your neck so you’re ready to catch the shot with a moment’s notice. I told you this digital sports photography thing was expensive.
Set Your White Balance for Indoor Sports
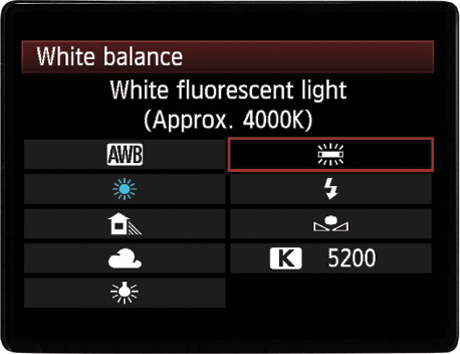
If you’re going to be shooting sports indoors, you can count on your photos having a yellow or green tint, caused by the indoor lighting used at most indoor events. You can save yourself a lot of Photoshop editing down the road if you change your white balance to either Fluorescent or Tungsten/Incandescent now, in the camera. (Set it at Fluorescent and do a test shot, then take a look at your test shot in your LCD monitor. If the overall color looks too yellow or green, then try Tungsten/Indcandescent. See the Canon menu above.) By doing this, you’re offsetting the yellow or green tint you would have had, which will keep you from pulling your hair out later. If you’re shooting in RAW format, you can always reset the white balance later in your RAW processing software. But by setting the correct white balance in the camera, at least you’ll see your photos in the proper color temperature when you view them in the LCD monitor on the back of your camera.
Shoot at a 1/1000 Sec. Shutter Speed or Faster
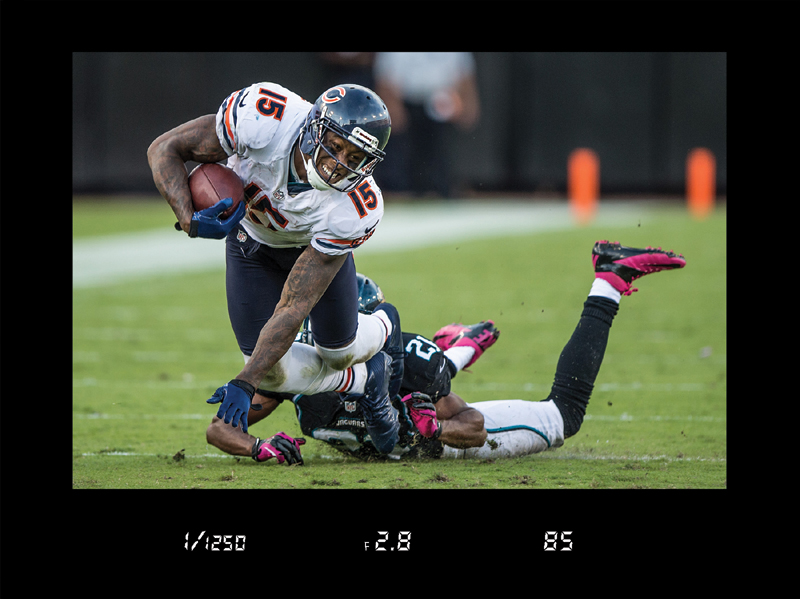
With sports photography, most of the time you’re going to want to freeze the action of the athletes (or cars, or motorcycles), and to do that, ideally, you’ll need a shutter speed of around 1/1000 of a second or faster (any slower than that and you’ll probably have at least some blur. Although I’ve shot sports as low as 1/640 of a second and wound up with some sharp shots, they’re not all sharp, so 1/1000 of a second is our goal). If you’re shooting outside on a sunny day, this is no problem—just set your camera to aperture priority mode, use the lowest f-stop your camera will allow (ideally, f/2.8, if your lens will let you go that low, but if not, try for f/4 or f/5.6—lower is better), and you’ll probably have shutter speeds of more than 1/4000 of a second or higher. If it’s a partly cloudy day, you may drop down to 1/2000, and that’s okay, too, as long as you stay above 1/1000. This all sounds too easy, right? Switch to aperture priority mode on your camera, use the lowest f-stop you can, and if you’re shooting outside on a sunny day, hitting 1/1000 of a second is no problem. There’s gotta be a catch, right? Nope. Well, there’s just one thing: the key phrase is “outside on a sunny day.” As long as that describes where you’re shooting, there is no catch. However, when you shoot at night, or indoors in an arena, a domed stadium, or gym, that’s when things get really sticky (see the next page).
Shooting at Night or Indoors? Raise Your ISO!
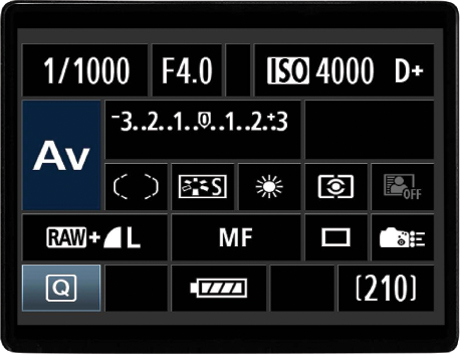
The biggest challenge of shooting sports happens when you shoot at night, or if you shoot indoors in an arena, gym, or a domed stadium. That’s because, without that bright sunlight, your shutter speed will drop like a rock. There’s really only one way around this—you’ll have to raise your ISO like crazy to get your shutter speed back up to 1/1000 of a second to freeze sports action. So, why do we worry so much about raising the ISO? Well, it’s because the higher you raise your ISO, the more noise (grain) you’ll see in your photos. Today’s high-end sports cameras (like the Canon EOS-1D X and the Nikon D4) have very low noise, even at very high ISOs, but it’s still sometimes visible. But, really, there’s nothing we can do about it—the only way to get our shutter speed up at night or indoors is to raise our ISO until it raises our shutter speed enough. This is why “fast lenses” (like an f/2.8 or f/4) are so helpful—the faster the lens you have, the less you’ll have to raise your ISO (and the less noise you’ll have). So, how much of a difference does a fast lens really make? Well, if I’m shooting in an NFL football stadium at night with really bright stadium lighting, and I set my f-stop to f/4, I have to set my ISO around 4,000 to get my shutter speed up to 1/1000 of a second to freeze the action. If I have an f/2.8 lens instead, I can usually set it at just 1,600 ISO (much less noise). That one stop makes that big a difference (but man do they charge you a bundle for that one extra stop of light). So, our plan when shooting at night or indoors is to shoot at our widest aperture (lowest number f-stop possible for our lens) and then increase our ISO until we hit a 1/1000 of a second shutter speed. You will see some noise, but seeing some noise beats having a blurry photo every single time.
Getting Burned by Indoor Lighting
If you’re shooting indoors at an arena or outdoors under the lights, you already know you’re going to have to raise your ISO quite a bit to be able to freeze the action (see the previous page), but there’s another area where you’re likely to get burned under these lights: most stadiums and arenas don’t have consistent light throughout the field of play. For example, it’s not uncommon for the center of the field to be much brighter than either end of the field, or for one end of the court to be darker than the other. The reason why you want to keep an eye out for this is because when parts of the playing field are darker than others, your shutter speed will drop in those parts of the field, and that might mean blurry shots in the most important parts of the playing field (think about it—the scoring doesn’t happen in the middle of the field for most sports, it usually happens at the ends). So, what you’ll have to do is keep an eye on your shutter speed when shooting in those areas, and if you see your shutter speed drop below 1/1000 of a second, you’ll need to raise your ISO while the action is happening in that area, and then lower it back down when they move to better-lit areas of the field. If it sounds like kind of a pain in the butt to have to keep an eye on this all night, you’re absolutely right.
Shoot Wide Open
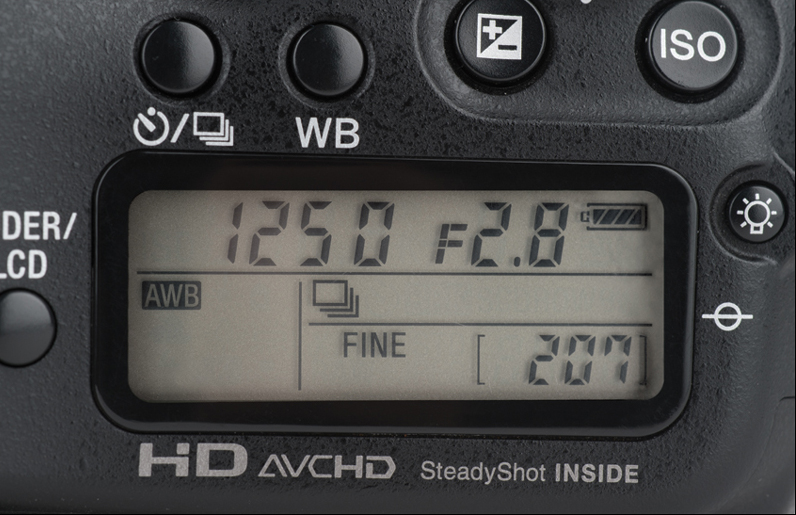
By shooting wide open, I mean shoot as close to your wide open aperture as possible (so if you have an f/2.8 lens, shoot at f/2.8 or one stop up). This will pay off in two ways:
(1) This will blur the background, creating a more dramatic, dynamic, and uncluttered photo of your subject. Busy backgrounds are a problem when shooting sports, and shooting with a telephoto lens at such a wide open aperture gives you a very shallow depth of field (meaning your subject in the foreground is in focus, while the background is out of focus).
(2) You’ll be able to shoot at faster shutter speeds, which will greatly help when shooting indoors under artificial low-light situations.
Shooting in Burst Mode
Much of the shooting you’ll be doing in sports photography will require you to take bursts of shots (four or more shots per second) in order to make sure you get the shot while a play is in motion. So, you’ll need to set your camera to shoot multiple shots while you hold down the shutter button (this is called burst mode on some digital cameras). By default, most cameras shoot one frame at a time, so you’ll have to switch this burst mode on.
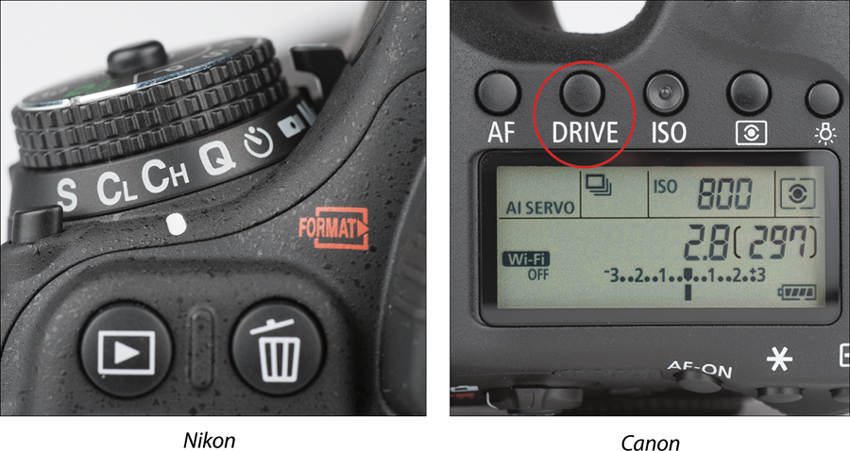
Nikon: Switch the camera’s mode to continuous (where holding down the shutter release takes multiple photos) by first pressing the Menu button, choosing the Custom Settings menu, and then choosing Continuous High-Speed (to choose either 10 fps or 11 fps). Then, press the release mode dial lock release button on the top left of the camera and turn the release mode dial to CH.
Canon: Press the Drive or AF•Drive button, then rotate the quick control dial until you see an icon that looks like a stack of photos on the top LCD panel.
Now, you can simply hold down the shutter button to fire multiple shots.
RAW or JPEG for Sports Shooters?
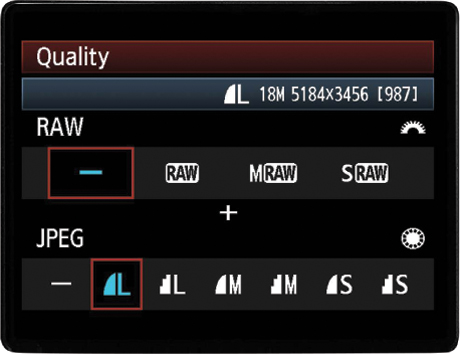
Because of the fact that much of sports photography is taken in burst mode (see the previous page) and the fact that you only have so much memory space in your camera’s multiple-shot buffer, the larger the photos you take, the quicker that buffer will become full. When it’s full, you’re done shootin’ (well, at least until it has time to write the shots to your memory card, which empties the buffer again). That’s why many pro sports photographers choose to shoot in JPEG format rather than RAW. It’s because JPEG files are considerably smaller in file size so more of them fit in the buffer (plus, since they’re smaller, they write to your memory card faster, so you can effectively shoot more uninterrupted shots in JPEG format vs. RAW format). Now, there are some purists who feel so strongly about shooting in RAW for every occasion (including shots of their kid’s birthday party at Chuck E. Cheese) that reading about anyone advocating any file format other than RAW sends them scrambling into a tower with a high-powered rifle to pick off pedestrians. To them, I just say, “Remember, RAW is a file format, not a religion.” (By the way, I know a popular Sports Illustrated magazine shooter who now sets his cameras to shoot RAW+JPEG, which captures both file formats at the same time. Just thought you’d like to know.)
Pan to Show Motion
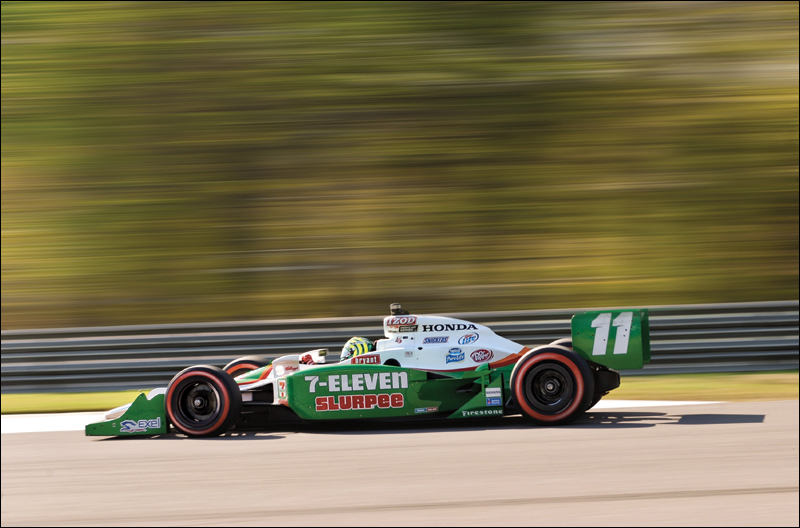
For this entire chapter we’ve been talking about using super-fast shutter speeds to freeze the motion of sporting events, but there are times when it’s more dramatic to emphasize the motion and let parts of the photo become intentionally blurry from movement. There are three keys to this technique:
(1) Use a slow shutter speed—ideally, either 1/30 of a second or 1/60 of a second. So, switch to shutter priority mode (using the mode dial on the top of your digital camera) and set the shutter speed accordingly.
(2) Pan right along with your subject—following them with your camera. Believe it or not, it’s the camera’s motion that creates the blurring background, because you’re trying to move (pan) right along with the athlete so they remain sharp while everything around them appears blurred.
(3) Use continuous shooting (burst) mode for your best chance to capture a sharp shot—capturing multiple shots per second really pays off here.
One important thing to remember: Don’t stop panning when the athlete leaves your frame—continue panning for a couple of seconds afterwards to get a smooth release.
Pre-Focus to Get the Shot

If you’re covering an event where you have a pretty good idea where the action is going to happen (for example, you’re covering baseball and you know the runner on second base is headed to third, or you’re covering snowboarding and you know approximately where the snowboarder is going to land), pre-focus on that spot, so when it happens, all you have to do is press the shutter button. You can start by leaving auto focus on, and then focus on the spot where you expect the action to occur, then switch your lens to manual focus and leave the focus alone (it’s set). Now you can pretty much relax and watch the event unfold. When the runner (jumper, skier, etc.) gets near your pre-focused point, just aim back to that area and fire—knowing the focus is locked onto that point. No waiting for auto focus to either get, or miss, the focus. You’re good to go—just fire away.
Shoot Vertically for More Impact
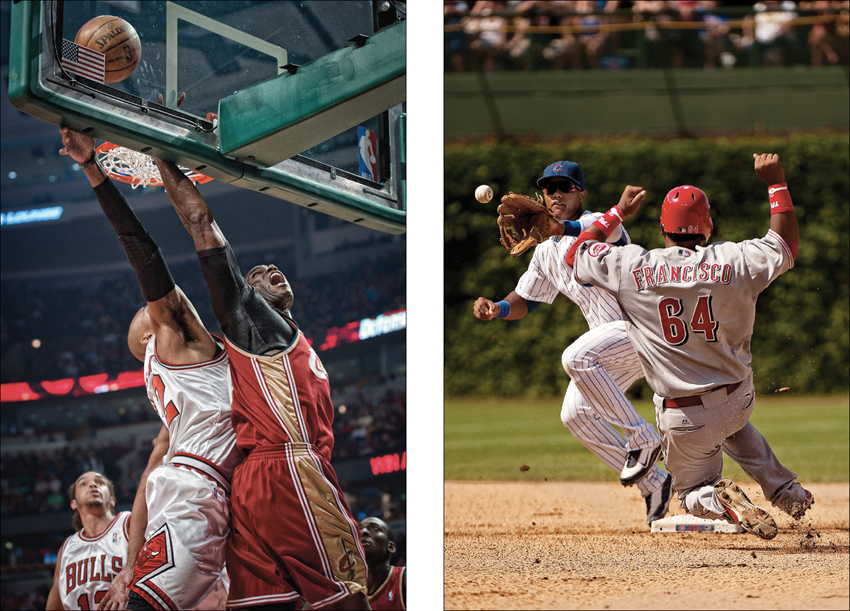
Much of pro sports photography is shot vertically because it’s easier to fill the frame with your subject (plus, it’s ideal for magazine covers, ads, etc.). Just turn the camera sideways, get in tight (with your long lens) and make the magic happen (so to speak). This particularly holds true if you’re shooting a single athlete, rather than two or more, where a horizontal shot might work best, but when it comes to shooting a single subject, your best bet is to go vertical. That being said, if you want to really cover your bases (like the way I worked that sports metaphor in there), shoot both as much as possible. As my tech editor Bill Fortney says, “The editor will always ask for the orientation you didn’t shoot.”
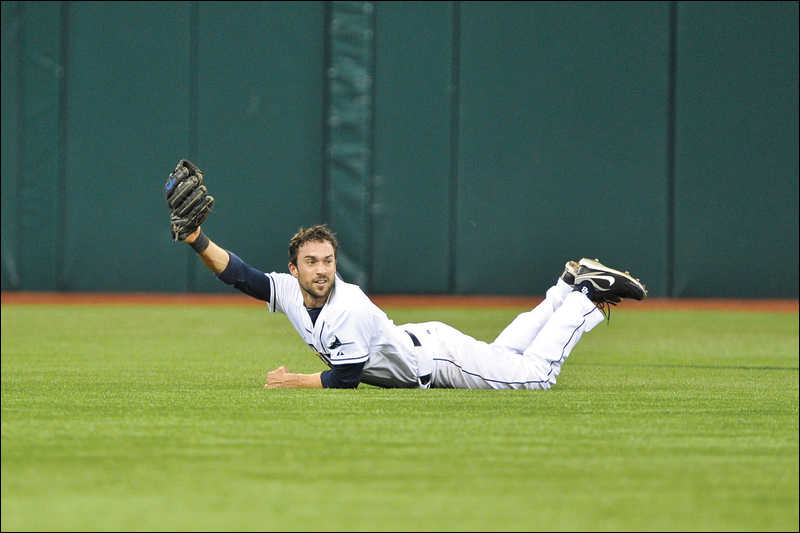
Don’t Be Afraid to Crop Your Photos
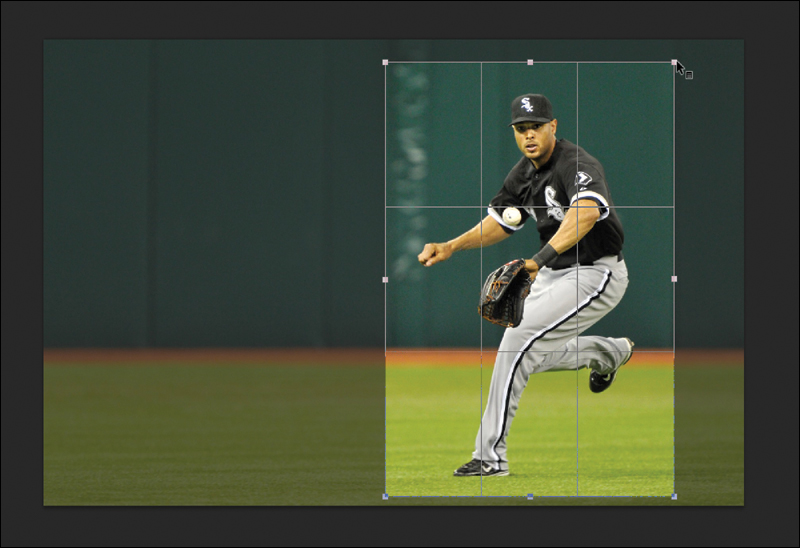
In general, I hate cropping, and if I have to crop a photo after I’ve taken it, it kind of makes me feel like I’ve failed at my most basic job as a photographer—deciding what to include in the photo (how the photo is composed). So, it makes me really mad if I have to crop and I do it very rarely, except for sports, where I crop all the time and feel no remorse whatsoever. I have to. All sports photographers (especially the pros) do. It’s because, for most sports, the play often moves away from you in a split-second—a basketball player steals a pass, turns, and runs down the court; a quarterback throws a pass to a receiver 70 yards down the field from you; a baseball player hits a ball deep into the outfield. Even with a 400mm lens, outfielders look tiny in your frame, so we have to crop in tight after the fact (in Photoshop, Elements, Lightroom, etc.) to create dynamic-looking images. It’s a part of sports photography—the tight crop, and the tighter the better! If you’re reading this and thinking, “Oh, so that’s how those sports shooters get those super-up-close shots that look so great!” The answer is “Yes!” and now you can do it, too! Also, the shorter the lens you have, the more you’ll be doing it (you’ll crop a lot less if you have a 400mm lens than you will if you only have a 200mm lens). This is another reason why having a high-megapixel camera is a big benefit to a sports photographer—you can crop the image in tight and still have plenty of resolution for print or for the web. One more thing: when you’re cropping your image and you think to yourself, “Man, that’s really a tight crop!” that’s your cue to crop it even tighter!
You Need Two Eyes and a Ball
When you’re shooting athletes, what’s the most important thing to capture? Generally, it’s their face. It’s their facial expressions that tell the story, and it’s their faces that people want to see, but if you really want to take it to the next level, try to include the ball in the shot, as well (if it’s a sport that uses a ball, anyway. No sense in including a ball in a Formula One racing shot). There’s an old adage used by sports photo editors (the folks who decide which images wind up in a sports magazine) that goes, “Give me two eyes and a ball.” If you’ve got those two, you’ve got a shot that tells a story and that’s going to capture the imagination of your viewer. So, keep that floating around in the back of your mind while you’re shooting the game—“I need to see two eyes and a ball.”
Don’t Always Focus on the Winner

In sports photography (and in sports in general), it’s only natural to follow the winner. If someone scores a critical point, you’ll be capturing shots of the athlete that made the big score, right? If a team wins, you’ll be shooting shots of the winning team celebrating. But if you follow that tradition of covering only the winner, you might miss some of the most dramatic shots with the most powerful story-telling angle, which are the expressions and reactions of the loser or the losing team. This is especially important if you just missed the action play—quickly switch to the reaction of the guy who missed the ball, or didn’t block the shot, or missed the goal, etc. Sometimes their reactions are more fascinating than those of the person who makes the shot. Next time, try catching the expression of the golfer who missed the putt (or the golfer who lost because her opponent just sank a 40-footer), and see if it doesn’t elicit as much or more emotion as a shot of the winner.
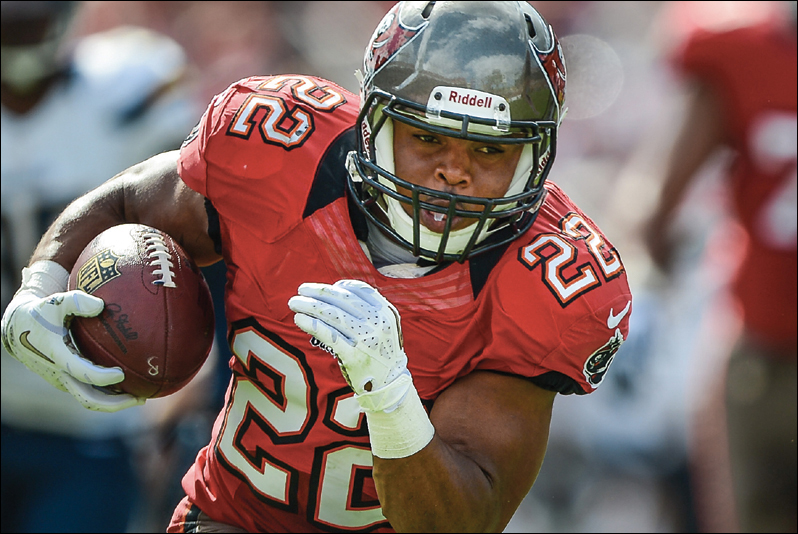
Composing for Sports
When composing your sports images, give your athlete somewhere to go. Don’t compose the shot so your athlete is running out of the frame, compose it so there’s room in front of the athlete to move to continue his visual story, so the athlete doesn’t look boxed in. It’s an uncomfortable look for sports, so when you’re composing, be sure to leave some running room (i.e., for a shot of an athlete running left, compose the shot with him on the far-right side of the frame. That way, he visually has room to run). This simple compositional trick will make a big difference on the impact of the final image.
The Pros Know the Game
If you know the game you’re shooting (for example, if you’re a baseball fanatic and you’re shooting a baseball game), you’re going to get better shots than the next guy because you’re going to know where the next play is likely to unfold. This is a huge advantage in sports shooting, and being able to anticipate when and where the big moment will unfold can make all the difference in getting “the shot.” The key is you have to watch the game while you’re shooting, so you can see the play unfolding and be ready to aim where you feel the action will take place. You won’t always be right, but you’ll be right enough that you’ll get the shot more often than not. So, what if you’re assigned to shoot a game you don’t know well? Go online and watch some videos, go to the newsstand and buy some magazines on the topic, and study how the pros that cover that sport are shooting it—find out who the stars are in that sport and make sure you follow them (after all, the stars are most likely to be involved in the big plays, right?). It basically comes down to this: if you know the game, you’re putting yourself in the best position to get “the shot.” If you don’t know the game, the only way you’ll get “the shot” is by sheer luck. That’s not a good career strategy.