Chapter Seven. Avoiding Problems Like a Pro
How to Avoid Digital Headaches
SHUTTER SPEED: 1/1600 SEC F-STOP: F/2.8 ISO: 200 FOCAL LENGTH: 300MM | PHOTOGRAPHER: SCOTT KELBY

Pros are out shooting every day. And when I say out, if they’re studio photographers they’re actually usually shooting indoors, so in that case, of course I mean they’re out shooting in the studio. Stick with me here, will ya? Anyway, these pros are out shooting every day, while most of the rest of us only get to shoot when our wives let us. I mean, we only get to shoot on certain occasions (like when our wives are out of town), so although we run across digital problems when we’re shooting, since we won’t have to deal with them again until our wives fly to Minnesota to visit their parents, we just let them slide. The pros don’t because they have to deal with these things every day (meaning their in-laws live in the same town they do), so the way they keep from having migraine headaches the size of the Shuttle’s booster rockets is by figuring out clever ways to deal with them on the spot. So, this chapter is kind of a shortcut because you’re going to get the benefits of years of other people’s headaches, but you’re going to get to fix them right now, sidestepping one of the real downsides of shooting digital, and that primarily is having to shoot your cousin Earl’s wedding (see, you should have listened to your wife when she told you not to get that long lens). Now, you may have noticed that I’ve been referring to wives as if all photographers were men, and clearly that’s not the case. It’s just that I am a man (a masculine, mannish, manly man) and therefore it would be silly for me to say, “My husband didn’t want me to go shooting that day,” when you know darn well he wouldn’t mind. Wait—that’s not what I meant.
Pro Tips to Avoid White Balance Problems

White balance problems often happen when you shoot indoors under fluorescent, incandescent, or just “them regular ol’ light bulbs.” Of course, you don’t generally find out about them until you open the photos later on your computer and all the shots have either a yellowish, or greenish, or blueish color cast. By default, your camera is set to Auto White Balance, which works pretty well outdoors, but generally doesn’t work worth a darn indoors. The pros use three methods to avoid white balance problems when they shoot: (1) They go into the camera and choose a preset white balance setting that matches the lighting they’re shooting in (it’s easier than you think—just go to your camera’s white balance section, and choose either Incandescent [for regular indoor lighting] or Fluorescent [for typical office lighting]). You can choose preset white balance settings for outdoor shots as well, and you’ll get more realistic colors there, too. (2) They create a custom white balance. Luckily, your camera will do most of the work for you if you just put a neutral gray card (you can find these at any camera store or B&H Photo) about 8 to 10 inches in front of your lens, and zoom in/out so the card fills your frame. Then, go to your camera’s custom white balance menu and set it up to measure what it sees to create a custom white balance (it’s easier than it sounds—just take a peek in your camera’s manual). And, (3) they shoot in RAW format, so they don’t worry about white balance, because they can choose the white balance after the fact, either in Adobe Photoshop’s Camera Raw or in their RAW processing software (if they don’t use Photoshop’s RAW processor). This is just one advantage of shooting in RAW (see Chapter 10 for more on why RAW rocks).
Cold Weather Shooting Means Extra Batteries
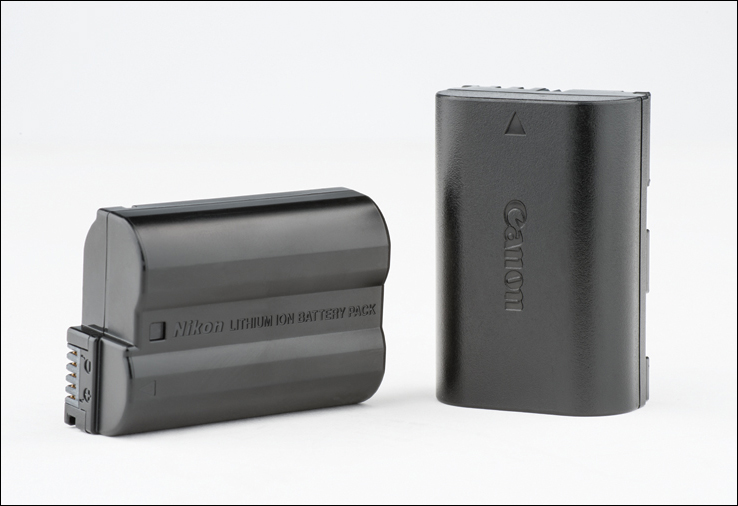
Another thing the pros have learned is that digital camera batteries don’t last nearly as long in cold weather. So if you’re going out shooting in the snow, you’d better bring at least one or two backup batteries for your camera or it could turn into a very short shoot.
Don’t Change Lenses in Dusty Weather
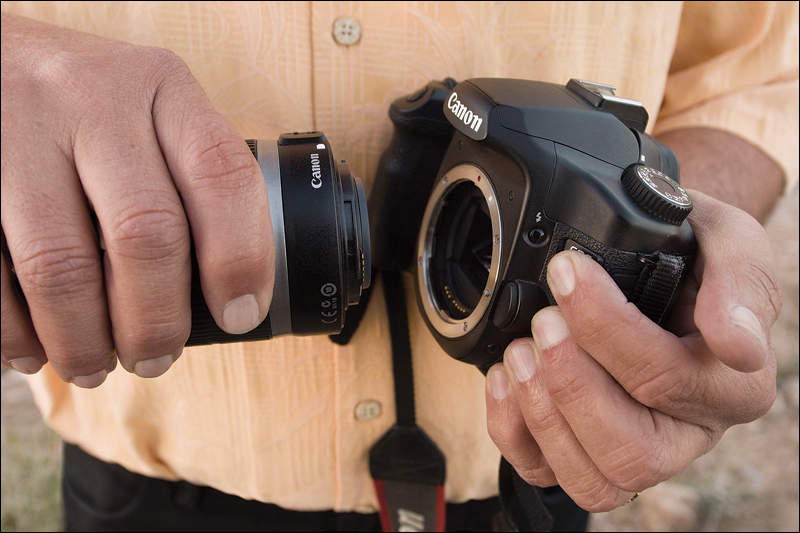
If you’re shooting outdoors, take a tip from the pros and don’t change lenses if you’re in a dusty environment. That’s the last thing you want getting down inside your digital camera, and although sometimes you can’t see the dust swirling around you, your camera’s sensors will see it, and then so will you (when you open the photos on your computer). If you must change lenses, try to go back to your car, or some indoor location, and switch lenses there. Remember, it doesn’t take a whole lotta dust to make your camera really miserable—it’s worth the extra effort to either plan carefully for shoots in desert or sandy conditions and go with just one lens, or to keep your car nearby so you can go inside, shut the door, and change the lens without fear of fouling your gear.
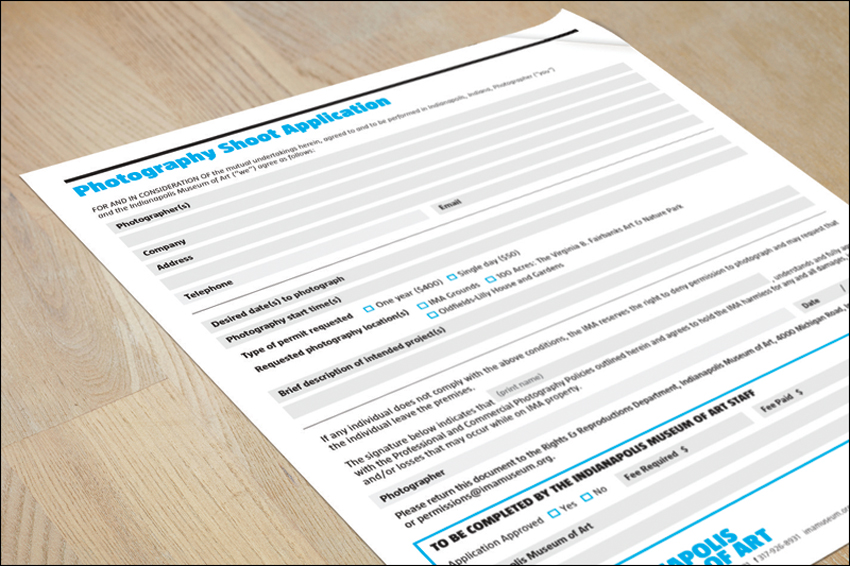
Many indoor locations (including museums, aquariums, public buildings, etc.) don’t allow you to shoot on a tripod, even though these locations generally have very low “museum-like” lighting. However, in some cases, you can apply for a free permit to shoot on a tripod—such as the one shown above from the Indianapolis Museum of Art—you just have to ask in advance. I’ve had a number of instances where, by asking in advance, they would let me come in before or after hours to shoot when nobody’s there (alleviating their fear that someone might trip on my tripod and sue them). Sometimes government buildings or museums will let you apply for a permit so you can shoot during their regular open hours, but often they’ll have you come before or after hours, which I actually prefer. So, usually it’s just me and a security guard shooting at five o’clock in the morning or nine o’clock at night, but at least I’ve got a stable shooting platform, I’m getting sharp shots because I’m on a tripod, and I don’t have to worry about anyone tripping over my tripod, shooting their flash while I’m trying to shoot, or rushing me to get out of the way.
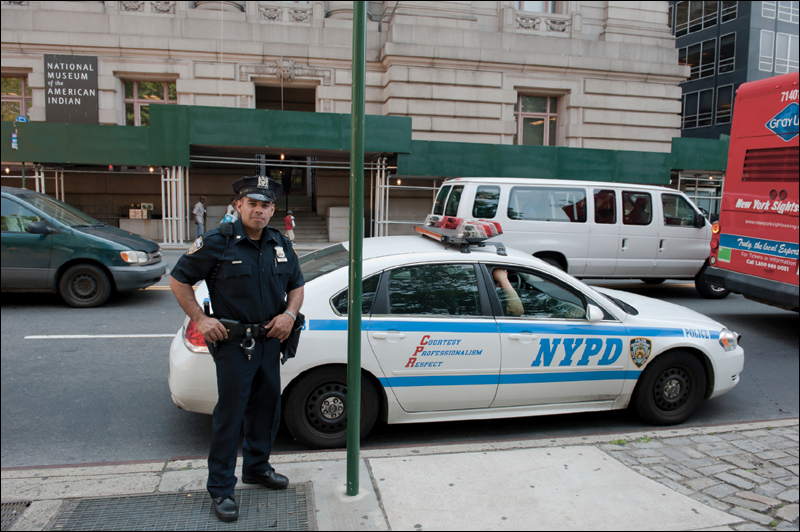
Especially since September 11th in the U.S., people can sometimes get freaky when they see someone shooting photos outside their building (which is common in downtown areas), and they’re particularly touchy outside state and federal buildings. Recently, a photographer I know was shooting in a downtown area, and when he pulled his eye away from his viewfinder he was surrounded by three security guards. He didn’t realize the building he was shooting was a federal building (it just looked like a fascinating old building to him), and the guards wanted to confiscate his camera’s memory card. Luckily, he was able to convince the guards to let him just delete the photos from his card right in front of them, but if he hadn’t, the police would have been involved within minutes (it was a federal building, after all). However, building security for corporations can be very aggressive as well (I’ve heard stories there, too), so just take a little care when shooting in downtown areas and be prepared to delete shots off your card if necessary. Also, as a general rule, in the U.S. and in other countries, you’re taking your chances any time you shoot government buildings, airports, military bases, terrorist training camps, nuclear missile silos, Russian sub bases, etc.
A Tip for Shooting on an Incline
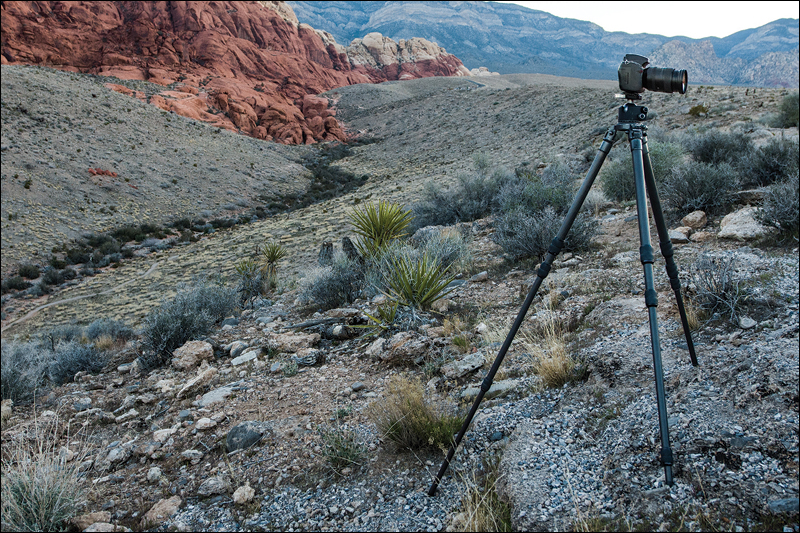
If you find yourself shooting on an incline with your tripod, here’s a tip that can save your camera from instant death. Let’s say you’re shooting on a rock or on the side of a hill. Your tripod has three legs—place only one facing you. That way, if the camera starts to tip back, the single leg acts like an anchor and keeps it from falling. If the two-legged side is facing you, with the single leg on the rock or hillside, your camera will topple right over.
The Other Reason Pros Use a Lens Hood
The lens hood that comes with most good-quality lenses these days is designed to reduce or eliminate the lens flare that can creep into your lens when shooting outdoors in daylight, but pros keep a lens hood on even indoors (basically they keep it on all the time) for another reason—it protects the lens. Think about it—the glass end of your lens is pretty much flush to the end of the lens barrel, and if it comes in contact with anything that’s not really, really soft, it can get scratched, cracked, or just fingerprinted or dirty. However, when you put a lens hood on the end, it puts a buffer between the glass and the scary world around it. It can save your lens if you drop it or knock it into someone or something.
Keeping Your Lens Out of Trouble

If you’re going to be using good-quality lenses with your digital camera, then I highly recommend buying a UV filter for each lens. Although the UV part doesn’t do all that much (it filters out UV rays to some extent, which makes your photos look better to some small extent), the real reason to use one is to protect your lens (specifically, the glass on your lens, which can get scratched easily or break if you drop it). Although this “buy a UV filter/don’t buy one” controversy is heavily debated on the web, I can tell you from personal experience it saved one of my lenses from certain death. I was out on location and, while changing lenses, I somehow lost my grip and my lens crashed to the ground, glass first. My filter was severely damaged, but once I unscrewed it and took a look at my lens, it was totally unscathed. The filter took all the damage, and it’s much cheaper to buy a new filter than it is to replace an expensive lens. So, while a UV filter might not do all that much for your photos, it does a lot for your peace of mind.
Limit Your LCD Time to Save Battery Life
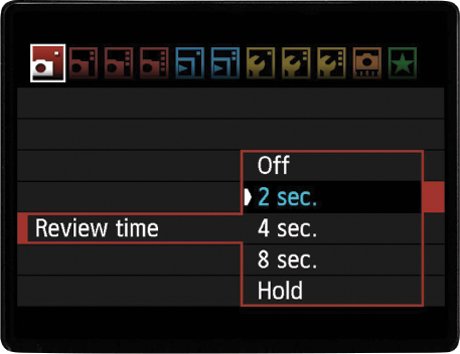
One of the biggest drains on battery life is the color LCD monitor on the back of your digital camera. Although it’s a very important part of digital photography, using it too often can really drain your battery, but here’s something that can help—lower the number of seconds that your LCD displays right after you take the shot. After all, if you need to see a shot you just took again, you can just press the playback button on the back of your camera and it will reappear. Also, limit your chimping (admiring your photos on the LCD monitor or showing them off to others while making “Oooh! Oooh!” sounds).
Bracket If You’re Not Sure About Exposure
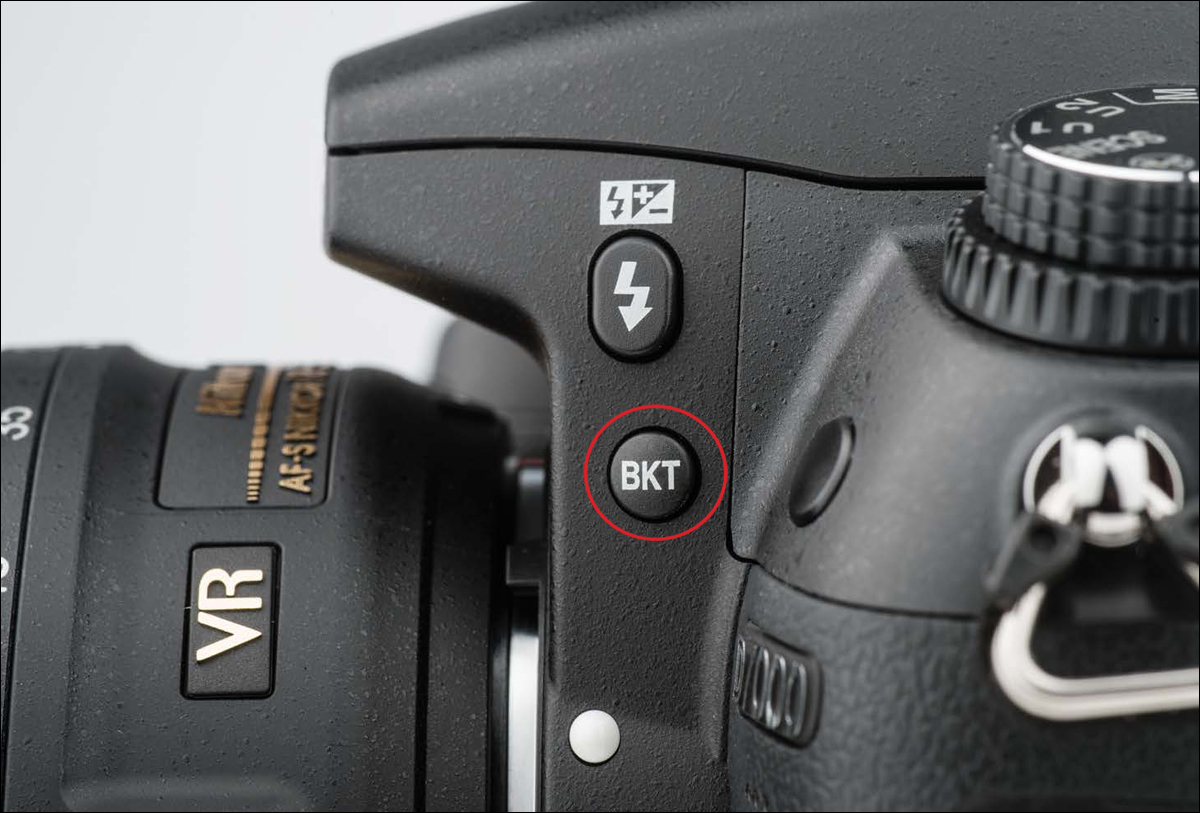
In a tricky lighting situation, or a situation where you’ve just got to get the correct exposure for the shot, the pros make use of the camera’s built-in exposure bracketing feature. This basically sets up your camera to shoot multiple versions (as many as five, if you like) of your current scene using different exposures (some lighter, some darker) with the idea that one of them will be just right. It starts by using the suggested exposure reading taken by your camera (which your camera believes is the correct exposure, by the way, but it can sometimes be fooled in tricky lighting situations), then it creates another image that is slightly underexposed, and another slightly overexposed (so you’ve bracketed both ends of the original exposure). This greatly increases your odds of getting the perfect exposure, and since digital film is free—hey, why not, right? You turn on bracketing right on the camera itself. For Nikon digital cameras, depending on the model, the bracketing button may be to the left of the viewfinder below the pop-up flash or on the release mode dial (it says “BKT” on the button). On Canons (like the 60D or the Rebel T4i), you have to turn on bracketing from the menu itself.
Avoid Red Eye
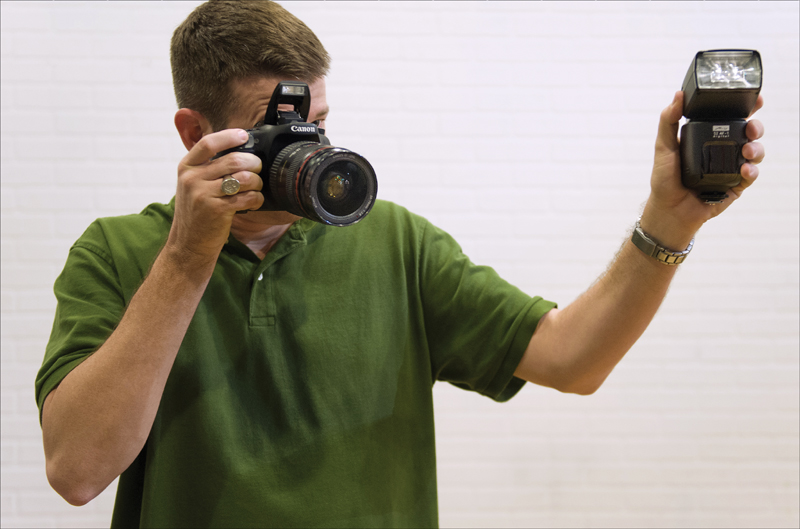
Without going into all the technical (and physiological) reasons why people in our photos often get “red eye” when we use a flash, let’s just look at how to avoid it. The main culprit is your camera’s pop-up flash, which sits right above your lens and is an almost automatic recipe for red eye. The easy fix (the one the pros use anyway) is to either get that flash (ideally) off the camera and hold it a couple of feet away from the lens, or at the very least up much higher away from the lens, to reduce the chance for red eye. Another method is to bounce your flash off the ceiling, which is a great cure for red eye. Of course, all of these require you to have a separate external flash unit (and not just your camera’s built-in pop-up flash). If you can’t spring for an external flash, there are a few other popular strategies when you have no choice but to use your built-in pop-up flash: (1) Turn on some room lights, if possible. It lets your subject’s pupils contract, and that causes less red eye than shooting in complete darkness. (2) If your camera has a red-eye reduction mode (where it sends a preemptive flash, which causes your subject’s pupils to quickly contract, before it fires the main flash), that sometimes reduces red eye. (3) Ask your subject to look slightly away from the lens and that will certainly help, plus (4) moving your camera closer to your subject can also help reduce the dreaded red eye.
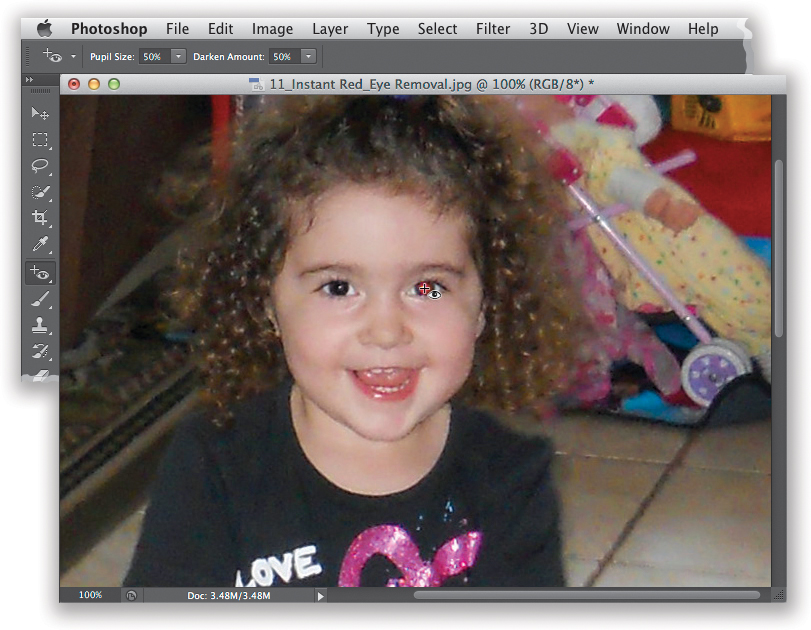
Okay, let’s say you forgot to try one of the strategies on the previous page and you wind up with an important photo that has red eye. Luckily, it’s easier than ever to get rid of red eye. Whether you’re using Photoshop, Lightroom, or Elements (the consumer version of Photoshop), you can use the Red Eye or Red Eye Correction tool to quickly get rid of red eye. Here’s how they work: open the photo in Photoshop (or Lightroom, or Elements), then get the Red Eye tool, and simply click directly on the red area in one of the eyes. That’s it—it does the rest. Then do the other eye. Not too shabby, eh? If clicking directly on the red part of the eye is too hard (the person is standing kind of far away so their eyes are kind of a small target), then just take the tool and click-and-drag to create a rectangle or oval around the whole eye area, and when you release the mouse button, it will do its thing. Either way you do it, that red eye is going to be gone in seconds. Just another reason why I love Photoshop.