Dojo has built-in support for one of the most elegant Web page features: drag and drop. You might think that letting users drag and drop elements in your Web pages should be simple, but you’ll find that it isn’t if you write all the code yourself. After accounting for cross-browser issues, you’ll be writing about five single-spaced pages of JavaScript code.
Dojo, the cross-platform JavaScript toolkit, to the rescue! Dojo has lots of drag-and-drop capability built in, and all you need to do is put it to work—which can be as easy as making the dojoType value of an element dojo.dnd.Moveable (the dnd stands for drag and drop).
In this chapter, you’ll see how to add drag-and-drop capability to your Web pages, from supporting simple moveables to creating notes the user can type into and move around a Web page.
It all starts with dojo.dnd.Moveable dojoType. Supporting dragging and dropping can be as simple as styling the element that you want to let the user drag and drop and then setting its dojoType attribute to dojo.dnd.Moveable. We’ll get started by doing exactly that.
In Dojo, elements that can be dragged and dropped are called moveables. To create a moveable, you set the element’s dojoType attribute to dojo.dnd.Moveable.
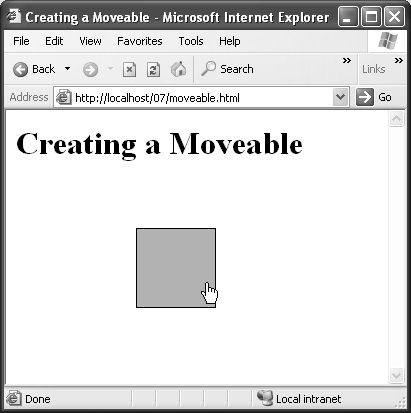
The example moveable.html creates and styles a moveable <div> element as a cyan-colored box that can be dragged around the page.
Procedure 7.1. To create a moveable:
Open your Web page in a text editor.
Add a
dojo.require("dojo.dnd.Moveable");statement to your code.Create a new
<div>element with itsclassattribute set to"moveable"and style it as a cyan box with a border, as shown in Script 7.1.Example 7.1. Setting the class and style for a moveable.
1   <html>
2     <head>
3       <title>Creating a Moveable</title>
4       <style type="text/css">
5         .moveable {
6           background: cyan;
7           width: 80px;
8           height: 80px;
9           border: 1px solid black;
10          cursor: pointer;
11        }
12      </style>
13      <script
14        type="text/javascript"
15        djConfig="parseOnLoad:true"
16        src=  "http://o.aolcdn.com/
17        dojo/1.1/dojo/dojo.xd.js">
18      </script>
19
20      <script type="text/javascript">
21        dojo.require("dojo.parser");
22        dojo.require(
23          "dojo.dnd.Moveable");
24      </script>
25    </head>
26
27    <body>
28      <div class="moveable">
29      </div>
30    </body>
31  </html>
Set the
<div>element’sdojoTypeattribute todojo.dnd.Moveable.Script 7.2 shows what your page should look like after you make the additions.
Example 7.2. Creating a moveable.
1   <html>
2     <head>
3       <title>Creating a Moveable</title>
4       <style type="text/css">
5         .moveable {
6           background: cyan;
7           width: 80px;
8           height: 80px;
9           border: 1px solid black;
10          cursor: pointer;
11        }
12      </style>
13      <script
14        type="text/javascript"
15        djConfig="parseOnLoad:true"
16        src=  "http://o.aolcdn.com/
17        dojo/1.1/dojo/dojo.xd.js">
18      </script>
19
20      <script type="text/javascript">
21        dojo.require("dojo.parser");
22        dojo.require(
23          "dojo.dnd.Moveable");
24      </script>
25    </head>
26
27    <body>
28      <h1>Creating a Moveable</h1>
29      <div class="moveable" dojoType=
30        "dojo.dnd.Moveable" >
31      </div>
32    </body>
33  </html>
Save your file.
Navigate to your file in a browser. You should see the cyan
<div>element.Drag the
<div>element with the mouse (Figure 7.1).
You can also create moveables in code, which can be useful if you want to handle drag-and-drop events of the kind we’ll work with later in this chapter.
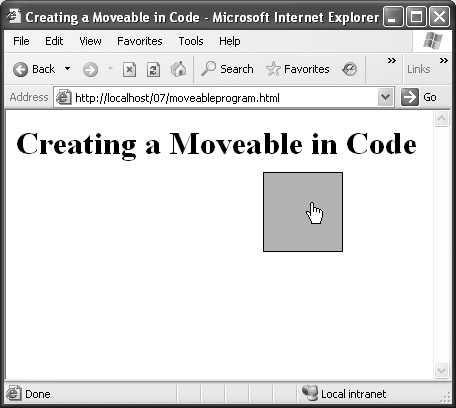
The next example, moveableprogram.html, mimics the previous example, but it creates its moveable entirely in code—no <div> element needed.
Procedure 7.2. To create a moveable in code:
Open your Web page in a text editor.
Add a
dojo.require("dojo.dnd.Moveable");statement to your code.Create a new
<div>element with itsclassattribute set to"moveable"and style it as a cyan box with a border, as shown in Script 7.3.Example 7.3. Setting the class and style for a moveable.
1   <html>
2     <head>
3       <title>Creating a Moveable in
4         Code</title>
5       <style type="text/css">
6         .moveable {
7           background: cyan;
8           width: 80px;
9           height: 80px;
10          cursor: pointer;
11          border: 1px solid black;
12        }
13      </style>
14      <script
15        type="text/javascript"
16        djConfig="parseOnLoad:true"
17        src="http://o.aolcdn.com/
18          dojo/1.1/dojo/dojo.xd.js">
19      </script>
20
21      <script type="text/javascript">
22        dojo.require("dojo.parser");
23        dojo.require("dojo.dnd.Moveable");
24      </script>
25    </head>
26
27    <body>
28      <h1>Creating a Moveable in Code</h1>
29    </body>
30  </html>
In an
addOnLoadfunction, create a new<div>element. Add themoveableclass to the new<div>element and append the<div>element to the Web page.Make the
<div>element adojo.dnd.Moveableelement.Script 7.4 shows what your page should look like after you make the additions.
Example 7.4. Creating a moveable in code.
1  <html>
2    <head>
3      <title>Creating a Moveable in
4        Code</title>
5      <style type="text/css">
6        .moveable {
7          background: cyan;
8          width: 80px;
9          height: 80px;
10         cursor: pointer;
11         border: 1px solid black;
12       }
13     </style>
14     <script
15       type="text/javascript"
16       djConfig="parseOnLoad:true"
17       src="http://o.aolcdn.com/
18         dojo/1.1/dojo/dojo.xd.js">
19     </script>
20     <script type="text/javascript">
21       dojo.require("dojo.parser");
22       dojo.require("dojo.dnd.Moveable");
23       dojo.addOnLoad(function() {
24         var div =
25           document.createElement("div");
26         dojo.addClass(div, "moveable");
27         dojo.body().appendChild(div);
28         var moveable = new
29           dojo.dnd.Moveable(div);
30        });
31      </script>
32    </head>
33    <body>
34      <h1>Creating a Moveable in Code</h1>
35    </body>
36  </html>
Save your file.
Navigate to your file in a browser. You should see the new moveable (Figure 7.2).
Dragging a <div> element around is fun, but you can display an element, such as a text area, in a moveable as well.
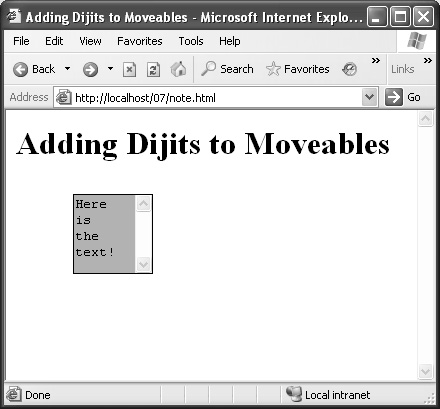
The example note.html creates a moveable text area that the user can drag around the page and type in.
Procedure 7.3. To create a moveable text area:
Open your Web page in a text editor.
Add a
dojo.require("dojo.dnd.Moveable");statement to your code.Create a new
<div>element with itsclassattribute set to"moveable"and style it as a cyan box with a border, as shown in Script 7.5.Example 7.5. Setting the class and style for a moveable text area.
1   <html>
2     <head>
3       <title>Adding Dijits to
4         Moveables</title>
5       <style type="text/css">
6         .moveable {
7           background: cyan;
8           border: 1px solid black;
9           width: 80px;
10          height: 80px;
11        }
12      </style>
13
14      <script
15        type="text/javascript"
16        djConfig="parseOnLoad:true"
17       src="http://o.aolcdn.com/
18         dojo/1.1/dojo/dojo.xd.js">
19      </script>
20
21      <script type="text/javascript">
22        dojo.require("dojo.parser");
23        dojo.require(
24         "dojo.dnd.Moveable");
25      </script>
26    </head>
27
28    <body>
29      <h1>Adding Dijits to Moveables</h1>
30
31      <div dojoType="dojo.dnd.Moveable">
32      </div>
33    </body>
34  </html>
Insert a text area into the moveable, as shown in Script 7.6.
Example 7.6. Creating a moveable text area.
1   <html>
2     <head>
3       <title>Adding Dijits to
4         Moveables</title>
5       <style type="text/css">
6         .moveable {
7           background: cyan;
8           border: 1px solid black;
9           width: 80px;
10          height: 80px;
11        }
12      </style>
13
14      <script
15        type="text/javascript"
16        djConfig="parseOnLoad:true"
17       src="http://o.aolcdn.com/
18         dojo/1.1/dojo/dojo.xd.js">
19      </script>
20
21      <script type="text/javascript">
22        dojo.require("dojo.parser");
23        dojo.require(
24          "dojo.dnd.Moveable");
25      </script>
26    </head>
27
28    <body>
29      <h1>Adding Dijits to Moveables</h1>
30
31      <div dojoType="dojo.dnd.Moveable">
32        <textarea class="moveable">
33          Enter your text!
34        </textarea>
35      </div>
36    </body>
37  </html>
Save your file.
Navigate to your file in a browser. You should see the draggable text area.
Enter text in the text area. You should see your text appear in the draggable text area (Figure 7.3).
The previous task showed how to make a text area draggable, but that’s not always what you want. What if the user drags the mouse to try to select text? As things stand, the whole text area would move. You can fix this problem by adding a dragging handle.
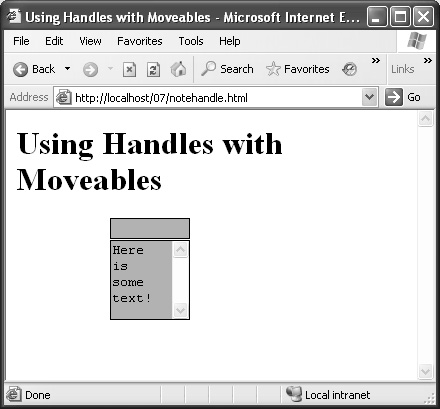
The example notehandle.html adds a handle above the text area and disables the text area’s ability to start dragging operations.
Procedure 7.4. To create a draggable handle:
Open your Web page in a text editor.
Add a
dojo.require("dojo.dnd.Moveable");statement to your code.Create two new
styleclasses, one for the moveable text area and a smaller one for the dragging handle, as shown in Script 7.7.Example 7.7. Creating style classes for a moveable with a draggable handle.
1   <html>
2     <head>
3       <title>Using Handles with
4         Moveables</title>
5       <style type="text/css">
6         .moveable {
7           background: cyan;
8           border: 1px solid black;
9           width: 80px;
10          height: 80px;}
11        .draggable {
12          border: 1px solid black;
13          cursor: pointer;
14          background: cyan;
15          width : 80px;
16          height: 10px;}
17      </style>
18      <script type="text/javascript"
19        djConfig="parseOnLoad:true"
20        src="http://o.aolcdn.com/
21          dojo/1.1/dojo/dojo.xd.js">
22      </script>
23      <script type="text/javascript">
24        dojo.require("dojo.parser");
25        dojo.require("dojo.dnd.Moveable");
26      </script>
27    </head>
28    <body>
29      <h1>Using Handles with Moveables</h1>
30    </body>
31  </html>
Add the dragging handle to the moveable
<div>element, setting the<div>element’shandleattribute to the handle’s ID, as shown in Script 7.8.Example 7.8. Creating a draggable handle.
1   <html>
2     <head>
3       <title>Using Handles with
4         Moveables</title>
5       <style type="text/css">
6         .moveable {
7           background: cyan;
8           border: 1px solid black;
9           width: 80px;
10          height: 80px;
11        }
12        .draggable {
13          border: 1px solid black;
14          cursor: pointer;
15          background: cyan;
16          width : 80px;
17          height: 10px;
18        }
19      </style>
20      <script type="text/javascript"
21        djConfig="parseOnLoad:true"
22        src="http://o.aolcdn.com/
23          dojo/1.1/dojo/dojo.xd.js">
24      </script>
25      <script type="text/javascript">
26        dojo.require("dojo.parser");
27        dojo.require("dojo.dnd.Moveable");
28      </script>
29    </head>
30    <body>
31      <h1>Using Handles with Moveables</h1>
32      <div dojoType="dojo.dnd.Moveable"
33        handle="handle">
34        <div id="handle"
35          class="draggable"></div>
36        <textarea class="moveable">Enter
37          your text!
38        </textarea>
39      </div>
40    </body>
41  </html>
Save your file.
Navigate to your file in a browser and enter text in the text area (Figure 7.4). Then try dragging the box.
Note that you need to drag using the dragging handle at the top, not the text area.
You can also make your dragged items respond to drag events, such as the starting and stopping of dragging.
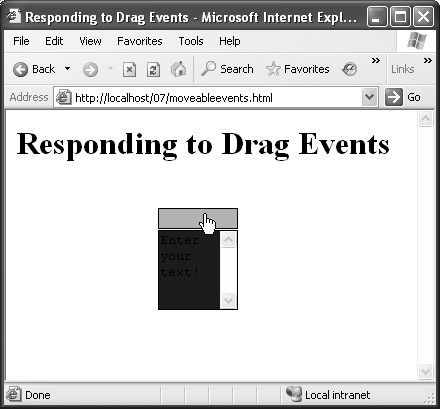
The next example, moveableevents.html, catches the start of a drag operation and turns the text area in the draggable <div> blue.
Procedure 7.5. To respond to drag events:
Open your Web page in a text editor.
Add a
dojo.require("dojo.dnd.Moveable");statement to your code.Create a new style,
dragging, that includes a blur background.Use the
dojo.subscribemethod to connect code to the"/dnd/move/start"and"/dnd/move/stop"events, and usedojo.queryto add and remove the dragging class to and from the text area when dragging starts and stops.Script 7.9 shows what your page should look like after you make the additions.
Example 7.9. Responding to drag events.
1   <html>
2     <head>
3       <title>Responding to Drag
4         Events</title>
5       <style type="text/css">
6         .moveable {
7           background: cyan;
8           border: 1px solid black;
9           width: 80px;
10          height: 80px;
11        }
12        .draggable {
13          border: 1px solid black;
14          cursor :pointer;
15          background: cyan;
16          width : 80px;
17          height: 10px;
18        }
19        .dragging {
20          background : blue;
21        }
22      </style>
23
24      <script
25        type="text/javascript"
26        djConfig="parseOnLoad:true"
27        src="http://o.aolcdn.com/
28        dojo/1.1/dojo/dojo.xd.js">
29      </script>
30
31      <script type="text/javascript">
32        dojo.require("dojo.parser");
33        dojo.require(
34          "dojo.dnd.Moveable");
35        dojo.addOnLoad(function() {
36        dojo.subscribe(
37          "/dnd/move/start", function(n){
38          dojo.query("#moveable >
39           textarea").addClass("dragging");
40        });
41        dojo.subscribe(
42          "/dnd/move/stop", function(n){
43          dojo.query("#moveable >
44         textarea").removeClass(
45         "dragging");
46        });
47      });
48      </script>
49    </head>
50
51    <body>
52      <h1>Responding to Drag Events</h1>
53
54      <div id="moveable"
55        dojoType="dojo.dnd.Moveable"
56        handle="handle">
57        <div id="handle"
58          class="draggable"></div>
59        <textarea class="moveable">Enter
60          your text!</textarea>
61      </div>
62    </body>
63  </html>
Save your file.
Navigate to your file in a browser and drag the handle. You should see the text area turn blue (Figure 7.5).
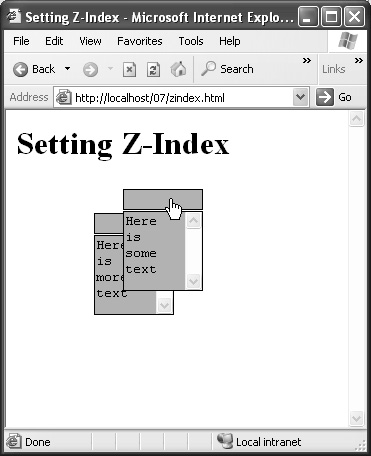
When you have multiple moveables on a Web page, you have to arrange them so that when the user drags one, it doesn’t slide under other elements as the user moves it. The way to do that is to give the dragged element a higher HTML z-index value than the other elements.
The example sindex.html has two moveables. When the user starts dragging one, that moveable is given a higher z-index value than the other, so that the dragged moveable always rides over the stationary one.
Procedure 7.6. To keep the dragged movable visible when using multiple moveables:
Open your Web page in a text editor.
Add a
dojo.require("dojo.dnd.Moveable");statement to your code.Create two new moveables and use the
dojo.connectmethod to connect a function to theironMoveStartevents that uses thedojo.stylemethod to increase the z-index value.Script 7.10 shows what your page should look like after you make the additions.
Example 7.10. Keeping the dragged movable visible when using multiple moveables.
1   <html>
2     <head>
3       <title>Setting Z-Index</title>
4       <style type="text/css">
5         .moveable {
6           background: cyan;
7           border: 1px solid black;
8           width: 80px;
9           height: 80px;
10        }
11        .draggable {
12          border: 1px solid black;
13          cursor :pointer;
14          background: cyan;
15          width : 80px;
16          height: 10px;
17        }
18      </style>
19      <script type="text/javascript"
20        src="http://o.aolcdn.com/
21          dojo/1.1/dojo/dojo.xd.js">
22      </script>
23
24      <script type="text/javascript">
25        dojo.require(
26          "dojo.dnd.Moveable");
27
28        dojo.addOnLoad(function() {
29          var moveable1 = new
30          dojo.dnd.Moveable("moveable1",
31          {handle : "handle1"});
32          var moveable2 = new
33          dojo.dnd.Moveable("moveable2",
34          {handle : "handle2"});
35
36          var zIndex = 0;
37          dojo.connect(moveable1,
38            "onMoveStart", function(mover){
39              dojo.style(mover.host.node,
40              "zIndex", zIndex++);
41          });
42          dojo.connect(moveable2,
43            "onMoveStart", function(mover){
44            dojo.style(mover.host.node,
45            "zIndex", zIndex++);
46          });
47        });
48      </script>
49    </head>
50
51    <body>
52      <h1>Setting Z-Index</h1>
53      <div id="moveable1"
54        dojoType="dojo.dnd.Moveable">
55        <div id='handle1'
56          class="draggable"></div>
57        <textarea class"moveable">Here is
58          some text</textarea>
59      </div>
60      <div id="moveable2"
61        dojoType="dojo.dnd.Moveable">
62        <div id='handle2'
63          class="draggable"></div>
64        <textarea class="moveable">Here is
65          more text</textarea>
66      </div>
67    </body>
68  </html>
Save your file.
Navigate to your file in a browser. You should two moveables (Figure 7.6).
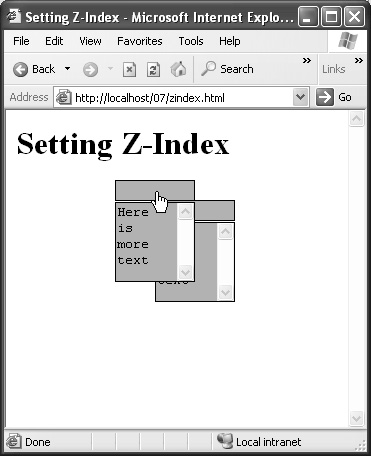
Drag one to watch it ride over the other (Figure 7.7).
Dojo lets you limit where an element can be dragged. You limit the drag motion with the constraints item when calling the dojo.dnd.move.constrainedMoveable constructor.
The example limits.html limits one moveable to a box with a size of 200 × 200 pixels.
Procedure 7.7. To limit drag motion:
Open your Web page in a text editor.
Add
dojo.require("dojo.dnd.Moveable");anddojo.require("dojo.dnd.move");statements to your code.Create two new moveables. For one, specify
dojo.dnd.move.constrainedMoveableand set thecontraintsitem to a box of 200 × 200 pixels.Script 7.11 shows what your page should look like after you make the additions.
Example 7.11. Limiting drag motion.
1   <html>
2     <head>
3       <title>Setting Drag Limits</title>
4       <style type="text/css">
5         .moveable {
6           background: cyan;
7           border: 1px solid black;
8           width: 80px;
9           height: 80px;
10        }
11        .draggable {
12          border: 1px solid black;
13          cursor :pointer;
14          background: cyan;
15          width : 80px;
16          height: 10px;
17        }
18      </style>
19      <script type="text/javascript"
20        src="http://o.aolcdn.com/
21        dojo/1.1/dojo/dojo.xd.js">
22      </script>
23      <script type="text/javascript">
24        dojo.require("dojo.dnd.Moveable");
25        dojo.require("dojo.dnd.move");
26
27        dojo.addOnLoad(function() {
28          var limits = function() {
29            box = {};
30            box["t"] = 0;
31            box["l"] = 0;
32            box["w"] = 200;
33            box["h"] = 200;
34            return box;
35          }
36          var moveable1 = new
37          dojo.dnd.move
38          .constrainedMoveable("moveable1",
39          {handle : "handle1", constraints
40          : limits, within : true});
41          var moveable2 = new
42          dojo.dnd.Moveable("moveable2",
43          {handle : "handle2"});
44          var zIndex = 0;
45          dojo.connect(moveable1,
46             "onMoveStart", function(mover){
47               dojo.style(mover.host.node,
48               "zIndex", zIndex++);
49           });
50           dojo.connect(moveable2,
51             "onMoveStart", function(mover){
52             dojo.style(mover.host.node,
53             "zIndex", zIndex++);
54           });
55         });
56       </script>
57     </head>
58     <body>
59       <h1>Setting Drag Limits</h1>
60       <div id="moveable1">
61         <div id='handle1'
62            class="draggable"></div>
63         <textarea class="moveable">Here is
64           some text</textarea>
65       </div>
66       <div id="moveable2">
67         <div id='handle2'
68           class="draggable"></div>
69         <textarea class="moveable">Here is
70           more text</textarea>
71       </div>
72    </body>
73  </html>
Save your file.
Navigate to your file in a browser and drag the first moveable. You should see it stop at the borders of a 200 × 200 box (Figure 7.8).

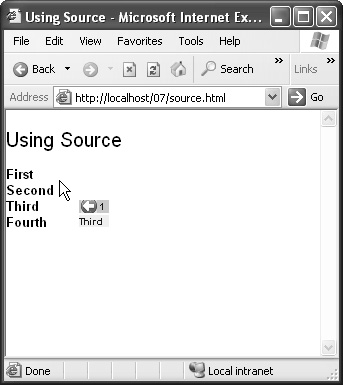
Dojo comes with a package named dojo.dnd.Source that lets you drag HTML elements on Web pages. When you use dojo.dnd.Source, you give the enclosed draggable elements the dojoType attribute "dojoDndItem".
This example, source.html, lets the user drag and rearrange some text in a page.
Procedure 7.8. To use Source to drag elements:
Open your Web page in a text editor.
Add a
dojo.require("dojo.dnd.Source");statement to your code.Create a new
<div>element withdojoTypeset todojo.dnd.Sourceand four<div>elements enclosing text inside it, withclassset todojoDndItem.Script 7.12 shows what your page should look like after you make the additions.
Example 7.12. Using Source to drag elements.
1   <html>
2     <head>
3       <title>Using Source</title>
4
5       <link rel="stylesheet"
6         type="text/css"
7         href="http://o.aolcdn.com/dojo/1.1/
8         dijit/themes/tundra/tundra.css" />
9
10      <link rel="stylesheet"
11        type="text/css"
12        href="http://o.aolcdn.com/
13        dojo/1.1/dojo/resources/dojo.css"
14      />
15
16      <link rel="stylesheet"
17        type="text/css"
18        href="http://o.aolcdn.com/
19        dojo/1.1/dojo/resources/dnd.css" />
20
21      <script
22        type="text/javascript"
23        djConfig="parseOnLoad:true"
24        src="http://o.aolcdn.com/
25          dojo/1.1/dojo/dojo.xd.js">
26      </script>
27
28      <script type="text/javascript">
29        dojo.require("dojo.parser");
30        dojo.require("dojo.dnd.Source");
31      </script>
32
33    </head>
34    <body>
35      <h1>Using Source</h1>
36      <br>
37
38      <div dojoType="dojo.dnd.Source"
39        class="container">
40
41        <div class="dojoDndItem">
42          <b>First</b></div>
43
44        <div class="dojoDndItem">
45          <b>Second</b></div>
46
47        <div class="dojoDndItem">
48          <b>Third</b></div>
49
50        <div class="dojoDndItem">
51          <b>Fourth</b></div>
52
53      </div>
54    </body>
55  </html>
Save your file.
Navigate to your file in a browser and drag the text “Third.” You should see an insertion arrow appear (Figure 7.9).
Drop the “Third” item so that it appears first. The text should be rearranged (Figure 7.10).

You can also handle drag-and-drop events when using dojo.dnd.Source. Just use dojo.subscribe to connect a function to the events that you want to handle.
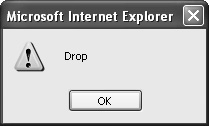
The example drop.html displays an alert box when the user drops an element.
Procedure 7.9. To handle events with Source:
Open your Web page in a text editor.
Add a
dojo.require("dojo.dnd.Source");statement to your code.Create a new
<div>element withdojoTypeset todojo.dnd.Sourceand four<div>elements enclosing text inside it, withclassset todojoDndItem.Connect code to the drag-and-drop events that you want to handle with the
dojo.subscribemethod.✓ Tip
In the script here, the code for all but the drop event is commented out so that you don’t have to click a lot of OK buttons in alert boxes as you drag and drop elements.
Script 7.13 shows what your page should look like after you make the additions.
Example 7.13. Handling events with Source.
1   <html>
2    <head>
3      <title>Handling Drop Events</title>
4      <link rel="stylesheet"
5        type="text/css"
6        href="http://o.aolcdn.com/
7        dojo/1.1/dijit/themes/
8        tundra/tundra.css" />
9      <link rel="stylesheet"
10       type="text/css"
11       href="http://o.aolcdn.com/
12       dojo/1.1/dojo/resources/
13       dojo.css" />
14     <link rel="stylesheet"
15       type="text/css"
16       href="http://o.aolcdn.com/
17       dojo/1.1/dojo/tests/
18       dnd/dndDefault.css" />
19     <script
20       type="text/javascript"
21       djConfig="parseOnLoad:true"
22       src="http://o.aolcdn.com/
23         dojo/1.1/dojo/dojo.xd.js">
24     </script>
25     <script type="text/javascript">
26       dojo.require("dojo.parser");
27       dojo.require("dojo.dnd.Source");
28       dojo.addOnLoad(function()
29       {
30         dojo.subscribe(
31         "/dnd/source/over", function(src)
32         {
33           //alert("Drag over");
34         });
35         dojo.subscribe("/dnd/start",
36         function(src, nodes, copy)
37           //alert("Drag start");
38         });
39         dojo.subscribe("/dnd/drop",
40         function(src, nodes, copy)
41         {
42           alert("Drop");
43          });
44          dojo.subscribe("/dnd/cancel",
45          function()
46          {
47            //alert("Drag cancel");
48          });
49        });
50      </script>
51    </head>
52    <body>
53      <h1>Handling Drop Events</h1>
54      <br>
55      <div dojoType="dojo.dnd.Source"
56        class="container">
57        <div class="dojoDndItem">
58          <b>First</b></div>
59        <div class="dojoDndItem">
60          <b>Second</b></div>
61        <div class="dojoDndItem">
62          <b>Third</b></div>
63        <div class="dojoDndItem">
64          <b>Fourth</b></div>
65      </div>
66    </body>
67  </html>
Save your file.
Navigate to your file in a browser and drag and then drop an element. When you drop the element, an alert box appears indicating that the drop took place (Figure 7.11).