Creating HTML elements by code
Responding to clicks of the mouse on specific elements and stopping responding to clicks of the mouse on specific elements
Creating and accessing arrays
Playing an audio clip and a video clip
Checking player responses and preventing bad behavior
Introduction
This chapter demonstrates how HTML elements can be created dynamically and then positioned on the screen. This is in contrast not only to drawing on a canvas element but also to the old way of creating more or less static web pages using HTML markup. Our goal is to produce a quiz in which the player put into chronological order a set of presidents of the United States. The set of presidents is randomly chosen from the complete list of presidents. There is a reward for a correct ordering: playing a video clip and an audio clip. The ability to display video and audio directly (also termed natively) using HTML5 is a big improvement over the old system, which required using the <object> element and third-party plugins on the player’s computer. In our game, the video and audio serve only a minor role, but the fact that developers and designers can use HTML5 and JavaScript to produce a specific video at a specific point in the running of an application is very important.
Autoplay refers to video clips played without user action. As of April, 2018, the Chrome browser adopted a policy for autoplay of video (see https://developers.google.com/web/updates/2017/09/autoplay-policy-changes for details). This policy is intended to prevent autoplay in many cases. The reasoning is that autoplay of video may subject users to data fees and may overload networks. Video ads can be annoying. I accept the reasoning; however, I want the reward to happen as soon as the player successfully completes a game. The Chrome browser has a method of determining what they term user engagement. The reward that I have programmed for player success consists of a muted video played at the same time as an audio clip. This appears to pass the Chrome test for user engagement and the media does get played. Still, autoplay policies are something you need to be aware of and investigate in the future.

An opening screen for the quiz
This gives me a chance to comment on this particular game. I can recite the presidents in order and so can play this game very well. This situation has problems, because I need to make sure the quiz works when players give wrong answers OR misbehave in other ways that I explain later. The purpose of this chapter is to introduce HTML, CSS, and JavaScript features and general techniques that you can use to build your own quiz, making your own choice of topics. Keep in mind that you probably are not building the game for yourself.
By the way, for the U.S. presidents, I needed to provide some way to address the issue of Grover Cleveland, the only person who occupied the presidency for two, non-consecutive terms. I chose to include on the list the names Grover Cleveland (1) and Grover Cleveland (2). Perhaps you will need to take a similar step for your subject matter.
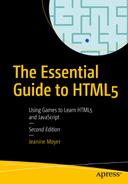
The player chooses what she believes is the earliest president in this set of 4
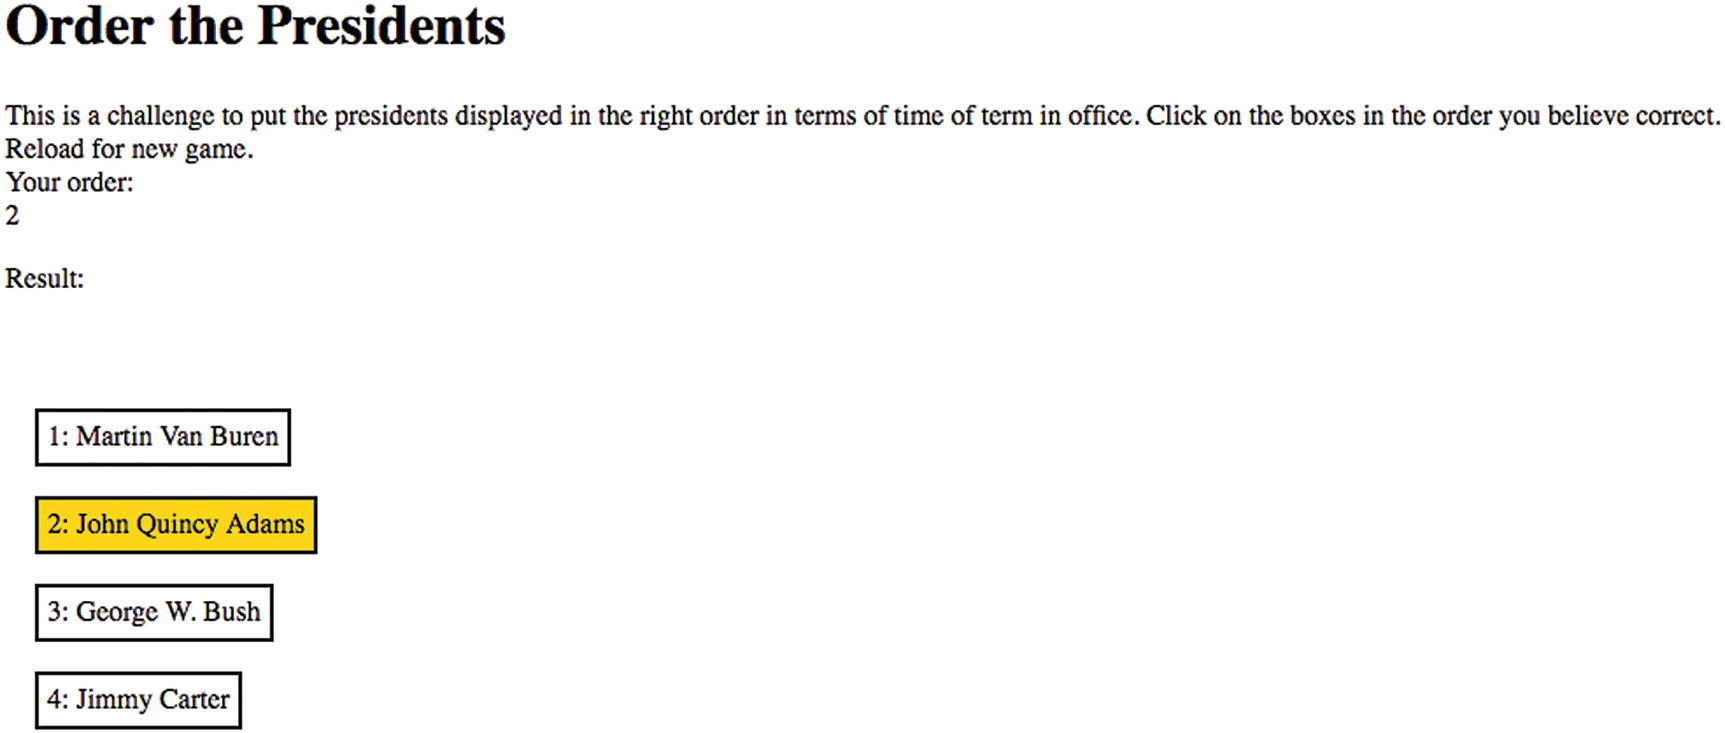
The player has clicked on John Quincy Adams and then Martin Van Buren
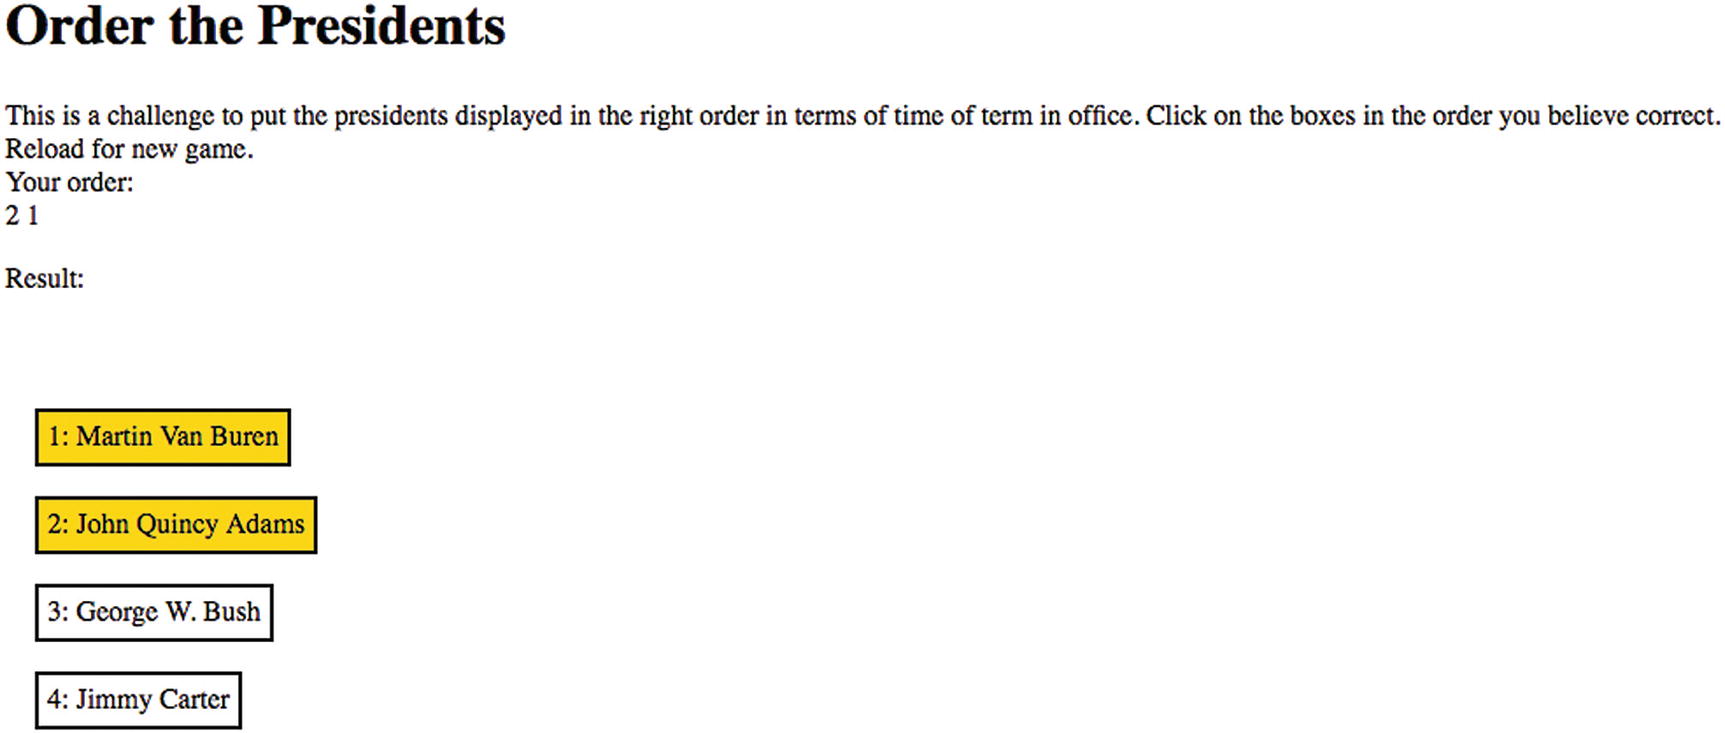
After successful ordering of the set of presidents
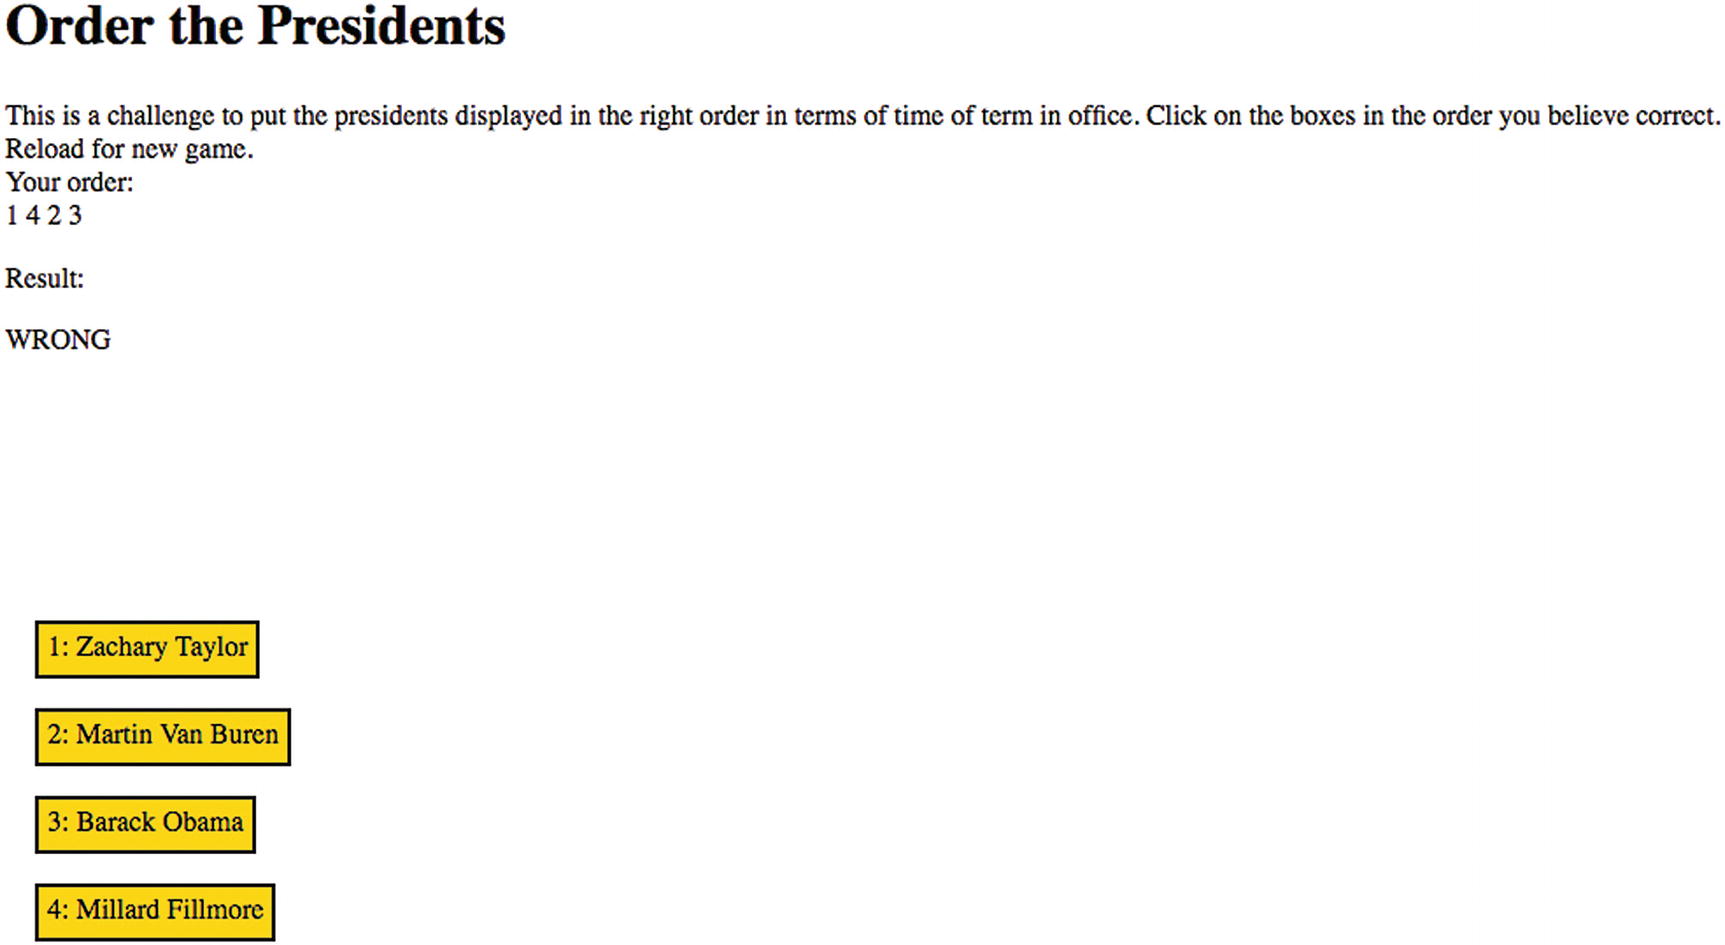
Incorrect ordering by the player
Critical Requirements for a Quiz Game
A quiz requires a way to store information or, to use a fancier term, a knowledge base. We need a way to choose specific questions to ask, randomly, so the player sees a different set of challenges each time. Since what we’re storing is names, we can use a simple technique.
Next we need to present questions to the player and provide feedback on the player’s actions. We can decide on how much feedback. My game changes the color of a box once it is clicked and the order is displayed under the heading “Your Order”. I decided to wait to check the player’s ordering until it is complete. My technical reviewer pointed out that in an early version of the game, my coding permitted a player to click on the same box two times. I decided to handle this by not responding to an extra click. You can decide if this is the approach you want to take. The general issue is that you need to expect that players/clients/users can do strange things. Sometimes you may want to tell them that this is wrong and sometimes you, meaning your code, should simply ignore the action.
I decided that a correct ordering deserved a reward: the playing of a patriotic video clip. As I will explain, this required acquiring a video clip and a separate audio clip.
HTML5, CSS, and JavaScript Features
Now let’s delve into the specific features of HTML5, CSS, and JavaScript that provide what we need to implement the quiz. I again build on what has been explained before, with some redundancy just in case you skipped around in your reading.
Storing and Retrieving Information in Arrays
You may remember that an array is a sequence of values and that a variable can be set up as an array. The individual components of an array can be any data type—including other arrays! Recall that in the memory games in Chapter 5, we used an array variable named pairs in which each element was itself an array of two elements, the matching photo image files.
In the quiz application, we will again use an array of arrays. For the quiz show, we set up a variable named facts as an array to hold the information the names of presidents. The critical information is the order of the items in the array. Each element of the facts array is itself an array. My first thought on creating this application was that there would be simply an array of String objects, each String holding a president’s name with the array in order. However, I then decided I would need an array of arrays, with the second element holding a Boolean (true/false) value to be used to prevent picked the same name twice for a single game.
The individual components of an array are accessed or set using square brackets. Arrays in JavaScript are indexed starting from zero and ending at one less than the total number of elements in the array. One trick to remember that the indexing starts from zero is to imagine the array all lined up. The first element will be at the start; the second 1 unit away; the third 2 units away; and so on.
The length of the array is kept in an attribute of the array named length . To access the first item in the facts array, you use facts[0]; for the second element, facts[1], and so on. You will see this in the coding.
Increasing Prices in an Array Using a For Loop
Code | Explanation |
|---|---|
for(var i=0;i<prices.length;i++) { | Do the statements inside the brackets, changing the value of i, starting at 0 and increasing by 1 (that’s what i++ does) until the value is not less than prices.length, the number of elements in the array. |
prices[i] += Math.max➥ (prices[i]*.15,1); | Remember to interpret this from the inside out. Compute .15 times the ith element of the array prices. See what’s greater, this value or 1. If it is this value, that’s what Math.max returns. If it is 1 (if 1 is more than prices[i]*.15), use 1. Add this value to the current value of prices[i]. That’s what += does. |
} | Close the for loop . |
Notice that the code does not state the size of the prices array explicitly. Instead it is represented in the expression prices.length. This is good because it means that the value of length changes automatically if and when you add elements to the array. Of course, in our example we know the number to be 45, but in other situations it’s better to keep things flexible. This application can be a model for a quiz involving any number of facts when a fact is one piece of information, with the order being important.
JavaScript only supports one-dimensional arrays. The facts array is one-dimensional. However, the items in the array are themselves arrays: facts[0] element is itself an array, and so on.
Note
If the knowledge base was much more complex or if I were sharing the information or accessing it from somewhere else, I might need to use something other than an array of arrays. I could also store the knowledge base separate from the HTML document, perhaps using an eXtended Markup Language (XML) file. JavaScript has functions for reading in and accessing XML. Most important of all, I would put the facts away on a server so the any player could not view the source to see what the order actually is. My defense in not doing that is that 1) I did not want to get into server-side programming, and 2) if a player worked that hard, he or she would learn something.
The design for the quiz is to present a randomly chosen set of four names for each game, so we define a variable nq (standing for number in a quiz) to be 4. This never changes, but making it a variable means that if we wanted to change it, it would be easy to do.
The do-while exits as soon as facts[c][2] is false, that is, when the element at index c is available for use.
Each time the player makes a move, that is, clicks on a block, information is added to this array using the push method. The slots array is accessed by the checkorder function to be described in the “Checking the Player’s Answer” section.
Creating HTML During Program Execution
An HTML document typically consists of the text and markup you include when you initially write the document. However, you can also add to the document while the file is being interpreted by the browser, specifically, when the JavaScript in the script element is being executed (called execution time or runtime ). This is what I mean by creating HTML dynamically. In this application, like most of the ones in this text, the body tag has the onload attribute set to invoke a program I name init. This function calls another function that sets up the game.
Then I need to put something into the newly created object. This actually takes a few statements.
to provide the visible content. The i+1 is so the player sees indexing starting at 1 and not 0.
The body element often is the appropriate choice, but you can use appendChild on other elements as well and this can be useful. For example, you can use the attribute childNodes to get a collection (a NodeList) of all the child nodes of a specific element to do something for each one, including remove it.
Methods Typically Used in Dynamic Creation of HTML
Code | Explanation |
|---|---|
createElement | Creates the HTML element |
appendChild | Adds the element to the document by appending it to something in the document |
getElementByID | Gets a reference to the element |
The formatting of each block is done in the CSS in the style element (see next). The code creates a unique ID for each block. This unique ID is constructed from the index of the name in the facts array. It is used when checking the player’s ordering.
Once we create these new HTML elements, we use addEventListener to set up events and event handlers. The addEventListener method is used for a variety of events. Remember, we used it on the canvas element in Chapter 4.
Arranging for the program to respond to the player makes use of the addEventListener method . The statement thingelem.addEventListener('click',pickelement); defines the event, namely clicking on the block, and the event handling: invoking the pickelement function .
Note
If we didn't have these elements and the capability to do the addEventListener and refer to the attributes using the this (forgive the awkward English) and instead drew stuff on a canvas, we would need to perform calculations and comparisons to determine where the mouse cursor was and then look up the corresponding information in some way to check for matches. (Recall the coding for the Slingshot in Chapter 4.) Instead, the JavaScript engine is doing much of the work and doing it more efficiently—faster—than we could by writing the code ourselves.
You’ll see the code in complete context in the “Building the Application” section.
Using CSS in the Style Element
Cascading Style Sheets (CSS) lets you specify the formatting of parts of an HTML document. Chapter 1 showed a very basic example of CSS, which is powerful and useful even for static HTML. Essentially, the idea is to use CSS for the formatting, that is, the look of the application, and to reserve HTML for structuring the content. See David Powers’ Beginning CSS3 (Apress, 2012) for more information on CSS.
Let’s take a brief look here at what we’ll use to generate the dynamically created blocks holding the names of the presidents.
An element type using the element type name
A specific element, using the id value
A class of elements
In Chapter 1, we used a style for the body element and for the section elements. For the quiz, I write a directive for a class of elements I gave the name thing.
The padding setting determines the spacing between the text and the box; the margin determines the spacing around the element. I think of a padded cell to help me remember the difference. In fact, the margin setting is not necessary here because my code positions the blocks vertically using the variable rowsize.
The period before thing indicates that this is a class specification. The position is set to absolute and top and left include values that can be changed by code.
The absolute setting refers to the way the position is specified in the document window—as specific coordinates. The alternative is relative, which you’d use if the part of the document was within a containing block that could be anywhere on the screen. The unit of measurement is the pixel and so the positions from the left and from the top are given as 0px for 0 pixels, and the border, margin, and padding measurements are 2 pixels, 5 pixels, and 5 pixels, respectively.
Here, my and mx are numbers. Setting style.top and style.left requires a string, so our code converts the numbers to strings and adds the "px" at the ends of the strings.
Responding to Player Moves
In the pickelement function , you’ll see code for responding and keeping track of the player’s moves. The pickelement header has as a single parameter called ev. However, there also is what we can call an implicit parameter. The function is called because of action on a specific element. The term this within the code refers to that element.
In the code, this refers to the current instance, namely the element that the player clicked. We set up listening for the event for each element so when pickelement is executed, the code can refer to the specific element that heard the click using the this. When the player clicks on a block holding the name John Quincy Adams, the code knows it, where by “knows” I am anthropomorphizing the program more than I would like. Putting it another way, the same pickelement function will be invoked for all the blocks we have placed on the screen, but, by using this, the code can refer to the specific one that the player clicks on each time. The pickelement code extracts the ID from the element and the first character in the textContent. The information from the ID is used to populate an array, named slots, that will be used to check the player’s ordering. The character from the textContent, 1 or 2 or 3 or 4, will be used to display to the player what choices have been made.
The gold is one of the set of established colors, including red, white, blue, etc. that can be referred to by name. Alternatively, you can use the hexadecimal RGB values available from a program such as Adobe Photoshop or an online site such as pixlr.com .
The functionreference variable has been set to point to pickelement.
The pickelement function extracts and converts to a number the original numeric portion of the block ID. This is added (pushed) onto an array named slots. When the length of the slots array is equal to nq, the checkorder function is called.
Tip
You can specify a font in the style section. You can put “safe web fonts” in any search engine and get a list of fonts purported to be available on all browsers and all computers. However, an alternative approach is to specify an ordered list of fonts so if the first one is not available, the browser will attempt to find the next. See Chapter 8 for more information.
Presenting Audio and Video
HTML5 provides the audio and video elements for presenting audio and video, either as part of a static HTML document or under the control of JavaScript.
In brief, audio and video comes in different file types, just like images do. The file types vary based on the containers for the video and the associated audio, and audio by itself, as well as on how the video and the audio are encoded. The browser needs to know how to handle the container and how to decode the video to display the frames—the still images making up the video—in succession on the screen, and how to decode the audio to send the sound to the computer speakers.
Videos involve a considerable amount of data, so people still are working on the best ways to compress the information, taking advantage, for example, of what is similar between frames without losing too much quality. Websites are now displayed on small screens on cell phones as well as large high-definition TV screens, so it’s important to take advantage of any knowledge of what the display device will be. With this in mind, though we can hope that browser makers standardize on one format in the future, the HTML5 video element provides a way to work around the lack of standardization by referencing multiple files. Developers, therefore need to produce different versions of the same video (that includes those of us creating this quiz application).
Including controls="controls" puts the familiar controls on the screen to allow the player/user to start or pause the audio clip. I do not provide controls for the video.
You also may ask why I don’t write code to create the video and audio elements dynamically, but have them in the HTML document. The answer to that is that I want to make sure the audio and video files are downloaded completely. Since human play does take some time, this probably would happen with no special work, but it is a good precaution to take.
Tip
CSS has its own language, sometimes involving hyphens in terms. The CSS term for expressing how elements are layered on the screen is z-index; the JavaScript term is zIndex.
Checking the Player's Answer
With this background on JavaScript, HTML, and CSS, we are now ready to describe the coding of the quiz application.
Building the Application and Making It Your Own
The knowledge base for the quiz is represented in the facts variable, which is an array of arrays. If you want to change the quiz to another topic, one that consists of pairs of names or other text, you just need to change facts. Of course, you also need to change the text that appears as an h1 element in the body element to let the player know the category of questions. I defined a variable named nq, for number in each quiz (the number of pairs to appear onscreen) to be 4. You can, of course, change this value if you want to present a different number of pairs to the player. The other variables are used for the original positions of the blocks and to hold status information, such as whether it’s a first click or a second click.
Functions in the Quiz Application
Function | Invoked By/Called By | Calls |
|---|---|---|
init | Invoked by the action of the onLoad in the <body> tag | setupgame |
setupgame | init | |
pickelement | Invoked as a result of the addEventListener calls in setupgame | checkorder |
checkorder | pickelement |
The setupgame function is where the HTML is created for the blocks. Briefly, an expression using Math.random is evaluated to pick one of the rows in the facts array. If that row has been used, the code tries again. When an unused row is found, it is marked as used (the third element, index value 2) and the blocks are created.
The pickelement function is invoked when a block is clicked. It adds to the string on displayed on Your Order and adds to the slots array, which will be used by checkorder. The checkorder function does the checking. It displays either WRONG or CORRECT and, if the order was correct, makes the audio control and the video visible and starts playing both.
Note that there is redundant code in my program. I did this to ease the effort to enable repeat play without reloading or “do-overs” .
The Complete Code for the Presidents Quiz
<html> | HTML tag. |
<meta charset="UTF-8"> | Defines the charset, in this case a form of Unicode. It can be omitted, and I do omit it in many examples, but include it here to let you see it. |
<head> | Head tag. |
<title>Ordering Quiz with Rewards</title> | Complete title element. |
<style> | Style tag. |
.thing {position:absolute; left: 0px; top: 0px; border: 2px; border-style: double; background-color: white; margin: 5px; padding: 5px; } | Formatting for what I have termed the blocks with the name of a president. |
audio {visibility: hidden;} | Starts off audio control as hidden. Default positioning. |
video {visibility: hidden; display: none; position:absolute;} | Starts off video as hidden. |
</style> | Close style element. |
<script type="text/javascript"> | Script tag, starting script element, with JavaScript specified. |
var facts = [ | Declaration of facts array. |
["George Washington",false], | Name and indication that this name not used. |
["John Adams",false], | |
["Thomas Jefferson",false], | |
["James Madison",false], | |
["James Monroe",false], | |
["John Quincy Adams",false], | |
["Andrew Jackson",false], | |
["Martin Van Buren",false], | |
["William Harrison",false], | |
["John Tyler",false], | |
["James Polk", false], | |
["Zachary Taylor",false], | |
["Millard Fillmore",false], | |
["Franklin Pierce",false], | |
["James Buchanan",false], | |
["Abraham Lincoln",false], | |
["Andrew Johnson",false], | |
["Ulysses Grant",false], | |
["Rutherford Hayes",false], | |
["James Garfield",false], | |
["Chester Arthur",false], | |
["Grover Cleveland (1)",false], | This is how I chose to represent Grover Cleveland's first term in office. |
["Benjamin Harrison",false], | |
["Grover Cleveland (2)",false], | This is how I chose to representGrover Cleveland's second term in office, which was not consecutive with his first. |
["William McKinley",false], | |
["Theodore Roosevelt",false], | |
["William Taft",false], | |
["Woodrow Wilson",false], | |
["Warren Harding",false], | |
["Calvin Coolidge",false], | |
["Herbert Hoover",false], | |
["Franklin Roosevelt",false], | |
["Harry Truman",false], | |
["Dwight Eisenhower",false], | |
["John Kennedy",false], | |
["Lyndon Johnson",false], | |
["Richard Nixon",false], | |
["Gerald Ford",false], | |
["Jimmy Carter",false], | |
["Ronald Reagan",false], | |
["George H. W. Bush",false], | |
["Bill Clinton",false], | |
["George W. Bush",false], | |
["Barack Obama",false], | |
["Donald Trump",false] | |
]; | Close facts array. |
var thingelem; | Used to hold created elements. |
var nq = 4; | Number of facts presented. |
var col1 = 20; | Horizontal position of column of names. |
var row1 = 100; | Vertical position of first name. |
var rowsize = 50; | Spacing allocated for each block. |
var slots = []; | Used in checking to hold indices into facts. |
var answertext=" "; | Initial value of answer. |
var song; | Will hold reference to audio element. |
var functionreference; | Will hold reference to pickelement. |
var v; | Will hold reference to video element. |
var res; | Will hold reference to place for result. |
var ans; | Will hold reference to place for answer. |
function init(){ | Header init function. |
res = document.getElementById("results"); | Get the reference. |
ans = document.getElementById("answer"); | Get the reference. |
functionreference = pickelement; | Set to be used to remove event handling. |
song = document.getElementById("ruffles"); | Get the reference. |
v = document.getElementById("vid"); | Get the reference. |
row1= .5* window.innerHeight; | Adapt to window height. |
setupgame(); | Invoke setupgame. |
} | Close init. |
function setupgame() { | Header setupgame. |
slots=[]; | Initialize slots. Redundant, but done here to prepare for enhancements. |
answertext=""; | Initialize answertext. Redundant, but done here to prepare for enhancements. |
var i; | Indexing variable. |
var c; | Will hold index to facts. |
var mx = col1; | Initial horizontal setting. It will not change. |
var my = row1; | Initial vertical setting. This will change. |
var d; | Holds newly created element. |
var uniqueid; | Will hold the ID. It will be generated from the random index into facts. |
for (i=0;i<facts.length;i++) { | For loop to mark all facts as not being used. |
facts[i][2] = false; | Mark fact as not used. |
} | Close for loop . |
for(i=0;i<nq;i++) { | For loop to select and create the four boxes with names of presidents. |
do {c = Math.floor(Math.random()*facts.length);} | Get a random selection. |
while (facts[c][1]==true); | If it has been selected already, repeat the do clause. |
facts[c][1]=true; | Now set this fact as being used. |
uniqueid = "p"+String(c); | Create a unique ID by affixing "p" to the index converted to a String. |
d = document.createElement('pres'); | Create an element. |
d.innerHTML = | Set its innerHTML to |
"<div class="thing" id='"+uniqueid+"'>placeholder</div>"; | be a div, class="thing" and ID the generated unqueid. |
document.body.appendChild(d); | Append this to the body. This action makes it visible. |
thingelem = document.getElementById(uniqueid); | Get a reference to it. |
thingelem.textContent=String(i+1)+": "+facts[c][0]; | Make its content by the number followed by the name. |
thingelem.style.top = String(my)+"px"; | Position it vertically. |
thingelem.style.left = String(mx)+"px"; | Position it horizontally. |
thingelem.addEventListener('click',pickelement); | Enable response to click. |
my +=rowsize; | Increment my for the verticalpositioning. |
} | Close the for loop. |
} | Close setupgame. |
function pickelement(ev) { | Header for pickelement. Invoked when player clicks on a block. Note: ev is not used but necessary for event handlers. What is used is the this term. |
var answert; | Will hold the number 1, 2, etc. |
var positiont; | Will hold position in original array as text. |
var positionn; | Will hold position as number. |
positiont = this.id.substring(1); | Create position by removing the first letter of ID. |
answert= this.textContent.substring(0,1); | Create what will be added to answer by taking the first character of thetextContent. Note: Works if fewer than 10 choices. |
answertext = answertext+answert+" "; | Add the answer for this to what there is already. |
ans.innerHTML= answertext; | Display answertext. |
positionn = Number(positiont); | Generate the number. |
this.style.backgroundColor = "gold"; | Make block gold. |
this.removeEventListener('click',functionreference); | Remove event handling. |
slots.push(positionn); | Add positionn to the slots array to beused in the checking. |
if (slots.length==nq) { | Have there been nq clicks on block? |
checkorder(); | …. If so, invoke checkorder. |
} | Close if . |
} | Close pickelement function. |
function checkorder(){ | Header for checkorder. |
var ok = true; | Start off with ok set to true. |
for (var i=0;i<nq-1;i++){ | Loop through all elements in slots. |
if (slots[i]>slots[i+1]){ | If the ith slot is more than the (i+1)th slot. |
ok = false; | Set ok to false. Answer is not in order. |
break; | Leave for loop. |
} | Close if. |
} | Close for loop. |
if (ok){ | The ok variable holds true or false. If true, |
res.innerHTML= "CORRECT"; | Display CORRECT . |
song.style.visibility="visible"; | Make the song element, that is, the controls, visible. |
song.currentTime = 4; | This audio clip has some seconds ofsilence, so this prevents seconds of no sound. |
song.play(); | Play the song. |
v.style.visibility="visible"; | Set the video to visible. |
v.currentTime=0; | Set to start at the start. |
v.style.display="block"; | Make visible (may be redundant). |
v.play(); | Start to play video. |
} | Close if ok true clause. |
else { | else . |
res.innerHTML = "WRONG"; | Display WRONG |
} | Close else. |
} | Close checkorder function. |
</script> | Close script element. |
</head> | Close head element. |
<body onload="init();"> | Body tag. Note setting of onload. |
<audio id="ruffles" controls="controls" preload="auto" alt="Hail to the Chief"> | Audio tag. |
<source src="hail_to_the_chief.mp3" type="audio/mpeg"> | The MP3 source. |
<source src="hail_to_the_chief.ogg" type="audio/ogg"> | The OGG source |
Your browser does not accept the audio tag. | Done for older browsers. |
</audio> | Close audio element. |
<video id="vid" preload="auto" width="50%" alt="Fireworks video" muted> | Video tag. Noted muted attribute. |
<source src="sfire3.webmvp8.webm" type='video/webm; codec="vp8, vorbis"'> | The WEBM source. |
<source src="sfire3.mp4"> | The MP4 sources. |
<source src="sfire3.theora.ogv" type='video/ogg; codecs="theora, vorbis"'> | The OGG source. |
Your browser does not accept the video tag. | For older browsers. |
</video> | Close video element. |
<h1>Order the Presidents</h1> | Heading. |
This is a challenge to put the presidents displayed in the right order in terms of time of term in office. Click on the boxes in the order you believe correct. | Instructions. |
<br/> | Line break. |
Reload for new game. | More instructions. |
<br/> | Line break. |
Your order: | Heading for player's answers. |
<div id="answer"></div> | Place for player's answers. |
<p> | Vertical spacing. |
Result: <div id="results"></div> | Will hold result. |
</p> | Vertical spacing. |
</body> | Close body . |
</html> | Close html. |
The first step to making this application your own is to choose the content of your quiz. The values here are names, held in text, but they could be descriptions of events, mathematical expressions, or names of songs. You also could create img tags and use the information kept in the array to set the src values of img elements. More complicated, but still doable is to incorporate audio. Start simple, with something resembling the list of U.S. presidents, and then be more daring.
You can change the look of the application by modifying the original HTML and/or the created HTML. You can modify or add to the CSS section.
You can easily change the number of questions (but can’t have more than 9), or change the four-question game to a four-question round and make a new round happen automatically after a certain number of guesses or when clicking on a button. You would need to decide if presidents are to be repeated from round to round.
You can also incorporate a timing feature. There are two general approaches: keep track of time and simply display it when the player completes a game/round successfully (see the memory games in Chapter 5) or impose a time limit. The first approach allows someone to compete with themselves but imposes no significant pressure. The second does put pressure on the player and you can decrease the allowed time for successive rounds. It could be implemented using the setTimeout command.
You can identify links to websites that discuss the facts or to Google map locations as mini-awards for correct answers—or as clues.
You may not like the way the quiz blocks remain on the screen while the video is showing. You can remove them using a loop that makes each element invisible. Look ahead to the Hangman application in Chapter 9 for ideas.
Testing and Uploading the Application
The random feature of the game does not impact the testing. If you wish, you can substitute fixed choices after the Math.random coding, do the bulk of the testing, and then remove these lines of code and test again. The important thing to do for this and similar games is to make sure your testing involves both correct guesses and incorrect guesses, as well as bad behavior on the part of the player, like clicking on a choice already made.
Create or acquire the video and/or audio
Produce the different versions, assuming you want to support the different browsers
Upload all the files to the server
You may need to work with your server staff to make sure the different video types are properly specified. This involves something called the htaccess file. HTML5 has now been around for a time and this way of featuring video on web pages should be familiar to server staff.
Alternatively, you can identify video and/or audio already online and use absolute URLs as the src attributes in the source elements in the media elements .
Summary
Creating HTML during runtime using document.createElement, document.getElementById, and document.body.appendChild
Setting up event handling for the mouse click event using addEventListener
Removing event handling for the mouse click event using removeEventListener
Changing the color of objects on the screen using code to change CSS settings
Creating an array of arrays to hold the quiz content
Using for loops for iterating over the array
Using do-while loops to make a random choice of an unused question set
Using substring for extracting strings to be used in the checking
Turning a string into a number using the Number function
Using video and audio elements for displaying video and audio encoded in formats acceptable by different browsers
You can use dynamically created and repositioned HTML along with the drawing on canvas that you learned in the previous chapters. The implementation of Hangman, described in Chapter 9, does just that. You can use video and audio as a small part of an application, as was done here, or as the major part of a website. In the next chapter, we return to drawing on canvas as we build a maze and then travel through the maze without crossing the walls.