
2. Circles
Circles are so basic to the Google+ experience that I was tempted to start this book by talking about them. Because you can’t use circles until you actually have a Google+ account, however, they had to wait until this chapter.
Circles are groups of the people you follow on Google+. One person can be in many circles, and circles can contain many people. (There’s a limit of 5,000 people per circle, but I doubt that many circles will hit that limit.)
Still confused? Circles mimic our relationships in the real world to a degree. You deal with different circles of people in day-to-day life: family members, close friends, co-workers, and so on. Because Google+ is about sharing information with people, it makes sense to group those people into similar circles. Then you can choose to share some things (like those pictures you took while out carousing) only with certain people (such as your Drinking Buddies circle).
In this chapter, I cover everything about circles, starting with the default circles and moving on to adding and removing people, creating custom circles, managing existing circles, and sharing your circles.
Working with Circles
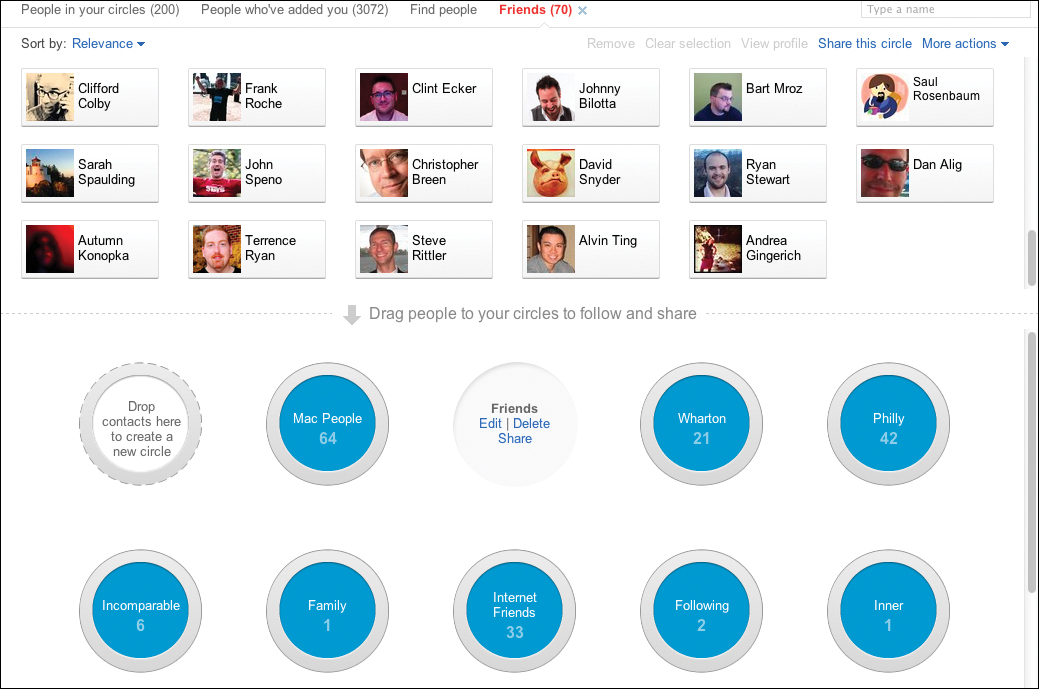
Click the Circles icon in the Google+ toolbar (Figure 2.1) to manage your circles. In the resulting Circles page (Figure 2.2), you can do a variety of things: create new circles, find people, add people to circles, and more. This page is broken into two sections: people in the top section, which I call the people browser, and circles in the bottom section, which I call the circle browser.
Figure 2.1. The Google+ toolbar.

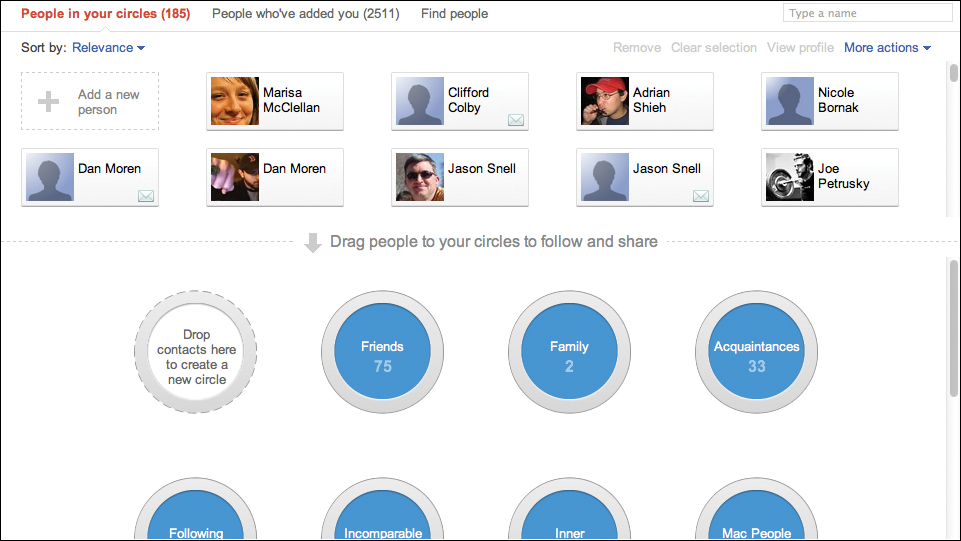
If you’re looking at this page for the first time, you’ll see only the Google+ default circles listed in the circle browser:
• Friends
• Family
• Acquaintances
• Following
By default, the people browser displays only the people in your circles—as you can tell by looking at the People in Your Circles tab, which is red. That’s the active view. The numbers next to this tab are the number of people currently in your circles. Figure 2.2 shows that I have 185 people in various circles of mine.
If you want to see which people have you listed in their own circles, click the People Who’ve Added You tab, which turns red to show that it’s the active tab. Your own circles will still be displayed in the circle browser, but the people browser changes to list everyone who has you in a circle—even people who aren’t in any of your circles. Clicking this tab is a great way to make sure that you’re following the people of interest who are following you.
Finding people
The people browser can also help you find more people to follow. When you click the Find People tab (Figure 2.3), Google+ displays people that it thinks you may want to follow, based on who’s already in your circles, who’s in your Gmail contacts list (if you use Gmail), and how you’re linked to people through any connected accounts in your profile. (Flip back to Chapter 1 for more information about connected accounts.)
Figure 2.3. The Find People tab lists people whom you may be interested in adding to a circle.

The Find People tab gives you three other ways to find people. The Find Friends bar at the top of the page lists three options:
• Yahoo. If you have a Yahoo email account, click this link, and log in with your user name and password. Google+ searches your contacts for people.
• Hotmail. This link works just like the Yahoo link except that you log in with your Hotmail credentials.
• Upload Address Book. What if you have an address book on your computer or on another service that isn’t listed? As long as you can export the contents of your address book into a CSV (commaseparated values) file or into vCards, you can use this link to upload those files to Google+. Then you can add those folks to your Google+ circles.
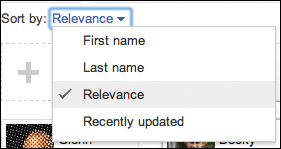
You can set how people show up in the people browser by clicking the Sort By menu in the top-left corner of each tab. Figure 2.4 on the next page shows the Sort By menu for the People in Your Circles tab, which allows you to sort by Relevance (the default), First Name, Last Name, or Recently Updated. Recently Updated first shows the people who’ve recently done something on Google+ and then sorts the rest of your people in the order in which they did something on Google+, from most to least recent.
Figure 2.4. People are sorted by relevance by default. You can sort by a few other things.
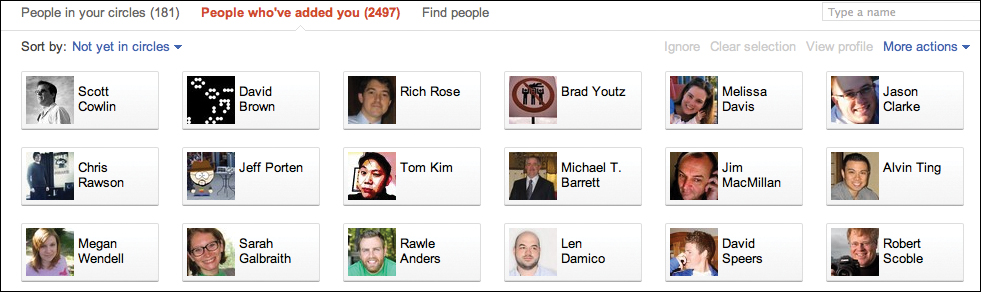
The Sort By menu in the People Who’ve Added You tab also has a special sort option: Not Yet in Circles. This option is great for finding people who have you in one of their circles but who aren’t in a circle of yours.
Adding people to a circle
Now that you know how to find people and see who has you in a circle, it’s time to add someone to a circle of your own. Here’s what you do:
1. Log in to Google+.
2. Click the Circles icon in the navigation bar to open the Circles page.
3. In the people browser, search for the person you want to add (refer to “Finding people” earlier in this chapter).
The search in Figure 2.5 finds people in the People Who’ve Added You tab sorted by Not Yet in Circles.
Figure 2.5. This tab lists people who have you in their circles but aren’t in one of your circles.
4. Click the person you want to add.
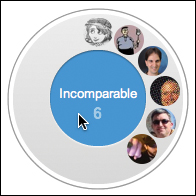
When you select a person in the people browser, the item turns blue (Figure 2.6).
Figure 2.6. Click a person to select him.
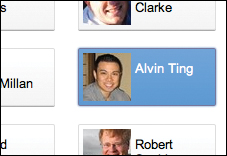
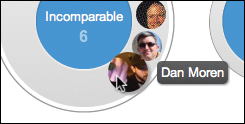
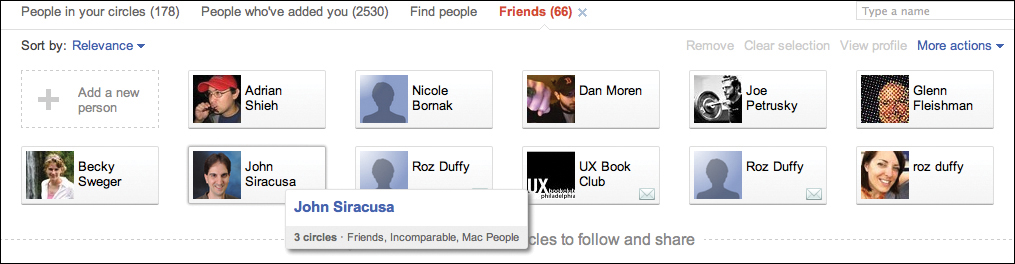
When you hover over a person’s picture in the people browser, his name appears along with a snippet from his profile so that you’ll know you’re adding the right person.
You can select more than one person this way; just click as many people as you want to add to the circle.
5. Drag the selected person into the circle browser, and drop him into the circle you want to add him to (Figure 2.7).
Figure 2.7. Drag and drop a selected person to add him to a circle.
A yellow alert at the top of the screen lets you know that the person has been added to your circle, and he receives a notification that you’ve added him.
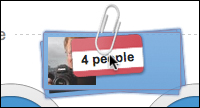
When you’re dragging multiple people, Google+ displays them as a stack (Figure 2.8).
Figure 2.8. You can select multiple people, and Google+ tells you how many people are in your selection.
People will be notified when they’re added to one of your circles, but they won’t be told the name of the circles to which they’ve been added. You can have a circle named People I Don’t Like, for example, and add anyone to it; the people you add will never know.
Removing people from a circle
Just as you can add people to a circle, you can take them out. You have a default circle called Friends, but you know that friendships sometimes end. Here’s how to remove someone from a circle:
1. Log in to Google+.
2. Click the Circles icon in the navigation bar to open the Circles page.
3. In the circle browser section, click the circle from which you want to remove the person.
When you click a circle, the people browser shows only the people that are in that circle (Figure 2.9). Also, the selected circle turns gray, with links added, and a new tab appears in red at the top of the people browser: the name of the circle with the number of people in the circle displayed next to it. If you click the X on this tab, the tab closes, and you go back to the People in Your Circles tab.
Figure 2.9. Display who’s in a circle by clicking it.
4. Find the person you’re looking to delete.
You can scroll through the list of people in the selected circle, which can take a while if the circle is crowded, or you can search for the person (refer to “Finding people” earlier in this chapter).
In the top-right corner of the people browser is a search box containing the text Type a name in gray (refer to Figure 2-3). When you type a name in that box, only the people whose names match the query are displayed (Figure 2.10).
Figure 2.10. Looking for someone in a circle? Just use the filter to show only the people who match your query.

5. Click the person you want to remove.
If you want to remove more than one person, that’s OK; just click as many people as you want to remove.
When you select a person, a new Selected tab and some action items appear (Figure 2.11).
Figure 2.11. Select someone to activate some action links, such as Remove.

6. Click the Remove action item.
The selected person is removed from your Friends circle—an action that’s confirmed by a yellow message at the top of the page.
If you decide that you were a little hasty in your removal, click the Undo link in the confirmation message, and the person you deleted is added back.
Creating a custom circle
When you start following a bunch of people on Google+, you’ll find that the default circles just don’t cut it for all the groups of people that you know. That’s why you can create as many circles as you want and name them whatever you like. A circle can have a single member (I have a circle called Inner that has only my wife in it, should I want to share something only with her), or it can have as many as 5,000 people (in case you have an incredible number of siblings, perhaps).
I recommend creating two general groups of circles:
• Relationship-based. We all have different types of relationships: friends, co-workers, Internet friends, and more (even friends who are also co-workers!). Create circles to reflect these relationships, and organize people in those circles. My co-worker friends, for example, end up in both my Friends circle and my Wharton circle because I work at Wharton Computing.
• Interest-based. Google+ has lots of interesting people who are sharing interesting things, but they aren’t necessarily people you know. They don’t belong in relationship-based circles, but you still want to group them somehow. You could create a couple of circles devoted to a particular topic (I have a Google+ circle for Google people who work on Google+, for example) or geography (for people who live in a particular area).
Suppose that you follow a lot of people who have the same first name: Dan. Why not create a circle called The Dans and put everyone who’s named Dan in it? Just follow these steps:
1. Log in to Google+.
2. Click the Circles icon in the navigation bar to open the Circles page.
3. Make sure that you’re on the People in Your Circles tab so that the name search will find all the people you follow.
4. Type Dan in the name filter box, and select all the resulting Dans (Figure 2.12).
Figure 2.12. All the Dans I know—on Google+, anyway.
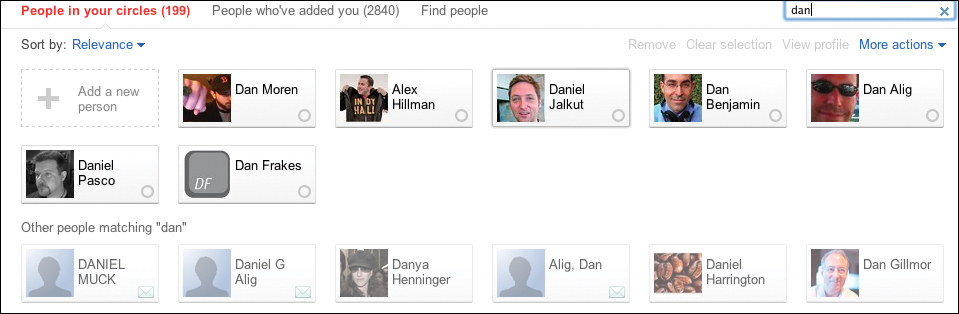
The search results return people who are already in your circles first, followed by people you don’t follow but may be interested in following. Feel free to drag any of those interesting people into your circles.
5. Drag the people you’ve selected to the circle browser, and drop them on the icon titled Drop Contacts Here to Create a New Circle (Figure 2.13).
Figure 2.13. Create a new circle by dropping people on this icon.
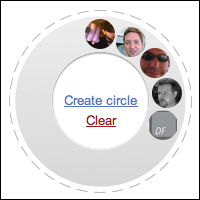
6. To create the circle you just populated, click the Create Circle link (Figure 2.14), or click Clear if you’ve changed your mind.
Figure 2.14. Click Create Circle to do just that.

When you click Create Circle, the circle editor opens.
7. Give your circle a name and a description (maximum 500 characters), if you like (Figure 2.15).
Figure 2.15. Every circle needs a name; descriptions are optional.
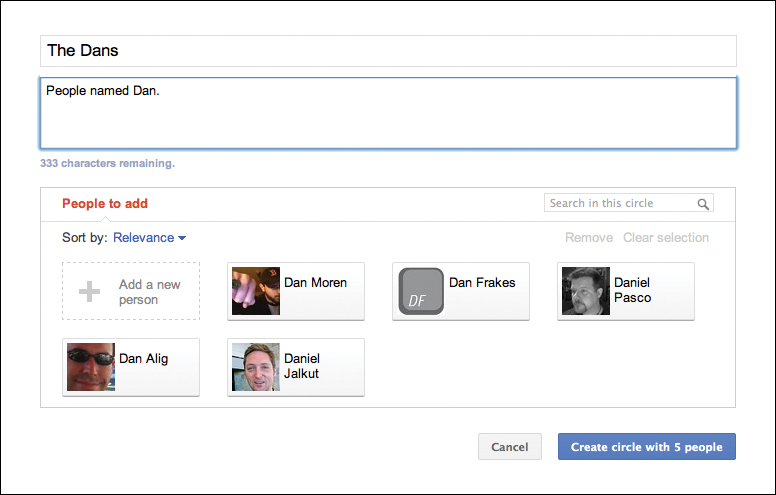
8. If you forgot to add someone who should be in this circle, click the Add a New Person icon, and follow the onscreen directions.
9. When you’re done, click the blue Create Circle with x People button.
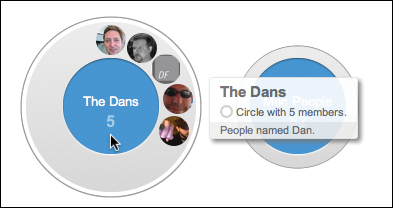
Google+ creates your new circle (Figure 2.16). Now you can share items with just those folks and check out what they’ve been posting to Google+. (For more on both of those topics, see Chapter 3.)
Figure 2.16. The Dans circle has been created.
Managing Your Circles
So far in this chapter, you’ve spent a lot of time interacting with the people browser, but you can do a lot with the circle browser, such as rearrange, rename, reorganize, and delete existing circles. I cover all these topics in this section.
Moving circles
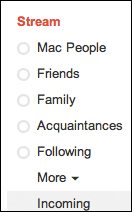
The order in which your circles appear in the circle browser may not matter to you, but it affects how you use Google+. When you’re looking at your stream, five of your circles are displayed, with the rest hidden in the More section (Figure 2.17). The order of your circles in the circle browser determines the order of the list of your circles in your stream.
Figure 2.17. Your circles are displayed next to your stream.

To rearrange your circles, just drag the circle you want to move to its new position (Figure 2.18). Your stream circle list updates automatically to reflect this new order (Figure 2.19).
Figure 2.18. Reorder your circles in the circle browser to change their order in your stream.
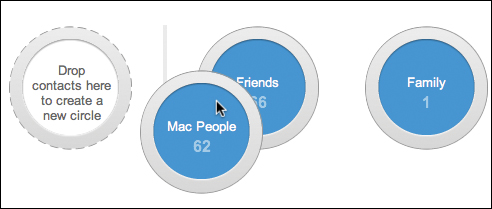
Figure 2.19. Reordered circles.
Editing names and descriptions
When you create a circle, you have the chance to name it and add a description (refer to “Creating a custom circle” earlier in this chapter). These items aren’t set in stone, however; you can change them however you like. To do that, follow these steps:
1. Log in to Google+.
2. Click the Circles icon in the navigation bar to open the Circles page.
3. Click the circle that you want to rename.
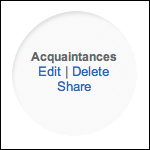
The circle turns gray, and Edit, Delete, and Share links appear (Figure 2.20).
Figure 2.20. The Edit link allows you to change the name and/or description of the selected circle.
4. Click the Edit link.
A mini circle editor opens (Figure 2.21).
Figure 2.21. Editable circle details.
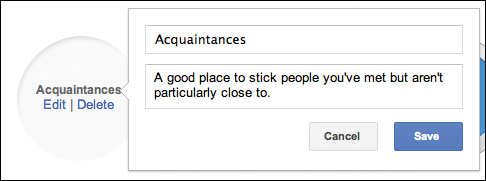
5. Type a new name and description in the appropriate text boxes, and click Save.
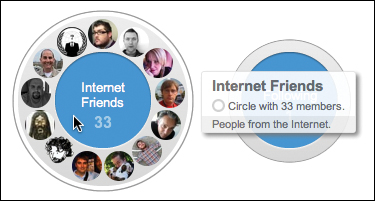
Now the circle formerly known as Acquaintances is called Internet Friends and has a new description (Figure 2.22).
Figure 2.22. My newly renamed circle. I love my Internet friends.
You can also edit a circle by right-clicking it and choosing Edit Circle from the shortcut menu.
Removing or moving people
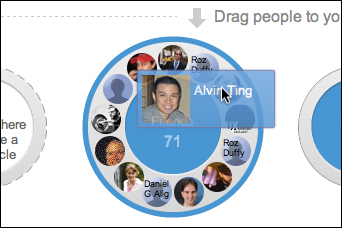
You know how to remove people from circles by using the people browser (refer to “Removing people from a circle” earlier in this chapter). To a lesser degree, you can do the same thing in the circle browser. When you hover your mouse over a circle, it expands and displays up to 13 people who are in that circle. If the circle has more than 13 members, the 13 most relevant people (as determined by Google+) are displayed (Figure 2.23).
Figure 2.23. Hovering over a circle displays up to 13 circle members.
When you hover over a person in the circle, his or her name appears (Figure 2.24).
Figure 2.24. You can delete or move this circle member.
Click that person to do one of two things:
• Drag him out of the circle. Just drag the person to an area of the circle browser outside all your circles. A red trash-can icon appears as you drag (Figure 2.25). When you release the mouse button, the person you dragged is deleted from the circle.
Figure 2.25. Drag a member out of a circle to remove him.
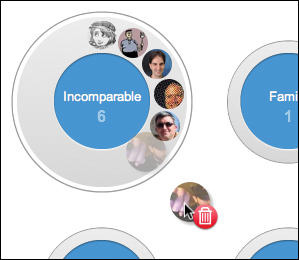
This action removes the person from this circle only. If he’s listed in more than one of your circles, his other memberships aren’t affected. If this circle is the only one of yours he was in, however, dragging him out removes him from your stream.
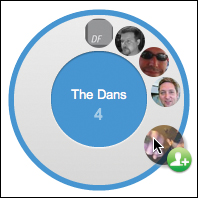
• Drag him to another circle. Just click a person in your circle and drag him over the circle you want to add him to. A little green icon appears as you drag (Figure 2.26). When you release the mouse button, the person you dragged is added to the new circle and is still in the original circle too.
Figure 2.26. Drop a circle member to another circle to add him to that circle.
Deleting circles
Deleting a circle (including the default circles) that you no longer use is easy, but you need to know a few things before you do:
• When you delete a circle, anyone who is in that circle only is removed from your list of contacts in Google+. People who are in multiple circles aren’t deleted, and their other circle memberships aren’t affected.
• Stuff that you’ve shared with the members of this circle will no longer be viewable by them unless they’re also members of another circle that can see the shared items.
With those caveats out of the way, you’re ready to delete some circles. Follow these steps:
1. Click the circle that you want to delete.
Edit, Delete, and Share links appear (refer to Figure 2.20).
2. Click the Delete link.
A confirmation dialog box appears, displaying some warnings (Figure 2.27 on the next page).
Figure 2.27. Deleting a circle has consequences.
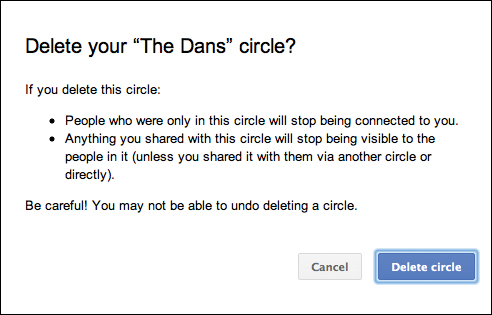
3. Click the blue Delete Circle button.
The circle rolls off the screen into oblivion.
You can also delete a circle by right-clicking it and choosing Delete Circle from the shortcut menu.
If you deleted a circle in haste, you can sometimes restore the circle by clicking the Undo link in the yellow confirmation message (Figure 2.28). This method doesn’t work all the time, so be sure you’re certain that you want to delete a circle—and that you’ve selected the correct circle—before you delete.
Figure 2.28. The circle is gone, but you may be able to restore it by clicking Undo.
What Circles Are Your People In?
Figure 2.29. Hover over a person to see what circles he or she is in.
Getting Change Notifications
Whenever you add someone to one of your circles, he or she gets a notification of this fact. You’re also notified when someone adds you to a circle. You won’t know the name of the circle to which you’ve been added (feel free to create a Handsome Authors circle and add me to it), but you’ll know that someone is interested in what you have to say on Google+.
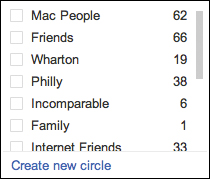
By default, your notification is an email alert (Figure 2.30). The email includes the name of the person who added you and his or her profile picture. Clicking the picture takes you to that person’s profile page, where you can add him or her to any of your circles by clicking the red Add to Circles button in the top-right corner (Figure 2.31). A menu appears, listing all your circles in the order in which you arranged them in the circle browser (Figure 2.32). Click each circle you want to add the person to. You can even create a circle by clicking the Create New Circle link.
Figure 2.30. When you’re added to someone’s circle, you’re notified via email.
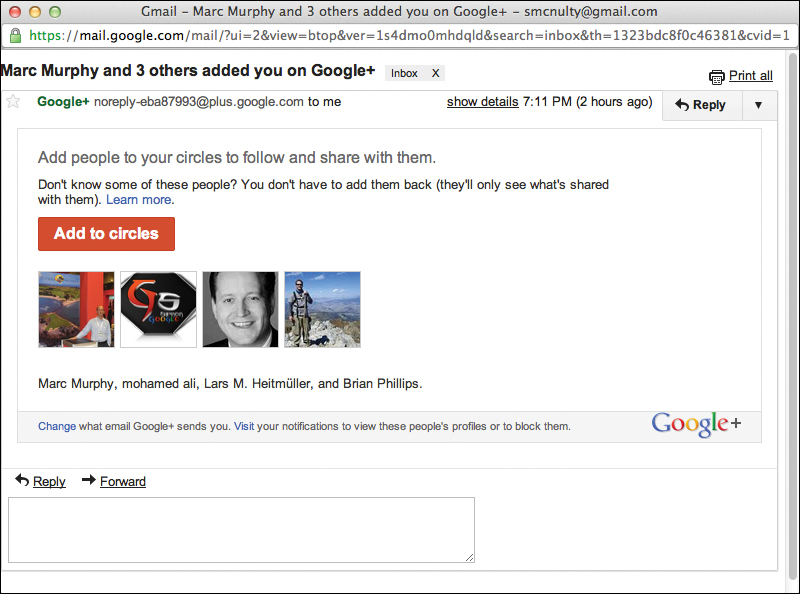
Figure 2.31. If someone has you in a circle, his profile says so.
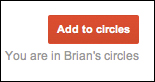
Figure 2.32. Clicking the Add to Circles button brings up your list of circles and the option to create a new one on the spot.
In addition to sending email notifications, Google+ uses the Plus bar to display a variety of notifications, such as telling you when someone has added you to a circle. The number of notifications is displayed in red (Figure 2.33). This display goes up to 9; if you get more than 9 notifications, the display reads 9+.
Figure 2.33. Notifications are also displayed in the Plus bar.
Click the number in the Plus bar to reveal the Notifications menu, which lists all your notifications, new and old (Figure 2.34). As soon as you open the Notifications menu, the counter resets to 0.
Figure 2.34. Notifications are grouped by type.
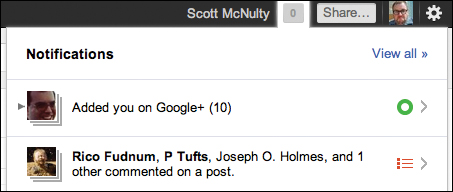
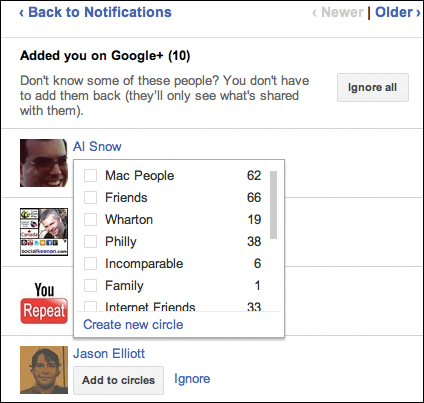
Now you can take some actions on the various notifications, which are grouped by types denoted by the icon to the right. A green circle signifies notifications that concern circles. (The top notification in Figure 2.34, for example, says that 10 people have added me to their Google+ circles.) Click a notification to see each of the individual notifications. As you can see in Figure 2.35, each notification includes an Add to Circles button. Hover over that button to bring up your list of circles; then click the circle you want to add the person to or create a new one.
Figure 2.35. You can add people to circles right from the Notifications menu.
You can also ignore the person or all the people who added you in a batch. The concept of ignoring someone is covered in Chapter 3.
Sharing Your Circles
Your circles are very personal things, and as I mention earlier in this chapter, the people listed in your circles have no way of knowing which circles they’re in. Depending on how you use circles, you may want to share some of them with other people on Google+.
Perhaps you’re a panelist in a podcast, and you’ve made a circle composed of your fellow panelists. Here’s how to share that circle with your stream:
1. Click the Circles icon in the Google+ toolbar to open the Circles page.
2. Click the circle you want to share.
Edit, Delete, and Share links appear (refer to Figure 2.20).
3. Click Share.
The Share Circle box appears, with your circle smack dab in the middle.
4. Add a comment, and specify the people with whom you want to share this circle (Figure 2.36).
Figure 2.36. Sharing a circle with your stream.
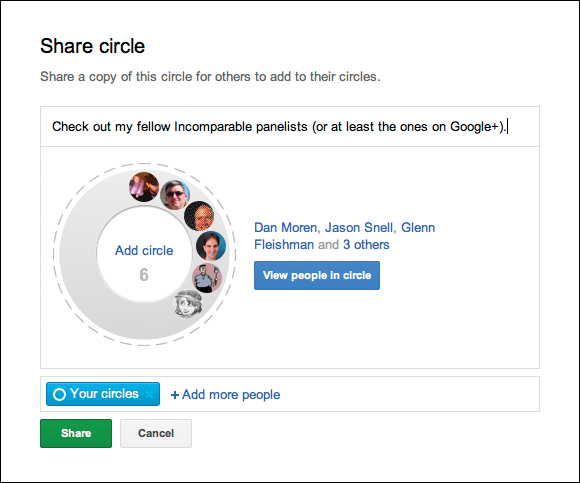
Keep in mind that the people with whom you share a circle will be able to see all the members of the circle and add them to circles of their own.
5. Click the green Share button.
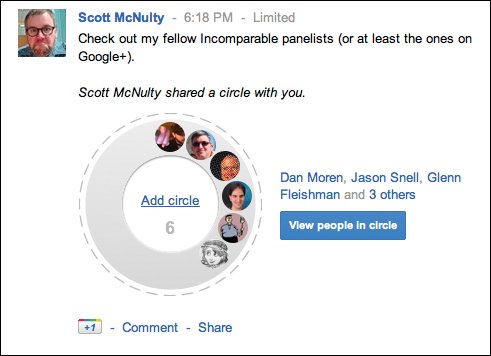
The circle is posted to your stream (Figure 2.37 on the next page). Now when people see that circle in their stream, they can click the blue View People in Circle button to see who’s in the circle.
Figure 2.37. A shared circle posted to the stream.
If you can see a shared circle, you can also add its members to an existing circle of your own or create a new one, as follows:
1. Click the View People in Circle button to see the members of the shared circle.
2. Click the people you want to add to the circle.
3. Type the name of the existing or new circle to which you want to add those people (Figure 2.38).
Figure 2.38. You can add people from a shared circle to a new, or existing, circle.
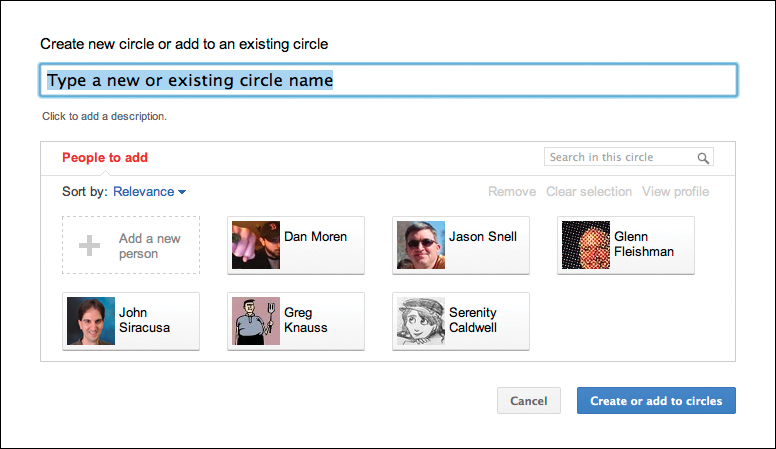
4. Click the Create or Add to Circles button.