
3. Dipping into the Stream
If Google+ were a three-legged stool, which it isn’t, the first two legs would be your Google+ account and circles. The final leg of this hypothetical stool would be the stream. Everything people in your circles share with you is displayed in your stream.
This chapter covers how to post to your stream, how to make sure you’re sharing with only the people you want to share with, and how to manage your stream so that you’re not seeing stuff you have no interest in. It also covers what you can do with other people’s posts, including commenting on them and sharing them.
Sharing Overview
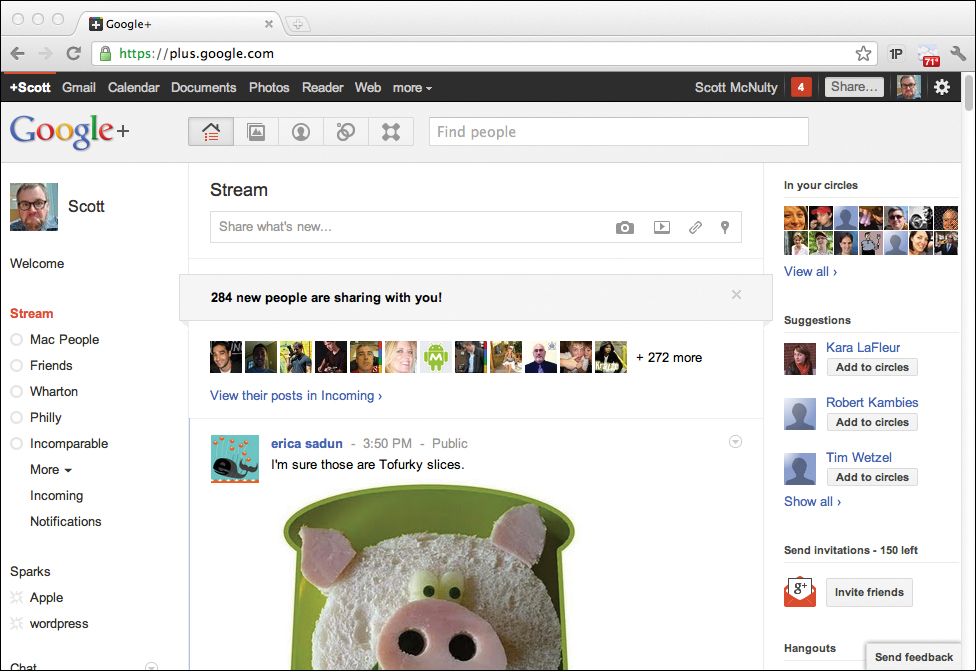
The first thing you’ll want to do is post something to your stream (Figure 3.1). Posting content to your stream is known as sharing in Google+ vernacular. At the top of your stream is the sharing box, ready for you to start typing in.
Figure 3.1. The Google+ Stream.
In addition to text, you can share the following types of things:
• Pictures
• Videos
• Links
• Your location
Location is a little special because it can be appended to any of the other post types. (Obviously, the text post type is just text, but you can also include location data.) You can’t post a picture and a video in the same post, however.
The following sections take a look at how you put together something to share on your stream. Each post in a stream has three components: the text box, the post type, and the people/circles you’re sharing with.
Text box
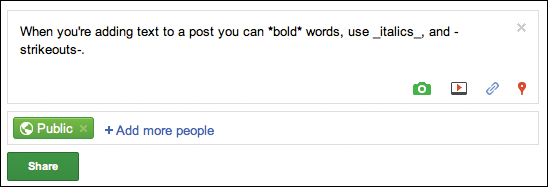
The most basic part of any post in Google+ is text. In Figure 3.2, I’ve entered some text in the sharing box and formatted it using the limited options available today on Google+:
• For boldface, type *Bold*.
• For italics, type _Italics_.
• For strikethrough, type -Strikeouts-.
Figure 3.2. Formatting options in the text field of the sharing box are limited but useful.
Let’s say you follow someone on Google+, and you want to make sure that person notices something you’re sharing. Type either a plus sign (+) or at symbol (@) and the first few letters of the person’s name in the text box to mention her in your post. As you type, Google+ lists people in your circle who match what you’re typing (Figure 3.3). Click the person you want to mention, and a link to her profile is inserted (Figure 3.4). This little trick also automatically shares the post with the person you mentioned.
Figure 3.3. Mention another Google+ user by typing + or @ and the name in the sharing box and selecting that person from your circles.
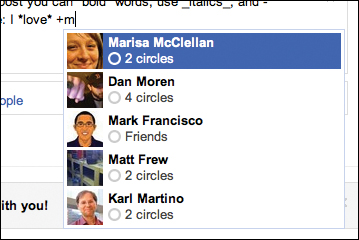
Figure 3.4. Mentioning someone automatically adds her to the people with whom this post is shared.
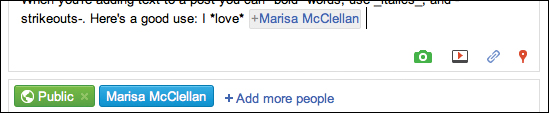
When you’re ready to share your post, just click the Share button (Figure 3.5).
Figure 3.5. A post in the stream that uses formatting and mentions someone.
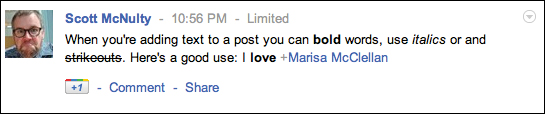
Some things to keep in mind when mentioning people in posts: A mentioned person might receive a notification that he or she has been mentioned in the post. No matter who you share the post with, even if it’s just with one person, anyone mentioned in a post will be able to see the post.
Post types
At the bottom right of the sharing box are four little icons that represent the available post types (Figure 3.6). From left to right, the icons allow you to share a photo (or photos), video, a link, or your location. I’ll take a look at the types in order so you can see the differences.
Figure 3.6. The icons for the various things you can share on Google+: photos, video, links, and your location.
Photos
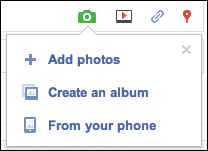
If you have any type of image you want to post to your stream (including, but not limited to, funny pictures of kitties, family photos, and animated GIFs), all you have to do is click the little green camera to bring up the photo sharing options (Figure 3.7).
Figure 3.7. The photo sharing options.
Add Photos. The first option is the most straightforward. Click Add Photos, and a file browser appears. Select the picture you want to upload to Google+ from your computer, and click Open or OK. The image is uploaded and attached to your post, without text for the moment (Figure 3.8).
Figure 3.8. Add Photos allows you to upload pictures directly to your post.

Right under the photo are two options: Edit Photos and Add More. Clicking Add More brings up the file browser again so you can select and upload another picture. (Keep clicking Add More to add more and more pictures to this post.)
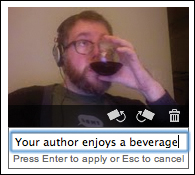
Edit Photos brings up the photo editor (Figure 3.9). Hovering your mouse over a photo makes three icons appear at the bottom of the photo: Rotate Counterclockwise, Rotate Clockwise, and Delete. Click the Add Caption link to add a caption to your photo (Figure 3.10). Press Return or Enter to save the caption or Esc to clear whatever you’ve entered.
Figure 3.9. Google+ has some rudimentary photo-editing options, including rotation.
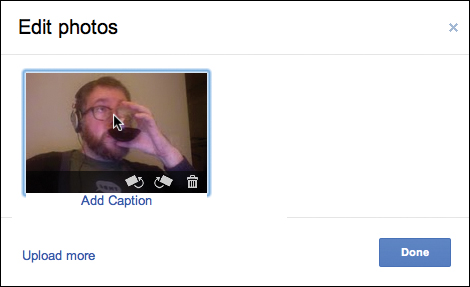
Figure 3.10. Adding a caption gives people a little more information about the photo.
Create an Album. While you can upload multiple images using the Add Photos option, that can get pretty tedious. If you want to share multiple photos, use the Create an Album option.
Clicking this link brings up the album creator (Figure 3.11). You can add photos to an album by clicking the blue Select Photos from Your Computer button or by selecting some pictures from your computer and dragging them into the dotted-line box.
Figure 3.11. Creating an album is a great way to upload more than one related photo at a time.
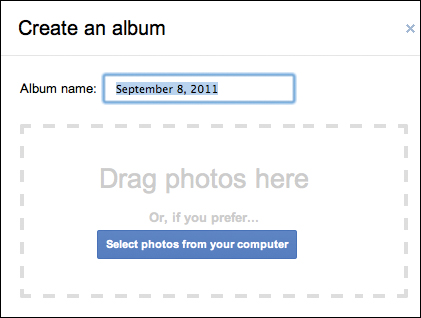
Either way, the photos start to upload into this new album (Figure 3.12). By default, Google+ uses the current date as the name of your album, which probably isn’t what you want to call it. Enter a name of your own in the Album Name field.
Figure 3.12. I’m uploading three photos into my Gettysburg album.
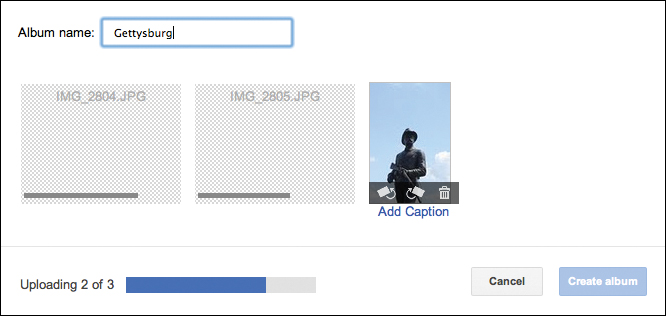
Hover over a picture in the album creator to add a caption or use one of the three available actions (two rotates and delete).
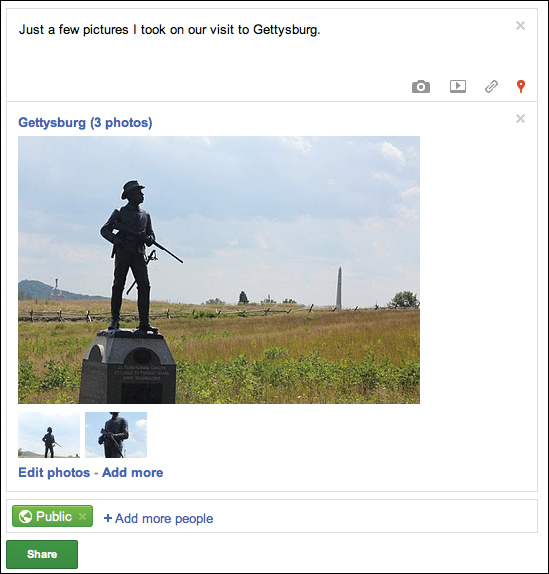
When you’re happy with your album, click the blue Create Album button, and the album is ready to share (Figure 3.13). One main image is shown, with the rest of the images in the album displayed along the bottom of the post.
Figure 3.13. The album in the sharing box.
From Your Phone. This interesting option works only if you have the Google+ Android app installed on your phone. If you don’t have the app installed or aren’t using an Android device, clicking this option just shows you a message prompting you to install the app (Figure 3.14). This option is covered in Chapter 5.
Figure 3.14. The Android app is required to use the From Your Phone option.

When your photos are posted, they show up in the streams of everyone with whom they were shared (Figure 3.15 on the next page). People can comment on them, share them, or even tag people in the photos. (The tagging functionality is covered in Chapter 5 as well.)
Figure 3.15. A photo album (top) and a single photo (bottom) are shared in my stream.

Videos
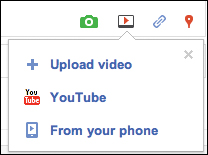
Click the green video button in the share box to insert/upload a video to your stream. As with sharing pictures, you have three methods of choosing a video (or videos) to share (Figure 3.16).
Figure 3.16. The video sharing options.
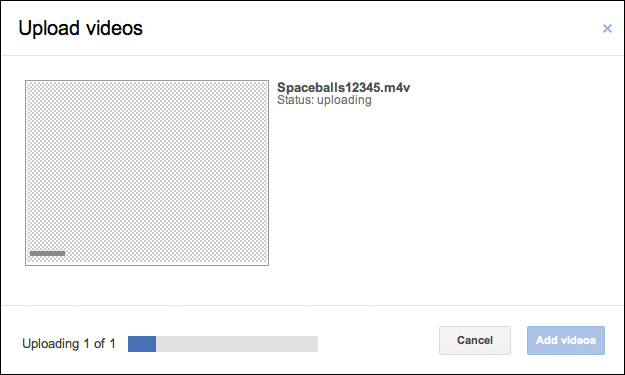
Upload Video. If you have a video on your computer that you want to share, this is the option for you. Click the Upload Video link, and the video uploader appears (Figure 3.17). It looks and functions much like the photo uploader. Either click the blue Select Videos from Your Computer button to browse your computer’s file system or just drag the movies you want to upload into the dotted-line box. Google+ displays the file name of the video and the upload progress (Figure 3.18).
Figure 3.17. Drag a video into the dotted-line box to start the upload.
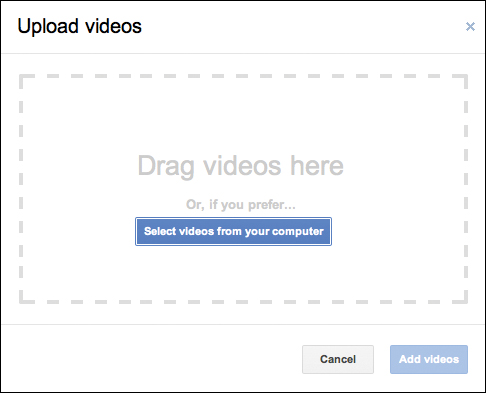
Figure 3.18. The video-upload progress is shown here.
The time required to upload a video depends greatly on two things: file size and upload speeds. The smaller the file, the less time uploading takes. At fast upload speeds, even large files upload quickly.
Google+ has to process the video for playback. Processing time varies depending on how large the video file is. The blue Add Videos button is disabled until all the videos you’ve uploaded have finished processing.
When processing completes, a thumbnail of your video appears, with a Play button on it (Figure 3.19). Clicking the Play button plays your video in the uploader. This is a great way to make sure that nothing has gone awry with the processing.
Figure 3.19. One video has been uploaded.

If you want to add a few more videos, click the Upload More link to add them. When your videos are all set, click the blue Add Videos button to share them.
The videos you uploaded appear under the text area of the share box. Unlike with photos, you can’t add a caption or any other type of descriptive text to the video itself, so make sure to include some explanation in the text of the post.
Click Share when you’re happy with your videos and they’re posted to your stream.
YouTube. If you’re just looking to share a cute kitty video or the latest viral video with your friends, the YouTube link of the video sharing menu is for you (refer to Figure 3.16).
When you click the YouTube link, you’re taken to the YouTube sharing interface, with three options listed on the left side (Figure 3.20). By default, the search option is selected. Enter a search term for the video you want to share. In Figure 3.20, I’ve searched for Japan’s most famous feline: Maru.
Figure 3.20. Searching YouTube for the perfect Maru video to share.
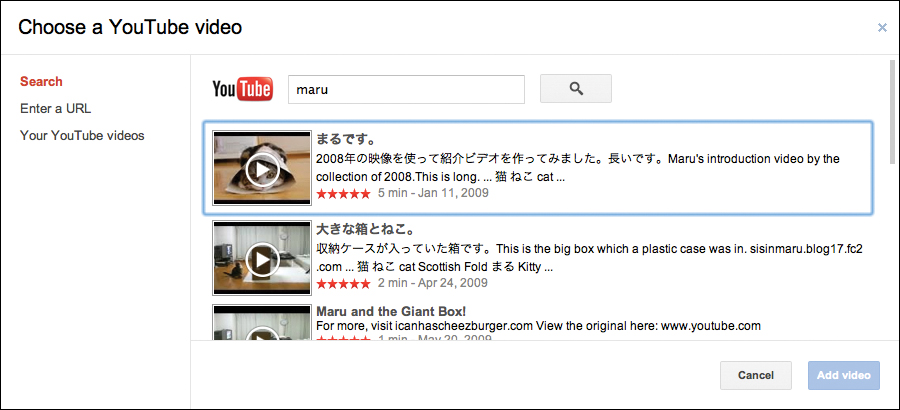
The results show a thumbnail of the video, the title (in Japanese in Figure 3.20), a bit of the YouTube description, as well as the video’s rating and when it was posted. The currently selected video is outlined in blue.
Click the video’s thumbnail to enlarge the preview and watch the video right in the YouTube search-results interface (Figure 3.21). When you’ve found the video you’re looking for, click the Add Video button, and the selected video will be ready to share with your stream (Figure 3.22).
Figure 3.21. Click a search result to preview it.
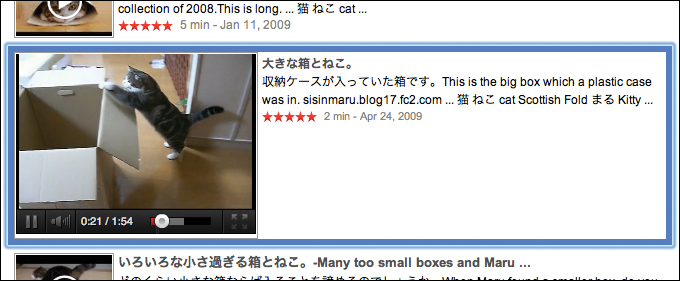
Figure 3.22. A YouTube video in the sharing box.
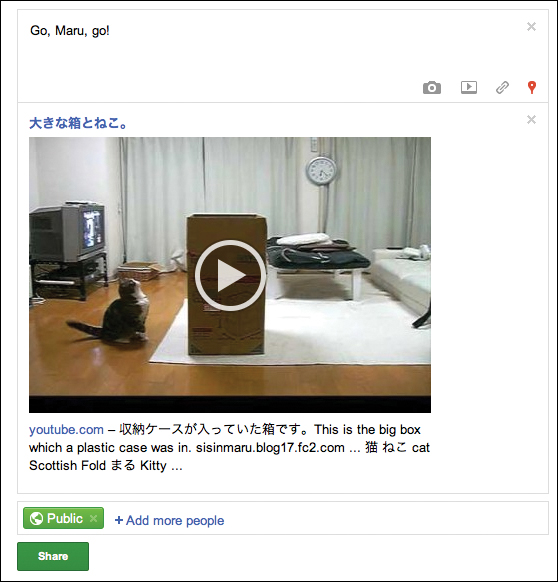
Don’t want to share the video you selected after all? Click the X in the top-right corner of the video section.
If you have the URL of a YouTube video (perhaps someone posted it to Twitter or just emailed you the link directly), click the Enter a URL link on the left side and paste it in the text field (Figure 3.23 on the next page). As soon as the link is pasted, the YouTube video appears, so you can watch it and make sure that you have the correct video of a kitten being surprised. (Yep, that’s the one.)
Figure 3.23. Paste the URL of a YouTube video here to share it. The video is previewed.
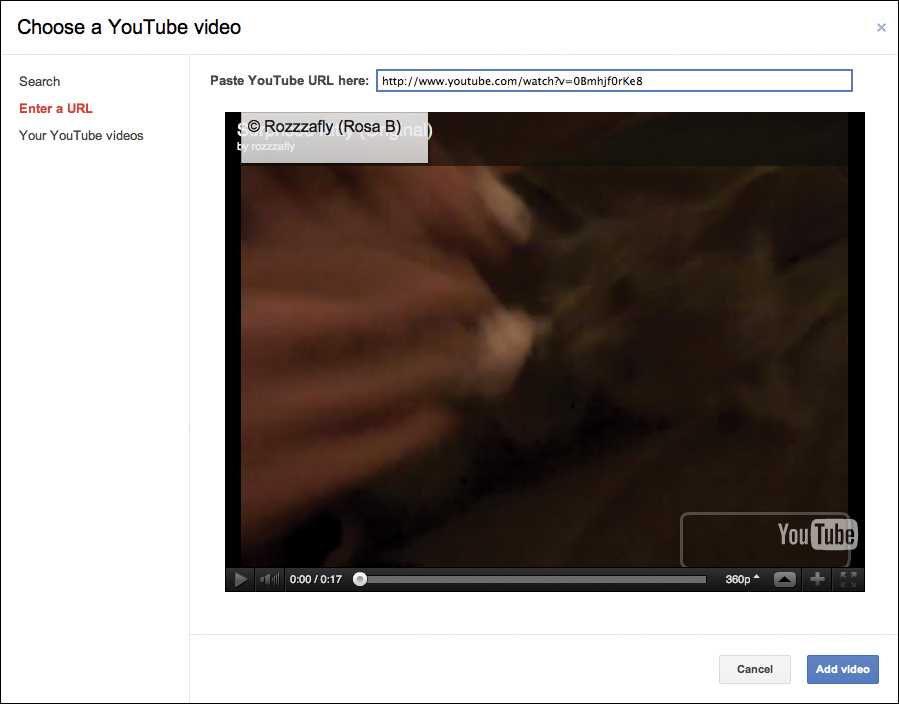
Click Add Video, and the video is ready to share.
The last option in the YouTube sharing screen is useful only if you have a YouTube channel of your own. If you do have a YouTube channel, clicking Your YouTube Videos displays a list of your YouTube videos (Figure 3.24 on the next page). This list functions just like the YouTube search-results list in the search screen. Click the video you want to share to highlight it in blue and play a preview of the video. Click Add Video to share it.
Figure 3.24. If you have a YouTube account with videos, those videos are listed in the Your YouTube Videos tab.

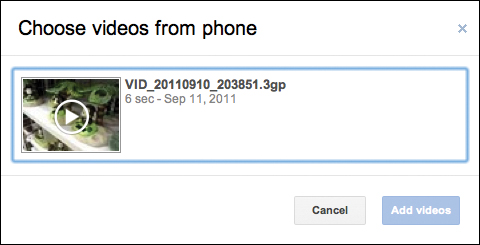
From Your Phone. The final way to share video is From Your Phone. This option requires that you have an Android device running the Google+ app (see Chapter 7). The app can automatically upload any video you take on your phone to a private album on Google+. When you click the From Your Phone link, all the movies uploaded from your phone are listed (Figure 3.25). Clicking any of the videos listed selects it and allows you to preview it. Click the Add Videos button to insert the video.
Figure 3.25. Videos from an Android phone with the Google+ app installed.
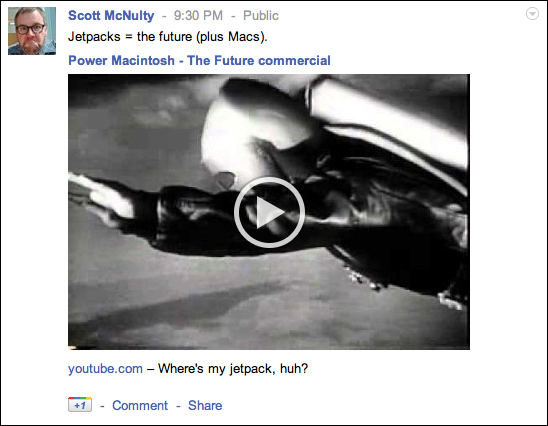
No matter which method you follow to share video, the post to your stream looks pretty similar. Figure 3.26 shows a YouTube video that I shared with my stream.
Figure 3.26. A shared YouTube video in the stream.
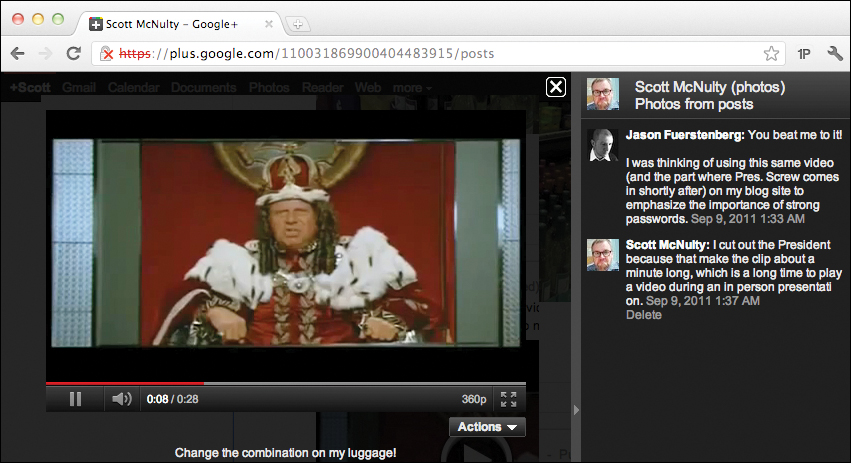
When you share a video you’ve uploaded directly to Google+, display of the video and playback work a little differently. Clicking the video opens the video’s player page, where the video is displayed, and any comments on the post are listed to the video’s right (Figure 3.27).
Figure 3.27. Clicking a video uploaded to Google+ opens that video’s page and displays any comments on the post.
Links
Click the Link icon in the share box to bring up the link box (Figure 3.28 on the next page). Paste or type a link in the box and then click the Add button. Google+ looks at the link and fetches the page’s title, a description, and an image from the page to use as a thumbnail (Figure 3.29 on the next page).
Figure 3.28. Paste a link to share it.

Figure 3.29. Google+ inserts a description and a thumbnail automatically.

If the image Google+ chooses isn’t very good, click the arrows at the top of the image to cycle through other possibilities from the page. Stop when you find one you’re happy with (Figure 3.30). If you don’t like any of the options, click the X to clear the image, and no thumbnail will appear next to your link.
Figure 3.30. You can set the thumbnail yourself by clicking the white arrows and cycling through images on the page.
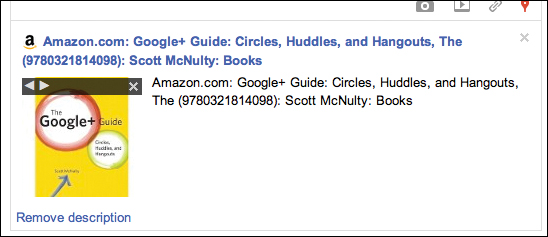
The description is generated from the page you’re linking. If you aren’t a fan of the description, you can delete it by clicking the Remove Description link. The thumbnail and link both remain, sans description.
Click Share, and your link is posted to your stream (Figure 3.31). As with any link, the people you shared this with can click it to visit the page. Make sure you pick a good thumbnail to encourage clicking.
Figure 3.31. A shared link posted to my stream. (That looks like a good book!)
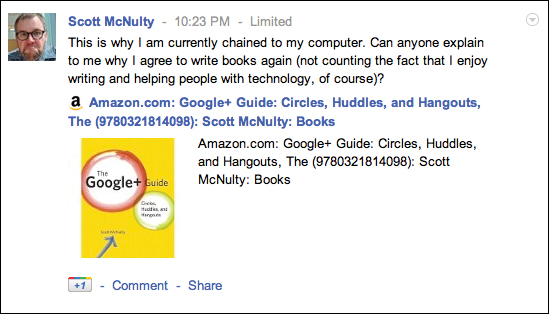
The appearance of the Share link depends on what you’re linking to. Most links will be displayed like the Amazon link in Figure 3.31, but if you paste a link to YouTube, the video will be embedded instead of a thumbnail. (This also works for Vimeo.com links.)
Location
Add your current location to anything you post on Google+ by clicking the Location icon in the share box (Figure 3.32). Location data can be added to any post type.
Figure 3.32. The red pin is the Location icon.
Because you’re viewing Google+ in a browser, your browser must support geolocation. If it doesn’t, the location feature won’t work.
Depending on your browser settings, you may see a warning when you click the Location icon, like one shown in Figure 3.33. This warning is meant to prevent Web sites from determining your physical location without your knowledge. Because you initiated the location check, allow Google+ to get your location.
Figure 3.33. Google+ asks your browser for location data. Most browsers will ask you to allow this information to be reported.

Google+ figures out your location based on information from your Internet service provider and displays it (Figure 3.34). If you hover your mouse over the location, you’ll notice that it isn’t just text, but a link. Click the link to see the location Google+ displayed on Google Maps.
Figure 3.34. Location can be added to any post type.
If you decide against including your location information with a post (perhaps the location is a little too accurate, and you aren’t comfortable sharing it), just click the X in the location box to remove it.
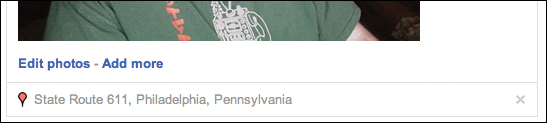
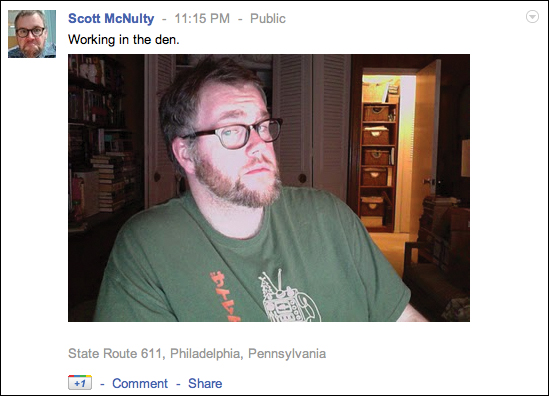
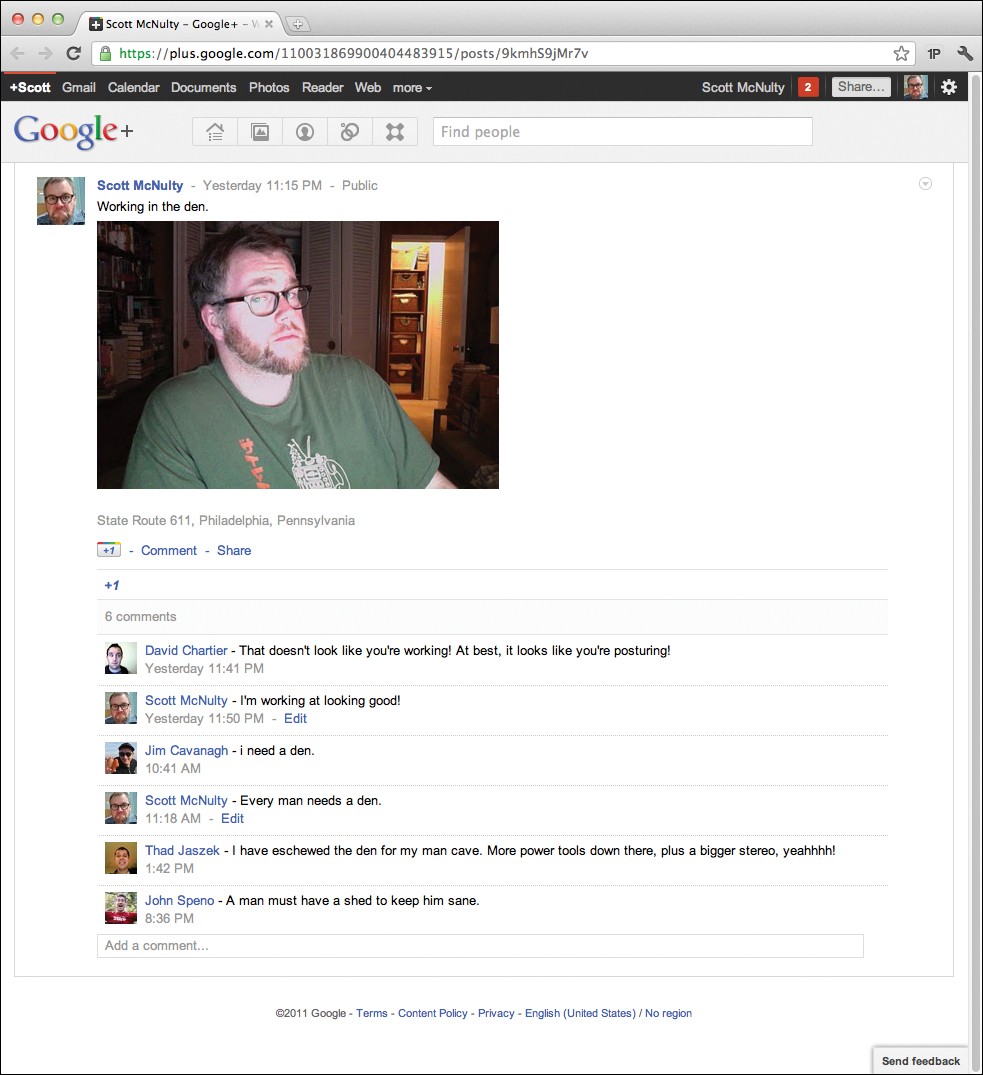
When you’re happy with the location data appended to your post, click Share, and the item (with location) is shared on your stream (Figure 3.35).
Figure 3.35. A picture of me shared on my stream with my location.
Setting Who You’re Sharing With
In Chapter 2, I show you how to set up circles: groups of people on Google+ that you follow. Each circle has related people in it: friends, family members, and so on. You can share items just with particular circles or even with particular people (or one person).
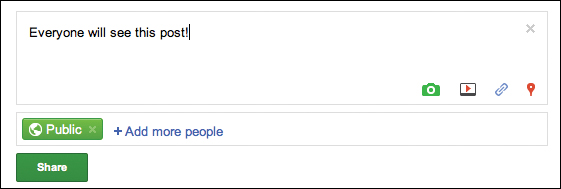
Above the green Share button is the circle box. In Figure 3.36, the post is set to be shared with the public. This means that anyone, logged into Google+ or not, will be able to see whatever I’m sharing. This post will also show up in search-engine results.
Figure 3.36. The Public icon means anyone will be able to see this post.
If you’d rather limit who can view this item, just click the X in the green Public icon to remove it and then do the following:
1. Click the Add Circles or People to Share With link (Figure 3.37).
Figure 3.37. Click the link to add circles/people to share this post with.

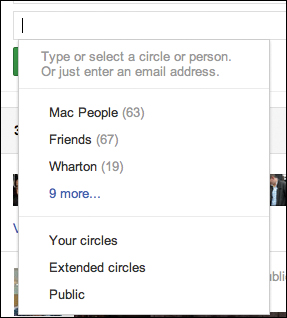
The circle/people selector appears (Figure 3.38). All the circles you created are listed here (click the More link to see all your circles listed), as well as three special groups:
• Your Circles. Anyone in any of your circles will be able to see a post shared with this group.
• Extended Circles. Anyone in your circles, and anyone in their circles, will be able to see items shared with this group. Think of this as two degrees of Google+ separation.
• Public. You’re sharing this item with the world.
Figure 3.38. Your circles are listed, as are the three built-in groups.
2. Select a circle that you want to share by clicking it in the list or typing its name in the text box.
You can share the same item with multiple circles. Each circle appears as a blue icon with a circle and its name displayed on it (Figure 3.39).
Figure 3.39. The blue icons represent circles that this post will be visible to.

3. If you want to share an item with a particular person, just type his or her name.
Google+ generates a list of possible matches based on what you’ve typed, with people from your circles listed first (Figure 3.40).
Figure 3.40. Sharing with a particular person is as easy as typing a name.

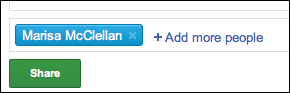
4. Click the name to add that person to the sharing box (Figure 3.41).
Figure 3.41. This post will be shared with Marisa, and only Marisa.
5. Add people to the sharing box by clicking the Add More People link.
6. Repeat steps 2–5 until you’ve added all the people/circles you want to share this item with.
Here’s an example. I’ve decided that I want to share this item with my lovely wife, Marisa, and with my podcasting buddies in a circle called Incomparable. I create my post, add Marisa and the Incomparable circle, and make sure to remove the Public circle (Figure 3.42).
Figure 3.42. Who will be able to see this post? Marisa and anyone in the Incomparable circle.

Just before I click the Share button, I want to make sure that I remember who is in the Incomparable circle. I hover over the blue circle icon, and the first three people in the circle are listed, as well as the total number of people in this circle (Figure 3.43).
Figure 3.43. Click a circle’s icon to see the first three people in the circle.
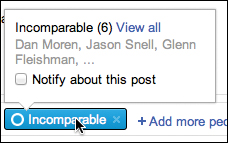
You can check the Notify About This Post box to alert to everyone in the circle about the item you’ve shared with them. By default, this box is unchecked because the item will show up in circle members’ streams anyway (if they’re following you, of course).
Because there are six people in this circle, I want to see all of them, so I click the View All link, and a circle editor appears (Figure 3.44).
Figure 3.44. The View All link displays everyone in the circle.
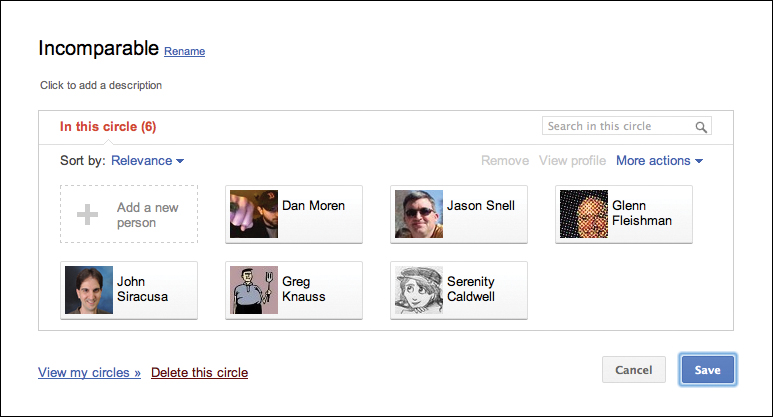
I can edit the circle as I see fit here. (See Chapter 2 for more information.)
7. Click Save if you’ve made any changes.
You return to the sharing box.
8. Click the Share button when you’re all set with your circles/people and the item is posted to your stream.
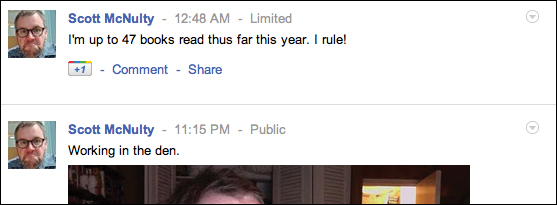
You can tell when a post has been shared with a certain set of people because it’s labeled Limited right next to the time the post was posted. If you click Limited, you’re able to see with whom the post was shared (Figure 3.45). Post shared with the public group are marked Public, and those shared with your extended circles are marked Extended Circles.
Figure 3.45. Posts shared with certain people/circles are denoted as Limited.
Interacting with Posts
When a post hits the stream, the fun isn’t over. In this section, I show you how to edit a post, share someone else’s post, link to a post, comment, use Google+’s Plus bar and +1 button, and mute people’s posts. (You’ll thank me about the last one especially.)
Commenting on posts
By default, you can comment on any Google+ posts in your stream. If you’re the first person to leave a comment, you’ll see a Comment link at the bottom of the post. Click that link, and the comment entry field appears (Figure 3.46). Type your comment, and click Post Comment (Figure 3.47). Keep in mind that anyone who can see the post will also be able to see your comment.
Figure 3.46. Write a comment and click the Post Comment button.
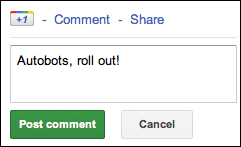
Figure 3.47. My very helpful comment is displayed for all to see.
You can mention people, and format text, in comments just like you can in the sharing box. See the “Text box” section earlier in this chapter for details.
When a post already has comments, a comment field is available. Just start typing your comment (Figure 3.48).
Figure 3.48. The comment field on posts with comments.
After you’ve left a comment, you can always edit it by clicking the Edit link (Figure 3.49). You can change the text of your comment or delete it if you’ve thought better of leaving a comment.
Figure 3.49. Click the Edit link to change your comment.
Sharing posts
Your own posts make up a small part of the stream; the rest come from the people in your circles. Suppose that a friend of yours posts something that you think people in your circles would be interested in. You can actually repost, or share, your friend’s post.
Remember that people on Google+ can share things with limited groups of people. If the post you want to share is marked Limited, consider with whom you’re planning to share it.
Sharing someone else’s post is pretty easy. Follow these steps:
1. Find the post you want to share.
2. Click the Share link at the bottom of the post.
The Share This Post interface appears (Figure 3.50).
Figure 3.50. Share other people’s Google+ posts from this form.
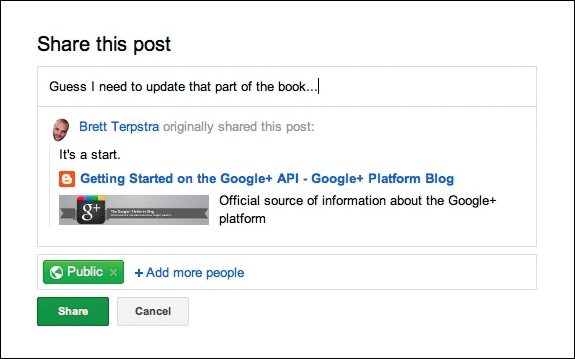
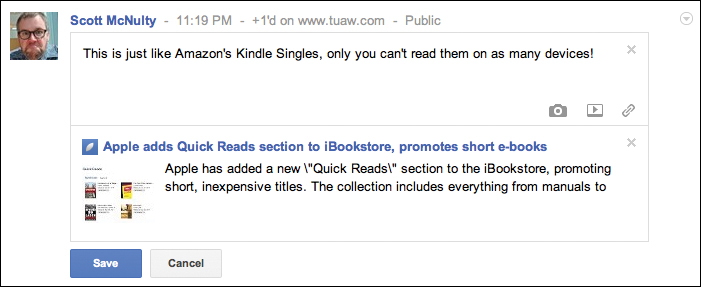
3. Add some commentary in the text box.
4. Set which circles/people you want to share the post with.
5. Click Share.
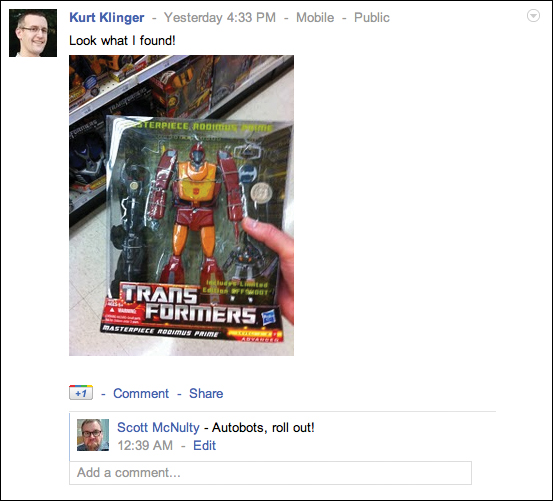
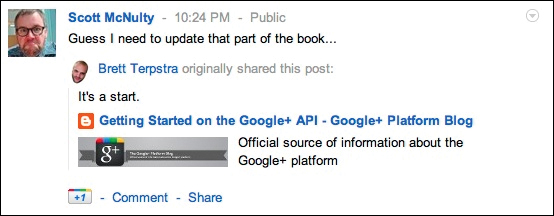
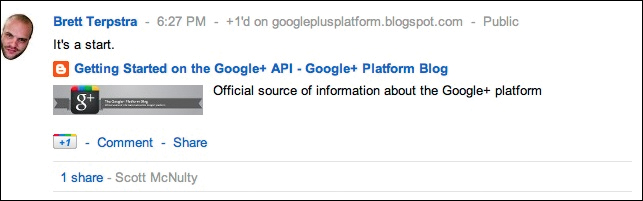
This post is shared with your selected circles (Figure 3.51 on the next page).
Figure 3.51. Brett’s post shared by me on my stream.
When someone shares one of your posts, you’ll get notified. All the people who share a post in this manner are listed below the original post (Figure 3.52 on the next page).
Figure 3.52. Each post lists how many times it has been shared and by whom.
Disabling sharing for posts is covered in the “Taking other post actions” section later in this chapter.
Using the Plus bar and +1 button
There are a couple of other ways you can post items to your stream: using the Plus bar or the +1 button on participating Web sites.
Plus bar
One of the interesting things about the black Plus bar (see Chapter 1 for more information) is the sharing box incorporated into it. Click the box labeled Share, and the full share box is revealed (Figure 3.53). All the features of the sharing box are available on the Plus bar; you can share text, pictures, videos, and your location with only the circles you choose.
Figure 3.53. You can share right from the Plus bar.
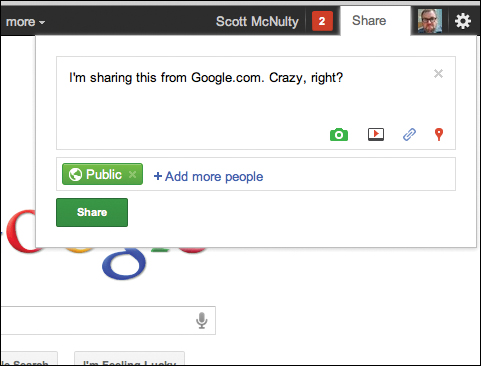
At the moment, the Plus bar doesn’t appear on too many Google sites other than Google+ itself and Google.com.
+1 button
You’ve probably noticed that every post on Google+ sports a +1 button. So do any comments left on posts.
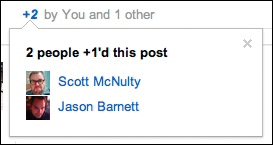
To +1 a post (meaning that you enjoyed that post or support it), just click its +1 button (Figure 3.54). The number of +1s a post has received is listed below the post. If you click that number, the people who +1ed it are displayed (Figure 3.55).
Figure 3.54. +1ing a post is also shown below the post.

Figure 3.55. Hover over the number of +1s to see who the +1s are from.
To +1 a comment, just hover your mouse over the comment, and click the +1 button that appears (Figure 3.56 on the next page). The number of +1s is displayed next to the comment, which makes using comments for polls possible. In Figure 3.56, I posted a question with two choices to my stream. I left two comments that each offered one of the choices. People voted for their choice by +1ing the appropriate comment, making a crude poll.
Figure 3.56. You can even +1 individual comments on posts, which allows for simple polling. Go niblets!

Taking other post actions
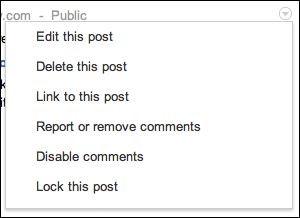
In addition to commenting, sharing, and +1ing posts, you can take a few more actions on posts. The available actions differ, depending on whether the post is one you wrote or someone else’s post. Either way, clicking the little triangle in the top-right corner lists the actions (Figure 3.57 on the next page).
Figure 3.57. The actions available to you on your own posts.
Actions for your posts
Figure 3.57 shows the actions that are available for a post you wrote:
• Edit This Post. You can change any of the text you entered, and remove a photo, video, link, or location from a post, by using the Edit This Post action (Figure 3.58).
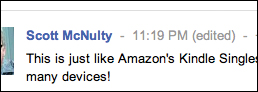
When you’re happy with your edits, click the blue Save button. Edited posts are denoted with the word Edited in parentheses next to the updated time stamp (Figure 3.59).
Figure 3.59. When you edit a post and save it, the word Edited is displayed next to the time of the edit.
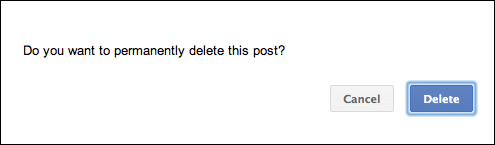
• Delete This Post. Post something that no amount of editing can fix? Share something with the wrong circle? Click Delete This Post, and a warning appears, asking if you’re sure (Figure 3.60). Click the blue Delete button, and the post is gone. There’s no undo.
Figure 3.60. Deleting a post removes it from Google+.
• Link to This Post. Every post on Google+ has a permalink that points directly to it. This allows you to send a link to a post to your friends who may not be on Google+. The Link to This Post action opens the post’s permalink in your browser so you can copy it (Figure 3.61).
Figure 3.61. Public posts have permalinks you can share with anyone.
• Report or Remove Comments. This action is available only for your posts that have comments. Clicking this action makes a couple of icons appear next to each comment on the post (Figure 3.62 on the next page). The top icon (the X) deletes the comment. The bottom icon (the flag) flags the comment for inappropriate language.
Figure 3.62. Delete or flag a comment or part of a post.
• Disable Comments. You can disable comments on posts with or without comments. Clicking this action simply removes the Comment link and box, so no one can leave a comment (or additional comments if some have already been left). This action turns into Enable Comments when clicked, allowing you to turn comments back on.
• Lock This Post. Google+ is all about sharing, but what if you post something to a limited group of people and want to be sure they don’t share it? Lock This Post removes the share option, and the word Locked is displayed on the post (Figure 3.63).
Figure 3.63. Locking a post disables sharing, even on a public post.

On locked posts, this action is Unlock This Post.
Actions for other people’s posts
The options available to you in the actions menu for other people’s posts are slightly different from those that are available for your own:
• Link to This Post. Just like the action available for your public posts, this action opens the post’s permalink for linking elsewhere (public posts only).
• Report Abuse. Click the Report Abuse action, and flag icons appear next to all the parts of the post (including comments, if there are any). Click the icon on the inappropriate part of the post, and select the reason why you’re reporting it (Figure 3.64). Click Submit, and the flag icon turns red.
Figure 3.64. When flagging a post, you need to supply a reason.
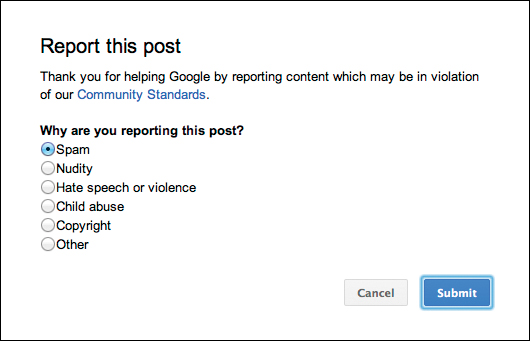
If you want to cancel your report, click the flag icon again.
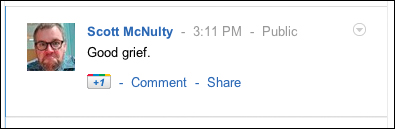
• Mute This Post. What if you don’t care about a particular post, but you want to see the person’s other posts? Click Mute This Post, and the post—and only that post—is removed from your stream (Figure 3.65). Immediately after you mute a post, you have a chance to unmute it by clicking the Undo Mute link.
Figure 3.65. Muting a post hides it from your stream, but you see other posts by the same person.
• Block This Person. Sometimes, there are people you want nothing to do with. Click the Block This Person link to block the author of the post (Figure 3.66).
Figure 3.66. Blocking a person makes him invisible to you. (I blocked Lucius only as an example.)

Before you click the blue Block button, make sure that you understand the ramifications:
• The blocked person’s content won’t appear in your stream.
• The blocked person won’t be able to comment on anything you post.
• The blocked person is kicked out of any of your circles he or she was in.
The person you blocked will be able to see any of your public posts on Google+ but won’t be able to comment on them. Don’t worry about offending someone by blocking him or her: Google+ won’t notify people about being blocked (though they may figure it out on their own when they can no longer comment on your public posts).
To unblock someone, follow these steps:
1. Click the Circles icon in the Google+ toolbar to go to the circle browser (see Chapter 2).
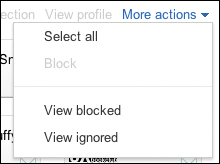
2. Choose View Blocked from the More Actions menu (Figure 3.67 on the next page).
Figure 3.67. The More Actions menu in the circle browser allows you to display everyone you’ve blocked.
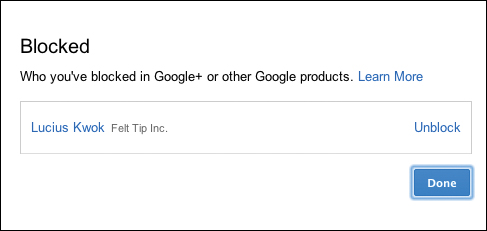
All the people you’ve blocked are listed, along with an Unblock link next to each name (Figure 3.68).
Figure 3.68. The blocked list allows you to unblock people.
3. Click the Unblock link.
4. Click the blue Done button.
The person is once again able to interact with you fully on Google+ (Figure 3.69). Make sure to add the person to some circles, because he was forcibly ejected from all your circles when you blocked him.
Figure 3.69. Because Lucius was removed from all my circles when I blocked him, the unblocked alert includes a handy Add to Circles button.
Navigating the Stream
Getting from post to post on the stream is straightforward: Just scroll down.
The most recent content appears at the top, with earlier posts arranged below. An older post might appear back up at the top when someone leaves a new comment on it. If you’re a keyboard jockey, you can jump through posts by pressing the J key to go forward post by post and K to go backward.
When a post is selected, a blue line appears on its left side (Figure 3.70).
Figure 3.70. The selected post is highlighted.
As you make your way down the stream, you may want to hop to the top so you can access the share box. To jump to the top of the stream quickly, just double-click the black Plus bar. That’ll scroll up to the top of the stream automatically.
Filters
I have a bunch of circles composed of people who generally post about the same thing. By default, my stream shows the people I follow jumbled all together, which is fine, but sometimes I just want to see what my Mac People are sharing.
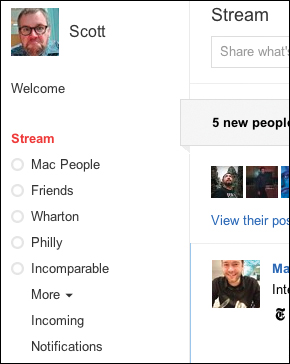
The left column of the stream includes a section called Stream, with a list of all your circles (Figure 3.71). As you can see in Figure 3.71, Stream is in red because this isn’t just a simple list of circles; it’s a list of filters that you can apply to your stream. The active filter—in this case, Stream—is displayed in red.
Figure 3.71. Your available stream filters.
To see updates from a particular circle, click it in the filter list (Figure 3.72).
Figure 3.72. The stream showing only those posts from people in my Mac People circle.

Incoming
Among the circle-based filters is something called Incoming. Chances are that you don’t have a circle called Incoming, so what the heck is it? The Incoming filter shows you things that people who aren’t in any of your circles have shared with you. This may mean that they’ve shared an item with one of their circles that includes you or that they’re sharing something directly with you. Either way, it’ll show up in the Incoming section of your stream.
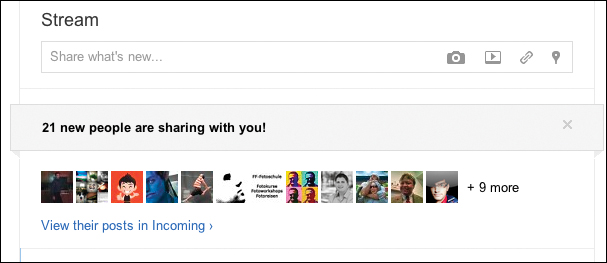
An alert is displayed at the top of your stream, displaying the number of people who are sharing things with you, along with their profile pictures (Figure 3.73). The alert includes a link to your Incoming stream and an X in the top-right corner to dismiss it.
Figure 3.73. People whom you don’t follow but who recently shared things with you are shown in this alert.
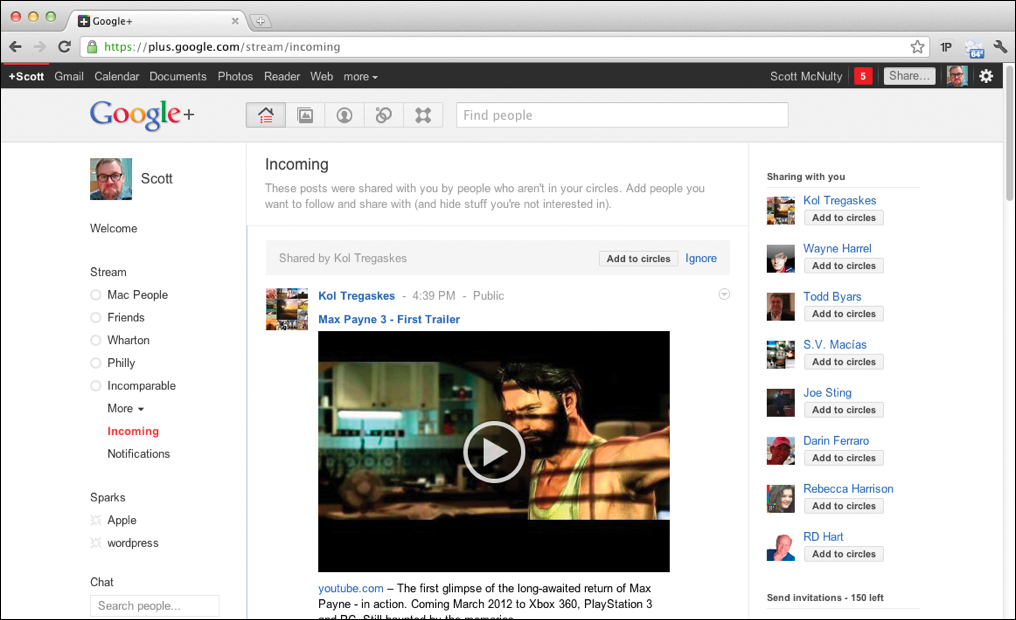
The Incoming stream looks just like your regular stream except that it’s populated by people who aren’t in your circles (Figure 3.74). Because the Incoming stream is full of folks who aren’t in any of your circles, there’s a gray bar above each shared item, identifying who shared the item and displaying two buttons: Add to Circles and Ignore.
Figure 3.74. The Incoming stream lists all the posts shared with you by people outside your circles.
Ignoring people does a few things:
• Any items they shared with you are removed from the Incoming stream.
• New items they share will not be displayed in your Incoming stream.
• If ignored people mention you in posts, you won’t be notified.
If you decide that you want to un-ignore someone, just click the Circles icon in the Google+ toolbar. In the circle browser, choose View Ignored from the More Actions menu. This brings up the list of people you’ve ignored, with an Un-ignore link displayed next to each. Click the link and then click the Done button to un-ignore someone.