
CHAPTER 6
Analyzing Android Applications
The Android Operating System (OS) is used by many vendors on phones and tablets ranging from low-cost budget devices to flagships. Due to its open-source nature it can be found on many other devices including entertainment systems, TVs, e-readers, netbooks, smartwatches, car computers, and gaming consoles.
Android is the mobile platform that has the biggest market share out of all the mobile operating systems available. With this esteemed achievement comes the attention of many hackers around the world wanting to expose security flaws in the OS and popular applications on the platform. Although many app stores are available for Android users, observing only the official Google Play Store statistics from AppBrain (http://www.appbrain.com/stats/number-of-android-apps) reveals that Google Play Store holds more than 1.1 million applications for download. Vulnerabilities are constantly being discovered in popular applications with varying degrees of severity, and due to the maturity of tools and information about finding these vulnerabilities, this trend looks to be ever increasing.
This chapter presents some fundamental concepts of Android including its application structure, security model, and infrastructure central to its operation. It also delves deeper into the intricacies of the Android platform and ways that you can explore these by setting up a testing environment and making use of popular tools. The goal of this chapter is to provide you with the background knowledge required to find and exploit security flaws in applications.
Creating Your First Android Environment
The first step in building your ideal testing environment is downloading the Android Software Development Kit (SDK). Whether you plan to use an emulator or physical device, the Android SDK provides many tools that are essential to getting started with Android hacking. You can download the SDK tools from http://developer.android.com/sdk/ for your OS. The two options are to download the entire Android Developer Tools package, which includes an integrated development environment (IDE) and all the tools, or download an archive containing only the tools. For the large majority of testing, having only the tools and not a full development environment setup should suffice. However, occasionally you may still have to write a custom application to test a certain condition or create a proof of concept. We highly recommended using Linux as your base OS when testing Android because many of the tools that you will be experimenting with in subsequent chapters were originally written for Linux, and have shown to be less error-prone on Linux. However, you can ignore our bias and use other operating systems successfully. If you are new to Linux, it is recommended that you use the Ubuntu distribution (see http://www.ubuntu.com/). This is because of the wealth of information and tutorials available for newcomers.
After extracting the SDK tools, place the entire tools/ directory on your path. In Linux, you do so by adding the following line to your .bashrc in your home folder and then opening a new terminal:
export PATH=$PATH:/path/to/sdk/tools/:/path/to/sdk/platform-tools/ This command appends the provided folders to your path. Some hackers prefer to create symbolic links to specific binaries in a directory that is already in their path (like /usr/local/bin), which you can do as follows:
# cd /usr/local/bin
# ln –s /path/to/binary
The following is a shortened listing of Android SDK tools to get you started:
- adb—The tool that is used most to interact with devices and emulators to install new applications, gain a shell on the system, read system logs, forward network ports, or do a multitude of other useful tasks.
- monitor—This tool is useful for peeking into running processes on a device and taking screenshots of the device’s screen. It is useful for penetration testers who need to gain evidence of an action for reporting purposes.
- android—You use this tool to manage and create new Android emulators.
- aapt—This tool converts assets into binary form to be packaged with applications. It can also perform reverse-engineering tasks that allow someone with only the compiled application package to convert binary application resources into readable text.
A 64-bit system requires an additional installation of 32-bit packages needed by the SDK tools. You can install these on Ubuntu 13.04 upward by using
$ sudo dpkg –add-architecture i386
$ sudo apt-get update
$ sudo apt-get install libncurses5:i386 libstdc++6:i386 zlib1g:i386
Prior to that version of Ubuntu, you use the following command:
$ sudo apt-get install ia32-libs Android provides an excellent set of emulators for all versions from the most current all the way back to Android 1.5. To create your very first Android emulator that runs Android 4.4.2 KitKat, run the following to display the Android SDK Manager interface:
$ android sdk You can use this to install SDK platforms, system images, and tools. Figure 6.1 shows the user interface.

Figure 6.1 From this Android SDK Manager interface you can install SDK platforms and tools.
Select Android 4.4.2 (API 19), click Install, and agree to the user license. It will now download and install all required packages. You are now able to create a KitKat emulator by running the Android Virtual Device (AVD) Manager:
$ android avd On the AVD Manager’s user interface, click the New button. The configuration in Figure 6.2 is fit for most purposes but you can customize it to suit a particular testing requirement.
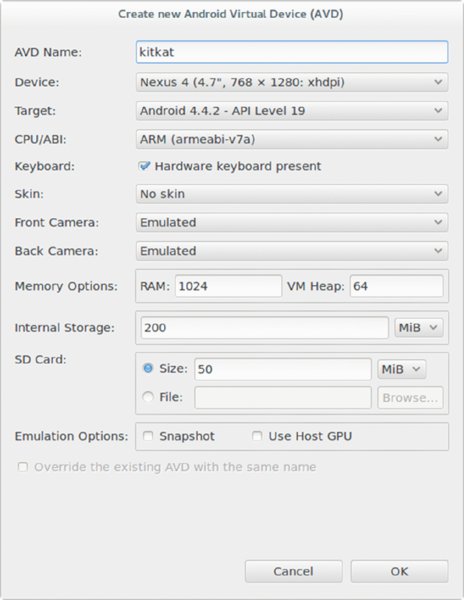
Figure 6.2 You can customize your emulator configuration. Here is just one example.
Your emulator should now be created. You can start it by clicking the Start button on the AVD manager or running the following from a terminal if you know the name of your created AVD:
$ emulator -avd kitkat After the emulator launches, list all connected Android devices on your computer by using one of the included SDK tools named ADB (Android Debug Bridge):
$ adb devices To get an interactive shell on the listed device issue the following command:
$ adb -s device_id shell If only a single device is connected, you can omit the -s parameter. If you have only a single emulator open and a connected physical device, you can also omit the -s parameter and use -e (emulator) and -d (device) to interact with each, respectively. ADB will be used for a number of tasks on Android, and we advise you to take the time to learn all of its functionality and syntax.
You might immediately notice some minor differences between an actual device and an emulator, such as
- Emulators provide root access by default whereas actual devices do not. The exact way in which Android determines the privilege level of ADB is through a configuration option named
ro.securewhich will be explored in Chapter 8. - Emulators do not operate correctly for certain applications that make use of physical hardware, such as USB, headphones, Wi-Fi, Bluetooth, and so on.
- You are not able to place or receive real phone calls on an emulator. However, an interface exists that allows you to emulate this to a degree.
Emulator restrictions are documented at http://developer.android.com/tools/devices/emulator.html#limitations. When performing testing on an Android application, you should have multiple devices at hand in addition to the emulators to accommodate for the differences between them.
The Android emulator provides a way for users to emulate a number of events, such as receiving an SMS or phone call through a console interface. Locate the console by observing the output of adb devices in the previous command. For example, an emulator named emulator-5554 indicates that it has a listening port on TCP 5554 on the local host. Use a telnet or netcat (nc) client to access the console interface. Most Linux distributions come with nc, which you use to access the console interface as follows:
$ nc localhost 5554
Android Console: type 'help' for a list of commands
OK
help
Android console command help:

    help|h|?         print a list of commands
    event            simulate hardware events
    geo              Geo-location commands
    gsm              GSM related commands
    cdma             CDMA related commands
    kill             kill the emulator instance
    network          manage network settings
    power            power related commands
    quit|exit        quit control session
    redir            manage port redirections
    sms              SMS related commands
    avd              control virtual device execution
    window           manage emulator window
    qemu             QEMU-specific commands
    sensor           manage emulator sensors
Some other more technical differences between the Android emulator and physical devices are not so apparent on first observation. Writing an exploit for a memory corruption vulnerability will quickly reveal these differences. Exploitation at this level is an advanced topic that would require a separate publication on its own. However, all that is important is that you realize that at the lowest levels of operation, an emulator is not an exact replica of how Android runs on a real device, even though it may feel that way. Often, exploits that work on an emulator may require significant changes to work on an actual device.
Alternatives other than using the emulator that comes with the Android SDK are available. Popular ones include
- Genymotion (
http://www.genymotion.com/) - Virtualbox running Android x86 (
http://www.android-x86.org/) - Youwave (
https://youwave.com) - WindowsAndroid (
http://windowsandroid.en.softonic.com/)
These emulators run x86 versions of Android and some applications that contain native code may not support this architecture. However, for exploring Android to understand how it works, they are useful and some may run quicker than the Google emulators. However, it is still the author’s preference to use the official Android emulator as it is always guaranteed to be unmodified.
For testing purposes, using a physical Android device may be better than using an emulator because of emulator speed issues or hardware requirements such as Wi-Fi or Bluetooth. As opposed to other mobile platforms where jailbreaking your testing device is essential, you can do a surprising amount of testing or hacking without root access on an Android device. However, some actions cannot be performed or take longer to perform without having root access on the device and so having root access is always advised. More concrete examples of some of the constraints of assessing an application without having root access will be explored in later chapters. The Internet offers many guides on ways to root your specific device. An overview of typical ways to root an Android device appears later in this chapter in the “Rooting Explained” section.
Understanding Android Applications
The majority of users experience Android applications through downloading them from the Play Store, reviewing the permission requirements presented to them (or not), and then installing. After the application has been installed, a new home screen icon appears that allows them to open the application, just as the developer intended. As a technical person, you should not feel satisfied with not knowing exactly how and why installation worked. What happened behind the scenes when you clicked the button to install that application? How did this application reach your device? How did it go from a packaged download to an installed application that you can use securely? These are all questions that you need to answer before you can be satisfied with moving onto assessing Android applications.
Reviewing Android OS Basics
Before exploring the weird and wonderful world of Android applications, take a step back and understand how the operating system functions as a whole. You can view the Android OS as having two distinct sides to it: a stripped-down and modified Linux kernel and an application virtual machine that runs Java-like applications. The differences between the mainline Linux kernel and the Android kernel have varied over the years and have started to lessen, but fundamental differences between how conventional Linux and Android operate remain. On conventional Linux, applications that are started by a user are run under that user’s context. This model relies on a user’s not installing malicious software on her computer because there are no protection mechanisms against accessing files that are owned by the same user that you are running as. In contrast to conventional Linux computing, each application that is installed on an Android device is assigned its own unique user identifier (UID) and group identifier (GID). In certain instances this statement does not hold true and applications can run under the same user, but these are covered later in this chapter under the “Application Sandbox” section. A snipped output of running the ps command to display information about running processes on an Android device is shown here:
shell@android:/ $ ps
USER     PID   PPID  VSIZE  RSS     WCHAN    PC         NAME
root      1    0     640    496   c00bd520 00019fb8 S /init
...
root    46   1   4660   1200  ffffffff b6f61d14 S /system/bin/vold
root    48   1   9772   1268  ffffffff b6f1fd14 S /system/bin/netd
...
root    52   1   225052 39920 ffffffff b6ecb568 S zygote
...
system  371  52  307064 46084 ffffffff b6ecc5cc S system_server
u0_a7   424  52  255172 45060 ffffffff b6ecc5cc S com.android.systemui
...
radio   520  52  259604 25716 ffffffff b6ecc5cc S com.android.phone
u0_a8   534  52  248952 56996 ffffffff b6ecc5cc S com.android.launcher
u0_a9   789  52  244992 20612 ffffffff b6ecc5cc S com.android.mms
u0_a16  819  52  246240 20104 ffffffff b6ecc5cc S com.android.calendar
...
u0_a37  1419 52  233948 17132 ffffffff b6ecc5cc S com.svox.pico
root    1558 61  928    496   c0010008 b6f57fa0 S /system/bin/sh
u0_a52  1581 52  238060 25708 ffffffff b6ecc5cc S com.mwr.dz
u0_a52  1599 52  240328 27076 ffffffff b6ecc5cc S com.mwr.dz:remote
...
root    14657 1558  1236   464   00000000 b6f0b158 R ps
In this output, note that applications are running as different users. Newly installed applications are assigned UIDs sequentially from 10000 onward (until a maximum of 99999). You can observe this configuration in the Android source at https://android.googlesource.com/platform/system/core/+/master/include/private/android_filesystem_config.h. The user named u0_a0 has UID 10000, and similarly, a user named u0_a12 has UID 10012. Every Android application has to be given a unique package name by its developer. The naming convention for these packages should be all lowercase and the reverse Internet domain name of the organization that developed it. For instance, if an application is named “battery saver” and it was developed by the fictitious “Amazing Utils” company then perhaps they could name the package com .amazingutils.batterysaver. This would almost guarantee a unique package name and any other application created by this organization could also have the prefix com.amazingutils that would allow logical grouping of their applications.
If you were to install this application on your device, you would see that it assigns a private data directory at the following location on your device’s filesystem. On disk this may look something like the following:
shell@android:/ # ls -l /data/data/
...
drwxr-x--x u0_a46   u0_a46           2014-04-10 10:41
com.amazingutils.batterysaver
...
Notice that the owner of the folder is the newly created user for that application (u0_a46, which translates to UID 10046).
The Dalvik Virtual Machine (DVM) was specifically designed for the Android platform and is unique to it. The main reason for its existence is that it was designed to run on hardware with processing and memory constraints and is much lighter than the normal Java Virtual Machine. It was designed in a way that allows many Dalvik VMs to be run at the same time in a memory-efficient manner. The code that runs on it is written and compiled to Java classes and then converted into a single DEX file using the dx SDK utility. The following is an example of compiling a simple Java JAR for Android without using an IDE. First, create a file named Test.java with the following content:
class Test
{
    public static void main(String[] args)
    {
        System.out.println("It works! :D");
    }
}
Issue the following commands that will compile the class to normal Java bytecode, and then use the dx utility to convert it to a JAR that contains Dalvik-compatible bytecode.
$ javac Test.java
$ dx –dex –output=test.jar Test.class The JAR is now compiled and can be pushed to the device and executed using the dalvikvm or app_process binaries on the device. The arguments provided to these binaries tell the Dalvik VM to look for the class named Test in /data/local/tmp/test.jar and execute the main function.
$ adb push test.jar /data/local/tmp
$ adb shell dalvikvm -cp /data/local/tmp/test.jar Test
It works :D
The previous code does not produce a full-fledged, installable application on Android. You must follow Android package conventions and have the SDK automatically package your code into an installable Android package that can be deployed onto a device. This example does, however, demonstrate the close link between Java and Dalvik that exists. This could help Java developers transition into the world of Android and its internals. Intricate runtime internals are explored later in this chapter in “Looking Under the Hood.” In addition to this, Android 4.4 introduced a runtime replacement for Dalvik, named ART (Android Runtime), which promised to improve the speed of applications drastically.
Getting to Know Android Packages
An Android package is a bundle that gets installed on an Android device to provide a new application. This section will explore the structure of packages and different ways that exist to install them on a device.
Observing the Structure of a Package
Android applications are distributed in the form of a zipped archive with the file extension of .apk, which stands for Android Package. The official mime-type of an Android Package is application/vnd.android.package-archive. These packages are nothing more than zip files containing the relevant compiled application code, resources, and application metadata required to define a complete application. According to Google’s documentation at http://developer.android.com/tools/building/index.html, an APK is packaged by performing the following tasks:
- An SDK tool named
aapt(Android Asset Packaging Tool) converts all the XML resource files included in the application to a binary form.R.javais also produced byaaptto allow referencing of resources from code. - A tool named
aidlis used to convert any.aidlfiles (explored in Chapter 7 in “Attacking Insecure Services”) to.javafiles containing a converted representation of it using a standard Java interface. - All source code and converted output from
aaptandaidlare compiled into.classfiles by the Java 1.6 compiler. This requires theandroid.jarfile for your desired API version to be in theCLASSPATHenvironment variable. - The
dxutility is used to convert the produced.classfiles and any third-party libraries into a singleclasses.dexfile. - All compiled resources, non-compiled resources (such as images or additional executables), and the application DEX file are used by the
apkbuildertool to package an APK file. More recent versions of the SDK have deprecated the standaloneapkbuildertool and included it as a class insidesdklib.jar. The APK file is signed with a key using thejarsignerutility. It can either be signed by a default debug key or if it is going to production, it can be signed with your generated release key. - If it is signed with a release key, the APK must be zip-aligned using the
zipaligntool, which ensures that the application resources are aligned optimally for the way that they will be loaded into memory. The benefit of this is that the amount of RAM consumed when running the application is reduced.
This compilation process is invisible to you as the developer as these tasks are automatically performed by your IDE but are essential to understanding how code becomes a complete package. When you unzip an APK you see the final product of all steps listed above. Note also that a very strictly defined folder structure is used by every APK. The following is a high-level look at this folder structure:
/assets
/res
/lib
/META-INF
AndroidManifest.xml
classes.dex
resources.asrc - Assets—Allows the developer to place files in this directory that they would like bundled with the application.
- Res—Contains all the application activity layouts, images used, and any other files that the developer would like accessed from code in a structured way. These files are placed in the
raw/subdirectory. - Lib—Contains any native libraries that are bundled with the application. These are split by architecture under this directory and loaded by the application according to the detected CPU architecture; for example, x86, ARM, MIPS.
- META-INF—This folder contains the certificate of the application and files that hold an inventory list of all included files in the zip archive and their hashes.
classes.dex—this is essentially the executable file containing the Dalvik bytecode of the application. It is the actual code that will run on the Dalvik Virtual Machine.AndroidManifest.xml—the manifest file containing all configuration information about the application and defined security parameters. This will be explored in detail later in this chapter.- Resources.asrc—Resources can be compiled into this file instead of being put into the res folder. Also contains any application strings.
Installing Packages
Behind the scenes, the process of downloading an application from the Play Store and installing it is actually quite a bit more complicated than one would imagine. The simplest way that Google could have implemented this process is to have the Play Store application visit a website and allow the user to browse through the application categories. When the user chooses to install an application Google would provide an “install” link and all that this does is download the APK file over HTTPS from the browser. What is wrong with this approach? Well, considering this method from a security point of view, how does the OS know that the downloaded package came from the Play Store and is safe to install? The APK would be treated like every other download using the browser and therefore no degree of trust can be afforded using this method.
Instead, Google implemented a very modular and robust way to perform installations. When you click the Install button on the Google Play application or website, functionality to deliver and install the application is invoked on the device via the GTalkService. This functionality works from a system application on every Android device and maintains a connection to Google infrastructure via a pinned SSL connection. Various other services such as the Android Device Manager or Google Cloud Messaging (GCM) make use of the GTalkService. The installation process via the GTalkService was explored in an excellent blog post by Jon Oberheide at https://jon.oberheide.org/blog/2010/06/28/a-peek-inside-the-gtalkservice-connection/. The GTalkService gracefully handles cases where the device on which you are installing an application is offline or in a low-signal area. It simply queues the message and delivers it when the device comes online. One of the reasons Android is considered so “open and free” is that so many different ways exist to find and install Android applications. Google does not force users to make use of its Play Store and users can make use of many other application stores instead. Some device vendors and phone carriers like to include their own app stores on devices they sell. A good example of this is the Samsung Apps application that is included on all Samsung devices. Other such examples of popular alternative app stores include Amazon Appstore, GetJar, SlideMe, F-Droid, and a number of big players in the Eastern markets.
In addition to these application stores, multiple ways exist to install new applications onto your device by simply having access to the APK that you would like to install. Making use of an Android SDK tool named ADB (Android Debug Bridge) is one of the simplest ways to do this. Assuming a correct SDK installation, ADB will be on your PATH. Issuing the following command will install an APK onto a connected device or emulator:
$ adb install /path/to/yourapplication.apk On Android 4.2.2 and later, making an ADB connection may require you to accept a prompt allowing your computer to connect. The install command of ADB works behind the scenes invoking the package manager on the device (/system/bin/pm). Package Manager can perform a number of actions, including listing all installed packages, disabling an application that came with the device that you consider unnecessary “bloatware,” or obtaining the installed path to a particular application. For all the available options, type the following command and observe the output:
$ adb shell pm Another way to install an application could be to host it on a web server. Some application developers choose not to put their application on any app stores and rather serve it from their website. These sites often check for Android browser user agent strings and automatically start the download of their APK. A simple method of hosting the contents of your current folder using Python can be done as follows:
$ python -m SimpleHTTPServer
Serving HTTP on 0.0.0.0 port 8000 ...
10.0.0.100 - - [04/May/2014 22:27:14] "GET /agent.apk HTTP/1.1" 200 -
Browse to http://your_computer_ip:8000 on your device and click on the APK you want to install. You will be prompted with an installation activity.
Other techniques may exist to install applications; however, the ones mentioned here are reliable and work on any device regardless of whether you have root access on it. Other ways may include SSH access to the device or even other installer desktop applications, but these are non-standard ways to perform installations and require additional tools.
Using Tools to Explore Android
The best way to learn the internals of Android and become familiar with the way it works is to explore an emulator or device armed with some basic knowledge about it. By exploring Android and becoming comfortable with its internals, you will have the ability to investigate features for which no public information exists.
A simple example of this type of exploration is observing—through inspection of the tool or reading the source code—how some of the standard SDK tools work.
ADB
For instance, when installing an application on the device you may see the following output:
$ adb install application.apk
541 KB/s (156124 bytes in 0.236s)
     pkg: /data/local/tmp/application.apk
Success
This output shows that the user who runs adbd (which is typically “shell” on a normal non-rooted device) has the ability to read, write, and execute files in the /data/local/tmp directory. When exploring a device that is not rooted, you can use this directory but have insufficient privileges to access the /data parent directory.
ADB is the single most useful SDK tool for exploring Android. The following is a list of common tasks that you can perform using ADB:
- List connected devices—
$ adb devices - Get a shell on a device—
$ adb shell - Perform a shell command and return—
$ adb shell <command> - Push a file to a device—
$ adb push /path/to/local/file /path/on/android/device - Retrieve a file from a device—
$ adb pull /path/on/android/device /path/to/local/file - Forward a TCP port on the local host to a port on the device—
$ adb forward tcp:<local_port> tcp:<device_port> - View the device logs—
$ adb logcat
If more than one device is connected, prepend the ADB command with -s <device_id>. If you have one connected device and one emulator, instead of providing their device IDs with the -s argument, you can use -d (for device) and -e (for emulator).
Some Android devices may come with a very limited set of utilities installed by default, and having additional tools installed that ease the process of exploring the device is useful.
BusyBox
BusyBox incorporates a large variety of standard Linux utilities into a single binary. A common misconception about running BusyBox on Android is that it requires root. This is incorrect, and users should be aware that executing a BusyBox binary runs it under the same user account and privilege context of the calling process. You can compile BusyBox with the utilities you require or download a pre-compiled binary that includes many utilities. At the time of this writing, the BusyBox website provided pre-compiled binaries for many architectures at http://www.busybox.net/downloads/binaries/. This includes ARM, which is the CPU architecture used by the majority of Android devices. You can download a BusyBox binary for the correct architecture (ARMv7 in this case) from the site and then upload it to the /data/local/tmp directory on your Android device without the need for root access using the following command:
$ adb push busybox-armv7l /data/local/tmp
77 KB/s (1109128 bytes in 14.041s)
Get a shell on the device, browse to /data/local/tmp, and mark it executable using the following command:
shell@android:/ $ cd /data/local/tmp
shell@android:/data/local/tmp $ chmod 755 busybox-armv7l
Here is an output of the available tools provided by BusyBox:
shell@android:/data/local/tmp $ ./busybox-armv7l
./busybox-armv7l
BusyBox v1.21.1 (2013-07-08 10:26:30 CDT) multi-call binary.

...
acpid, add-shell, addgroup, adduser, adjtimex, arp, arping, ash,
awk, base64, basename, beep, blkid, blockdev, bootchartd, brctl,
bunzip2, bzcat, bzip2, cal, cat, catv, chat, chattr, chgrp, chmod,
chown, chpasswd, chpst, chroot, chrt, chvt, cksum, clear, cmp, comm,
conspy, cp, cpio, crond, crontab, cryptpw, cttyhack, cut, date, dc, dd,
deallocvt, delgroup, deluser, depmod, devmem, df, dhcprelay, diff,
dirname, dmesg, dnsd, dnsdomainname, dos2unix, du, dumpkmap,
dumpleases, echo, ed, egrep, eject, env, envdir, envuidgid, ether-wake,
expand, expr, fakeidentd, false, fbset, fbsplash, fdflush, fdformat,
fdisk, fgconsole, fgrep, find, findfs, flock, fold, free, freeramdisk,
fsck, fsck.minix, fsync, ftpd, ftpget, ftpput, fuser, getopt, getty,
grep, groups, gunzip, gzip, halt, hd, hdparm, head, hexdump, hostid,
hostname, httpd, hush, hwclock, id, ifconfig, ifdown, ifenslave,
ifplugd, ifup, inetd, init, insmod, install, ionice, iostat, ip,
ipaddr, ipcalc, ipcrm, ipcs, iplink, iproute, iprule, iptunnel,
kbd_mode, kill, killall, killall5, klogd, last, less, linux32, linux64,
linuxrc, ln, loadfont, loadkmap, logger, login, logname, logread,
losetup, lpd, lpq, lpr, ls, lsattr, lsmod, lsof, lspci, lsusb, lzcat,
lzma, lzop, lzopcat, makedevs, makemime, man, md5sum, mdev, mesg,
microcom, mkdir, mkdosfs, mke2fs, mkfifo, mkfs.ext2, mkfs.minix,
mkfs.vfat, mknod, mkpasswd, mkswap, mktemp, modinfo, modprobe, more,
mount, mountpoint, mpstat, mt, mv, nameif, nanddump, nandwrite,
nbd-client, nc, netstat, nice, nmeter, nohup, nslookup, ntpd, od,
openvt, passwd, patch, pgrep, pidof, ping, ping6, pipe_progress,
pivot_root, pkill, pmap, popmaildir, poweroff, powertop, printenv,
printf, ps, pscan, pstree, pwd, pwdx, raidautorun, rdate, rdev,
readahead, readlink, readprofile, realpath, reboot, reformime,
remove-shell, renice, reset, resize, rev, rm, rmdir, rmmod, route, rpm,
rpm2cpio, rtcwake, run-parts, runlevel, runsv, runsvdir, rx, script,
scriptreplay, sed, sendmail, seq, setarch, setconsole, setfont,
setkeycodes, setlogcons, setserial, setsid, setuidgid, sh, sha1sum,
sha256sum, sha3sum, sha512sum, showkey, slattach, sleep, smemcap,
softlimit, sort, split, start-stop-daemon, stat, strings, stty, su,
sulogin, sum, sv, svlogd, swapoff, swapon, switch_root, sync, sysctl,
syslogd, tac, tail, tar, tcpsvd, tee, telnet, telnetd, test, tftp,
tftpd, time, timeout, top, touch, tr, traceroute, traceroute6, true,
tty, ttysize, tunctl, udhcpc, udhcpd, udpsvd, umount, uname, unexpand,
uniq, unix2dos, unlzma, unlzop, unxz, unzip, uptime, users, usleep,
uudecode, uuencode, vconfig, vi, vlock, volname, wall, watch, watchdog,
wc, wget, which, who, whoami, whois, xargs, xz, xzcat, yes, zcat, zcip
This is a huge set of tools, many of which do not come as part of the Android image. Some of these tools are common utilities used on a desktop or server version of Linux, such as cp and grep, which the Android image inconveniently left out. Do not expect all the included tools to work fully, because some aspects of Android simply do not work the same as on conventional Linux systems. You can add BusyBox to the shell’s PATH environment temporarily without root by entering the following command:
shell@android:/ $ export PATH=$PATH:/data/local/tmp Standard Android Tools
Some useful tools that are present on Android systems in the /system/bin directory include the following:
pm—This stands for “package manager” and is the command-line package management utility on Android. It performs all tasks relating to installation, uninstallation, disabling, and information retrieval of installed packages. Some useful commands are:- List all installed packages—
shell@android:/ $ pm list packages - Find the stored APK path of an installed application—
shell@android:/ $ pm path <package_name> - Install a package—
shell@android:/ $ pm install /path/to/apk - Uninstall a package—
shell@android:/ $ pm uninstall <package_name> - Disable an installed application (useful for disabling pesky applications that came with your device)—
shell@android:/ $ pm disable <package_name>
- List all installed packages—
logcat—This tool allows you to view system and application logs with flexible filters. This tool can only be invoked by applications or users on the device that have the associated privilege level to do so.- If you would like to view all logs, simply run—
shell@android:/ $ logcat - If you know the name of the tag you are looking for then you can filter by it using—
shell@android:/ $ logcat -s tag
- If you would like to view all logs, simply run—
getprop—This tool allows you to retrieve all system properties including verbose hardware and software information.dumpsys—This tool displays information about the status of system services. If run without any arguments it iterates through all system services. You can also find these services by runningservice list.
drozer
drozer is an Android assessment tool that was released in March 2012 at Blackhat EU under the name Mercury. Its original intention was to eliminate the need for writing one-use applications that test for a certain issue, and it has evolved into a full testing suite. It was created because of the need to test each aspect of an Android application in a dynamic way. Put simply, drozer has two distinct use cases:
- Finding vulnerabilities in applications or devices—It allows you to assume the role of an installed Android application and interact with other apps and the underlying operating system in search of vulnerabilities.
- Providing exploits and useful payloads for known vulnerabilities—It does this by building malicious files or web pages that exploit known vulnerabilities to install drozer as a remote administration tool.
Chapter 7 focuses heavily on using drozer to find vulnerabilities, and Chapter 8 delves into the darker side of drozer and ways of using provided exploits to gain access to Android devices as an attacker.
drozer has two different versions: the community and pro editions. The community edition provides the raw power of drozer and gives the user access to a command-line interface only. It is also a fully open-source project that was released under a 3-clause BSD license. The professional version focuses on features that make doing Android security testing easy for people who do it as a part of their job. It provides a graphical user interface that makes visualizing the large amount of information that can be collected during the course of a typical security assessment of an Android device easier. Throughout the following chapters, the community edition of drozer is used for two reasons: It is free, and it facilitates the learning of Android security better than the pro version, mainly because it does not shield you from what it is doing under the hood. For more information about the differences, see the tool’s homepage at https://www.mwrinfosecurity.com/products/drozer/.
How drozer Works
drozer is a distributed system that makes use of some key components:
- Agent— A lightweight Android application that runs on the device or emulator being used for testing. There are two versions of the agent, one that provides a user interface and embedded server and another that does not contain a graphical interface and can be used as a Remote Administration Tool on a compromised device. Since version 2.0, drozer supports “Infrastructure mode,” in which the agent establishes a connection outward to traverse firewalls and NAT. This allows more realistic attack scenarios to be created and requires a drozer server.
- Console—A command-line interface running on your computer that allows you to interact with the device through the agent.
- Server—Provides a central point where consoles and agents can rendezvous, and routes sessions between them.
These components use a custom protocol named drozerp (drozer protocol) to exchange data. The agent is somewhat of an empty shell that knows only how to run commands it receives from the console and provide the result. A very technically brilliant method of using the Java Reflection API facilitates the execution of code from Python in the console to Java on the agent. This means that from Python code it is possible to instantiate and interact with Java objects on the connected device.
Installing drozer
To set up drozer, visit https://www.mwrinfosecurity.com/products/drozer/community-edition/ and download the package that is appropriate for your platform (Linux, Windows, or Mac). For standard application testing purposes, the tool requires only two parts: an agent application that needs to be installed on your Android device and a console that is run from your computer. You will require the following to install drozer successfully on your computer:
- Python 2.7
- Java Development Kit (JDK) 1.6
- Android SDK
- ADB on your
PATH - Java on your
PATH
The drozer agent can be installed on your Android device using ADB. It is included as agent.apk in all download packages or as a separate package on the download page. To install the agent on your device, perform the following command:
$ adb install agent.apk For more verbose information about installing drozer, please refer to the user guide presented on the download page.
Starting a Session
You must first set up suitable port forwarding from your device or emulator to your computer because the embedded server in the drozer agent listens on TCP port (31415 by default). Perform the following command to forward this port to your computer:
$ adb forward tcp:31415 tcp:31415You can now open the drozer agent on the device and turn on the Embedded Server option as shown in Figure 6.3.
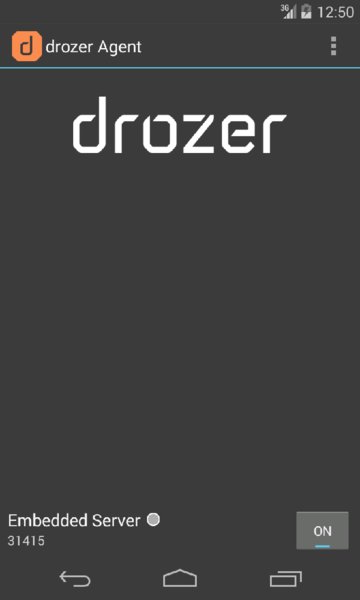
Figure 6.3 The main activity of the drozer agent displaying the embedded server toggle.
On your computer you can now perform the following command to connect to your agent:
$ drozer console connect You should now see a drozer command prompt that confirms your device ID and looks as follows:
Selecting 1f3213a063299199 (unknown sdk 4.4.2)

            ..                    ..:.
           ..o..                  .r..
            ..a..  . ....... .  ..nd
              ro..idsnemesisand..pr
              .otectorandroidsneme.
           .,sisandprotectorandroids+.
         ..nemesisandprotectorandroidsn:.
        .emesisandprotectorandroidsnemes..
      ..isandp,..,rotectorandro,..,idsnem.
      .isisandp..rotectorandroid..snemisis.
      ,andprotectorandroidsnemisisandprotec.
     .torandroidsnemesisandprotectorandroid.
     .snemisisandprotectorandroidsnemesisan:
     .dprotectorandroidsnemesisandprotector.

drozer Console (v2.3.4)
dz>
Using the drozer Console
The drozer console is essentially a command-line interface that allows you to run modules currently installed in the framework. To find the available modules, use the list command. Running this command without any arguments will give a list of all available modules, and providing it with an argument filters the module list by that keyword. The following shows an example:
dz> list package
app.package.attacksurface  Get attack surface of package
app.package.backup         Lists packages that use backup API (returns
                           true on FLAG_ALLOW_BACKUP)
app.package.debuggable     Find debuggable packages
app.package.info           Get information about installed packages
app.package.launchintent   Get launch intent of package
app.package.list           List Packages
app.package.manifest       Get AndroidManifest.xml of package
... Some modules do not come as part of the standard drozer installation. This is because they are seen as additional modules that may not be used regularly or are specialized for a certain task such as installing an additional tool or a root exploit for a certain device. You search for modules from the online central module repository using the module search command. Here -d is used to show module descriptions:
dz> module search -d
...
metall0id.root.cmdclient
   Exploit the setuid-root binary at /system/bin/cmdclient on certain
   devices to gain a root shell. Command injection vulnerabilities exist
   in the parsing mechanisms of the various input arguments.
    This exploit has been reported to work on the Acer Iconia, Motorola
    XYBoard and Motorola Xoom FE.
...
metall0id.tools.setup.nmap
    Installs Nmap on the Agent.
    Nmap ("Network Mapper") is a free and open source (license) utility
    for network discovery and security auditing.

mwrlabs.develop
    Start a Python shell, in the context of a drozer module.
You can also search available modules for specific keywords contained within their descriptions or names by providing a keyword to module search. This functionality can also be invoked from outside of a drozer console by using the drozer module command from your terminal. The searched module repository is at https://github.com/mwrlabs/drozer-modules/.
Modules are organized into namespaces that group specific functions. Table 6.1 details the default namespaces; however, drozer module developers may choose to create additional namespaces.
Table 6.1 A List of drozer Namespaces and the Purpose of the Modules in Each
| NAMESPACE | DESCRIPTION |
app.activity |
Find and interact with activities exported by applications. |
app.broadcast |
Find and interact with broadcast receivers exported by applications. |
app.package |
Find packages installed on a device, and display information about them. |
app.provider |
Find and interact with content providers exported by applications. |
app.service |
Find and interact with services exported by applications. |
auxiliary |
Useful tools that have been ported to drozer. |
exploit.pilfer |
Public exploits that extract sensitive information from vulnerable applications through various means. |
exploit.root |
Publicly available root exploits for Android devices. |
information |
Extract additional information about a device and its configuration. |
scanner |
Find common vulnerabilities in applications or devices with automatic scanners. |
shell |
Interact with the underlying Linux OS through a shell. |
tools.file |
Perform operations on files; e.g., copy files to and from the device. |
tools.setup |
Upload additional utilities on the device for use inside drozer; e.g., busybox. |
A good way to understand what an unprivileged application has access to on a device is by using the drozer shell. Launch it and issue an id command as shown here:
dz> shell
u0_a59@android:/data/data/com.mwr.dz $ id
uid=10059(u0_a59) gid=10059(u0_a59) groups=3003(inet),50059(all_a59)
 context=u:r:untrusted_app:s0
u0_a59@android:/data/data/com.mwr.dz $
Remember that UIDs are assigned sequentially from 10000 upwards, and more about how the groups are assigned to an application is explained later in this section in “Inspecting the Android Permission Model”.
You can find more information about what a module does and its command-line parameters by using the help command within the console. Alternatively, use -h inline when executing a command as shown here:
dz> run app.package.info -a com.mwr.dz -h Another useful feature of the console is the ability to redirect any output from a module to a file. You can do this in the same manner as you do it on the terminal using the > character like so:
dz> run app.package.info -a com.mwr.dz > /path/to/output.txt For other useful semantics and shortcuts, refer to the drozer user guide on the project’s download page.
Writing Your Own Basic Modules
For you to get used to drozer’s complex way of executing Java from Python and help with module development in general, installing the following module is crucial:
dz> module install mwrlabs.develop
Processing mwrlabs.develop... Done.

Successfully installed 1 modules, 0 already installed.
This module provides an interactive shell to test the instantiation of objects, retrieval of constant values, and execution of methods. For example, suppose you want to create a module that returns the package’s name when provided with an application’s UID. You could test it first using the auxiliary.develop .interactive module that was installed previously.
dz> run auxiliary.develop.interactive
Entering an interactive Python shell. Type 'c' to end.

> /home/tyrone/dz-repo/mwrlabs/develop.py(24)execute()
-> self.pop_completer()
(Pdb) context = self.getContext()
(Pdb) pm = context.getPackageManager()
(Pdb) name = pm.getNameForUid(10059)
(Pdb) print name
com.mwr.dz
drozer provides some “common library” commands to help alleviate reimplementation of common tasks. You can find them defined in the /src/drozer/modules/common/ folder of the drozer console source code. The self.getContext() function used previously is a helper function that provides a handle on Android Context, which can be elusive at times. An equivalent Java implementation of the preceding code could be the following:
Context context = getApplicationContext();
PackageManager pm = context.getPackageManager();
String name = pm.getNameForUid(10059);
Turning this simple concept into a fully functioning drozer module may look as follows:
from drozer.modules import Module

class GetPackageFromUID(Module):

    name = "Get a package's name from the given UID"
    description = "Get a package's name from the given UID"
    examples = """
dz> run app.package.getpackagefromuid 10059
UID 10059 is com.mwr.dz
"""
    author = "Tyrone"
    date = "2014-05-30"
    license = "BSD (3 clause)"
    path = ["app", "package"]
    permissions = ["com.mwr.dz.permissions.GET_CONTEXT"]
    def add_arguments(self, parser):
        parser.add_argument("uid", help="uid of package")

    def execute(self, arguments):
        context = self.getContext()
        pm = context.getPackageManager()
        name = pm.getNameForUid(int(arguments.uid))
        self.stdout.write("UID %s is %s

" % (arguments.uid, name))
Saving the newly created module in a file with extension .py in a local repository allows access to it from drozer. Creating a local repository can be done using the following command from the console (or similarly using the drozer command from the terminal).
dz> module repository create /path/to/repository Running your newly created module produces the following output:
dz> run app.package.getpackagefromuid 10059
UID 10059 is com.mwr.dz
During development of a module, turning on debugging mode on the console by invoking it with --debug may be useful. This command prints any errors produced by the loading or running of the module to the screen. For more advanced examples of developing modules, refer to the drozer documentation or read the source code of other similar modules for a deeper insight.
Introduction to Application Components
Android applications and their underlying frameworks were designed in a way that keeps them modular and able to communicate with each other. The communication between applications is performed in a well-defined manner that is strictly facilitated by a kernel module named binder, which is an Inter-Process Communication (IPC) system that started as the OpenBinder project and was completely rewritten in 2008 for use on Android. It is implemented as a character device located at /dev/binder, which applications interact with through multiple layers of abstraction.
Android applications can make use of four standard components that can be invoked via calls to binder.
- Activities—Activities represent visual screens of an application with which users interact. For example, when you launch an application, you see its main activity. Figure 6.4 shows the main activity of the clock application.
Services—Services are components that do not provide a graphical interface. They provide the facility to perform tasks that are long running in the background and continue to work even when the user has opened another application or has closed all activities of the application that contains the service. To view running services on your device go to the Running tab in the Application Manager, as shown in Figure 6.5.
Two different modes of operation exist for services. They can be started or bound to. A service that is started is typically one that does not require the ability to communicate back to the application that started it. A bound service provides an interface to communicate back results to the calling application. A started service continues to function even if the calling application has been terminated. A bound service only stays alive for the time that an application is bound to it.
- Broadcast receivers—Broadcast receivers are non-graphical components that allow an application to register for certain system or application events. For instance, an application that requires a notification when receiving an SMS would register for this event using a broadcast receiver. This allows a piece of code from an application to be executed only when a certain event takes place. This avoids a situation where any polling needs to take place and provides a powerful event-driven model for applications. In contrast to other application components, a broadcast receiver can be created at runtime.
- Content providers—These are the data storehouses of an application that provide a standard way to retrieve, modify, and delete data. The terminology used to define and interact with a content provider is similar to SQL: query, insert, update, and delete. This component is responsible for delivering an application’s data to another in a structured and secure manner. The developer defines the back-end database that supports a content provider, but a common choice is SQLite (see
http://www.sqlite.org/), because Android makes the implementation of SQLite so easy due to their similar structures. Defining a content provider that can retrieve files and serve them is also possible. This may provide a preferable approach for applications that implement access control on the retrieval of their files from other applications.

Figure 6.4 The main activity of the clock application

Figure 6.5 A list of running services on a device and the applications they belong to
Defining Components
Each Android package contains a file named AndroidManifest.xml in the root of the archive. This file defines the package configuration, application components, and security attributes. Figure 6.6 shows an example manifest.
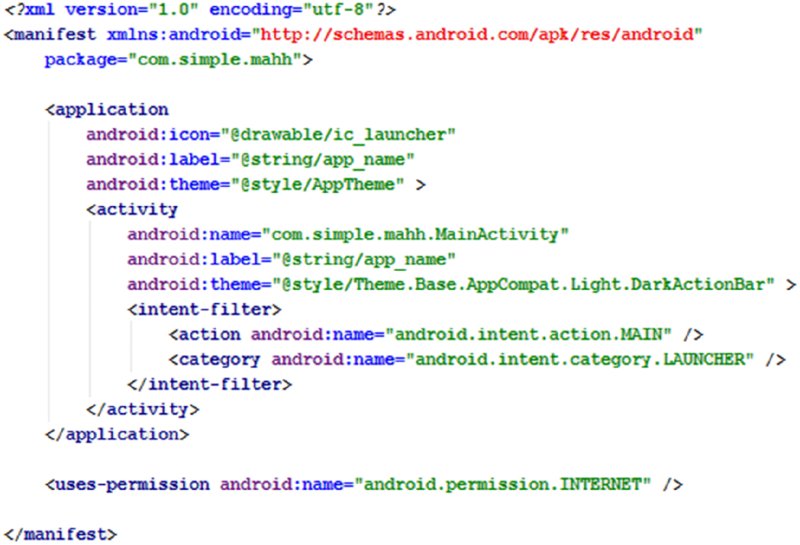
Figure 6.6 A simple manifest file showing the general structure
Only components that are defined in the manifest file are usable inside the application, with the exception of broadcast receivers. One of the most important aspects of securing defined components in the manifest is using strongly configured permissions, which is explored in detail later in this chapter in “Understanding Permissions”.
Interacting with Components
An intent is a defined object used for messaging that is created and communicated to an intended application component. This communication is done through calls to binder. It includes all relevant information passed from the calling application to the desired application component and contains an action and data that is relevant to the request being made. A simple example of an application sending a request to open a particular URL in a browser would look as follows in code:
Intent intent = new Intent(Intent.ACTION_VIEW);
intent.setData(Uri.parse("http://www.google.com"));
startActivity(intent);
The preceding code creates a simple implicit intent to view a URL, and the startActivity() function is called with the intent as a parameter. Any application’s activity that is able to respond to a VIEW action on data that is formatted like a URL will be eligible to receive this intent. If only a single application can handle this intent, the intent is routed to that application by default. Otherwise, an application picker is shown. An application defines “intent filters” in its manifest, which catches the intents that are appropriate for its components. For example, if an activity in your application can handle HTTP links to websites, then an appropriate intent filter looks as follows:
<activity android:name="MyBrowserActivity">
    <intent-filter>
        <action android:name="android.intent.action.VIEW"/>
        <data android:scheme="http" />
    </intent-filter>
</activity>
This snippet states that the activity named MyBrowserActivity in this application can handle any intent with an action of android.intent.action.VIEW and has the data scheme of http://.
If you want to make sure that an intent that you send always reaches an application you intend and would not like the system to decide, then you can make use of explicit intents. Explicit intents specify the application and component that the intent should be delivered to. For example, if an application you created needs to explicitly open a URL in the Android browser application, you use the following code:
Intent intent = new Intent(Intent.ACTION_VIEW);
intent.setData(Uri.parse("http://www.google.com"));

String pack = "com.android.browser";
ComponentName comp = new ComponentName(pack, pack + ".BrowserActivity");
intent.setComponent(comp);

startActivity(intent);
You can try this from drozer without having to create a test application as follows:
dz> run app.activity.start --action android.intent.action.VIEW --data-uri
http://www.google.com --component com.android.browser
com.android.browser.BrowserActivity
drozer can be used to interact with all application components in the same easy manner. The following is an example of querying the system settings content provider from drozer that can be queried from any application:
dz> run app.provider.query content://settings/system
| _id | name                         | value |
| 1   | volume_music                 | 11    |
| 2   | volume_ring                  | 5     |
| 3   | volume_system                | 7     |
| 4   | volume_voice                 | 4     |
| 5   | volume_alarm                 | 6     |
| 6   | volume_notification          | 5     |
| 7   | volume_bluetooth_sco         | 7     |
| 9   | mute_streams_affected        | 46    |
| 10  | vibrate_when_ringing         | 0     |
| 11  | dim_screen                   | 1     |
| 12  | screen_off_timeout           | 60000 |
| 13  | dtmf_tone_type               | 0     |
| 14  | hearing_aid                  | 0     |
| 15  | tty_mode                     | 0     |
| 16  | screen_brightness            | 102   |
| 17  | screen_brightness_mode       | 0     |
| 18  | window_animation_scale       | 1.0   |
| 19  | transition_animation_scale   | 1.0   |
| 20  | accelerometer_rotation       | 1     |
| 21  | haptic_feedback_enabled      | 1     |
| 22  | notification_light_pulse     | 1     |
| 23  | dtmf_tone                    | 1     |
| 24  | sound_effects_enabled        | 1     |
| 26  | lockscreen_sounds_enabled    | 1     |
| 27  | pointer_speed                | 0     |
| 28  | mode_ringer_streams_affected | 422   |
| 29  | media_button_receiver        |
com.android.music/com.android.music.MediaButtonIntentReceiver |
| 30  | next_alarm_formatted         |       |
Chapter 7 shows many more examples of interacting with components using drozer. The ability to find vulnerabilities in application components requires a thorough understanding of their features and how they can be invoked.
Looking Under the Hood
This section explores the finer details of what happens under the hood when installing and running an application.
Installing an Application
When an application is installed on an Android device, various tasks must be performed by the Package Manager Service and installd to ensure that the OS fully recognizes and knows how to work with it. The following is a high-level view of the steps:
- Determine correct installation location according to package parameters
- Determine if this is a new installation or update
- Store the APK in the appropriate directory
- Determine the application’s UID
- Create the application data directory and set the appropriate permissions
- Extract native libraries and place them in
libsdirectory of application data directory and set appropriate file and folder permissions - Extract the DEX file from the package and put its optimized equivalent in the cache directory
- Add package particulars to
packages.listandpackages.xml - Send a broadcast stating that the package was installed
This installation process was documented in depth by Ketan Parmar in a blog post at http://www.kpbird.com/2012/10/in-depth-android-package-manager-and.html#more. For the purposes of the next discussion, one of the most important points to take away from the previous list is that when an Android package is installed, it is also stored on the device. User-level applications are stored in /data/app/, and applications that came with the system image are under /system/app/.
Here is an example listing of all the APK files present in the /data/app/ folder on an Android 4.4 emulator:
root@android:/data/app # ls -l *.apk
-rw-r--r-- system   system  ...  ApiDemos.apk
-rw-r--r-- system   system  ...  CubeLiveWallpapers.apk
-rw-r--r-- system   system  ...  GestureBuilder.apk
-rw-r--r-- system   system  ...  SmokeTest.apk
-rw-r--r-- system   system  ...  SmokeTestApp.apk
-rw-r--r-- system   system  ...  SoftKeyboard.apk
-rw-r--r-- system   system  ...  WidgetPreview.apk
An important point to note is that each of the APK files listed is world readable according to their file permissions. This is the reason downloading them off a device or accessing them without having any particular level of privileges is possible. These same permissions are set on packages stored in the /system/app and /system/priv-app folders.
The Play Store used to have a Copy Protection function that you could enable when publishing an application. Applications that have been installed with this deprecated option reside in /data/app-private/ and are marked with the following file permissions, which do not allow world read access like the other third-party and system applications:
shell@android:/data/app-private # ls -l -a
-rw-r----- system   app_132    629950 2014-04-18 23:40 com.mwr.dz-1.apk
These applications have essentially been installed using the FORWARD_LOCK option provided by the Package Manager. You can replicate this installation option by using the following command from an ADB shell on your device:
shell@android:/data/local/tmp $ pm install -l agent.apk This installs the package with FORWARD_LOCK enabled, which places its APK in the /data/app-private folder. It should be noted here that this form of “copy protection” is fundamentally broken and relies on users not having privileged access on their device. If users have privileged access they can retrieve the application and redistribute it by other means and install it on other devices without this mechanism having any bearing.
Upon installing an application, in addition to storing the APK on disk, the application attributes are cataloged in files located at /data/system/packages.xml and /data/system/packages.list. These files contain a list of all installed applications as well as other information important to the package. The packages.xml file stores information about each installed application, including the permissions that were requested. This means that any changes made inside this file will directly affect the way that the OS treats the application. For instance, editing this file and adding or removing a permission from an application literally changes the application’s permissions. This fact may be used by application testers on Android to manipulate packages into a desirable state for testing or modification. It has also been used by Android “tinkerers” to build toolkits that allow for the “revocation” of permissions on chosen applications. This, of course, requires privileged access on the device because of the allocated file permissions on packages.xml, which is shown here:
root@android:/ # ls -l /data/system/packages.xml
-rw-rw----- system system 57005 2014-04-18 21:38 packages.xml Another procedure that takes place at installation time is the optimization and caching of the package’s DEX file. The classes.dex file is extracted from the APK, optimized using the dexopt utility, and then stored in the Dalvik cache folder. This folder exists at $ANDROID_DATA/dalvik-cache on every device (which is normally /data/dalvik-cache). It is optimized so that minimal instruction checking needs to be performed at runtime, and other such pre-execution checks can be performed on the bytecode. For more information about the specific tasks run by dexopt go to https://cells-source.cs.columbia.edu/plugins/gitiles/platform/dalvik/+/android-4.3_r0.9/docs/dexopt.html. The process of creating an ODEX may take time, and this could degrade first-run performance for applications. This is why most system applications on an Android image come pre-”odexed,” or a process of odexing is performed on first startup of the OS. If you explore the filesystem, notice that APKs in the /system/app directory may have an accompanying file with the same name and an extension of .odex. These are the application’s “optimized DEX” files that are stored outside of the package archive.
Pre-optimizing the DEX files means that when applications are run they do not need to be processed and stored in the cache first, which improves the loading time of the application. The processing procedure used by the dexopt utility for converting a DEX to an ODEX is a complex one. It involves parsing each instruction and checking for redundancies that can be replaced and using inline native replacements for methods that are called frequently. This process makes these ODEX files highly dependent on the specific version of the VM in use on the device. As a consequence, it is unlikely that an ODEX file will work on another device, unless the device software type and versions are identical.
Running an Application
Android uses an unusual procedure for starting new applications. It works by having a single application VM started when the OS boots that listens for requests to launch new applications. When it receives a request, it simply fork()’s itself with new application parameters and code to run. The process that listens for new application requests is aptly named zygote. This technique makes the process of creating new application VMs efficient, as core libraries are shared between VMs. When a user clicks on an application icon, an intent is formulated and sent using startActivity(). This is handled by the Activity Manager Service, which sends a message to zygote with all the parameters required to start the application. Zygote listens on a UNIX socket located at /dev/socket/zygote and has the following permissions, which allow only the system UID or root to interact with it:
root@android:/ # ls -l /dev/socket/zygote
srw-rw---- root     system            2014-05-04 11:05 zygote
When an application is started, the Dalvik cache is checked to see whether the application’s DEX file has been optimized and stored. If it has not, the system has to perform this optimization, which impacts the application’s loading time.
Understanding the Security Model
The foundation of the Android application security model is that no two applications running on the same device should be able to access each other’s data without authorization. They should also not be able to affect the operation of the other application adversely or without the appropriate consent. This concept is the basis of an application sandbox.
In theory, this concept is simple but the practical implementation of what defines an authorized action or not is complex. Keeping an open and extendible environment while maintaining security means that the security model has to stretch further than just the application code itself. An application would need to know whether another application is authorized to perform an action and so the concept of application identity is important.
Android has built-in ways of checking which entity created an application, and using this information could determine what privilege context it can be assigned on the device. After all, if any application author could claim to be Google, enforcing any trust boundaries would not be possible and every application would have to be afforded the same level of trust on the device. An application author’s identity is managed by code signing.
Code Signing
The signing of an Android package is done cryptographically through the use of digital certificates whose private key is only held by the application developers. Code signing is used to prove the identity of an application’s author in order to designate a degree of trust to it in other aspects of the security model. Signing of a package is mandatory, even if the certificate used is the default debug certificate that can only be used during development.
To generate your own X.509 certificate that can be used for signing, use the following command:
$ keytool -genkey -v -keystore mykey.keystore -alias alias_name -keyalg RSA
 -keysize 2048 -validity 10000
Signing your unsigned application can be performed using the following command, making use of your newly created certificate:
$ jarsigner -verbose -sigalg SHA1withRSA -digestalg SHA1 -keystore
mykey.keystore application.apk alias_name
The certificate information of an application is contained within the CERT.RSA file in the META-INF folder inside every Android package.
You can view the certificate using any tool capable of parsing the DER format. Here is an example of using openssl to display the certificate and its attributes:
$ openssl pkcs7 -inform DER -in CERT.RSA -text -print_certs
Certificate:
    Data:
        Version: 3 (0x2)
        Serial Number: 10623618503190643167 (0x936eacbe07f201df)
    Signature Algorithm: sha1WithRSAEncryption
        Issuer: C=US, ST=California, L=Mountain View, O=Android,
OU=Android, CN=Android/[email protected]
        Validity
            Not Before: Feb 29 01:33:46 2008 GMT
            Not After : Jul 17 01:33:46 2035 GMT
        Subject: C=US, ST=California, L=Mountain View, O=Android,
 OU=Android, CN=Android/[email protected]
        Subject Public Key Info:
            Public Key Algorithm: rsaEncryption
                Public-Key: (2048 bit)
                Modulus:
                    00:d6:93:19:04:de:c6:0b:24:b1:ed:c7:62:e0:d9:
                    d8:25:3e:3e:cd:6c:eb:1d:e2:ff:06:8c:a8:e8:bc:
                    a8:cd:6b:d3:78:6e:a7:0a:a7:6c:e6:0e:bb:0f:99:
                    35:59:ff:d9:3e:77:a9:43:e7:e8:3d:4b:64:b8:e4:
                    fe:a2:d3:e6:56:f1:e2:67:a8:1b:bf:b2:30:b5:78:
                    c2:04:43:be:4c:72:18:b8:46:f5:21:15:86:f0:38:
                    a1:4e:89:c2:be:38:7f:8e:be:cf:8f:ca:c3:da:1e:
                    e3:30:c9:ea:93:d0:a7:c3:dc:4a:f3:50:22:0d:50:
                    08:07:32:e0:80:97:17:ee:6a:05:33:59:e6:a6:94:
                    ec:2c:b3:f2:84:a0:a4:66:c8:7a:94:d8:3b:31:09:
                    3a:67:37:2e:2f:64:12:c0:6e:6d:42:f1:58:18:df:
                    fe:03:81:cc:0c:d4:44:da:6c:dd:c3:b8:24:58:19:
                    48:01:b3:25:64:13:4f:bf:de:98:c9:28:77:48:db:
                    f5:67:6a:54:0d:81:54:c8:bb:ca:07:b9:e2:47:55:
                    33:11:c4:6b:9a:f7:6f:de:ec:cc:8e:69:e7:c8:a2:
                    d0:8e:78:26:20:94:3f:99:72:7d:3c:04:fe:72:99:
                    1d:99:df:9b:ae:38:a0:b2:17:7f:a3:1d:5b:6a:fe:
                    e9:1f
                Exponent: 3 (0x3)
        X509v3 extensions:
            X509v3 Subject Key Identifier:
                48:59:00:56:3D:27:2C:46:AE:11:86:05:A4:74:19:AC:09:CA:8C:11
            X509v3 Authority Key Identifier:
keyid:48:59:00:56:3D:27:2C:46:AE:11:86:05:A4:74:19:AC:09:CA:8C:11
                DirName:/C=US/ST=California/L=Mountain
View/O=Android/OU=Android/CN=Android/[email protected]
                serial:93:6E:AC:BE:07:F2:01:DF

            X509v3 Basic Constraints:
                CA:TRUE
    Signature Algorithm: sha1WithRSAEncryption
         7a:af:96:8c:eb:50:c4:41:05:51:18:d0:da:ab:af:01:5b:8a:
         76:5a:27:a7:15:a2:c2:b4:4f:22:14:15:ff:da:ce:03:09:5a:
         bf:a4:2d:f7:07:08:72:6c:20:69:e5:c3:6e:dd:ae:04:00:be:
         29:45:2c:08:4b:c2:7e:b6:a1:7e:ac:9d:be:18:2c:20:4e:b1:
         53:11:f4:55:d8:24:b6:56:db:e4:dc:22:40:91:2d:75:86:fe:
         88:95:1d:01:a8:fe:b5:ae:5a:42:60:53:5d:f8:34:31:05:24:
         22:46:8c:36:e2:2c:2a:5e:f9:94:d6:1d:d7:30:6a:e4:c9:f6:
         95:1b:a3:c1:2f:1d:19:14:dd:c6:1f:1a:62:da:2d:f8:27:f6:
         03:fe:a5:60:3b:2c:54:0d:bd:7c:01:9c:36:ba:b2:9a:42:71:
         c1:17:df:52:3c:db:c5:f3:81:7a:49:e0:ef:a6:0c:bd:7f:74:
         17:7e:7a:4f:19:3d:43:f4:22:07:72:66:6e:4c:4d:83:e1:bd:
         5a:86:08:7c:f3:4f:2d:ec:21:e2:45:ca:6c:2b:b0:16:e6:83:
         63:80:50:d2:c4:30:ee:a7:c2:6a:1c:49:d3:76:0a:58:ab:7f:
         1a:82:cc:93:8b:48:31:38:43:24:bd:04:01:fa:12:16:3a:50:
         57:0e:68:4d
-----BEGIN CERTIFICATE-----
MIIEqDCCA5CgAwIBAgIJAJNurL4H8gHfMA0GCSqGSIb3DQEBBQUAMIGUMQswCQYD
VQQGEwJVUzETMBEGA1UECBMKQ2FsaWZvcm5pYTEWMBQGA1UEBxMNTW91bnRhaW4g
VmlldzEQMA4GA1UEChMHQW5kcm9pZDEQMA4GA1UECxMHQW5kcm9pZDEQMA4GA1UE
AxMHQW5kcm9pZDEiMCAGCSqGSIb3DQEJARYTYW5kcm9pZEBhbmRyb2lkLmNvbTAe
Fw0wODAyMjkwMTMzNDZaFw0zNTA3MTcwMTMzNDZaMIGUMQswCQYDVQQGEwJVUzET
MBEGA1UECBMKQ2FsaWZvcm5pYTEWMBQGA1UEBxMNTW91bnRhaW4gVmlldzEQMA4G
A1UEChMHQW5kcm9pZDEQMA4GA1UECxMHQW5kcm9pZDEQMA4GA1UEAxMHQW5kcm9p
ZDEiMCAGCSqGSIb3DQEJARYTYW5kcm9pZEBhbmRyb2lkLmNvbTCCASAwDQYJKoZI
hvcNAQEBBQADggENADCCAQgCggEBANaTGQTexgskse3HYuDZ2CU+Ps1s6x3i/waM
qOi8qM1r03hupwqnbOYOuw+ZNVn/2T53qUPn6D1LZLjk/qLT5lbx4meoG7+yMLV4
wgRDvkxyGLhG9SEVhvA4oU6Jwr44f46+z4/Kw9oe4zDJ6pPQp8PcSvNQIg1QCAcy
4ICXF+5qBTNZ5qaU7Cyz8oSgpGbIepTYOzEJOmc3Li9kEsBubULxWBjf/gOBzAzU
RNps3cO4JFgZSAGzJWQTT7/emMkod0jb9WdqVA2BVMi7yge54kdVMxHEa5r3b97s
zI5p58ii0I54JiCUP5lyfTwE/nKZHZnfm644oLIXf6MdW2r+6R8CAQOjgfwwgfkw
HQYDVR0OBBYEFEhZAFY9JyxGrhGGBaR0GawJyowRMIHJBgNVHSMEgcEwgb6AFEhZ
AFY9JyxGrhGGBaR0GawJyowRoYGapIGXMIGUMQswCQYDVQQGEwJVUzETMBEGA1UE
CBMKQ2FsaWZvcm5pYTEWMBQGA1UEBxMNTW91bnRhaW4gVmlldzEQMA4GA1UEChMH
QW5kcm9pZDEQMA4GA1UECxMHQW5kcm9pZDEQMA4GA1UEAxMHQW5kcm9pZDEiMCAG
CSqGSIb3DQEJARYTYW5kcm9pZEBhbmRyb2lkLmNvbYIJAJNurL4H8gHfMAwGA1Ud
EwQFMAMBAf8wDQYJKoZIhvcNAQEFBQADggEBAHqvlozrUMRBBVEY0NqrrwFbinZa
J6cVosK0TyIUFf/azgMJWr+kLfcHCHJsIGnlw27drgQAvilFLAhLwn62oX6snb4Y
LCBOsVMR9FXYJLZW2+TcIkCRLXWG/oiVHQGo/rWuWkJgU134NDEFJCJGjDbiLCpe
+ZTWHdcwauTJ9pUbo8EvHRkU3cYfGmLaLfgn9gP+pWA7LFQNvXwBnDa6sppCccEX
31I828XzgXpJ4O+mDL1/dBd+ek8ZPUP0IgdyZm5MTYPhvVqGCHzzTy3sIeJFymwr
sBbmg2OAUNLEMO6nwmocSdN2ClirfxqCzJOLSDE4QyS9BAH6EhY6UFcOaE0=
-----END CERTIFICATE-----
You can also use the Java keytool utility with the following parameters:
$ keytool -printcert -file CERT.RSA Application certificates are not verified by the Android operating system in any way and do not need to be issued by a certain Certificate Authority (CA) like other platforms. In fact, the majority of applications make use of a self-signed signing certificate and the OS does not check this certificate against any stored or online repository. The signing certificate is checked only when the application gets installed and if the certificate subsequently expires, the application will still run as normal. Google recommends that signing certificates be created with a validity period of 25 years or longer to support seamless updates to your application (see http://developer.android.com/tools/publishing/app-signing.html#considerations). Google Play enforces that the expiration on the signing certificate used to sign published applications is after October 22, 2033. This again is to support updates to your application.
With all the preceding information at hand, one can observe that the Android OS does not follow a conventional Public Key Infrastructure (PKI) process. It does not query any infrastructure to check the authenticity of an author’s claimed identity. This does not mean that the model is flawed in any way, it is simply different. Certificates are used for doing comparisons against other applications claiming to be written by the same author in order to establish trust relationships as well as for accepting application updates. This security model depends highly on the operating system’s ability to compare these application certificates and deny forged applications the associated privilege of a certain certificate. This chapter provides more concrete examples later when the permission model is introduced and protection levels are discussed. As noted by Nikolay Elenkov in a blog post at http://nelenkov.blogspot.com/2013/05/code-signing-in-androids-security-model.html, the certificate check is a literal binary comparison of the two certificates being compared. The function that handles this check is in /core/java/android/content/pm/Signature.java of the Android source tree, and the specific check is highlighted in the code:
@Override
public boolean equals(Object obj) {
    try {
        if (obj != null) {
            Signature other = (Signature)obj;
            return this == other‖ Arrays.equals(mSignature,
                                    other.mSignature
        }
    } catch (ClassCastException e) {
    }
    return false;
}
This means that issuing an update for your application is only possible if it has been signed with exactly the same certificate. If a developer loses his signing certificate, he can no longer issue updates to his users. Instead, he would have to publish their latest application update as a new application that has been signed with their new certificate. This means that users would have to re-download the newly published application as if it were a new application altogether. This speaks to the importance of keeping your signing certificate safe and backed up appropriately.
For the official Android Developer documentation from which some of this information has been taken, please visit http://developer.android.com/tools/publishing/app-signing.html.
Discovered Vulnerabilities
A number of vulnerabilities have been discovered in the way that the validation of signatures is performed on APK files. The presented vulnerabilities affect devices up to and including Android 4.3.
Google Bug #8219321—”Master Key” Vulnerability
In February 2013, Bluebox Security discovered the first vulnerability in the way that Android application contents are cryptographically verified. This is commonly known as the “Master Key” vulnerability. The discovered bug allowed for the arbitrary modification of an APK file without invalidating the cryptographic signature.
The vulnerability was that if a duplicate filename occurred in the zip archive, only the first file entry’s hash was checked. The MANIFEST.MF file included in each APK contains all the hashes of each file present in the rest of the archive. Here is an example:
$ cat META-INF/MANIFEST.MF
Manifest-Version: 1.0
Created-By: 1.0 (Android SignApk)

Name: res/layout-land/activity_main.xml
SHA1-Digest: tHBSzedjV31QNPH6RbNFbk5BW0g=

Name: res/drawable-xhdpi/ic_launcher.png
SHA1-Digest: itzF8BBhIB+iXXF/RtrTdHKjd0A=
...
Name: AndroidManifest.xml
SHA1-Digest: HoN6bMMe9RH6KHGajGz3Bn/fWWQ=
...
Name: classes.dex
SHA1-Digest: 6R7zbiNfV8Uxty8bvi4VHpB7A8I=
...
However, it is possible in the zip format to include two files with the same name. This bug exploits the fact that the hash of the first file is checked in Java code, but then the second file with the same name ends up being used by the C++ implementation when deployed to the device. This means that the second file can contain completely new contents and the validation of the APK still passes all checks. This vulnerability makes taking a legitimate application and including malicious code without breaking the signature possible. This vulnerability can also be used to gain system (and sometimes root) access on a device by modifying and reinstalling a system application. This use case is explained later in this chapter in “Root Explained”.
A basic proof of concept was created by Pau Oliva to demonstrate how simple the process is to repackage an APK with modified code without breaking the signature. You can find it at https://gist.github.com/poliva/36b0795ab79ad6f14fd8. A more comprehensive tool that exploits this issue and other discovered code signing vulnerabilities was written by Ryan Welton and is at https://github.com/Fuzion24/AndroidZipArbitrage/.
Google Bug #9695860
Just two days after bug #8219321 was revealed, a patch was committed (see https://android.googlesource.com/platform/libcore/+/9edf43dfcc35c761d97eb9156ac4254152ddbc55%5E%21/) that revealed another way that could be used to manipulate an APK to the same effect as the Master Key bug. This time, the vulnerability existed in the way that the length of the “extra” field in the local file headers of an entry in the zip archive was calculated in code. Figure 6.8 shows a simplified view of a zip archive containing a single file.

Figure 6.8 The simplified structure of a zip file containing a single file entry.
The format provides for a 16-bit length “extra” field, but in the Java code the length was read as a signed 16-bit number. This meant that overflowing this value into a negative length was possible. Exploitation techniques presented by the community were quite involved but putting it simply, the discrepancy between how the Java and C++ implementation parsed these values allowed for the injection of altered files that passed the signature validation. Jay Freeman covers various exploitation techniques in detail at http://www.saurik.com/id/18.
Google Bug #9950697
In July 2013, another vulnerability affecting signature verification of packages was patched by Google. To find the exact commit go to https://android.googlesource.com/platform/libcore/+/2da1bf57a6631f1cbd47cdd7692ba8743c993ad9%5E%21/. The length of the “name” field in the local file headers of an entry in the zip file was found to not be checked by the Java verification code. Rather, this length was calculated from another place in the zip file, known as the “central directory.” This can be exploited by setting a large “name” value in the local file header, which is not checked by the Java implementation, and putting the correct “name” in the “central directory.” The C++ code checks the local file header and executes code that is appended. However, the Java code verifies the signature of the entry according to the length of the “name” in the “central directory.” Building an archive with entries that satisfy both conditions and allow for the execution of arbitrary code while maintaining the signatures of the files in the package is therefore possible. Once again, Jay Freeman provides an excellent in-depth write-up of this issue at http://www.saurik.com/id/19.
Understanding Permissions
Imagine if every application you have installed on your device could access your contacts, SMS messages, GPS location, or any other information. This would be a scary prospect in a world where the average Android user has 26 or more applications installed (according to http://www.statista.com/topics/1002/mobile-app-usage/chart/1435/top-10-countries-by-app-usage/). This section will discuss how Android implements its permission model and assigns applications the rights to request access to device resources.
Inspecting the Android Permission Model
Android employs a fine-grained privilege model for applications. Applications have to request “permission” to access certain information and resources on a device. A user who installs an application from the Play Store is presented with an activity displaying the types of information and hardware that the application can access on your device. However, this information is abstracted away from the technical details in newer versions of the Play Store and does not display the details of the actual permission requested. Figure 6.9 shows an example of clicking the “Permission details” option in the Play Store on the Twitter (https://twitter.com/) application.
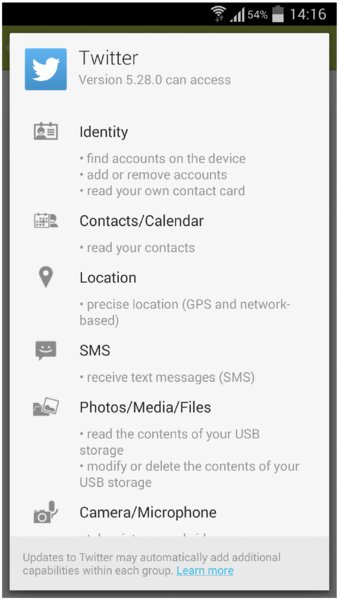
Figure 6.9 The required permissions displayed when looking at the permission details on the Twitter application.
Each defined permission has a unique name that is used when referring to it in code as well as a friendly label and a more verbose description about what it is for. This means that when an application permission activity shows “Read your text messages (SMS or MMS)” that it actually translates back to the permission with the name android.permission.READ_SMS. If you examine the AndroidManifest .xml file associated with an application, notice the XML describing the defined and requested permissions respectively as <permission> and <uses-permission> tags.
In drozer, to find the permissions that have been requested and defined by a certain application, run the app.package.info module with the package name as the argument (in this case the Android browser):
dz> run app.package.info -a com.android.browser
Package: com.android.browser
  Application Label: Browser
  Process Name: com.android.browser
  Version: 4.4.2-938007
  Data Directory: /data/data/com.android.browser
  APK Path: /system/app/Browser.apk
  UID: 10014
  GID: [3003, 1028, 1015]
  Shared Libraries: null
  Shared User ID: null
  Uses Permissions:
  - android.permission.ACCESS_COARSE_LOCATION
  - android.permission.ACCESS_DOWNLOAD_MANAGER
  - android.permission.ACCESS_FINE_LOCATION
  - android.permission.ACCESS_NETWORK_STATE
  - android.permission.ACCESS_WIFI_STATE
  - android.permission.GET_ACCOUNTS
  - android.permission.USE_CREDENTIALS
  - android.permission.INTERNET
  - android.permission.NFC
  - android.permission.SEND_DOWNLOAD_COMPLETED_INTENTS
  - android.permission.SET_WALLPAPER
  - android.permission.WAKE_LOCK
  - android.permission.WRITE_EXTERNAL_STORAGE
  - android.permission.WRITE_SETTINGS
  - android.permission.READ_SYNC_SETTINGS
  - android.permission.WRITE_SYNC_SETTINGS
  - android.permission.MANAGE_ACCOUNTS
  - android.permission.READ_PROFILE
  - android.permission.READ_CONTACTS
  - com.android.browser.permission.READ_HISTORY_BOOKMARKS
  - com.android.browser.permission.WRITE_HISTORY_BOOKMARKS
  - com.android.launcher.permission.INSTALL_SHORTCUT
  - android.permission.READ_EXTERNAL_STORAGE
  Defines Permissions:
  - com.android.browser.permission.PRELOAD
Searching for applications that have requested a particular permission using the permission filter is also possible. For verbose package information, make use of the app.package.info module or for a short list, use app.package.list in the following manner, providing the permission of interest as a parameter:
dz> run app.package.list -p android.permission.READ_SMS
com.android.phone (Phone)
com.android.mms (Messaging)
com.android.gallery (Camera)
com.android.camera (Camera)
Requesting certain permissions may cause the application’s user identifier to be added to a Linux group. For instance, requesting the permission android.permission.INTERNET puts the application in the inet group. This mapping is shown here:
<permission name="android.permission.INTERNET" >
    <group gid="inet" />
</permission>
These mappings are defined in /system/etc/permissions/platform.xml. Other permissions may not equate to any group amendments being made and are simply a form of access control. For instance, the READ_SMS permission does not allow the application to read the SMS database directly, but rather allows it to query content://sms and other related content providers. The following drozer command allows a user to query which content providers require the READ_SMS permission:
dz> run app.provider.info -p android.permission.READ_SMS
Package: com.android.mms
  Authority: com.android.mms.SuggestionsProvider
    Read Permission: android.permission.READ_SMS
    Write Permission: null
    Content Provider: com.android.mms.SuggestionsProvider
    Multiprocess Allowed: False
    Grant Uri Permissions: False
    Path Permissions:
      Path: /search_suggest_query
        Type: PATTERN_PREFIX
        Read Permission: android.permission.GLOBAL_SEARCH
        Write Permission: null
      Path: /search_suggest_shortcut
        Type: PATTERN_PREFIX
        Read Permission: android.permission.GLOBAL_SEARCH
        Write Permission: null

Package: com.android.providers.telephony
  Authority: mms
    Read Permission: android.permission.READ_SMS
    Write Permission: android.permission.WRITE_SMS
    Content Provider: com.android.providers.telephony.MmsProvider
    Multiprocess Allowed: False
    Grant Uri Permissions: True
    Uri Permission Patterns:
      Path: /part/
        Type: PATTERN_PREFIX
      Path: /drm/
        Type: PATTERN_PREFIX
  Authority: sms
    Read Permission: android.permission.READ_SMS
    Write Permission: android.permission.WRITE_SMS
    Content Provider: com.android.providers.telephony.SmsProvider
    Multiprocess Allowed: False
    Grant Uri Permissions: False
  Authority: mms-sms
    Read Permission: android.permission.READ_SMS
    Write Permission: android.permission.WRITE_SMS
    Content Provider: com.android.providers.telephony.MmsSmsProvider
    Multiprocess Allowed: False
    Grant Uri Permissions: False
...
When an application attempts to access one of the content providers listed previously, the operating system will check that the calling application holds the required permission. If it does not hold the appropriate permission, a permission denial results. An example of querying content://sms from drozer, which does not hold the READ_SMS permission by default, is shown here:
dz> run app.provider.query content://sms
Permission Denial: opening provider
com.android.providers.telephony.SmsProvider from ProcessRecord{b1ff0638
 1312:com.mwr.dz:remote/u0a56} (pid=1312, uid=10056) requires
android.permission.READ_SMS or android.permission.WRITE_SMS
Protection Levels
Each permission that is defined has an associated attribute known as its protection level. Protection levels control the conditions under which other applications can request the permission. Naturally, some permissions are more dangerous than others and this should reflect in the assigned protection level. For instance, third-party applications should never be granted the ability to install new applications (using the android.permission.INSTALL_PACKAGES permission) and the system should not allow it. An author of a number of applications may want to share information or invoke functionality between her applications at runtime in a secure manner. Both of these scenarios can be achieved by selecting the correct protection level on defined permissions. Table 6.2 describes all the available protection levels that can be set on a newly defined permission.
Table 6.2 Permission Protection Levels
| PROTECTION LEVEL | INTEGER VALUE | DESCRIPTION |
| normal | 0x0 | The default value for a permission. Any application may request a permission with this protection level. |
| dangerous | 0x1 | Indicates that this permission has the ability to access some potentially sensitive information or perform actions on the device. Any application may request a permission with this protection level. |
| signature | 0x2 | Indicates that this permission can only be granted to another application that was signed with the same certificate as the application that defined the permission. |
| signatureOrSystem | 0x3 | This is the same as the signature protection level, except that the permission can also be granted to an application that came with the Android system image or any other application that is installed on the /system partition. |
| system | 0x10 | This permission can only be granted to an application that came with the Android system image or any other application that is installed in particular folders on the /system partition. |
| development | 0x20 | This permission can be granted from a privileged context to an application at runtime. This scarcely documented feature was discussed at https://code.google.com/p/android/issues/detail?id=34785. |
As a practical example of protection levels in action, take a look at what happens when you compile a new drozer agent with the INSTALL_PACKAGES permission and attempt to install it.
$ drozer agent build --permission android.permission.INSTALL_PACKAGES
Done: /tmp/tmp2RdLTd/agent.apk

$ adb install /tmp/tmp2RdLTd/agent.apk
2312 KB/s (653054 bytes in 0.275s)
     pkg: /data/local/tmp/agent.apk
Success
The package installs successfully but logcat shows a log entry from the Package Manager saying the following:
W/PackageManager(  373): Not granting permission
android.permission.INSTALL_PACKAGES to package com.mwr.dz
(protectionLevel=18 flags=0x83e46)
It refused to grant the INSTALL_PACKAGES permission. This can be confirmed in drozer by displaying the permissions held by the agent:
dz> permissions
Has ApplicationContext: YES
Available Permissions:
 - android.permission.INTERNET
It is quite obvious that this happened because of the protection level set on the INSTALL_PACKAGES permission, which is signature|system (which equates to an integer protection level of 18. This value comes from performing a Boolean OR operation on 0x02 and 0x10). The drozer agent was not signed by the same certificate as the application that defined the INSTALL_PACKAGES permission (which is usually the package named android) and it did not come as part of the system image. Hence, the request to attain this permission was rejected by the OS. If one application permission request is rejected, the application will still function correctly as long as it handles this rejection gracefully when attempting to use functionality provided by this permission at runtime. If the application does not handle this scenario gracefully it may result in an application crash.
Third-party applications that do not have any intention of sharing data or functionality with applications from other developers should always define permissions with the signature protection level. This ensures that another developer cannot write an application that requests your permission and gains access to your exported components. This may not constitute a direct risk to your application or its data depending on what the permission is used for; however, in most cases this is not desirable from a security perspective. Using the signature protection level does not affect the application’s ability to integrate or communicate with other applications created by the same developer, as these applications would be signed with the same certificate. This is why it is so important that Android packages are signed cryptographically, or else how would Android know which application is fit to hold a particular permission? In fact, Android will not allow you to install an application that is not signed and doing so from ADB will result in an error with the code INSTALL_PARSE_FAILED_NO_CERTIFICATES. The use of permissions with protection levels provides a strong foundation for application security for developers; however, the foundation’s strength depends on the correct configuration of protection levels.
Application Sandbox
The Android application sandbox comprises multiple measures that were designed to ensure that one application cannot harm another or read its data without being explicitly allowed to do so.
Start by looking at what measures are in place from a native Linux viewpoint. As discussed earlier in this chapter, each application runs as its own user on Android. This provides a strong model for filesystem security that is inherited from UNIX. Each application’s private data directory is marked with the file permissions that only allow the application’s user to access it. Here is an example of the drozer agent’s data directory permissions:
drwxr-x--x u0_a59 u0_a59 2014-05-11 18:49 com.mwr.dz Attempting to access this folder as any other non-privileged user results in a permission denial, as shown in this example:
shell@android:/ $  ls -l /data/data/com.mwr.dz
opendir failed, Permission denied
However, note that the folder is marked as world executable. This means that any other files or subfolders inside this directory with lax permissions set on them will result in the exposure of these files to any user (and hence application) on the system. Chapter 7 explores this topic in detail.
An exception to the rule that each application runs as its own user is when an application requests to use a sharedUserId. This can be done by using the manifest entry android:sharedUserId="requested.userid.name". This request is granted to an application only if it is signed by the same certificate as the first application that requested this user identifier. If a set of applications use this option, they will be running under the exact same UID. This means that there will be no separation between them and they can freely read and write to each other’s private data directories. There are even configuration options available to accommodate running these applications in the same process. This means that every one of these applications effectively hold all the permissions of the entire collection of applications running under the same user identifier.
An example of mapping what the collective permissions are of applications making use of the android.media sharedUserId is shown in drozer:
dz> run app.package.shareduid -u 10005
UID: 10005 (android.media:10005)
  Package: com.android.providers.downloads
  Package: com.android.providers.downloads.ui
  Package: com.android.gallery
  Package: com.android.providers.media
  Permissions: android.permission.WRITE_EXTERNAL_STORAGE,
android.permission.ACCESS_ALL_DOWNLOADS, android.permission.WAKE_LOCK,
android.permission.WRITE_SETTINGS, android.permission.WAKE_LOCK,
android.permission.CAMERA, android.permission.RECEIVE_BOOT_COMPLETED,
android.permission.ACCESS_DOWNLOAD_MANAGER,
android.permission.ACCESS_NETWORK_STATE,
android.permission.SEND_DOWNLOAD_COMPLETED_INTENTS,
android.permission.WRITE_MEDIA_STORAGE,
android.permission.WRITE_EXTERNAL_STORAGE, android.permission.RECORD_AUDIO,
android.permission.ACCESS_FINE_LOCATION,
android.permission.RECEIVE_BOOT_COMPLETED, android.permission.INTERNET,
android.permission.READ_EXTERNAL_STORAGE, android.permission.SET_WALLPAPER,
android.permission.INTERACT_ACROSS_USERS, android.permission.READ_SMS,
android.permission.ACCESS_MTP, android.permission.READ_EXTERNAL_STORAGE,
android.permission.ACCESS_CACHE_FILESYSTEM,
android.permission.MODIFY_NETWORK_ACCOUNTING,
android.permission.SEND_DOWNLOAD_COMPLETED_INTENTS,
android.permission.MANAGE_USERS, android.permission.READ_EXTERNAL_STORAGE,
android.permission.ACCESS_ALL_DOWNLOADS,
android.permission.CONNECTIVITY_INTERNAL,
android.permission.WRITE_EXTERNAL_STORAGE,
android.permission.UPDATE_DEVICE_STATS
This drozer module can be used to retrieve the collective permissions that all four packages shown effectively hold. You can find more about the sharedUserId attribute at http://developer.android.com/guide/topics/manifest/manifest-element.html#uid.
Other application sandbox features are controlled by binder. Every application has access to binder and is able to communicate with it. Specialized IPC parcels are sent to it by applications and passed to the Activity Manager Service, which checks whether the calling application holds the permission required to perform the requested task. For example, if an application had to request that an exported activity from another application be started, the OS would check that the calling application holds the appropriate permission to start the activity. All Android API calls to exposed application components are controlled and the permission model is strictly enforced when accessing them.
Some application permissions are not enforced by binder, but rather by the Linux group assigned to an application. As explained in the “Understanding Permissions” section, requesting some permissions may get your application put in a certain group. For instance, inet when requesting android.permission .INTERNET. This means that accessing the network from an application would be governed by the OS’s native security checks and not binder.
In summary, Android does not implement a sandbox as you would expect. People often think of a sandbox as a completely separate virtual machine environment like one would run a sample of malware inside to make sure that it cannot infect the host system. Instead, Android uses only the strength of Linux user and group separation security enforced by the kernel as well as special IPC calls to binder to uphold the application capability security model. It does not provide a completely segregated environment for each application as some have thought.
Filesystem Encryption
Full disk encryption (FDE) is when the contents of an entire drive or volume are encrypted and not only selected individual files. This is useful because it requests the password from the user at startup and from then onward transparently encrypts and decrypts all data read and written to the disk. This serves as protection against stolen or lost disks that have been powered down. Part of the benefit is being able to defeat common forensics techniques such as disk imaging and booting the disk attached to another OS in order to browse the contents. Widely accepted FDE software makes use of a user-provided password in order to derive the key used for encryption.
FDE has been available on Android since version 3.0 (Honeycomb). It makes use of the dm-crypt module in the kernel to transparently encrypt and decrypt data on the block device layer. This is the same implementation used on modern Linux systems and is a tried and trusted form of FDE. The encryption suite used under the hood is aes-cbc-essiv:sha256, which had no publicly acknowledged weaknesses at the time of writing. Filesystem encryption is not enabled by default on Android versions prior to 5.0 (Lollipop) and has to be enabled by the user in the encryption options in the security section of the settings application. The user’s unlock screen PIN or password is the same one that is used to encrypt the FDE password. This means that Android generates a password, and this is encrypted using a key that is derived from the user’s screen unlock PIN or password. The key used to encrypt the FDE password is derived from the PIN or user’s password using 2000 rounds of PBKDF2 on versions of Android prior to 4.4 (KitKat). KitKat onwards implements scrypt for key derivation instead of PBKDF2 to make brute-forcing of long PIN numbers and passwords extremely difficult. The use of this intermediary password allows users to change their unlock screen password without having to change the actual FDE password.
This solution encrypts only the /data partition on an Android device. This means that the private data directory of applications and other sensitive user information is encrypted. Performing disk imaging techniques on the entire filesystem (as one would do in a forensic investigation) would yield access to only this encrypted data and not to any of the files in the /data folder or any of its subfolders. An interesting downfall is that the Secure Digital (SD) card is not included as part of the standard FDE scheme used by Android. Some handset manufacturers have included the encryption of the SD card as part of their customizations to Android; however, these implementations are proprietary and non-standardized. This means that gaining physical access to an Android device that has not implemented SD card encryption will allow the retrieval of all files stored on the SD card. Some applications have been discovered to use the SD card for storage of sensitive files, so this may prove useful to an attacker.
Disk encryption by nature protects only data at rest. This means that if an attacker had to gain code execution on a device that is making use of FDE on Android, he would not notice a difference in the data he could access. He would find that the data he retrieves is not encrypted in any manner, as it would transparently be decrypted for him by dm-crypt. Disk encryption does, however, protect users when an encrypted device has been stolen and the attacker does not have code execution or access to the device.
For additional information about the technical aspects of FDE on Android check out http://source.android.com/devices/tech/encryption/ and http://nelenkov.blogspot.com/2014/10/revisiting-android-disk-encryption.html.
Generic Exploit Mitigation Protections
Attackers have exploited native memory corruption issues since the first operating systems, and Android is no exception. Where native code is running in applications, the potential exists to corrupt memory structures to take control of it. To combat the trivial exploitation of native bugs, OS developers began to implement preventative and reactive measures known as exploit mitigations. These measures result from the attitude of “we will not be able to secure all code, so why not make it harder to exploit these issues instead.”
Many of the mitigations that Android makes use of are inherited from the Linux kernel. Applications on Android can make use of native libraries that are built in C/C++ or execute binaries that are included in their assets. Code that contains vulnerabilities and is in a code path that provides an entry point for an attacker could be exploited by the attacker to take control of the application. Note that if an attacker had to successfully exploit a native component, he would gain the privileges of the application itself and nothing more. In other words, native code runs under the exact same context as the calling application.
A simple example of this scenario is the Android browser. All the parsing performed by the Android browser is done inside a native library. If an attacker can provide malformed HTML, JavaScript, CSS, or any other element that requires parsing from this native component, he could potentially cause the corruption of memory structures within the browser application. If this is done in a finely crafted manner, an attacker can cause new code to be executed by the application. This is why including any and all exploit mitigations on the Android OS is important to protect users from compromise.
Exploit mitigations have been included since the very first publicly available version of Android. However, mitigations that are comparable with modern desktop operating systems have only been available in Android since version 4.0 (Ice Cream Sandwich). This point may be argued, but the fact is that writing an exploit for a remotely exploitable memory corruption vulnerability on a Jelly Bean (or newer) device is a time-consuming task that often requires the chaining of multiple vulnerabilities. Exploit mitigations do not make it impossible to write an exploit for a vulnerability but rather make it a lot more expensive to do so. Table 6.3 lists some of the truly noteworthy mitigations introduced to Android.
Table 6.3 Noteworthy Exploit Mitigations Included in Android
| EXPLOIT MITIGATION | VERSION INTRODUCED | EXPLANATION |
| Stack cookies | 1.5 | Protects against basic stack-based overflows by including a “canary” value after the stack that is checked. |
safe_iop |
1.5 | Provides a library that helps reduce integer overflows. |
dlmalloc extensions |
1.5 | Helps prevent double free() vulnerabilities and other common ways to exploit heap corruptions. |
calloc extensions |
1.5 | Helps prevent integer overflows during memory allocations. |
| Format string protections | 2.3 | Helps prevent the exploitation of format string vulnerabilities. |
NX (No eXecute) |
2.3 | Prevents code from running on the stack or heap. |
| Partial ASLR (Address Space Layout Randomization) | 4.0 | Randomizes the location of libraries and other memory segments in an attempt to defeat a common exploitation technique called ROP (Return-Oriented Programming). |
| PIE (Position Independent Executable) support | 4.1 | Supports ASLR to ensure all memory components are fully randomized. Effectively ensures that app_process and linker are randomized in memory so that these cannot be used as a source of ROP gadgets. |
RELRO (RELocation Read-Only) and BIND_NOW |
4.1 | Hardens data sections inside a process by making them read-only. This prevents common exploitation techniques such as GOT (Global Offset Table) overwrites. |
FORTIFY_SOURCE (Level 1) |
4.2 | Replaces common C functions that are known to cause security problems with “fortified” versions that stop memory corruption from taking place. |
| SELinux (Permissive mode) | 4.3 | Allows for fine-grained access control security policies to be specified. When properly configured policies are present, it can provide a significant improvement in the security model. Permissive mode means that security exceptions are not enforced when a policy is breached. This information is only logged. |
| SELinux (Enforcing mode) | 4.4 | Enforcing mode means that the specified policies are imposed. |
FORTIFY_SOURCE (Level 2) |
4.4 | Replaces additional functions with their “fortified” versions. |
Note that using the latest NDK (see https://developer.android.com/tools/sdk/ndk/index.html) and targeting the latest Android API version automatically enables all the exploit mitigations discussed in Table 6.3. These mitigations can also be turned off explicitly, but there is seldom a need to do that.
You can find more information about the exploit mitigations and other security features introduced in each version at https://source.android.com/devices/tech/security/ and in the relevant source code commit logs.
Table 6.4 Noteworthy Exploit Mitigations to Prevent a Non-privileged User From Exploiting a Vulnerability and Gaining Root Access
| EXPLOIT MIGITATION | VERSION INTRODUCED | EXPLANATION |
mmap_min_addr |
2.3 | This value specifies the minimum virtual address that a process is allowed to mmap and was set to 4096. This stops processes from mapping the zero page and causing a null pointer dereference in order to execute arbitrary code as root. |
kptr_restrict and dmesg_restrict |
4.1 | Avoids leaking kernel addresses when displaying /proc/kallsyms and /proc/kmsg to users. |
mmap_min_addr update |
4.1.1 | This value was increased to 32768. |
installd hardening |
4.2 | The installd daemon no longer runs as the root user. This means that any compromise of this component will not result in a privilege escalation to root. |
Init script O_NOFOLLOW |
4.2 | This helps prevent against symbolic-link related attacks. |
Init script no longer parses /data/local.prop |
4.2 | Using some vulnerability to add ro.secure=0 or ro.kernel .qemu=1 to /data/local.prop was a common way of escalating from the system user to root as these values cause adbd to be started as root. |
Removed setuid/setguid programs |
4.3 | Removed all setuid/setgid programs and added support for filesystem capabilities instead. |
Restrict setuid from installed apps |
4.3 | The /system partition is mounted as nosuid for all processes that were spawned by zygote. This means that installed applications cannot abuse vulnerabilities in any SUID binaries to gain root access. |
Rooting Explained
On Android, by default no way exists to run an application or some task within it as the root user. This simple fact has led to entire communities of researchers dedicating their time to finding ways to obtain root on various Android devices. There are also very many misconceptions about what rooting your device entails technically and why it is possible (or not) on certain devices. This section sheds light on some of the common rooting methods and gives a technical breakdown of each.
Rooting Objectives
A typical objective of rooting an Android device is so that you can put a su binary in a directory on the PATH (for example, /system/bin or /system/xbin). The job of the su binary is to allow a user to switch security contexts and become another user, including root. The su binary should, however, first determine whether the user should be allowed to impersonate the requested user. The required criteria is different on conventional Linux systems from the methods used on commonly found su packages on Android, but one fact that remains the same is that the su binary needs to be running as root in order to allow the change to another user context. The following shows the file permissions on su on a modern Linux system:
$ ls -l /bin/su
-rwsr-xr-x 1 root root 36936 Feb 17 04:42 /bin/su
These permissions tell you that any user can execute this binary and when she does she will be running it as the root user. This is a Set User Identifier (SUID) binary, which sets the user ID to the file’s owner upon execution. You can invoke it from within an application by using code similar to this:
Runtime.getRuntime().exec(new String[]{"su", "-c", "id"}); This executes the id command as the root user and works because the su binary is on the PATH, which means that the OS knows where to find it on the system. When using su on a Linux system, it asks for the target user’s password to authenticate the action. However, on Android a different approach is commonly taken because the root user does not have a password. Different root manager application developers use different technical methods but they both come down to the same concept for the user. When an application executes su, an activity is displayed to the user requesting the user’s permission to grant the requesting application root context. These applications usually display information about the application requesting root and what it is attempting to execute. Figure 6.10 shows an example of a prompt from the SuperSU application.

Figure 6.10 The prompt displayed by SuperSU to allow an application access to root context.
This application works by using a custom version of su that sends a broadcast directly to a broadcast receiver in the SuperSU application. This broadcast contains the requesting application’s information as well as relevant details about which command will be executed as root. After this broadcast is received by the application it displays a prompt to the user with the supplied information. The su binary then polls a file in the private data directory to find out whether permission was granted by the user. According to the user’s decision, su decides to setuid(0) or not.
The information just presented explains how you can allow applications to execute commands as root in a user-controlled manner that in theory is safe. Another objective that an attacker may pursue is gaining persistent root access on a device under his control without the user noticing. For this purpose, a completely unprotected custom version of su is included with drozer as part of the tools.setup.minimalsu module. This su version is meant to be used for post-exploitation on older devices and should not be used for everyday purposes. Here is the code for it:
#include <stdio.h>
#include <unistd.h>

int main(int argc, char **argv)
{
    if (setgid(0) || setuid(0))
        fprintf(stderr, "su: permission denied
");
    else
    {
        char *args[argc + 1];
        args[0] = "sh";
        args[argc] = NULL;

        int i;
        for (i = 1; i < argc; i++)
            args[i] = argv[i];

        execv("/system/bin/sh", args);
    }
}
This code is simply using setuid(0) and setgid(0) to change to the root user’s context, which means that any application that executes su will receive root context and no checks are performed or prompts shown to the user. An application that has been allowed to run commands as root can control absolutely any aspect of the device and completely breaks the Android security model. This means that it will be able to access any other application’s files or modify their code at rest or at runtime. This is why there are so many warning labels about downloading untrusted applications that require root access. An application that implements poor or malicious code can damage the OS or even ruin it completely.
Rooting Methods
Many online articles provide tutorials on rooting specific devices; however, technical details of what exactly is going on in the background are often scarce. This section does not delve extensively into different methods of rooting devices, but does give you enough information to know what scenarios an attacker could use with each type to gain access to the data stored by applications.
There are two main ways of gaining root access on an Android device—using an exploit and using an unlocked bootloader. Both are explored in the following subsections.
Using an Exploit
Android uses the Linux kernel and also contains code added by device manufacturers. Like most code these implementations could contain bugs. These bugs could be anything from a simple mistake in the permissions of a particular file or driver code that does not handle certain user input securely. Entire books have been written about finding these sorts of vulnerabilities, so we explore a small subset of noteworthy exploits from different vulnerability classes.
Using an Unlocked Bootloader
Some devices come with a user-unlockable bootloader that allows you to flash new firmware onto it. Various methods can be used to obtain root using an unlocked bootloader. The most common ways are flashing a new recovery image or flashing a pre-rooted kernel image that already contains the su binary. This may void the warranty of your device or if you do not know what you are doing, you may leave your device in an irrecoverable state.
Other device manufacturers may also provide unlocked bootloaders but different tools and protocols to perform flashing operations. A good example of this is Samsung; you can use a tool named ODIN to flash any Samsung device. A vast number of guides are on the Internet on how to use tools from each manufacturer and where to get custom system and recovery images.
Reverse-Engineering Applications
Reverse-engineering is the process of gaining a deep understanding of a system or application by only having the finished product at hand. Being able to understand what is happening under the hood of an application that you do not have the source code of is the basis of reverse-engineering. A very different mindset and set of skills is needed when compared to performing source code review of an application. This section covers the multiple techniques and tools required to reverse engineer Android applications. First, having the APK file of your target application is crucial. This may be an application that is already installed on a device you have or one that is available on the Play Store (or some other app store).
Retrieving APK Files
If the application you are targeting is on a device that you are able to get ADB access to, you can use this access to retrieve the APK file. Sometimes, finding the package name of a target application can be tricky. For example, look at the twitter application. The following approach lists all installed packages on the device and looks specifically for the word twitter:
$ adb shell pm list packages | grep twitter
package:com.twitter.android
This package was easy to find because it had a predictable word in the package name. However, this may not always be the case. For example, to find the package that is started when you click the Terminal Emulator launcher icon, run your search in drozer using the app.packages.list command with a filter for this application’s label.
dz> run app.package.list -f "Terminal Emulator"
jackpal.androidterm (Terminal Emulator)
This application would not have been found using the ADB method. To pull this application off the device you first need to find the path where the APK is stored, which you can do using ADB as follows:
$ adb shell pm path jackpal.androidterm
package:/data/app/jackpal.androidterm-2.apk
Or using drozer’s app.package.info module and observing the APK Path line in the output:
dz> run app.package.info -a jackpal.androidterm
Package: jackpal.androidterm
  Application Label: Terminal Emulator
  Process Name: jackpal.androidterm
  Version: 1.0.59
  Data Directory: /data/data/jackpal.androidterm
  APK Path: /data/app/jackpal.androidterm-2.apk
  UID: 10215
  GID: [3003, 1015, 1023, 1028]
  Shared Libraries: null
  Shared User ID: null
  Uses Permissions:
  - android.permission.INTERNET
  - android.permission.WRITE_EXTERNAL_STORAGE
  - android.permission.ACCESS_SUPERUSER
  - android.permission.WAKE_LOCK
  - android.permission.READ_EXTERNAL_STORAGE
  Defines Permissions:
  - jackpal.androidterm.permission.RUN_SCRIPT
  - jackpal.androidterm.permission.APPEND_TO_PATH
  - jackpal.androidterm.permission.PREPEND_TO_PATH
To reverse engineer applications from the Play Store, you would need to install them onto a device you own and then use the preceding method. However, sometimes the application you are targeting is not available in the Play Store from your country. You can overcome this issue by using sites to which you provide the package name or Play Store link to your target application, and they provide a direct APK download. Two such sites are
Viewing Manifests
A big part of understanding an Android application is obtaining and reviewing the AndroidManifest.xml file associated with the package. A number of tools are available to do this, and this section discusses three of them.
aapt
The Android Asset Packaging Tool (aapt) that comes with the Android SDK can be used to dump binary resource files included in an APK. To dump the manifest of the drozer agent using aapt, perform the following command:
$ aapt dump xmltree /path/to/agent.apk AndroidManifest.xml
N: android=http://schemas.android.com/apk/res/android
  E: manifest (line=2)
    A: android:versionCode(0x0101021b)=(type 0x10)0x5
    A: android:versionName(0x0101021c)="2.3.4" (Raw: "2.3.4")
    A: package="com.mwr.dz" (Raw: "com.mwr.dz")
    E: uses-sdk (line=7)
      A: android:minSdkVersion(0x0101020c)=(type 0x10)0x7
      A: android:targetSdkVersion(0x01010270)=(type 0x10)0x12
    E: uses-permission (line=11)
      A: android:name(0x01010003)="android.permission.INTERNET" (Raw:
"android.permission.INTERNET")
    E: application (line=13)
      A: android:theme(0x01010000)=@0x7f070001
      A: android:label(0x01010001)=@0x7f060000
      A: android:icon(0x01010002)=@0x7f020009
      A: android:debuggable(0x0101000f)=(type 0x12)0xffffffff
...
Another shorter way to dump resources in addition to the manifest is:
$ aapt l -a /path/to/agent.apk You will notice that aapt does not produce XML output, which makes it hard to use inside XML viewing applications. Instead, it produces text that specifies E: for an XML entity and A: for an attribute. Using aapt can be useful when you have limited tools available.
AXMLPrinter2
This tool parses the Android binary XML format directly. Therefore, APK files need to be unzipped first in order to obtain the AndroidManifest.xml to pass as an argument to this tool. You can download it from https://code.google.com/p/android4me/downloads/list. Here is an example of using it to parse and display the drozer agent manifest:
$ unzip agent.apk
Archive:  agent.apk
  inflating: res/drawable/ic_stat_connecting.xml
  inflating: res/layout/activity_about.xml
  inflating: res/layout/activity_endpoint.xml
  inflating: res/layout/activity_endpoint_settings.xml
  inflating: AndroidManifest.xml
...

$ java -jar AXMLPrinter2.jar AndroidManifest.xml
<?xml version="1.0" encoding="utf-8"?>
<manifest
    xmlns:android="http://schemas.android.com/apk/res/android"
    android:versionCode="5"
    android:versionName="2.3.4"
    package="com.mwr.dz"
    >
    <uses-sdk
        android:minSdkVersion="7"
        android:targetSdkVersion="18"
        >
    </uses-sdk>
    <uses-permission
        android:name="android.permission.INTERNET"
        >
    </uses-permission>
    <application
        android:theme="@7F070001"
        android:label="@7F060000"
        android:icon="@7F020009"
        android:debuggable="true"
...drozer
A module in drozer named app.package.manifest can parse manifest files and display them to screen. Using drozer to retrieve a manifest differs from other tools in that it can only parse the manifests of installed applications. The argument that is passed to this module is the package’s name whose manifest you would like displayed. An example of this is shown here:
dz> run app.package.manifest com.mwr.dz
<manifest versionCode="5"
          versionName="2.3.4"
          package="com.mwr.dz">
  <uses-sdk minSdkVersion="7"
            targetSdkVersion="18">
  </uses-sdk>
  <uses-permission name="android.permission.INTERNET">
  </uses-permission>
  <application theme="@2131165185"
               label="@2131099648"
               icon="@2130837513"
               debuggable="true"
...Disassembling DEX Bytecode
Like all other compiled and interpreted code, the Dalvik bytecode contained within DEX files can be disassembled into low-level human-readable assembly.
Dexdump
Dexdump is a tool that comes with the Android SDK, and you can find it in any of the subdirectories in the build-tools folder of the SDK directory. To disassemble DEX files into Dalvik instructions, use the following command:
$ ./dexdump -d /path/to/classes.dex
...
    #3              : (in Landroid/support/v4/app/FragmentState$1;)
      name          : 'newArray'
      type          : '(I)[Ljava/lang/Object;'
      access        : 0x1041 (PUBLIC BRIDGE SYNTHETIC)
      code          -
      registers     : 3
      ins           : 2
      outs          : 2
      insns size    : 5 16-bit code units
057050:                                        |[057050]
android.support.v4.app.FragmentState.1.newArray:(I)[Ljava/lang/Object;
057060: 6e20 ea03 2100                         |0000: invoke-virtual {v1,
v2},
Landroid/support/v4/app/FragmentState$1;.newArray:(I)[Landroid/support/v4/a
pp/FragmentState; // method@03ea
057066: 0c00                                   |0003: move-result-object v0
057068: 1100                                   |0004: return-object v0
      catches       : (none)
      positions     :
        0x0000 line=137
      locals        :
        0x0000 - 0x0005 reg=1 this Landroid/support/v4/app/FragmentState$1;
        0x0000 - 0x0005 reg=2 x0 I

  source_file_idx   : 1152 (Fragment.java)
...
The output produced by this tool is quite hard to read and almost in the most rudimentary state possible.
Smali and Baksmali
Baksmali is a disassembler that makes use of Jasmin syntax (see http://jasmin.sourceforge.net/). It accepts DEX and APK files as arguments and disassembles each class in the DEX file to its own file, which is in a much more readable format. This, in turn, makes analysis of this code much more manageable. To disassemble the DEX file inside an APK, perform the following command:
$ java -jar baksmali-x.x.x.jar /path/to/app.apk If no output directory is specified via the -o flag then by default all class files will be put in a directory named out.
Combined with the tool named smali, this toolkit is very powerful. Smali is an assembler that compiles a directory filled with classes in disassembled format back to a single DEX file. You can use the following command:
$ java -jar smali-x.x.x.jar -o classes.dex out/ Go to https://code.google.com/p/smali/ to download both of these tools.
IDA
IDA is a very popular disassembler used by reverse engineers all around the world. The power of IDA is its rich user interface and vast support for many different CPU architectures and interpreters. It is a commercial tool sold by Hex-Rays and is available at https://www.hex-rays.com/.
IDA is able to understand the DEX format and provides a user interface with a “graph-view” for understanding the flow of application logic in an intuitive way. Figure 6.12 shows an example of the graph view provided when disassembling a DEX file with IDA.

Figure 6.12 Graph view showing the disassembly of a DEX file in IDA.
Decompiling DEX Bytecode
Reading and understanding disassembled code is hard work. The more natural way to review an application would be to obtain the source code. Dalvik bytecode contained within a DEX file is an interpreted language that can be translated back to something that resembles the original source code. This can be performed by tools natively on the DEX file or by first converting the DEX file to standard Java CLASS files.
Dex2jar and JD-GUI
Dex2jar converts Android DEX files to Java Class files. This is useful because many tools are already available that can decompile Java bytecode back to source code. It is open source and you can download it from https://code.google.com/p/dex2jar/. It has grown from just a decompiler into a tool suite that performs many different tasks. However, the focus in this section is on converting Android DEX files to Java files. Here is an example of performing this operation with the d2j-dex2jar utility:
$ ./d2j-dex2jar.sh /path/to/agent.apk -o /output/to/agent.jar
dex2jar /path/to/agent.apk -> /output/to/agent.jar
The produced JAR file can now be decompiled back into Java source code using a number of available tools. The most popular choice for decompilation and viewing is JD-GUI. Figure 6.13 shows the converted JAR file open in JD-GUI.
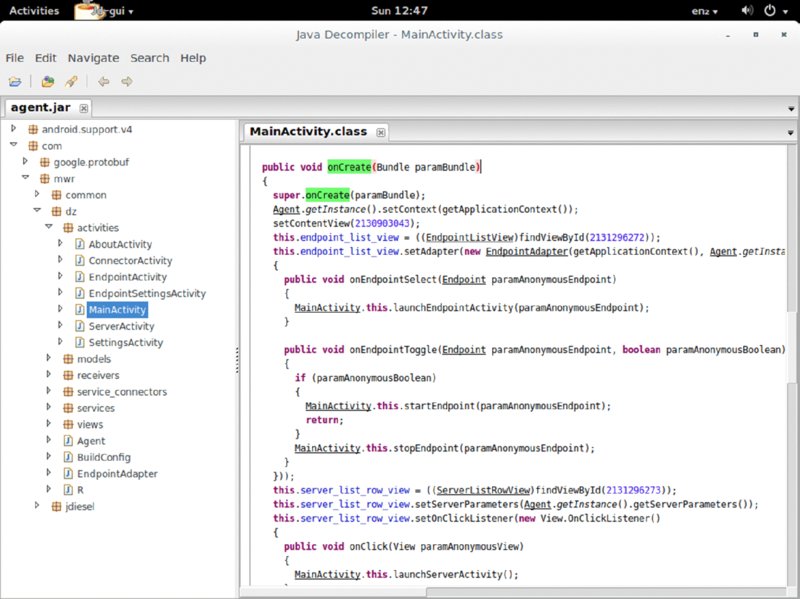
Figure 6.13 Viewing decompiled application code in JD-GUI
JD-GUI can be downloaded from http://jd.benow.ca/ for all major platforms.
JEB
JEB is a dedicated Android application decompiler that is sold by PNF Software. It comes in two flavors:
- JEB Automation—This command-line decompiler enables you to write scripts and perform bulk analysis of multiple files quicker.
- JEB Full—This includes the command-line decompiler as well as a GUI that allows for easy navigation of the decompiled application. The look and feel of the user interface is very similar to IDA by Hex-Rays.
Figure 6.14 shows an example of decompiling an application in the JEB interface.
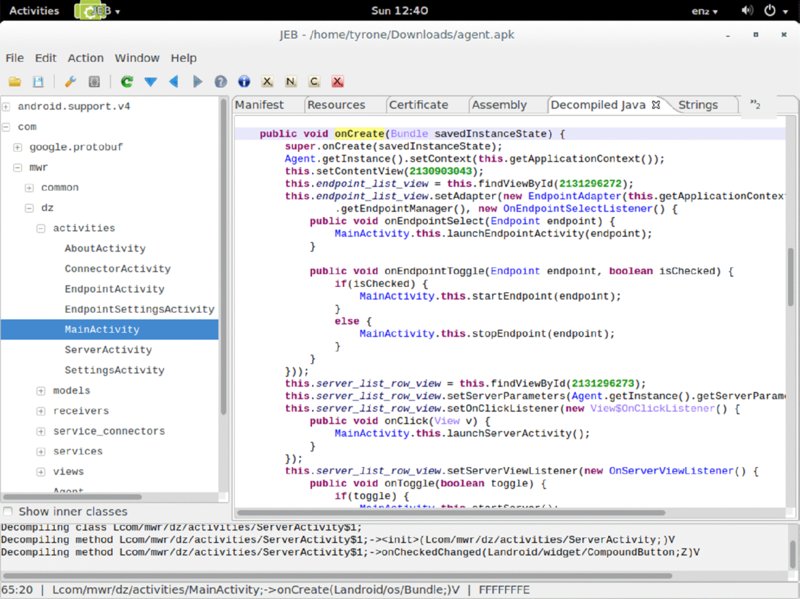
Figure 6.14 Viewing decompiled application code in JEB
JEB works directly on the Android package’s DEX file and does not use any intermediate steps that convert the DEX to a JAR file like other tools. Subtle differences in the Dalvik and Java bytecode sometimes cause other tools to fail to decompile the code. This is what JEB overcomes by performing this decompilation natively on the DEX file. For the casual Android application hacker, this failure may not be a problem. However, if accuracy and quality decompilation is what you are after, JEB offers it at a price. Go to http://www.android-decompiler.com/ for more information about JEB.
Decompiling Optimized DEX Bytecode
DEX files for system applications aren’t usually stored inside their APK. Rather, the code is pre-optimized and stored as an ODEX file. This file is the result of many optimizations that cause it to become reliant on the exact version of the Dalvik VM in use and other framework dependencies. This means that ODEX files cannot be decompiled in the same way as DEX files. In fact, they first need to be converted back to DEX files that have those optimizations and framework dependencies removed.
To perform this conversion from ODEX to DEX you can use smali and baksmali. You download the entire /system/frameworks directory of the device on which the optimization took place, which you can do using ADB:
$ mkdir framework
$ adb pull /system/framework framework/
pull: building file list...
...
pull: /system/framework/framework2.odex -> framework/framework2.odex
pull: /system/framework/framework2.jar -> framework/framework2.jar
pull: /system/framework/framework.odex -> framework/framework.odex
pull: /system/framework/framework.jar -> framework/framework.jar
pull: /system/framework/framework-res.apk -> framework/framework-res.apk
pull: /system/framework/ext.odex -> framework/ext.odex
pull: /system/framework/ext.jar -> framework/ext.jar
pull: /system/framework/core.odex -> framework/core.odex
pull: /system/framework/core.jar -> framework/core.jar
pull: /system/framework/core-libart.odex -> framework/core-libart.odex
pull: /system/framework/core-libart.jar -> framework/core-libart.jar
pull: /system/framework/core-junit.odex -> framework/core-junit.odex
pull: /system/framework/core-junit.jar -> framework/core-junit.jar
...
123 files pulled. 0 files skipped.
1470 KB/s (56841549 bytes in 37.738s)
The target ODEX file can then be disassembled into an assembly-like format that uses the provided framework dependencies and then compiled back into a normal DEX file. For instance, try this on the Settings.odex file that belongs to the settings application.
$ adb pull /system/priv-app/Settings.odex
2079 KB/s (1557496 bytes in 0.731s) You can use the following command to convert the ODEX to smali. By default, it stores the disassembled code in the out/ directory.
$ java -jar baksmali-x.x.x.jar -a 19 -x Settings.odex -d framework/ Now the disassembled code can be assembled again into a DEX file.
$ java -jar smali-x.x.x.jar -a 19 -o Settings.dex out/ The -a parameter given to smali and baksmali is the API version used by the applications. After you have generated a DEX file you can use your favorite decompilation and viewing tools to analyze the source code.
You can find the API version in use programmatically or by observing which Android version is running on your device and then finding the corresponding API version number. Table 6.5 shows this mapping for all versions available at the time of writing.
Table 6.5 Mapping Android Versions to Corresponding API Levels
| PLATFORM VERSION | API LEVEL | VERSION CODE |
| Android 5.0 | 21 | LOLLIPOP |
| Android 4.4W | 20 | KITKAT_WATCH |
| Android 4.4 | 19 | KITKAT |
| Android 4.3 | 18 | JELLY_BEAN_MR2 |
| Android 4.2, 4.2.2 | 17 | JELLY_BEAN_MR1 |
| Android 4.1, 4.1.1 | 16 | JELLY_BEAN |
| Android 4.0.3, 4.0.4 | 15 | ICE_CREAM_SANDWICH_MR1 |
| Android 4.0, 4.0.1, 4.0.2 | 14 | ICE_CREAM_SANDWICH |
| Android 3.2 | 13 | HONEYCOMB_MR2 |
| Android 3.1.x | 12 | HONEYCOMB_MR1 |
| Android 3.0.x | 11 | HONEYCOMB |
| Android 2.3.3, 2.3.4 | 10 | GINGERBREAD_MR1 |
| Android 2.3, 2.3.1, 2.3.2 | 9 | GINGERBREAD |
| Android 2.2.x | 8 | FROYO |
| Android 2.1.x | 7 | ECLAIR_MR1 |
| Android 2.0.1 | 6 | ECLAIR_0_1 |
| Android 2.0 | 5 | ECLAIR |
| Android 1.6 | 4 | DONUT |
| Android 1.5 | 3 | CUPCAKE |
| Android 1.1 | 2 | BASE_1_1 |
| Android 1.0 | 1 | BASE |
http://developer.android.com/guide/topics/manifest/uses-sdk-element.html#ApiLevels
This table is going to be useful as a reference for future chapters that will discuss vulnerabilities that were fixed in certain API versions.
Reversing Native Code
The Linux shared object (.so) files that can be included as part of an Android application may also require reverse engineering. This may be a scenario where source code is not available and the code being executed by the native component needs to be understood. Typically, native components run compiled machine code for the ARM architecture; however, Android now runs on multiple other architectures as well. At the time of writing, the supported architectures also included x86 and MIPS.
Disassembly and the understanding of native code in this way is a topic that is beyond the scope of this book. A number of tools are available to disassemble native code, and IDA is one of the most popular choices for this task.
In addition to just disassembling native code, it is possible to decompile it with the Hex-Rays Decompiler. Hex-Rays provides a full decompiler from ARM machine code to pseudo-C output; it is at https://www.hex-rays.com/products/decompiler/ with a hefty price tag attached to it. Multiple open-source attempts have been made at creating a decompiler for ARM machine code, but to date they have not been as successful as commercial counterparts.
Additional Tools
This section lists other tools that may be of interest to an Android reverse engineer.
Apktool
You can use Apktool to reverse-engineer an entire Android package back to a workable form for modification. This includes converting all resources, including AndroidManifest.xml, back to (nearly) their original source as well as disassembling the DEX file back to smali code. To do this, perform the following command:
$ java -jar apktool.jar d /path/to/app.apk output
I: Baksmaling...
I: Loading resource table...
I: Loaded.
I: Decoding AndroidManifest.xml with resources...
I: Loading resource table from file: /home/tyrone/apktool/framework/1.apk
I: Loaded.
I: Regular manifest package...
I: Decoding file-resources...
I: Decoding values */* XMLs...
I: Done.
I: Copying assets and libs...
You can compile a fully working APK file again after making any necessary modifications to the source by using the following command:
$ java -jar apktool.jar b output/ new.apk
I: Checking whether sources has changed...
I: Smaling...
I: Checking whether resources has changed...
I: Building resources...
I: Copying libs...
I: Building apk file...Apktool is an ideal tool to use if you need to modify any aspect of an application that you do not have the source for. Download it for free from https://code.google.com/p/android-apktool/.
Jadx
Jadx is an open source DEX decompiler project that is in a working state and looks evermore promising each version. It contains command-line tools as well as a GUI to browse decompiled code. Source code and downloads are at https://github.com/skylot/jadx. Figure 6.15 shows the jadx-gui tool that has decompiled an Android application.

Figure 6.15 Viewing decompiled application code in Jadx-gui
JAD
JAD is another popular free tool that allows for the decompilation of Java Class files back to source files. It does not provide a user interface like JD-GUI does. Unfortunately, it is not in active development anymore and the last release was in 2001. In some cases it has been found to be less reliable than using other similar tools. You can download it from a mirror site at http://varaneckas.com/jad/.
Dealing with ART
Android devices making use of the new Android Runtime (ART) convert DEX files into OAT files at installation time. OAT files are essentially ELF dynamic objects that are run on the device and one would assume that they would have to be treated like native code when reverse engineering them. A tool named oatdump performs a similar disassembling function for OAT files as dexdump does for DEX files. Explore the options provided by this tool if you are interested in disassembling an OAT file. However, similarly to dexdump the output is provided in quite a raw manner.
One simple fact that can be used is that the APK file of each installed application is still stored on the device. This means that the DEX file of your target application is still accessible in the normal way even when the converted OAT file is being used on the device. Another interesting detail is that every OAT file contains the original DEX file(s) embedded inside it. Pau Oliva created a script called oat2dex that can extract the DEX file(s) from within a given OAT file. This script relies on radare2 (see http://www.radare.org/) and can be found at https://github.com/poliva/random-scripts/blob/master/android/oat2dex.sh. This can be used if the original APK containing the DEX is no longer available. At the time of writing reverse-engineering tools and techniques for OAT files were still in active research by the security community.
Summary
Android is a unique operating system with some components that would be familiar to those who understand the inner workings of Linux. However, the way in which applications work on Android is completely unique to the platform. The security model provided for Android applications is complex but rich and requires you to have a thorough understanding before you can analyze applications.
The tools available on Android for reverse engineers and hackers are mature and can be used to thoroughly investigate application behavior and their underlying code. Using these tools it is possible to easily dig in and get ready to start finding vulnerabilities in applications. This chapter presented all of the fundamental knowledge required to move on to hacking Android applications and Chapter 7 will give you a kick start in doing just that!