
The Photographer’s Introduction to Video in Lightroom 4 and Photoshop CS6
Introduction
Photography and video have historically been separate disciplines. But changes brought about by the digital age have motivatedphotographers to explore the video features on their still cameras, or to present and market their work through video.
Still cameras added high-definition (HD) video. Standard definition (SD) video has been a digital camera feature for many years, but having HD video in a digital SLR (DSLR) cameramakes it possible to shoot video at a level of quality that used to require a dedicated video camera costing much more money. in addition, HDvideo makes it possble to shoot video using the wide range of existing lenses produced for SLR cameras over the last half century or so, allowing much more control over visual aspects of the image such as depth of field. Again, to use comparable lenses on a video camera requires a video camera that typically costs many times the price of a DSLRcamera. At the other end of the camera spectrum, common smartphones also added the ability to shoot HD video, helping to make HD the new baseline for video resolution that all hardware and software need to support.
People now expect to see video wherever they go online. When visiting web sites about news, travel, products, education and tutorials, sharing over social media, or services such as wedding photography, people often expect video to appear alongside text and photographs. They may see the presence of video as a sign of a more professional web site, or at least a sitewith a bigger budget behind it. Some photographers consider adding video to their skill setjust to keep up with the competition, which creates opportunities for photographers to use video as a way to differentiate themselves from photographers who stick to stills.
Computers and Internet access are faster. HD video editing used to require a heavily equipped desktop computer, but now ultrathin laptops, tablets, and even smartphones have the power to edit and upload an HD video from wherever you are. And more people now have Internet access that’s fast enough to view HD video and upload their own HD productions to YouTube and other web sites.
Image-editing software added the ability to handle video. As HD video became a standard feature in almost every camera from digital SLRs to smartphones, software that formerly handled only still imagesadded support for importing, organizing, and editing individual video clips, and in some cases, sequencing clips on a timeline. While dedicated video-editing software is readily available, you may find the video-editing experience in Lightroom and Photoshop to be more familiar to you as a photographer.
I wrote this book to help photographers make the transition from stills to video. Because still photography is the jumping-off point for this book, it does assume that you already have a working knowledge of photographic principles such as depth of field and shutter speed.
You can choose from a wide range of software, but this book concentrates on Lightroom and Photoshop for two reasons: Many photographers already use both, and their support for video has increased in later versions to keep pace with video advances in cameras. You’ll also read a fair amount about Adobe Bridge because it comes with Photoshop making it a natural partner to Photoshop.
This book assumes you have Adobe Photoshop Lightroom 4 or Adobe Photoshop CS6, or both. It also assumes that you’re a still photographer who is already familiar with the basics of editing still images in Lightroom or Photoshop and is new to video.
You can also use Photoshop to create frame animations, but because this book focuses on recorded videos and still photographs, it doesn’t cover frame animation.
Picking the Right Software for Video
With so many Adobe applications now claiming support for video files, they can’t all do the same thing, can they? In fact, the meaning and scope of “video support” changes depending on what Adobe software you’re using; just because an application supports video doesn’t mean you can edit a Hollywood blockbuster onit. Let’s break down what kind of video editing Adobe applications can handle.
Adobe Photoshop Lightroom 4
Although Lightroom 4 added support for video, Lightroom doesn’t strive to be a full-blown video editor. What’s convenient about Lightroom and video is that you can import both video clips and stills from your camera at the same time, and then apply the powerful organizational tools in Lightroom to them. It’s also possible to trim and make tone and color adjustments to single video clips in Lightroom, although with somewhat less control than in other applications.
There’s no timeline, so you can’t combine video clips into a finished piece. That said, Lightroom is still valuable in that you can use it to organize projects that include both stills and video, preparing them for timeline editing in other software such as Photoshop. Lightroom can also trim, color-correct, and export individual clips, and export a collection of stills as a video slideshow with text and audio.
The Adobe tech note “Video Support” details the video file formats you can import from a camera into Lightroom 4. You can read it at http://helpx.adobe.com/lightroom/kb/video-support-lightroom-4-3.html.
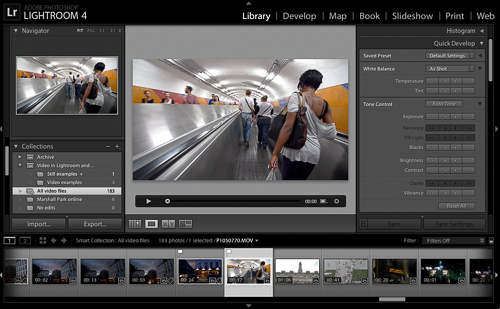
Figure 1. Video in Lightroom 4
Adobe Photoshop CS6 and Adobe Bridge CS6
Adobe Photoshop CS6 has a fully functional video-editing timeline where you can edit together clips, including transitions, fades, and audio. (Timeline video editing was introduced in Adobe Photoshop CS5, but only if you had thehigher-priced Photoshop CS5 Extended version.)You can use Adobe Bridge CS6 to import and organize both video clips and still images for the video projects you edit in Photoshop CS6.

Figure 2. Video in Photoshop CS6
Which Software Should You Use for Your Video Project?
Because Lightroom 4 doesn’t have a video timeline and Photoshop CS6 does, if what you want to do is edit clips together into a finished piecethe answer is easy: You’ll be using Photoshop.
If you have both Lightroom and Photoshop, the big question is whether you want to use Lightroom or Bridge to organize stills and video. Lightroom works best as a video organizer when you’re already heavily invested in using Lightroom to organize your still photos and if you prefer how Lightroom works. If you already have Photoshop and not Lightroom, you can do a lot of the same organization using Bridge; adding Lightroom won’t buy you much.
Many of the basic video projects that a photographer might want to create can be covered by the timeline in Photoshop CS6, especially those you want to show on the Internet or display from a computer. What about the high-end Adobe video applications such as Adobe Premiere Pro and Adobe After Effects (included in Adobe Creative Suite CS6 Production Premium)? You probably won’t need themunless you want more precision, flexibility, production efficiency, and the ability to finely tune video for television broadcast, motion picture projection, or to author DVDs/Blu-ray Discs. Photoshop is arguably a better place for a photographer to start exploring video, because the video-editing user interface is based on the Photoshop interface you’re already familiar with. Because Premiere Pro and After Effects are intended for the user interfaces that video industry professionals are familiar with, they have a more challenging learning curve for a photographer.
What Kind Of Video Do You Want To Make?
A successful video project is like a good photo project in that you should have a clear story to tell. What’s your story, and what style are you after? Do you want to show off your portfolio? Communicate your brand to potential customers?Provide a video presentation product to add value to your studio’s photo packages? Each of these might require a different approach and use different tools.
In general, be aware that Lightroom can only trim and color-correct individual video clips or export a video slideshow of stills, so that if your project involves combining more than one video clip you must use Photoshop CS6 or dedicated video-editing software.
Slideshow
You can create a simple slideshowin many different ways. Your photo-editing software may let you export one straight from the application in a choice of formats. If you want a slideshow to play reliably on a wide range of computers and mobile devices, saving a slideshow as a video will probably work best. Other slideshow formats, such as PDF, may depend on a device being able to play the file as a slideshow. Video is also the most reliable way to share a slideshowsynchronized with audio.
You can easily export a slideshow video from Lightroom 4. If you want more control over the timing and presentation of the slideshow, you can manually create a slideshow in Photoshop CS6. Of course, dedicated video-editing softwaregives you the most control over all aspects of a video slideshow.
There are also online services such as Animotothat provide ready-to-use slideshowtemplates. The more sophisticated services have templates that use polishedlayered graphics and slick animated transitions, though you may have to be careful to make sure that some templates’ eye candy doesn’t overwhelm the photos themselves.
Simple Story
An effective narrative video can be as simple as a string of clips edited with no special effects or transitions, only cuts and basic fades. Choosing a simple video style makes it more likely that you can edit your video with software you already have, because you won’t need to have high-qualityvisual effects. Photoshop CS6 can easily handle short, simple stories, and so can affordable video-editing software such as Apple iMovie or Windows Movie Maker.
Flashy and Fancy
If your goal for your video isto grab the attention of your audience in a spectacular way, you may want to use special effects like animated layers of semi-transparent graphics, or eye-catching transitions. You can create those effects in Photoshop CS6, although professional video-editing software such as Adobe Premiere Pro or Adobe After Effects give you the widest range of high-quality effects. But think carefully as to whether your story needs special effects, because doing them well adds complexity that will take a lot more time to perfect, and creates an additional learning curve if you’re new to video editing.
Individual Clips
If you don’t need to create finished video sequences of multiple clips, you can use Lightroom or Photoshop to edit clips and then export them toa standard video format. For example, you may want to go with this route if you’re preparing individual clips for editing in specialized video software, or for a stock agency.
Tips for Shooting Video
This book is focused on editing video in Lightroom and Photoshop, not shooting, but you’ll be happier with your video projects if you remember a few important tips as you plan to shoot video.
Video has its own visual vocabulary and well-established conventions which may not occur to you naturally as a still photographer. If you want to make effective videos, there is probably no tip more important than taking a film class.
Set Your Expectations Appropriately
You’ve probably seen some of the stunning cinematic productions done with digital SLRs, but bear in mind that those often involve a full crew and mounting the camera on a rig with specialized equipment for capturing high-quality audio, maintaining focus, and stabilizing the camera. In many cases the camera itself seems to disappear into the production equipment that surrounds it. If you have to get by with a lot less, and if you’re shooting by yourself, keeping your goals simple will help you complete your project efficiently and with a minimum of hassle.
Storyboard and Plan
If you’re going to tell a story, at least have an outline of each shot in your storybefore you shoot. Even better is to create a storyboard where youvisually sketch out how you want to frame each shot and how each shot changes. If you’re creating a slideshow, you can use Collections in Adobe Bridge or Lightroom to refine the image sequence before creating the slideshow.

Figure 3. Arranging still images for a slideshow in a collection in Lightroom
Stabilize Your Camera
Camera movement can be extremely distracting foryour viewers. Steady shots with smooth movement appear much more professional, so a stabilized video image is worth striving for. While you can find stabilization features in video-editing software, applying it takes time and won’t fix all types of camera shake and unintended movement. in terms of overall workflow, it’s much more efficient if you remove unwanted camera movement at the time you shoot, by putting the camera on a tripod or the type of stabilizer system you can walk around with, such as a Glidecam.
Stay in Focus
As a stillphotographer, you may be used to relying on fast, accurate autofocus. But autofocus doesn’t work in video mode on a lot of cameras (even some pricey digital SLRs), so if you have one of those, you have to focus manually. If you don’t already know how to use the manual focus aids on your camera, learn them. For example, many cameras can magnify the viewfinder display to make it easier to focus manually.

Figure 4. Manual focus viewfinder magnified 10x for better visual focusing
Professional video productions often employ a focus puller, a person whose job it is to maintain manual focus, often with the help of a video monitor mounted on the camera. If that’s overkill for your production, and yet you find manual focus too much trouble to maintain while shooting, there are other workarounds you can employ. You can pre-focus the camera to a specific distance and simply make sure you always maintain that camera-to-subject distance for the duration of a shot. You can also set up your shot for more depth of field(the range of distances that are in focus) so that minor focus errors are less noticeable; you can increase depth of field by closing down the lens aperture if you have enough light to maintain the exposure you want.
Tip
If your camera can’t autofocus in video mode, one easy way to focus before shooting a video scene is to first use your camera’s autofocus in still mode to quickly lock in on your subject, then switch to manual focus and video mode to shoot the scene.
UnderstandFrame Rate vs. Shutter Speed
At first glance it might seem that frame rate and shutter speed are the same thing, but in video, a 30-frames-per-second frame rate does not always equal 1/30th of a second exposures.
When you set a slower shutter speed than the frame rate, each frame is exposed at the frame rate. For example, if you set the camera to a frame rate of 30 frames a second and a shutter speed of ¼ of a second, the actual exposure has to be 1/30th of a second in order for the camera to maintain a 30fps frame rate. Many cameras won’t even let you choose a shutter speed that’s lower than the frame rate.
When you set a shutter speed higher than the frame rate, you can get that shutter speed. For example, when you set the frame rate to 30 frames a second and a shutter speed of 1/200th of a secondyou still get 30 exposures per second at 1/200th of a second each.
One consequence of these effects is that in low light you have less freedom to use shutter speed to get more light into the camera, because you can’t use a shutter speed that requires a longer exposure than your frame rate allows. You’re more dependent on the fastest aperture value your lens can achieve and the highest ISO speed your camera can achieve that still looks clean.
Using high shutter speeds changes the look of motion in your videos. We’re used to the amount of motion blur that you get at 24 fps (film) and 30 fps (video). When you use higher shutter speeds such as 1/250th of a second, motion blur is reduced or sometimes eliminated, which can create a strobing effect. If you want the look of motion to leave a more traditional impression on your audience but there’s too much light for the aperture you want to use, you may want to darken the scene by adding a neutral density filter to your lens so that you can set a shutter speed like 1/24th or 1/30th of a second.
Leave Enough Time for Editing and Transitions
Always record clips that are a few seconds longer than you need, both at the beginning and at the end of the clip. You’ll need this extra time when you edit. If you want to create a half-second transition between two clips on a video timeline, you’ll need at leasta half-second of time at both the end of the first clip and the beginning of the second clip so that the transition doesn’t obscure any part of the action. A common guideline is to shoot five seconds of extra time before and after your action; this gives you much more flexibility to refine the timing of your edits. The extra time before and after a clip’s action is sometimes called the head and tail, respectively, and sometimes they’re both referred to as handles.

Figure 6. Clips with heads and tails that allow sufficient overlap for transitions
Capture High-Quality Audio
It’s natural to focus on the visuals when creating a video, but audio quality contributes greatly to how your audience percieves your work. Unfortunately, the built-in microphones on digital cameras aren’t that great to start with, and they pick up a lot of noise from your hands adjusting focus and other controls. Because built-in camera microphones are usually not directional, they also pick up a lot of ambient sound that you might not want to include. If your camera has an audio input port, consider attaching a high-qualityexternal microphone. Or record into a separate high-quality audio recorder, although that creates the extra step of synchronizing the audio to the video later in post-production. However, Lightroom and Photoshop don’t have tools that help synchronize audio to video.
Organizing and Preparing Your Video Clips
Lightroom and Bridge give you similarly powerful ways to get your clips and stills together. Both let you freely collect, organize, and sequence images from multiple folders, and both let you use keywords and other metadata to help gather the images and clips you need to make your video.
Preview What You Have
When organizing your clips, you need to quickly view the clips and images you’ve got. In both Lightroom and Bridge, your best friends are the thumbnail views and the spacebar.
In Lightroom, evaluate media in the Loupe view (press E) with the Filmstrip (press F6) across the bottom. You can now press the left and right arrow keys to quickly view media. If you come across a video, you can watch it by pressing the spacebar or using the video playback controls.

Figure 7. Video playback control bar in Lightroom
Bridge works very similarly. Thumbnails are in the Content panel, and you can check the content in the Preview panel. Instead of spending time arranging panels, choose Window > Workspace > Preview to call up a workspace preset that makes the Preview panel large and the Content panel next to it as a vertical strip of thumbnails that you can navigate with arrow keys. When a file is selected in the Content panel, press the spacebar to view an image full screen or to start/stop playback of a video in the Preview panel.
Figure 8. Viewing video in Bridge
One advantage to using Bridge is that it recognizes more still and video file types than Lightroom, because Lightroom is intended to work with formats that are generated by digital cameras. If your video needs to include non-camera file types, Bridge may be a better way to preview and organize your media.
Organize Clips With Collections
It’s natural to organize a project using regular folders, but using folders can quickly become limiting when you want do things like create a video from media stored in several different folders. Lightroom and Bridge let you use collections, a great way to bring together the files you want to use for a video.
A collection is a set of files that you can group for any reason, and it doesn’t have to correspond to how or where files are stored. A file can exist in many different collections at once, so that for example you could use a single video clip of a waving flag in 17 different collections—no need to waste space making17 copies of the video. Taking a file out of a collection doesn’t delete the file itself, only its listing in that collection; and it doesn’t delete the file from other collections.
In Lightroom, you find Collections in the left panel stack in any module. To create a new collection, click the plus sign at the top left of the Collections panel heading, choose Create Collection, set options and name your collection. Then add any file from the Filmstrip or Grid view to that collection by dragging its thumbnailto the collection you created.

Figure 9. Collections in Lightroom
If you want to organize multiple collections together, create a collection set by clicking the same plus sign where you created a collection and choosing Create Collection Set. You can use a collection set to contain collections that contain the clips for each scene in your video.
Another advantage of collections is that inside one, you can arrange files in a specific sequence. For example, if you want to create a slideshow video of a few images from a folder, you can use a collection to contain the subset of images you want to use and also arrange them in an order that’s different than the sort order in the folder. Or you can maintain three different sequences of the same ten images by creating three different collections of the same images. In the Lightroom Slideshow module, the Collections panel lets you create a Slideshow collection that remembers your slideshow settings along with the image sequence.
When you set a Lightroom collection as a target collection, you can add files to it with a single-key shortcut. Ctrl-click/right-click on a collection and choose Choose Set as Target Collection. With that set up, as you browse through files in Lightroom as soon as you see a file you want to use in your video you can simply press the B key to kick it into the target collection.
Bridge also has collections (Window > Collections Panel), but they aren’t quite as powerful as in Lightroom. You can still gather files from multiple folders and sequence them, but you must manually drag files into each collection. Bridge doesn’t have a Target Collection feature.

Figure 10. Collections in Bridge
If you plan to use video-editing software, be aware that a custom sequence you create in a Lightroom or Bridge collection won’t carry over to video-editing programs. Collections are still useful for roughing out a video, butsave your detailed sequencing adjustments until you get to the timeline in the actual software you’ll use to edit your video.
Organize Media With Metadata, Filters, and Smart Collections
If you already use keywords and metadatain Lightroom and Bridge to catalog your filesyou can use them to speed up gathering media for your video project. For example, if you’re creating a slideshow about New York and you’ve entered a New York location into your photos, you can quickly filter your media to show only photos from New York. Additionally, you can create a Smart Collection that always shows you the results of that type of search, so that if you take more photos tagged New York they will be automatically added to that smart collection. This works similarly in Lightroom and Bridge.
In Lightroom, the filter bar (View > Show Filter Bar) lets you narrow down the files you see based on the metadata criteria you enter. Click Metadata, choose Location Columns from the filter presets menu, then click the location metadata you want to use as your filter. This technique works with any type of metadata that’s important to your production, so you can filter on keywords like the names of people you want to include. Once you’ve filtered your media you can then look over the thumbnails and add the best bits to your project’s collection.

Figure 11. Lightroom Filter Bar set to filter by location
In Bridge, you can use the Filter panelin a similar way.
A smart collection is like a saved search or a saved filter. A clue that you need to use a smart collection is when you’ve run the same search multiple times during the course of a project. In Lightroom, you create a smart collection by clicking the same plus sign that you use for creating a collection, but you choose Create Smart Collection instead. You then set up the rules that define the smart collection, such as all videos with the keyword “basketball” recorded between October and March.

Figure 12. Setting up smart collection rules in Lightroom
Bridge also supports smart collections; to create one, click the New Smart Collection button in the Collections panel.

Figure 13. Smart collections in Bridge
Tip
If you like to mark your best images and clips using the pick flags in Lightroom or the star ratings and labels in Lightroom and Bridge, you can also use filters and smart collections to quickly display just those files.
Where Should You Color-Correct Video?
When you have video clips imported in Lightroom or Bridge and you plan to edit them in Photoshop or other video-editing software, you can perform the color correction in Lightroom, Photoshop, or the other video editor.
While Lightroom does have powerful correction features, a number of them don’t work on video. Some of the features that don’t work are important ones like Noise Reduction, Highlights, and Shadows. A much wider range of adjustments are available in Photoshop, including noise reduction and the Image > Adjustments > Shadows/Highlights command. Also, as you’ll see later in this book, color-correcting video in Lightroom is not always direct and precise. If you’re going to edit your video in Photoshop, you might decide to use Lightroom as an organizer only and leave the corrections for Photoshop.
In the big picture, Lightroom and Photoshop are best for editing video you’ll upload to the Internet or present from a computer or DVD. If you’re preparing a video that needs to meet broadcast standards, such as a television commercial or program, it might be better to have a video professional edit and verify your project usingthe tools in high-end video-editing software such as Adobe Premiere Pro or Adobe After Effects.
Trimming and Correcting Video Clips in Lightroom
If you’ve decided to adjust your video clips in Lightroom, here’s how you’ll do it. First view a clip as I described in “Preview What You Have,” and decide whether it needs to be trimmed, and if it needs tone or color adjustments.
Should You Trim Video in Lightroom?
If you’re going to edit multiple clips together in other software such as Photoshop, whether you trim video clips in Lightroom depends on what else you need to do to the clips. If you’d prefer to use the controls in Lightroom to correct tone or color, you might also want to trim them in Lightroom before you export the corrected clips for Photoshop. However, if you don’t need to do anything to them in Lightroom, it may be better to leave the trimming to the next application. In Lightroom, trimming is purely visual and the time readout is precise to minutes and seconds, but not frames. In other video editors, you can trim to specific frame numbers. However you do it, remember to leave a few seconds of footage before and after the scene to allow time for transitions.
Bridge doesn’t offer any trimming capabilities, so you can use Bridge only to organize video clips and other media for editing in other software.
Trimming a clip in Lightroom
Trimming the beginning and end of a clip in Lightroom is a straightforward visual process.
1. View the video in the Library module using Loupe view (press E).
2. Click the Trim Video button to reveal the trim controls.

Figure 14. Trim controls revealed
3. Drag the start and end markers to set the new duration of the clip. You might find it easier to drag the current-time indicator to locate the exact frame you want, and then drag a start or end marker up against it.

Figure 15. Start and end markers after trimming
Trimming is nondestructive, so you can come back and change the trim points later if you change your mind.
If you think the thumbnail image of the clip isn’t the best representation of the content, you can pick a better thumbnail image, also called the poster frame. Just go to the frame you want to use, click the frame button, and choose Set Poster Frame.
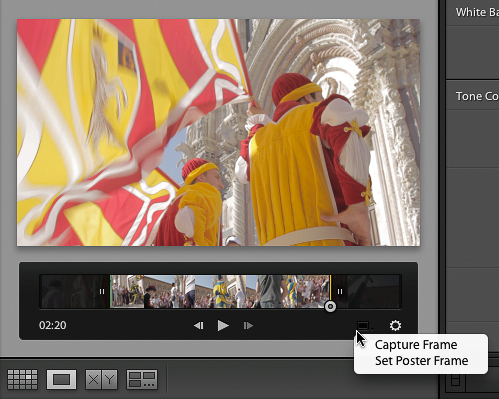
Figure 16. Set Poster Frame menu
Color-correcting a clip in Lightroom
If you use Lightroom regularly, you’re probably used to spending all your time in the Develop module, so it might come as a surprise that you can’t edit video in the Develop module. All adjustments happen in the Library module, and all tone and color adjustments happen in the Quick Develop panel there. You’ll find that only some Quick Develop options are available for video.

Figure 17. The Quick Develop panel in Lightroom
In the Quick Develop panel, the White Balance options control the blue/yellow and green/magenta color balance of the video, Exposure controls overall brightness, Whites and Blacks control the highlight and shadow clipping points respectively, and Vibrance adjusts saturation while preventing over-saturated colors and protecting skin tones. That’s all you get to do, and you have to eyeball it because Quick Develop doesn’t have the numerical precision of the Develop module.
However, there is a workaround that lets you use the Develop module to a limited extent:
1. Drag the current-time indicator to a frame that’s representative of the clip.
2. Click the Frame button and choose Capture Frame. Lightroom saves a JPEG still image of that frame and stacks it with the clip.

Figure 18. Capturing a frame
3. Select the JPEG still. In the Quick Develop panel or in the Develop module, use the tone or color controls to correct the image as needed.
Note
Lightroom can apply only a limited set of correction options to video: White Balance, Exposure, Contrast, Whites, Blacks, Saturation, Vibrance, Tone Curve, the HSL/Color/B&W panel, Split Toning, Process Version, and Calibration. While you can use other options, they won’t be applied to the video in step 5.
4. In the Develop module, click the plus sign to the right of the Presets panel header. Name the preset and select the options that you want to save as part of the preset.

Figure 19. Creating a new preset
5. Switch to the Loupe view in the Library module, select the video, and then in the Quick Develop panel, choose the preset you just savedfrom the Saved Preset menu.
While this workaround does work, it does mean that you may have to create a new preset for each clip you want to correct. But if you need to get some video out quickly and the Lightroom color controls are what you’re most familiar with, you’ll get it done faster this way than if you had to learn how to use color-correction tools in video-editing software.
Exporting VideoFrom Lightroom
In Lightroom, exporting video is similar to exporting still images. There are just a few differences. In the Export dialog box (File > Export), some options aren’t available: You can’t resize, sharpen, or watermark. You also can’t use the File Settings section, but you do get to choose a video file format in the Video section. Let’s walk through this:
1. Select one or more videos you want to export, and then click the Export button or choose File > Export.
2. Set the Export Location and File Naming options as needed.
3. In the Video section, make sure Include Video Files is selected, and choose a Video Format and Quality.

Figure 20. Video export options in Lightroom
If you’ve edited video, in most cases you’ll want to choose H.264; the Quality levels below Max are there in case you’re uploading to a web site that places an upper limit on the bit rate of your video. I describe the Video Format and Quality options in more detail in “About Video Export Options” because Lightroom and Photoshop use similar options.
Note
If you selected both stills and videos, the still image options will be available but will apply only to stills. In the File Format section, choose a format other than Original or the video adjustmentsyou applied in Lightroom won’t appear.
4. Click Export. Lightroom saves the new video file to the folder you specified in Export Location.
Exporting a SlideshowVideo from Lightroom
There are two ways to export a slideshow from Lightroom: As a PDF and as a video. Naturally, I’ll talk about the video option in this book. It’s pretty straightforward: After setting up options in the Slideshow module, click the Export button in the bottom left corner.
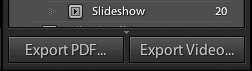
Figure 21. The Export Video button in the Lightroom Slideshow module
The only option in the Export Slideshow to Video dialog box, other than the folder and filename, is the Video Preset menu. Lightroom provides a list of size presets and suggested uses for them, and these are helpful for understanding which preset to choose. If you’re going to deliver the slideshow directly to a specific device you can select the appropriate preset, but if you’re planning to upload to an online video service such as YouTube or Vimeo you might as well just upload the largest size, 1080p, and let the service optimize the video for smaller sizes and mobile devices automatically.

Figure 22. Video export presets in Lightroom
Preparing Still Images for Video
If you want to include any still images at all in your video, you’ll need to prepare the images properly. The two issues are orientation and pixel dimensions.
Working With a Widescreen Video Frame
The first big difference between stills and video is that just about all video is presented in a wide (landscape) orientation. If you want to include tall (portrait) stills, you have a decision to make. If you fit an entire tall image within the height of a video frame, you’ll have a lot of unused space on the sides. If you zoom in on the image to fill the frame, you’ll cut off the top and bottom ends. Decide what compromise you’re more willing to live with.
If you decide to show the entire image, two things you can do to make the unused space less noticeable are to use a background other than black, or show two or more vertical images at once.
If you choose to zoom in on the image, you can take advantage of motion by panning vertically. Photoshop provides pan and zoom options that I talk about later in “Animating Layers.”
Even horizontal photographs don’t typically fit an HD video frame exactly. HD video uses a 16:9 aspect ratio, while the proportions of a digital SLR frame are 3:2. Many cameras capture video at 4:3, the standard definition aspect ratio. If you fit an entire 3:2 or 4:3 video frame inside a 16:9 video frame there will be space around the left and right sides, although it’s a lot less than with a tall image. You can decide to crop the top and bottom of a wide still on a widescreen video frame as long as you don’t lop off any important content.

Figure 23. Aspect ratio differences
Which Still Image File Formats Are Best for Video?
The short answer is that you can use any format that you can import into Lightroom or Photoshop. A high-quality JPEG is good enough for most video projects, particularly those that will be downsampled or compressed further for online viewing. For best results and the least amount of image degradation, consider using TIFF or PSD (Photoshop) format images in your video projects.
It’s OK to use raw files for the still images that you use in an exported Lightroom slideshow or in a Photoshop video timeline. Because a raw file is imported into Photoshop as a Smart Object by default, it may require more processing overhead than a TIFF, PSD, or JPEG file unless you rasterize the raw filein Photoshop (Layer >Smart Objects > Rasterize).
As for resolution, most of today’s cameras produce images with so many pixels that you can simply drag images into a video timeline at their full out-of-camera resolution and have more than enough pixels to maintain sharpness. (A 1080p HD video frame is only two megapixels.) If you’ve cropped down a still image pretty far, it may not fill the video frame, such as a 1200-x-900-pixel image inside a 1920-x-1080-pixel HD video frame. If that happens in Photoshop and no higher-resolution original is available, you can select the image, choose Edit > Free Transform, and then Shift-drag any corner handle until the image fills the frame. Of course, enlarging the image means it may appear a bit soft.
If you’re concerned about color consistency and know how to color-manage your images, and if your original images use a color space other than sRGB, consider using copies of your originals that have been converted to sRGB. The color space of HDTV is very similar to sRGB. When importing raw files into Photoshop for use in a video, click the blue text at the bottom of the Camera Raw dialog box and choose sRGB from the Color Space menu during the conversion at import time.
Creating a New Document in Photoshop for Video
When you create a new video in Photoshop, the document you create should ideally be the proper pixel dimensions and aspect ratio for the final video format you want to export, although you do have the option to export to a different document size. If you plan to export to multiple pixel dimensions (for example, HD and low-bandwidth online versions), create a document at the largest size you’ll need.
To create a blank video document:
1. In Photoshop, choose File > New, and then in the New Document dialog box enter a Name.

Figure 24. The New Document dialog box in Photoshop
2. Choose Film and Video from the Preset menu.
3. Choose the video format you want from the Size menu. If you have no idea what you need but you plan to upload the video to the Web, choose HDTV 1080p/29.97, a common widescreen format. (If you need smaller sizes, you can edit the Width and Height or just choose a smaller size when you render the final video.)
4. Click OK.
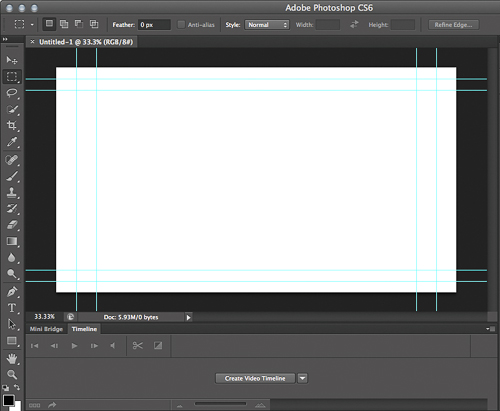
Figure 25. New Photoshop document created with a widescreen HD video frame size
Tip
If you plan to use a video clip that’s already the size you want to use for your video project, open that directly in Photoshop instead of creating a new document. Photoshop will then create a document based on the exact pixel dimensions of that video. You can then add other videos and stills to that document.
Whether you start from an existing video or create a new blank video document once it’s open you’re ready to start bringing in other media.
Adding Video Clips from Lightroom or Bridge
You can use the easiest and fastest way to set up a Photoshop video timeline if all your media are video clips of the same pixel dimensions.
1. Starting from Lightroom or Bridge, drag only one video clip to Photoshop. You can drop it on the Photoshop icon or on the application frame.
Photoshop creates a new document at the correct pixel dimensions and also creates a video timeline and video group.

Figure 26. New Photoshop document based on a video file
2. Switch to Lightroom or Bridge, drag one or more video clips, and drop them on the Photoshop document (not on the dock icon, which may create separate Photoshop documents).
Photoshop adds the new videos to the same video group as the first clip you imported, sequencing them one after the other.

Figure 27. Sequence in a video group
Tip
If you’re starting with video files in Bridge, a quick way to get your videos into Photoshop is to select multiple videos and then choose Tools > Photoshop > Load Files into Photoshop Layers.
Tip
If you’re starting from Lightroom or Bridge, it’s a good idea to create a collection in advance for the video and still clips you want to use in your Photoshop project. I talked about collections in “Organizing Clips with Collections.”
Conrad/Susan: Is the tip supposed to include the same wording/information as the following intro sentence, or vice versa?--Bethany
Adding a Mix of Video and Stills from Lightroom or Bridge
If you’re starting from Lightroom or Bridge, it’s a good idea to create a collection in advance for the video and still clips you want to use in your Photoshop project. I talked about collections in “Organizing Clips with Collections.” Once that’s done, you’re ready to start adding media to Photoshop.
1. Open a video in Photoshop or set up your Photoshop document; see “Creating a New Video Document in Photoshop.”
2. In the Timeline (Window > Timeline), click the Create Video Timeline button.

Figure 28. Create Video Timeline button
3. Starting from Lightroom or Bridge, drag one or more video clipsor still imagesinto the new Photoshop document window.
(If you dragged a camera raw file, click OK to close the Camera Raw dialog box that appears.)
What you’ll see next is your first media item on the Photoshop document, but with a Free Transform bounding box. This means the image is not yet fully placed in the document; the bounding box is there to give you an opportunity to move and resize the object first. This is nothing new; it’s how an object appears when you import it using the File > Place command.
4. If the new object doesn’t fill the document, click the aspect ratio lock icon in the Options bar and type the height of the frame in pixels (in our case, 1080px) into the H field. This will fit the object in the document without stretching it. (You can also do this later by choosing Edit > Free Transform.)

Figure 29. Adjusting image height in the Options bar
5. If needed, drag to position the media in the document.
6. Press Enter or Return to finish placing the imported media.
7. If you dragged in more than one still image or video clip, the next object appears with its Free Transform bounding box, so repeat steps 3 through 6 until all of the objects you imported are placed. Remember...you’re not done until you’ve pressed Enter or Return for the last video or still you imported!
The media you imported appears in the Layers panel, which is what you’d expect from working with stills in Photoshop. However, the same stack of layers also appears in the Timeline, and next you’ll turn that into a sequence in time.
8. In the Timeline, Shift-click the first and last layers that you want in your video, click the filmstrip icon on any of the selected layers, and choose New Video Group from Clips.

Figure 30. Creating a new video group from selected clips
9. In the Timeline, zoom out so that you can see the entire video group sequence.
Photoshop sequences the clips in time, one after the other. From here, you can reorder the clips, adjust when they start and end, and apply corrections and effects.
Tip
If you’re mixing stills, videos, and video sizes, you can save steps by making sure that the first file you drag into Photoshop (with no other documents open) is the video matching the pixel dimensions of the video you want to create. This automatically creates a new document at the optimal size and creates a video timeline and video group.
Editing a Video in Photoshop CS6
As with Lightroom, Adobe knew that it wouldn’t make sense to drop an entire high-end video-editing program into Photoshop. The video features are designed to give you the essentials of video but integrated into the way Photoshop already works. This simplifies the video-editing learning curve for photographers. While high-end video-editing software is more powerful, you’ll probably find it a bit more alien and it will probably take a lot longer to learn and master. You’ll start with the video group you created after importing files.
Tip
If you add a new layer to a video group and it’s invisible on the canvas, move the current-time indicator so that it’s within that layer in the timeline sequence.
Getting to Know the Photoshop Timeline and Canvas
Most of the video-editing capability of Photoshop is in the Timeline panel (Window > Timeline). It’s in this panel that you string together video clips into a program. You’ll also find another set of video-related commands in the Layers > Video Layers submenu.

Figure 31. The Timeline panel in Photoshop.
You can think of the Timeline as a time-based version of the Layers panel; you see the same layers stacked from front to back in both panels. The difference in the Timeline panel is that you can create a video group that also sequences layers in time. You can freely mix static layers with video groups, and a layer you use in a video group can be a video, still image, or any other layer you can create in Photoshop such as text or a background. In addition, you can animate any layer. You’ll learn about the options as we walk through some examples.

Figure 32. Video layer compared to a video group
On the Canvas, by default you see a set of blue guides near the edge. The outer guides mark the action-safe area, and the inner guides mark the title-safe area. The idea behind these is that many televisions slightly enlarge and crop the video image, a practice known as overscan. If you want to make sure that important video subjects and text do not get cut off on TVs that overscan, keep important subjects inside the action-safe area and keep all text inside the title-safe area.
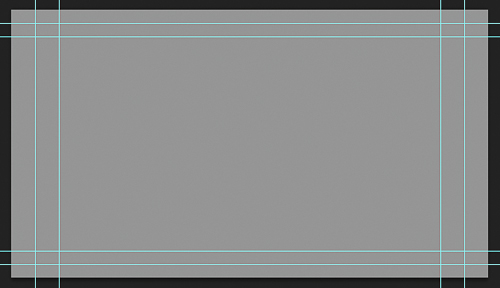
Figure 33. Action-safe and title-safe areas
Previewing the Timeline
To preview the video timeline, just press the spacebar to start and pause. You can also use the playback controls in the Timeline panel. Click the far left button to return to the first frame.
Depending on the resolution and frame rate of your video compared to the processing power of your computer, playback may or may not be smooth. To display frames as quickly as possible, Photoshop caches frames in RAM. You can tell which frames are cached by looking at the teal-colored line that appears above the timeline when you preview. If the video is playing back at the timeline’s frame rate, the teal line is solid and the frame rate at the bottom of the timeline is white. If the computer can’t keep up, the frame rate readout is red and the teal line has breaks in it to indicate which frames weren’t cached.

Figure 34. Frame caching indicator in the Timeline above the first video layer
You can cache uncached frames by playing the Timeline again with audio muted and Allow Frame Skipping turned off in the Timeline panel menu. This forces Photoshop to cache every frame, since it won’t be skipping frames to keep video in sync with realtime audio playback. Just remember to un-mute audio and turn on Allow Frame Skipping when you’re done.

Figure 35. Setting up for manually caching frames
If there isn’t enough RAM to cache all the frames, you’ll see earlier frames become un-cached to free up space. To prevent this, make the work area smaller until the teal line stays completely solid. If this happens often, you’ll need to give Photoshop more RAM by exiting other applications or adding more RAM. You can also increase the memory allocated to Photoshop in the Performance panel of the Preferences dialog box, as long as you don’t exceed the Ideal Range listed there (you must leave some RAM free for your operating system).
The speed of video playback is also affected by the number and nature of effects you apply to video, the frame rate of the clips, and the pixel dimensions of the frame. Lower Timeline frame rates and smaller frames draw faster.
Basic Edits and Cuts
By default, video clips are the duration that they were when you imported them, and still images are 5 seconds long.
To adjust the duration of a clip, position the pointer over either end of a clip in the Timeline and drag. While a video clip can’t be longer than its original duration, you can show a still image for as long or as short as you like. When you adjust duration by a certain amount, all of the media that follows moves forward or back by that amount; this is known as a ripple edit.

Figure 36. Performing a ripple edit
To maintain the duration and time position of the clip but change the beginning and ending frames, position the current-time indicator at the beginning of the clip and Command-Option-drag/Ctrl-Alt-drag the middle of the clip.
To rearrange the sequence, just drag any clip and drop it over another clip. The clip you dropped takes the place of the underlying clip, whichshifts later in the timeline by the duration of the clip you dropped.

Figure 37. Rearranging a sequence
Video layers inside a video group are always sequenced with the other clips in that video group. If you want a still or video clip to play in front of or behind other clips, drag it out of a video group and stack it by itself in the Layers panel or into another layer group. That clip will no longer be affected by the edits inside the video group.

Figure 38. Pulling a layer out of a video group
Transitions and Fades
The first step in using a transition is thinking about whether you actually need it. Some novice video editors overuse transitions (especially fancy ones), while experienced video storytellers concentrate on the overall pacing of the edits using mainly simple cuts and a few fades.
To add a transition, click the Transitions button, specify the Duration you want, and then drag a transition to an edit point between two clips.

Figure 39. Dragging a transition to a clip
After adding a transition, preview it, and if necessary refine the timing of the transition by dragging the end and beginning of the clips on both sides of the transition.
Adjusting a Video Clip in Photoshop
If you have no experience with professional video-editing software, the color correction tools in those applications can seem foreign and difficult. That’s not the case with Photoshop, which is much friendlier to photographers when it comes to video editing. If you already know how to correct still images in Photoshop, you can use that knowledge with video clipsright away.
There are a fewthings you need to know about video clips in Photoshop that affect how you make adjustments to them.
With still images, you can apply edits like Levels and Vibrance either directly to an image or by using adjustment layers. With video, you must use adjustment layers because you can’t alter the video pixels directly.(For the same reason, you can’t use Photoshop retouching tools on videopixels.)
You can’t apply filters and effects directly to a video clip, but that doesn’t mean it’s impossible. All you have to do is convert the video clip to a Smart Object. Just as with still images, filters you apply to Smart Objects behave as Smart Filters, which means you can always double-click them in the Layers panel to edit them nondestructively.
Let’s take a look at an example. This video clip was shot using a camera preset with flat contrast, so I want to boost contrast in Photoshop using a Curves adjustment layer.

Figure 40. Original video clip which is a little flat
To apply an adjustment layer to a video:
1. Select the layer (you can do this in the Layers panel or in the Timeline) and then in the Adjustments panel, click the Curves button.

Figure 41. Curves button in the Adjustments panel
2. In the Properties panel, adjust the curve.
3. In the Timeline, preview the adjustment.

Figure 42. Adjusted video clip
Now let’s apply a creative filter:
1. Select the layer and choose Filter > Convert for Smart Filters or Layer > Smart Objects > Convert to Smart Object. They do the same thing. (If those commands are unavailable, the layer may already be converted.)
2. Choose any filter on the Filter menu that’s available. I chose Filter >Oil Paint.
3. Adjust the filter settings and click OK.

Figure 43. Filtered video
You can also apply layer effects to video, such as drop shadows and beveled edges, but their value for recorded video is limited. Layer effects are more useful when creating animated type or graphics.
AddingOther Kinds of Layers
So far I’ve covered video layers and still images, but you aren’t limited to those. You’re free to create other graphics that are possible in Photoshop and add them to the timeline. For example, if you’re making a promotional video for your studio, you can create type layers containing text with your studio name, website, and contact information. You can import your logo and animate it, and create pattern or gradient layers as backgrounds.
Animating Layers
Animation means changing values over time. The obvious example is when a graphic moves across the screen or changes size. In the Photoshop video timeline, you can animate position and other transformation attributes, layer opacity, and layer style attributes.
Animation Presets for Panning and Zooming
Creating animation from scratch can be a bit of a chore, so Photoshop provides easy presets for popular animation styles.
To use an animation preset:
1. In the Timeline, click the triangle at the top right corner of a video layer or video group to display the Motion panel.
2. Choose the type of motion you want, and set the options. In my example, I chose Pan and set it to -180 degrees to move the trucks image from right to left.


Figure 44. Applying a Pan preset and the pan completed
3. Chances are you’ll want to edit the motion, so click the triangle to the left of a video layer or video group to expand the keyframe editor.

Figure 45. Keyframe editor expanded
You’ll see two red keyframes at the beginning and end of the clip duration. The red color indicates that they were automatically generated.
4. Drag the current-time indicator to the first keyframe.
5. Change the attribute you want to edit. For Pan, use the Move tool. For Rotate, choose Edit > Free Transform and drag outside the bounding box. For Zoom, choose Edit Free Transform and Shift-drag a corner handle. You can also edit the position, rotation angle, and scaling values in the Options bar.
6. To change keyframe timing, drag either keyframe horizontally to the frame where you want it to take effect.
Animating Manually with Keyframes
Keyframes are the power behind animation, and they’re what you use if you want to create animation from scratch or edit animation presets. A keyframe is a marker on the timeline that represents a change in settings. For example, if you want to move a photo across the screen, you set two keyframes at the frames where you want the animation to start and stop. The keyframes store the information for the starting and ending positions, and Photoshop interpolates the motion between the keyframes.
To animate position:
1. Click the triangle to the left of a video group (not a video layer) to expand the keyframe editor.
2. Move the current-time indicator to the frame where you want to set one state of the animation. In my example, I move the current-time indicator to the end because I want the text to end with a normal appearance.
3. Click the stopwatch icon for an attribute to enable animation for it and to add a keyframe at the current time. In my example, I turn on keyframes for Transform and Text Warp.

Figure 46. Stopwatch icons turned on, first keyframes created
4. Move the current-time indicator to the frame where you want to set a different state for the animation. I moved the current-time indicator to the start.
5. Click the diamond icon to add a keyframe at the current time, and do so for each attribute you want to change. I again created keyframes for Transform and Text Warp. The icon turns yellow when it’s on a frame where a keyframe exists.

Figure 47. New keyframe
6. Change the attributes so that the layer looks the way you want it to at this keyframe. I applied a text warp (Text > Text Warp) and also chose Edit > Free Transform to scale up the layer and move it off the side.
7. Repeat steps 5 to 7 at every frame where you want to modify the animation. You can add keyframes at any frame, even between existing keyframes, and you can drag keyframes left and right to other times.

Figure 48. Animation sequence
The same steps work for animating the Opacity and Style options on the Timeline. If you can’t find an option on the Timeline it can’t be animated, with one exception: If you convert a video layer to a Smart Object, the Position option turns into the Transform option so that you can animate Free Transform changes.
Audio
Photoshop uses the audio tracks that come with your video files. You can adjust those, or add your own.
Editing Audio in the Timeline
There are two mute buttons in the Timeline. The one at the top of the Timeline mutes all Timeline audio, and each audio track has its own mute button.

Figure 49. The two mute icons
To edit the audio of a video, click the triangle at the top right corner of a video layer (not a video group) to display the options panel, click the musical notes icon to display the Audio options, and adjust the options you want to change. This is where you can control volume and fade audio.

Figure 50. Audio options
To add a new audio track, click the musical notes icon near the left side of an Audio Track and choose New Audio Track. As with a video track, you can sequence multiple songs or audio files on a single audio track.

Figure 51. Audio track menu
To add audio to an audio track, click the musical notes icon near the left side of an Audio Track and choose Add Audio.
Licensing Music ForYour Videos
Although it’s tempting to simply use songs you purchased on CD or from an online music store, the licensing agreements for those songs generally don’t cover use in your own videos. Music companies are employing increasingly sophisticated automated searching for licensing infringments, so if you or one of your clients uploads a video with improperly licensed music to a site like YouTube, the infringement may be discovered. However, this book can’t give legal advice, so consult with your own attorney to interpret license agreements for songs you want to use.
There is a growing industry providing music that can be licensed relatively affordably for legal use in presentations by photographers and videographers. Some of these companies are Triple Scoop Music (triplescoopmusic.com), Song Freedom (songfreedom.com), The Music Bed (themusicbed.com), and Smartsound (smartsound.com) which powers the Vimeo Music Store.
Creating a Quick SlideshowVideo in Photoshop
Now that we’ve looked at the capabilities of video in Photoshop, let’s circle back and walk through an example of a project a photographer might want to do: a simple slideshow that allows more customization than in Lightroom.
1. In Lightroom or Bridge, create a collection of the images you want to use.

Figure 52. Images ready in Bridge
2. Create a document in Photoshopusing a video frame size (see “Creating a New Document in Photoshop for Video”). For this example, I’ll use HDTV 1080p/29.97.
3. From Lightroom or Bridge, select all of the images in your slideshow collection.
4. Drag all the images and drop them into the blank Photoshop document. (For camera raw files, you’ll have to press OK for each image to finish placing them.)

Figure 53. Dropping images into Photoshop
5. In the Timeline, click the Create Video Timeline button.
6. In the Timeline, select all of the images you imported, click the filmstrip icon for any of the selected clips, and choose New Video Group From Clips. The stills become a sequence; you can now preview the slideshow.
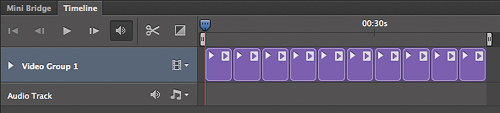
Figure 54. Still images as a new sequence
If you want the images to fit the frame and they don’t, now that the images are all in a single video group you can scale them together.
1. Select the video group and choose Edit > Free Transform.
2. In the Options bar, click the lock icon between W and H to lock the aspect ratio, type 1920px into the H option (to match the frame width), and press Enter or Return. Press Enter or Return again to commit and exit the Free Transform handles. (You may have to repeat this for horizontal images separately, since they’re shorter than the vertical images.)

Figure 55. Adjusting image width in the Options bar to fill the frame
Right now the slideshow includes images only. Let’s add some descriptive text.
1. Select the Horizonal Type tool, drag a text rectangle over the slideshow but inside the inner set of title-safe guides, and enter text for an opening title, adjusting the type specs and position as needed.

Figure 56. Type entered on a new type layer
2. In the Timeline, drag the text layer to the beginning of the video group sequence containing the slideshow. The sequence of still images shifts down to make room for the text layer.
3. Option-drag/Alt-drag the text layer from the beginning of the slideshow to the end. This creates a copy of the text layer. Now use the Horizontal Text Tool to edit the ending text layer so that you can have a closing slide with text.

Figure 57. Text layers added to beginning and end of sequence, and editing end text
This is a good time to change the background to black.
1. Click the semicircle icon at the bottom of the Layers panel and choose Solid Color. Pick the black color and click OK to create a black solid color layer that you can use as a background.
2. In the Layers panel, drag the Color Fill 1 layer out of the layer group. You may have to drag it to the top of the stack to get it out of the layer group. Then drag it to the bottom of the layer stack, making sure it’s below and outside the video group. In the Timeline, drag the start and end of the Color Fill 1 layer to match the slideshow.

Figure 58. Black Color Fill background now behind the slide show
Now you can add fades and transitions.
1. Click the Transition button and drag a Fade with Black transition to the beginning of the first layer, and drag another Fade wth Black transition to the end of the last layer. Scrub the current-time indicator to check the fade.

Figure 59. Dragging a Fade with Black transition to start of slideshow
2. Click the Transition button and drag a Cross Fade transition between the first two images. Repeat to apply the same transition to the edits between the other images and preview those.

Figure 60. Dragging a Cross Fade transition to first edit
At this point, you can customize durations, use animation to slide images in and out, reposition vertical images so that two or more fit in a single horizontal frame, add more text, and add audio. And remember that everything that was done here can be done with video clips as well, or with a mix of video clips and stills.
When you’re happy with how it previews, all that’s left to do is renderthe video to a file.
About Video Export Options
The options you see when exporting or rendering video can be long and confusing, especially in professional video-editing software. The presets in Lightroom and Photoshop go a long way toward simplifying the process, but there are a few things you should know about what the options mean.
File Formats
Lightroom and Photoshop can export to similar file formats.
H.264 is the format in which most digital SLRs capture video, but it’s really better suited for presentation and is currently the preferred option for that. H.264 is also the format that major online video-sharing sites such as YouTube and Vimeouse for encoding their vast libraries of video, in part because it’s been optimized for Internet bandwidth.
Photoshop includes the QuickTime format. Its presets may be appropriate if the next destination is video-editing software such as Adobe Premiere Pro or Adobe After Effects.
Lightroom includes a choice called Original. This lets you export a video clip in the format it was in when imported, such as AVI, but without any Lightroom modifications.
DPX is more of a storage and intermediate production format, able to preserve more image quality than H.264 but taking up more disk space and not suited for online Internet presentation. Because DPX supports such a high degree of color fidelity, it’s preferred if you want to create video that’s to be edited further as part of professional video and motion picture productions. You probably don’t need to choose DPX unless it is a requirement of a production you’re part of.
Frame Sizes
It’s easy to be overwhelmed by the choices in frame sizes, when you have such a wide range including PAL, DV, HDV, and Widescreen. Fortunately, the choices are easier for photographers today because 1080p HD widescreen is now playable on more televisions, computers, Internet connections, and mobile devices than ever. As more video is played directly from today’s fast drives, it’s increasingly reasonable to use HD frame sizes like 720p and 1080p, and less necessary to generate multiple versions for various devices and connection speeds unless you know that your clients use older computers. This is especially true for online delivery through video-sharing sites such as YouTube, where the best option is to upload a full 1080p video and let the online service adapt to lower frame sizes themselves.
In short, unless you know your clients are constrained by their hardware, choose a 1080p or 720p HD video frame size.
Frame Rates
In years past, lowering the frame rate was one way to reduce file sizes and bandwidth, but on today’s hardware you don’t need to deviate from the frame rate in the preset you choose. Just go by the preset.
Rendering Video from Photoshop
Like Lightroom, Photoshop has convenient presets that reduce the complexity of rendering video.
To export video from Photoshop:
1. Click the Render Video button.

Figure 61. Render Video dialog box
2. In the Location section, enter a filename and choose a folder.
3. In the next section, choose Adobe Media Encoder. (Photoshop Image Sequence is intended for animations.)
4. Choose a Format, and then choose a Preset for that format.
If you don’t know what to choose, the H.264 format and the High Quality preset is a safe choice that can be played back from most computers. If you intend to upload the video to YouTube or Vimeo, choose one of their H.264 presets. These are also H.264, but tuned for the upload and encoding requirements of those services.
You probably won’t need to choose the DPX and QuickTime formats unless you’re preparing video for a workflow that specifically asks for those formats, such as developing content for a mobile app, television production, or software for encoding DVD and Blu-ray Discs.
Once you choose a Format and Preset, in most cases you do not need to change anything else except to make sure Color Manage is on.
5. Click Render.
As with previewing, the time it takes to render video depend on the length of the clip, the effects you used, the number of layers, the frame dimensions, and the format you chose. It usually takes significantly more time to achieve the Internet-friendly high compression of formats such as H.264.