The Luminar Studio |
1 |
In a lot of books, this is the chapter you’re likely to skim over, or outright skip, so you can jump right to editing. I’m not judging! I’ve done the same thing. Touring an application’s interface sometimes feels like getting stuck behind a slow driver on an expressway.
That said, think of Luminar as a photo studio (or your photo bag when you’re in the field): when you know where everything is, you can easily grab the lens or filter you need and get the shot you want. If you’re fumbling around trying to locate the right piece of equipment, you can get frustrated and lose focus on the image you’re capturing or editing.
As you’ll soon discover, Luminar has a lot of working parts, such as the Catalog, which organizes your photo collection, and its many editing tools. Many of those parts aren’t visible at times.
Instead, let’s take a slightly different approach. I’m going to point out the essential tools and areas that will soon become second nature to you, in what I believe to be their order of importance. And this is a good opportunity to answer a fundamental question: just what is AI?
What Exactly Is AI?
Remember when Apple introduced the first iMac, and soon the market was flooded with translucent plastic products that all had names starting with “i-”? We’re now in the age of AI, with companies slapping the diminutive acronym onto all sorts of things to make them sound smart or trendy. In the case of Luminar AI, I’m immensely relieved that there’s substance behind the name.
AI is short for artificial intelligence, which itself is shorthand for software systems that choose actions based on massive amounts of underlying data. To keep this in a photographic context, think about how you edit a photo: you are the one who manually adjusts exposure, contrast, and so on, to achieve the results you want—that’s your own intelligence. With AI, the software examines the scene and applies adjustments based on what it knows about the image.
A more accurate term for AI-driven photo editing is machine learning, or ML, which doesn’t sound as snazzy. Developers essentially “teach” software about photography by feeding it millions of images to analyze. Over time and with refinement, the software learns to identify scenes and objects, such as people, faces, and skies. When the software can recognize things in an image, it can act on them. (That said, Luminar doesn’t offer facial recognition, or the ability to name specific people in a photo.)
In Luminar AI, machine learning can bypass a lot of manual work on your part. Let’s look at an example. In Figure 1-1, you and I see a woman standing in front of a field of sunflowers. Most photo editing apps, though, see just a collection of colors and brightness values. If we wanted to change the exposure of the sky, we’d have to define that area ourselves by creating a selection or mask, or hand-painting it using a brush tool of some sort.

FIGURE 1-1: You and I can immediately discern what’s happening in this photo, but most software sees only rows of colored pixels.
When Luminar loads the image, its ML algorithms automatically recognize the same aspects of the image that we do (Figure 1-2).
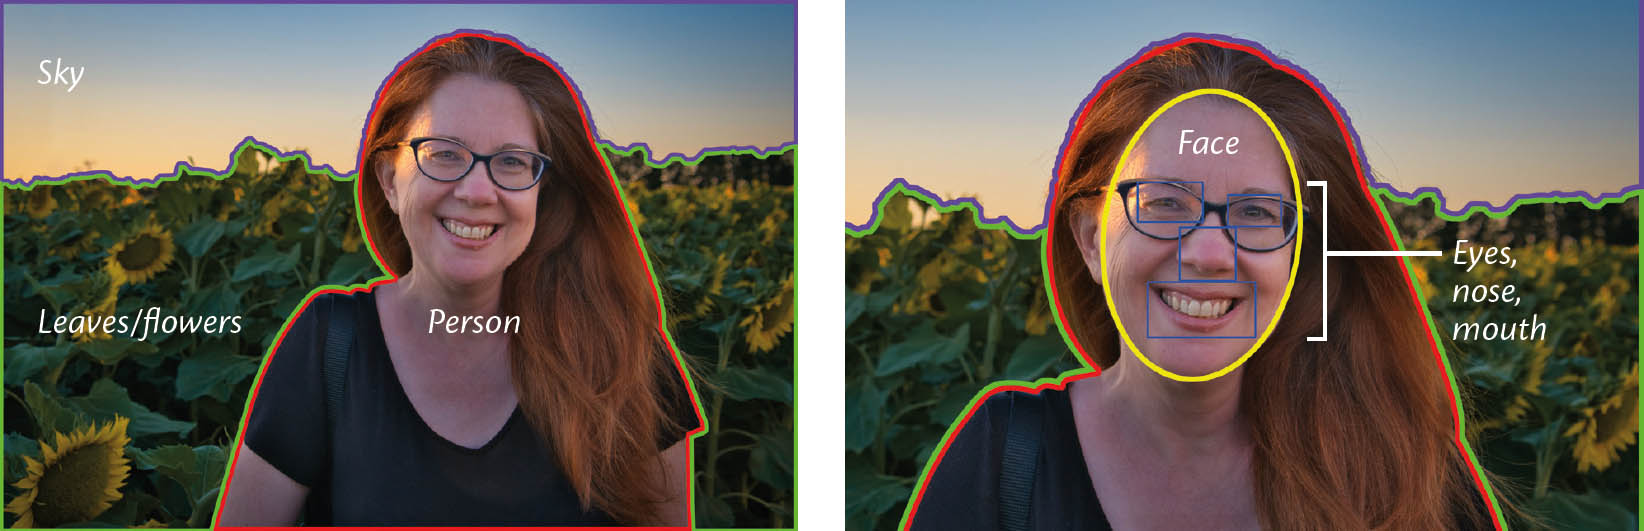
FIGURE 1-2: Luminar identifies objects within the photo, just as you and I do.
Broadly, it can tell that there’s an area in the upper-third of the frame that is likely a sky, a person-shaped object in the foreground, and a grouping of green and yellow shapes that resemble leaves and flowers.
Since the software determined that a person is present, it also identifies patterns that match a face, including two eyes, a nose, and a mouth. If more of her body was visible in the frame, Luminar would also be able to identify that, too.
At this point, nothing is edited. But Luminar’s observations about the photo enable tools that work specifically on those areas.
I can use the Sky AI tool to quickly replace the sky, lighten just the face using the Face AI tool, and the Landscape tool (with its Foliage Enhancer slider) to boost the green of the sunflower leaves and stalks (Figure 1-3). In other apps, I would need to spend much more time creating selections and masking those specific areas.

FIGURE 1-3: Three edits, three sliders, three minutes: I replaced the sky, boosted the green of the leaves, and lightened her face.
The Luminar Workflow
The buttons at the top of the window switch between Luminar’s modes (Figure 1-4). You can jump into any mode you want, of course, by clicking one of the buttons, but Skylum has positioned them in a logical workflow order: add photos; work with them in the Catalog; choose a template for a photo; make additional edits; and finally, export the finished image.

FIGURE 1-4: Switch between Luminar’s main modes at the top of the window.
Speaking of interface items, the Windows version eschews a traditional menu bar in favor of locating all the menu items under the Luminar AI logo (Figure 1-5). The macOS version also uses this as a menu, but contains only the items found when you click the Luminar AI item in the menu bar.

FIGURE 1-5: In Windows, the app’s menus are found under the Luminar AI button.
The Sidebar
“Sidebar” seems like a bland moniker for the portion of Luminar that will get most of your focus, but I appreciate that Skylum didn’t try to jazz it up for crazy marketing reasons. The sidebar’s contents change depending on which mode you’re in: folders and albums in the Catalog mode, all the tools in the Edit mode, and so on (Figure 1-6). When the Catalog is visible, the sidebar also includes the Info panel that reveals essential metadata about the selected photo.
The sidebar is always present as you’re working. If you want to eke out some more screen space, you can hide the image thumbnails at the bottom of the window by choosing View > Show Filmstrip. Occupying even less space is the Photo Actions panel, which includes the image file name and the buttons for favoriting or rejecting the shot; choose View > Show Photo Actions Panel to toggle its visibility.

FIGURE 1-6: All of the editing tools are tucked into the sidebar, leaving plenty of room for you to work on your image.
Edit Tools
I cover editing tools in much more depth in Chapter 6, so here I want to introduce the mechanics of how they work.
When you activate the Edit panel, the tools are organized into four main groups within a large scrolling list: Essentials, Creative, Portrait, and Pro. The Essentials group, for example, includes tools such as Light (for adjusting exposure and white balance) and Enhance AI (which does wonders with just two sliders).
Click a tool’s heading to hide or show the sliders for applying that tool’s edits. Only one tool’s controls are available at a time (Figure 1-7).
The Edit sidebar also accommodates the Local Masking feature (![]() ) (covered in Chapter 7) and the History feature (
) (covered in Chapter 7) and the History feature (![]() ) for rolling back edits (mentioned later in this chapter).
) for rolling back edits (mentioned later in this chapter).
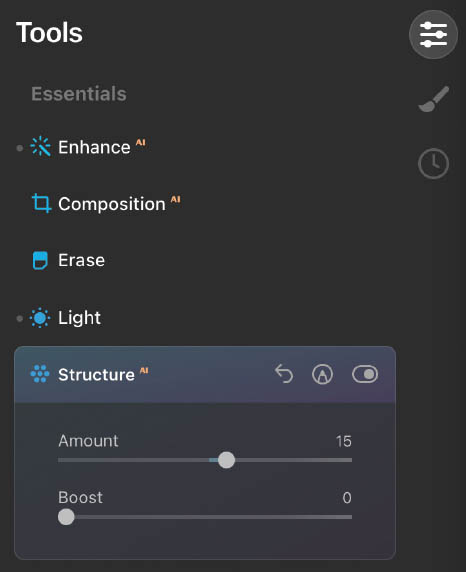
FIGURE 1-7: To streamline the editing interface, only the active tool is visible.
The Histogram
For a long time I ignored histograms—I can see a photo with my own two eyes, after all! But was I really seeing it? After consistently underexposing my photos, both in camera and during editing, I realized that the histogram is more than a fancy colorful representation of the data in the image. Now, I keep the histogram visible at all times. Choose View > Show Histogram to make it appear (Figure 1-8).
In addition to showing how color and tone are distributed in a photo, the histogram can reveal clipped areas that are blown-out to white or darkened to complete black. Click the triangles that appear when you move the pointer over the histogram to view those areas. (For more, see Chapter 6.)
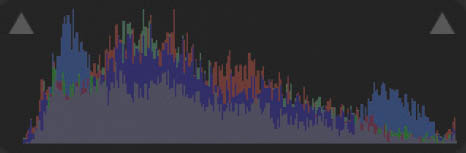
FIGURE 1-8: Learn to love the histogram, because it can get you out of some bad editing situations.
Templates
One of the goals of Luminar AI is to make photo editing quick and easy. Templates apply pre-made edits to your photo. Sometimes those fix shortcomings like exposure, but more often templates impart a particular look and feel to the image (Figure 1-9).
When you select a photo and click the Templates button, Luminar uses its AI processing to figure out what kind of image it is—landscape? sunset? beach scene? portrait?—and suggest templates that might be suitable. After you apply one, you can switch to the Edit mode and continue editing, since all the controls the template adjusted can be further manipulated. I cover templates in Chapter 5.
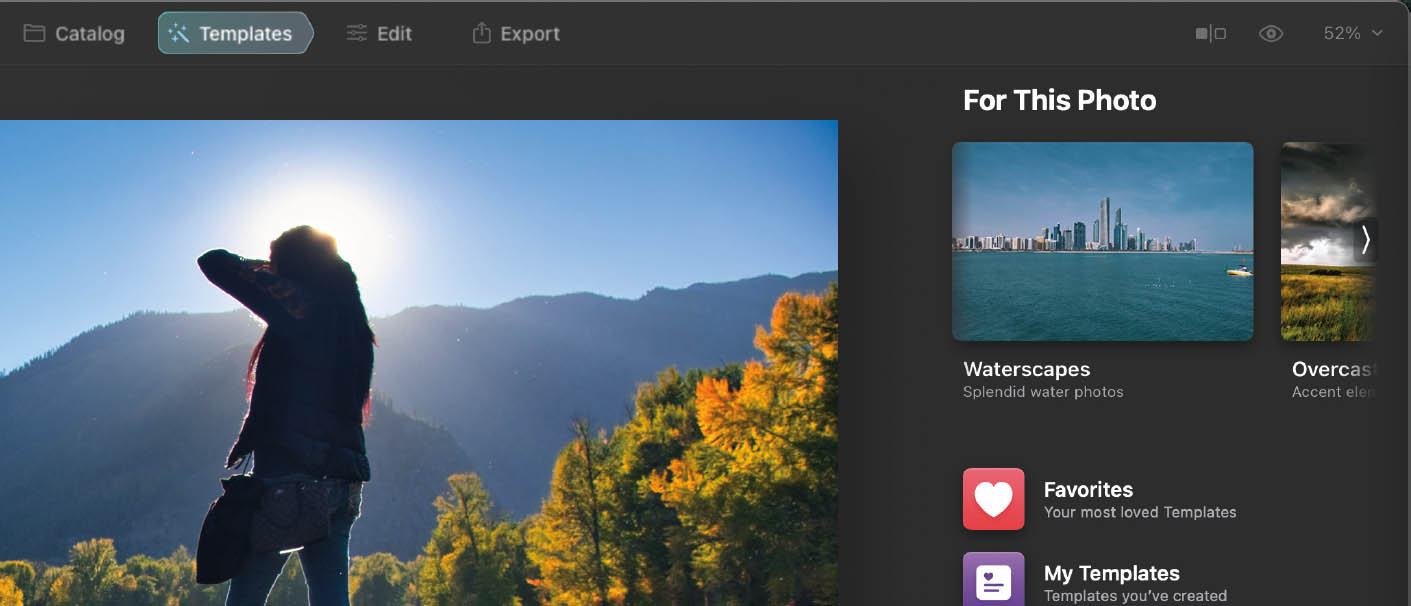
FIGURE 1-9: Think of templates as a starting point for further editing.
Compare and Quick Preview
Like the options for hiding toolbars and viewing the photo full-screen, these two options get used a lot. I’m listing the keyboard shortcuts first because I find it’s so much easier to use them than to click the toolbar buttons with your cursor.
- Compare: Press the semicolon (;) key or click the Compare (
 ) button in the toolbar to view a split-screen display of the photo (Figure 1-10). Drag the middle divider to expose the Before and After versions of the image.
 - Quick Preview: Press the backslash () key or click the Quick Preview (
 ) button in the toolbar to reveal the unedited version of your photo for comparison’s sake. (It’s oddly named, since what you’re doing is viewing the old version, not previewing the edited version, but you get the idea.)
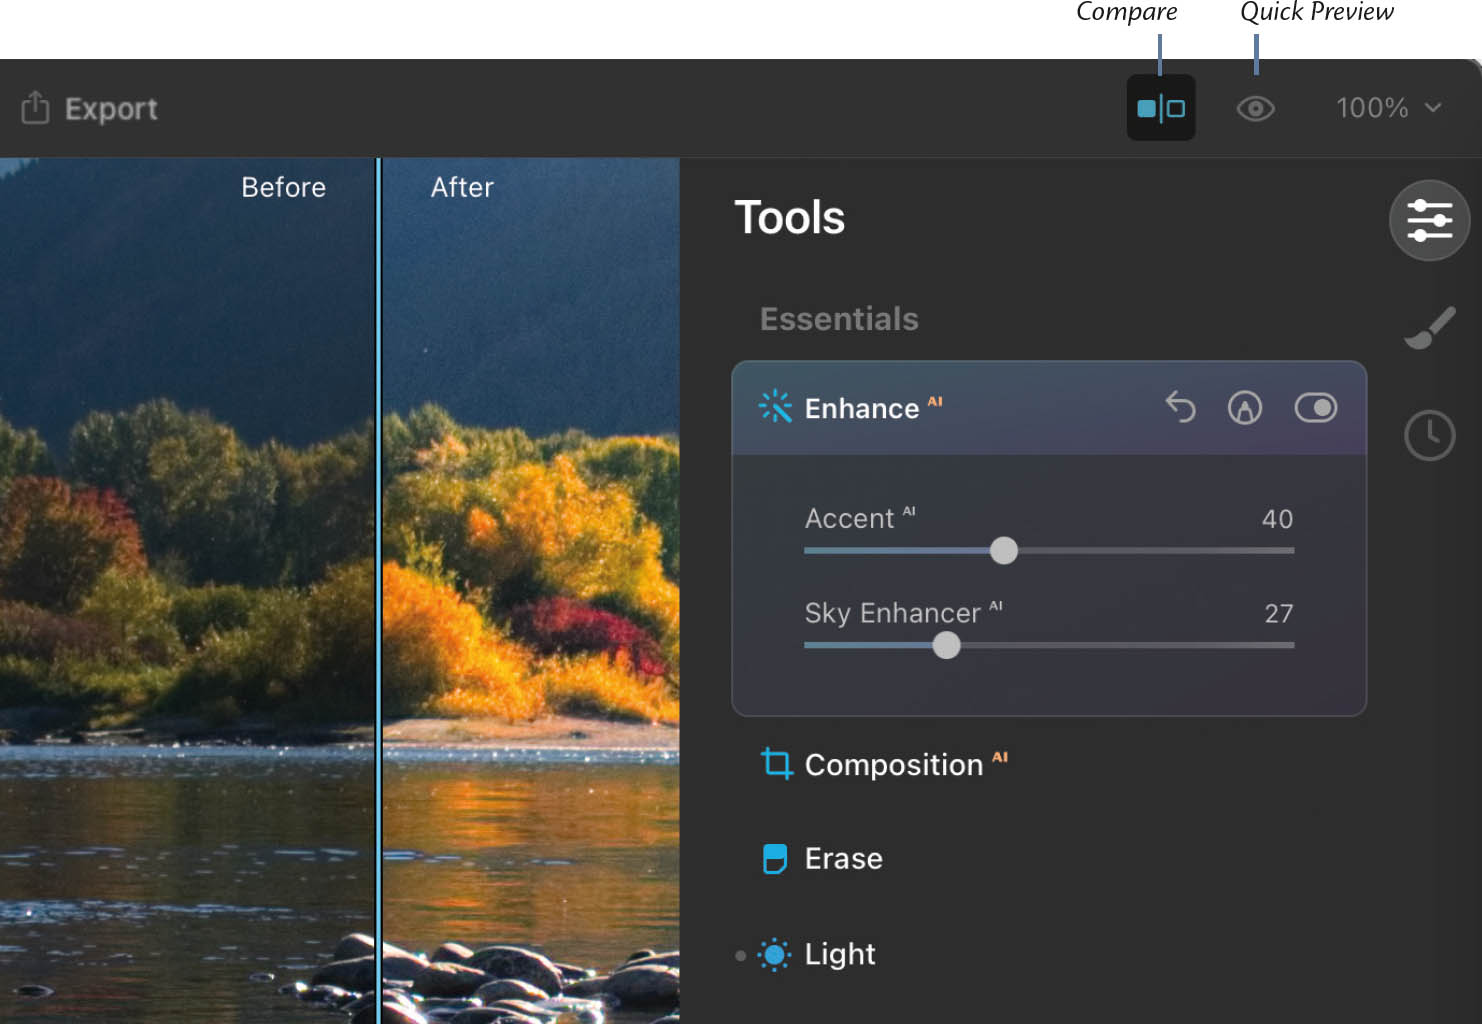
FIGURE 1-10: View a quick before-and-after comparison of your photo.
Zoom/Full Screen Preview
Zoom is a feature that may seem inconsequential compared to the edit tools, yet you can easily use it hundreds of times while working on an image.
- Fit to Screen: Press Command/Ctrl-0 or choose View > Fit to Screen to view the entire image in the working area.
- Zoom to 100%: Press Command/Ctrl-1 or choose View > Zoom to 100% to zoom to 100% view, where the pixels on your screen correspond to the pixels in the image. This view is essential when retouching areas, creating masks, or even checking focus.
- Zoom In: Press Command/Ctrl-+ (the plus sign) or choose View > Zoom In to enlarge the view incrementally: 25%, 50%, 100%, 200%, 300%, 600%, 1200%, 2400%, and even 3000% (which basically makes everything look like algae).
- Zoom Out: Similarly, press Command/Ctrl- – (the minus sign) or choose View > Zoom Out to reduce the view in the same increments above.
- Toolbar Zoom menu: Another option is to choose a zoom level from the Zoom pop-up menu (Figure 1-11).

FIGURE 1-11: You should always check your photo at 100% several times as you’re editing. Although this menu tops out at 1200%, you can zoom in as close as 3000% using the Command/Ctrl– + and Command/Ctrl– — keyboard shortcuts!
When you’re zoomed in, notice that the pointer becomes a hand icon. To move to another part of the image without zooming out, click and drag in any direction; or, if you’re using a trackpad, swipe with two fingers.
In the macOS version of Luminar AI, you have two additional viewing options:
- Full Screen Preview: Press the F key to hide all of Luminar’s tools and view the image at its largest size on your display, zoomed to fit. You can also choose View > Enter Full Screen Preview. This option also activates Full Screen mode, which puts Luminar into its own screen space, hiding the menu bar and any other running applications. Press F again, or choose View > Exit Full Screen Preview, to go back to editing.
- Full Screen: Separately, you’ll also find the option to Enter Full Screen (choose View > Enter Full Screen, or press Command-Control-F), which does the same thing as Full Screen Preview, but retains the program’s interface items such as the sidebar. Move the mouse pointer to the top of the screen to reveal the menu bar. To get out of Full Screen mode, choose View > Exit Full Screen, or press Command-Control-F again.
History
Editing a photo is never a linear process for me. I make some edits, change my mind, go back to an earlier version, try something different—you get the idea. In some applications, you can undo a set number of times, and if you close the document, that history is gone the next time you work on it.
Not so in Luminar (Figure 1-12). It keeps track of all your edits, from the moment you open the file the first time. To step back through your last edits, choose Edit > Undo, or press Command/Ctrl-Z. To go to any previous edit, click the History (![]() ) button in the sidebar and click the last step you want to keep (newest edits are at the top). Any subsequent edits are no longer applied. As soon as you make another edit, the ignored actions are deleted.
) button in the sidebar and click the last step you want to keep (newest edits are at the top). Any subsequent edits are no longer applied. As soon as you make another edit, the ignored actions are deleted.

FIGURE 1-12: Return to earlier actions by selecting them from the History list.
The Catalog
There are a few ways of getting photos into Luminar for editing, as I detail in Chapter 2, but my favorite is to store them in the Catalog for one simple reason: convenience. If Luminar is your main tool for interacting with your photos, it helps enormously to have them all in one interface.
Unlike some applications that want to consolidate all images into one central location, Luminar can peek into whichever folder you choose to store your photos and make them appear in a gallery interface that lets you quickly identify them visually (Figure 1-13).

FIGURE 1-13: Using the Catalog lets you browse your entire photo collection without leaving Luminar.
The Catalog panel in the sidebar reveals source folders you’ve added, any albums you create, and shortcuts to favorites and edited images. Change the size of the image thumbnails by choosing a view from the menu at the right of the toolbar: Small, Medium, Large, or Largest. You can also choose View > Zoom In or View > Zoom Out.
Select a photo and double-click it, or press the spacebar to switch to single image mode. To return to the gallery view, press the spacebar again, or press the G key.
The Catalog isn’t a full digital asset manager (DAM). You can flag or reject images, sort based on those criteria, and perform rudimentary text searches, but that’s it. See Chapter 8 for more details.
The Info Panel
With the Catalog mode active, press the I key or click the Info (![]() ) button on the Info panel to reveal information about the image you’re viewing: file name and format; ISO, aperture, shutter speed, exposure compensation, and focal length; capture date and time; size in dimensions and storage; the camera and lens used; white balance mode; and metering method (Figure 1-14).
) button on the Info panel to reveal information about the image you’re viewing: file name and format; ISO, aperture, shutter speed, exposure compensation, and focal length; capture date and time; size in dimensions and storage; the camera and lens used; white balance mode; and metering method (Figure 1-14).
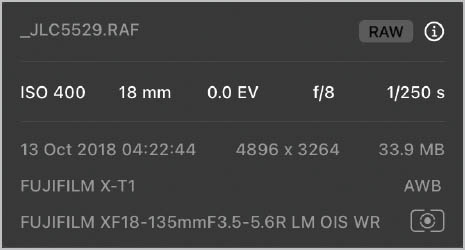
FIGURE 1-14: The illustrious and illuminating Info panel.
Strategies for Speeding Up Luminar
Although publicly we say that what matters most is the finished photo, I don’t know anyone who wouldn’t want to reach that point faster. Some methods of speeding up Luminar are obvious: a newer, faster computer will tend to give the program more pep just because the hardware can process instructions more efficiently. If you’re able to add RAM to your machine, particularly under Windows, that should help.
The macOS version includes two settings that can speed up your interaction with Luminar and don’t involve shelling out money for new hardware. Choose Luminar AI > Preferences to adjust the following:
- Increase the Cache Size (macOS): As you edit, Luminar creates cache files, temporary working files that it can reference to speed things along. On the Mac, you can increase the maximum amount of disk space allocated for caching. Increase the Max Size for Caching slider (Figure 1-15).
- Use Graphics Processor (macOS): If your computer has a decent graphics processing unit (GPU), Luminar can tap its power to speed up rendering edits and other tasks, and free up the main processor to calculate other edits. Under Graphics, set Use Graphic Processor to On.
The Windows version of Luminar relies more on the central processing unit (CPU) and RAM than on a GPU, which is why there’s currently no similar setting under Windows. I’m hoping that a future update takes better advantage of the processing power of GPUs.

FIGURE 1-15: The macOS version includes a setting for assigning more cache memory for Luminar to work with.
Handling Luminar 4 Edits
I can’t sugarcoat this: Luminar AI won’t read or convert catalogs created by Luminar 4. If you’ve come to Luminar AI from the previous version, you’re not able to access your old library or make changes to the photos you’ve already edited. It stinks.
Even if you point Luminar AI at a source folder already used by Luminar 4, you won’t see the edits, because both apps store all the edits in their respective catalog files—this is how Luminar does its nondestructive editing, where the originals are always unchanged. (I cover source folders in Chapter 2.)
So, what to do?
One silver lining is that both versions of Luminar can coexist on your computer. If you want to revisit an edit made in Luminar 4, open it there. Or, you can open an edited photo in Luminar 4, open the same unedited photo in Luminar AI, and match the edit settings manually as best you can. That gets tricky if the Luminar 4 edit includes layers, which aren’t supported in Luminar AI, and masks, which will need to be re-created.
On macOS, there’s another option. The app Avalanche for Luminar by CYME (cyme.io) can read a Luminar 4 catalog and convert it to a Luminar AI catalog (Figure 1-16). (The company also sells Avalanche Unlimited, which supports additional catalog conversions, such as between Lightroom and Apple Aperture.)
Avalanche does a good job with most images, but it’s not perfect. It can’t do anything with Luminar 4 layers, for instance, since Luminar AI doesn’t support them. That also means any corrections made using the Erase or Clone & Stamp tools don’t transfer, because Luminar 4 creates new layers for them. Still, it beats having to redo all the work you’d already invested in Luminar 4.
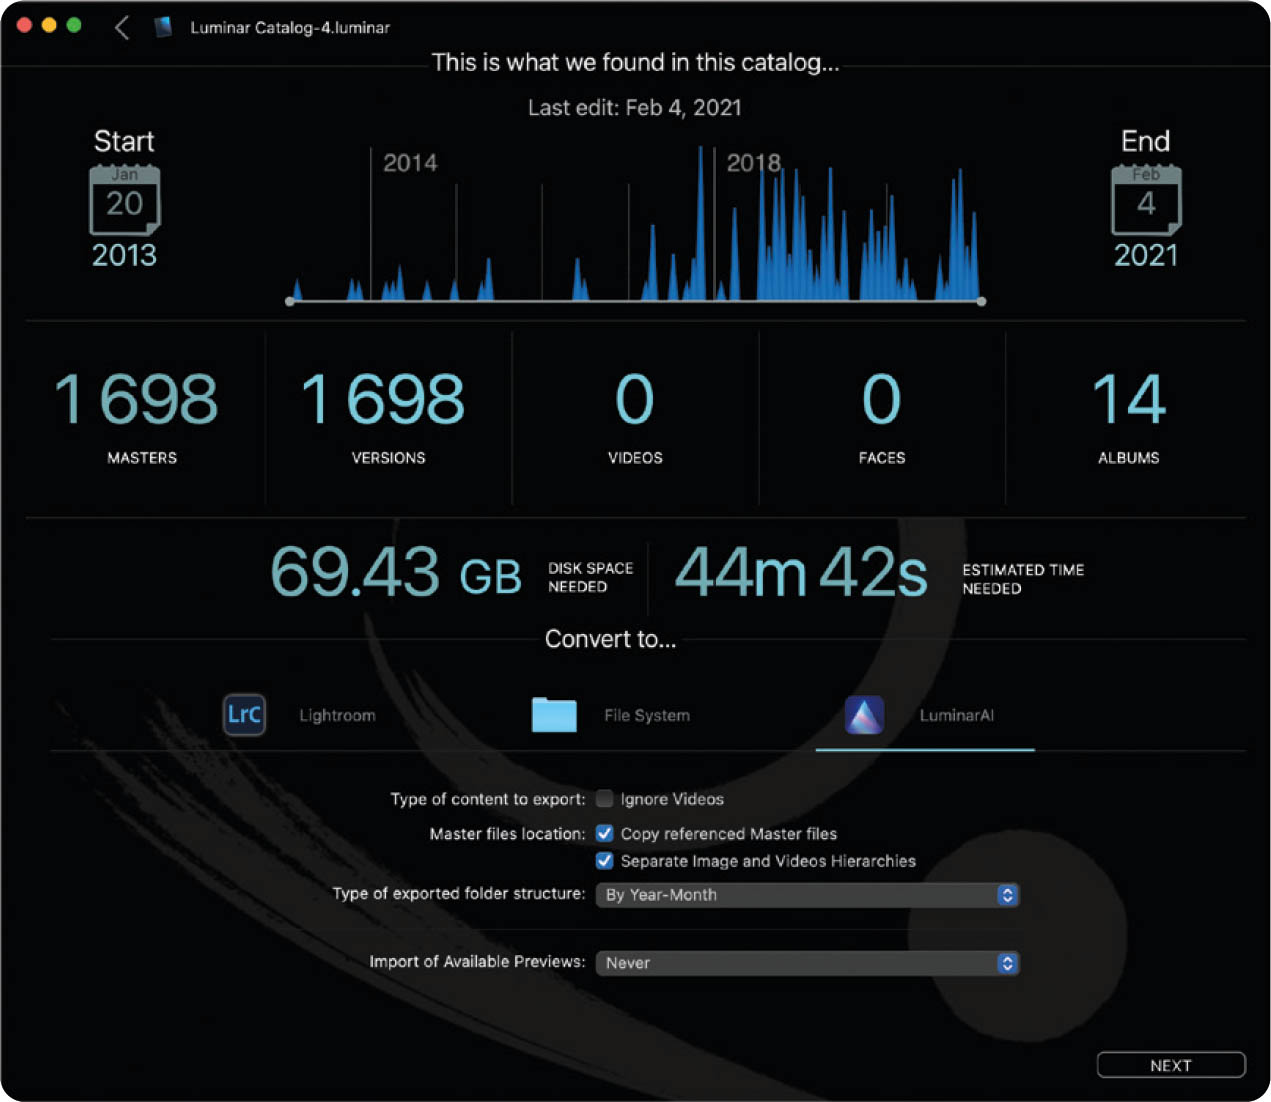
FIGURE 1-16: Avalanche can convert Luminar 4 catalogs to Luminar AI catalogs.