Weather alerts
wind, rain, heat, cold
Wind
Wind is the invisible enemy of the Steadicam. Even the slightest breeze can alter your precise framing and ruin the shot. But there are several things you can do to minimize its effect.
Keep the wind off the rig
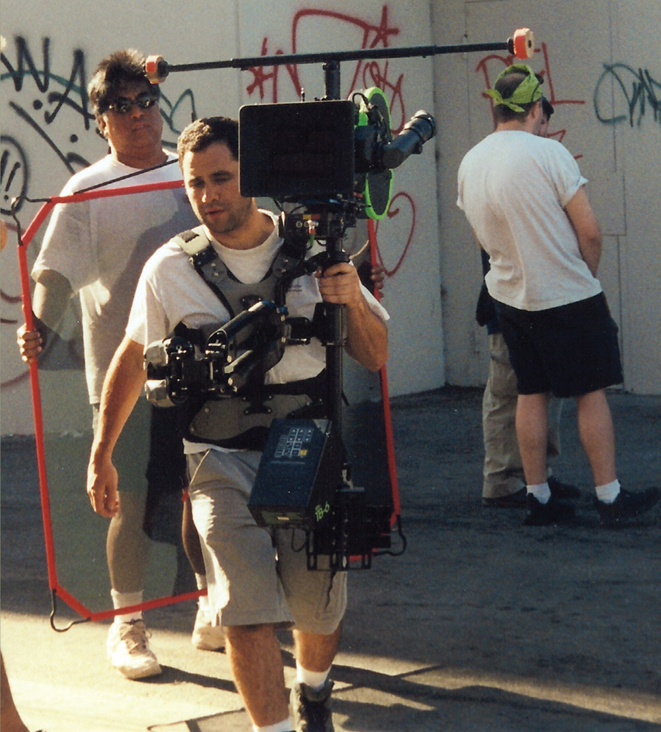
First and foremost is to try to keep the wind from hitting your rig in the first place. Typically, operators have a grip hold a “4-by” solid or double net next to the rig to keep the wind from hitting it. The challenge is for the grip to keep the solid in the right spot as you move about and as the direction of the wind shifts.
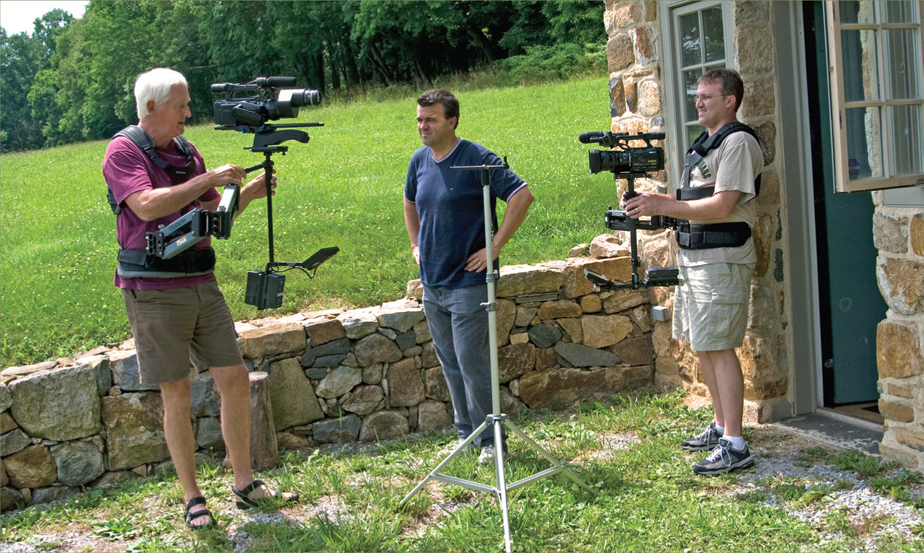
Garrett always suggested that you keep a length of colorful yarn in your kit and tie it to the mounting rod of the solid. You tell the grip to aim the yarn at the rig, not you. I’ve always found it hard to find the time, inspiration, or the spare 4-by to tie my yarn to, so I’ve still got that original piece of bright red yarn from 1982 in my kit, untouched. Instead, I try to have two solids and two grips make a “V” around my back to keep the wind off the rig, regardless of the wind’s direction. In addition I will use another grip and solid if needed, and/or the bodies of the director, DP, assistant, craft service technician, etc., huddled together to shield me from the wind.
Some operators prefer using double nets rather than solids. A double will cut the wind down significantly, but there is less turbulence in the transition area from shielded to unshielded. It would be great to have the best of both worlds and make up your own shields that were solid at the center and like a double net all around the edges.
Using a V of solids, you can shoot looking directly into the wind. The V forms a little pocket of calm air, and you can operate quite well in winds of 25 mph or more. (However, it may require several grips to hold each solid.)
Larry McConkey has long had a custom triptych of 6 foot tall shields that clip together. Each shield has a Plexiglas window that the grip can look through to see what Larry is doing.
We often use grips to block the wind from the rig. The stronger the wind (wind force goes up by the square law), the bigger or more numerous the grips must be.
Increase the rig’s inertia
You can also reduce the effect that the wind has on your rig by increasing the rig’s inertia. Your first line of defense is extending the monitor and battery and lengthening the telescoping post. This is nice because it adds no weight to the rig and is generally very quick to do.
Your second option is to add some more inertia via Antlers (or a similar scheme). This is useful because you can orient the Antlers sideways (unlike the fore-aft orientation of all the other components) and even out the angular inertia in all three axes. When the wind hits a rig with Antlers oriented this way, it tends to be a lot less squirrelly — it tends to move spatially a bit, but not angularly.
Your third choice is to add gyros. This is a bit more challenging, as it often requires a major rearrangement of the sled’s components and special brackets. It’s also noisy and takes additional power. That being said, gyros can make your rig very, very stiff and wind resistant and are particularly good for lock offs at the head or tail of a shot when it is really critical.
Rain
You want to keep the rain out of your rig. The electronics in particular don’t like the moisture, and there are steel parts in the arm that can rust. It won’t hurt the vest to get wet, but it’s not much fun to wear it once it is soaked.
Covering the gear
Several companies make custom covers for the arm and sled; you should have a Gore-Tex or similar rainproof but breathable shell to go over your vest.
We like the pre-fab gaiters for the arm, but a big plastic garbage bag also works like a charm. Just poke a small hole in the closed end for the arm post, gather it loosely about the center elbow and the hinge near the vest, and you are good to go.
I prefer wrapping the monitor and the electronics in clear plastic wrap to using the custom covers. If moisture does get inside the plastic wrap, you just cut it off and start again, and the plastic wrap presents less of a wind shadow than the custom covers.
Start wrapping the monitor with one clean, dry layer stretched over the monitor face. Then wind more plastic around and around until you think the monitor is protected. Secure with duct tape — not gaffer tape — and rubber bands or bungee cords.
Start wrapping the electronics at the bottom, and wind your way up and around everything until the electronics are covered. The wrappings will act like shingles on a roof, and you secure the top layer to the post with duct tape. Use rubber bands where you can.
The battery on some rigs can be covered with a ziplock type bag, secured with a rubber band. On other rigs it’s best to use the plastic wrap method.
You generally cover the camera as the assistants would like to cover it, but try to minimize the wind shadow. The camera cover generally covers the stage and electronics adequately. Forget about the gimbal. It gets wet and does not care.
One of my favorite rain moments was for a Woody Allen movie, Celebrity. In a big scene at the end of the film, a crowd has gathered outside a movie theater for the premier. It’s raining — artificially from a large number of towers. It’s about 40° out, the extras cringe every time the AD calls “roll sound,” and I’m having a fine time shooting under the marquee, far from the freezing deluge. Having a fine time, that is, until they suggest I go out into the street.
But this is a big movie with lots of resources. I quickly commandeer four grips and an “Easy-Up” tent. We roll the edge to create a gutter on the front, and I can march about the street fully protected from the rain, but not from the glare of the extras’ eyes.
I’ve also worked many times all day or night in the pouring rain and wind and mud and, with the protections mentioned above, come away without a scratch. When you can, it’s nice to have an umbrella or Easy-Up follow you around. When you can’t, it’s generally not a big deal.
Water and sand
Sand gets everywhere and water is very corrosive, especially salt water.
The beach is a very hostile environment for a Steadicam. Cover your gear as if it were pouring rain. Even for that one quick shot, one gust of wind or one splash could result in hours of maintenance work on your rig.
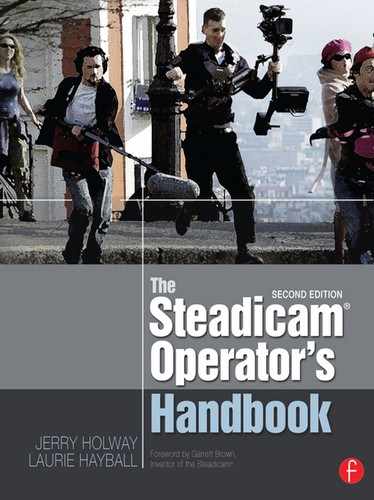
Temperature extremes
Steadicam operators have worked all over the world under the most extreme conditions. The equipment, with a few minor precautions, can operate from –40°F to over 120°F (–40°C to +50°C). Under these extreme conditions, however, the operator must work hard to take care of himself or herself.
A trick for running on sand
Bury a length of chicken wire or plastic fencing just beneath the surface of the sand. It works like snowshoes!
Hydrate
Whether it’s hot or cold, or just a lovely spring day, proper hydration is a must. Alternate water and a sports drink if you are working hard. Drink some water followed by the sports drink. Then more water. The liquids should be at room temperature, so it’s more easily absorbed with less shock to your system. Drink a little bit all the time; don’t wait until you are thirsty. If you are dehydrated, you risk cramping or fainting, and you tend to think more slowly. Plus, you are thirsty.
Cold climates
As the temperature drops, the operator must add more and more layers of clothing. Down to about 0°F, nothing really extraordinary is called for. A layer of good moisture wicking material next to the skin (like polyester) should be followed by several layers of fleece and a final rain- and wind-resistant layer. All layers should be loose enough to allow good circulation, and you should be able to open up your clothing between takes to vent out the moisture generated while you shoot.
The vest should be worn outside all but the outer shell, with the socket block protruding through a gap in the zipper. Many operators have special slits sewn into their clothing to accommodate the socket block, but a lot of us just use off the rack jackets.
In conditions below zero, be sure to add extra insulation on the outside of the vest spar. The spar not only compresses the insulation under it, but it acts like a giant heat sink, sucking the heat out of your heart. We’ve discovered the hard way that it can be very painful. Maybe even fatal if you’re in the rig too long.
Hands and feet
As the temperature drops, you need to consider when you should start wearing gloves and how thick should they be. Should your gloves be smooth or sticky? Your decision should be based partly on the shot requirements, and partly on how your hands feel to you at the moment. Some of us have less circulation in our hands and quickly start putting on the gloves; others wait a lot longer. When it’s just a little bit cold, some people like thin leather gloves, others may prefer latex or half gloves with the fingers cut off.

It’s a good idea to go to sporting goods stores and see what different athletes use — you may find something from kayaking that suits you just fine. Operators who typically work in cold environments have many different pairs of gloves and mittens in their kit.
Chemical hand and foot warmers are great for keeping you warm, especially when you opt to grab the cold post with your bare fingers for the moment of shooting, and then return your hand to the glove between takes.
Always take care of your feet. Unfortunately, as your boots get bigger and thicker to ward off the cold, they don’t necessarily provide the same positive support as your normal operating shoes. Combine clumsy boots with ice and snow and you risk falling with your gear. If you know you will be working in the snow and ice, find boots that keep you warm and provide secure footing and proper support.
Batteries and monitor
Most batteries do not work very well when cold. Try to keep them above 40°F. Many operators charge their batteries and keep them ready in an insulated cooler with an electric blanket inside. Wrap the battery in an insulated bag when it’s on the rig, and if necessary, put one of those little hand warmers in the bag with the battery.
LCD (liquid crystal display) screens do not like to operate below freezing — the liquid freezes. Many LCD monitors have automatic circuits that prevent them from operating below freezing unless you choose to do so. Normally, the LCD screens made for Steadicam use have large backlights that generate a lot of heat. You can keep your LCD warm in cold weather by insulating the back of it and keeping it on with the backlight set to maximum brightness. When docked, place an insulated cover over the screen.
If you know you are going to spend a lot of time in below freezing weather, we suggest you buy a commercial 14 or 24 volt DC power supply (at the same voltage as your batteries) of the right amperage (10 amps is more than sufficient for most rigs). Make an adaptor cable and use the mains to power the rig and keep everything warm between takes. Place your battery into the insulated cooler and go find a warm spot for yourself.
Hot climates
When it’s hot, you need to keep yourself and the equipment as cool as possible. For the gear, it’s generally best to turn everything off so that it generates no heat, and keep everything out of the sun. There’s nothing quite like putting on a black vest that’s been baking in the sun and then humping 70 pounds around. Keep yourself and all of your equipment in the shade.
Once again, you must take special care of the batteries, as they don’t like to be hot, and they generate heat when being used and when charging. Many batteries and chargers have thermal circuitry to prevent charging or discharging when the temperature is too high. Be sure that your charging station is in the shade and that there is plenty of air circulating through the charger.
Stay hydrated. Do not drink iced drinks, and stay away from sugary sodas. Tepid water and sports drinks may not sound appetizing, but they will keep you working longer with less stress on your body.
Wear a hat, maybe even one of those hats with a small fan built into it. If it’s dry enough, wrap a towel soaked in cold water around your neck — especially when you are not wearing the rig. And wear the rig as little as possible. Stay cool.
Wear loose, light-colored clothing that can breathe: nothing tight or constricting. If there’s a reflection in a shot that requires you to wear black, then wear black for the shot and then change back into your normal hot weather costume.
Take care of your feet. They will really appreciate it if you change your socks and shoes at least once during the day. Soaking your feet in a bucket of cool water can be heavenly.
When it’s really hot, we do not jump in and out of an air conditioned building or vehicle. Stay outside in the shade and get used to the heat. Your body will sweat, keeping you cool.
It may seem strange, but don’t forget to warm up and stretch when it’s hot. Stay loose.
Whenever you travel from one environment to another, be sure to pace yourself. If you live in New England and suddenly find yourself shooting in Panama, it’s going to take a few days to get used to the heat and humidity. Altitude, jet-lag, new food, pollen, or pollution can also wreak havoc on your body. Have your assistants watch you carefully, making sure you don’t get dehydrated or overextended. A day that would be okay back home can knock you out in “paradise.”
Survivor no. 1
Scott Lakey
In 1997 I was asked by a Swedish company to shoot a new concept show called Expedition Robinson (Survivor). I was asked to shoot with my EFP camera on a tripod, handheld camera, as well as Steadicam. I didn’t know what I was getting myself into, but thought, “Why not?”
The location was to be an island in Malaysia. Within 2 months I was in Malaysia, 125 km north of Singapore. The temperature was 33°C (91.4°F) in the shade, with high humidity, sand, and salt air. We lived on a nearby island and planned a commute to the “Survivors Island.”
Steadicam was to be used on the games as well as during the island council. I was fortunate to remember Jerry’s motto: never, never, never use a Steadicam on a helicopter. I shot the opening aerial scenes and stock shots with a handheld camera from a helicopter door. (A week later on another job the helicopter crashed and killed five people. My friend the pilot and co-pilot perished. If my American mother had been able to read the Swedish newspapers she would have thought I had died.)
Later that first day I was back on the hard ground and we had to transport my Steadicam Master Film from a boat across the island’s lowlands and then up a high hill to the island council. We had locals (bearers) who would help us get the gear up the hill. The red earth footpath up the hill killed us. The two bearers could not take more than one item at a time, and we could not convince them to take more on their low salary. We had to do the job ourselves and if lucky had some assistance. Our dreams of servants greeting us with iced tea and fans at the top were just dreams.
Several tons of gear to transport up Hell Hill. Hot, sweaty, and thirsty. We drank 6–10 liters of water daily. Someone even had to get the water up that hill. The Steadicam was always a favorite item not to carry. Not light. We set up the cameras around the island council and I set up my Steadicam first as it was my responsibility.
I threw a silver Mylar emergency blanket on the Steadicam to protect it from the sun. The positions chosen for us were backlit much of the day depending on when we were shooting. Oh well, too much trouble to move everything. Our cameras got quite hot in that direct sun so close to the equator. One camera switch panel melted. We decided to use white sheets at first to cover the cameras from the sun. Later we custom made Mylar plastic covers that we cut and taped ourselves. Much more effective and did not fly saway with the wind gusts.

When all cameras were built, we started to test our primitive setup. I noticed the island council was a circle filled with coral heads. Very bumpy to walk on and an attempt was made to fill sand between the coral heads. When all was fine I placed the Steadicam on my body. We went through a rep and then called in the contestants.
We had lost much gas getting all the gear up on the hill and the 40°C (104°F) in the sun did not give us more energy. Trying to fly over the coral heads I was lucky not to break an ankle. Steady: well not exactly. As I stood there holding a fixed shoot after my bumpy move I noticed something biting my leg. As I was holding a fixed shot I was forced to bear it. When I placed the Steadicam down I realized the critter that bit me was a sand fly,* the world’s most irritating creature.
The sand was carted up from the beach. The beach shoots were equally as difficult. The island was full of holes where the former Vietnamese had dug for water and buried their dead. Ten thousand had lived there at one time after the war. And several thousand were thought to be buried there.
The technique of placing plastic fencing down to make walking on sand tolerable was not possible, as they had no time to prepare and no interest to do it. I had to rough it.
I shot often on the beach barefoot. It seemed the best way to work. I tried many techniques for the sand flies and on the morning boat to the location island I first used sunscreen and then applied the strongest mosquito spray on top. That worked fine until I was in the water transferring gear or shooting. One dip in the drink was enough to get a swarm of sand flies on your leg.
That first Survivor was historic as Swedish press called it fascist TV. We had no idea we were creating TV history. The first survivor to leave the island returned home to Sweden and committed suicide a month later. He was a Bosnian Serb married to a Muslim living in Croatia and then moving to Sweden. He was an educated lawyer and could not even get a job as a dishwasher. I was with him when he was deprogrammed after leaving the island. He said he felt fine and was not hostile or depressed; someone had to be the first off. That did not go well with the Swedish press and his wife blamed the show. The TV was forced to remove the scenes with him. The chief left her position as the pressure was on her. Funny thing was that 2 months later it was the top show in Swedish history. Mark Burnett bought into Planet 24 and 2 years later turned it into the top show in the United States.
A little white insect with black wings. Very easy to miss. It has the jaws of a shark and it leaves a sting that turns to an itch and if you scratch it leaves a welt the size of a watch face within 3 days. If you continue to scratch it gets infected. I saw many beautiful Swedish women with lovely long legs that looked like they were losers in a shotgun battle after one day’s encounter with the sand flies. The Malaysians fog and spray the beaches with diesel fuel. The sand flies don’t die, they just swarm to the next island. Sorry, neighbors. This was to be our shooting location for 2 months. I shot there two seasons.
Documentaries and industrials
The Steadicam can be a great tool for shooting documentaries and industrials.
There are two basic things to consider: You should move the camera wisely, just as you would in any other situation, and your behavior as an operator has much more impact on the “set” of a documentary or industrial than on a movie set.
The Steadicam can move well and add production value. It can give a sense of freedom and naturalness, which is especially helpful and reassuring to nonprofessional actors. It can connect spaces and show the flow of processes.
The Steadicam operator can work in spaces too difficult or dangerous to lay track, and he can easily and quickly move out of the way. This last factor is really important in factories, around large machinery, near big animals, and in hospitals, where moving yourself and your gear out of the way is truly a matter of life and death.
Minimize the equipment and yourself
Don’t make a big deal about the machine; stay focused on the subject. Do your setup and balancing unobtrusively, quickly, and if possible, out of sight. Make the Steadicam, setting it up, and getting the vest on and off seem routine and uninteresting. Minimize the mechanics, and try to connect with the subject on a personal level.
If the operator behaves well, the circus act of carrying a Steadicam can be minimized. I’ve often let folks be amazed and play with the contraption as I’m wearing it. Their interest in the device briefly takes their minds off the fact that they will be on camera. We get to know each other a little and relax. Eventually we all get bored with the Steadicam, and then we start to shoot. The contraption disappears as the subject becomes more important.
Wear dull colored clothing. Don’t stand out. Blend in. If you’re shooting an orchestra that’s performing a live concert, wear a tux. Really. Don’t show up in a corporate environment and wear spandex. Actually, never wear spandex. It’s not about you; don’t be a distraction. There are exceptions. Here’s one: when working in a prison environment, don’t wear jeans and tee-shirts like the rest of the “population.”
Connect with the subject
One huge advantage a Steadicam operator has over conventional operators: his face is not hidden behind the viewfinder. The operator can connect to the subject, smile, and react as the audience. You can either kill your subject: laugh at him, ridicule him; or you can support him: laugh at his jokes, be interested in his subject, what he has to say, etc.
Steadicam operators always have the option of looking around and easily seeing what is outside of the frame. Compared to conventional operators, you can move with more security, knowing where to step, and you can anticipate and prepare for things about to enter frame, and do it all without disturbing the image or your subject. You also can be more aware of interesting incidents off camera and prepare to slide from the current subject toward the next, knowing where and when to stop more easily.
Keep the story, the project in mind
Documentary footage shot on Steadicam doesn’t suffer from distracting handheld bounces, long the bane of documentary film editors. All too often a piece of important action or dialogue was ruined by an unwanted camera shake. Steadicam is smooth and continuous, the shots can go on forever, and there’s the problem. There is an opportunity for Steadicam operators to be so intrigued with their work that they forget to shoot for the editor, for the movie.
Give your editor cut points. Don’t move the camera all the time, don’t get caught up in moving around and around your subject just because it’s possible. Stop and watch things unfold. Move when necessary, for a reason. Then stop again. Think like an editor, like a filmmaker.
Use different lenses. Don’t shoot everything wide, don’t forget everything you’ve learned about the rich language of cinema. Take many cutaways. Be prepared to jump to the dreaded tripod or the dolly or crane when it’s appropriate to do so. It’s good to have a second camera, or at least a quick release system compatible with your Steadicam set up, so you can change modes quickly, without fuss.
To use longer lenses, you are going to need a good focusing system and, in most cases, a good assistant. To use zoom lenses, you will need some sort of zoom control like the J-7 on your gimbal handle. And you will always want the lightest possible camera for your Steadicam. Do not get stuck with a heavy camera; everyone will be disappointed at the end of the day.
Be sure everything is wireless. This includes sound recording if you are shooting video. Your tape should only be considered the back-up audio or guide track; the audio guy should make the master audio on a separate, wired deck.
If your primary work is documentaries and industrials, you should strongly consider buying one of the new fully featured, lightweight Steadicams. They can do almost everything the top of the line Steadicams can do. There is no compromise in the performance, yet you have a lot less to carry around. (In the old days, many light stabilizers were also light on features, performance, and quality — most rigs were not really professional grade.)
Pace yourself. Don’t get overly fatigued. Be in more than adequate shape for the physical challenge. Make sure everyone understands the limits, and whenever possible, design in times and places where you can rest. You may want more than one docking station, or a docking stand that can easily be rolled from place to place, with all your major tools, batteries, and accessories on board. You may want extra batteries, as charging batteries may be inconvenient or impossible. Plan ahead for yourself and for the gear.
Being open to the subject, staying mentally alert, and creating images and cut points and everything on the fly is lots of fun. And you can end up in really odd or interesting places — like the inside of a four-story high power generation boiler, an airplane factory, an operating room, or some Mayan ruins — the world is full of interesting, real things to shoot.
Capturing reality
Chris Fawcett
I adored handheld camerawork but was unsatisfied with the final product — which always had a touch of “wedding photography” to it. Handheld camera never replicates the smoothness of the eye, and if that is relevant to storytelling in drama, it can only be more relevant to documentary. I wanted a medium that would match movement with movement without introducing extraneous movement of its own. The jittery cinema vérité look has power, but it is a style, and in approaching a subject, interposing any device is asking the viewer to peer through a stylistic window.
Children of Stalin was conceived as a feature length documentary about the daily life of a group of inmates and staff in a residential mental institution in the ex-Soviet Republic of Georgia. Some friends warned me off the project: “You will see things that you will never be able to forget,” they said, and they were right. A small crew of director, camera, sound, and interpreter were to spend 3 weeks living just outside the gates and every available moment documenting what was going on inside them. With some reservations, the director and I wanted to use Steadicam. Disadvantages seemed to include setup time and, in a mental hospital, the possibility of introducing something that might intimidate the patients.
Once on location, setup time vanished as a problem. Compared to the time spent moving tripod positions while shooting, the half-minute needed to put on the Steadicam was trivial. Once the patients became accustomed to us, we chanced introducing the Steadicam to the men’s ward. The reaction was almost opposite to that expected. Instead of being half hidden with a camera growing out of my head, I was open to the view of the patients, who were clearly more at ease with my presence. I could even shake hands and interact when necessary, while still filming. I was just a person with a camera floating alongside — and since the camera didn’t do anything other than follow me about, it held little interest. Working with eye to eyepiece, as I had done up to then, seemed rude and distant in retrospect.
Having studied Steadicam primarily in drama, I approached shots in a cinematographic way, checking out possible compositions relative to light sources, and planning interesting ways to move between them. I would think ahead so as to end up in good dramatic positions, considering the possibility of extending the shot from there. No longer was it necessary to stop the camera between tripod (or handheld) positions, but the scene could be documented in long sweeping takes, locking off at key moments to focus on detail. The experience was liberating, but the rushes fell short of expectations. The choreography was smooth, the compositions considered, and the dramatic moments — well, that was the problem — dramatic. Instead of getting closer to the subject, I’d interposed another device, a new stylistic window to peer through. The medium was getting in the way of the message.
Steadicam in documentary is often limited to reconstructive devices and other prepared shots, and I began to appreciate why. For several nights, I looked at Steadicam rushes, growing despondent until I remembered something I learned in fencing. When your opponent is on the attack, having a plan is counterproductive. If you stand en garde, running through the possibilities of defense and counterattack, before you know it your opponent will score. If you refuse to plan, but let considerations wash over as they occur to you, there is a part of you that is capable of turning an attack, if you allow it. Leaving room for the unknown allows for the possibility of appropriate spontaneous response.
Applying this to Steadicam meant still being aware of the situational and compositional possibilities, but refusing to engage them directly; and in the next few days, thanks to a supportive crew, I had a chance to experiment. At once, the rushes changed character. Instead of planning a shot in the typical dramatic way, I just tried to look and not look away until something drew the camera’s attention. Without considering where we would end up, I attempted to let the lens rove where it wanted, allowing the mood and motion of the subject to drive.
Toward the end of the shoot, we had an opportunity to film inside the unrenovated women’s department, something denied to us up to that point because some staff worried we might present the hospital in a bad light. We had filmed the women in the yard and other areas of the grounds, but had nothing to counterpoint our shots from inside the newly renovated men’s department. A renegade decision (taken after a long Georgian lunch) on the part of one of the staff let us in, and we knew we would have just a few minutes before someone more senior turned us out.
We begin the shot conventionally, making a round of the ward to take everything in. On returning to the main door we find ourselves still undisturbed — a few precious minutes remain. Now the interpreter tells us we must leave immediately — the chairman of the board is coming — but here is this strange place full of people we have grown to trust, admire, and respect laid before us, a place in which we feel welcome, a place we have come expressly to document. The sound recordist and I put our backs to the door, and settle in to just allowing ourselves to look and listen within that space. In these precious minutes, we sling-shoot the gravity wells of the inmates’ internal worlds, and the relationships between them, free falling from one moment to the next. A simple close-up on a timid girl widens to reveal a weeping woman pleading to the room. The girl ducks behind, and we follow till a pacing woman invites the lens on, revealing another patient, complaining and gesticulating into space. We linger, sink to an old dear lying fidgeting, and drift across inmates perched on their beds — one calm, one agitated — rising to encounter a watching woman smoking by the window. Her glance throws us down to Ketino’s bed, from where she shouts at a woman standing too close. We pass along her to engage the interloper — cursing back now — and track around to view the pair arguing. Someone’s passing disengages us, and we are drawn deep into the ward, wheeling now to meet the most forlorn person in the ward, gyrating in her place, mumbling unheard words.
When we were (very tolerantly) ejected, I felt that half an hour had passed, yet that night we saw we had shot not 12 minutes of tape. Thinking on those final minutes raises hairs on the back of my neck. Had I been condemned to hang in the morning, within that time I’d have forgotten entirely. I knew then and I know now: that is how I wish to work. In the edit, that scene was dropped. It was pivotal only to me.
Steadicam brings new possibilities to documentary making and not just for master shots; it cuts well too. Compared to tripod and hand-held work, the percentage of usable footage is increased, and more choice offered to the editor. When shifting camera positions, the Steadicam glides from one composition to the next. A static shot becomes a tracking shot becomes a static shot again. Pan, boom, tilt, track, and zoom interact in a seamless storytelling continuum.
Traditional compositional features — the rule of thirds, the golden mean — become moments through which the moving frame passes. Vanishing points are supplemented by appearing and disappearing points, and the Platonic vision of “carving nature at its joints” is superseded by the timelessness of a frame exploring space — not drifting aimlessly, but breathing with its subject; a frame free to blend the gravitas of a stare with the lightness of a glance, mirroring, with camera movement, the way the eye sees, matching qualities of action with qualities of movement in four-dimensional composition.
Children of Stalin was shot in DVCPRO 50, on Panasonic AJ-SDX900P cameras, at 25 fps progressive. One camera was stripped of viewfinder and battery and mounted on a custom low-profile plate (instead of the standard Betacam-style quick-release plate) to lower its weight and center of gravity to suit the rig. Colorimetrics and resolution were heavily tweaked, with some success, to resemble film. The Steadicam Flyer was almost maxed out with two IDX batteries, a Lockit box (to sync timecode to the audio hard disk recorder), a Micron wireless audio receiver (to record guide track from the audio mixer), and a Vocas ZiF-100 lens controller mounted on the gimbal handle. The ZiF was invaluable for covert zooming within moves, and for pulling up to seven stops of iris (sometimes successfully) between indoors and out. Despite operating at capacity, the Flyer was responsive, and its lightweight and low profile meant that fatigue was barely an issue. The documentary was directed by Harrie Timmermans for Egmond Film & Television, and M+S sound recorded by Pepijn Aben on an Aaton Cantar.
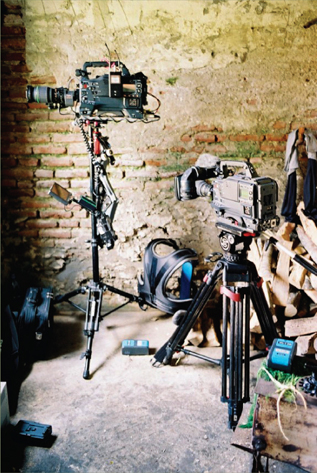
Equipment storage room
Video and Steadicam
One really great thing about video shoots is the quality of the image you get on the monitor — it’s as sharp and clear as it’s ever going to be. If you’ve got a big, bright color monitor, so much the better!
There are, of course, many issues and concerns related to working with video cameras and the specific video environment in which you’ll be working. Here are just a few: Are you working with a camcorder or just a video head? Either way, how are you connected to the truck or video village? Wireless or cabled? Is it a multi-camera shoot? Live? Live to tape? High def or standard def? What sort of high def? How are you going to focus, iris, and/or zoom? Will you have an assistant? A cable puller?
These questions are primarily related to specific gear you must have to survive, but they also have implications for operating.
The last thing you want is any technical concern reducing the quality of your shooting.
That may seem obvious, but sometimes all the nuts and bolts, especially in live shows, can overwhelm the best of us. So think ahead, do your homework, be prepared, and arrive early, because there’s always something new in the video world.
Mount the camera to your sled
This might seem easy, but there are often many difficulties. The typical “tripod adapter” that comes with most handheld video cameras often has a lot of flex. Tripod adaptors might be fine for working on a tripod, but they aren’t so hot for Steadicam. Find a way (wedges, gaffer tape, something!) to get rid of the slop. If you are using an on-board battery, microphone, Obie light, etc., check those mounts for slop as well.
All cables on the sled should be tied or taped down and immobilized, as any loose cable will flop and upset your critical balance.
Low mode can be really easy or very tough. The quickest and most secure way is just to flip the camera over and reorient the image in post (and at video village for the director). See the low mode section for some details, special brackets, and concerns.
Get the image to your monitor
If you are shooting standard definition (NTSC or PAL), there’s no problem. If you’re shooting HD, things get tricky. Hopefully, the camera has a standard definition output, or maybe you’re lucky and have a monitor that works in SD and all flavors of HD. If not, you’ve got to get a down-converter, or if you are sending an HD signal by wire to video village, it might be possible to send a standard def signal back to your monitor. Regardless, you’ve got to make it work.
HD, monitors, and related technologies are changing rapidly, so you’ve got to do some research to find out how your Steadicam equipment is going to work with a particular camera on your shoot day. Fortunately, the Web makes finding the information you need easy, and you can get advice on the latest widgets from experienced operators.
Sending your signal
Sometimes you have to get your high quality signal out to the world, whether for monitoring, broadcasting, or recording. There are two basic possibilities, wired or wireless: wireless is generally preferred from an operating point of view — one is free to roam without the influence of cables or the danger of inattentive cable pullers. There are worries, however. A broadcast quality microwave transmitter weighs a bit, consumes more power, and sometimes the “auto-receiver-locator” in the dome gets the jitters, making it impossible to deliver smooth shots. On a multi-camera shoot, just swap your camera with one of the handheld operator’s cameras, and test for the jitters again. Newer Wi-Fi transmitters may work just fine without the aiming required of microwave transmitters. Again, technology in this area is racing forward, so do your homework.

Your other option is to be cabled to the rest of the world.
I used to do a lot of TV, especially live TV, and being one of the first I was able to insist on what I thought I needed to do it properly. Properly meant that no one at home would be able to spot a difference in video quality, and the level of control of the shot should not appear different from other moving cameras that were generally being operated on a crane of some sort (with lots of zooming to enhance the restrictions of their physical moves).
I wanted to offer moves that they could not make, albeit with judicious use of zoom as well, especially savoring moves that crossed the boundary of stage and audience. My intent was to make the use of Steadicam the same quality as the other cameras, aesthetically and technically, and at the same time break down long established barriers to where the camera could go. Along the way directors and I had to create a new aesthetic, a new language of camera moves, that could be incorporated seamlessly into the preexisting structure.
All this meant that I had to avoid any Steadicam-centric operating flaws from being evident (floating horizon, shiftless framelines, wandering headroom, inconsistent focus, falling on my ass). So, particularly for the live shows, my primary goal was not to fall, then to stay out of the other shots, to minimize control problems, and finally do something spectacular looking, in that order.
—Larry McConkey, June 21, 2004, on the Steadicam forum
Cable running technique
It’s imperative to minimize the influence of the cable(s) on the Steadicam and to be sure the cable will not compromise your safety.
Typically, try to get the most flexible (not necessarily the thinnest!) cable you can. Most operators carry several 12 foot lengths of really flexible coax cable with BNC connectors on each end in their kits. In standard definition situations, this cable is used as an extension of the main (heavy and stiff) coax from video village to the camera or with two special triax to coax adapters.
Most importantly, the way you attach even the most flexible cable to the Steadicam will have a great effect on the quality of your shots.
Tip: Consider balancing your rig a bit more bottom heavy than normal when using cables (and/or a gimbal mounted zoom controller). The lighter your top to bottom balance, the more influence the cables will have.
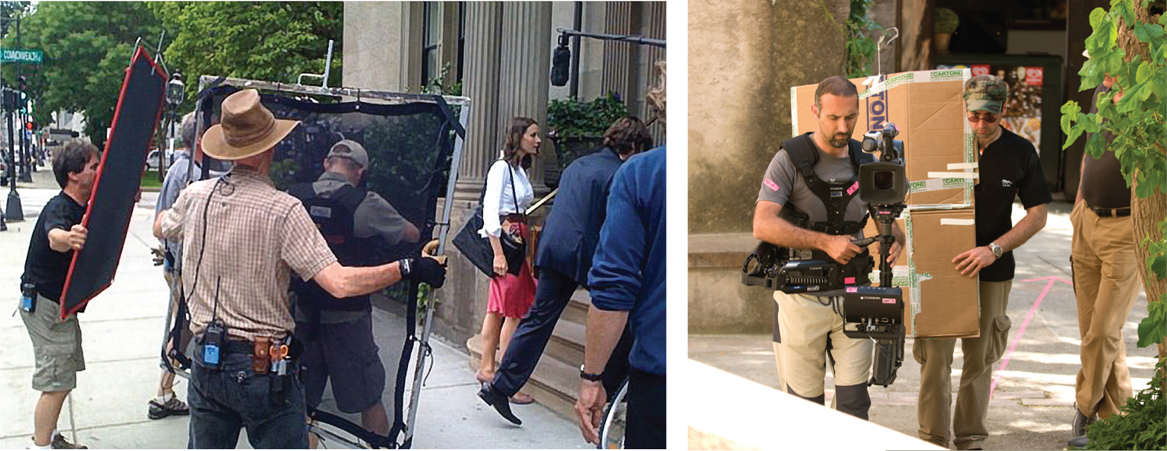
Here’s the best method for cabling: run the flexible cable down from the camera next to the lens and make a small loop that passes through your operating hand on the gimbal. This loop does not change much as you operate — and you can easily control its influence on the rig.
For years, we had the cable exit the operating hand into a bigger loop on the side and tucked it under the vest or belt, and from there the cable ran back to the truck or video village. Some folks ran the cable on the inside; some ran it up the arm. But recently, while working with the Panavision Genesis camera — which had two video cables, one audio cable, and one extra thick and stiff external power cable — we were forced to learn a new trick.
Before picking up your rig, wind a turn or two of the cable(s) around your forearm as shown in the bottom photo, and then pass the cable through your operating hand to create the small loop forward and up to the camera. The other end of the cable leaves your forearm, loops to your vest or belt as before, and on to the cable puller and video village. When you get the loops right, put a tag or two of tape on the cable so you can recreate the loops each time you lift the camera. This cabling method almost eliminates any influence from cables on your rig, and we recommend it no matter how small and flexible a cable you use.
Cable running for low mode
Note how the cable is laced up to the monitor rods and secured by a yellow strip of Velcro. A small-as-possible loop drops down to the operating hand, the cable is wound around the operator’s wrist, and then it is looped again to the vest.
All too often proper cable running is ignored when shooting in low mode. Take the time to restring the cables. Don’t let bad cabling diminish your operating!
Gear unique to video shoots:
• A spare Sony or Ikegami camera mounting plate in case they want to swap your camera from the Steadicam to sticks. Otherwise, use the mounting plate that comes with the camera.
• A remote tally light system
• A small LCD monitor with both power and video inputs from your sled. You will use this monitor for “Program.”
• A set of triax to coax barrel adapters
• Several right-angle BNC adapters
• 2 carabiners
• A selection of 3, 6, and 20 Ohm BNC jacked attenuators. Sometimes your video transmitter will interfere with the camcorder record heads or with the audio receivers on the camera. Suppressing the strength of your video transmitter may cause a messy monitoring image, but it will ensure clean audio.
• A 6 foot length of ultra-flexible silicone-jacketed triax cable
• 10 to 12 feet of ultra-flexible coax cable. Mogami makes an excellent neoprene jacketed cable, number 2964. Do not use the “spaghetti” BNC cable typically supplied with Steadicams. They do not have enough copper wire running through them to safely handle the 165 volts that is passed down to power your camera.
• An HD to SD (NTSC or PAL) down converter
• A monopod with a spare Steadicam docking bracket on it
• A wireless belt pack for your audio. In the case of loud shows, a doublemuffed headset that has a straight cable. Most headsets are single-muffed because the handheld camera is pressed against the right ear. Not so with Steadicam. Both ears need to be muffed, but a coiled cable will wreck the trim of the Steadicam rig.
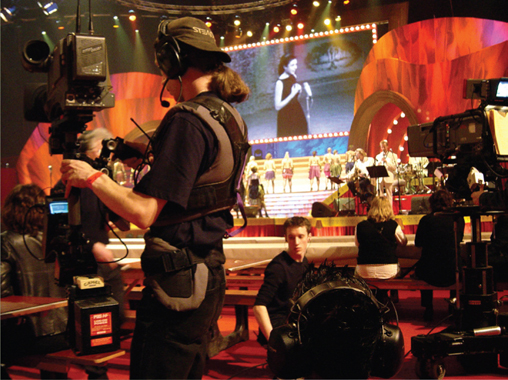
Multi-camera and live productions
When you get hired, you need to ask which camera and lens you’ll be using. Is it high def or standard def? Is it multi-cam or camcorder? Fiber optic or triax? Does the HD camera have a built-in down-converter to give you an NTSC or PAL image? What lens will you be using? You need to determine the proper gear pitch for follow focus as well as the proper cable for your J-7.
Many of your questions can only be answered by other technical personnel. Get the phone number of the company supplying the truck and the contact personnel. They are your key for prepping. The sooner you make contact with the truck’s video engineer, the happier everyone will be.
Triax and coax adaptors
If the job is triax, talk to the video engineer. Tell him you are using triax to coax adapters. The engineer knows you are going to say this, and he will give you one of three responses:
• “I’ve already set the base station up for your adapter, you’ll be fine.” You say, “Thank you.”
• Or, “Okay, I will go short the base station so you can use your adapter.” Again, you say, “Thank you.”
• Or he says, “You are not allowed to use that setup. You have to use our triaxial cable. A triaxial to coaxial cable is a safety hazard and not permitted.” You say, “Thank you, I understand.” Then you go off and cry.
Sound issues: If they want you to have a microphone on your camera, go meet the sound person and have him mount it up for you before you build the rig. A gentle reminder: the mic on your camera is live when your camera is on. Everything you say is heard in the truck. Everything. Fair warning.
In some houses, that last answer is not negotiable. This is usually the result of a cracked cable or a person being shocked while using the adapter method. It is not inherently dangerous, but if the cable is torn, you can get a jolt.
Plug in the coax cable coming off the camera so the truck can be sure everything is working and adjust your camera properly. Be sure your monitor and focus gear and other accessories are on and running during these tests — you don’t want any surprises just as you are about to go live.
Tally light
Take the remote tally light and carefully tape the sensor over the rear tally. This way the talent can still see the tally on the camera’s front. Run the LED down to your monitor. Many newer sleds have a tally system built in, with internal electronics, wires down the post, and LEDs built into the monitors.
The camera tally light is your only safe way to know if you are “on-air” or not — unless you use a Program monitor on your rig. If you cannot rig up a second Program monitor, the tally light is your god.
It’s one thing to hear in your double-muffs, “Dissolve Camera 4 to Camera 11.” It’s another to see your tally light fade in or out as the dissolve occurs. You are clean and off-air only when your tally is totally off.
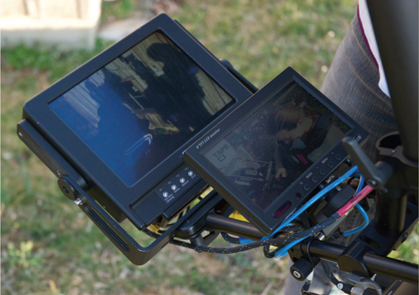
Program monitor
It’s a good idea to rig a small LCD monitor as a Program monitor so you can see what is on-air. Attach it close to your Steadicam monitor. Some sleds have two monitor mounts built in, so they can be easily configured to hold a small program monitor. You can avoid showing up in other cameras’ shots and create images that cut easily into the fabric of the show.
Your assistant
Bring a focus puller. Some producers try to get away without assistants or insist that they always use Steadicam operators who are one-man bands. Don’t go for that. Your focus puller may also act as your first cable puller, but be sure that does not interfere with the primary job — keeping everything in focus and assisting you. Usually you will be assigned one or more video utility folks to pull your cable.
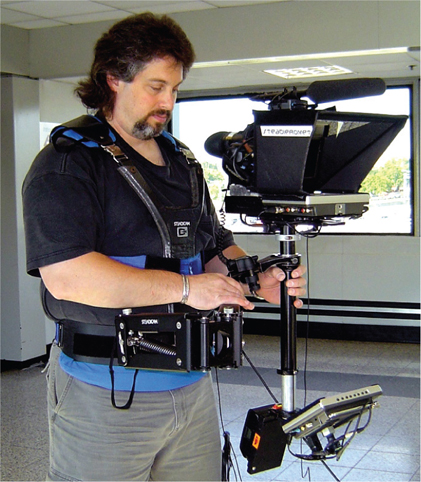
Teleprompters
Many prompters are not made to fly on a Steadicam. They’re either lightweight with flimsy bracketry or heavy and unwieldy. Almost all require an additional cable and consume some power.
The front-to-back profile of your camera might increase 12 inches or more, and you will need longer dovetail plates to balance the camera.
Panasonic DVX-100A, SteadiPrompt, two wireless mic receivers, stick mic for reference audio just in case. The thin wire is the prompter feed.
Getting the shots
On live multi-camera Steadicam jobs, it’s all about fitting in and still shining when your tally light is on.
Most of the time, we are given small bits of time to show flawless work that cuts well. Framing, the pacing of tilts, pans, and zooms to match the mood of the scene, and a willingness to at least try to be invisible all contribute to a good live TV experience.
Flipping to low mode generally takes too much time for a live show, but see if they can flip your image “live” in the truck. A simple move of the gimbal and you’ve got a new range of lens heights to give them for that one weird song about a Chihuahua.
Regarding zooming:I came of age in the movie business operating Steadicam with prime lenses. On One From the Heart, we tried the Cooke 20–60 mm on my BL III, but it had to be zoomed by my assistant, and the combination was mortally heavy. Finally, on La Traviata, Live from Paris, 2000 (also for Vittorio Storaro), I got control over my own lens and could move and zoom at will.
In a tiny apartment on Île St. Louis, I had the joy of shooting the entire finale of Act IV in a single, 23 minute, uncut one-take Steadicam shot, as Violetta approached her death at the window on the stroke of Notre Dame’s midnight bell. I made hundreds of undetectable adjustments in focal length, watching the images unfold on my monitor, as moment, place, lens angle, and motion came together time and again.
Though perhaps routine for our brothers and sisters who operate pedestal-mounted TV cameras, the understated art of the move/zoom combination was a revelation to me. (As I write this, eerily, up on my satellite radio come Violetta and Alfredo and their last fateful waltz before that window overlooking Notre Dame.)
—Garrett Brown, from part two of his moving camera article for Zerb
Zoom control
You can zoom using a J-7 or similar device with the proper cable to the lens. If you are not familiar with using a J-7 zoom control, get one early on and play around with it.
The camera lens has a zoom-speed adjustment. Unless you are shooting for MTV, production won’t want snap zooms. The control is typically just behind the handgrip on the right side of the lens. Back it all the way down to slow.
Production will be happy to see zooms and moves that solve problems. If you are throwing a shadow on talent or so close that you risk being in another camera’s shot, back off a bit and zoom in to compensate. A lot of stuff looks nicer or tells the story better at a longer focal length, so why cut yourself off at the knees? There was a time when some Steadicam operators would say, “I don’t zoom; you hired a Steadicam. Zoom from tripods, not with me.” That was a highly nonproductive approach.
A wonderful little bonus: The J-7 has two on/off switches. One is a small button, and one is a rocker switch. The camera record button can be made to trigger your headset mike. When you hit the record button on your J-7, you can talk to the truck without taking your hands off the rig and disturbing your shot.
Interacting with the audience
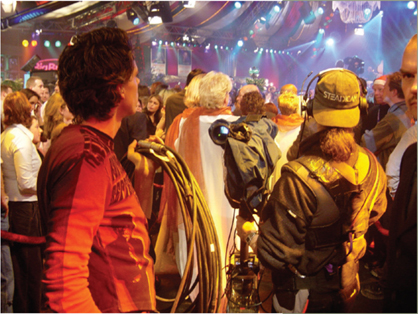
If they plant you in the audience, anything can happen. We’ve had disgruntled audience members try to trip us as we went past, steal our batteries, yank on the cable, etc. We’re blocking their view, and they’re not pleased. If they’re drunk, there’s not much you can do about it. You can try to be nice, smile as you fly past, duck out of the way to change batteries, and try to keep your cable pullers out of their view. Shooting the audience around you usually gets them into the proper spirit of the show, but not always. Keep a watchful eye on the big, mean-looking guy with the “Tripods Rule” tattoo.
I haven’t a thing to wear
If you are shooting inside or at night, you might be expected to wear “show blacks” so you are clothed in black from head to toe. Ask if you and your focus puller are required to wear show blacks. Some shows don’t care. Other shows are rather sticky about it, and will make your life miserable if you show up unprepared.
The SteadiTux had its debut on the 2001 Hispanic Heritage Awards at the Kennedy Center in Washington, DC. Snappy.
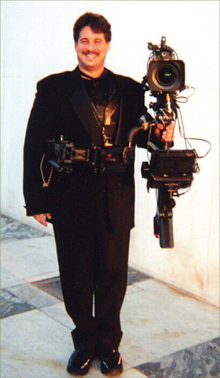
Customized tuxedo with slit lined with satin, allowing the arm to pass through from the vest underneath.
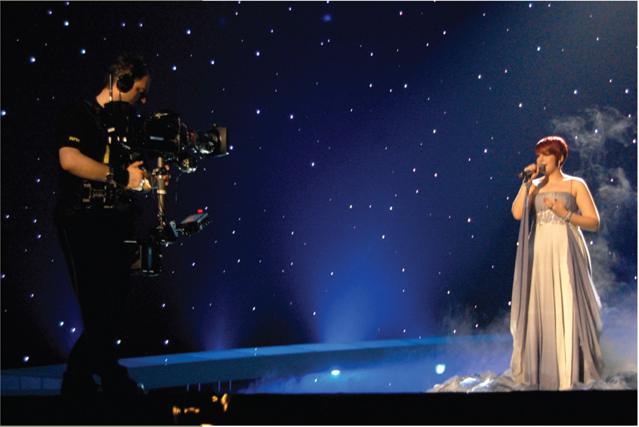
Steadicam® and live TV
by Lars Riis
Sometimes the hardest part of being a Steadicam operator is figuring out how to be useful to production
As Steadicam became more common in movies, more and more TV producers saw a new way to spice up their studio productions. Often they had little idea how to put it to good use — they just loved what they saw in the movies. It was up to the operators to educate producers to a level where they would understand what to expect and what to ask for in Steadicam work.
Some advantages of having the Steadicam in the studio were not even visible in the program, like the fact that a Steadicam operator can disappear from the floor in a second or two, leaving the floor open for other cameras. As a result, decorations could be built for 350° shooting, leaving a small area for cameras on pedestals, cranes, etc.
In Denmark in the mid-nineties, State of the Nation ran for 4 years as a weekly 45 minute live-broadcast talk show, debating politics, moral issues, current events, etc. The set was an arena with four seat rows in a 300° circle. We would have around 120 spectators and up to 10 miked guests. In the center of the circle was an oval table where the host would stand at one end and four head guests stood, two on each side of him. The idea was to have a very intense debate, at the table or between table and audience, where many opinions could be tested.
This program demanded a highly flexible production setup, to allow for maximum freedom in the debate. We ended up shooting on just four cameras — one on a crane mainly used for intro/outro shots and for reactions from the audience, another camera on a pedestal, holding a safe shot of the entire table, and two Steadicams, one on each half of the arena.
It was decided that we would stay on the Steadicam if at all possible. Rather than cut to crane or pedestal, we wanted to have the geography sorted out as well as give the viewers a sense of being in the middle of things. This meant that we as operators were all over the place, with just two rules: we only leave our half of the floor when we know we can return safely, and we sort out axis problems between us.
Axis problems rarely occur in a traditional studio design, but when the studio is 300° or more, you ask for trouble. These axis problems were easily solved with two Steadicams — we could always establish a new axis that only the Steadicams could work on and return when we felt the discussion was taking another direction — tally lit or not. Of course we had to listen very intensely to the debate and try to figure out who would react to this and that statement — add them to the frame if possible or offer the producer a reaction shot. To add to the confusion the host might leave the table and sit with guests in the audience, thereby forcing us to have both rigs on the same side of the studio for a while. We had talked these situations through so the host knew which camera to address. This understanding gave him total freedom to take off when he wanted — we knew we could cover his actions, and the producer knew to give us the ball.
Most producers have worked with cameras on pedestals that don’t change places — they often number them from left to right in the studio, but with the Steadicam the producer had little idea where we were and was therefore unable to guide us. Often the best he could do was to suggest where the whole thing would go from here and leave the puzzle solving to us.
It takes a while before a producer is comfortable with that arrangement, and it takes a lot of talking to make sure that you know exactly what he wants. After all, it is still his show, and you as operator can easily take it in the wrong direction. On the other hand, when all pieces fall into place the producer is all smiles, because he gets things that he was unable to plan for or even describe. When we get everything right we are able to tell the story in a much more elegant way than that of just cutting to reaction and back.
Getting it right of course involves focus pulling. In order to minimize the number of people on the floor, we had our pullers placed behind the pedestal camera with a monitor each, so they could see our framing, and decide who to keep in focus. We worked a lot on the long end of the lenses, so we could have interesting focus changes from audience to guest. Communication with the pullers was, as between operators, a matter of eyebrows and sign language.
It helped me a lot to have the same puller all the time, so I could feel confident that we understood each other without words. Without that understanding we could not push the envelope for what was possible in that studio. I have the deepest respect for those guys. It is not fair to place them far away with a monitor and only sometimes a good angle toward us — and still demand not just focus but even mind-reading skills.
Lars Riis
Of course we were relying on luck sometimes, but the more you prepare the luckier you get.
Heavy cameras
The upside of using a massive camera is primarily the stability it provides — it’s simply steadier. Big cameras, either film or video, also usually deliver great image quality. Some heavy cameras are also long cameras with lots of extra pan inertia (video cameras with long zoom lenses are one example), while others are quite compact, like the Arri 535B. The added stability and great image quality is one reason that many Steadicam operators like heavy cameras.
Using a heavy camera also presents serious problems and limitations. The most obvious one is operator fatigue; it simply takes more effort to lug around a heavier rig. In short shots (under a minute or two), this is usually not a problem, but for longer shots, going up hills or stairs, etc., it can really become a major issue. Running with a heavy camera is inherently more dangerous; you just don’t have the power to overcome the camera’s momentum if things go wrong.
Balancing and viewing the monitor become more difficult and less flexible with heavy cameras. The big camera mass must be counterbalanced by the same relatively light monitor and battery. Typically this requires a long sled with a low monitor, with the sorts of problems described above. Often additional weights are added to the bottom of the sled to keep the sled length reasonable, but this adds to the fatigue factor. True long mode with the lens far from the gimbal is impossible; a 3 foot superpost extension may only move the lens an inch or two. Depressing.
Heavy cameras are often physically wider than light cameras. I remember the joy of working with Panavison’s Genesis camera (in the all in one mode, recorder attached) when it first came out. It was heavy, and the power requirements (14 amps @ 14 volts when recording) meant that I had to power it externally. The power cable was big and thick and stuck out the right side of the camera, so I was forced to hold the rig farther from my body than normal, making for more effort and reducing the sweet spot. Finesse disappeared, and everything got worse during long, lactic acid masters, which we did for hours and hours and hours.
By day two I was determined to make everything work better. I bent the power cable — over the AC’s and DIT’s protests; I simply had to get the camera closer to me. If that meant I broke a few wires and the camera wouldn’t run at the lowest voltage, well, too bad. I also rerouted the audio and video cables on the camera, and I found a slightly different than normal Missionary position that got the camera another inch closer in. I also gave up on seeing the whole monitor most of the time; it was really low to counterbalance the camera and often blocked by the arm. Learn the shot and look only at the edges. It’s got to fly well, or it isn’t Steadicam the way I like it.
Forced march conditioning made operating the Genesis quite tolerable. After 2 weeks it was like picking up an Aaton 35III, although several long shots with 2 minute lock offs on the end still made my legs scream for oxygen.
Heavy cameras also put extra stress on the gear. Remember, in this context, a light camera for a big rig may be a heavy camera for a lighter rig. Vests distort under the increased loads, requiring more work from the operator to fly the Steadicam. The socket blocks, the arm, and the precision gimbal are subjected to excessive loads. Be careful of violent moves.
Unintended consequences
It happens. An inventor (okay, Garrett) does one good deed and oops! — something else is affected.
Older arms lifted a relatively small range of payloads, and the sleds were designed with the proper counterweights (battery, monitor, post length, etc.) for a good overall feel and monitor position with the anticipated weights of cameras.
With the new arms, the camera weight can easily be anything from a pound or two to 50 pounds. That’s great, except there are unintended consequences for the sled’s length and the monitor’s position.
So as an operator, you now have one more thing to worry about — adapting your sled to a much wider range of camera weights than, well, we used to have to worry about. This requires a bit of extra effort and some accessories or even a modification to your sled. Sleds like the Pilot™ were designed from the get-go for a wide range of camera weights. Some sleds ignore the issue, and some have enough versatility built in for many — but not all — cameras that can be carried by the arm.
With heavier cameras, you will need to add more weight to the base to keep the sled length relatively short. Your other option, dropping the monitor, may drop it too low for good viewing. Weights that dovetail or bolt to the base are convenient, but adding weight to the battery mount might give you more inertia as well.
For really light cameras, you will need to have a lighter base and/or to raise the monitor and/or to shorten the sled in order to have the gimbal relatively near the camera mounting stage. A weight plate between the camera mounting dovetail and the camera is simple, but a cage, with its c.g. 3–4 inches above the camera dovetail, is more efficient and gets the gimbal higher with less weight.
In some sleds, the monitor and battery positions are fixed to each other or have little vertical displacement, so your nondestructive options are to add some weight to the base (for heavy cameras) or to the stage (with very light cameras). A more expensive solution is to make an accessory that mounts the monitor separate from the battery/base, keeping it high for heavy cameras and/or keeping the gimbal high with very light rigs.
How much weight to add depends on which cameras you carry and how “perfect” you want the sled length and monitor viewing to be versus how much weight you want to carry and how much time and energy and cash you want to spend on accessories and modifications. Some sleds are simply too light for heavy cameras and other sleds are just too heavy for really light cameras, even though the arms can carry the weight.
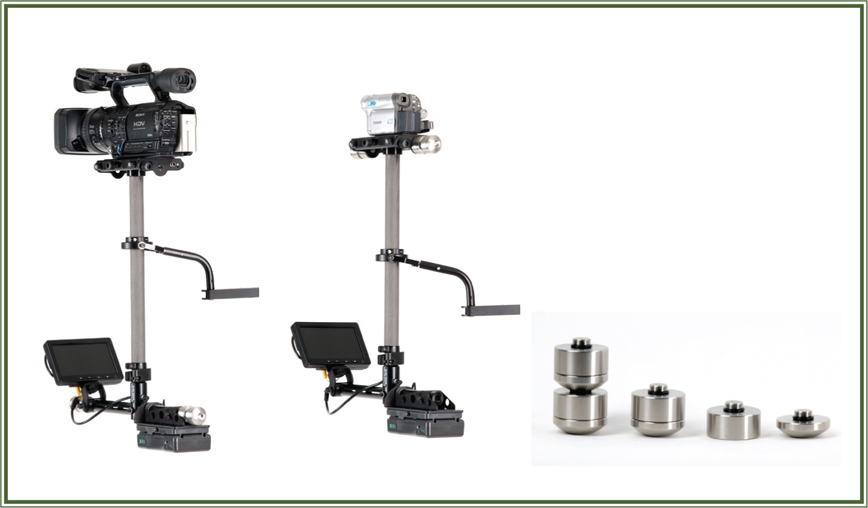
With the Pilot, a heavy camera (far left) requires added weight at the base of the sled, and weights added to the top of the sled help to balance a light camera (left).
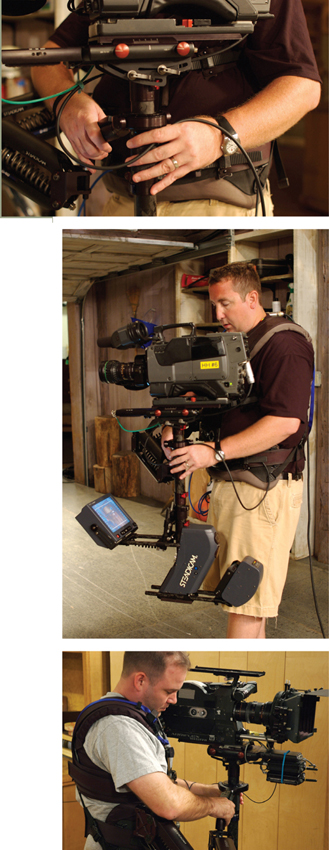
Lightweight rigs
Tuesday, September 11, 1973. On that fateful day, Garrett Brown makes the deal with Ed DiGiulio in the offices of Cinema Products, and our industry is born. Just as Garrett was walking out the door, Ed quietly asked him, “Will it work with 35 mm cameras?” Garrett assured Ed that it could. (Why say otherwise, even if…, but that’s another story.) The original Steadicams — the CP-35, the Universal Models I, II, and III — were designed around relatively heavy cameras, whether 35 mm, 16 mm, or the video cameras of the day.
But by 1986 it was clear — at least in Garrett’s mind — that the physical principles that made a big Steadicam work might also fly with the newly available camcorders. The trick, of course, was to create a structure that could still be carried and aimed by human hands (the operators did not shrink!) and to properly price the little Steadicam to mate with ever smaller, less expensive, and higher quality cameras.
Garrett quickly realized (a wonderful trait of his!) that a Steadicam for camcorders would be hampered by a traditional post and gimbal design — the torque on the wrist would be excessive. The operator needed to get the lifting hand more underneath the camera’s c.g., and this required a very clever “inter-gimbaled” handle. Garrett also realized that, for the operating hand, the control surface — the equivalent of the large diameter centerpost in the big rigs — had to be very small. Big rig handgrips and pressures would simply overwhelm the tiny Steadicam and its limited inertia.
It still had to have balanced masses below the camera. It also had to fold, have a tiny monitor, include batteries, etc. These and other design needs were finally accomplished (how easy past challenges seem to us now!), and in 1989, the Steadicam JR™ was born. Not Junior, but JR, I’ve been reminded many times.
Once a new operator understood and followed the instructions and advice in the manual, training tape, and the “cookbook” of camera settings, the JR could dolly like its larger, vest-and-arm-carried cousins, and more: it boomed from near the floor to high overhead. It was unobtrusive, light, and small. It was inexpensive. You could pass it through windows — even hand it off to another operator! You could shoot in a car or on a bicycle with ease, but of course it was still a Steadicam and required the same skills and practice and balance and patience as the big rigs, and as cameras and techniques continued to evolve, a few of the JR’s “warts” became evident. A new design was called for.
In fact, several new designs!
Merlin in low mode: The JR and now the Merlin can get quite low, just by placing the rig close to the floor. For shots where you need to get the lens really close to the surface along the floor or just skimming over things, it’s possible to fly the “metal gimbaled” Merlin in low mode (really in upside down mode). Just clip a small weight to the camera handle above the gimbal (bag clip?) and you are good to go. Don’t try this with the JR or plastic gimbals because the gimbal might pull apart. Test first over a bed or with an assistant with his hands underneath the camera, and practice the new handgrips!
Steadicam® light
by Garrett Brown
I recently taught Anthony Dod Mantle (the great Danish handheld cameraman) to operate the lightweight Steadicam Flyer, so he could shoot an intensely personal docudrama in South Africa. Afterward, he sent me this email:
“You are right in predicting that however bad or good I have been at it, I will never be the same again. I discovered a kind of personal knife through butter Zen. I cannot explain it to you really. Something in all honesty has happened inside of me. It was alive before but it is certainly even more alive now than ever. With Steadicam you have helped me to get closer to finding the magic space in between the planned and the unexpected, and you have licensed me to travel through it at leisure and in pleasure in a way I have never been able to imagine before.”
As my friend discovered, today’s new lightweight Steadicams can be just as powerful and eloquent as their big brothers and even more agile, and Steadicam (at any size) is distinctly not handheld.
Beginning with the Steadicam Flyer (for 6–19 lb cameras), and continuing with the remarkably successful Pilot (4–10 lb) and Merlin (1/2–5 lb), we now have capable, affordable light rigs that can be employed for hours at a time!
The physics scales down, the burden is negligible, the joys of operating are increased, and the ease of ambulating and reaching high and low (and even kneeling) will make you smile — not to mention your ability to carry on tirelessly as wider events unfold.
The only caveat with these light rigs is that extra care may be needed to isolate that “safe zone” and let the gifts of Steadicam prevail — exposing the center of gravity to your touch, separating large lifting forces from small aiming forces, taming spatial and angular aberrations, and getting your head out of the viewfinder and back in the real world — so you can move with vision and purpose.
Flyer, Pilot, and Merlin
The Flyer was designed for a new generation of DVC camcorders and made its debut in 2000, along with modern batteries and brighter LCD monitors that could finally be seen outdoors. The result exceeded expectations. Once the requisite light touch was mastered, it proved to be a precise and satisfying rig and an invaluable tool for workshops, where it eases the newbie’s burden and discourages “deathgrip” operating. The Flyer’s simple, folding construction greatly facilitates run and gun shooting and empowers long sequences, and its formed-metal arm was a real breakthrough, with inexpensive construction, increased boom range, and true isoelastic performance. This arm led me to the “Geo” arms for the big Steadicams and to the lighter, high performance arms for the Pilot and the Merlin.
The ultralight Pilot came along several years later and included another useful advance. The key for lightweight rigs is inertial resistance to unwanted moves. Rotational inertia increases by the square of the distance between the masses, so the Pilot includes a kit of screwon stainless steel Merlin weights that can be attached at the far extremities of its bottom post. As with Antlers on the big rigs, the result is a startling increase in inertia (with just a pound or so of added mass!) and the feel of a much heavier rig. The same weights also screw in fore and aft to the top stage, so even an absurdly light camera can be bulked up to keep the gimbal position where needed. And the Pilot goes easily into dynamic balance by shifting its novel bottom post forward or back as needed. I think the Pilot/Merlin arm is one of my best, with a 28 inch lifting range and great performance, hand-dialed for cameras from 3 to 10 lbs, and we worked hard to make its slim, comfortable vest fit the broadest range of human sizes ever — even under a tux!
The Steadicam Merlin is my dream machine. I was proud of the JR, and used it to good effect, but the original aluminum prototype was always my favorite — the lightest, stiffest JR on earth — and when the plastic molds started wearing out and modern cameras began to include monitors, I persuaded Tiffen that it was time to upgrade the handheld Steadicam and turn it into the precision instrument it deserved to be.
Long story short: in 2004, we got the go-ahead and Tony Sacksteder and I patented its “folding-caliper hinge” and designed streamlined stainless steel weights and a micrometer stage with removable dovetail and a six ball bearing version of our patented “inter-gimbaled” handle.
Its name was inspired by the swift little merlin hawk, but the marketing guys like its magical connotations, and I can’t disagree. Like all Steadicams, the Merlin is not just stable, it’s a more elegant way to hold a camera than handheld — not only for big moves and running around, but also for subtle, intimate lens trajectories that cannot be achieved any other way. Your camera can be as still as if on a tripod and suddenly your entire range of movement — your full arm reach, bending to the floor and lifting overhead plus the freedom to walk and run — can be in play without the handheld wobbles and shakes.
Professional Steadicam operators often use Merlins on big films to pre-visualize the work (why hump the big guy around to work out that long shot?) and it’s great for prosumers — great for parties, home movies, weddings, and impromptu videos where it can fly more easily and less obtrusively than anything else.
The Merlin and the Pilot also shine for documentaries, news segments, commercials, and low budget movies, and they’re great for remote locations, tiny crews, and anywhere that dollies and track, or even a full-sized Steadicam with all the trimmings, might simply overwhelm the subject.
Operating light Steadicams
Operating technique is the same as with the big guys, except the lighter the rig, the lighter the touch! Practicing at full telephoto is the fastest way to learn just how little contact is needed. Otherwise, same posture, same “Sistine Chapel, God-to-Adam” loose, relaxed handgrip, same concentrated rigor! In all cases, good operating and bad operating require about the same amount of effort, so it’s all about the choices we make for moving and aiming the lens. Do they match the director’s vision? Do we have the will and the skill to execute them take after take?
Garrett Brown
Lightweight Steadicam®
tips and tricks
Comprehensive information about the Flyer, Pilot, and Merlin can be found in their respective DVDs and manuals, but here are some useful techniques and hints for light rigs:
Quick adjusting lift for light arms:
• Load the arm with the rig as if you were about to shoot. The arm will likely be either too weak or too strong, or the two arm segments may lift unequally.
• Just as one does for the G-arms, lift or press down the camera and sled until the forearm (nearest to the camera) is held just above level, and then adjust the lift knob up or down as needed until the forearm stays level by itself.
• Lift or press down the camera and sled until the upper arm section is just above level. Adjust its lift up or down as needed. You’ll have to continuously raise or lower the position of the rig to keep the upper arm in place as you adjust it. Stop when both segments float level.
• Raise and lower the entire arm (with payload) to see if the segments track roughly together. Adjust lift on whichever one is out of sync — up or down as needed.
• Decide whether you want the arm level (recommended), or flying slightly low or high to help get a specific shot, and adjust both lift knobs appropriately.
Quick-adjusting arm-to-body trim
• Begin with the upper rod end dialed out 1/4′′ inch (6 mm) and the lower rod end fully dialed in (see photo at right).
• Mount the rig to the arm and hold it closely in front of you.
• Walk comfortably in place looking straight ahead. Freeze.
• Analyze what direction, if any, the rig is trying to fall away.
• Hold the rig back close to you and correct in/out by releasing the appropriate rocker screw and tightening the other.
• Side to side trim is probably okay, but if not, forcibly lift the rig to unload the arm and dial the upper rod end slightly in or out. If the rod end is too hard to adjust while wearing the rig, dock it and adjust the unloaded rod end.
• Repeat if necessary. It doesn’t have to be exact. When the arm sort of stays put laterally, you should sort of be comfortable!
Lightweight sled trim and inertia
For light rigs with extendable posts, keep the sled as short and the monitor and battery as extended as you can while remaining in dynamic balance. This helps keep your shooting more precise. Why? Because it reduces tilt inertia and increases pan inertia to be more similar, so combination moves are easier to manage. Also, it keeps the gimbal up higher on the post, which we like.
Tuck the monitor and battery together only if you need to reduce inertia for faster pans. Lengthen the sled only if you need to get the lens higher or if you can’t balance a heavy camera. It’s better to add a small weight down below and keep the rig shorter.
Here are some examples:
The Flyer LE monitor and battery do not extend, but you can keep the monitor mount low and the monitor and battery out to the front and rear to keep the rig as inert as possible. A simple modification to extend the monitor and battery would help get more pan inertia, as well as adding small weights like one can with the Pilot.
The Pilot becomes more inert and feels more like a larger rig as you add weights fore and aft (which also helps shorten the centerpost to keep its pan and tilt inertia balanced). Note that some ace event videographers strip off the monitor and battery and keep only the weights to make the rig back-packable for run and gun shooting — and to stop people from walking along to see the image. One such hotshot refers to the onboard monitor as a “bug light”!
The Merlin (except with the heaviest cameras) performs best with a mid-weight added to the finish weight in the forward position. To rebalance you’ll need to raise the lower spar a bit — which will also enlarge the fore and aft separation of the weights — thus greatly increasing the inertial feel with just a quarter-pound (113 gr) of added weight.
Drop times for lightweight Steadicams
Lighter or shorter rigs typically have shorter drop times. Super-post big rigs require longer drop times — as much as 10 seconds for radical tilts. Normal big rig drop times are a matter of taste, but are usually between 2.5 and 4 seconds.
Minimum Flyer, Pilot, and Merlin drop times are, respectively 2 seconds, 1.5 seconds, and 1 second. Of course, some operators are happy with less bottom heaviness and longer drop times. Experiment and see what level of bottom-heaviness suits your style of operating. If your Merlin has the six ball bearing gimbal, you can slightly lengthen the drop time.
Dynamic balance
Find your camera’s fore and aft c.g. by mounting all accessories, opening the monitor door, and rolling it on a pencil until it balances. Mark the fore and aft and side to side c.g.’s.
For lightweight rigs like the Flyer and Pilot, mount the camera on the sled and set the camera c.g. about 1/2 inch (12 mm) aft of the middle of the center post.
Simple, jointed rigs like the Flyer LE may then be usably put in dynamic balance by swinging down the battery until the rig is in static balance.
Dock the gimbal on the balancing pin and give it a spin. It should be close. If not, move the camera slightly fore and aft and retry balancing with the battery. Afterward, adjust the gimbal height for desired bottom-heaviness.
The Pilot, with its unique weight augmentation scheme, is more easily dealt with. Place the camera c.g. 1/2 inch (12 mm) aft of the post, loosen the bottom post clamp, and slide it fore and aft until statically balanced. Test spin and touch it up as needed.
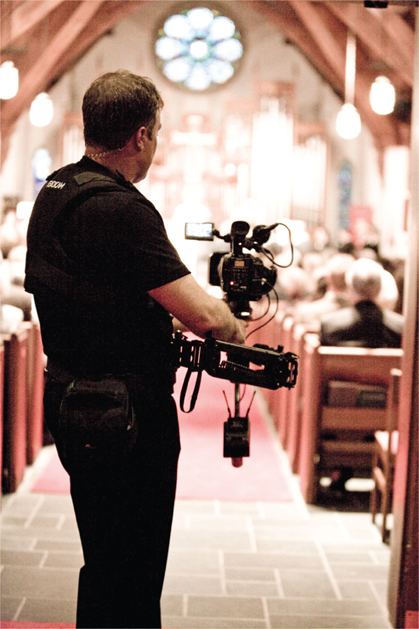
The Merlin is the only handheld that adjusts for dynamic balance. It has two independent ways to trim fore and aft: by sliding the dovetail plate and by adjusting the blue fore and aft trim roller. If panning the Merlin seems to precess (depart from level), you can fix it by trial and error: sliding the dovetail forward or back 1/4 inch (6 mm) at a time and re-trimming. If it seems to improve, “repeat until sweet.” Keep in mind that the Merlin can’t make endless 360° pans, so it’s hard to be sure that it’s out of dynamic balance. However, if your pans are flat time after time, you’re probably there.
Using the “Magic Formula” — available on www.merlincookbook.com — can probably get you closer than the trial and error method. Follow the online instructions, make the required vertical c.g. measurement, plug in the numbers, and voilà — all available solutions, all correct combinations of weights, arc size, trim marks — appear on the right. It even has separate sections for additional front weights for maximizing inertia.
Body position
Optimal body position is the same for all Steadicams, including the Merlin. Keep your hips angled about 30° to your path and keep the rig close (very close!). Don’t have bulging pockets or wear loose clothing that can flap against the rig.
This angled body position is great practice for the bigger rigs, where it seriously reduces fatigue — even for the Flyer at the end of a long day. Work close with the Pilot and Merlin and you’ll more easily view the camera’s monitor and see onscreen data and peak focus. Although it’s easier with a lightweight rig to find yourself operating with the rig in front of you in no man’s land, it’s more fatiguing and less precise. Get into the good old Missionary or Don Juan, even with the lightest of rigs.
How much the hips are turned in depends on the operator, and on the speed of the move.
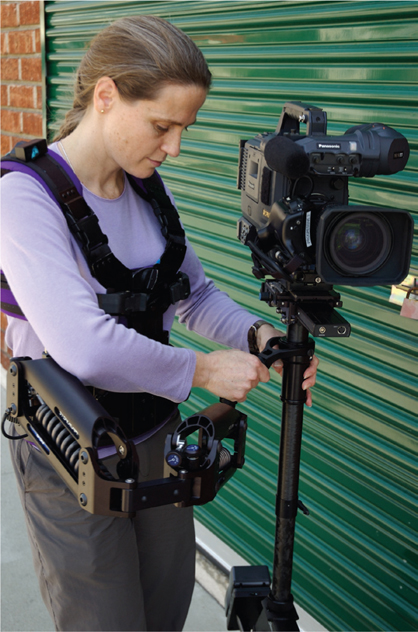
Dollying
Think of your arm hand (or your support hand for Merlin) as if it were pushing a big heavy dolly in 3D space. If you can dedicate a spare mental circuit to flying it along the desired path, it will move smoothly and stay on the rails. Starts and stops (often the most riveting moments) will be more powerful, and the emotional feel of your moves will match your intent.

Otherwise, if your attention is elsewhere, the camera will just randomly weave through space, betraying every footstep!
The big secret: lighten your grip. Then practice at full telephoto — it’s the fastest way to learn just how much or little control is needed.
Wind
Lightweight Steadicam operators make do without some of the amenities their colleagues on big features enjoy — multiple assistants, fancy trailers, massage therapists, personal chefs, etc., — but what they miss most are grips standing by with wind deflecting flags. Wind is the nemesis of good operating and about all we can say to you low budget types is select shooting positions that place your body between the wind and the camera. Fortunately, smaller Steadicams have less surface area and are easier to shield. If the wind is coming straight at the lens, stand behind the camera and at least block the straight-through path. The Merlin is the smallest and easiest to shield.
Merlin — special considerations
Hand positions
Two-handed operating, as shown in the DVD and manual, requires one of your hands (your choice) to support; the other to guide. Keep your thumb behind the guide ring, your first and second fingertips in front on the “tongue.” The second finger is used to help control tilt. This style is the easiest to learn and is generally the most precise. Master this first, before you move on to the one-handed technique.
Two-handed operating: the thumb and two fingertips of the guide hand lightly touch the guide ring and the tongue of the gimbal to aim the camera.
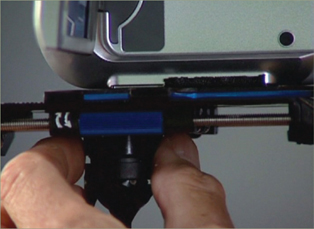
Operating one-handed has more panache, allows spectacular reaching and hi-lo booms, and keeps the other hand free for opening doors, nudging the clueless out of the way, and hanging onto cars, trains, and bicycles. But it’s definitely trickier than two-handed operating (and good stage trim is essential).
Look closely at the photo (left): you’ll see that the one hand grip actually comes in from the side, with the Merlin handle kicked out toward your hand. Place your forefinger crossways so that the second section (not the first section that includes the nail) lightly contacts the front of the tongue. The thumb will then naturally touch the guide ring on its back surface. Use those two opposing surfaces to start/stop and pan/tilt (it works for tilting because its gripping effect is square with the lens axis of the camera.
One-handed operating: the forefinger wraps farther around the gimbal.
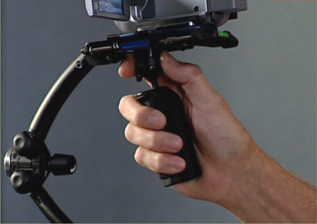
When panning, give it a start, letting your whole hand turn a bit, so your fingers are never strained or contorted, let it slide through your fingers until it’s almost pointing where you want, and put on the brakes! (If necessary, open and close your finger and thumb, one little rotational impulse after, to keep panning). This will take some practice, but it’s worth it. If your grip feels uncomfortable, it is incorrect.
Fatigue
Merlin is by far the lightest hand-held stabilizer, but your full payload will be about 1.4 times the weight of your camera. If the camera is a 5 pounder (2.27 kg), you’ll need your entire set of weights and the total will top 7 lbs (3.2 kg) and require some work to lug around. For heavy payloads, we suggest, at least initially, that you design shorter sequences! A 2 minute take is longer than most theatrical Steadicam shots.
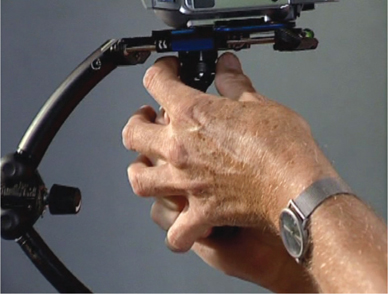
Simply using your Merlin will strengthen the relevant muscles and within days your endurance will greatly increase. In the meantime, you can get some lifting help from the unused fingers of your guide hand. Hook that little finger in between the fingers of your support hand a bit like a golf grip, as shown in the photo, and the load can be shared by both hands.
If your camera is even heavier (up to 7 pounds) and long continuous shots are in your future, have a look at the Merlin arm and vest. You can shoot forever without fatigue and if you suddenly need ultra-low or ultra-high lens heights or feel like handing the Merlin through a window, you can fly the rig right off of the arm and keep shooting.
Electronic image stabilization
EIS is designed to counteract small angular vibrations. With EIS, if you begin to walk or attempt to move your camcorder with your arms, those unwanted deviations become too gross for EIS to counteract.
In two important ways, Merlin beats the drawers off electronic image stabilizing features. The first way is that Steadicam (and Merlin in particular) provide superior stability against both small and large angular influences by shifting the c.g. from inside the camera body to the center of a gimbal that isolates the entire structure. In addition, Merlin turns your camcorder into a poised, balanced, inert object that can be oriented — panned and tilted — with gentle finger pressure and moved energetically without angular influence. In other words, it’s an inherently more elegant, smooth, and precise way to hold a camera than handheld. At full telephoto, EIS may provide some additional vibration damping, but be aware that some versions introduce hesitations at the beginning of your moves if the circuitry decides it’s a bump. Leave EIS turned off unless working at the long end of the zoom.
Accessories
We suggest mounting camera accessories such as wireless microphone receivers below the gimbal. Jim Farrell has invented an ingenious aftermarket accessory shelf (see websites on page 448) that replaces one of the supplied counterweights and has mounting locations for more weights as required.
Controlling zoom and start/stop is exponentially more important for lightweight Steadicams, particularly in impromptu or documentary situations. You are less likely to have an assistant with a fancy lens control, and more likely to “Roll!” because something great just started happening — but touching the camera makes your first few frames useless. Various stand-alone zoom/focus/pause controls are available. Panasonic made (and discontinued) a particularly small and light LANC control that could be secured to the Merlin handle.
Once you master one-handed operation, you can also control these other functions with your free hand by means of the infrared remotes supplied with many camcorders. We’ve even been known to run a short length of plastic fiber optic cable from under the stage up to the camera’s infrared sensor, so your support hand can operate the supplied remote.
Practice
The line dances and other exercises are just as useful for operating a lightweight rig as a full sized rig. You can also reproduce defined shots like the ones that have impressed you in the movies. Do them repeatedly, and critically play back every take and compare it with the originals. Micro-rehearse the difficult parts and build up your endurance and your ability to concentrate. Cycle your attention between the framing, the bubble (is it level?), the cues, the feel, the action, the hazards, the framing, the bubble, etc., and make sure you see the crucial element at the essential moment. For example, as you take the first step up a staircase, boom down slightly to delay any change in the framing. This will buy you an instant to look away from the screen and scout that dangerous first step! Success as an operator requires a great deal of that kind of lore, hard won by operators for 30 years, and most easily acquired by studying this book and/or attending a Steadicam workshop — even if your only Steadicam is a Merlin.
Garrett’s big night out
In 40 years of shooting, one of my best assignments was a revelatory all-nighter in September 1989, with that original Merlin-like JR prototype.
The Philadelphia Committee for the Homeless called to ask if I would shoot a documentary for high school kids with misguided notions about the “freedom” of the streets, to show them the true grim picture.
PCH had helped one highly intelligent, formerly homeless kid named Michael Bowden pull himself up and get back into society and he volunteered to moderate the video and be our guide to that strange lost world. But he had been a denizen for 18 months and knew that if we arrived with a full crew, Steadicam, assistants, lights, etc., our would-be subjects would melt away into the darkness.
I showed Michael my brand-new little prototype and its small Obie light, and he conceded that just the two of us might be less intimidating. It was decided that he would wear a little wireless mike and I would be his sidekick as we penetrated the fluorescent labyrinth of Philly’s subway concourses, observing our camera-shy subjects from the hip.
We began in twilight and worked until dawn. A PCH van carrying spare S-VHS-C tapes and batteries shadowed us on the streets up above, on call with a pair of klutzy portable cell phones.
I shot 25 cassettes, used 48 alkaline batteries, and dollied for miles with my tiny Steadicam and my backpack full of spares. We passed like ghosts through the churches and agencies that pass out used clothing; we snaked along the dinner line to the steam tables at St. John’s Hospice, dogged PCH volunteers bringing people to shelters, and trolled for breakfast at the dumpster out behind McDonald’s. And everywhere we listened to our less fortunate brothers and sisters: the sad, the angry, the hopeless, and the hopeful; the druggies and tired old boozers; the appallingly dirty and the impossibly clean men, women, and even children who slept fitfully in subway alcoves and under cardboard huts on the grand veranda of the Federal Reserve Bank and were roused up at dawn to trudge the long miles between meals and handouts and odd jobs.
Michael was brilliant. He still knew many of these wandering souls and they signed our releases, told their tales, and were somehow not scared off by my large self or my camcorder, hiding behind its dim little basher light.
My brother Shel was the principal editor at NFL Films and he donated his services to cut the video, and it premiered with a lot of hoopla and played for years at a number of the area high schools.
I am still proud of that little production and the influence it had, and I recently dug out a copy and realized what a unique chance it provided to learn what that little invention could accomplish. My camera was almost supernaturally invisible and inconsequential to our subjects, yet the moves have a breathtakingly grave and weighty presence. It remains to this day one of my most satisfying and memorable shoots.
Garrett shoots the food line at St. Johns soup kitchen. Note how accessorized the prototype is with an Obie, transmitter, extra batteries, etc., and how much it resembles the Merlin.
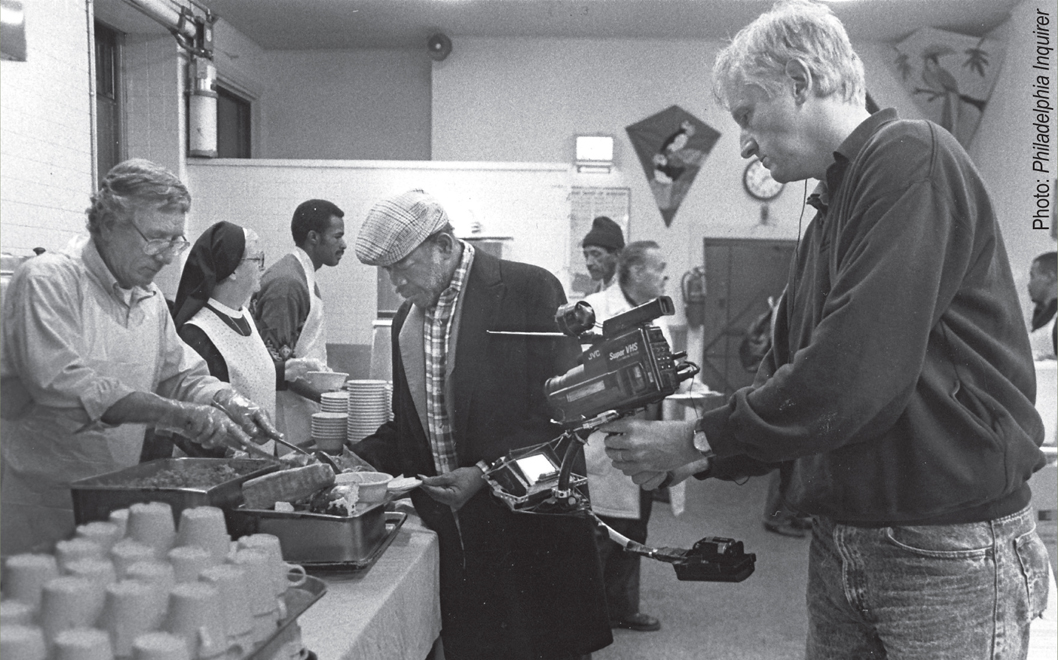
Those interested in the aesthetic aspects of the moving camera might also enjoy a pair of relevant articles online at: www.garrettcam.com/.zerb.php; and a contemporary newspaper article about Garrett’s 1989 homeless video at: www.garrettcam.com.
DSLR cameras and Steadicam®
Small DSLR cameras have been the rage for several years now. Often the unmodified still camera will be plopped on top of a small Steadicam like the Pilot. The camera will fly well, but focusing is limited (turn off auto focus except for practicing!).
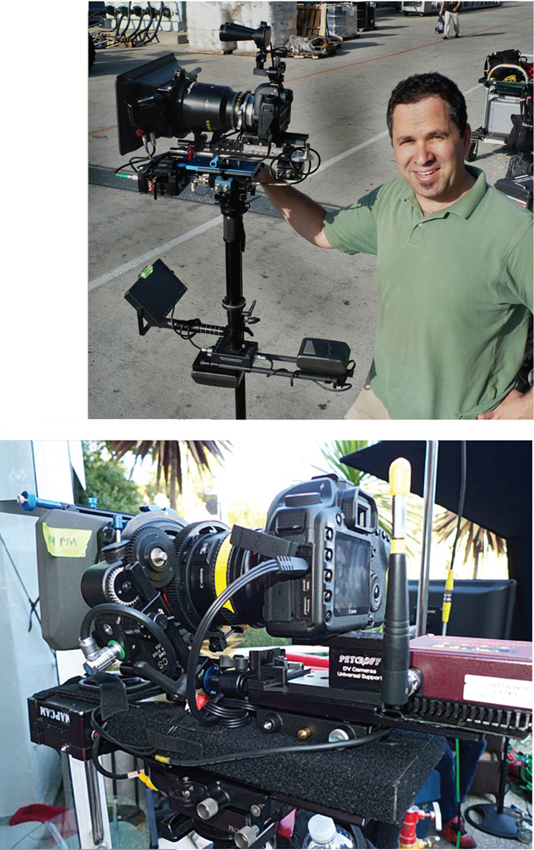
More professional applications will have accessories such as focus, iris, and zoom motors, matteboxes, etc. – just as one would have with typical film or video cameras. In the photo (left), Charles Papert’s camera is mated to a Panavison Primo lens. The rig also supports an ultrasonic rangefinder. In the lower photograph, a large weight plate has been added under the camera. This adds stability and gets the gimbal higher for more normal lens heights and a typical Steadicam “feel” to the rig.
One big annoyance of the original DSLR’s right out of the box: the lack focus rings and stops on the lenses – hence the Panavision lens set up. In the lower photo, the Canon lens has a focus gear attached to the lens and a special riser and rod system for the motor.
As we are going to press, new cameras like the Canon C300 are making their way into the market. They are a hybrid of the technologies that made the Canon D5’s and 7’s so popular, and the “old school” needs of film and video cameras and lenses. We suspect these new cameras will eliminate the headaches of the DSLR’s, but there will always be challenges.