
11. Build a Web Reference Library: Never Lose an Online Article
In This Chapter
![]() Using the Pocket service and app
Using the Pocket service and app
![]() Using PrintFriendly.com and PrintWhatYouLike.com
Using PrintFriendly.com and PrintWhatYouLike.com
![]() Using an Evernote Smart Notebook
Using an Evernote Smart Notebook
My Ultimate iPad is my go-to source for accessing just about everything—books, magazines, movies, TV shows, work files, home files, email, personal calendar, Dropbox, book proposals for my publishers (and book chapters for my editors), photos, medical records, and so much more. Over the last few years, I’ve developed good habits that allow me to make certain that almost anything I might need to access can be reached through my iPad. It has required a bit of planning—creating storage solutions, logical folder structures to hold files, and using OCR as much as possible so that I can quickly search through everything are just a few of the tasks I’ve had to perform to turn my iPad into what is basically a digital 24/7 personal assistant.
Think about that for a moment—with a living, breathing 24/7 personal assistant (that you trusted, of course), you would expect this person to help you maintain your schedule, check your messages, and perform dozens, maybe even hundreds, of additional tasks. A perfect assistant would help you to never forget an appointment, to never lose an important document, and to never be unprepared.
If you’re lucky enough to have a personal assistant, he or she is probably the one who should be reading this book. But if you don’t have one (like me), you should always be on the lookout for ways to push your Ultimate iPad to take on more responsibilities.
In this chapter, I want to share with you three work- and home-related obstacles I’ve encountered since becoming an iPad user and show you how I’ve used the iPad to get me around them. You’re also going to learn about the three tools I’ve found that have helped me to solve these problems—as a matter of fact, I’ve already used two of them this morning prior to writing this chapter!
Don’t Bookmark It, Pocket It
I do a lot of research online for my book projects as well as my hobbies. I frequently discover online articles or even entire websites that I really need to examine in detail, but I might not have the time at the moment. My typical solution was to just bookmark the website or article and come back to it when I had the time. Sometimes I would discover an online item that I knew wasn’t relevant right at the moment, but might be useful months or even a year or more down the road—and I’d bookmark it. I use subfolders to organize my bookmarks, but many users don’t; this just creates one long list of bookmarks (sometimes listed in alphabetical order and other times in the order you’ve added them) that eventually turns into the needle-in-a-haystack conundrum.
Organizing my bookmarks into folders (three examples are Woodworking, Kids Activities, and Book Projects) has helped me to navigate the thousands of URLs I’ve collected over the years. Yes, I said thousands. I don’t like to delete bookmarks, okay? (I found a nice tutorial on creating dovetail joints with my band saw years ago that I swear I’ll one day use.) I even created a READ LATER folder to hold bookmarks for me to, well...read later. It works, but I often forget it’s tucked into the Bookmarks folder. What I really want is something that’s easy to use, fun to use, and that I won’t forget about.
Note
Some of you may be saying, “But Apple’s Safari web browser has that really cool Reading List feature for saving websites to read later.” Yes, and it works well...if you use the Safari app. I frequently use a Windows computer and a Chrome or Firefox browser to save bookmarks. I also don’t use the Safari browser app on my iPad, favoring another one called Perfect Browser. But if you only use Safari, the Reading List feature is one way to always keep URLs organized for later viewing.
I’ve already told you I found a solution, so I won’t keep you in suspense any longer. It’s called Pocket, and it’s a really great way to flag websites for later viewing, but it also has a matching (and free) app for the iPad that presents your saved websites in an eye-catching format that might remind you of a catalog or a magazine. Even better—it doesn’t even require an Internet connection to access your saved websites. Let me show you how Pocket works.
![]() Save websites from a web browser.
Save websites from a web browser.
![]() Save websites from a supported app (on iPhone or iPad).
Save websites from a supported app (on iPhone or iPad).
![]() Email a link to a special Pocket email address.
Email a link to a special Pocket email address.
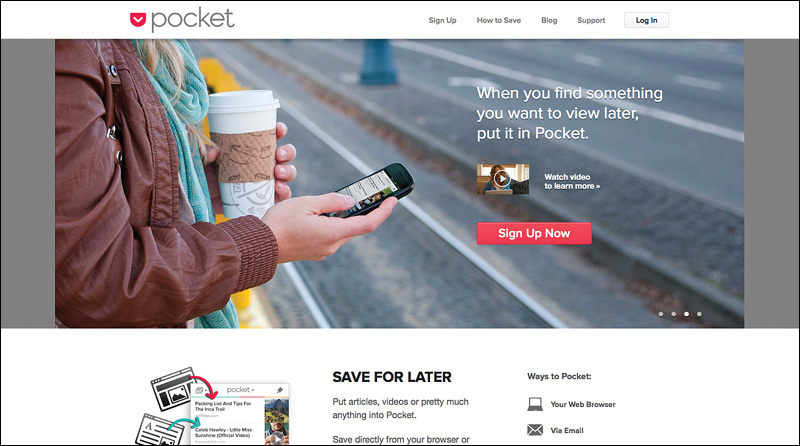
Before you can begin using Pocket, however, you need to create a free account. So open a web browser, point it www.getpocket.com, shown in Figure 11.1, and click the Sign Up Now button.
After creating an account, a new window appears to immediately let you install the free Pocket app for your iPad.
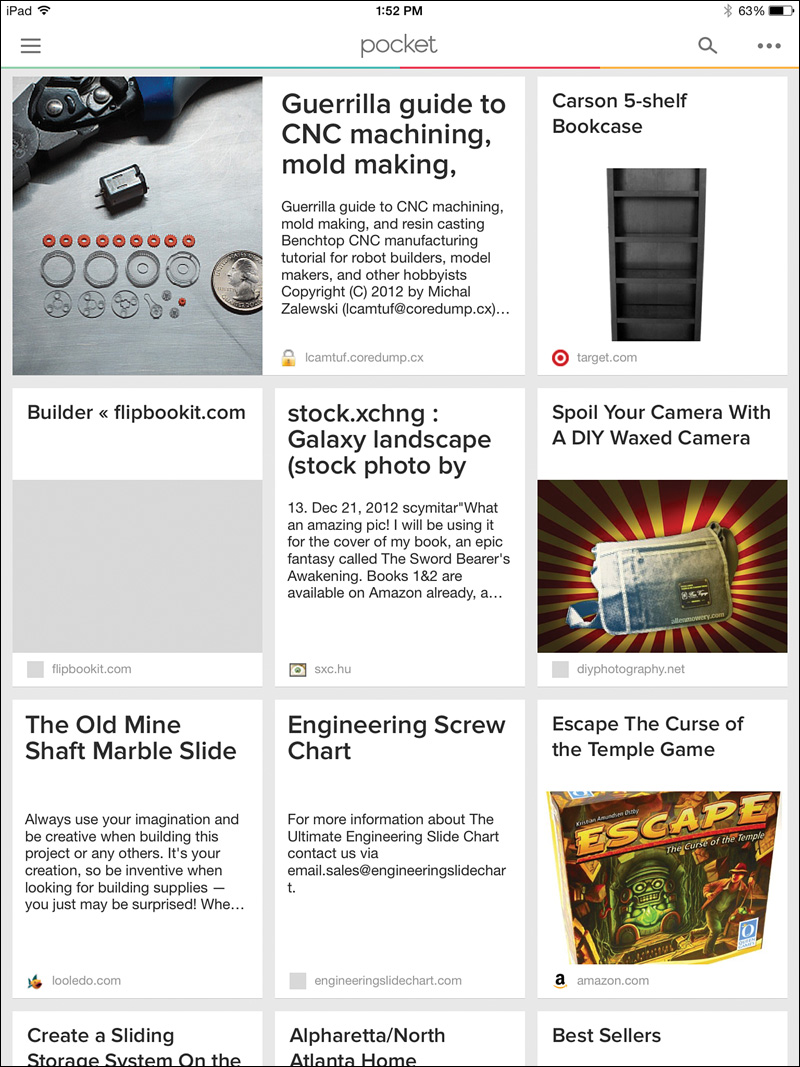
Before you learn how to use Pocket, take a look at Figure 11.2 and you’ll see an example of how the Pocket app looks when running on the iPad. (It will work in Portrait or Landscape mode.) This is the Pocket home page.
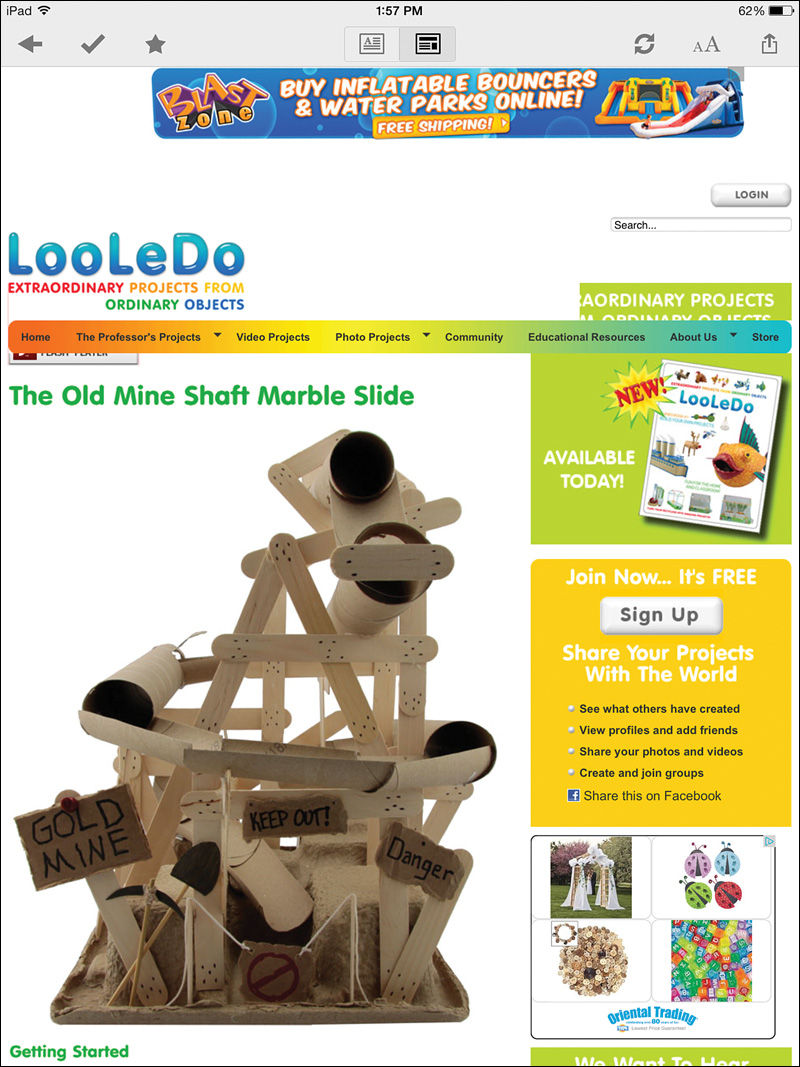
Websites that you save with Pocket will appear with a text header along with some text or image or both. Beneath the text or image will be a shorter version of the URL so you’ll know which website it belongs to. To open and read a saved item, just tap it. The item will open full screen and present you with a few options at the top, as shown in Figure 11.3.
Running from left to right across the top of the screen are the Pocket controls:
![]() Back—Takes you back to the previous page. The Pocket app works like a web browser, so tapping a link in the currently viewed page will open that page just as if you were using a browser. The Back button can take you all the way back to the original page—one more tap will return you to the Pocket home page.
Back—Takes you back to the previous page. The Pocket app works like a web browser, so tapping a link in the currently viewed page will open that page just as if you were using a browser. The Back button can take you all the way back to the original page—one more tap will return you to the Pocket home page.
![]() Read/Archive—Tap the checkmark if you wish to acknowledge that you’ve read a website or article. The item will be removed from the Pocket home page, so only tap this button if you’re ready to dismiss a saved URL and have it removed from the home page. (You can always view archived URLs by tapping the Main Menu button on Pocket’s home page and tapping the Archive option.)
Read/Archive—Tap the checkmark if you wish to acknowledge that you’ve read a website or article. The item will be removed from the Pocket home page, so only tap this button if you’re ready to dismiss a saved URL and have it removed from the home page. (You can always view archived URLs by tapping the Main Menu button on Pocket’s home page and tapping the Archive option.)
![]() Star—Tapping this button while a saved page is opened will place a star icon in the lower-right corner of the item’s box on the Pocket home page.
Star—Tapping this button while a saved page is opened will place a star icon in the lower-right corner of the item’s box on the Pocket home page.
![]() Article View—Tapping the Article View button will attempt to remove banner ads, menus, and other items, leaving behind only the page’s main content. It doesn’t always work 100%, but when it does it will remove a large amount of distraction and leave behind only the text and imagery that make up the main focus of the page.
Article View—Tapping the Article View button will attempt to remove banner ads, menus, and other items, leaving behind only the page’s main content. It doesn’t always work 100%, but when it does it will remove a large amount of distraction and leave behind only the text and imagery that make up the main focus of the page.
![]() Web View—Tapping the Web View button provides you with exactly what you would see if browsing the page on a standard web browser. Buttons, menus, advertisements, and other features will all appear.
Web View—Tapping the Web View button provides you with exactly what you would see if browsing the page on a standard web browser. Buttons, menus, advertisements, and other features will all appear.
![]() Refresh—If the page contains content that is constantly being updated (such as a weather website that updates the temperature every 30 seconds), the Refresh button can reload the page to display the updated material.
Refresh—If the page contains content that is constantly being updated (such as a weather website that updates the temperature every 30 seconds), the Refresh button can reload the page to display the updated material.
![]() Adjust Display—This button will allow you to increase or decrease the brightness of the screen. If you are using the Content Only button, additional controls will let you increase or decrease the size of the text displayed as well as switch between serif and sans-serif font.
Adjust Display—This button will allow you to increase or decrease the brightness of the screen. If you are using the Content Only button, additional controls will let you increase or decrease the size of the text displayed as well as switch between serif and sans-serif font.
![]() Share—The Share button will allow you to send the URL and page’s content to a variety of final destinations that include box.com, Twitter, Facebook, Evernote, Safari, and more.
Share—The Share button will allow you to send the URL and page’s content to a variety of final destinations that include box.com, Twitter, Facebook, Evernote, Safari, and more.
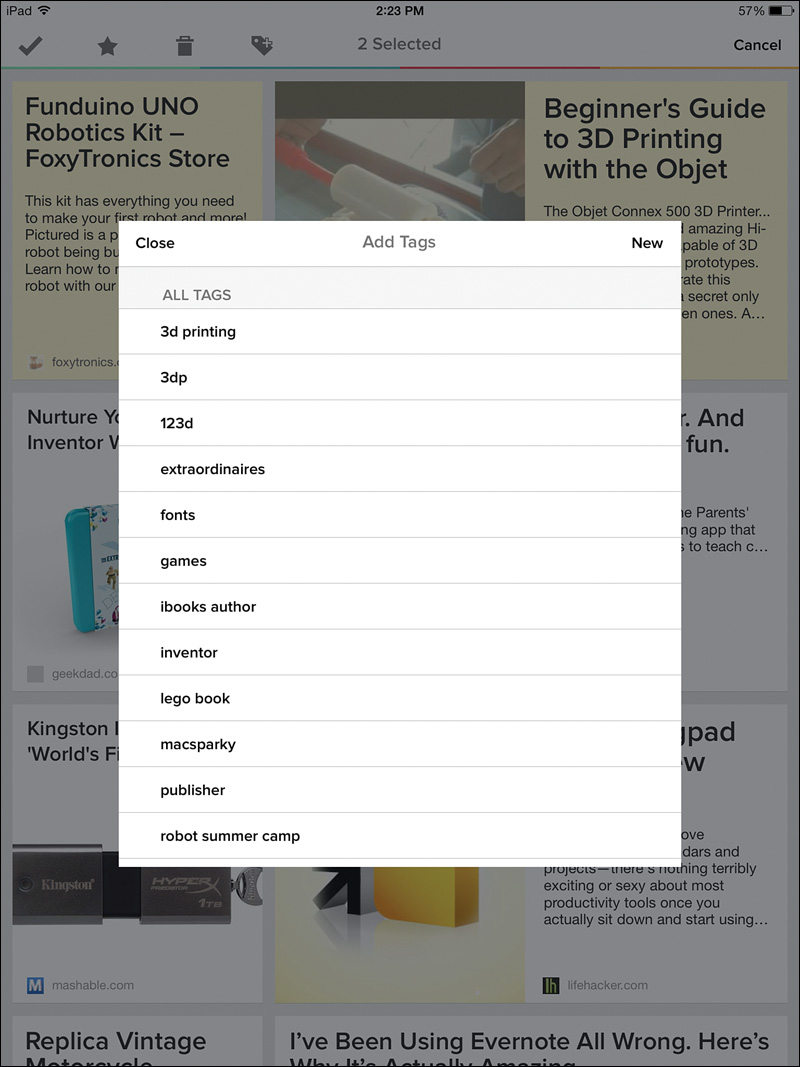
While on the Pocket home page, you can press and hold an item for two seconds until it’s highlighted yellow. Tap and hold additional items and those will be selected (in yellow) as well; you can also tap a highlighted item to turn off the highlight if necessary. Figure 11.4 shows two items selected.
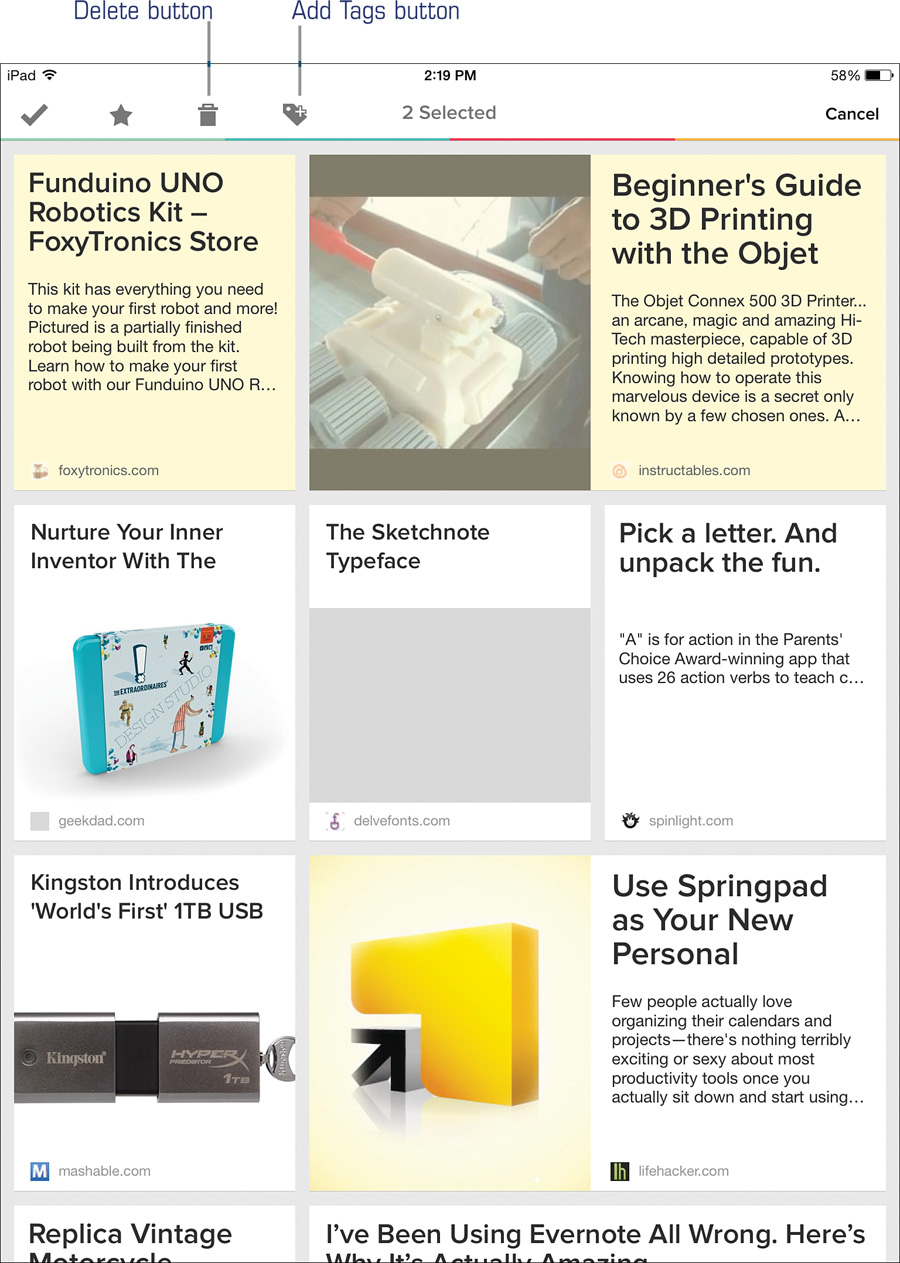
By selecting multiple items at once, you enter the Bulk Edit stage and can perform tasks such as tapping the Checkmark icon to archive all selected items at once or “Star” all selected items. (You can also enter the Bulk Edit stage by tapping the three dots in the upper-right corner of the screen; a menu appears that offers Bulk Edit plus the ability to switch between List View and Tile View.)
Two additional icons shown in Figure 11.4 are the Delete button (to delete all selected items; this cannot be undone) and the Add Tags button, which will let you select from keywords found on the pages. Click the New button shown in Figure 11.5 to create a new keyword.
When in Tile View, you can also swipe from left to right on a saved webpage to gain access to some of the same buttons found elsewhere in Pocket—Tag, Star, Read/Archive, Trash, and Share.
Using tags/keywords, you can use the Search button on the Pocket home page to filter the saved pages to display only those that match up to your keyword(s). It’s a very helpful feature when your Pocket collection of saved websites and articles starts to reach into the hundreds or even thousands—you won’t have to scroll down the page looking for that one particular URL you can’t remember but you know you flagged it with the “painting” tag.
Tip
Pocket works almost the same on a computer’s web browser in terms of opening/viewing, sorting, and adding tags, but each individual URL block has its own Checkmark (to archive), Star, Delete, and Share buttons.
But how do you get a web page or article into Pocket in the first place? There are a lot of ways to do this, so let’s start with adding a URL while you’re using your iPad. There are two methods to do this.
Copy a URL to the Clipboard
If you have an open browser on your iPad, simply tap the URL (typically at the top of the browser screen) to select it, and then tap again and choose the Copy option. (To copy a link embedded in a webpage, simply tap and hold the link—a window appears with a Copy option.)
Next, open up the Pocket app and look near the bottom right of the screen. You’ll see an Add button like the one in Figure 11.6—tap the button if you wish to add the URL to Pocket+.

Email the URL to Pocket
If you have an email account created and set up to use the Mail app on your iPad, all you have to do is paste the URL into the body of an email. In the TO: field, enter [email protected]. No subject is required. This method does require that the email address you are using match the address you provided when creating your Pocket account.
Note
There is a third option to add URLs to Pocket from your iPad, but it uses the Safari Mobile app and requires a few steps to install. Tap the Pocket Main Menu button, then Help, and then the How to Save option. Scroll down and read the “From Mobile Safari” section to enable this feature.
I’m not always finding URLs that I wish to save while using my iPad; most often, I’m on a computer. For computer web browsers, there are two methods that Pocket offers to users to save URLs; you can use one or both, it doesn’t matter because they are identical in how they work. Point your web browser to https://getpocket.com/add/, shown in Figure 11.7, and follow the instructions, which will vary depending on your choice of web browser.
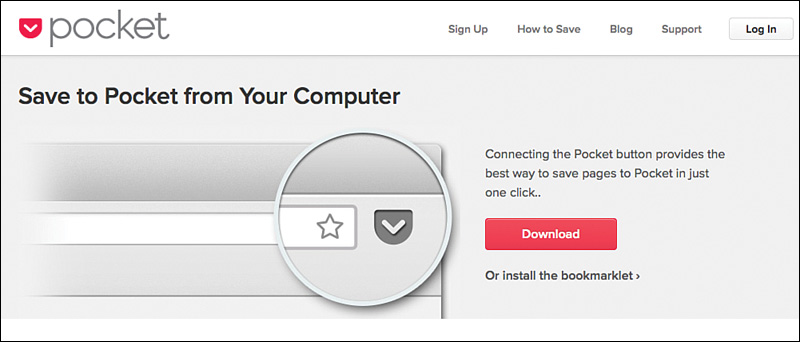
If you choose to add the bookmarklet, a button similar to the one shown in Figure 11.8 will appear on the toolbar running along the top edge of the screen when your browser is open.
When viewing a page in the browser window that you wish to save, click the bookmarklet button and you’ll see a pop-up window appear like the one in Figure 11.9—add tags if you like by clicking the Add Tags button.

If you clicked the Download button and installed the add-on tool, you’ll see a button similar to the one shown in Figure 11.10 that appears somewhere near the top of your browser. (In Safari, it’s placed near the left side of the screen, but in Chrome it appears to the far right.)
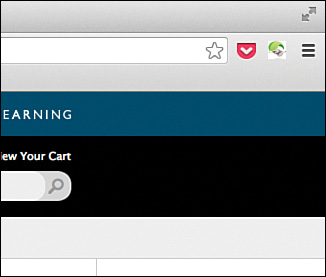
The Add-On button works identically to the bookmarklet, briefly flashing a message on the screen to let you know the URL is saved and offering you an “Add Tags” button, if you like, as shown previously in Figure 11.9.
In addition to these methods, there are over 300 apps that can save directly to Pocket—consult the Help option in the iPad app for more details.
Tip
Keep in mind that any app that has a Share button that lists the Mail app among the options can be used to send a link to Pocket. Just use the [email protected] address and you’re in business.
With Pocket running on your computer’s web browser and the Pocket app on your iPad, you’ll have an eye-catching and easy-to-use tool for catching up on your saved web pages and online articles. The Pocket app will synch with your Pocket account every time it is opened, downloading the latest saved URLs so you can even read them when an Internet connection isn’t available.
Videos will not be available when offline, only text and images. Also, you can use your iPad’s Settings app to configure whether the Pocket app can download using cellular data or Wi-Fi only.
After you review a website or read an article of interest, a single tap will easily archive a saved item, removing it from your reading list. But what if you’d like to save the content of a web page or article long term? With the Internet, you honestly never know if something will be there next year (or even next week).
You’ve probably experienced the dreaded 404 Error (missing web page) you get when you click a bookmark or return to a web page you haven’t visited in some time. Websites change, information gets moved around or archived, and entire articles can disappear without any notice. Fortunately, there are tools available for ensuring any information you find online can be kept long term.
Convert Online Content to PDF
Have you ever found an interesting recipe on the Internet that you bookmarked so you could return later to try it out? If not a recipe, maybe a set of instructions for a hobby you enjoy? Or maybe just an inspirational article that you wanted to keep for a child or to maybe use later in a speech? How would you feel if you returned later—a week, a month, maybe even a year or more—only to find that web page gone?
It’s happened to me more than I care to remember, and a few years back I made it a point to find a solution that would guarantee I never lost something from a website again.
Pocket is useful for storing web content that you wish to revisit later, but even Pocket can’t guarantee your saved websites will be there for you when you choose to read them; even its ability to store offline content is susceptible because Pocket synchronizes occasionally with all the URLs it saves. If a page is deleted or replaced with other information, it will eventually be deleted or replaced within Pocket.
So, what’s the solution? The answer is to grab the content immediately and save it offline so that you know you’ll be able to access for years. And there are a couple of ways to do this.
Most web browsers have the ability to save an entire web page for offline viewing, but this solution typically saves all the text and images and links and such as an HTML file in a folder on your computer. When you double-click the HTML file, it opens up in your browser and presents it just as if you were looking at the original web page. It’s not a bad solution, but it’s not perfect.
Software exists that can download an entire website’s content in one swoop. The problem here is that you often get a lot of stuff you don’t need. And although some applications will let you specify a single page to grab, you also tend to get all the extras with it—banners, advertisements, menus, logos, sidebars, and other items. Again, it’s a solution, but not perfect.
What’s the perfect solution, then? A perfect solution would be one that would allow you to select exactly what content you wish to pull from a website and nothing more. Furthermore, that solution would allow you to save it in a format that you could read on your Ultimate iPad whenever you need it.
In the section, you’ll find examples of two services that are as close to the perfect solution for saving online content to an offline format. Use one or both of these, and you’ll never have to worry about losing access to something important you found online again.
PrintFriendly.com
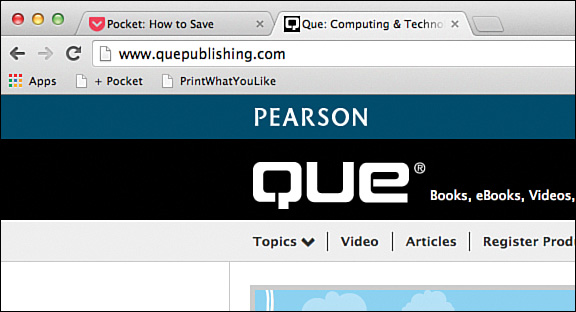
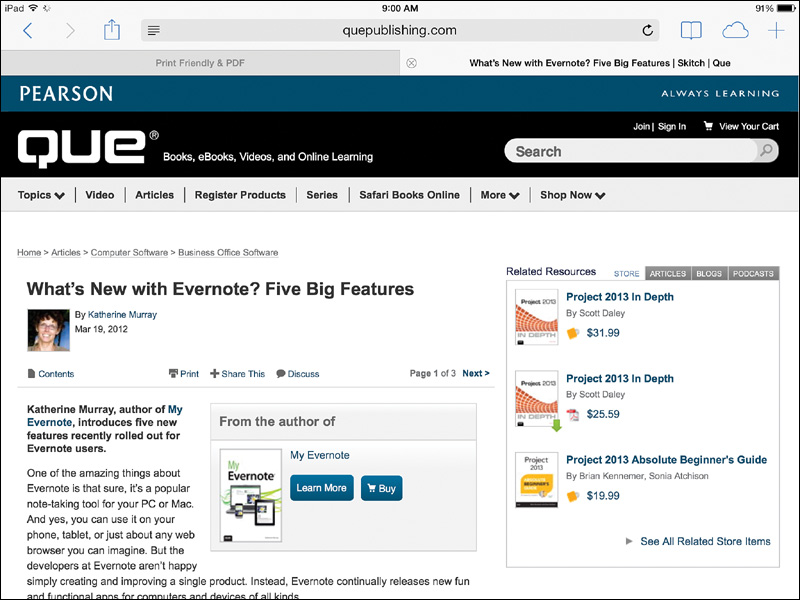
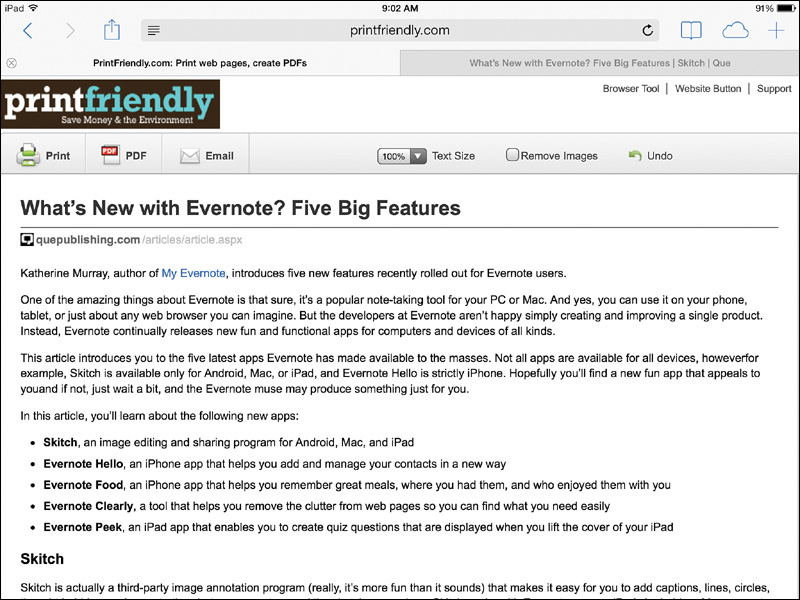
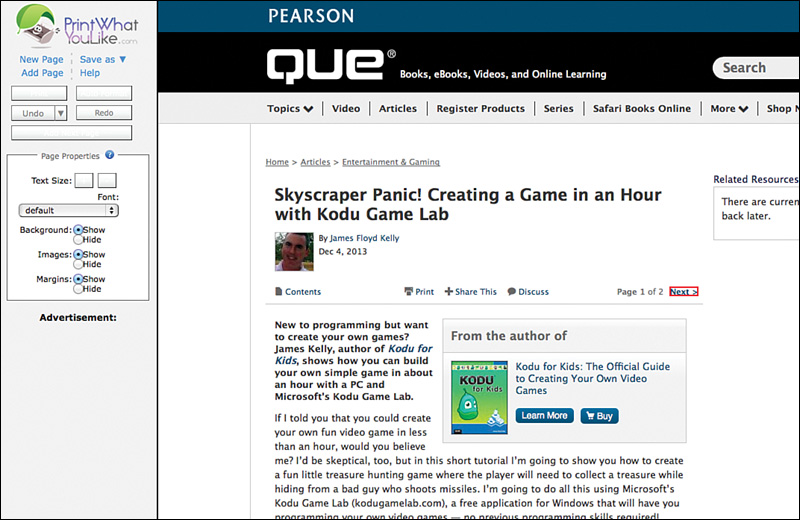
I browse websites from both my computer and my iPad (and sometimes my phone). Let’s say for the moment that I’m browsing on my iPad and I find an interesting article that I really want to keep but I’m not wanting to keep all the other “stuff” floating around the article. Figure 11.11 shows an article I wish to keep, but notice that it’s surrounded by a logo and menus at the top and a sidebar with some books for sale on the right.
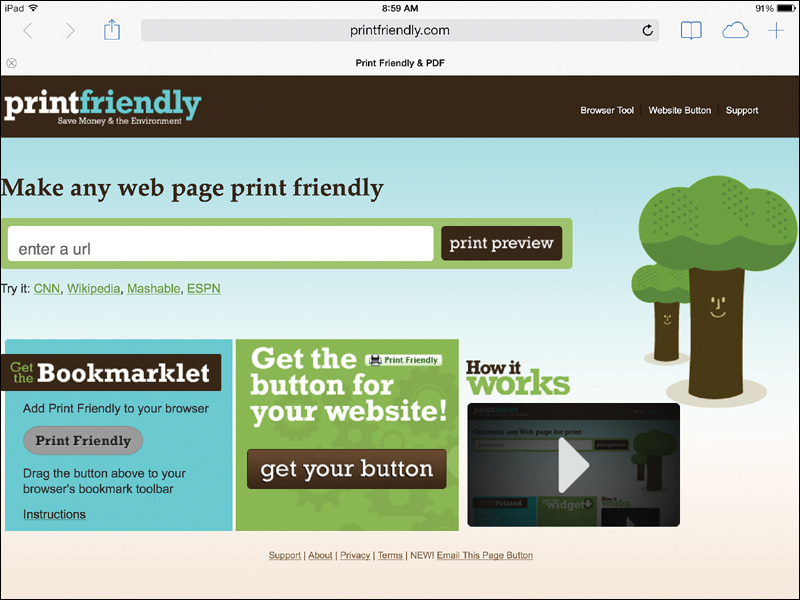
When I find an article like this (or some other online content) that I wish to keep, I immediately open up a new browser tab and point it to www.printfriendly.com, shown in Figure 11.12.
Note
If you’re not certain how to open a new tab in your iPad’s web browser, consult the Help documentation. If you have a browser that doesn’t support tabs, just copy the web page’s URL to the Clipboard and then browse to www.printfriendly.com. For this chapter, I’ll be using Safari for all examples.
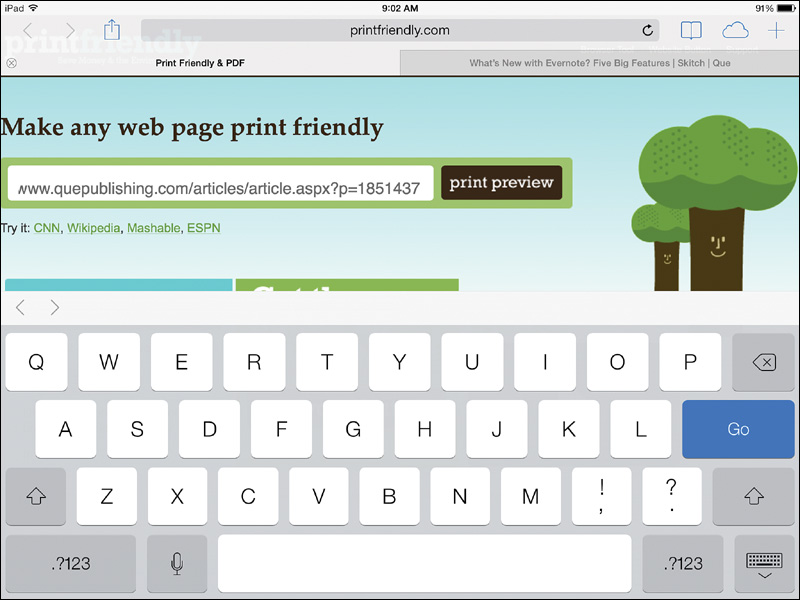
PrintFriendly.com has this nice, big box where you can copy and paste the URL, as I’ve done in Figure 11.13.
Tip
To copy an entire URL in Safari, all you have to do is tap inside the URL box near the top. The entire URL will be highlighted (selected). Simply tap once more on the selected URL and tap Copy to put the URL in the Clipboard. Then return to PrintFriendly.com and tap in the box labeled “enter a url” and select Paste.
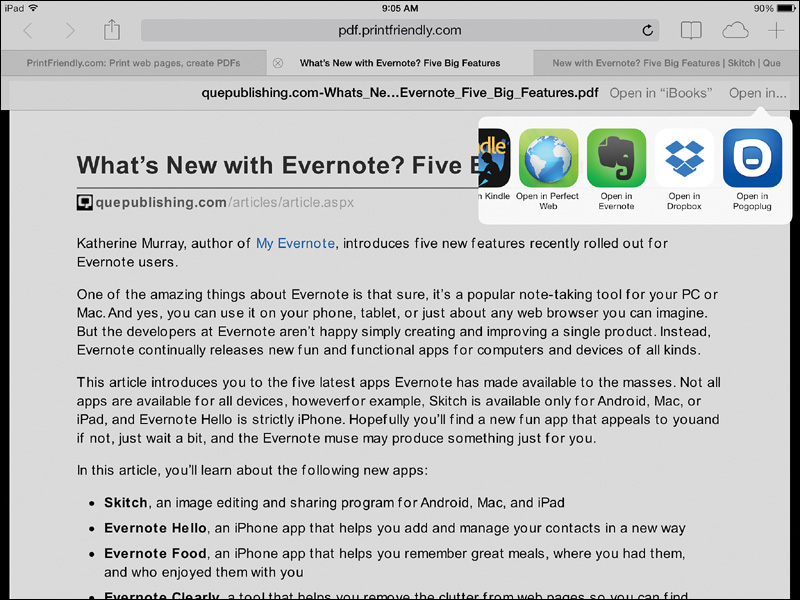
Tap the Print Preview button and PrintFriendly.com will attempt to pull out the main content on the page (minus logos, menus, and so on). Figure 11.14 shows the final result. Not bad.
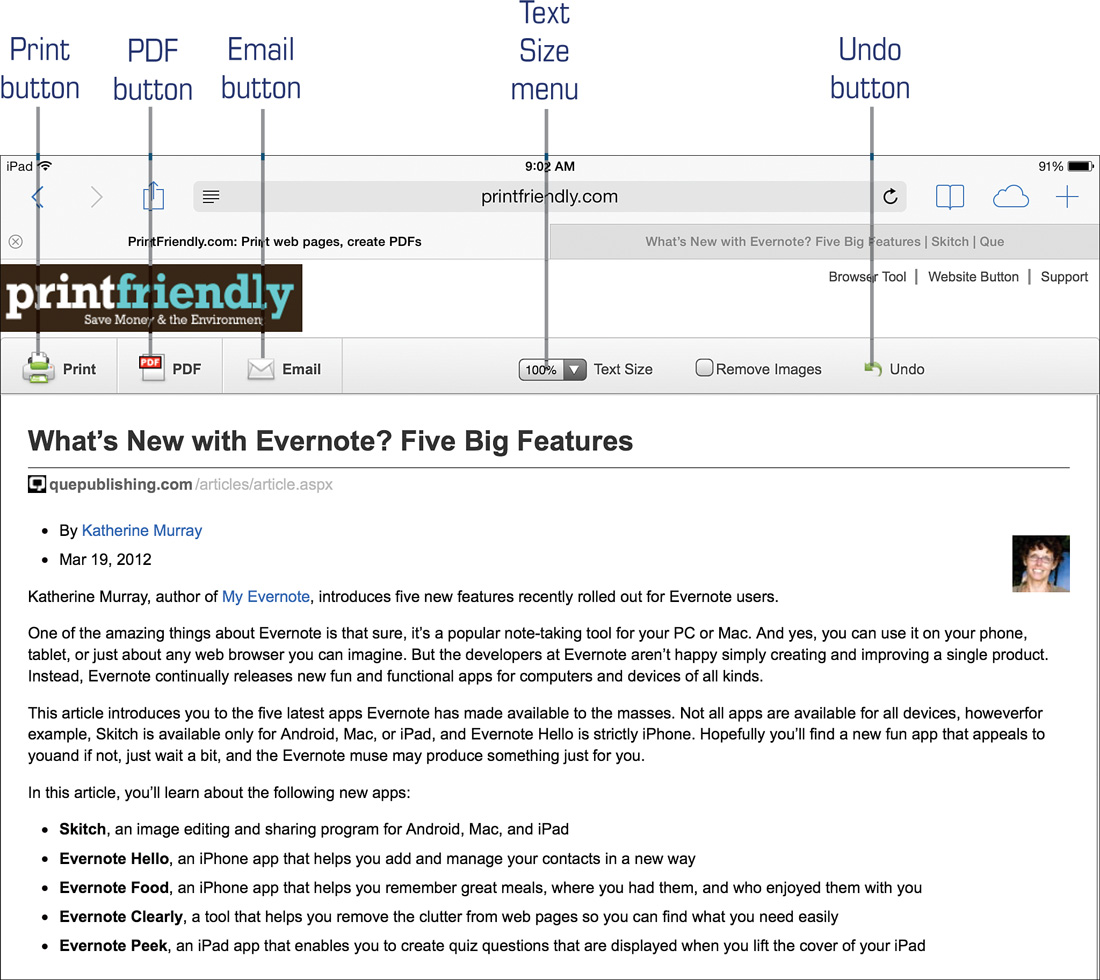
Sometimes PrintFriendly.com gets it right the first time. Other times, you may have some stragglers (such as a menu or an advertisement). This is not a problem. By tapping near the start of any line of text or on an image, you can delete the tapped item. If you make a mistake, simply tap the Undo button once and try again. Notice in Figure 11.15 that I’ve deleted the two bullet items (the By line and the date) as well as the single image to the right. You can also place a checkmark in the Remove Images check box to immediately remove all images. And, finally, you can adjust the font size using the Text Size drop-down menu.
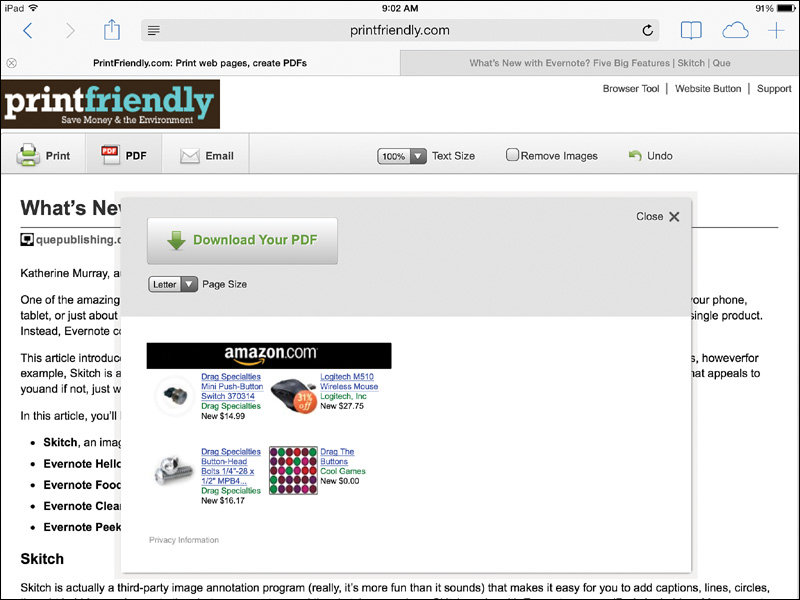
After cleaning up the page, it’s time to save it. If you have a printer that supports the Apple AirPrint service, you can tap the Print button to get a paper copy. You can also email yourself a copy by tapping the Email button. But I’m wanting to save this to a PDF file, so I’ll click the PDF button. A screen appears like the one in Figure 11.16. Tap the Download Your PDF button.
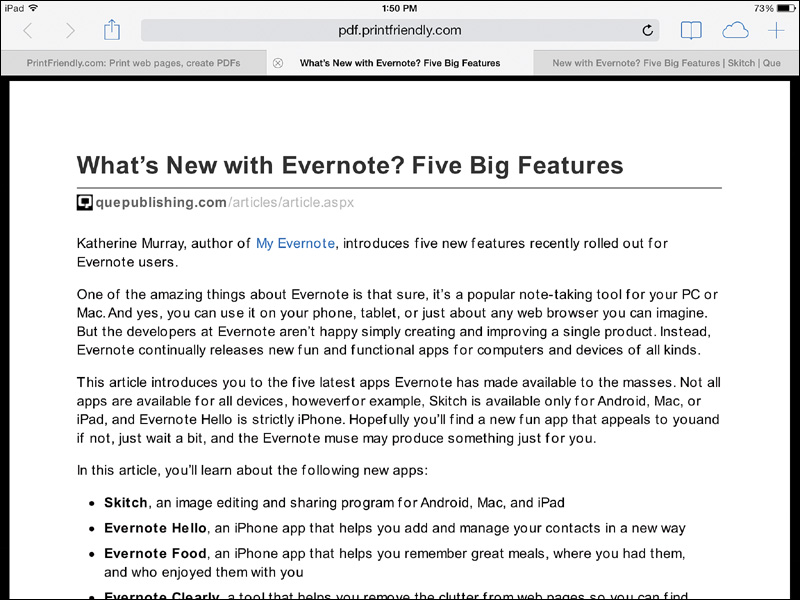
After you tap Download Your PDF, your saved PDF will open in the Safari app, as shown in Figure 11.17.
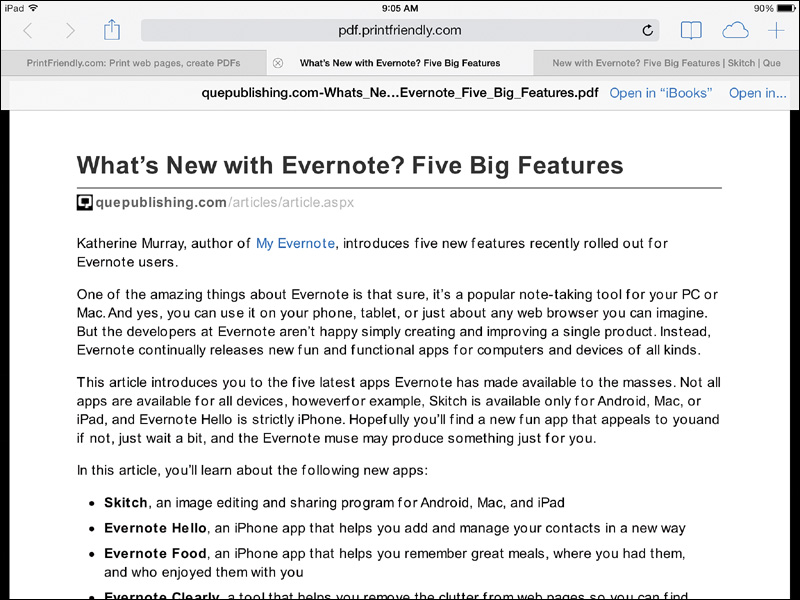
While viewing the saved PDF, tap anywhere on the open page and a small menu will appear near the top, as shown in Figure 11.18.
Caution
If you’re using a browser other than Safari, the steps to save the PDF to another app or to a service such as Dropbox may be different. Consult your browser’s Help documentation for instructions on how and where downloads are saved by the browser.
Tap the “Open in” option (shown in Figure 11.18) and a side-scrolling list of apps will appear, as shown in Figure 11.19. I like to save to Dropbox, but you could just as easily send the saved PDF to Evernote, GoodReader, or any other app you prefer.
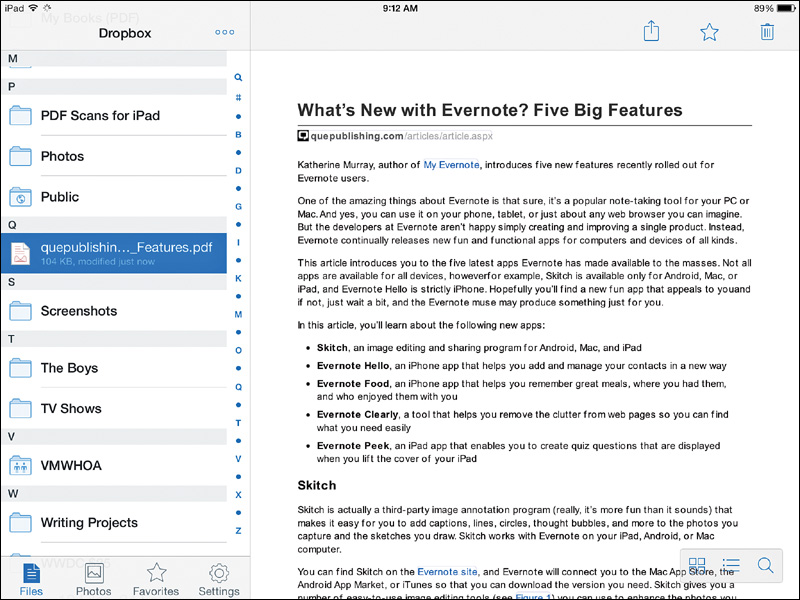
As you can see in Figure 11.20, the PDF is now safe in my Dropbox folder and can even be viewed and read by selecting it. (I’ll move it to a more specific folder later.)
PrintFriendly.com is a great way to immediately save online content you discover while browsing with your iPad, but it does have some limitations. It’s not always accurate in what it chooses to keep and discard, so you’ll always want to read over the content to make certain nothing has been deleted.
For those times when I need a bit more fine control over the final look and layout of the saved PDF, I turn to a slightly more advanced tool called PrintWhatYouLike.com.
PrintWhatYouLike.com
Both the PrintFriendly.com and PrintWhatYouLike.com websites were designed as a way for people to use less paper when printing out content from an website. It’s a great idea, and by eliminating advertisements and menus and banners and such, users can certainly save paper by printing only what they need from a web page. Fortunately, both of these websites support saving to PDF files, so Ultimate iPad owners can benefit from these tools, too.
PrintWhatYouLike.com doesn’t work well on the iPad because it uses a series of pop-up windows for editing a web page, and these pop-ups aren’t supported by Safari or any other browser that I’ve found.
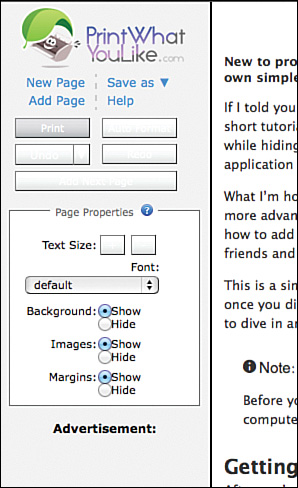
The PrintWhatYouLike.com tool works in much the same way as PrintFriendly.com—you copy and paste a URL into the text box and click the Start button shown in Figure 11.21.
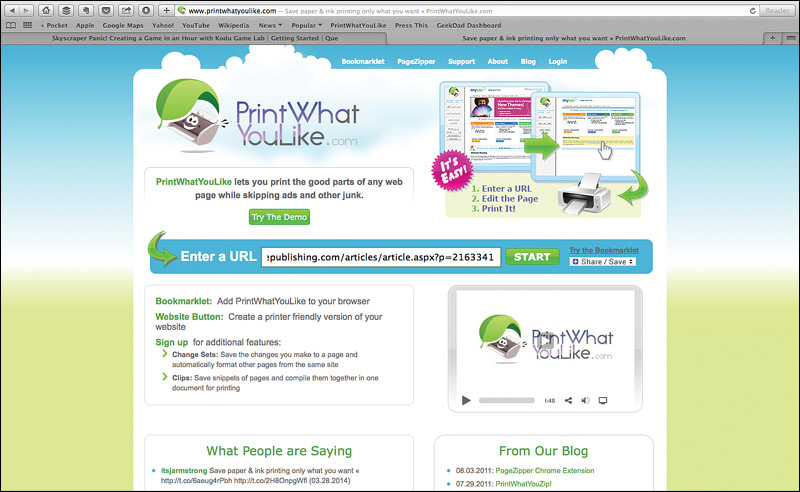
FIGURE 11.21 Use PrintWhatYouLike.com for more fine-tuning of a web page edit.
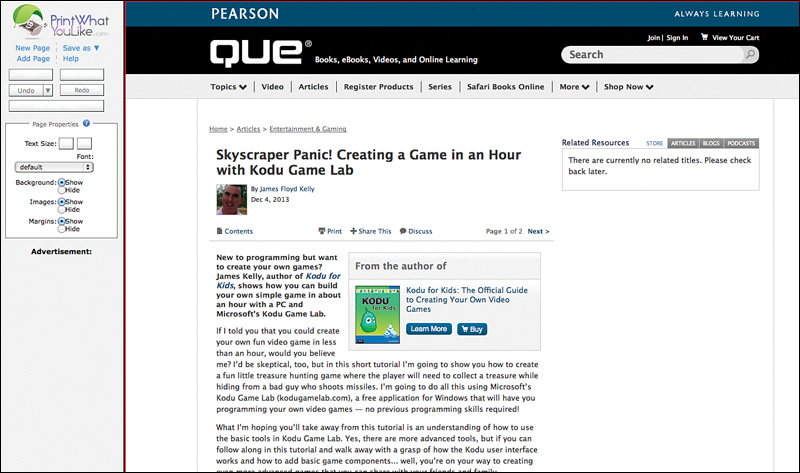
Unlike PrintFriendly.com, the PrintWhatYouLike.com service doesn’t try to guess what you will and won’t want in the final cleaned-up page. Figure 11.22 shows that the article I’m wanting to save has been opened and includes all the extra stuff—menus, logos, search bar, and so on. The only difference is the toolbar running down the left side of the screen.
The PrintWhatYouLike.com service has more features than I have room to cover in this chapter, but I am going to show you how to do the basic editing of a web page so you can save it to a PDF. I encourage you to play around with all the buttons and click the Help link for assistance if you need it.
PrintWhatYouLike.com treats just about anything you see on the screen as an editable object. If you move your mouse pointer over something as small as the Next button indicated in Figure 11.23, you’ll see a red box appear around it.
After an item is surrounded by a red box, left-click and a small menu will appear, like the one in Figure 11.24.
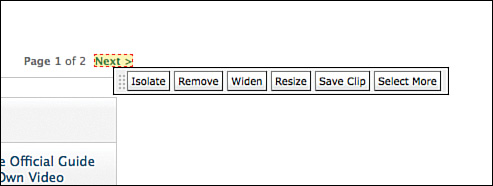
Moving from right to left, the buttons work as follows:
![]() Select More—This will slightly enlarge the red box surrounding an object. Once you click the Select More button, a matching Select Less button will appear to let you shrink the box. This is useful for fine-tuning the removal of items such as menu buttons, icons, and more.
Select More—This will slightly enlarge the red box surrounding an object. Once you click the Select More button, a matching Select Less button will appear to let you shrink the box. This is useful for fine-tuning the removal of items such as menu buttons, icons, and more.
![]() Save Clip—Clicking this button will save the selected item (anything inside the red box) for later use. You can collect clips and then save them to a single PDF; this is a useful feature if you’re doing research or collecting a series of similar articles and want to have them all in one document.
Save Clip—Clicking this button will save the selected item (anything inside the red box) for later use. You can collect clips and then save them to a single PDF; this is a useful feature if you’re doing research or collecting a series of similar articles and want to have them all in one document.
![]() Resize—Select an icon or photo or other image and you’ll be able to enlarge or shrink the item.
Resize—Select an icon or photo or other image and you’ll be able to enlarge or shrink the item.
![]() Widen—Click this button to change a web page’s format so it fills the screen completely from left to right. This is handy for taking a long article that requires a lot of scrolling down due to large left and right margins and forcing it to take up fewer pages.
Widen—Click this button to change a web page’s format so it fills the screen completely from left to right. This is handy for taking a long article that requires a lot of scrolling down due to large left and right margins and forcing it to take up fewer pages.
![]() Remove—Removes all contents from within a red selection box.
Remove—Removes all contents from within a red selection box.
![]() Isolate—Deletes everything outside of the red selection box.
Isolate—Deletes everything outside of the red selection box.
The Isolate tool is one of my favorites when cleaning up web articles for saving. If you move the mouse pointer around carefully, you can often cause a red selection box to appear around just the article and its included figures. You can see this in Figure 11.25.
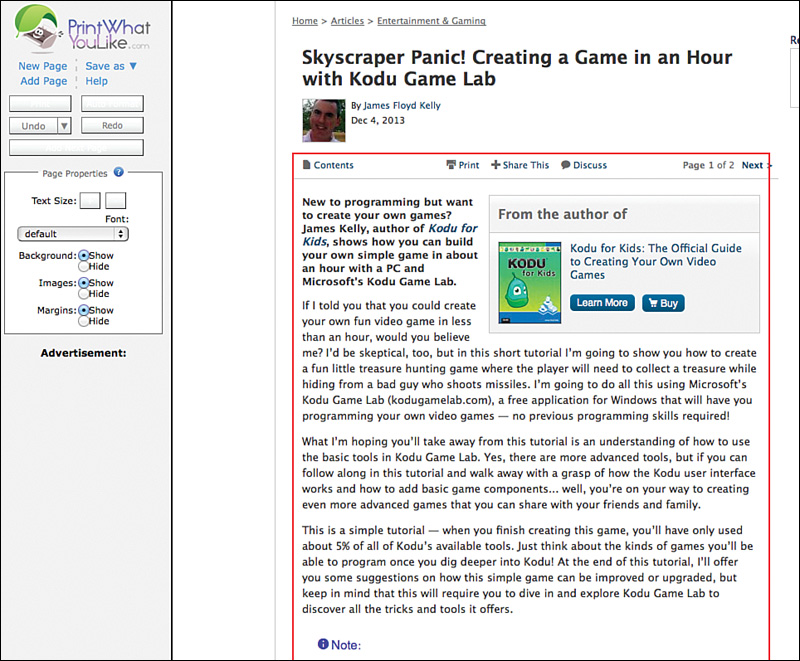
Now all that’s needed is to click once the article is surrounded and then click Isolate. Almost everything else on the page is gone except for my article and a few leftover navigation controls, as shown in Figure 11.26.
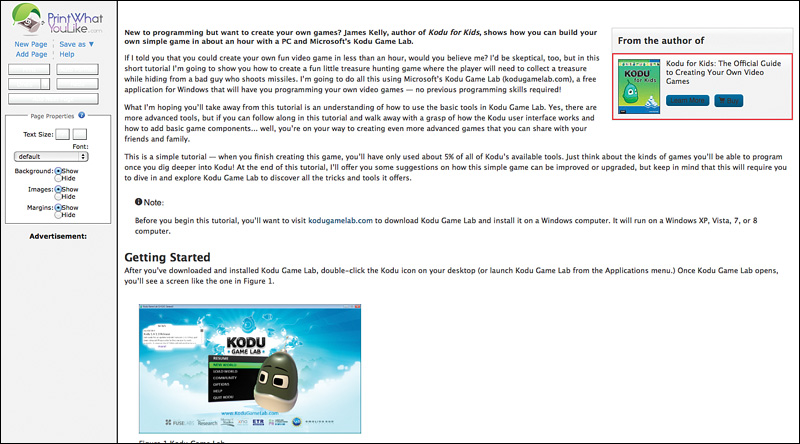
All that’s left is to click the sidebar on the right and remove the individual components one at a time.
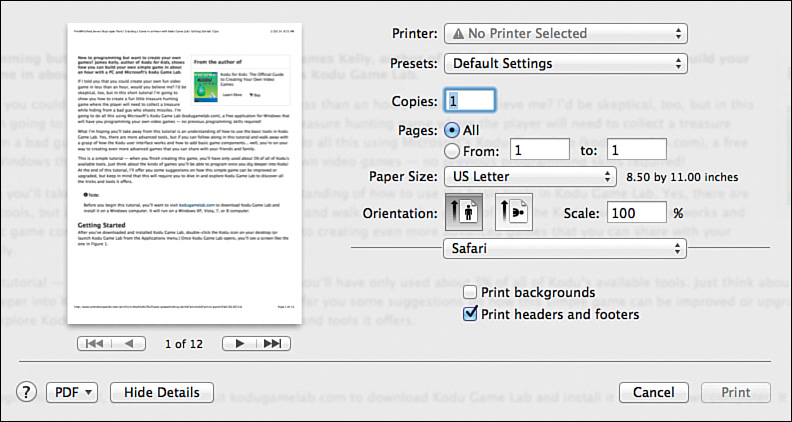
Once you’re satisfied with the content’s final look and layout, it’s time to save it as a PDF. Click the Print button on the left-side toolbar shown in Figure 11.27.
If you’re using a Mac, click the PDF button that appears in Figure 11.28. Select the Save as PDF option, name the document, select its destination, and you’re done.
For Windows users, unfortunately, saving to PDF will require downloading a free add-on such as PDFCreator (www.pdfforge.org) or a similar service that will allow Windows to save print jobs as PDF files.
PrintFriendly.com and PrintWhatYouLike.com are two services I cannot do without. I save a lot of content off of the Internet, and I prefer that it be as clean and clutter free as possible. These two tools allow me to remove advertisements, menus, and so much more, leaving behind only the text and the images that I want to include in my final saved PDF file.
After I create my PDF files, all that’s left to do is save them to Dropbox or my Pogoplug-connected hard drive, and they’ll always be there should I need them. (And if I save them to my paid Evernote account, the PDFs are also scanned and become keyword searchable.)
Between my desktop scanner, the Pocket app, PrintFriendly.com, and PrintWhatYouLike.com, you’d think that I would have covered just about every aspect of getting content into my Ultimate iPad...but not quite. What’s left? Let me show you.
Notes and Sketches Straight into Evernote
With a camera or a scanner, it’s easy to just take a photo of a hand sketch or a written note and send it to Dropbox or Evernote. As a matter of fact, I do this quite a bit—I do a bit of woodworking here and there, and I also tend to collect and modify schematics for electronic circuits. Both of these hobbies often have me sketching or drawing items on paper along with measurements and other values. I used to do these sketches on plain paper, but not anymore. A couple of years ago I discovered Evernote’s Notebook system, shown in Figure 11.29, and now everything has changed.

An Evernote Notebook can be purchased from the Evernote Market by visiting http://bit.ly/QLaBhO. Notebooks run between $11.95 and $32.95 depending on the size and format. Notebook sizes are small to large, blank or ruled pages, and paper or hardback covers. All notebooks come with a code for three months of Evernote Premium service; existing Premium customers will have their subscription extended by three months.
In a nutshell, anything you write or draw in an Evernote Notebook can be photographed using your iPhone or iPad’s camera and the free Evernote app. The Evernote app scans the page and converts any text it finds to searchable text. Also, special colored stickers that come with the notebooks can be configured to send the scans directly into certain notebooks. I use the green stickers to send photo-scans directly into a Woodworking notebook in Evernote and yellow stickers to send photo-scans into an Electronics notebook.
Note
To assign a custom notebook to a particular sticker, open the Evernote app on your iPad to the home screen, tap your name in the upper-left corner to open the Settings screen, and then tap the General option. Under General, tap Camera, followed by Moleskine Notebook, and then tap an icon (each icon has a unique color) and pick the notebook you wish to link to that sticker. Now, any time you stick one of the colored stickers on a page and take a photo with the Evernote app, the photo-scan will automatically drop into its matching notebook.
In Figure 11.30, you’ll notice that I’ve opened the Evernote app and the toolbar appears along the top left of the screen.
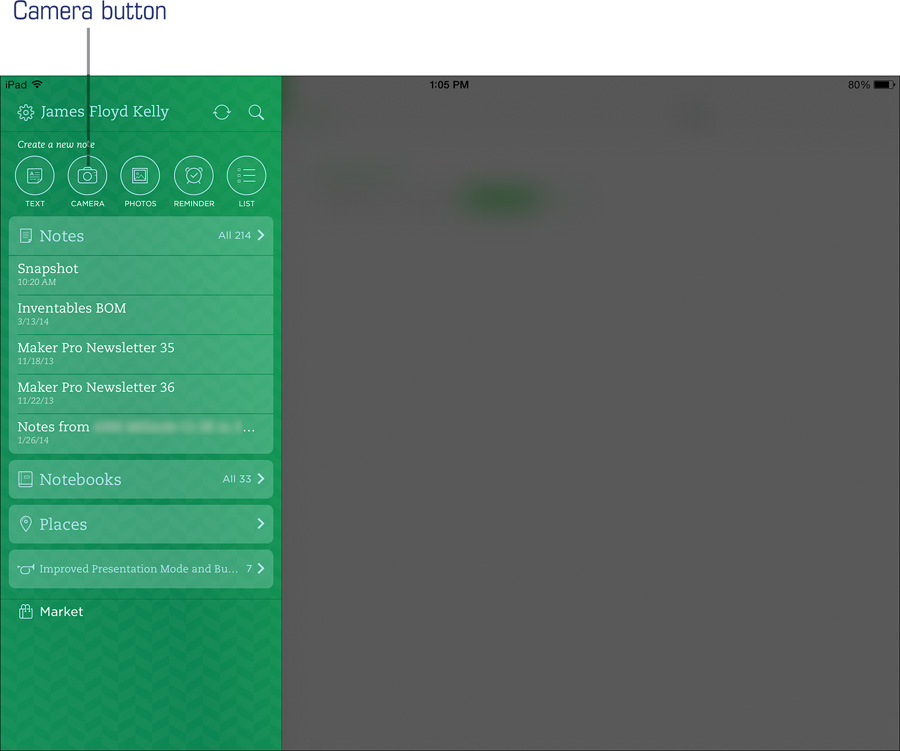
Tap the Camera icon to start the photo-scan process. Evernote’s camera tool will open (it differs slightly from the standard iPad Camera app) and you must select from one of the four options at the bottom that include Post-It Note, Photo, Document, and Business Card.
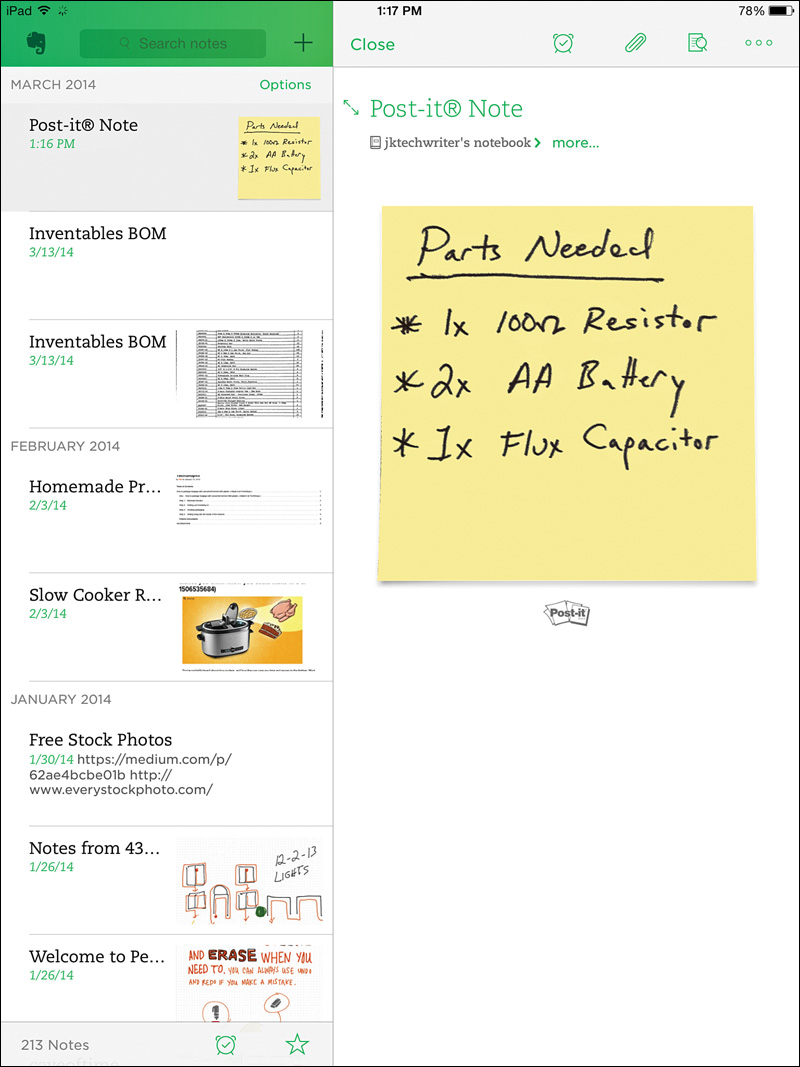
Here’s the really cool thing about Evernote—it will scan a Post-It Note, a document (text or even handwriting), or a business card and make all text it discovers searchable. Based on your selection, a box will appear on the screen to help guide you in properly fitting an item for scanning.
For example, if you’re scanning a Post-It Note, tap the Post-It Note option and the screen will display a perfectly square area, as shown in Figure 11.31.

After taking the photo, tap the checkmark in the lower-right corner (to indicate you’re done taking photos) and the note will appear in your default notebook, as shown in Figure 11.32. Notice that even though the text was written on a blue Post-It Note, the Evernote app scanned only the text and then placed it on a yellow Post-It Note background!
Using the Evernote Notebook system, the process is almost identical. Figure 11.33 shows that I’m preparing to take a photo of a sketch I made for some furniture placement along with dimensions. I’ve also placed a green sticker on the page that tells Evernote to file this photo-scan into my Woodworking notebook.
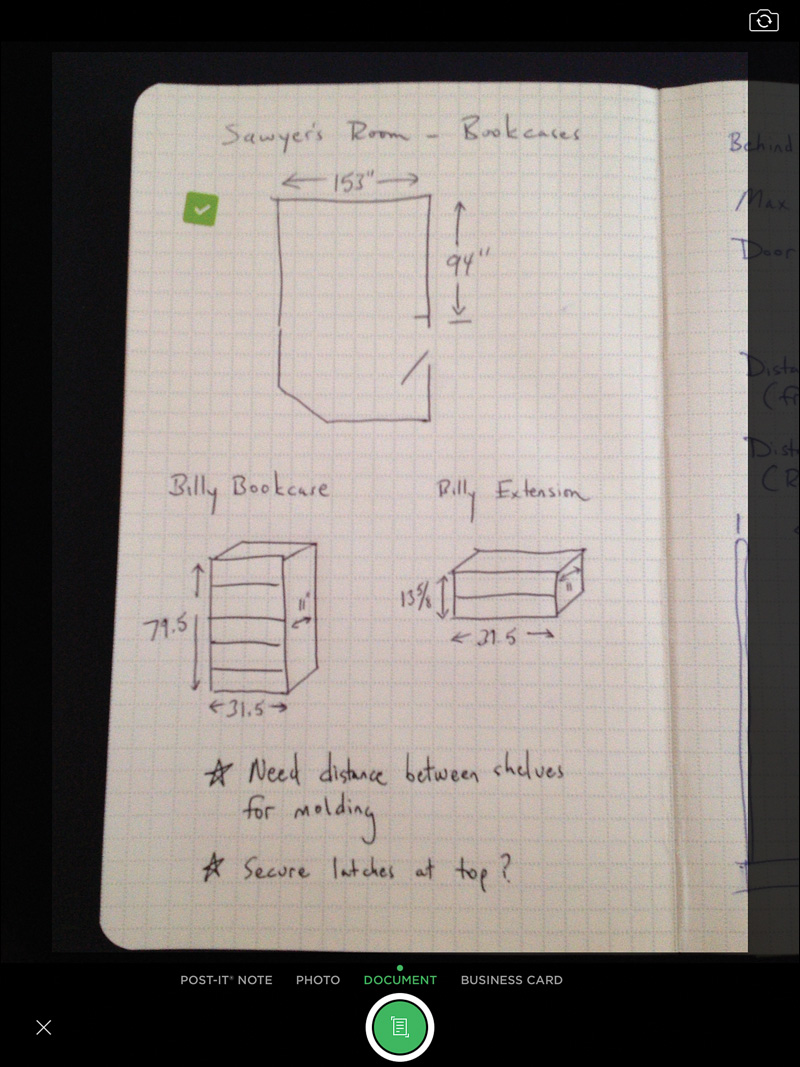
After I take the photo, the page is scanned, converted, and displayed in the Evernote app, as shown in Figure 11.34.
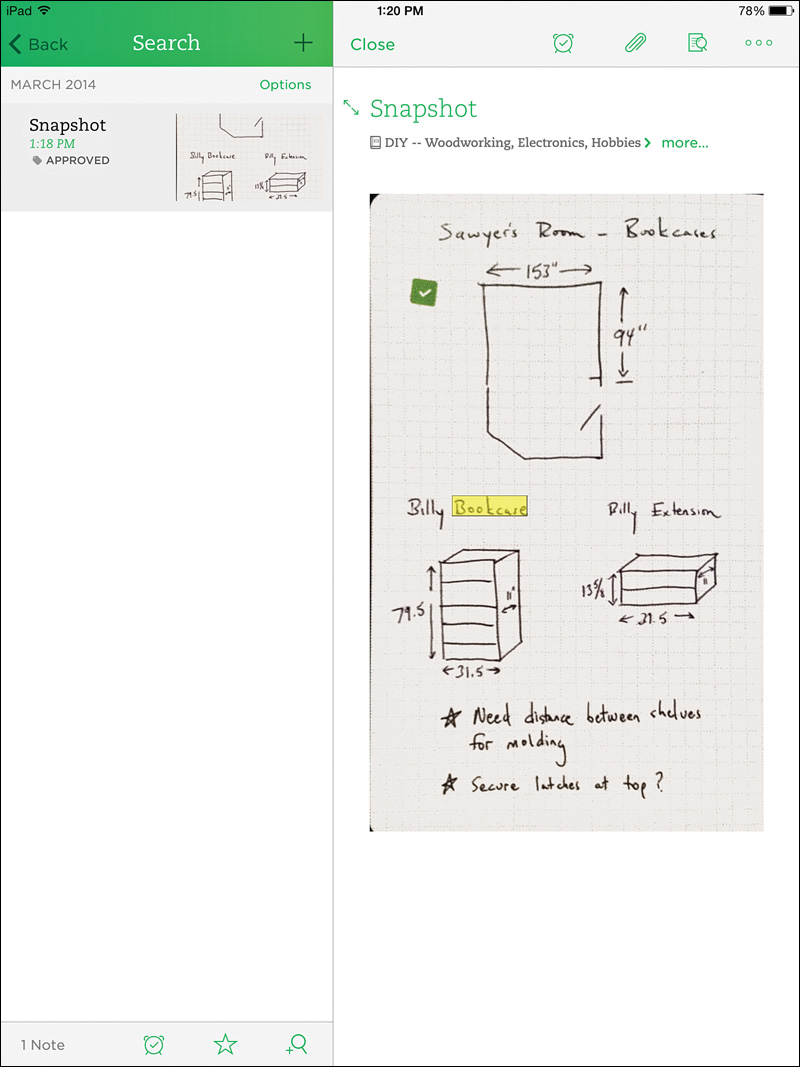
There are a few things you should take note of in Figure 11.34. First, notice that I used the Search box in the upper-left corner of the app to search for all documents containing the word “Bookcase.” On the left side of the screen will be a list of all notes in my Evernote account that contain that word. If I tap one, the note will appear on the right side of the screen with the keyword(s) highlighted. Finally, notice that this particular note is stored in the Woodworking notebook, just as I expected it to be because I used the green Smart Sticker.
As you can see, using the Evernote app offers up a variety of methods for storing and accessing your important documents. You could create a notebook called “Tax Documents” and assign that notebook to the purple Smart Sticker. From that point forward, all you have to do is stick a purple Smart Sticker on the document, take a photo of it with the Evernote app, and know that your bill is being backed up to Evernote. What’s more, you’ll be able to search the Tax Documents notebook using keywords any time you like.
Brainstorming sessions at work often involve Post-It Notes. Imagine collecting every Post-It Note in your Evernote account and having all of them searchable with keywords. And if you lack a personal or desktop scanner, Evernote has you covered with the built-in scanning capabilities from the app—it doesn’t support the same high resolution as a scanner, and it can’t do front and back at the same time, but in a pinch you could photograph every document you like and send them straight into Evernote for future reference and archiving purposes.
Never. Lose. Anything.
I hope you’re beginning to see that any mix of the various tools covered in this book can be used to help ensure that you never lose anything important. A scanner is a great and powerful way to take any loose documents and scan them in and make them searchable via keywords. Services such as Pocket help you save and store away web pages for later reading, and also support tags for finding what you need. Tools such as PrintFriendly.com and PrintWhatYouLike.com help guarantee that anything you find online that you absolutely must have in the future can be saved and kept safe, even if the original web content goes away. And with the Evernote app, you can use an Evernote Notebook to capture your notes and file them instantly away into specific notebooks using Smart Stickers. And Post-It Notes and business cards are just as easily saved using the Evernote app’s camera scanner feature that can make both text and handwriting fully searchable.
Using any or all of these tools, combined with a solid backup plan (refer back to Chapter 9, “Don’t Forget Your Backup: Long-Term Deep Storage”), will give you peace of mind because you’ll know that any documentation, web page, handwritten note, or anything else will be accessible from your Ultimate iPad.