QUEST 2
Textures, Patterns, and Landscapes
In this quest, discover science in cooking while you design a restaurant, learn about American Southwest patterns in art, create gardens to grow useful crops, and get ready for the tastiest lab.
LAB 5 PLEASE BE SEATED
Visit a local restaurant to complete the restaurant research. In Minecraft, design, craft, and operate a restaurant.
LAB 6 BANNER PLAY
Discover patterns in nature and craft patterns on banners in-game. Using construction paper, weave Minecraft-themed patterns.
LAB 7 COOKIES!
Craft cookies in and out of the game, complete with chocolate bumps.
LAB 8 GROW A GARDEN
In Minecraft, prepare the ground, plant seeds, and add water and some bone meal for the easiest gardening experience. Make real-life connections by planting seasonal seeds.
LAB 5
Please Be Seated
There are millions of restaurants, big and small, around the world. Restaurants are designed according to the style of food, culture, and community. Patterns and textures exist inside and outside of restaurants. The floor plan for seats, the layout of each dish, even the assembly of food are all patterns.
To complete this lab, the family activity will have you spend time researching local restaurants to explore all their aspects. In the game, you’ll craft a restaurant of your own and design it according to your own taste.
 ONLINE RESOURCE
Check out Arch Daily’s International Restaurant Design winners: http://goo.gl/d4v2Mq
Family Activity: Restaurant Research
Researching local restaurants is a fun way to gather crafting inspiration while filling your mental fuel tank for designing your own in Minecraft (see here).
 APPROXIMATE TIME TO COMPLETE
1 hour
MATERIALS
Camera
Notepad and pencil
1. Choose a restaurant. Consider one that’s opened recently or one you’ve never been to but have wanted to visit.
2. While dining in the restaurant, take photographs of the layout. Make notes about patterns and textures. Consider the floor plan, the types of food and how they’re served, and even the locations of the bathrooms.
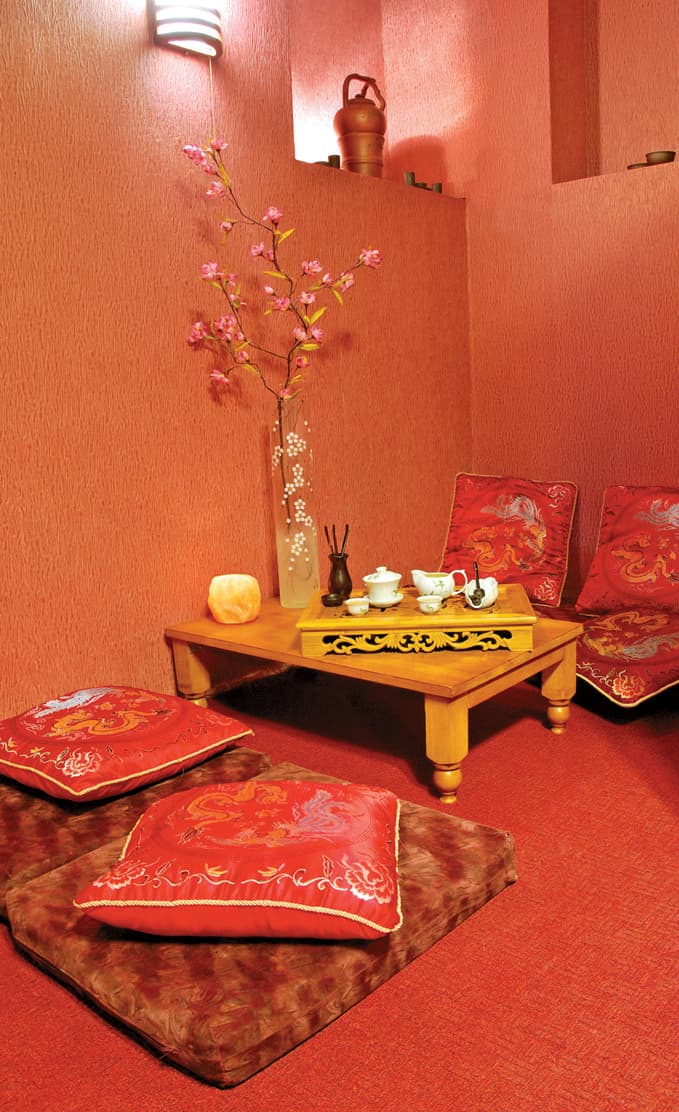
3. Visit one or two other restaurants that are larger or smaller than your first one and that serve different cuisines (figs. 1–3). Take photos and make notes. Consider how they’re the same as well as how they’re different.
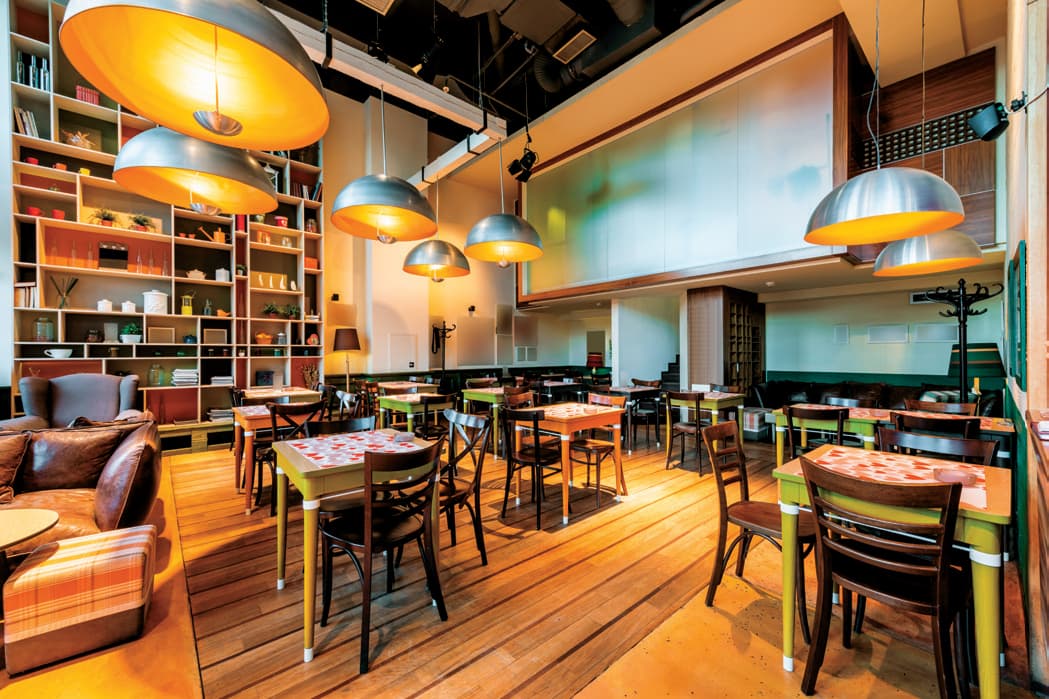
Fig. 1–3: As you research restaurants and their interiors for your in-game design, take note of their patterns and textures.
Minecraft Play: Design and Build a Restaurant
Designing and building restaurants in the game is an important way to customize your world. It’s fun to invite fellow players to visit your restaurant and enjoy a fresh meal of cooked chicken or even a cake.
GAME MODE
Creative
APPROXIMATE TIME TO COMPLETE
2–3 hours in Minecraft
PLATFORMS
PC/Mac, Consoles, PE
1. Sort through the information you gathered in the family activity and choose the elements you would like to include in your restaurant design. Follow the checklist on the opposite page as you design your own. As you work, stay true to your restaurant theme, but also consider doing something surprising.
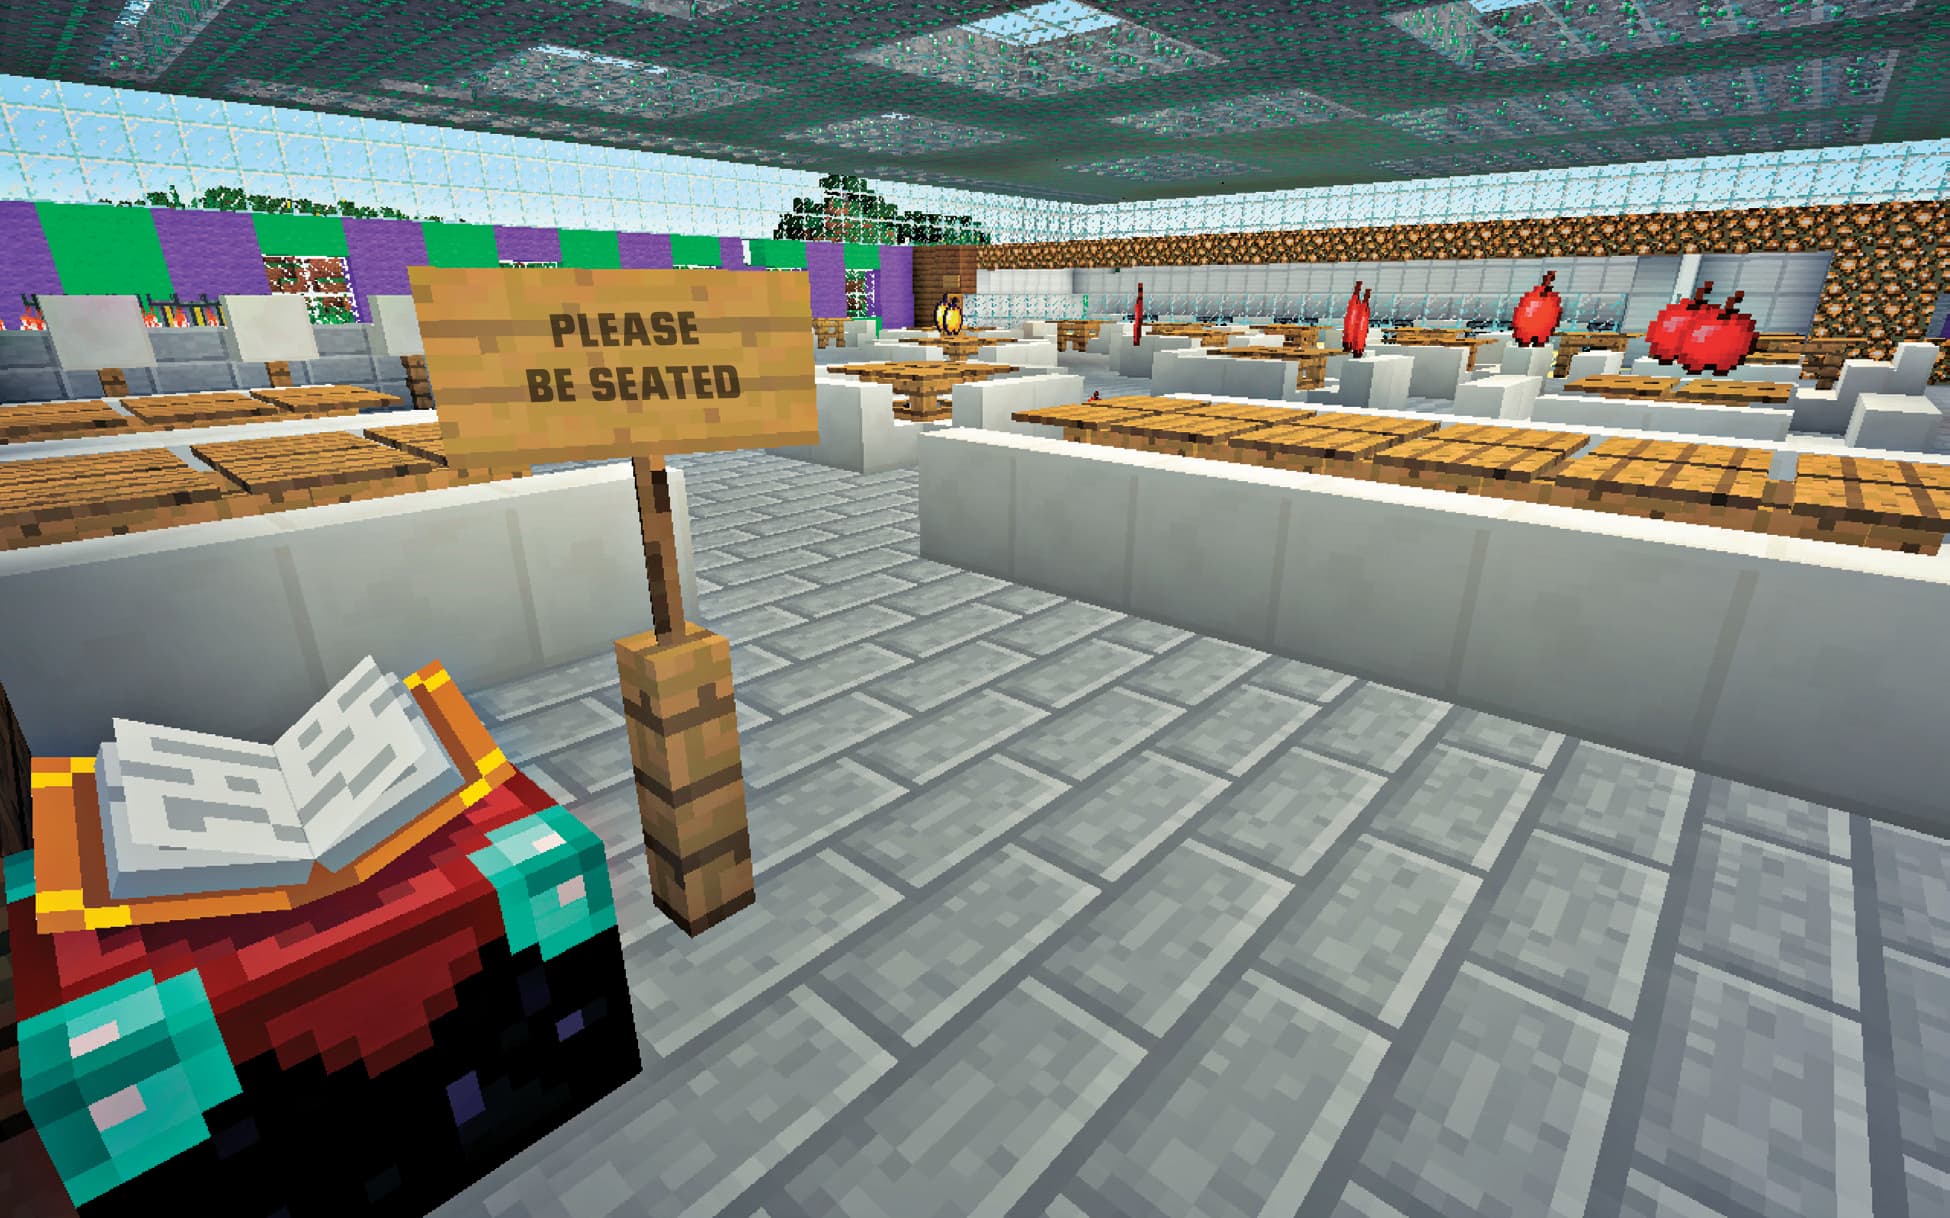
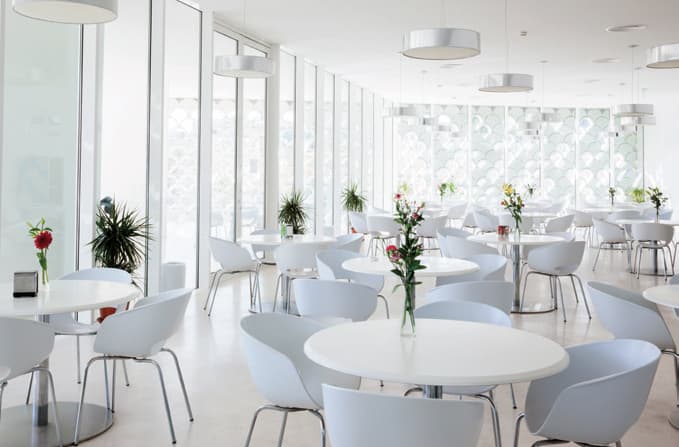
2. Choose a location for building your restaurant, one that suits its style. Will your restaurant be surrounded by other businesses in a large city? Could your restaurant be on a mountaintop or near a beach? We built a restaurant that blends the indoors with the outdoors (figs. 1 and 2), with a garden next to the seating.
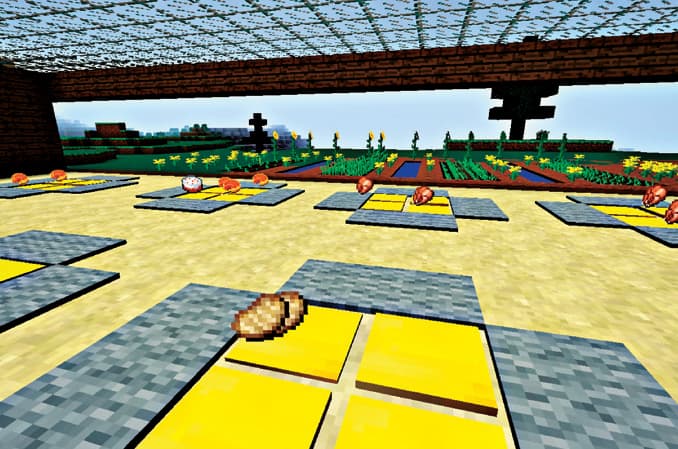
Fig. 1: In this design, the restaurant’s exterior (a garden) and interior (low tables and seats) are part of the same open flow.
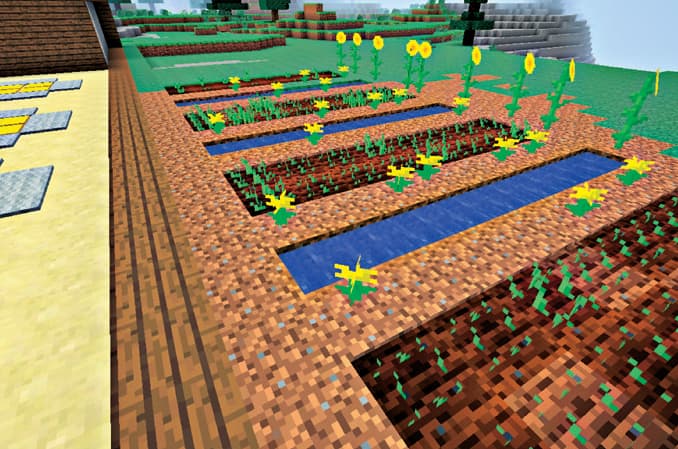
Fig. 2: The garden’s rows follow a pattern: two rows of garden plants separated by dirt, water, dirt with dandelions, and sunflowers.
3. The kitchen is the heart of every restaurant. Decide where yours will be in relation to the dining room. The kitchen for this restaurant is in the back, but the food is out front. Think about how many chests you’ll need for storage. The furnace cooks food to perfection (fig. 3).

Fig. 3: Stock your restaurant kitchen with raw chicken, raw fish, wheat, sugar, and vegetables and store in chests. The furnace cooks food to perfection.
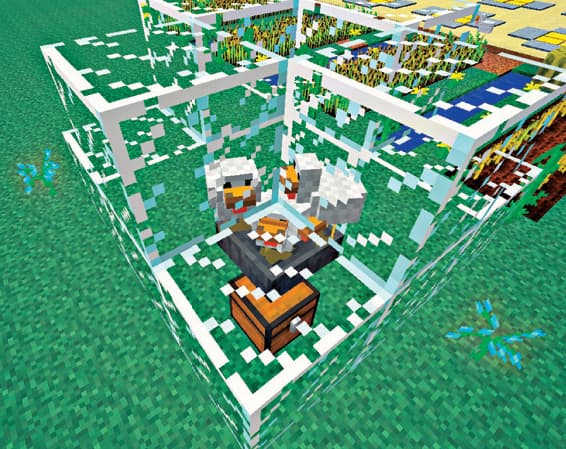
4. Decide where some of your food will come from. We built a yard for cows and chickens so we could get fresh milk and eggs easily (fig. 4).
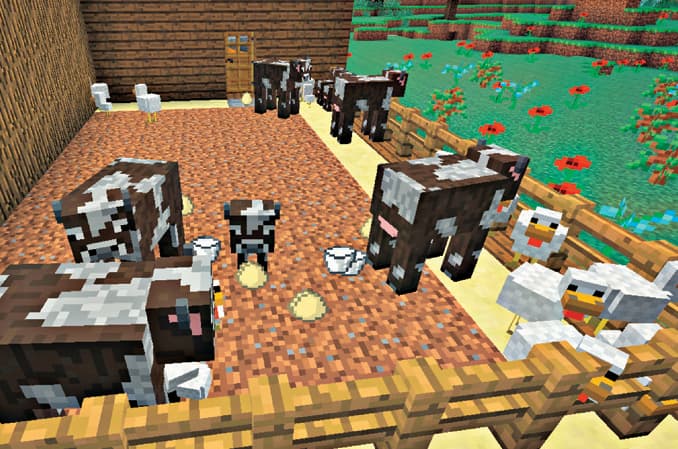
Fig. 4: It may seem strange to have animals near the dining area, but easy access to fresh eggs and milk make up for the barnyard feel.
5. Think about where the patrons will purchase and consume the food prepared in the kitchen. How much space is required between tables? What kind of pattern is the layout of the floor plan? Is it a simple grid with tables and chairs in rows, or more free-flowing?
6. When you choose a name and create a logo, remember that even logos have patterns in them. The pattern of your logo can be based on size, color, shape, and name. Take care in creating your name and logo. Make both memorable! The best restaurants designers consider theirs carefully.
ONLINE RESOURCE
If you want easy access to food, consider crafting an automatic egg farm. All you need is some redstone, hoppers, chickens, and a few other items. Check out this great tutorial on automatic egg farming: http://goo.gl/O8Øo6h
Automatic egg farms allow easy access to fresh eggs without having to chase chickens around the Overworld. Build the walls high enough to keep the chickens from getting out.
LAB 6
Banner Play
In this lab, we explore creating banners, which you can use as decoration both in and out of Minecraft. In the family activity, play with paper weaving to create a unique design. In Minecraft, explore textures and patterns by designing and creating banners inspired by Native American art from the American Southwest.
Use this paper weaving technique to create a patterned banner. The example shown opposite is a creeper face—the game’s blocky, “pixelated” look is a great fit for this technique. Copy our design, get inspired by Native American art opposite, below, or create a design of your own.
APPROXIMATE TIME TO COMPLETE
30 minutes
MATERIALS
Scissors
3 sheets of colored paper (2 in different colors)
Glue
Family Activity: Paper Weaving
1. Cut a sheet of paper into 1-inch (2.5-cm) wide strips. The length of the strips will depend on the size of your project. We used two colors to create our weaving (fig. 1), but you can use several; the more colors you use, the more layers you’ll weave.
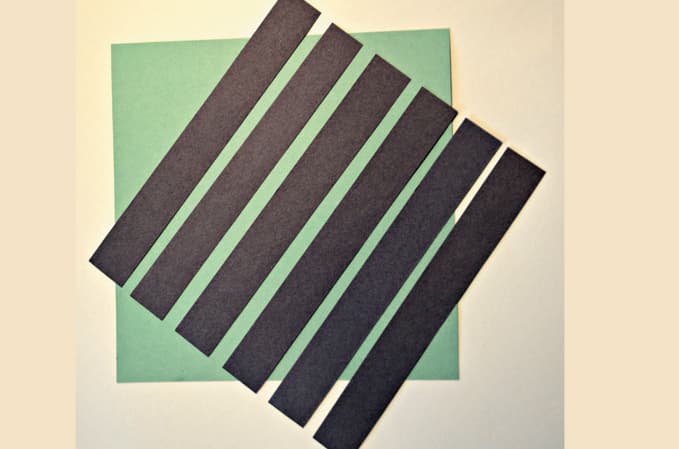
Fig. 1: Cut a sheet of colored paper into 1-inch (2.5-cm) wide strips.
2. Cut a second sheet of paper into strips of the same width, stopping about 1 inch (2.5 cm) from the edge (fig. 2).
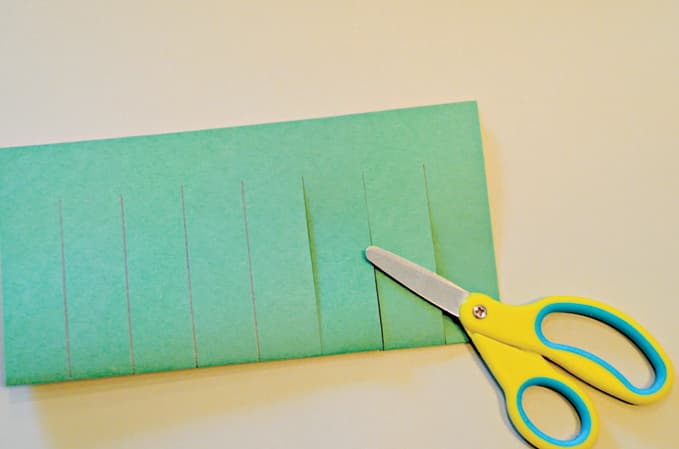
Fig. 2: Cut another sheet into strips, stopping about 1 inch (2.5 cm) from its edge.
3. Weave the loose strips of paper under and over the strips of the second sheet to create your pattern (fig. 3).
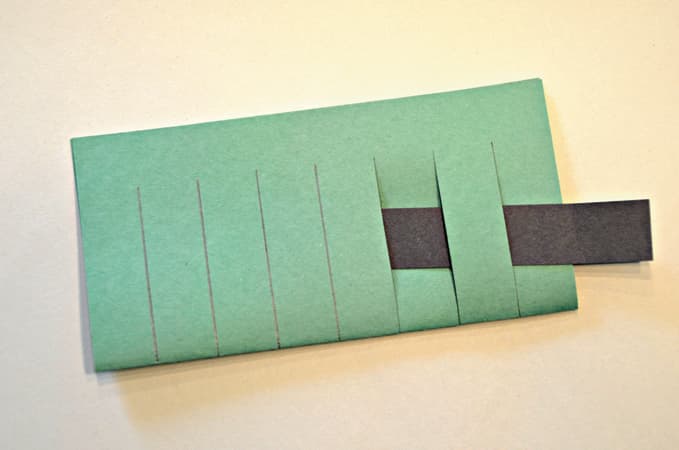
Fig. 3: Create a pattern by weaving the strips over and under each other.
4. Check your work as you go, make any final adjustments, then create a frame for your finished weaving by gluing it to a larger sheet of paper (fig. 4).
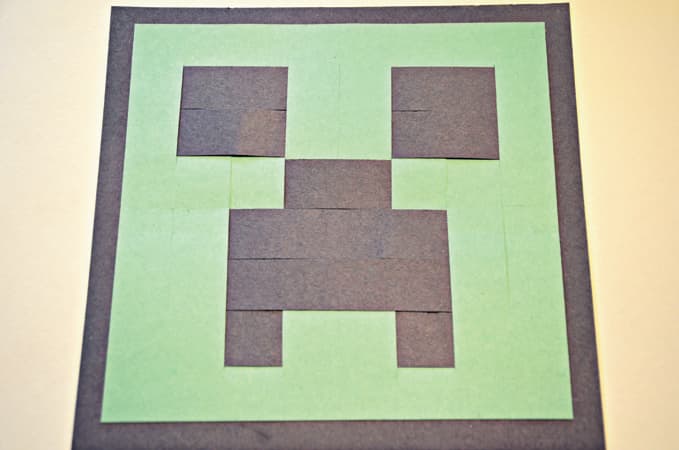
Fig. 4: Glue the finished weaving to a larger sheet.
Minecraft Play: Customized Mesa Banners
Banners, or decorative blocks, first appeared in Minecraft 1.8. You can decorate your Minecraft builds with customized banners with unique patterns by mixing colors and patterns.
Patterns occur naturally in Minecraft. Its various biomes, or climate-based regions, have different patterns. There are more than sixty unique biomes in Minecraft. In this part of the lab, you’ll explore the patterns of the rare Mesa or Bryce biome (see right), a dry biome. The Mesa biome has the most recognizable pattern in the form of colorful layers.
GAME MODE
Creative
APPROXIMATE TIME TO COMPLETE
1 hour in Minecraft
PLATFORMS
PC/Mac, Consoles, PE
SEED ACCESS INFORMATION
PC/Mac biome seed: 2347792175013291886
Xbox/PlayStation seed: 1522406735809595204
Pocket Edition seed: 3083210
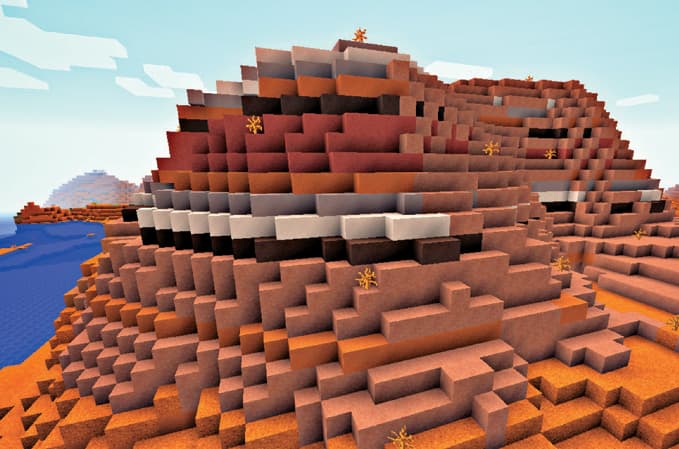
A wide shot of the Mesa or Bryce biome, which was released in Minecraft 1.7.2. The colorful blocks are types of clay that are useful in crafting.
1. Load a seed world with a Mesa biome. (Note that the Mesa biome may not be at spawn, the spot your character starts in-game. Press “e” to access your inventory, where you’ll find banners in many color variations (fig. 1).
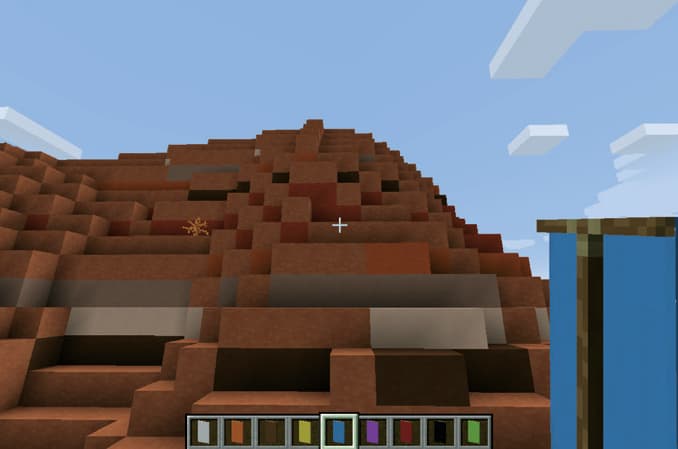
Fig. 1: A hot bar full of banners.
2. You’ll need a crafting table to create unique banners (fig. 2).
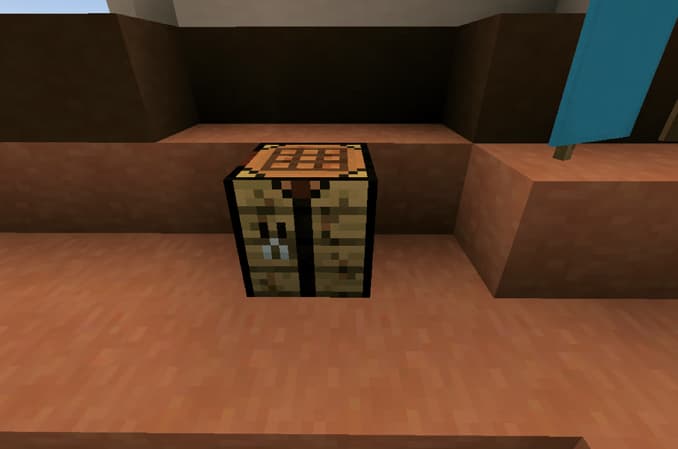
Fig. 2: Use a crafting table to customize the banners.
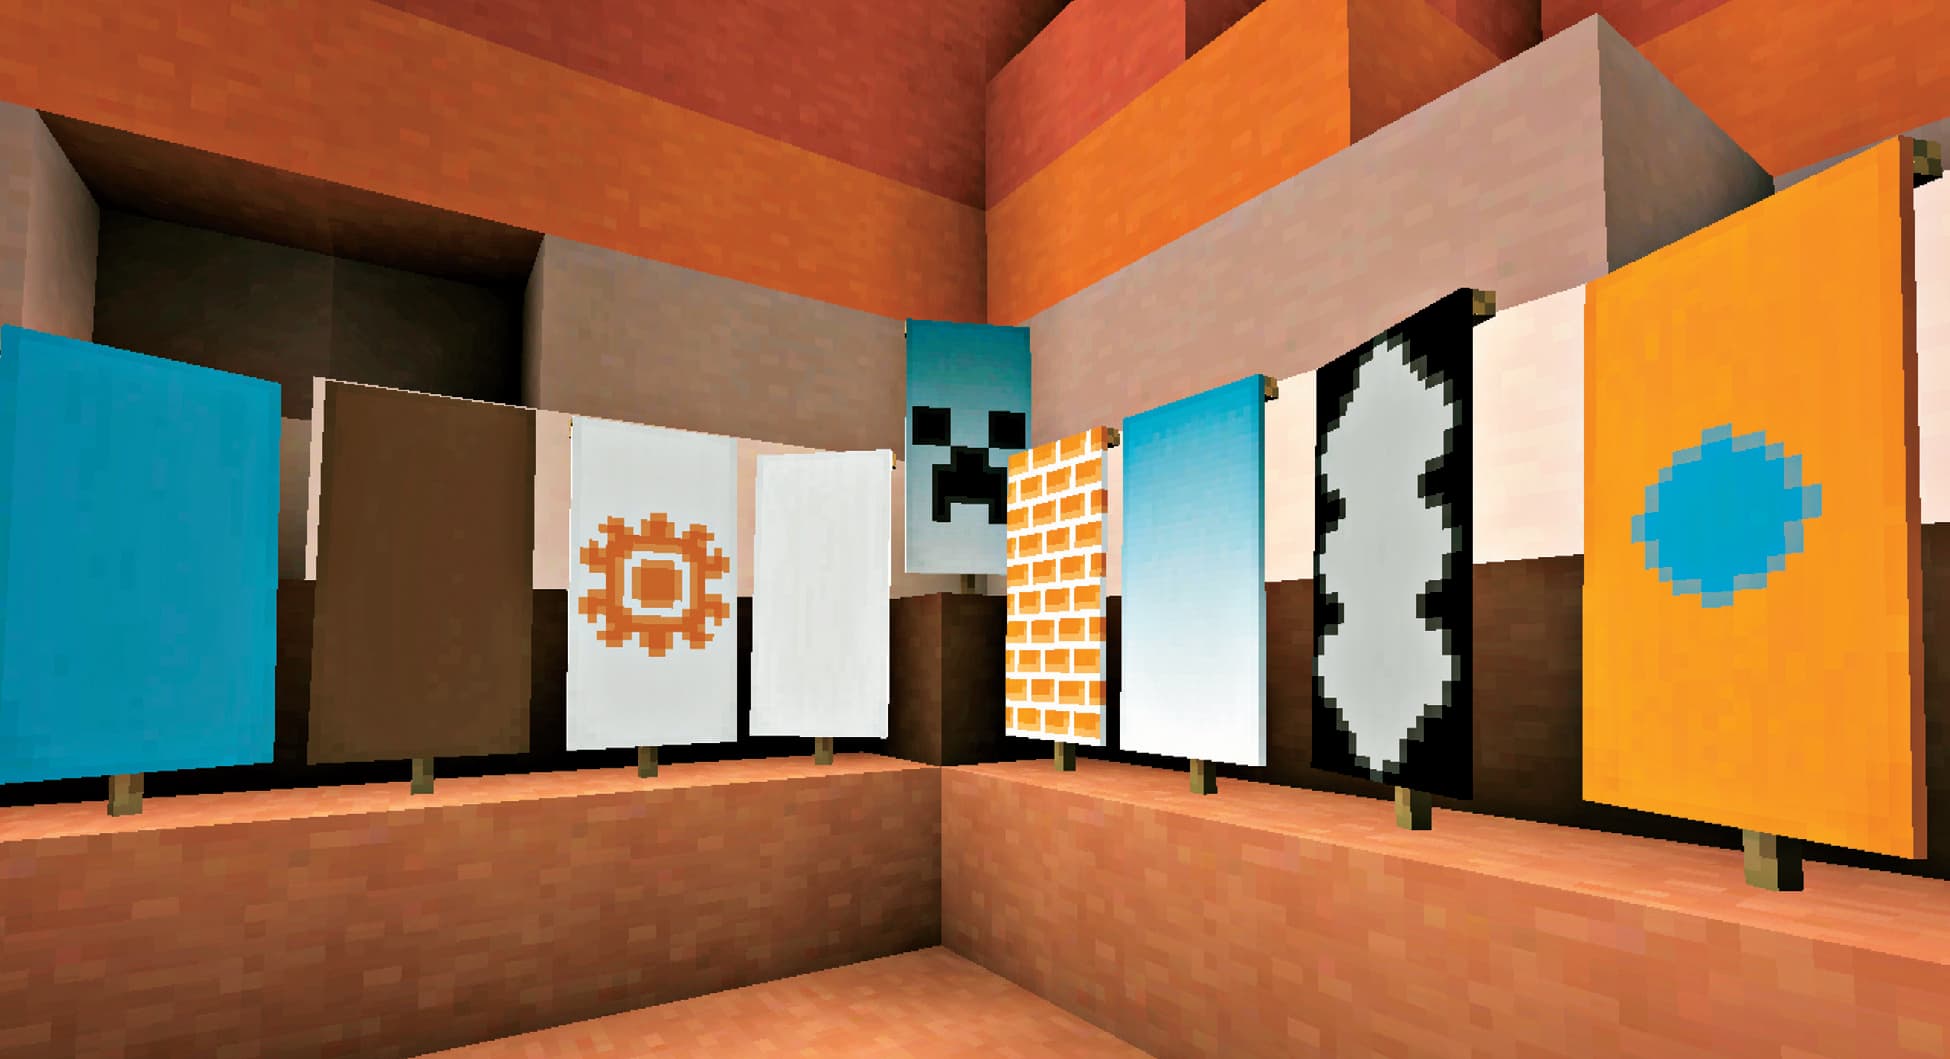
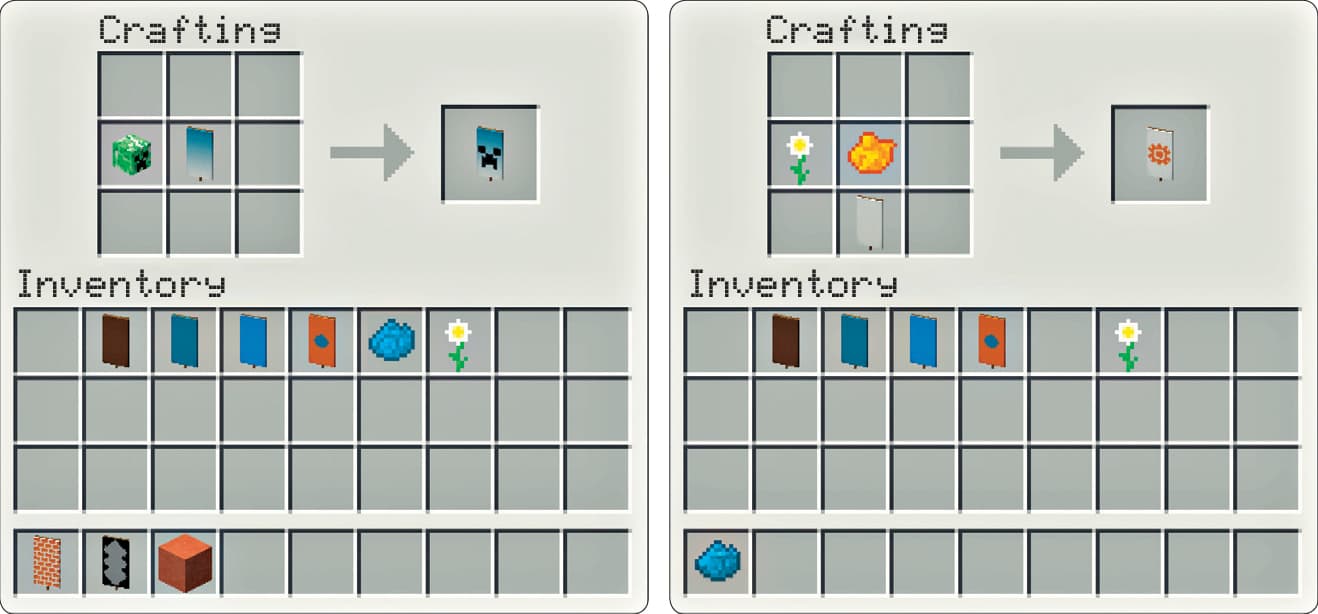
3. Place a banner and other items in the crafting table. For example, you can place a brick block next to a banner to create a brick-like pattern. Add a dye to the recipe to change the pattern’s color (figs. 3 and 4). Use dye in a Y-shaped pattern to create a gradient of color on the banner. You can then customize a gradient banner with a creeper head (fig. 5), a daisy (fig. 6), and more.
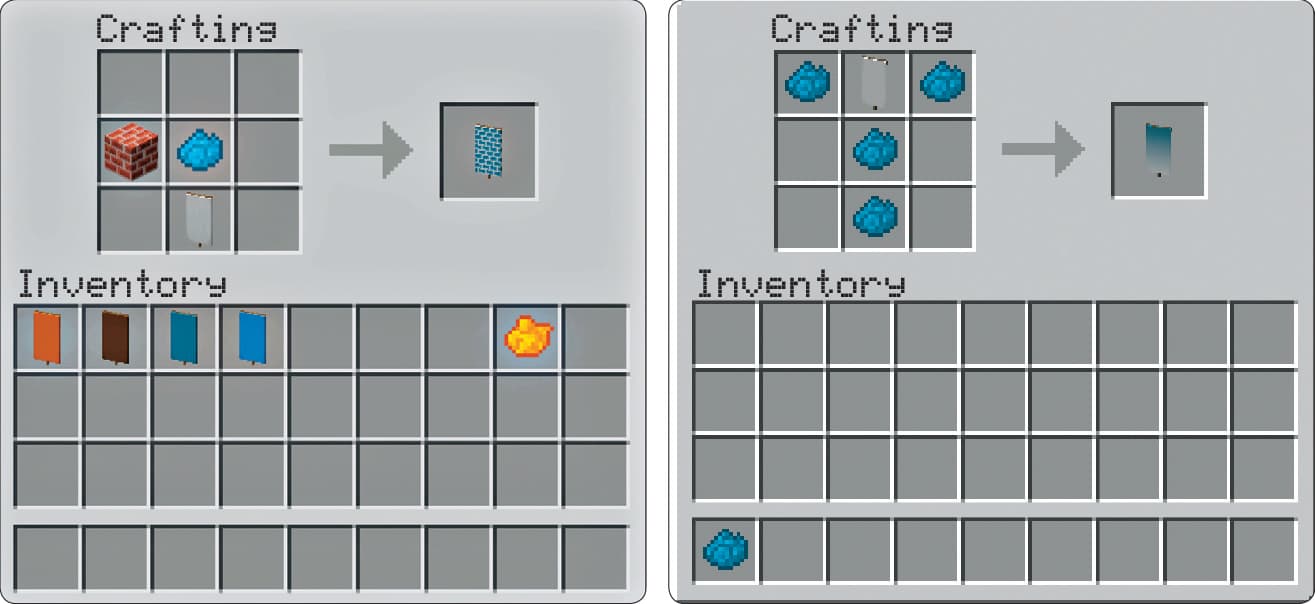
Fig. 3 and 4: Change dye colors to change the color of a pattern.
LAB 7
Cookies!
Crafting cookies in and out of the game make this the yummiest lab. To complete the family activity, bake a batch of delicious cookies to explore the science behind cooking.
Cookies were the first food in Minecraft that could be stacked. Stackable food allows you to carry more when exploring the world. But not all cookies in Minecraft are edible, as you’ll see in the Minecraft part of this lab.
Family Activity: Cookie Mania
Cooking is a science. When we combine ingredients like flour, sugar, and butter to make cookies, they change chemically and physically, first as each ingredient is added and mixed, which changes their texture. During baking, cookies go through a chemical change as the butter and other ingredients melt, aligning their atoms in new combinations. That physical change leaves the cookies lumpy with yummy bumps.
APPROXIMATE TIME TO COMPLETE
45 minutes
MATERIALS
Your favorite cookie recipes (we made chocolate chip and peanut butter cookies; see the Resources for suggestions on where to find recipes)
1. Notice the patterns among different cookie recipes. Some require more butter or sugar, while others ask for extras like chocolate chips. The pattern of baking cookies remains the same: prepare dry ingredients, prepare wet ingredients, mix, place dough onto pan, bake, eat, and smile (fig. 1).
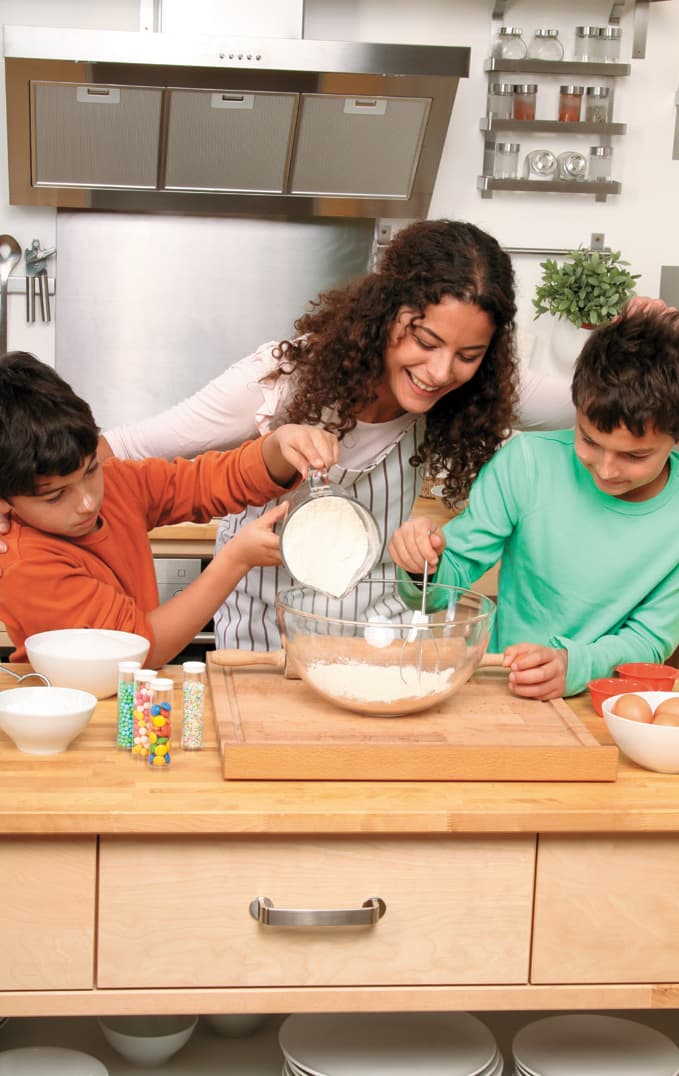
Fig. 1: Notice the changes in texture as you mix the dry and wet ingredients.
2. When you make your chocolate chip cookies, notice the changes in texture that happen as the ingredients are mixed and then baked (fig. 2).

Fig. 2: These baked chocolate chip cookies have a bumpy texture.
3. Try making peanut butter cookies. Peanut butter cookies generally have patterns on top. Once the peanut butter cookie is on the baking sheet, you can take different utensils like a fork, knife, or spoon to make patterns (fig. 3). Try making a creeper face on your peanut butter cookies.

Fig. 3: A fork was used to make the texture shown on these peanut butter cookies.
4. Be sure to share your delicious cookies!
Minecraft Play: Cookie Craft
Crafting cookies in real life is much more delicious than the in-game counterpart, but it can be just as fun. In this part of the lab, create cookies.
GAME MODE
Survival
APPROXIMATE TIME TO COMPLETE
1 hour in Minecraft
PLATFORMS
PC/Mac, Consoles, PE
1. Craft “edible” Minecraft cookies by harvesting wheat and cocoa beans. You can find cocoa beans hanging on trees in Jungle biomes, which are strewn with vines and trees (fig. 1).
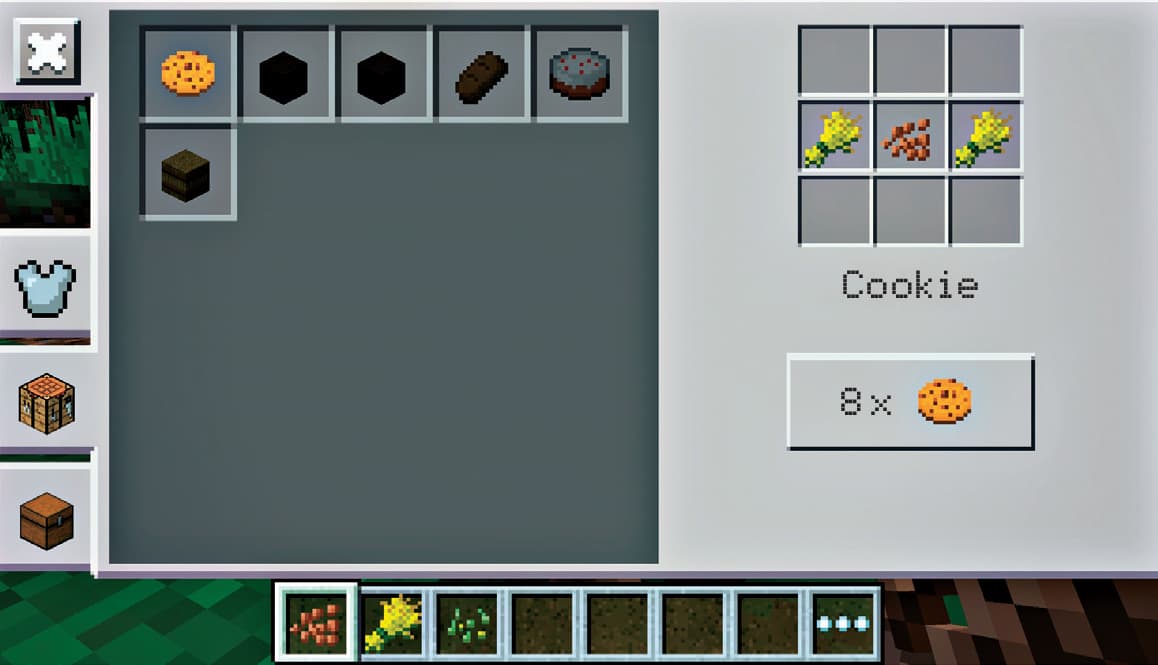
Fig. 1: Harvest some wheat and cocoa beans and place on a crafting table to make “edible” chocolate chip cookies. (Pocket Edition is shown here.)
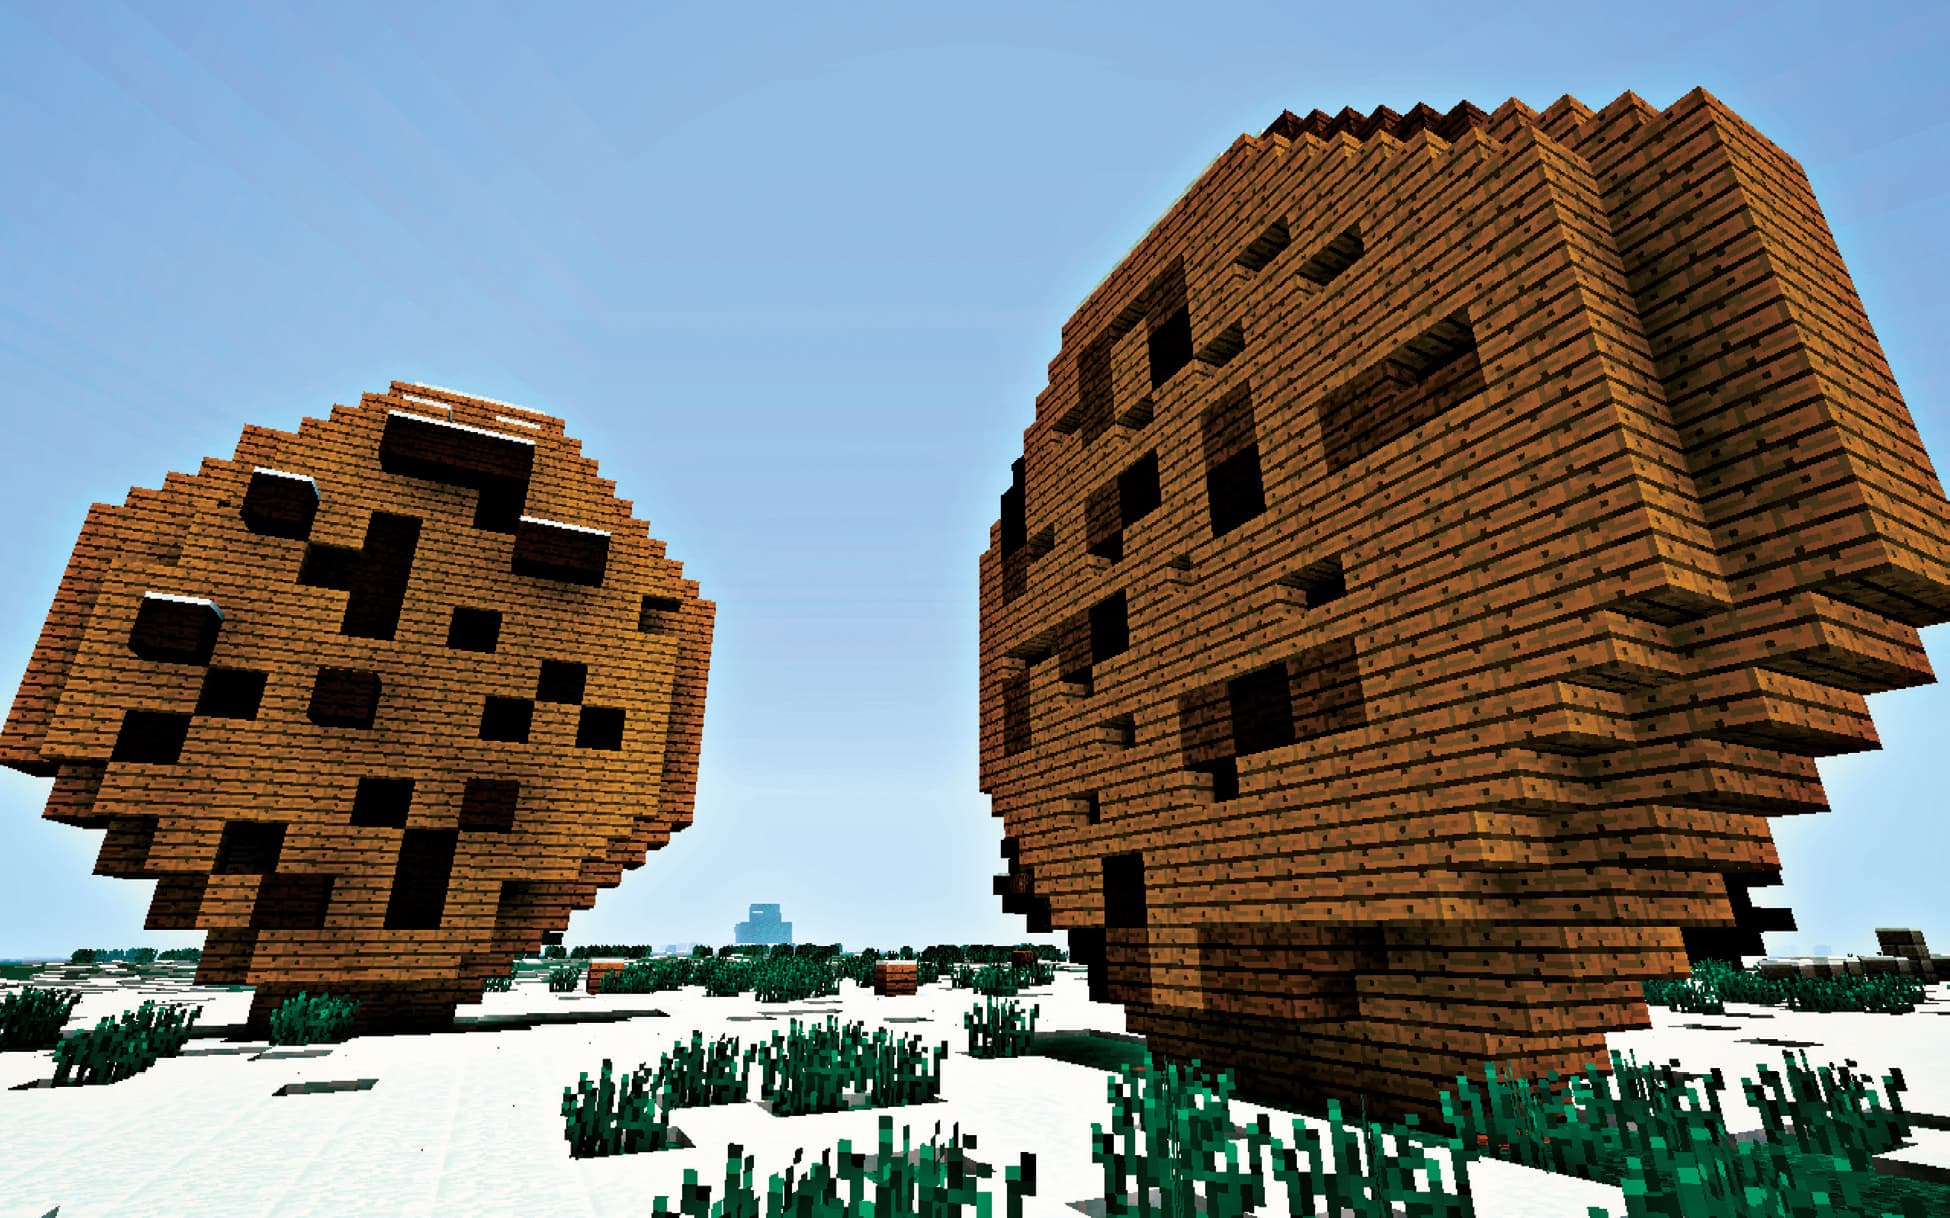
2. Create an oversized chocolate chip cookie (figs. 2 and 3). Study one of your freshly baked cookies. Notice the lumpy top, the different colors, and the uneven shape. Gather blocks, mixing oak wood planks (to get the light brown color) mixed with spruce wood or dark oak wood planks (for chocolate chips).
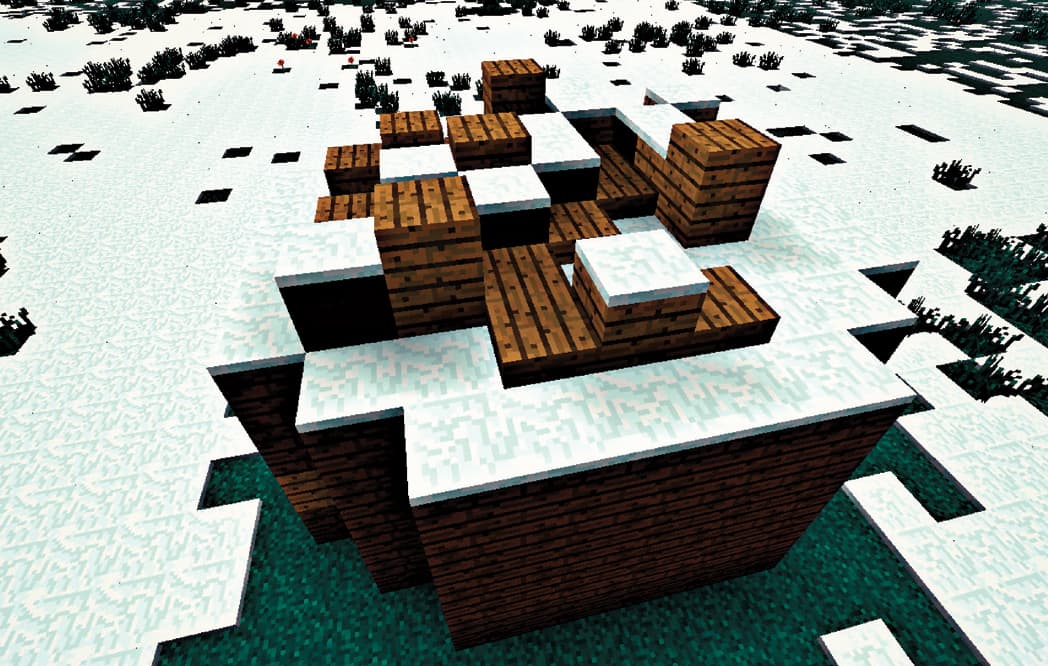
Fig. 2: This oversized cookie has a hidden center. The snow makes it look like powdered sugar was dusted on top.
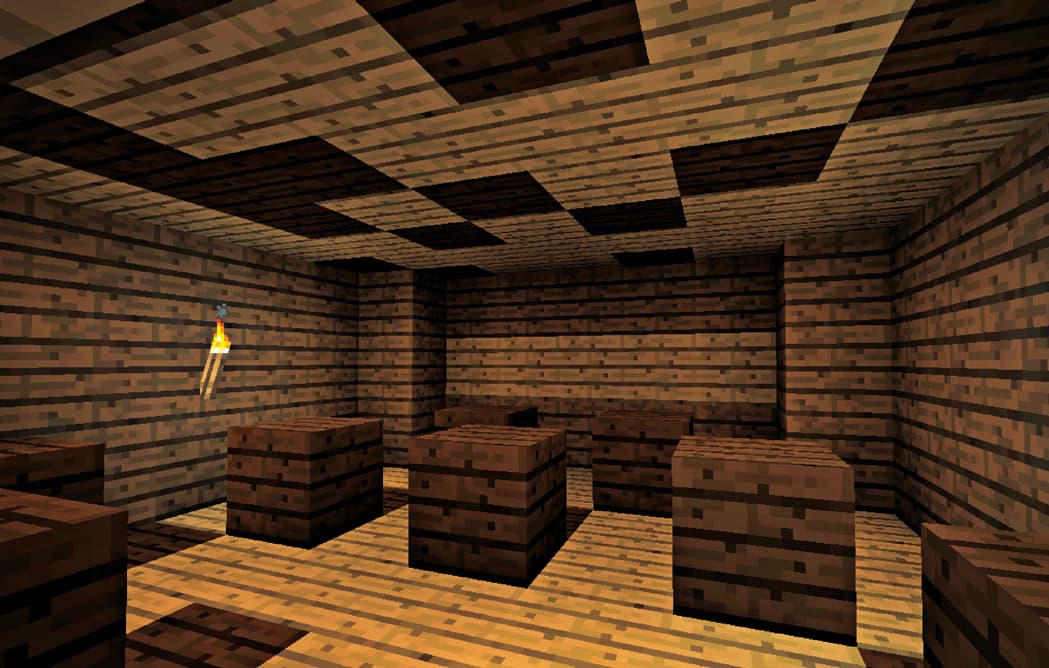
Fig. 3: This oversized cookie has a gooey center. Massive chocolate chips and torches keep the insides extra delicious.
3. Craft an oversized peanut butter cookie. Use birch wood planks to make the classic peanut butter color. Once you’ve crafted the shape of the cookie, use more of the blocks to create your own pattern on top. Just like a fresh peanut butter cookie takes a fork to create the grid shape, you can craft any pattern using more blocks (fig. 4).

Fig. 4: An oversized “peanut butter” cookie made from pumpkins and glass to resemble a creeper head.
ONLINE RESOURCE
To find a Jungle biome, do a web search for “jungle biome seed.”
LAB 8
Grow a Garden

Plants in Minecraft act similarly to plants out of the game. Both require sufficient sunlight, water, and prepared soil. Both start from seeds and, when harvested, give seeds in return. Plants outside the game use photosynthesis to produce their own food from sunlight. Plants in the game also require sunlight to grow. The farther your plants are from water, the slower they grow. As an example, wheat takes about 40 minutes of gameplay to grow from seed to harvestable crop. Of course, there are ways to make your crops grow faster, in and out of the game.
In this lab, you’ll grow plants in and out of the game as a way to connect gameplay with real life.
Family Activity: Planting Seeds
Help your Minecraft-loving counterpart learn about growing plants in this family activity. Pick out seeds appropriate for the growing season, plant them, and observe them as they grow. Try experimenting with different seeds, soil, and water content. Take some time to garden. Whether you’re planning a new garden or maintaining an existing one, this lab offers the chance to spend time outdoors.
APPROXIMATE TIME TO COMPLETE
30 minutes
MATERIALS
Pot
Soil
Packet of seeds
Water
1. Prepare the soil. Fill a garden pot with soil most of the way to the top. The soil should be rich in color and ready for your seeds and water.
2. Use a finger or a tool to poke a hole into the soil. Drop a couple of seeds into the hole and cover with soil. Water the seeds and place in sufficient sunlight (fig. 1).
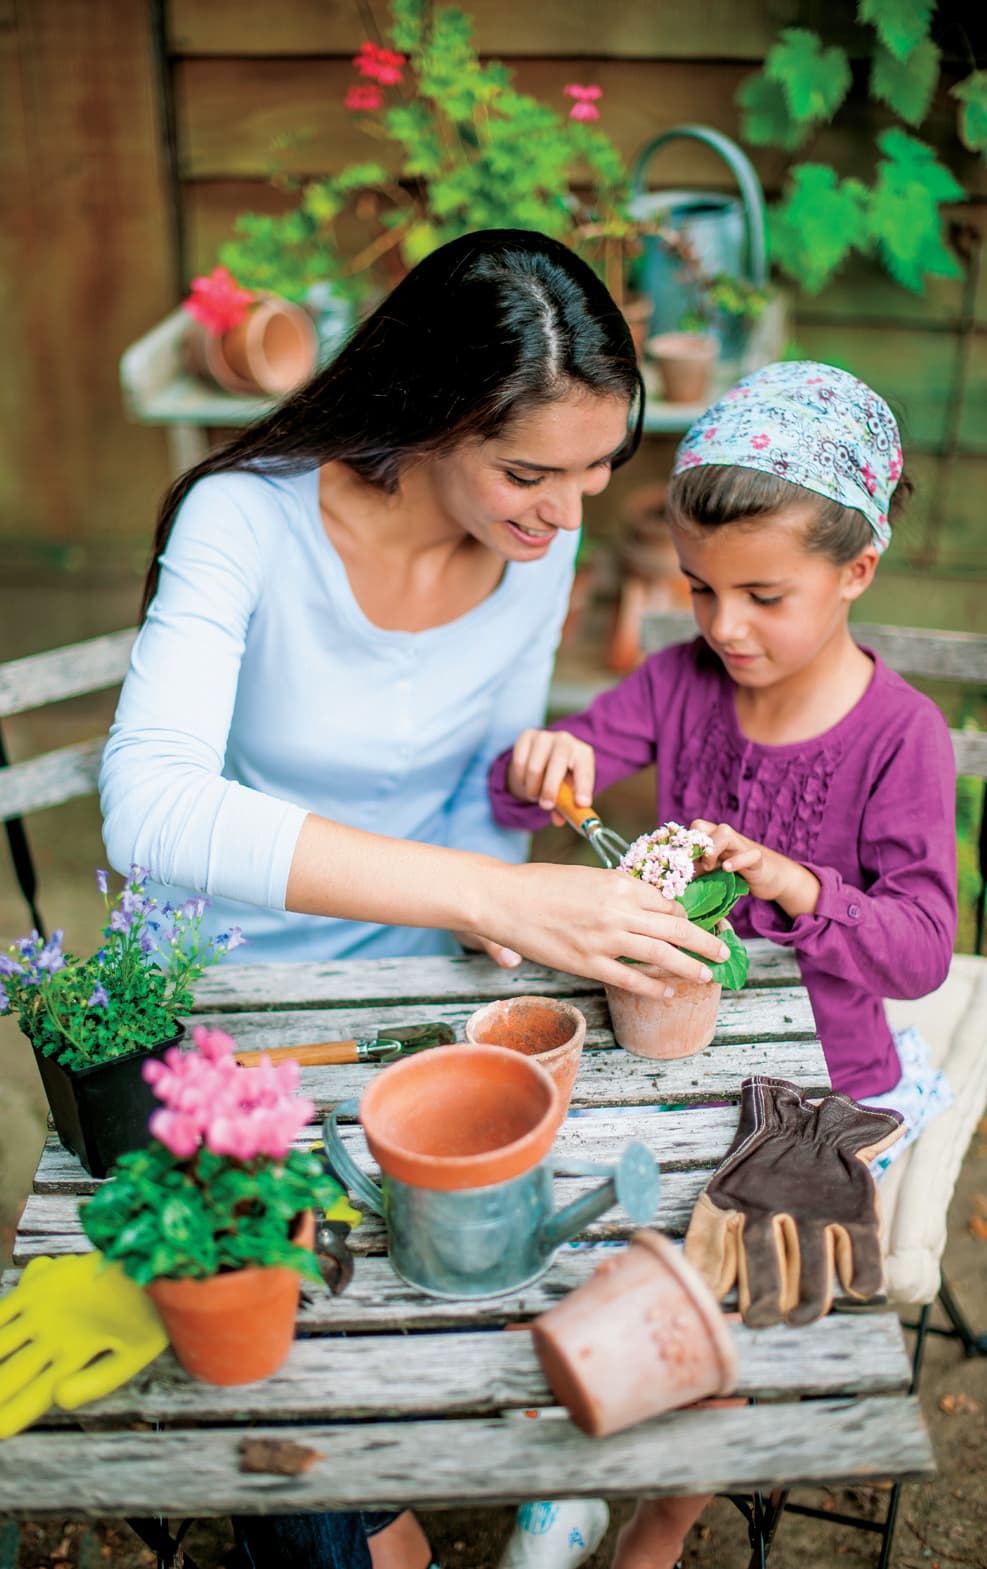
Fig. 1: Spend some time in the garden. Get your hands dirty by planting seeds in a garden pot, then give your plants the water and sun they need to grow.
Minecraft Play: Sow, Grow, Harvest
Time to build a garden in Minecraft. Craft a hoe out of any material you have available. Use the hoe to prepare the ground for your garden. Once you’ve used the hoe, pour water within a couple of blocks of your crop. For efficient use of crop watering, place the crops in rows with water in between.
GAME MODE
Creative
APPROXIMATE TIME TO COMPLETE
1 hour in Minecraft
PLATFORMS
PC/Mac, Consoles, PE
1. Potatoes, wheat, carrots, melons, and pumpkins are food staples inside the game. Potatoes can be found at automatically generated NPC (nonplayer character) villages and, more rarely, by killing a zombie. An easy way to collect wheat seeds is to break tall grass.
2. Craft a hoe (fig. 1). The material you pick will be subject to wearing down as it is used. Hoes are only for preparing the ground for planting, so you won’t need to craft many for a typical size garden. Right-click on the ground to prepare the soil for seeds.
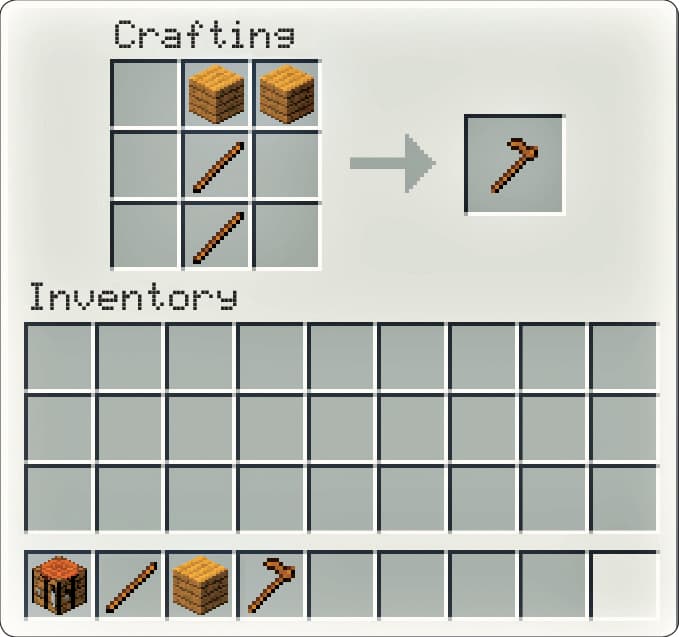
Fig. 1: Craft a hoe using sticks and wood, iron, stone, gold, or diamonds.
3. Bone meal is your secret growth-hacking tool. Bone meal can be crafted from bones (fig. 2). With bone meal, most plants will grow almost instantly. Without bone meal, your crops will take a few day/night cycles to grow to the harvestable stage (fig. 3). Gather bones by killing skeletons.

Fig. 2: Craft bone meal out of bones. One bone gives you three bone meals. Collect bones by killing skeletons.
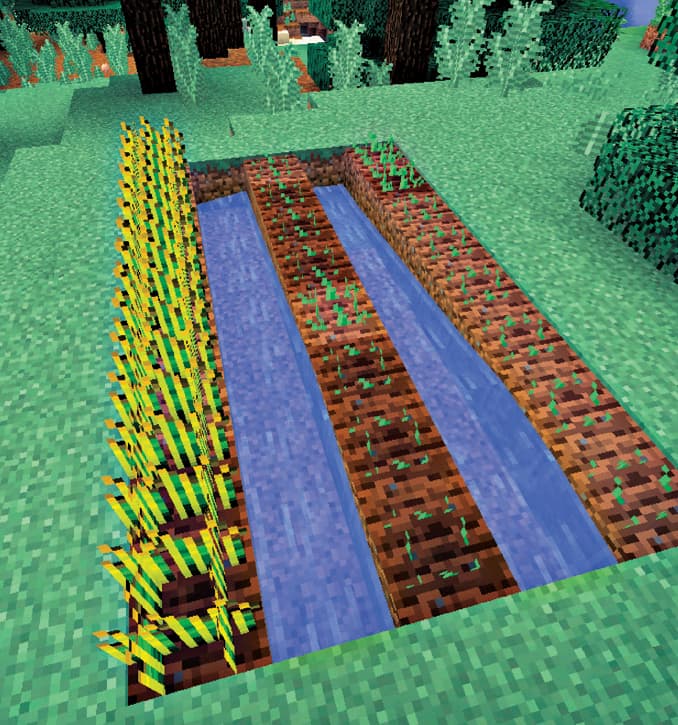
Fig. 3: The left row has been fertilized with bone meal. The other two rows have been left to grow naturally.
4. Once the crop is fully grown, left-click on the plant to harvest. Beware: wandering mobs can destroy your garden. Protect your crops with walls of iron bars (fig. 4) or any other block that will keep mobs out.
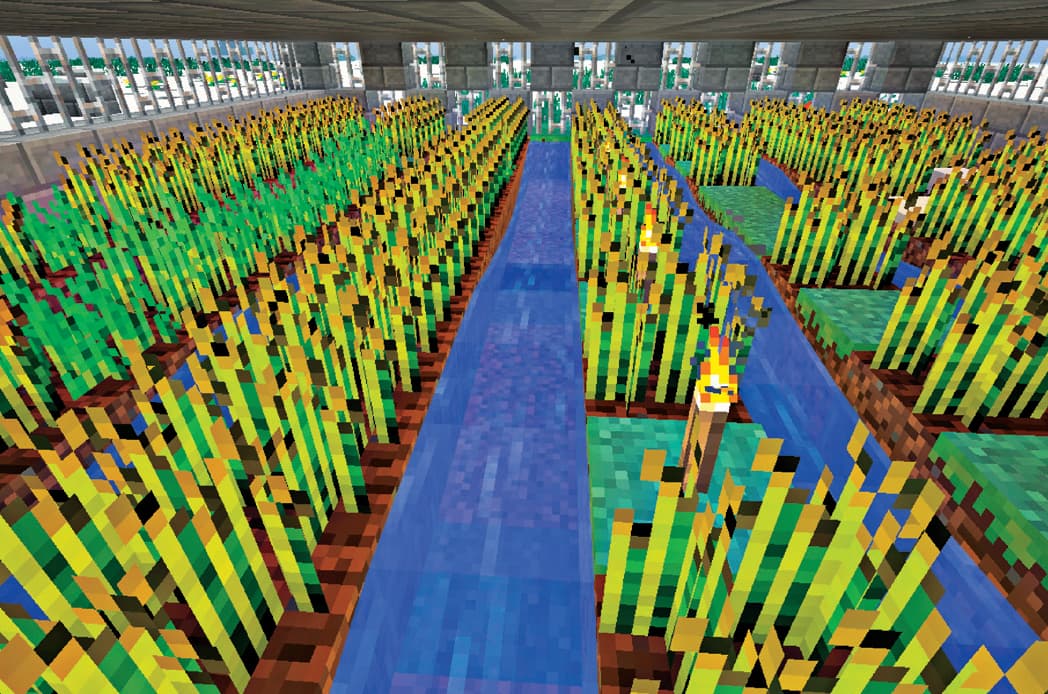
Fig. 4: Mobs can destroy your crops. You can prevent mobs from trampling them by placing iron bars to protect them.