2
Learning Objectives
By the end of this chapter, you will be able to:
- Explain the need for versioning commits
- Compare commits, branches, indexes, and working trees
- Define the various Git commands and state their functions
- Amend commits
This chapter describes the comparison and editing of commits
Introduction
In the previous chapter, we covered the concept of version control and various types of workflows. We then analyzed the GitHub UI and GitHub functions, such as teams and SSH. Finally, we created a repository by using GitHub etiquette.
In this chapter, we will explain the logic behind the need for versioning commits. Additionally, we will compare commits, branches, indexes, and working trees. By the end of this chapter, you'll be able to demonstrate how to amend commits.
Introduction to Versioning Commits
We have already discussed version control, and we have established that it aids in tracking changes. In this topic, we will address the following question:
How can we make Git track and monitor the changes in a file?
Our aim is to examine and demonstrate the various stages that a file passes through to become a candidate for a commit.
In Git, files can have the following statuses:
- Untracked: This a file that exists in the working tree whose changes are not being monitored by Git and aren't listed in the gitignore file.
- Unstaged: This a file whose changes are being tracked by Git; the file has been changed since the last commit and has yet to be moved to the index.
- Staged: This is a file whose changes are being tracked by Git; the file has been changed since the last commit and has been moved to the index. This file is a file that is ready for the Git commit. Staged files are the files in the index that are different from their corresponding files in the HEAD, that is, the version of the file in the most recent commit.
git status
git status is a utility that is used by Git. It's used to retrieve the details of files that are untracked, unstaged, or staged. git status lists files in order of their statuses.
The git status output is lengthy in nature. To view a brief list and status, use the -s or --short option with the git status command.
Exercise 12: Viewing and Establishing the Status of a File
To complete this exercise, you will need to create a class in the abacus application, so that you can host the functions that you'll be building for this application.
To establish the status of a file in a repository, follow these steps:
- Create a branch to host this modification by using the following command:
git branch ft-add-encapsulating-class
Note
The changes made on this branch will later be incorporated into the branch master, that is, the primary branch. Take a look at the following screenshot:

Figure 2.1: Branch master
Note
The modification is done by using the command below. Take a look at the following screenshot:
git checkout ft-add-encapsulating-class

Figure 2.2: Encapsulating a class
Note
You can create a branch by using git checkout -b ft-add-encapsulating-class. The prefix ft on the branch name is based on the best practices for enforcing a naming convention for different branch types.
ft: Use this prefix for a feature branch.
bg: This prefix should be used for bug branches.
fx: The fx prefix is utilized to identify a branch for rolling out hotfixes.
ch: This prefix is used for chore branches. Chores refer to tasks like styling code and rearranging files in a repository.
- Create the .gitignore file by using the following command:
echo '.DS_Store' > .gitignore

Figure 2.3: Encapsulating a class
- Run the git status command to view untracked files:

Figure 2.4: Creating the gitignore file
- Open the abacus repository in a text editor of your choice.
- Open compute.py in the text editor.
- Add the following lines to compute.py and save the changes:
Live Link for exercise_1_step_6.py: https://bit.ly/2S34XaF

Figure 2.5: The compute.py file
- Run git status to view any untracked and unstaged files:
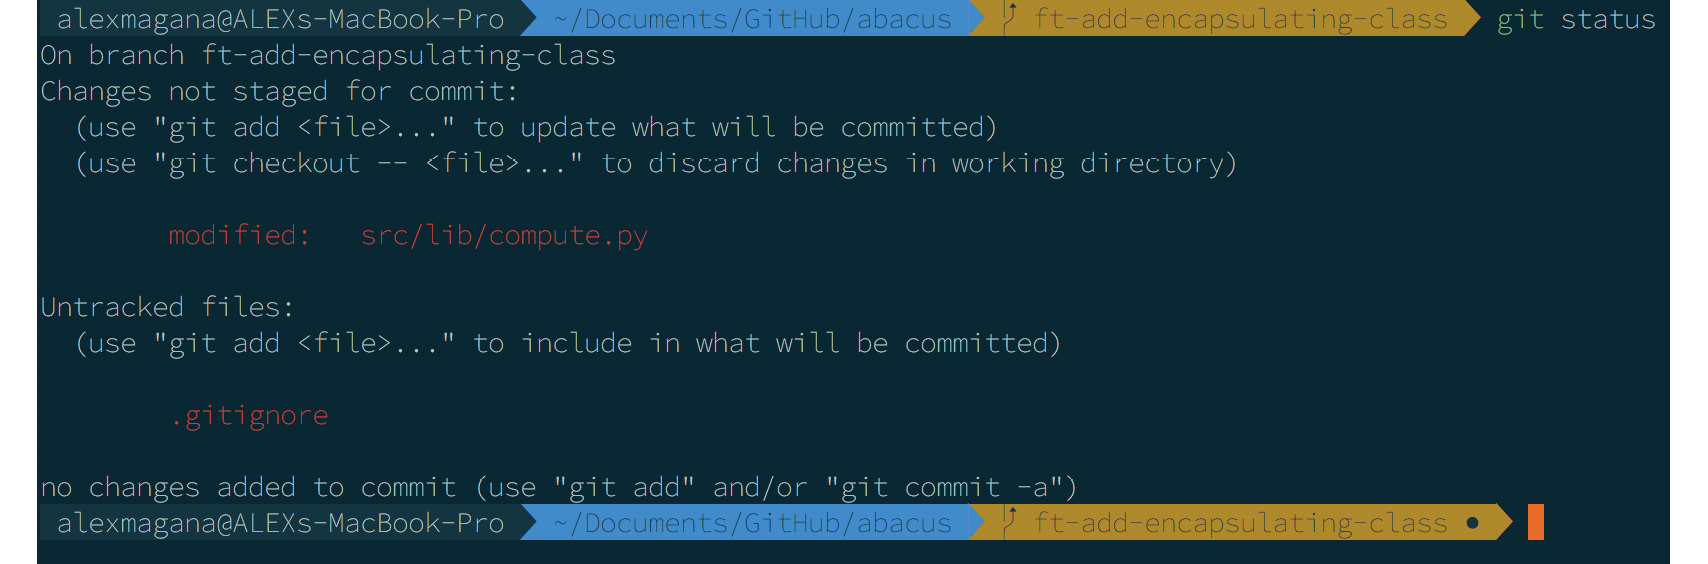
Figure 2.6: The modified compute.py file
- Run git add src/lib/compute.py to stage the changes made to the file.
- Run git status to view untracked and staged files:

Figure 2.7: Running the git status command
- Run git add .gitignore to start tracking the .gitignore file:
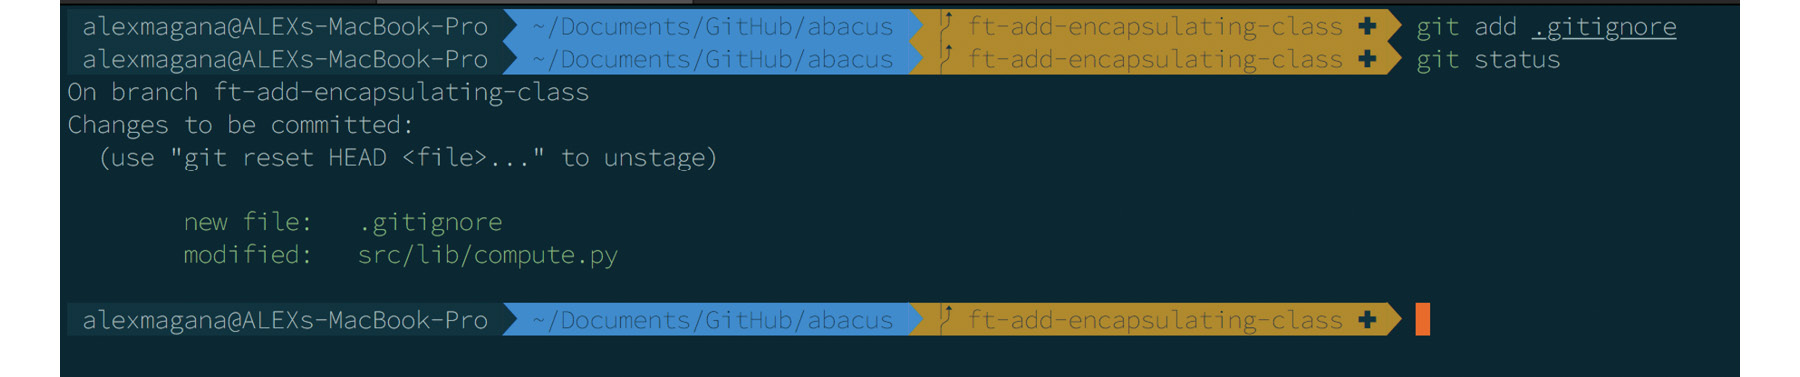
Figure 2.8: Tracking the .gitignore file
- Commit the staged changes by using the following command:
git commit -m "Add a class for math functions"

Figure 2.9: Committing the changes
Note
To ensure flexibility, atomic commits are preferred and emphasized in version control. The term atomic commits refers to units of change that can be treated as a single unit. This normally implies a single file or a small set of files. This enables the addition and removal of changes without affecting a large set of files.
- Push the changes made to a remote branch by using the following command:
git push origin ft-add-encapsulating-class

Figure 2.10: Pushing the changes to a branch
Note
Refer to the complete code at abacus/.gitignore and abacus/src/lib/compute.py for the files used in this exercise.
Go to https://github.com/TrainingByPackt/Version-Control-with-Git-and-GitHub/tree/master/Lesson%202-Versioning%20Commits to access this code.
Outcome
By following the steps that we have outlined, you should be able to use git status to view untracked, unstaged, and staged files.
git diff
The git diff command is used to compare one snapshot of changes to another. As the name suggests, this utility supports evaluating the differences between two snapshots of a repository.
In this section, we will explore some use cases of the git diff command.
Comparing the Working Tree to the Index
To compare the entire working tree to the index, run the git diff command without specifying a path:
git diff
This command supports examining the differences of a specific file or directory by accepting a path:
git diff -- [path_to_a_file_or_directory]
- git diff -- src/lib/
- git diff -- src/lib/compute.py
(1) and (2) compare the version in the working directory of the specified paths to the version that's present in the index.
Comparing the Working Tree to an Arbitrary Commit or Branch
A comparison can be made between the working tree and a specific commit on the same branch, or even the tip of a given branch. To compare the working tree to a given commit, use the following syntax:
git diff [commit_hash] -- [path_to_a_file_or_directory]
- git diff HEAD -- src/
- git diff f4e4e8d5b292dc94468b6f88223cac4f55c03713 -- src/lib/
- git diff master
(1) Compares the version in the working directory of the src directory, to the version of the most recent commit on the current branch.
(2) Compares the version in the working directory of the src directory to the version in the snapshot represented by the hash f4e4e8d5b292dc94468b6f88223cac4f55c03713.
(3) Compares the version in the working directory of the src directory to the version at the tip of the branch master.
Comparing the Index to an Arbitrary Commit
To compare the files in the index to a specific commit, (for example, the most recent commit, also referred to as the tip of the branch), you can use the --staged or --cached option with the git diff command. A commit hash is required for this scenario. The git diff command defaults to HEAD in the absence of a specific commit hash:
git diff --cached [commit_hash] or
git diff --cached [commit_hash] -- [path_to_a_file_or_directory]
- git diff --cached HEAD -- /src/lib/compute.py
(1) compares the version in the index of the compute.py file to the version at the tip of the current branch.
Comparing Commits and Branches
git diff provides a variant of the command's usage that supports comparing commits and branches.
To compare two commits or the tips of two branches, use the following syntax:
git diff [commit_hash or branch_name] [commit_hash or branch_name] or
git diff [commit_hash or branch_name] [commit_hash or branch_name] -- [path_to_a_file_or_directory] or
git diff [commit_hash or branch_name]..[commit_hash or branch_name]
- git diff ft-add-encapsulating-class master
- git diff ft-add-encapsulating-class..master
- git diff da39a3ee5e6b4b0d3255bfef95601890afd80709 86f7e437faa5a7fce15d1ddcb9eaeaea377667b8
(1) and (2) compare the differences between the tips of the specified branches.
(3) compares the differences between the files at the point referenced by the specified hashes.
Using the ... notation, git diff is capable of comparing the changes that have been made on branch A to branch B. This occurs from the point where the two branches share an ancestor to the most recent commit of branch B.
To achieve this, use the following syntax:
git diff [branch_A]...[branch_B] -- [path_to_a_file_or_directory]
- git diff ft-add-encapsulating-class...master
(1) lists the changes that have occurred in the branch master, since the ft-add-encapsulating-class branch was created from the branch master.
Note
When .. or … are used with the git diff command, it implies the comparison of two points in history, and not a range.
git diff defaults to HEAD when a commit hash or branch name is not specified.
Exercise 13: Examining Differences Between Files
To determine the differences in a branch or file, follow these steps:
- Launch the Terminal.
- Create a branch that comes off the ft-add-encapsulating-class branch by using the following command:
git checkout -b ft-support-multiplication-arithmetic
Note
This branch will be used to add a new feature to our application.

Figure 2.11: Creating a branch
- Open the abacus repository in a text editor of your choice.
- Open compute.py in the text editor.
- Add the following lines to compute.py and save the changes:
Live Link for file exercise_2_step_5.py: https://bit.ly/2QYS01B
def multiply(self):
sum = 1
for item in self.operands:
sum *= item
print(sum)
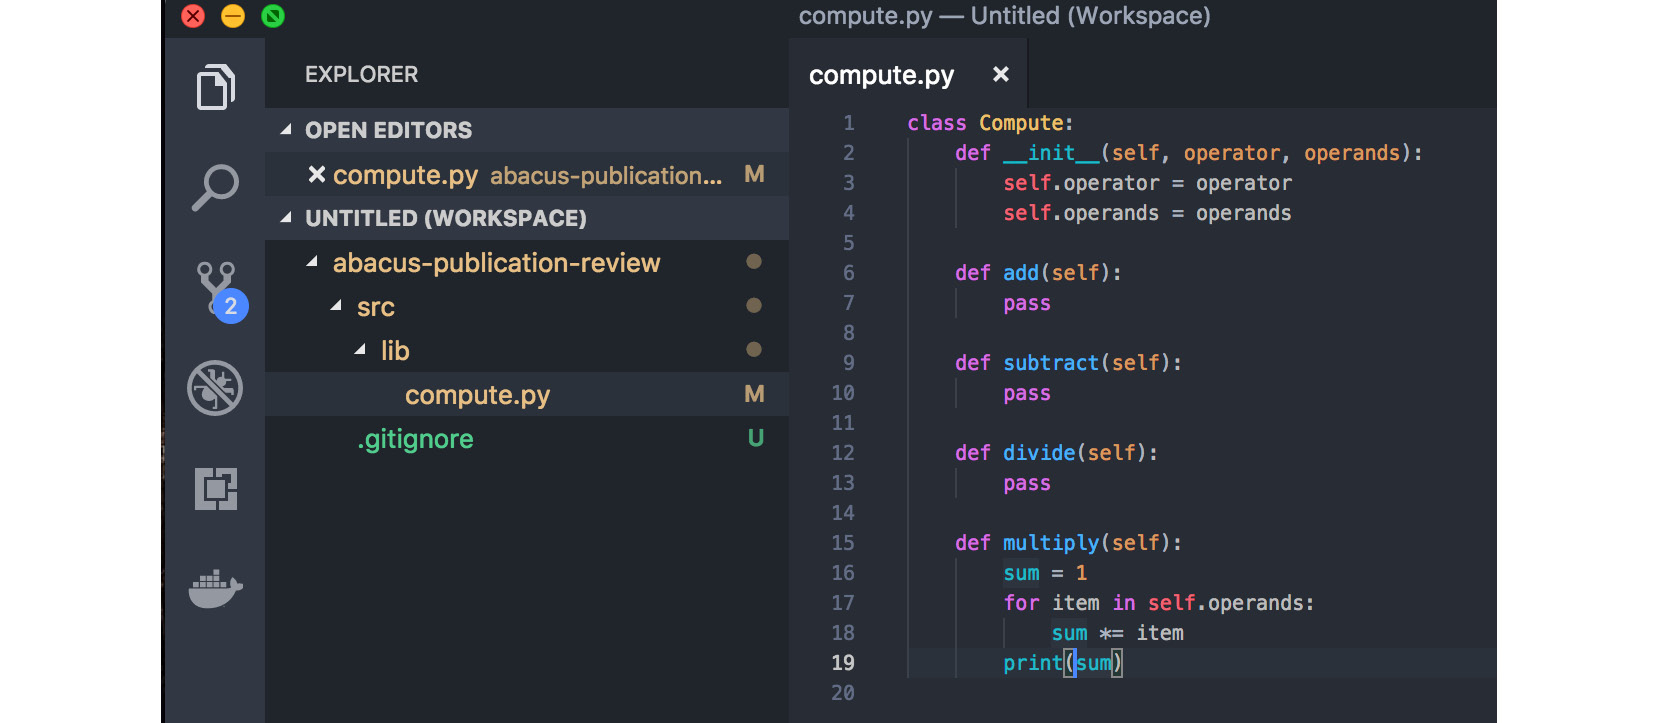
Figure 2.12: Editing the compute.py file
- Compare the working tree to the index by using the git diff command:
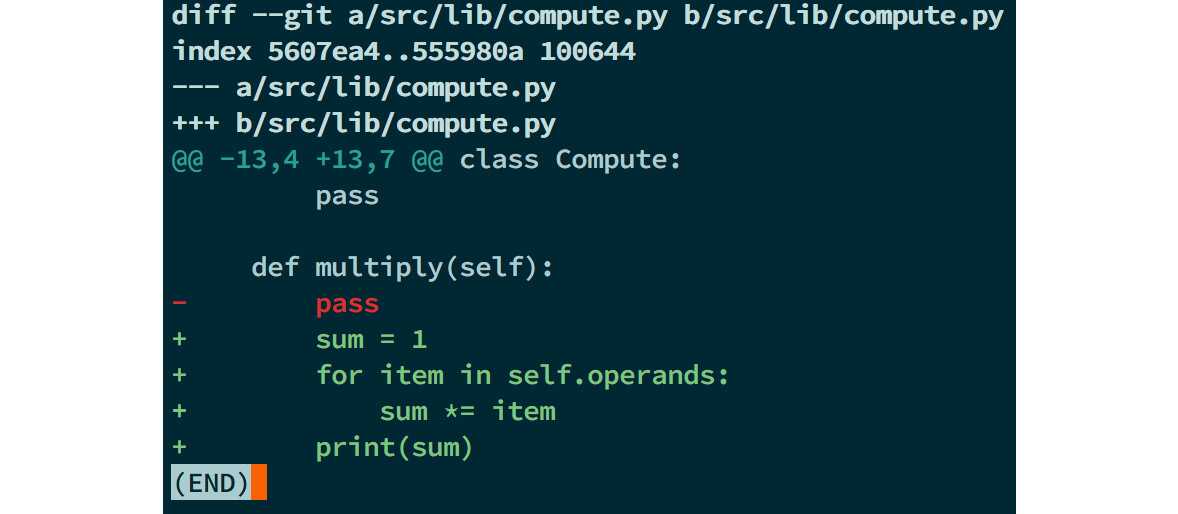
Figure 2.13: Comparing the working tree by using the diff command
- Compare the working tree to the master branch by using the git diff master command:

Figure 2.14: Comparing the working tree to the master branch
- Compare the index to an arbitrary commit by using the following commands:
git add src/lib/compute.py

Figure 2.15: Comparing the index
git diff --cached
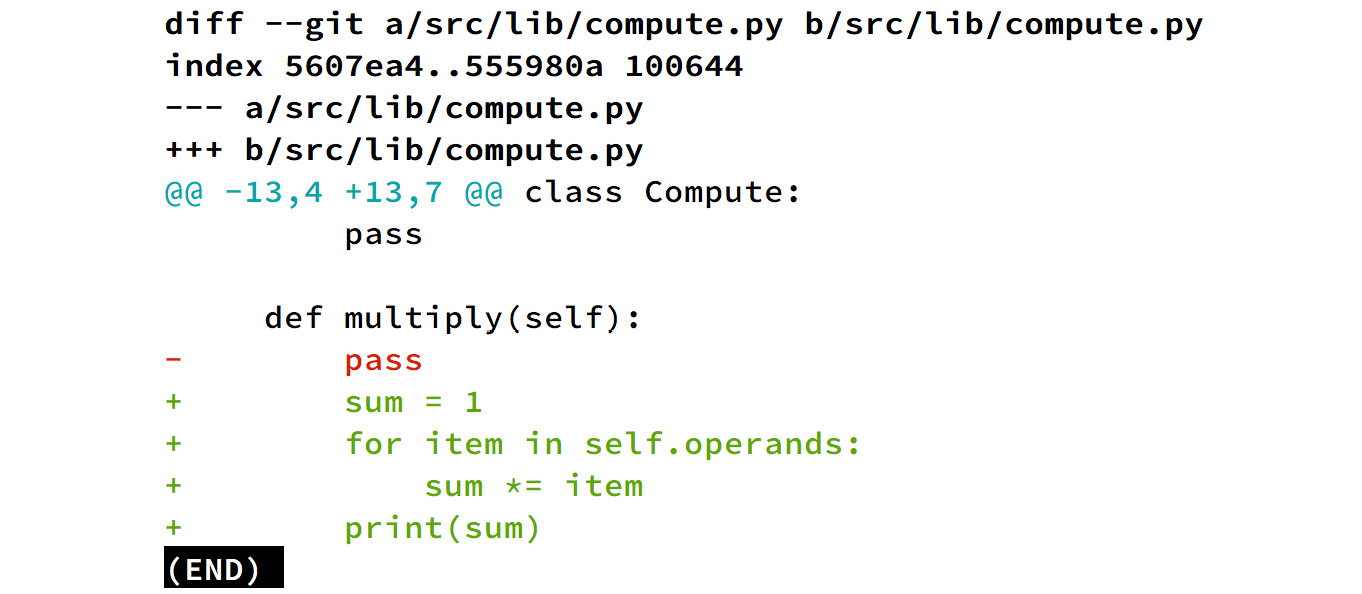
Figure 2.16: Comparing the index to an arbitrary commit
git diff --cached f4e4e8d5b292dc94468b6f88223cac4f55c03713

Figure 2.17: Comparing the index to an arbitrary commit
Note
To retrieve a commit hash, run the git log command
- You can compare different branches by using the following commands:
git commit -m "Add support for multiplication"

Figure 2.18: Comparing branches
git diff ft-support-multiplication-arithmetic..ft-add-encapsulating-class

Figure 2.19: Comparing branches
- Push the changes to a remote branch by using the following command:
git push origin ft-support-multiplication-arithmetic
Outcome
By completing this exercise, you should be able to list and examine the differences between varying snapshots of a branch.
Note
Refer to the complete code at abacus/.gitignore and exercise_2_step_5.py for the files that were used in this exercise. Go to https://github.com/TrainingByPackt/Version-Control-with-Git-and-GitHub/blob/master/Lesson%202-Versioning%20Commits/exercise_2_step_5.py to access this code.
git add
So far, we've established that a file exists in three forms, that is, untracked, unstaged, and staged. We've also explored how to determine the status of a file and examine the changes on a tracked file, whether it be unstaged or staged.
We will now explore how to add files to the index from the working tree. This is achieved by using the git add command.
The git add command uses the following syntax:
git add [options] [path_to_files]
The [options] used with git add include the following:
-n or --dry-run
This option simulates the behavior of git add for the specified file:
-f or --force
This option adds ignored files to the index:
-i or --interactive
This option creates an interactive prompt that can be used to add files from the working tree to the index:
-p or --patch
The --patch option caters to adding portions of a file to the index.
Once this option is chosen, it presents the differences in parts, referred to as hunks. You will then need to use the following options to instruct the git add utility on how to treat a hunk. Take a look at the patch interactive interface options that are given in the following table:
|
Option |
Meaning |
|
? |
Print help. |
|
y |
Stage this hunk |
|
n |
Do not stage this hunk |
|
q |
Exit or quit. Do not stage this hunk or any of the remaining hunks |
|
a |
Stage this hunk and all later hunks in the specified files |
|
d |
Do not stage this hunk or any of the remaining hunks in the file |
|
g |
Select a hunk to go to |
|
/ |
Search for the hunk that matches the specified regex pattern |
|
j |
Leave this hunk undecided; see the next undecided hunk |
|
J |
Leave this hunk undecided; see the next hunk |
|
k |
Leave this hunk undecided; see the previous undecided hunk |
|
K |
Leave this hunk undecided; see the previous hunk |
|
s |
Split the current hunk into more granular hunks |
|
e |
Manually edit the current hunk |
Exercise 14: Adding Files to the Index
To determine the stage of a file in order to ensure that it is ready for the commit process, follow these steps:
- Launch the Terminal.
- Create a branch that comes off the ft-support-multiplication-arithmetic branch by using the git checkout -b ft-support-subtraction-arithmetic command:
Note
This branch will be used to add a new feature to our application.

Figure 2.20: Creating a branch off the branch
- Open the abacus repository in a text editor of your choice.
- Open compute.py in the text editor.
- Make the following changes to compute.py and save the changes:
Live Link for file exercise_3_step_5.py: https://bit.ly/2zo4PM5
def subtract(self):
difference = 0
for item in self.operands:
difference -= item
print(difference)
def multiply(self):
if self.operands is None:
return
product = 1
for item in self.operands:
product *= item
print(product)

Figure 2.21: Editing the compute.py file
- Add files to the index in parts as seen in the screenshots below by using the following command:
git add --patch src/lib/compute.py

Figure 2.22: Adding files to the index

Figure 2.23: Adding files to the index

Figure 2.24: Adding files to the index
- Check the staged changes by using the git status command
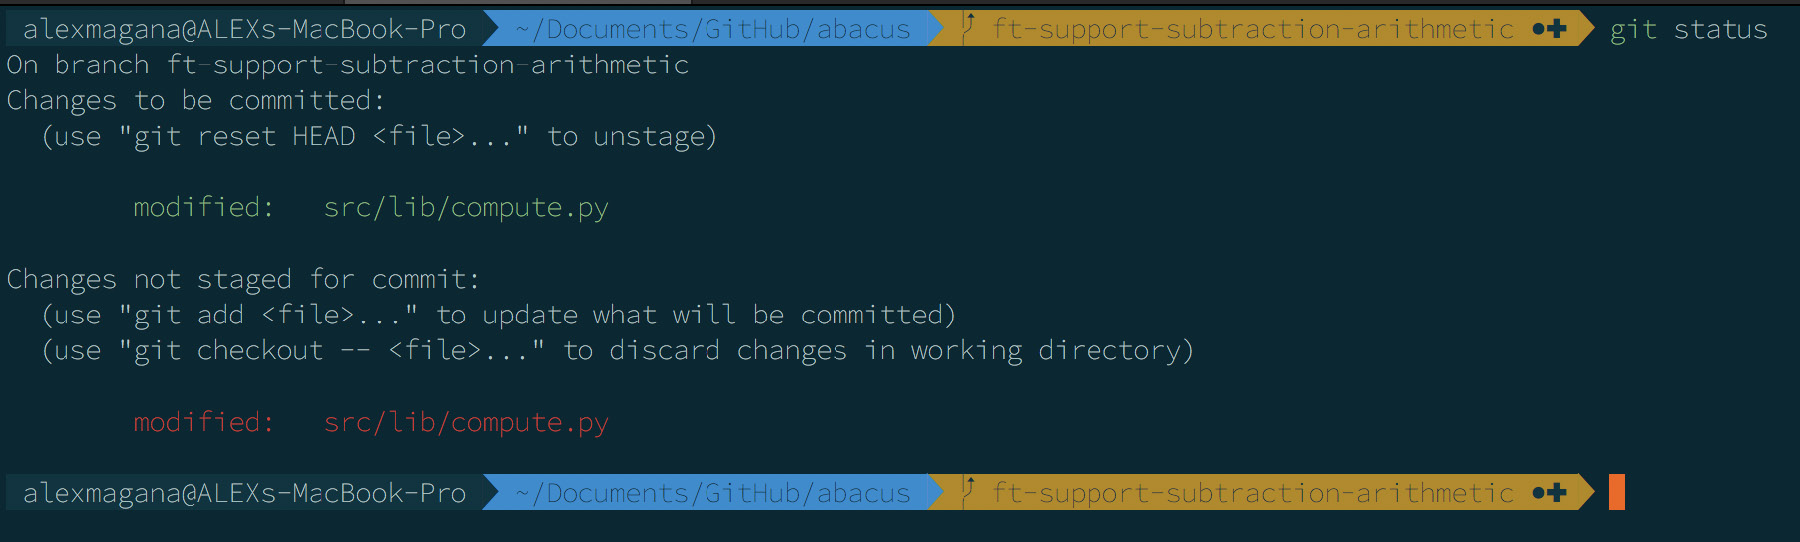
Figure 2.25: Checking the staged changes
- Commit the changes by using the following command:
git commit -m "Remove usage of a reserved word"
- Stage the remainder of the alterations by using the following command:
git add src/lib/compute.py

Figure 2.26: Staging the remainder of the alterations
- Commit the staged changes using the following command:
git commit -m "Add subtraction support"

Figure 2.27: Committing the staged changes
- Push the changes to a remote repository by using the following command:
git push origin ft-support-subtraction-arithmetic
Outcome
Having followed these steps, you should be able to add files to the index, commit the files, and push the files to a remote repository.
Note
git add will ignore files specified in the .gitignore file. Refer to the complete code at abacus/.gitignore and Version-Control-with-Git-and-GitHub/Lesson 2-Versioning Commits/exercise_3_step_5.py for the files used in this exercise.
Go to https://github.com/TrainingByPackt/Version-Control-with-Git-and-GitHub/blob/master/Lesson%202-Versioning%20Commits/exercise_3_step_5.py to access this code.
git commit
The git commit command saves the files in the index. This commit operation stores a message along with the commit. The message describes the additions or alterations associated with the created snapshot.
The syntax of this command is as follows: git commit [options].
Note
The git commit command requires that a message be provided for each commit operation.
The options supported by this command include -m [text] or --message [text].
This message is used to associate the index file with the commit action:
-a or -all
This option instructs the git commit utility to stage tracked files that are unstaged, that is, the tracked files have been added to the index if the files are yet to be staged. Untracked files are not added to the index.
-p or --patch
This launches the interactive patch tool. The options are akin to those that are available through the git add command. See the preceding table for more information on this.
-C [commit hash] or --reuse-message=[commit hash]
This instructs git commit to reuse a commit message and the author information of the specified commit hash.
-F [file] or --file=[file]
This command specifies a file from which a commit message should be obtained.
-t [file] or --template [file]
This command specifies the commit message template file.
-e or --edit
This command edits the provided commit message. This refers to the message provided by the -F, -t, and -m options.
--no-edit
This command uses the specified message as is. Do not launch an editor to edit the message.
--author=[author]
This command overrides the details of a commit author, and takes the following form:
git commit --author="Kifeh Polyswarm <[email protected]>"
--date=[date]
As you can see, this overrides the date details used in a commit.
-q or --quiet
This command suppresses the summary message that's returned after running the git commit command.
git rm
The git rm command performs two roles. These roles are used to remove files from the working directory and the index.
Removing Files From the Index
What doesn't git rm do?
git rm cannot remove a file from the working tree and retain the same file in the index.
git rm follows the following syntax:
git rm [options] [path_file_or_directory]
The options available for the git rm command are -n or --dry-run.
This option simulates the behavior of git rm for the specified files. -n and --dry-run do not do the actual removal.
-r
This option is applicable when using the git rm command in a directory. It removes the directory's contents recursively. This means that the directory and its contents are removed.
--cached
This option removes the specified files from the index only.
-f or --force
git rm checks the files marked for removal for matches, with the files in HEAD, at the tip of the current branch. This check is conducted before the file(s) are removed. The -f option overrides this check.
Exercise 15: Removing Files from the Working Tree and the Index
To remove files from the index or the working tree.
- Launch the Terminal and navigate to the location of the abacus repository.
- Create the scientific.py file in src/lib by using the following command:
echo '# Scientific arithmetic module' > src/lib/scientific.py

Figure 2.28: Creating the scientific.py file
- Track the added file by using the git add src/lib/scientific.py command:

Figure 2.29: Tracking the added file
- Remove the file from the index by using the git rm --cached src/lib/scientific.py command:

Figure 2.30: Removing the file from the index
- Remove the file from the index and the working tree by using the following code:
git add src/lib/scientific.py
git commit -m "Add scientific module"
git rm src/lib/scientific.py
git status
git commit -m "Remove scientific module"
ls src/lib
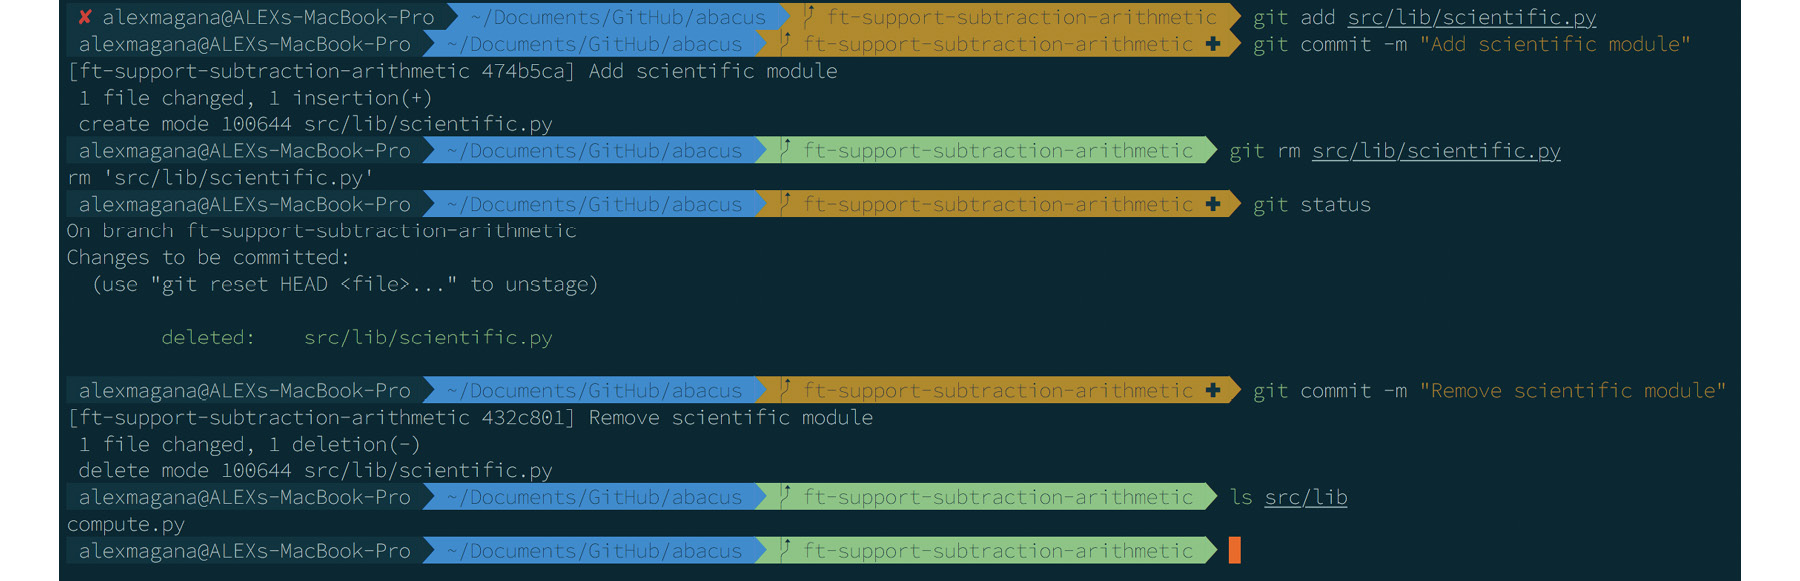
Figure 2.31: Removing the file from the index
Outcome
By completing this exercise, you should be able to remove an undesired file from the index and the working tree.
Note
The rm command removes the specified file from the working tree only. The git rm command, on the other hand, removes the file from the index and the working tree. This provides a shorter process for deleting files, since with rm, you need to run git add to impact the deletion process in the index.
git mv
In the event that you need to update the index for both, old and new paths automatically, the git mv command serves that purpose.
This command has two forms of implementation:
- git mv [options] [source] [destination]
- git mv [options] [source] … [destination]
(1) is used to rename a file.
(2) is used to move a file.
Exercise 16: Moving and Renaming Files
To learn how to handle files and directories using Git, follow these steps:
- Launch the Terminal and navigate to the location of the abacus repository.
- Create the scientific.py file in src/lib by using the following command:
echo '# Scientific arithmetic module' > src/lib/scientific.py

Figure 2.32: Creating the scientific.py file
- Add the file to the index and commit it by using the following command:
git add src/lib/scientific.py && git commit -C 474b5caaf480f7a367c1c456a53868c7fe32b9df --no-edit

Figure 2.33: Adding the file to the index
- Rename the file by using the git mv src/lib/scientific.py src/lib/advanced_compute.py command:

Figure 2.34: Renaming the file

Figure 2.35: Renaming the file
- Commit the file by using the git commit -m "Rename scientific module" command:

Figure 2.36: Committing the file
- Move the file by using the following commands:
mkdir -p src/lib/advanced/
git mv src/lib/advanced_compute.py src/lib/advanced/

Figure 2.37: Moving the file

Figure 2.38: Moving the file

Figure 2.39: Moving the file
Outcome
By completing this exercise, you should be able to rename and move files and directories using git mv.
History and Logs
Take a look at the following command to access the history: git log
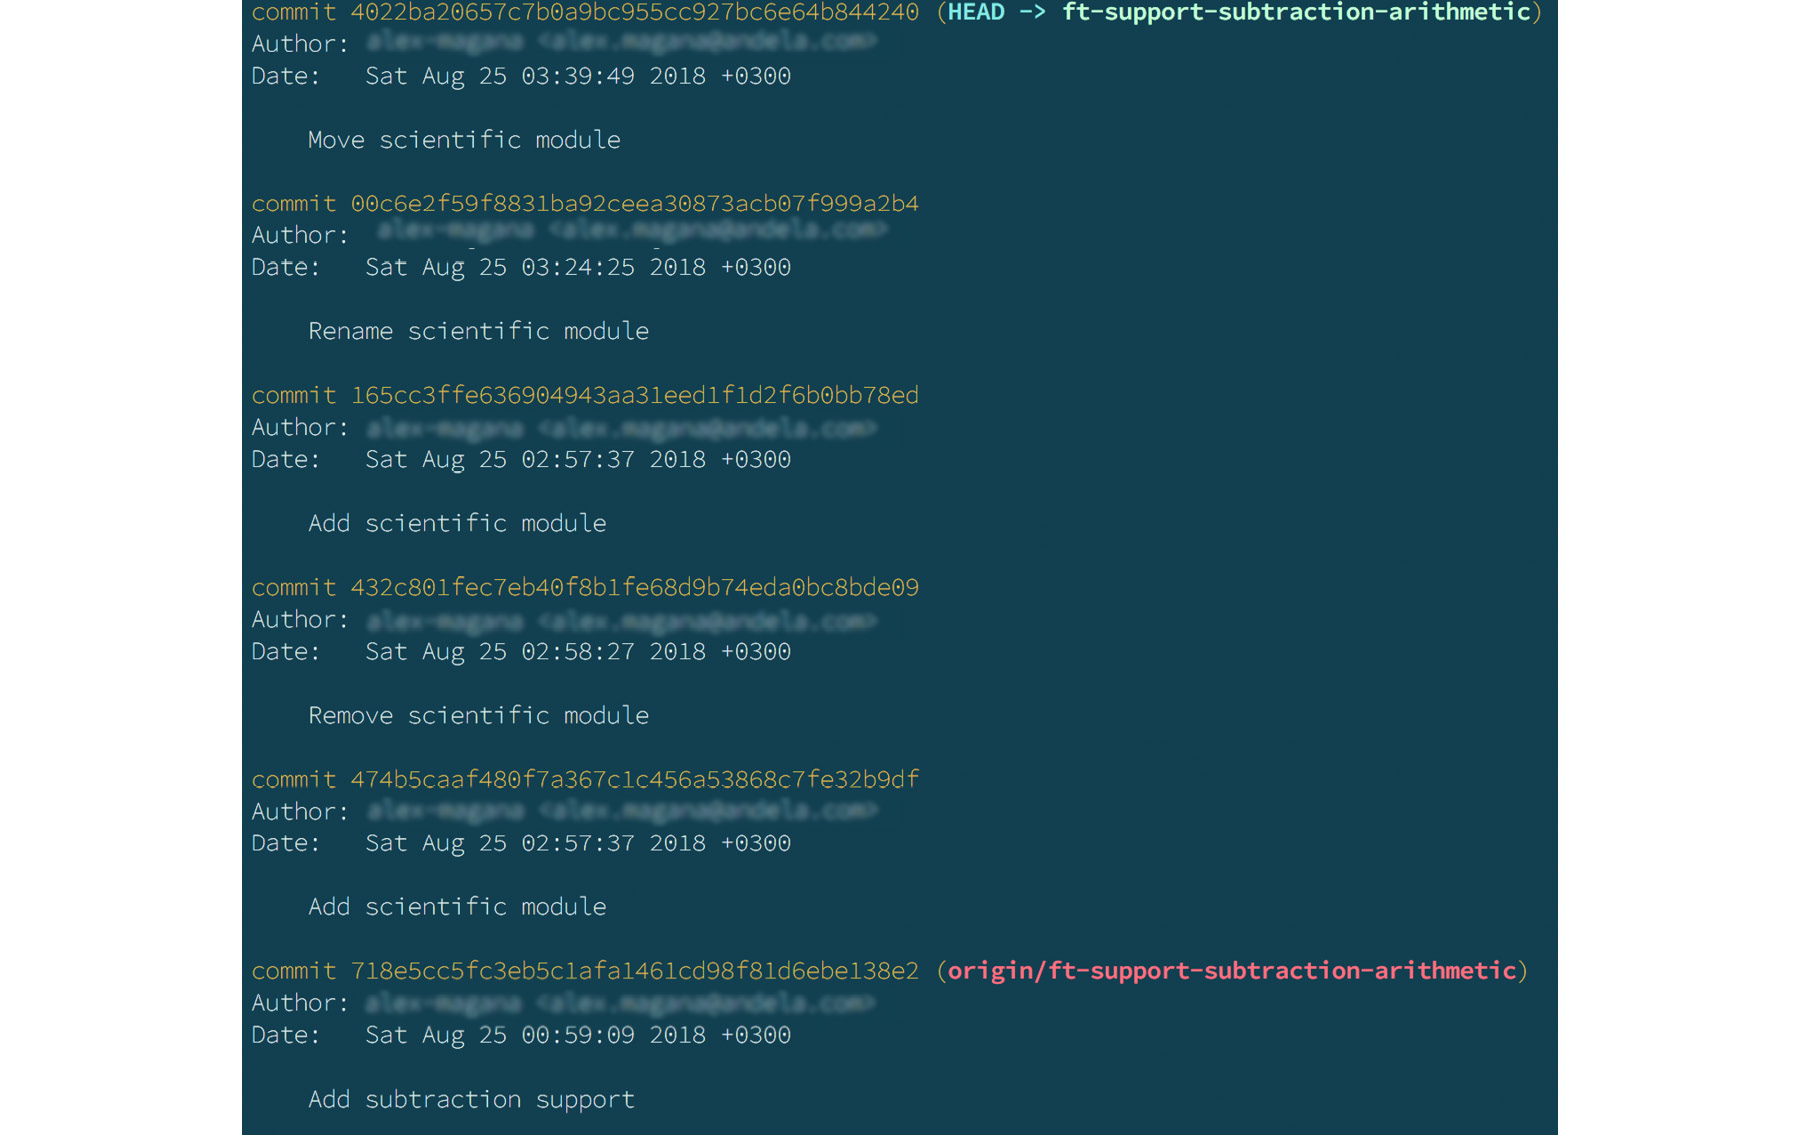
Figure 2.40: A git log file
The git log command lists the history of a branch and the repository, by extension. It uses options and a range to define the duration for which the logs should be retrieved:
git log [options] [version range] [path_to_file_or_directory] [version range]
The git log command can display the history of a branch when given a range of version hashes:
git log [hash_1]..[hash_2]
git log
718e5cc5fc3eb5c1afa1461cd98f81d6ebe138e2..
4022ba20657c7b0a9bc955cc927bc6e64b844240

Figure 2.41: A git log file
Options
The --follow command retrieves and displays the history of a file, beyond rename events:
git log --follow ./src/lib/advanced/advanced_compute.py

Figure 2.42: A git log file
The --decorate[=short or full or no] command displays the ref name of the listed commits as seen in the following screenshots:
git log --decorate=short
Note
The short option omits the ref/heads/,ref/remotes/, and ref/tags/ prefixes from the ref name that is displayed.

Figure 2.43: A git log file
git log --decorate=full
Note
The full option displays the full ref name. It includes the ref/heads/, ref/remotes/, and ref/tags/ prefixes in the ref name that is displayed.

Figure 2.44: A git log file
git log --decorate=no
Note
The no option omits the entire ref name from the commits.
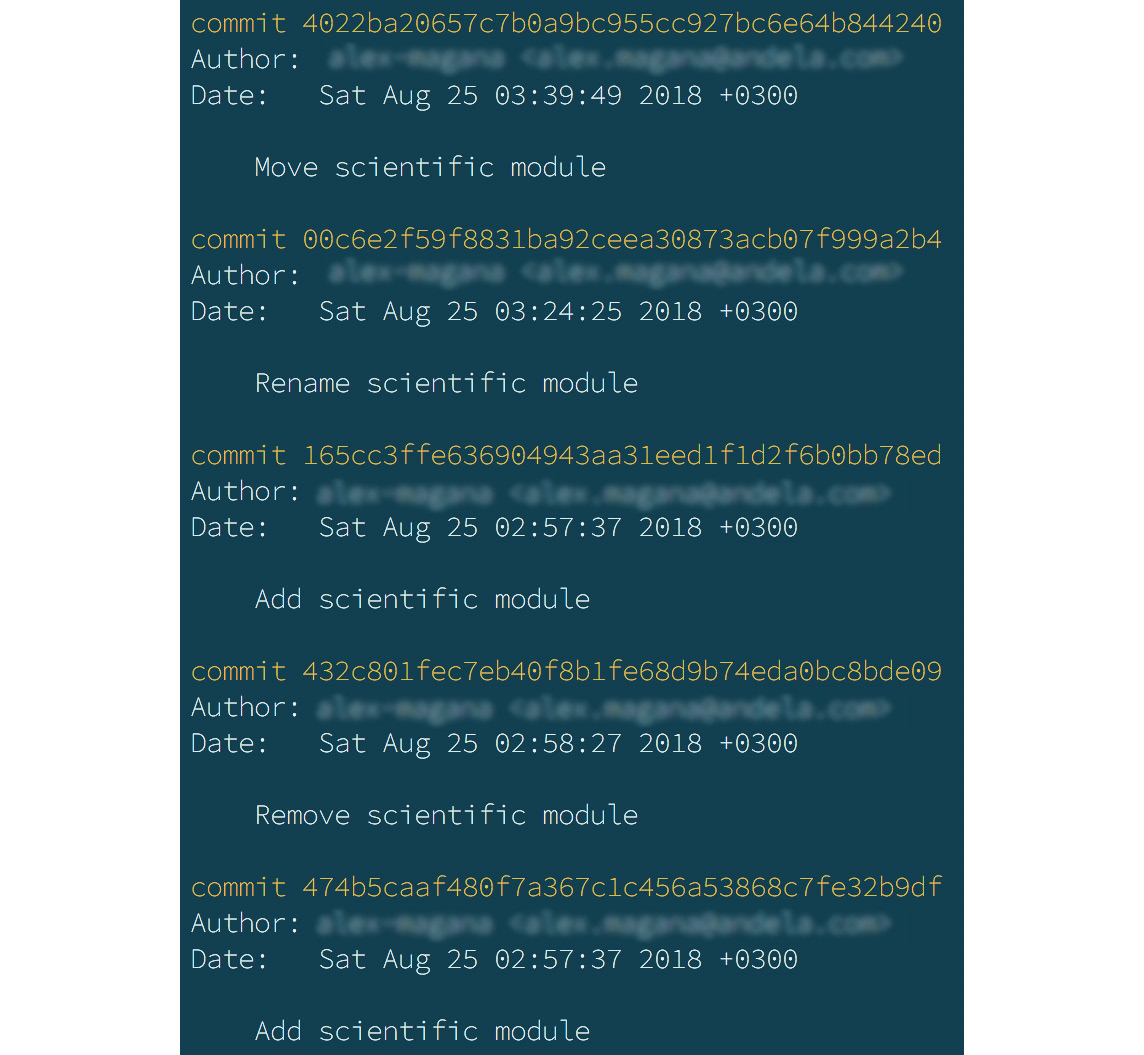
Figure 2.45: A git log file
Note
As shown in the preceding screenshot, the commit with the message Move scientific module does not include a ref name.
The -L [start]:[end]:[path_to_file] command views the changes that have been made to a section of a file, from line number X to line number Y:
git log -L 6:12:./src/lib/compute.py

Figure 2.46: Viewing the changes to a section of a file
Note
The preceding screenshot demonstrates the changes made to the source code in /src/lib/compute.py, for the content in line 6 to line 12, with each commit indicating the alterations it represents.
The --[number] , -n [number] ,and --max-count=[number] the specified number of commits only:
git log -3 or git log -n 3

Figure 2.47: Adding the scientific module
The --skip=[number] command skips the specified commits and displays the rest:
git log --skip=4
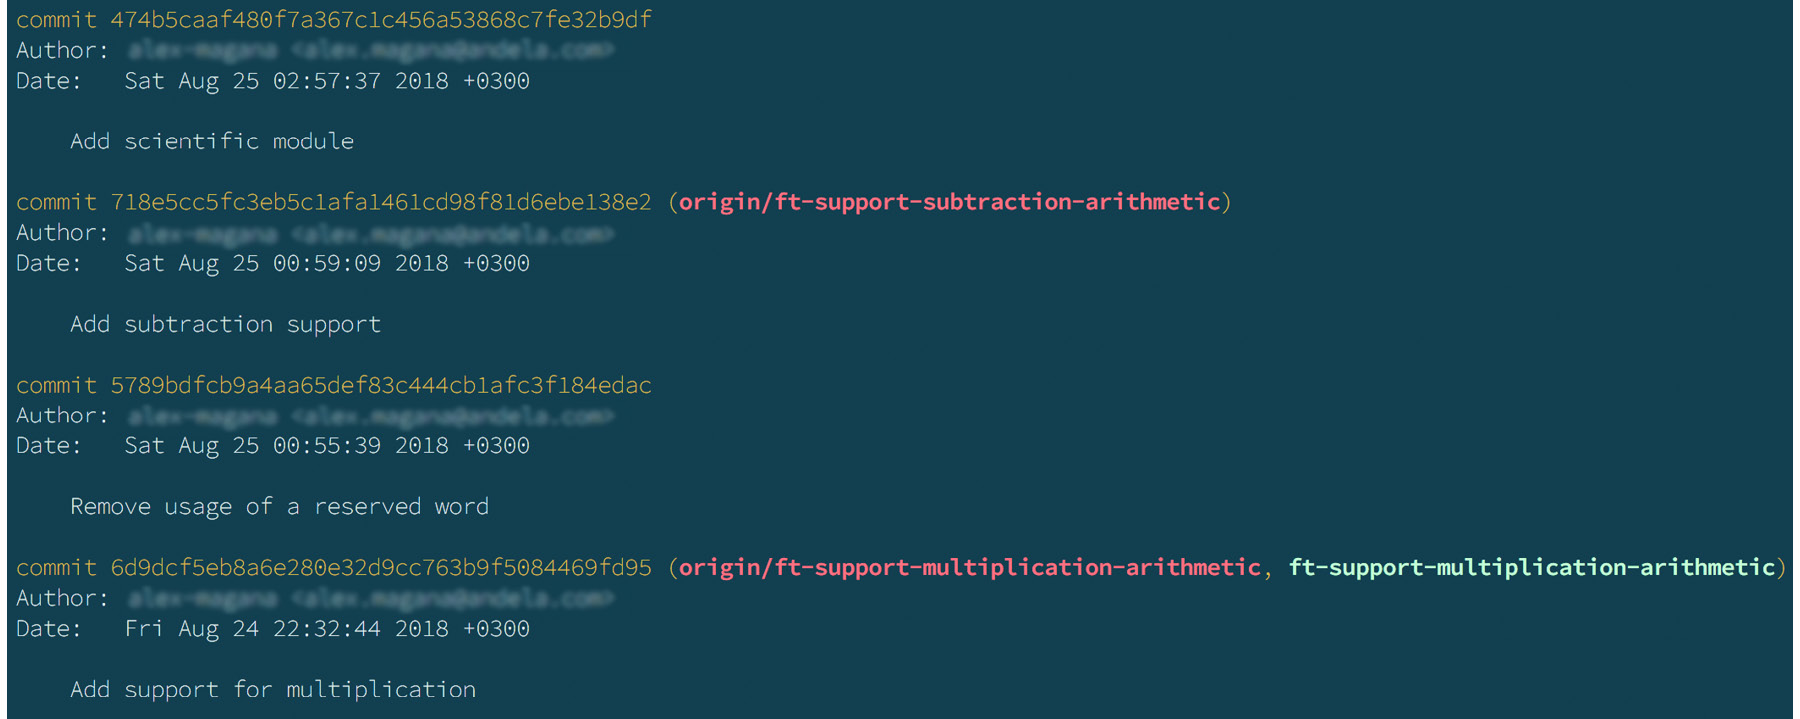
Figure 2.48: Adding scientific support
The --since=[date] or --after=[date] commits that have been created after a given date:
git log --after=25/08/2018
The --until=[date] or --before=[date] commits that precede a given date:
git log --before=24/08/2018
The --pretty=[format] command displays the history of a branch using a prescribed format:
git log --pretty=oneline

Figure 2.49: Modifying the scientific module
The following code displays the commit history details in a reverse chronological order:
[commit_hash] [commit title]
git log --pretty=short

Figure 2.50: Modifying the scientific module
The following code displays the commit history details in a reverse chronological order:
[commit commit_hash]
[Author: author_details]
[commit title]
Note
In the preceding screenshot, the commits are listed in the following format:
commit 4022ba20657c7b0a9bc955cc927bc6e64b844240
Author: alex-magana <[email protected]>
Move scientific module
git log --pretty=medium
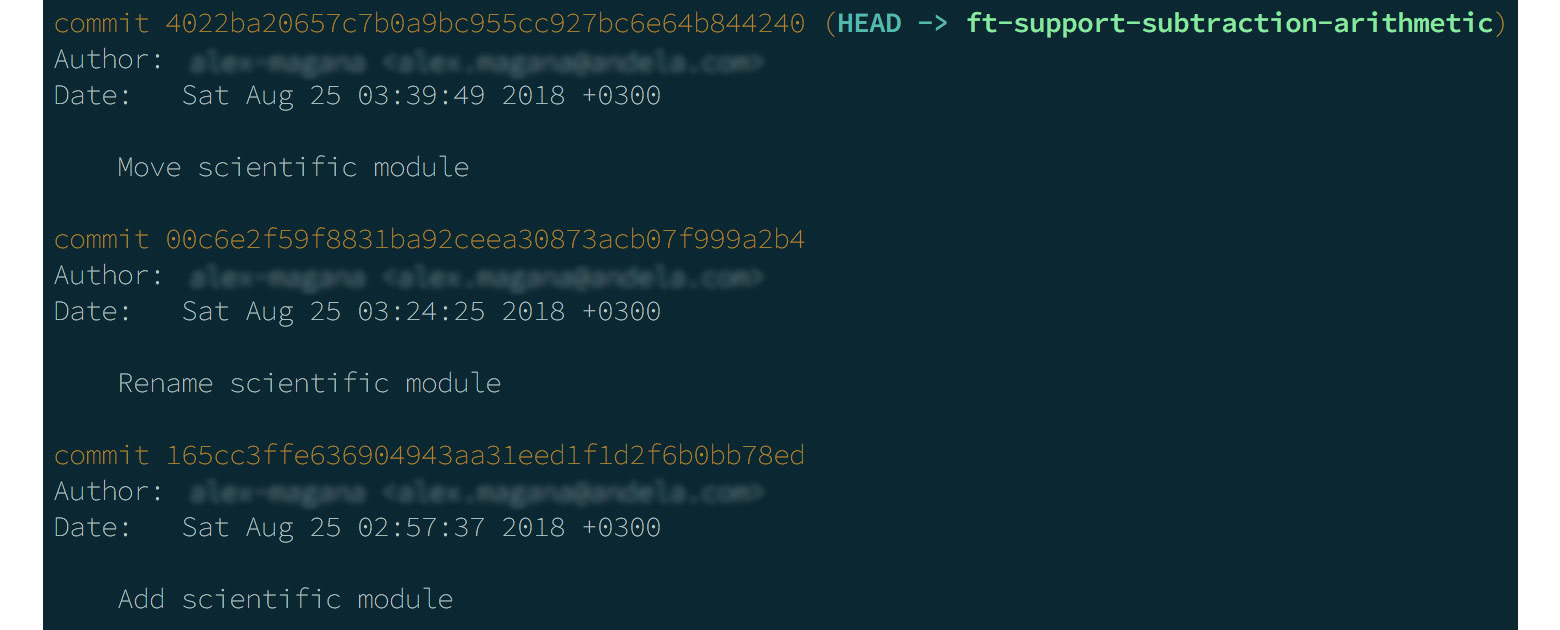
Figure 2.51: Modifying the scientific module
This command displays the commit history details in the following order:
[commit commit_hash]
[Author: author_details]
[Date: date_details]
[commit title]
Note
In the preceding screenshot, the commits are listed in the following format:
commit 4022ba20657c7b0a9bc955cc927bc6e64b844240
Author: alex-magana <[email protected]>
Date: Sat Aug 25 03:39:49 2018 +0300
Move scientific module
git log --pretty=format:[format string]
The format is a string that's in the form of %placeholder1 %placeholder2 %placeholderN.
The supported placeholders include the following and are shown in the following screenshots:
- %H: The commit hash
- %h: The abbreviated commit hash
- %T: A tree hash
- %t: An abbreviated tree hash
- %P: The parent hash
- %p: The abbreviated parent hash
- %an: Author name
- %ae: Author email
- %ad: Author date
- %ar: A relative author date
- %at: The Unix timestamp version of the author date
- %s: The subject of the commit
- %b: The body of the commit
- %n: A newline
git log --pretty=format:"%H %an"

Figure 2.52: String format
git log --pretty=format:"%H %an %ae"

Figure 2.53: String format
git log --pretty=format:"%H %an %ae %n %s %n %b"

Figure 2.54: Modifying the scientific module
Amending Commits
Consider a scenario where you have made changes and persisted them through git commit, and you now need to reword a commit message or the files in a commit. How can you edit the commit messages and their respective contents? In this section, we will explore how Git allows you to edit commits.
Amending a Single Most Recent Commit
The most recent commit can be edited by using --amend in the git commit command.
Exercise 17: Editing the Most Recent Commit
To edit the commit referenced by HEAD, that is, the most recent commit on a branch, follow these steps:
- Launch the terminal and navigate to the location of the abacus repository.
- Open the last commit message for editing by using the following command:
git commit --amend
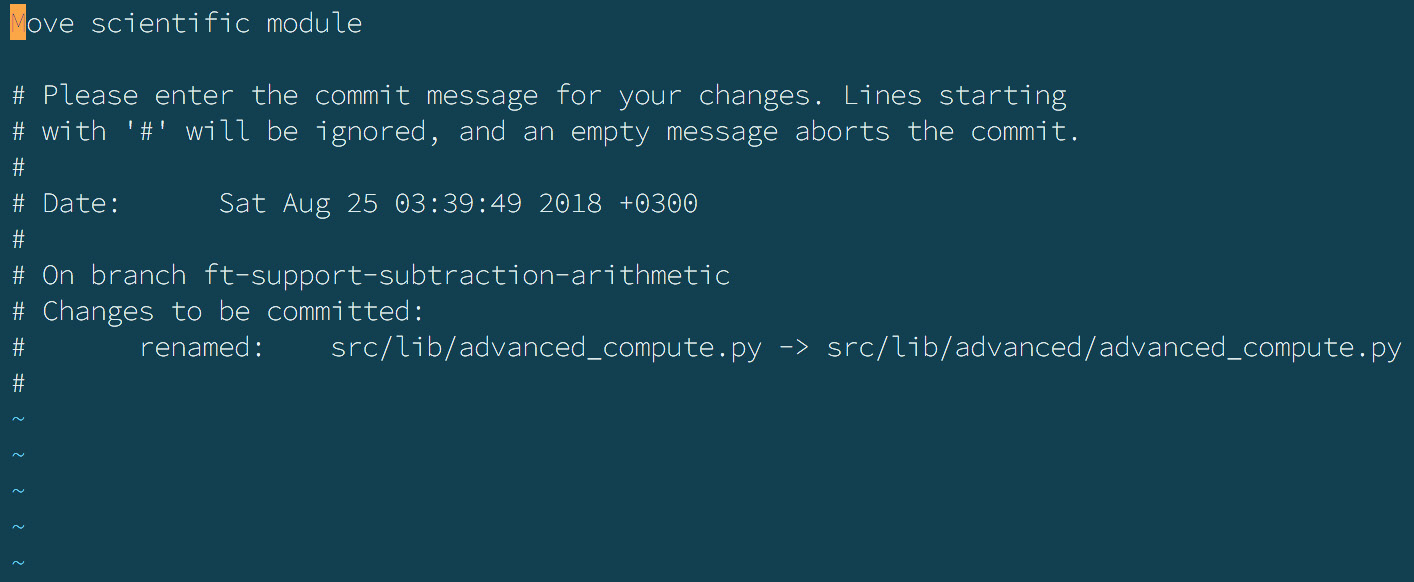
Figure 2.55: Editing the last commit
- Press i to switch to INSERT mode.
- Edit the message accordingly.
- Press Esc to exit INSERT mode.
- Press : and type wq to save the changes and exit the editor:
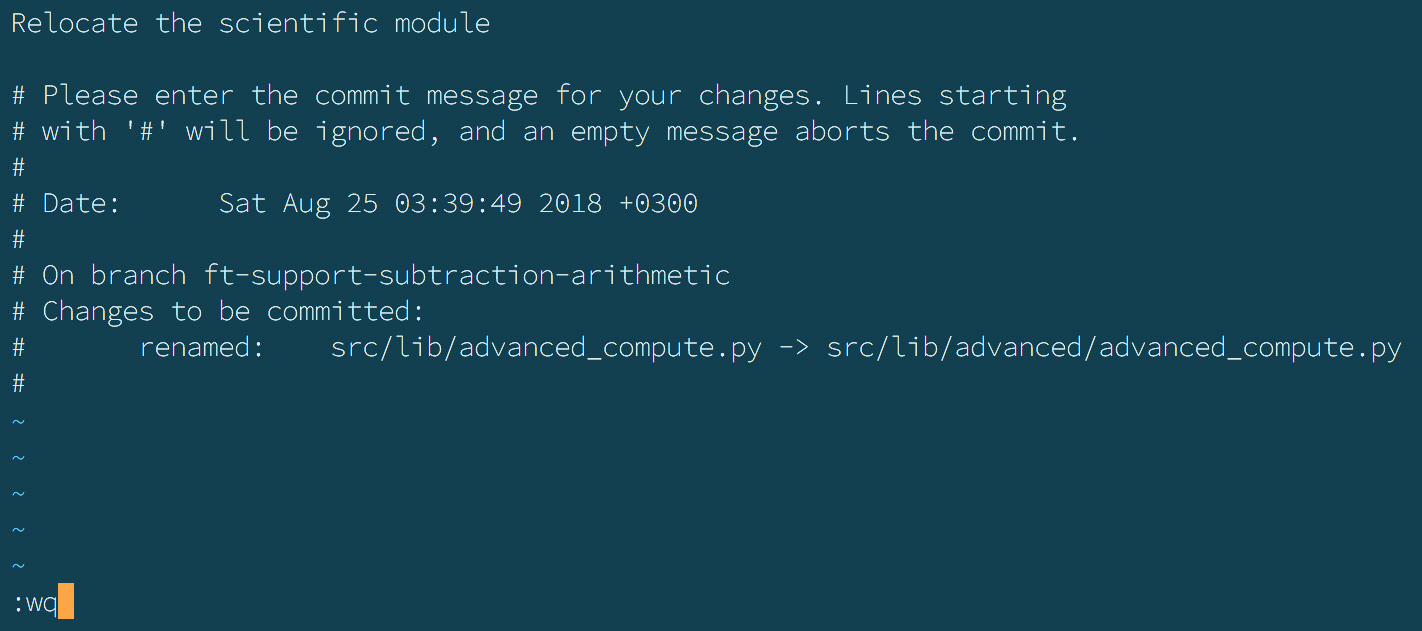
Figure 2.56: Saving the changes
- Press Return to execute the wq command.
Outcome
Through following this exercise, the most recent commit message should have been updated. An example of this is shown in the following screenshot:

Figure 2.57: Displaying the commit message
Amending Multiple Commits
The git rebase command provides the reword and edit options to edit the commits. The reword option allows you to edit a message, while the edit option supports editing a commit message, as well as the contents of a commit.
Exercise 18: Editing Commits Using the reword Command
To edit a message using the reword command, follow these steps:
- Launch the terminal and navigate to the location of the abacus repository.
- Retrieve the last four commits by using the git rebase -i HEAD~4 command:
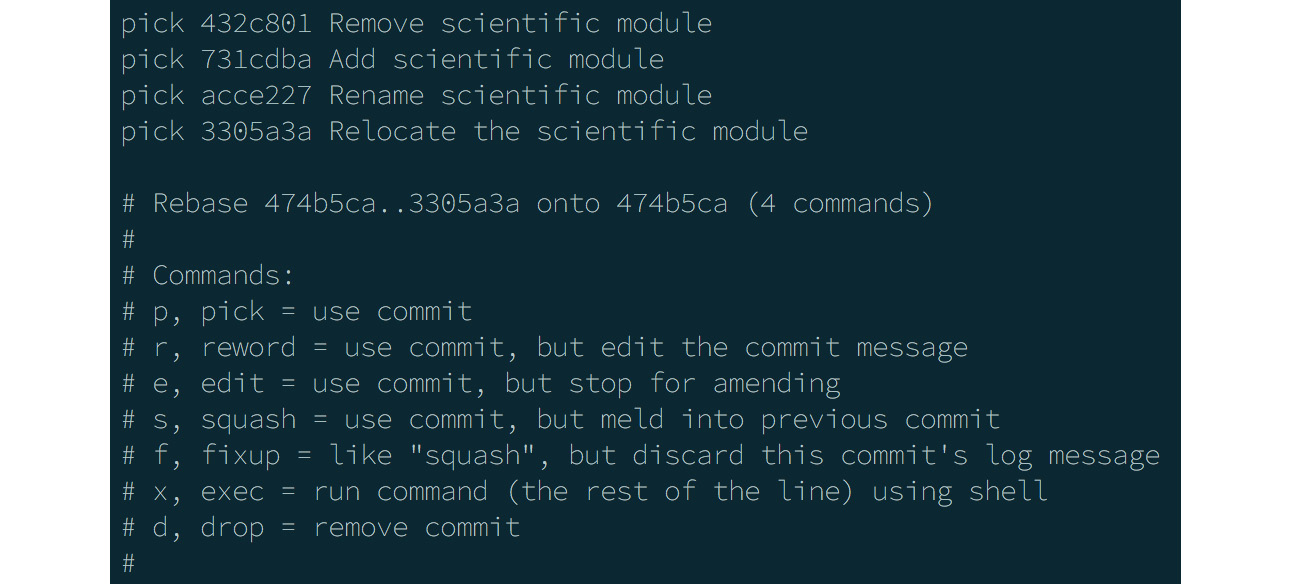
Figure 2.58: Retrieving the last four commits
Note
The commits are listed from the earliest/oldest (at the top of the list) to the most recent (the last on the list).
- Press i to switch to INSERT mode.
- Pick the desired message accordingly.
- Press Esc to exit INSERT mode.
- Press : and type wq to save the changes and exit the editor.
- Press return to execute the wq command.
- Edit the message in the next prompt.
Before editing the commit:
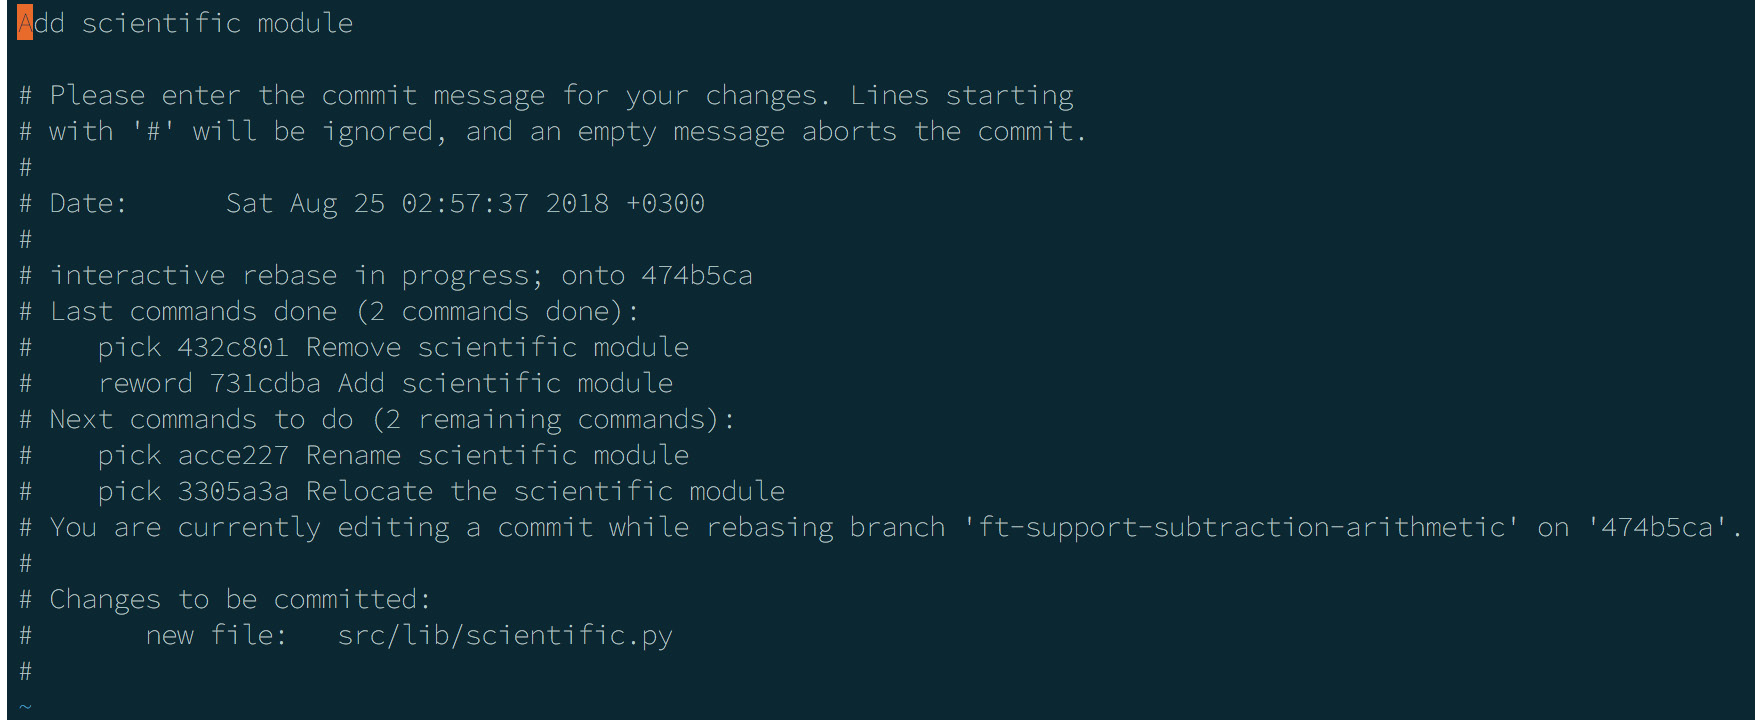
Figure 2.59: Before editing the commit
After editing the commit:

Figure 2.60: After editing the commit
- Make sure that these changes were made by using the git log -4 command:

Figure 2.61: Confirming the changes
Outcome
Through following this exercise, the changes to the commit should now be reflected in the output.
Exercise 19: Editing Commits Using the edit Command
To edit a message using the edit command, follow these steps:
- Launch the terminal and navigate to the location of the abacus repository.
- Retrieve the last three commits by using the git rebase -i HEAD~3 command:

Figure 2.62: Retrieving the last three commits
- Press i to switch to INSERT mode.
- Pick the desired message accordingly.
Note
Here, we will edit the commit with the hash feca887.
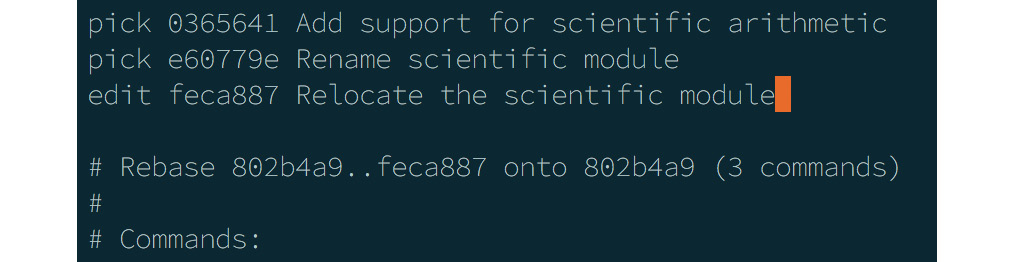
Figure 2.63: Editing the commit with the hash
- Press Esc to exit INSERT mode.
- Press : and type wq to save the changes and exit the editor.
- Press Return to execute the wq command.
- The rebase process pauses to allow for edits:

Figure 2.64: Using the rebase process
- Change the file in src/lib/advanced/advanced_compute.py, as shown in the following screenshot:

Figure 2.65: Making changes to the compute.py file
- Add the file to the index and commit the changes by using the following commands:
git add src/lib/advanced/advanced_compute.py
git commit --amend

Figure 2.66: Committing the changes
- In the editor, in the next prompt, press Esc to exit editing.
- Press : and type wq to save the changes and exit the editor. The following screenshot shows the result that should be expected in the Terminal:

Figure 2.67: Result in the Terminal
- Proceed with the rebase process and finish making any changes:
git rebase --continue

Figure 2.68: Rebase process
Outcome
The change to the commit has been reflected in the output via the use of the edit command.
Activity 2: Tracking Files
Suppose that you have been tasked with adding support for addition operations to the abacus application. The application should define a function that accepts a set of numbers and computes the sum of the numbers.
Your task is to implement file tracking commands and navigate the repository history.
To get started, you need to have the Git command-line tool installed on your computer. Additionally, you need to have an account on https://github.com/ and you need to be logged into your account on GitHub. Finally, you should have the abacus application repository on GitHub and your computer:
- Launch the terminal and navigate to the location of the abacus directory.
- Navigate to the required branch of the abacus application by using the required code.
- Create a branch for the feature that you'll develop off the ft-support-subtraction-arithmetic branch by using the required code.
- Add the required code lines to src/lib/compute.py and save the changes.
- Check the status of the files on the branch.
- Retrieve the alterations made to src/lib/compute.py.
- Add the changed file to the index and commit the changes.
- Create a file for recording the application logs.
- Check the status of the branch.
- Add the file to the index and commit it.
- Remove the log file from the working tree and the index.
- Retrieve the formatted details of the branch history for the five most recent commits.
- Edit the last commit.
- Edit the commit messages using the rebase utility:

Figure 2.69: Viewing the changes
Outcome
You have successfully implemented file tracking commands and navigated the repository history.
Note
For detailed steps regarding this activity, please refer to the Appendix section on page 276.
Summary
In this chapter, you explained the need for versioning commits. Then, you compared commits, branches, indexes, and working trees, and how they relate to each other. Next, you defined the various Git commands and stated their functions. Last but not least, you demonstrated how to amend commits, such as arbitrary commits.
In the next chapter, you will configure branch access and protection rules. You will also retrieve and incorporate changes in a repository.