Wax flower
The wax flower is known for a wide range of meanings that are linked to long life, patience, and endurance, to name a few. The wax flower’s long-lasting blooms make them a favorite for many reasons. They grow in beautiful shades of white, purples, pinks, and reds.
How to Paint a Wax Flower
The wax flower is a very dainty flower so if you are using a round brush larger than a number three, then you will be using more of the top half of the brush to achieve the smaller brushstrokes. The shapes of the petals will be small so using a smaller brush will allow you to have more control.
STEP 1
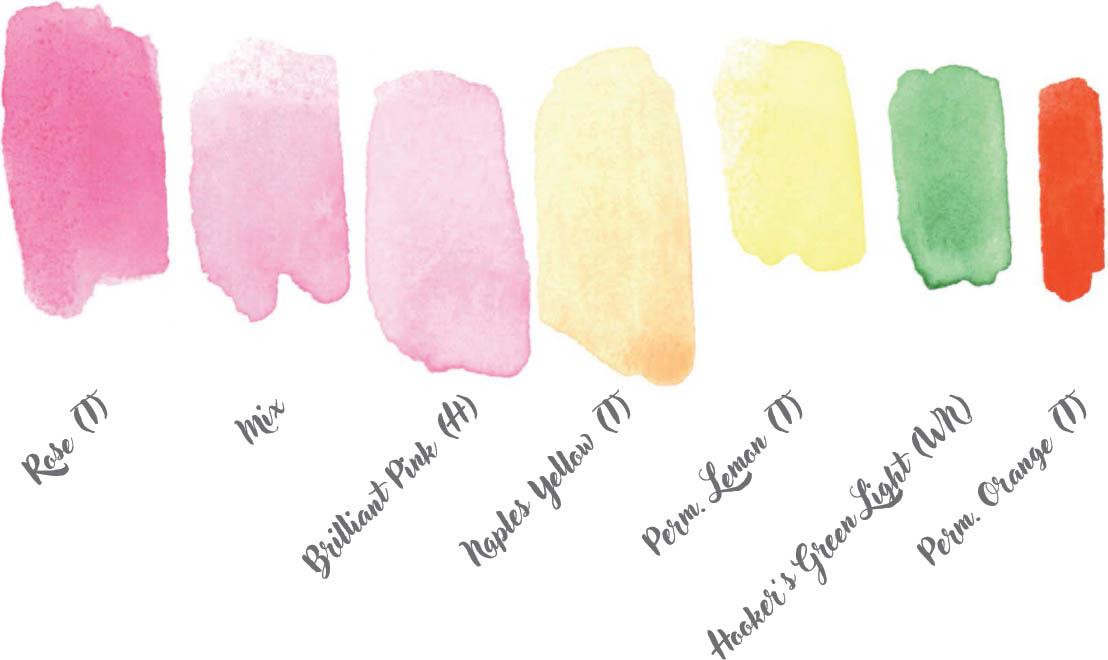
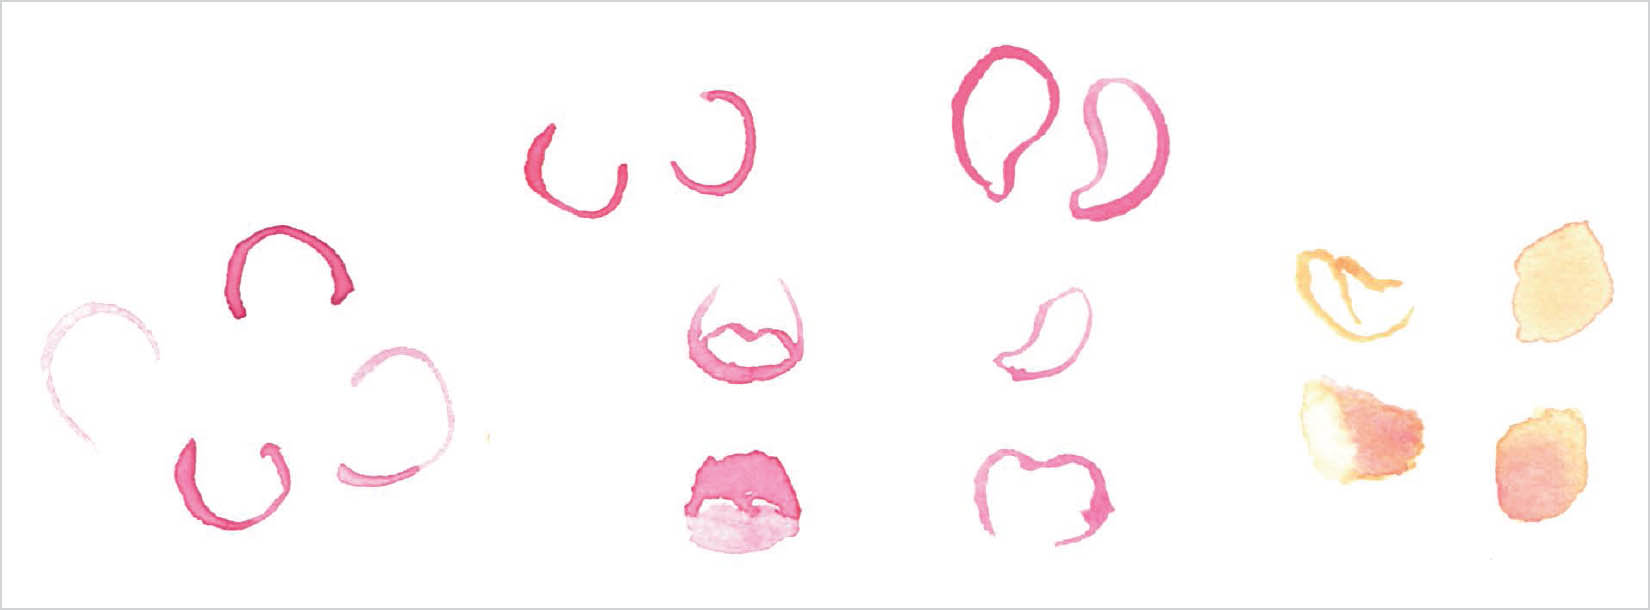
I want you to start by practicing painting the wax flower petals. Because you are painting something so delicate, it is easier to start by painting outlines with the tip of your brush and then fill them. Practice lifting out color for highlights, using a paper towel on the tops of the petals. This will make the petals appear like they are curling. Also practice creating these petals with a variety of colors ranging from pink to orange to a warm yellow. Feel free to combine multiple colors together. This is practice and color mixing is fun, and it will also make you a better painter. The variety of petals show a mix of angles. It is important to practice painting petals from different angles because the shapes, shadows, and highlights will vary based on where it is placed in the formation of the flower.
STEP 2
The middle of this flower is very small, so you really need to be in control of your paint and water. Using a yellow, paint a very small circle (or dot) making sure it is not perfectly round.
Next, using the same color, create an outer circle with a gap of white in between and with a textured edging. You are creating an open circle around a closed circle (or dot). Using the white gap as a guide, and while the yellow is still wet, fill in the white gap with green. You are essentially creating a green ring sandwiched between the yellow circles. When adding the green, use almost no water so the green doesn’t bleed too far and overpower the yellow.
If the green does bleed too far into the yellow, lift those areas out quickly with the corner of a paper towel. You can also use a clean, barely damp brush to absorb the colored water, and then lift it off the paper and blot it onto your paper towel. You want the middle to still have some yellow popping as this will allow the flower to keep its dimension.

STEP 3
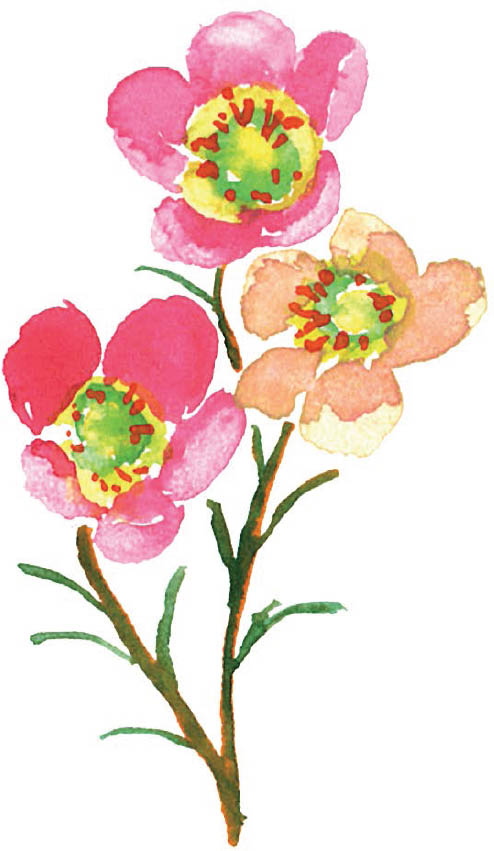
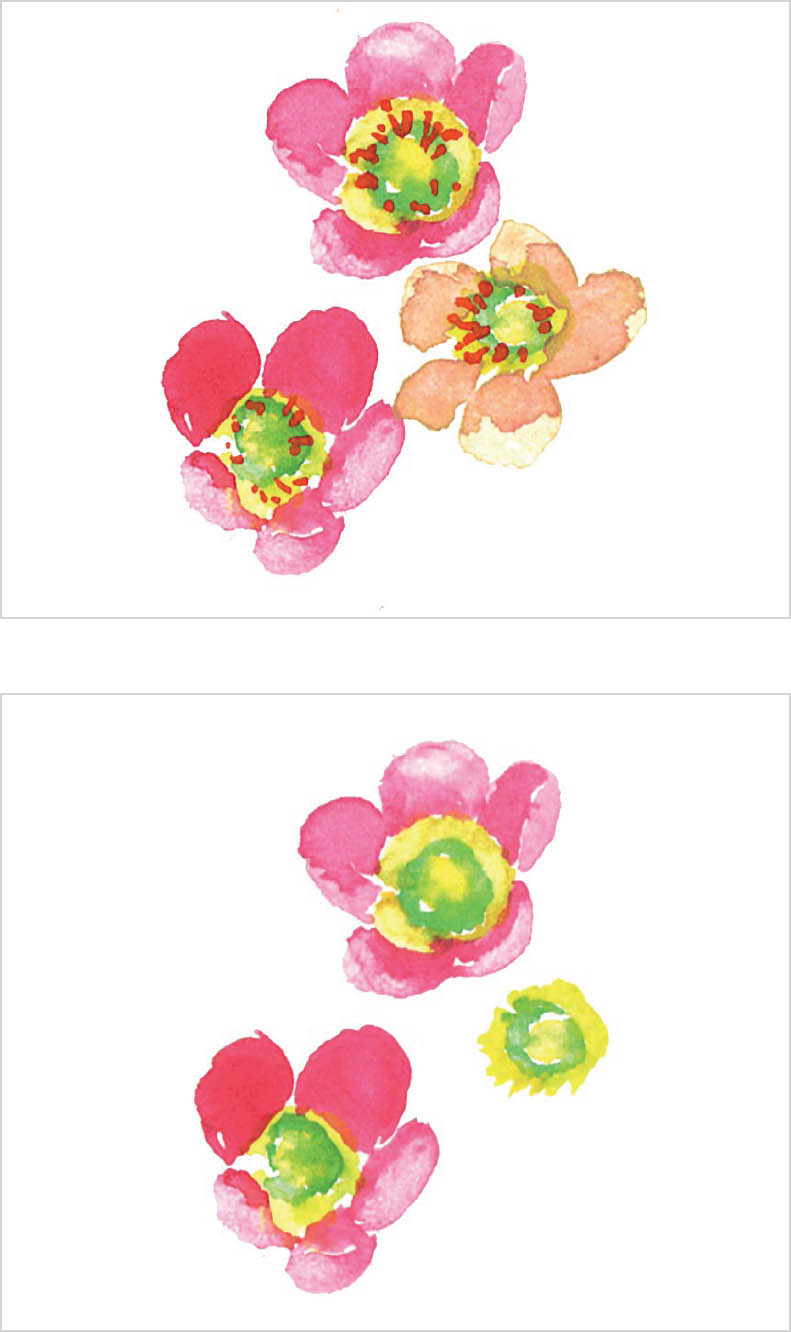
Create four wax flower middles and line them up leaving some space in between for petals. Practice adding petals to each, and make each flower a different color, from pink to orange-yellow. For the first two flowers paint the petals to face forward, and for the last two flowers, paint the petals with more of a hugging curve. These last two are not as open as the first two flowers. You are looking to create about five petals for each flower. Keep this in mind to plan for spacing as you paint.

For the petals you want to look more curved, make sure the top edges are light, some more than others to make it more realistic. Notice the first flower to the left where the bottom petal remains bolder with a small spot of white toward the edge. The petal is not curling over itself, so it is going to look different than the others. It is a simple petal folding down. The area of the petal closest to the center of the flower needs a pop of depth. Add some bolder pink or orange, or whatever color makes sense in comparison to the rest of the flower, on top of the lighter moist color. The purpose of the bold color in this area is to create shadow. Because this requires a lot of layering, wet-on-wet, it is best to use a smaller round brush.

Looking at the linework to the left, use an orange color to create more detail in the center of your flower after the center has dried. You want the lines to be more defined, and you don’t want the orange mixing in with the green, otherwise the center will turn brown.

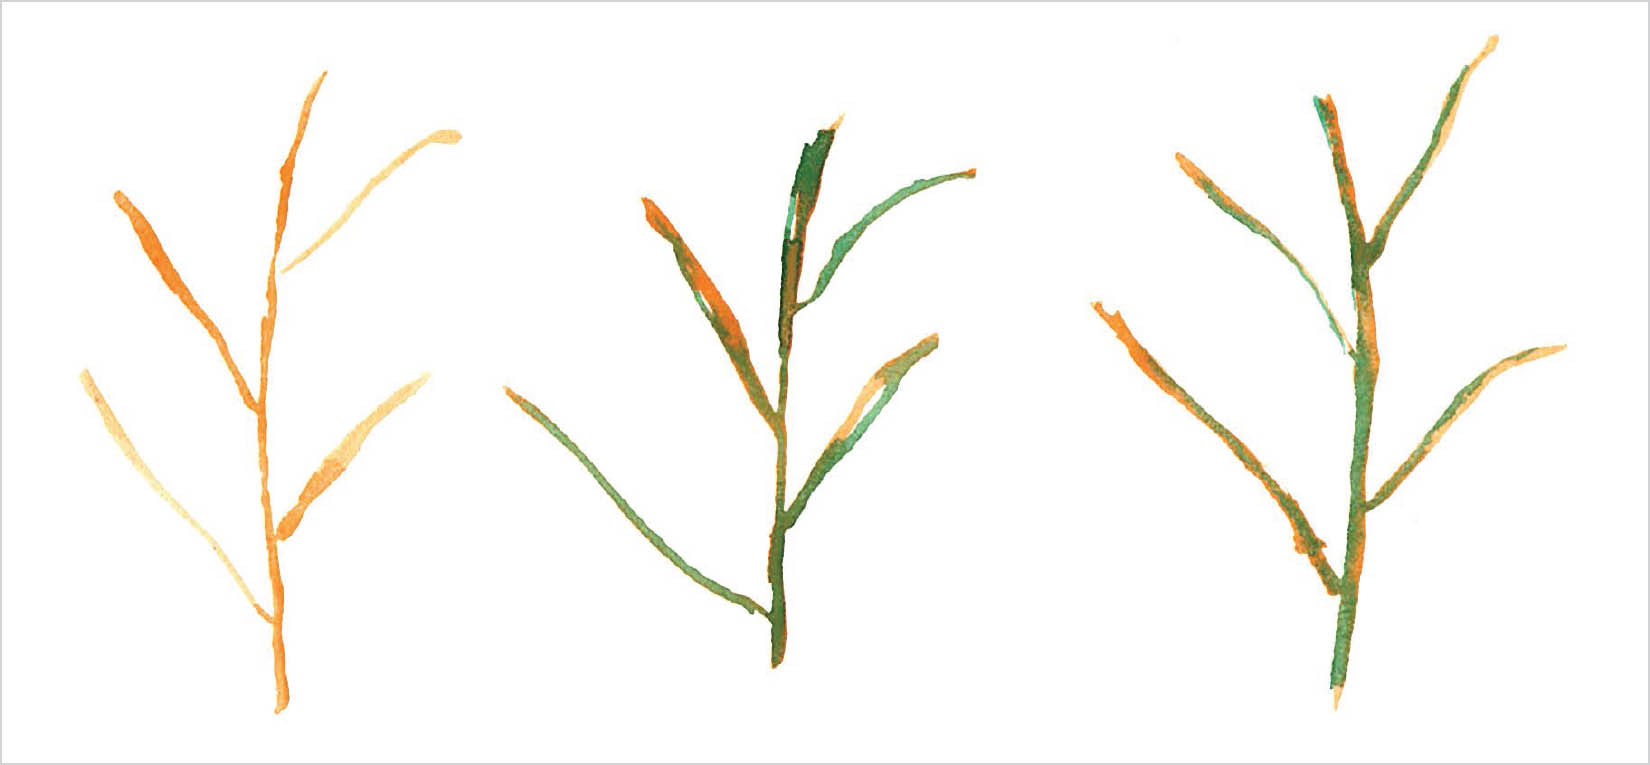
EXERCISE: Now you need something to display the flowers on, so I want you to practice creating very thin stems with the tip of your brush. Use Naples Yellow to create thin stems. Notice how the smaller stems are offset where they connect to the large stem. You don’t want your stems to be perfectly symmetrical. While the yellow is still a little wet, use green to paint over the yellow lines, leaving peeks of the yellow still showing.
STEP 4
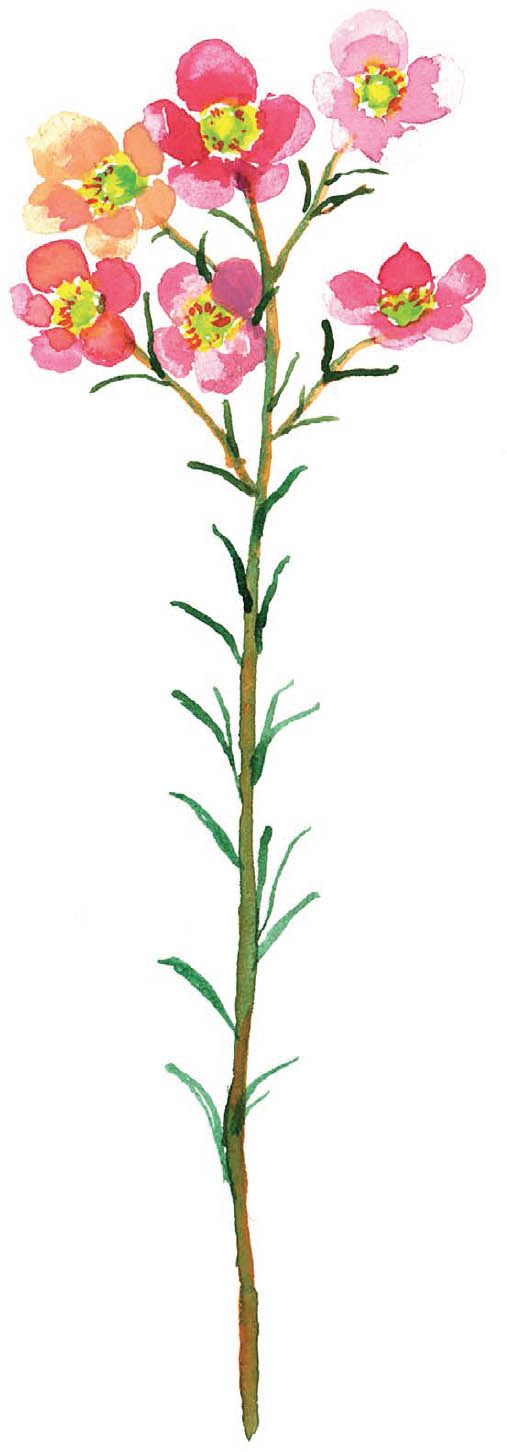
Because wax flowers are always found in groupings, I want you to learn how to paint them in groups. It’s always best to start with a group of three because it is simple and well balanced. As you practice, you can continue adding more flowers to create a larger bunch. Study the placement of each flower and the directions they are facing. All of this is important to create something that looks natural and whimsical.
Once you have your group of three flowers, it is time to add the stems. Notice where the stems meet the flowers, you can see that two of the stems do not touch the flowers: They get really close but don’t connect. The reason for this is that when painting small you want the image to remain less cluttered, and that small gap between the flower and stem helps break up the space. It also helps to emphasize the flower as the main show piece.