Microsoft’s Internet Information Services (IIS) is a web service that contains all of the tools necessary to create and deploy certificates for an SSL-enabled web server. For a discussion of how to install IIS and control access to IIS web pages and directories, see Chapter 20.
To create SSL certificates, follow these steps:
Run the Computer Management application from the Administrative Tools folder of the computer’s Control Panel.
Select Services and Applications → Internet Informaton Services → Default Web Site from the tree.
Choose “Properties” from the Action menu.
Select the “Directory Security” tab.
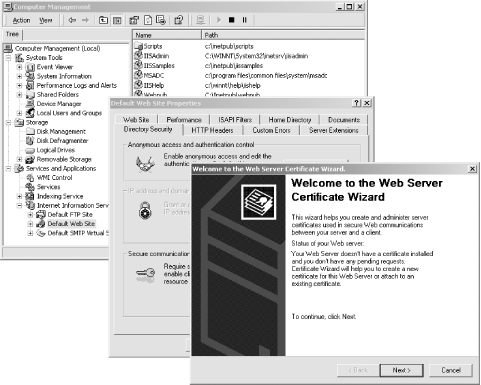
Press the “Server Certificate...” button inside the “Secure communications” box. This will start the “Web Server Certificate Wizard” (see Figure 17-9).
Select “Create a new certificate.”
Select “Prepare the request now, but send it later.”
Choose a name for the certificate and a bit length. Although the default is 512 bits, you should probably choose 1024 bits or more.
Specify an Organization and an Organizational unit.
Specify the domain of your server for the Common name (e.g., www.company.com).
Specify the geographical information.
You will now be prompted for a location in which to save the certificate. The default is c:certreq.txt.
The certificate request will be created in the file that you specify.
After you create the certificate, you can send it to a certification authority. Alternatively, you can sign it yourself using OpenSSL. Here we sign the certificate request using OpenSSL:
#openssl ca -in /tmp/req.csr -out /tmp/out.cer -policy policy_anythingUsing configuration from /etc/ssl/openssl.cnf Check that the request matches the signature Signature ok The Subjects Distinguished Name is as follows commonName :PRINTABLE:'localhost' organizationalUnitName:PRINTABLE:'Secure Server division' organizationName :PRINTABLE:'Servers Are Us' localityName :PRINTABLE:'Belmont' stateOrProvinceName :PRINTABLE:'Massachusetts' countryName :PRINTABLE:'AU' Certificate is to be certified until Sep 17 04:47:53 2002 GMT (365 days) Sign the certificate? [y/n]:y1 out of 1 certificate requests certified, commit? [y/n]yWrite out database with 1 new entries Data Base Updated #
Once you have a signed certificate, you will use the Web Server Certificate Wizard to import the certificate into IIS:
Press the “Certificate...” button on the “Default Web Site Properties” window to start the Web Server Certificate Wizard.
You will be told that there is a pending certificate request and that the certification authority has not yet responded. You can either delete the pending request or process it; the latter installs the certificate. Select “Process the pending request and install the certificate.”
You will be prompted for the path and filename of the certification authority’s repsonse.
You will be shown a summary of the fields on the certificate. Click “Next.”
Click “Finish.” The certificate is now imported.
IIS should automatically start up SSL services.
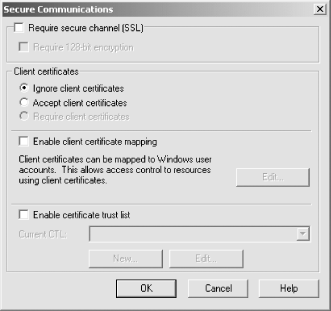
Once the certificate is loaded, you can manage SSL communications by clicking the “Edit...” button on the Default Web Site Properties window. This will bring up the “Secure Communications” window, as shown in Figure 17-10.