
Chapter 5
Performing Standard Maintenance
IN THIS CHAPTER
![]() Activating Windows Server 2022
Activating Windows Server 2022
![]() Adding and removing standard applications on the server
Adding and removing standard applications on the server
![]() Measuring reliability and performance on Windows Server
Measuring reliability and performance on Windows Server
![]() Protecting system data from loss or corruption
Protecting system data from loss or corruption
![]() Working with Remote Server Administration Tools for server administration tasks
Working with Remote Server Administration Tools for server administration tasks
![]() Managing servers with Admin Center
Managing servers with Admin Center
This chapter covers the everyday tasks that a system administrator would be expected to know how to do. From simple tasks like activating the license on a new server to working with the brand-new Windows Admin Center, there’s a little something in this chapter for everyone.
Activating Windows
When you first install a new operating system on a server, one of the first things you do is activate it. If you’re lucky enough to be on a domain with a Key Management Server (KMS), the activation of the server is automatically done for you. You don’t need to find the product key and type it into the server. The KMS manages the product keys (it uses Multiple Activation Keys [MAKs]) and activations for you. If you aren’t lucky enough to have a KMS, then you’ll need to manually activate the server. Here’s how to activate a server via the graphical user interface (GUI) and via the command line.
Through the graphical user interface
Activating Windows Server 2022 from the GUI is very simple. It starts in my favorite place: Server Manager! Here’s how to activate Windows Server 2022 through the Server Manager console:
- Starting in Server Manager, click Local Server in the left-hand side of the menu.
To start the activation process, click the Not Activated hyperlink next to Product ID.
A dialog box will launch automatically asking for the product key.
Enter your product key and click Next.
You’re prompted to activate Windows.
Click Activate.
You get a confirmation that Windows has been activated.
Click Close.
You’re left on the Activation screen shown in Figure 5-1, where you see that your version of Windows is now activated.
Through the command line
You can activate your copy of Windows Server via the command line as well. You may want to do this because you prefer to be a Command Prompt ninja, or maybe because you have Server Core installed and don’t have a choice.
Either way, first, you have to install the key. You do this with the Windows Server License Manager script, slmgr.vbs.
To use slmgr.vbs to install the key, you use the command with the parameter -ipk. Just replace <productkey> with your 25-character license key, including the dashes:
slmgr.vbs -ipk <productkey>
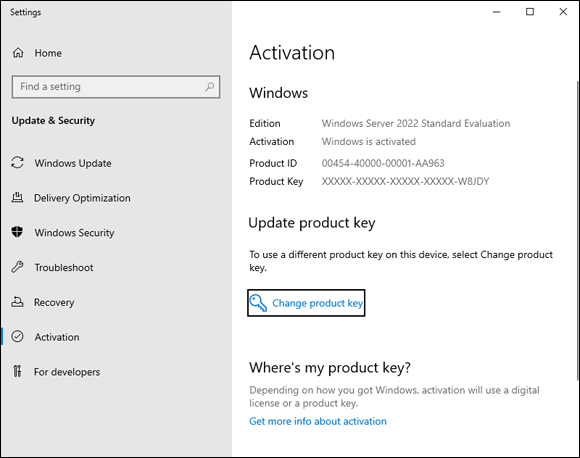
FIGURE 5-1: The activation window showing that Windows Server 2022 is activated.
You get a dialog box that tells you the product key installed successfully. Click OK.
After the license key is installed, you use the same script with the -ato parameter to do an online activation of your copy of Windows. You do that with the following command:
slmgr.vbs -ato
If the activation was successful, you get a dialog box that says the product was activated successfully, as shown in Figure 5-2.
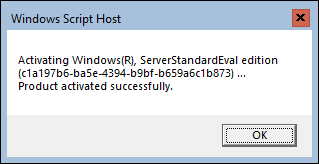
FIGURE 5-2: Using slmgr.vbs to activate Windows Server.
Configuring the User Interface
The user interface can be something that is very particular to a person. You may like things to be set a certain way. In this section, I cover some of the configuration options you have for working with the user interface.
Working with the Folder Options dialog box
The Folder Options dialog box lets you change quite a few things. To access it, open File Explorer, click the View tab, and then click Options and select Change Folder and Search Options (as shown in Figure 5-3).
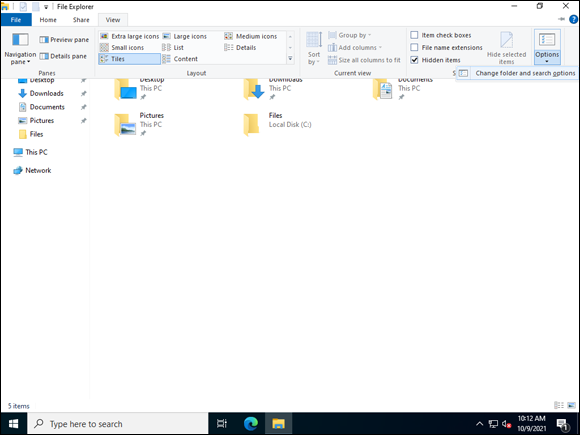
FIGURE 5-3: You can access the Folder Options dialog box through the View tab in File Explorer.
The Folder Options dialog box has three tabs: General, View, and Search.
The General tab
The General tab (shown in Figure 5-4) lets you adjust the general behavior of folders. You can set File Explorer to open by default to Quick Access (default) or to This PC. You have the choice when you open folders to make them open in the same window (default) or a new window. Tired of double-clicking to open a folder? Change it to a single-click. You can even set Quick Access to display frequently used folders (default), frequently used files, or both.
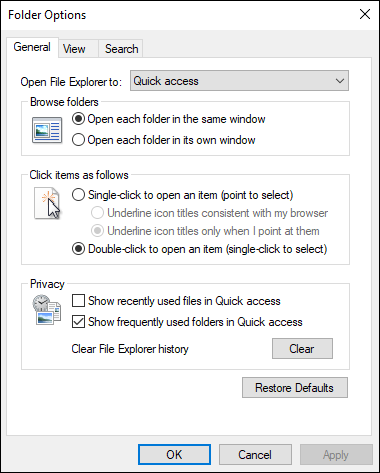
FIGURE 5-4: The General tab of the Folder Options dialog box.
The View tab
On the View tab (shown in Figure 5-5), you can make changes to how folders, and the items in folders, display. One of the most common changes I make on the View tab is to select Show Hidden Files, Folders, and Drives and Hide Extensions for Known File Types. With these two options set that way, I can view hidden folders like the Default user, and hidden files like ntuser.dat. And by not hiding extensions, it makes it easier to differentiate between application and config files when they have the same name.
Notice in the background of Figure 5-5 that you can see the file extensions and that the hidden file, which was previously not visible (in Figure 5-4), is now visible with a transparent icon.
The Search tab
The Search tab (shown in Figure 5-6) controls the behavior of the search function when searching through folders and files on the operating system. By default, the only choice selected here is Include System Directories in the When Searching Non-indexed Locations section. Other options include searching compressed files, file names, and contents. And you can tell Windows Search not to use the index during its search. Use that last option with caution — the process could take a while to complete depending on how much data it needs to go through.

FIGURE 5-5: The View tab of the Folder Options dialog box.
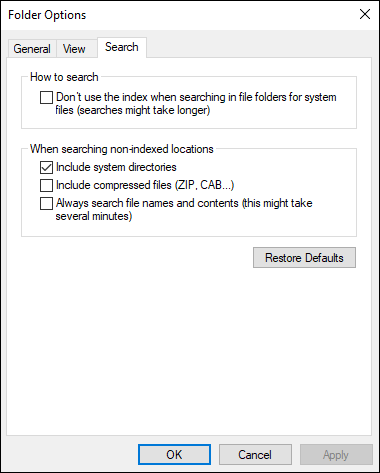
FIGURE 5-6: The Search tab of the Folder Options dialog box.
Setting your Internet Options
You can set your Internet Options in two ways: through the Control Panel, or you through the Network & Internet screen.
I’ll start with the Control Panel method. Follow these steps:
- Click Start, click Windows System, and then click Control Panel.
Click Network & Internet, and then click Internet Options.
The Internet Properties dialog box, shown in Figure 5-7, appears.
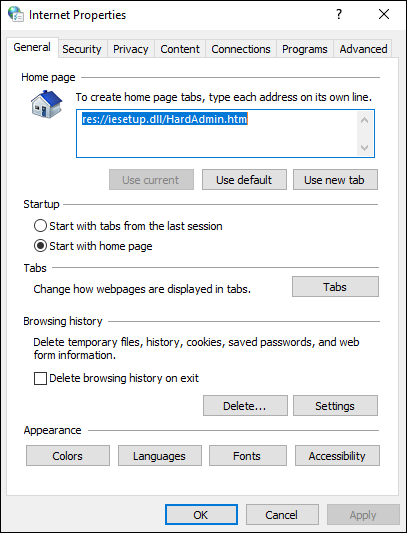
FIGURE 5-7: The Internet Properties dialog box.
There are seven tabs on the Internet Properties dialog box:
- General: The General tab allows you to set your own home pages, specific the startup behavior for Internet Explorer, define how you want web pages to be displayed in tabs, delete your browsing history, and tweak items related to appearance.
- Security: The Security tab allows you to set the security level for individual zones — the Internet, the Local Intranet, Trusted Sites, and Restricted Sites.
- Privacy: Allows you to specify if websites are allowed to track your location, how you want the pop-up blocker to function, and whether you want InPrivate mode to disable toolbars and extensions.
- Content: The Content tab focuses on various content-related features. You can work with certificates, control how AutoComplete functions, and look at the settings for any RSS-related feeds.
- Connections: Allows you to set up an Internet connection and specify a proxy within the local area network (LAN) settings area.
- Programs: The Programs tab lets you set default behaviors for clicking links and editing HTML files. It also lets you manage any add-ons you have installed and set programs that you want to use for things like email. You can set the file types that you want Internet Explorer to open as well.
- Advanced: The Advanced tab gives you a way to set more granular settings within Internet Explorer (IE). You can customize how IE will react to scripts, change which cryptographic settings you want it to use, and more.
The newer method of setting Internet Options is accessed via the Start menu, and the Settings icon, which looks like a gear. From there, you can select Network & Internet from the new Settings menu. I cover this area in greater detail in Book 4, Chapter 1.
Focusing on your Personalization settings
Personalization settings have gotten a lot of attention in Windows Server 2022. In fact, they have their own section in the new Settings menu. To access the Personalization settings, click the Start Menu, and then click the gear icon to access Settings. From there, click Personalization.
There are several different locations you can customize:
- Background: This section allows you to set the background with a picture, a solid color, or a slide show. You can set the background to fill, fit, stretch, tile, center, or span.
- Colors: In this section, you choose what your accent colors will be for things like your Start menu. You can choose specific colors, or you can select Automatically Pick an Accent Color from My Background, and new colors will be set anytime the background color changes. You can set where the accent color shows up, and you can select a light or dark app mode.
- Lock Screen: Here, you can set a custom image on your lock screen. You can choose from stock photos or choose your own.
- Themes: Much like in Windows 10, you can set themes in Windows Server 2022. These themes affect the background, colors, sounds, and what your cursor looks like.
- Fonts: The Fonts section allows you to search, view, and install new fonts. If you like a particular font, you can click it to see the font faces that are available, as shown in Figure 5-8 with the Courier New font.
- Start: The Start section allows you to customize what appears on your Start menu. You can choose to show more tiles or apps, or even let the Start screen take over the entire screen (as in Windows 8).
- Taskbar: The Taskbar section allows you to change the behavior of the taskbar. You can lock it or hide it, and you can choose to replace Windows PowerShell with the Command Prompt when you right-click the Start menu.
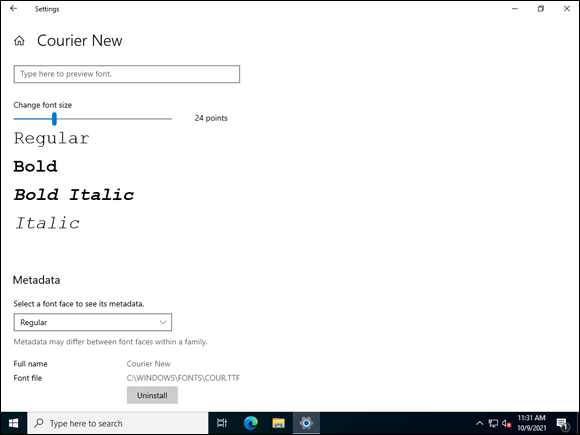
FIGURE 5-8: Viewing the available font faces for the Courier New font.
Reporting problems
The troubleshooting utility is still located in the Control Panel. To access the Control Panel, click Start, click Windows System, and then click Control Panel. From there, click System and Security, and then click Review Your Computer’s Status and Resolve Issues (in the Security and Maintenance section). Potential issues are broken out into Security and Maintenance issues, as shown in Figure 5-9.
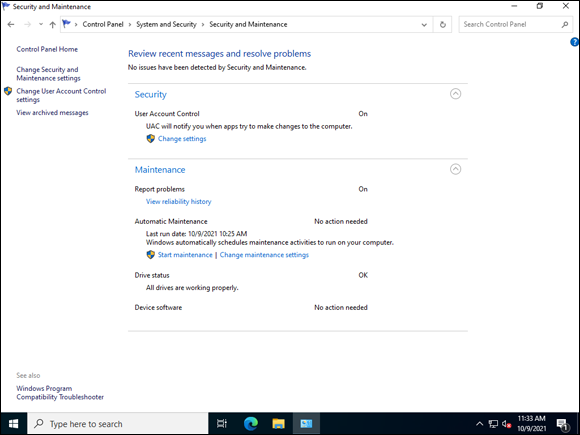
FIGURE 5-9: The troubleshooting utility can notify you of issues and possible resolutions.
Setting your Regional and Language Options
The Regional and Language Options are set in the new Settings menu under Time & Language. You can reach this by clicking the Start menu and then clicking the gear icon to access Settings. This allows you to set the date and time, the region, the language, and speech settings.
Working with the Performance Options dialog box
The Performance Options dialog box is pretty straightforward.
There are two ways to get there:
- Click Start, then click Windows System, and then click Control Panel. From there, choose the System and Security section, and then click System. Click Advanced System Settings. On the Advanced tab, click the Settings button under Performance.
- Click the Start menu, and then click the gear icon to access the Settings menu. Click System, click About, click System Info, and click Advanced System Settings. On the Advanced tab, click the Settings button under Performance.
Either way, you get a screen similar to Figure 5-10.
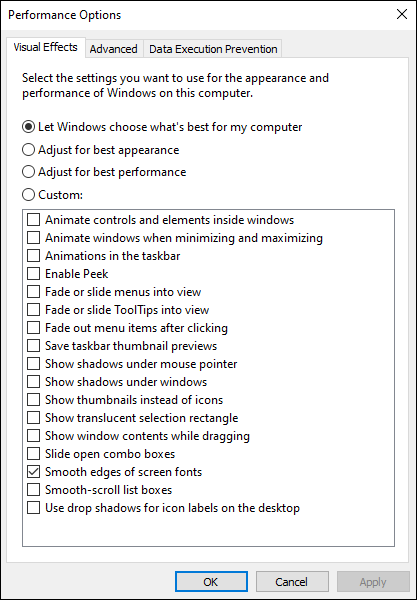
FIGURE 5-10: The Performance Options dialog box.
There are three tabs in the Performance Options dialog box:
- Visual Effects: Allows you to adjust the amount of visual effects that Windows uses. On a server, this should normally be set for performance rather than flashy screen transitions.
- Advanced: Allows you to set whether performance should target better performance for programs or background services, and allows you to adjust the amount of virtual memory being used.
- Data Execution Prevention: Data Execution Prevention (DEP) is a great feature for protecting your system against malicious code, but it can cause performance issues with some applications. Typically, your vendor will let you know if DEP needs to be disabled, and you can whitelist that program.
Understanding How User Access Control Affects Maintenance Tasks
User Account Control (UAC) was designed to protect your system against unauthorized changes. It requires certain types of changes to get administrator approval before they can execute. This ensures that malware and other rogue applications can’t run without your consent. It can also be incredibly annoying when you’re simply trying to get your work done. It prompts you for approval anytime a program wants to make a change on your system. If you’re logged in as a standard user, you must provide an administrator’s username and password or PIN. If you’re logged in as an administrator, you must select yes or no. Most maintenance tasks require some level of privilege elevation, so you’ll most likely run into this at some point. You can tell if you’ll get prompted by looking at the application you want to run. If the program’s icon has a shield icon in its lower-right corner, it will prompt for elevation.
There are four levels of settings within UAC, ranked from least secure to most secure:
- Never Notify: This is essentially turning UAC off. Don’t do this.
- Notify Me Only When Apps Try to Make Changes to My Computer (Do Not Dim My Desktop): This notifies you when programs are trying to make changes to your system. You can continue to do things in the background without acknowledging the UAC prompt.
- Notify Me Only When Apps Try to Make Changes to My Computer (Default): This will notify you when programs are trying to make changes to your system. You must answer yes or no (assuming you’re logged in as admin) before you’ll be allowed to continue. If you aren’t logged in as admin, you need to use an administrator account and password at the prompt.
- Always Notify: This is the most secure setting, but it’s also the most annoying because it will prompt you any time an application or user wants to make a change that needs administrator permissions.
If you want to make changes to UAC on an individual system, you can go through the Control Panel to System and Security, Security and Maintenance, and then Change User Account Control Settings, shown in Figure 5-11. If this is being controlled via Group Policy, the options in the image may be grayed out.
For more information on UAC, see Book 5, Chapter 3.
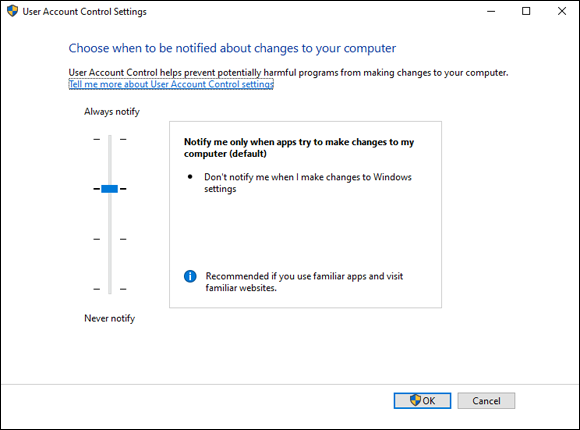
FIGURE 5-11: The User Account Control Settings dialog box.
Adding and Removing Standard Applications
Windows Server 2022 much like Windows 10 can take advantage of the Windows App Store for installing applications. You can also install them in the traditional way (by double-clicking the installer package that you downloaded or got from disc or flash media).
Removing apps can be done from one central place. Click Start, and then click the gear icon to access Settings. From there, click Apps. To remove an application, all you need to do is select it, and then click the Uninstall button, as shown in Figure 5-12.
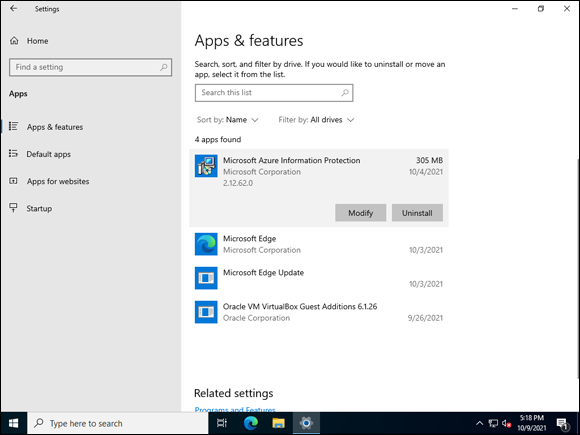
FIGURE 5-12: Uninstalling a program in the Apps & Features section of the Settings menu.
Measuring Reliability and Performance
As a System Administrator, you’ll have many days that start with complaints of “The server is sooooo slow.” If this happens, always blame the networking team. Just kidding.
Windows Server 2022 like many of its predecessors has several utilities that allow you to measure how well your system is performing and find potential bottlenecks or resource constraints. The most common tools are Performance Monitor, Resource Monitor, and Task Manager.
Performance Monitor
Performance Monitor allows you to gather information in real time and collect that information into a log for later review. It looks at what impact running applications on your system have to your system’s overall performance. You can access Performance Monitor from Server Manager by clicking Tools and then clicking Performance Monitor.
Performance Monitor is the perfect tool to track basic performance metrics across your central processing unit (CPU) and random access memory (RAM), although it contains quite a few more counters than just CPU and RAM. You can monitor performance for most of the hardware, software, and services running on your system.
In Figure 5-13, I’ve started Performance Monitor with the default % Processor Time and have added Interrupts/sec.

FIGURE 5-13: Performance Monitor running on Windows Server 2022.
One of the best things about Performance Monitor is that you can schedule collection. Say, for instance, that there is always a slowdown on your system between 10 p.m. and midnight. You can schedule performance monitor to run and analyze the data to determine where the issue lies and then see the results when you come in the next morning.
One of the downsides of Performance Monitor is how granular the counters are. It can be difficult to locate the counter that will give you the information that you need, so you may need to play with it a bit to find the right counter.
To add a counter to Performance Monitor, follow these steps:
- Open Performance Monitor and click Performance Monitor.
- Click the plus (+) sign in the menu bar.
- On the Add Counters screen, expand Processor and select Interrupts/Sec.
- With Interrupts/Sec highlighted, click the Add button and then click OK.
- Double-click your new counter, select a color different enough from the default counter’s color, and then click OK.
Resource Monitor
Resource Monitor is more useful for troubleshooting issues that are causing your system to hang or even potentially causing it to crash. You can see at a glance which processes are using the most resources or are using the largest amount of disk, network bandwidth, or memory. You can click the individual tabs for CPU, Memory, Disk, or Network to get more details on each. I actually like using this utility to troubleshoot performance issues as well. I find that it presents performance issues in a very helpful manner. See Figure 5-14 for an example of what Resource Monitor looks like.
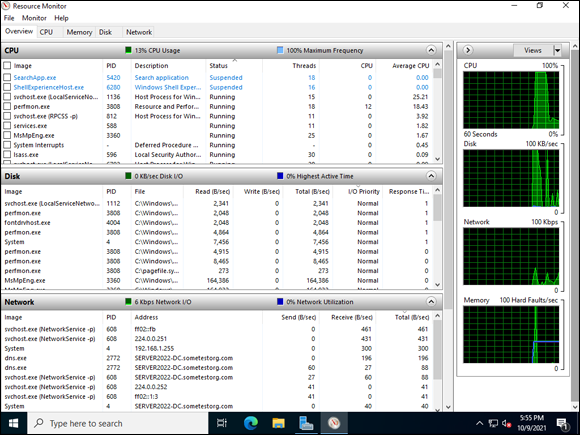
FIGURE 5-14: Troubleshooting resource contention is simple with Resource Monitor.
Task Manager
Task Manager has been around in the Windows operating system for a very long time. It provides a quick glance at CPU, network, and memory utilization, and it allows you to stop running processes or applications ungracefully if they aren’t responding.
There are two ways to access Task Manager:
- Right-click the taskbar and choose Task Manager.
- Press Ctrl+Alt+Del and choose Task Manager from that screen.
After you open Task Manager, you see a screen similar to Figure 5-15.
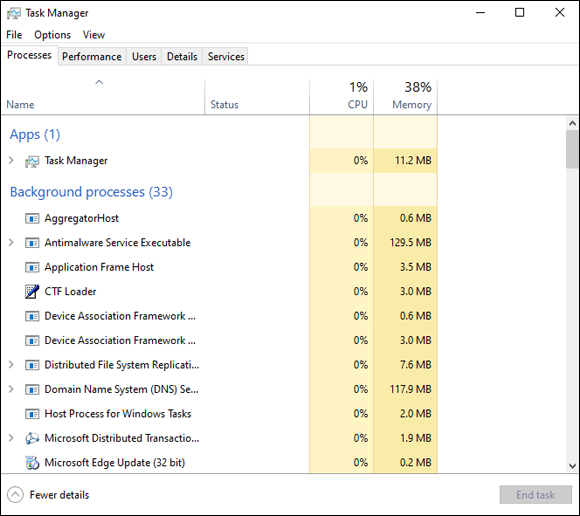
FIGURE 5-15: Task Manager in Windows Server 2022.
Most System Administrators come into Task Manager with one thing in mind. They have an application or a process that isn’t responding and they need to terminate it. Here’s how to do that in Task Manager:
- With Task Manager open, select the unresponsive application.
Click End Task.
The application or process will be stopped.
 Terminating programs through Task Manager is an ungraceful shutdown. It may lead to data loss and should be used as a last resort.
Protecting the Data on Your Server
One of the many jobs a System Administrator is tasked with is protecting a company’s critical assets. One of the most critical assets is almost always going to be data. Windows Server 2022 provides an optional utility that can be used to back up and restore data, known as Windows Server Backup.
Before you can use Windows Server Backup, you have to install the feature. Follow these steps:
- From Server Manager, click Manage and then click Add Roles and Features.
- On the Before You Begin screen, click Next.
- On the Select Installation Type screen, click Next.
- On the Select Destination Server screen, click Next.
- On the Select Server Roles screen, click Next.
- On the Select Features screen, scroll down and select Windows Server Backup.
- Click Next.
- Click Install.
- When installation finishes, click Close.
Windows Server Backup (once installed) can be accessed through Server Manager. Simply choose Tools⇒ Windows Server Backup.
 There is an interesting issue with the install of Windows Server Backup that has been around through several revisions of the server operating system: You’ve installed Windows Server Backup, but it doesn’t show up in the Tools menu. The fix: Go back to Add Roles and Features, and on the Select features screen, expand Remote Server Administration Tools and choose Network Load Balancing. I have no idea why installing the Remote Server Administration Tools for Network Load Balancing makes this show up. I experimented with several features and Network Load Balancing is the only one that resolved this issue.
System Backup
After you’ve installed Windows Server Backup, you can launch the console from Server Manager. Choose Tools⇒ Windows Server Backup. You’re be presented with a screen similar to Figure 5-16.
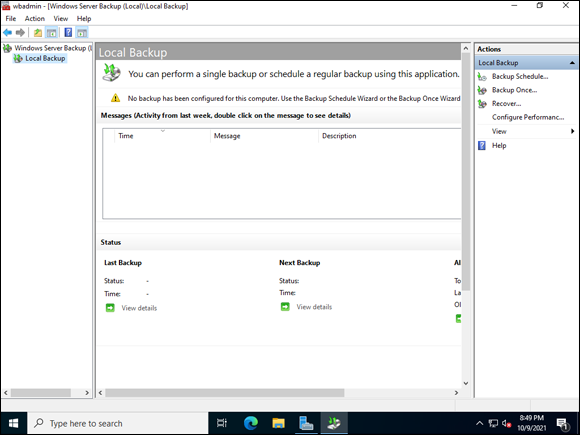
FIGURE 5-16: Windows Server Backup allows you to create and run backups, once or on a schedule.
Creating a one-time backup
There may be times when you want a recent backup because you’re about to do some maintenance or upgrade some software. In these instances, the scheduled backup may not be recent enough to suit your purposes. If this happens, a one-time backup is the best solution. Follow these steps:
- From Server Manager, choose Tools⇒ Windows Server Backup.
- In the Windows Server Backup console, choose Backup Once on the right side of the screen.
- On the Backup Options screen, select Different Options and click Next.
- On the Select Backup Configuration screen, select Custom and click Next.
Click Add Items and then choose what you want to back up.
I’m going to choose everything except my backup drive.
- Click OK and then click Next.
On the Specify Destination Type screen, you can select any of these — just don’t save the backup to the same drive you’re backing up.
I’m going to choose my local F: drive, so I’ll choose Local Drives.
- Click Next.
- On the Select Backup Destination screen, choose the drive you want to back up to and click Next.
- On the Confirmation screen, click Backup and the backup will start.
Creating a scheduled backup
To create a scheduled backup, follow these steps:
- From Server Manager, choose Tools⇒ Windows Server Backup.
- In the Windows Server Backup console, choose Backup Schedule on the right side of the screen.
- On the Getting Started screen, click Next.
- On the Select Backup Configuration screen, select Custom and click Next.
Click Add Items and then choose what you want to back up.
I’m going to choose everything except my backup drive.
- Click OK and then click Next.
On the Specify Backup Time screen, select how often you want the backups to run.
I’m going to select Once a Day and 9 PM.
- Click Next.
On the Specify Destination Type screen, you can select any of these — just don’t save the backup to the same drive you’re backing up.
I’ll select Backup to a Hard Disk That Is Dedicated for Backups.
- Click Next.
On the Select Destination Disk screen, select the disk that you want to back up to.
If it isn’t visible, click Show All Available Disks and select it from there.
After you select your backup disk, click Next.
You’re presented with a warning that the disk will be reformatted when you finish the wizard.
- Click Yes.
- On the Confirmation screen, click Finish.
System Restore
Restoring items is nice and simple through Windows Server Backup. Here’s how to recover a file that was deleted:
- From Server Manager, choose Tools⇒ Windows Server Backup.
- On the right-hand menu, click Recover.
On the Getting Started screen, select where the backup is stored.
In my case, I’ll choose This Server.
- Click Next.
Choose the available backup that you need.
This will be done with a calendar that has available dates, and a drop-down box with times.
- Click Next.
Select what you want to recover.
In my case, I deleted a file and a folder, so I’m going to choose Files and Folders.
- Click Next.
Browse the tree until you find what you’re looking for.
In my case, that looks like Figure 5-17.
- Click Next.
On the Specify Recovery Options screen, select the recovery destination and how the restore should react if it finds items with the same name in the destination.
In my case, I’ll choose Original Location and Overwrite Existing Versions.
- Click Next.
On the Confirmation screen, click Recover.
You can watch the progress of your recovery.
- When the recovery is complete, click Close.
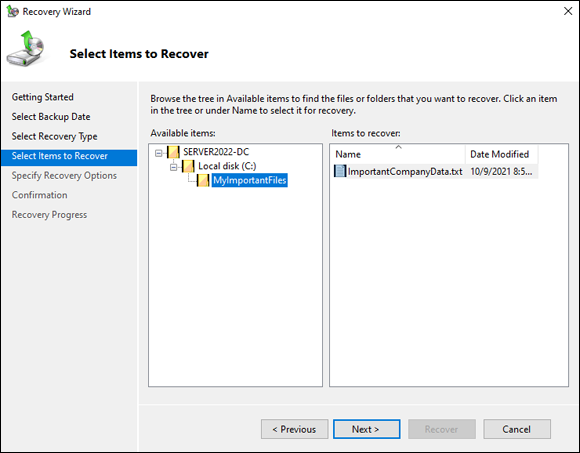
FIGURE 5-17: Restoring some files through Windows Server Backup.
Performing Disk Management Tasks
Managing server storage is an important task. So much so that larger organizations will typically have storage administrators in addition to system administrators. As a system administrator, you should have a good working grasp of how to manage and maintain the storage on your servers.
Managing storage
Much of the storage management tasks in Windows Server 2022 can be performed from the File and Storage Services area in Server Manager. From here, you can manage the volumes, disks, and storage pools associated with your server. If you would like to learn more about configuring and managing storage, check out Book 2, Chapter 2.
Managing disks
Managing the disks on your system is done through the File and Storage Services area in Server Manager. After you click File and Storage Services, just click Disks and you can manage the physical and logical disks, as well as the related volumes. By right-clicking the drive, you can create a new volume, bring an offline disk online, or take an online disk offline, or you can reset the disk. If you right-click the volume, you have a lot of options similar to the old Disk Management utility (which you could still use if you wanted to). You can see these options in Figure 5-18.

FIGURE 5-18: Managing a disk volume in File and Storage Services.
Defragmenting drives
As a disk is used and data is created and deleted, data on the disk becomes fragmented. This can cause performance issues on hard disk drives (HDDs). You’ll need to defragment your disk to resolve this issue. By defragmenting your HDD, you’re taking all the scattered data and combining it so that it occupies a single contiguous space. Solid-state drives (SSDs) can benefit from the optimization as well if they support TRIM, which allows the operating system to tell the SSD drive when blocks of data are no longer needed. To defragment or optimize your drive, follow these steps:
- From Server Manager, choose Tools⇒ Defragment and Optimize Drives.
Select the drive that is fragmented and click Analyze.
The analysis will return with recommendations on whether you need to optimize it.
- If needed, select Optimize and the drive will be defragmented.
Disk defragmentation used to be something that a System Administrator had to do manually, but in recent server operating systems, it’s scheduled automatically to run once a week, as you can see in Figure 5-19.
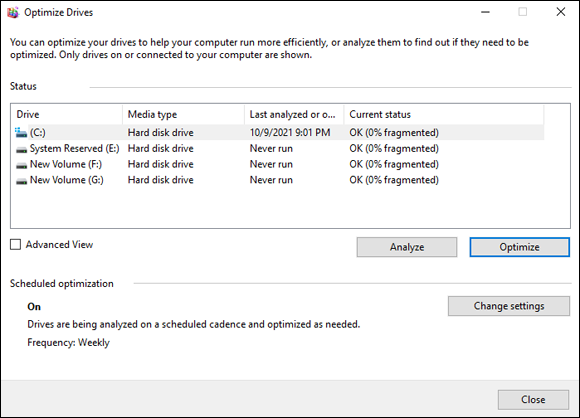
FIGURE 5-19: Disk defragmentation runs automatically once a week, but it can still be run manually.
Automating Diagnostic Tasks with Task Scheduler
For the System Administrator, some routine tasks need to get done, but they’re either inconvenient to manually perform or monotonous. For those kinds of tasks, Task Scheduler is a great way to automate maintenance tasks so the you no longer have to remember to log on to a system to do them.
Getting to Task Scheduler is simple. Server Manager launches when you log on to the system. From Server Manager, choose Tools⇒ Task Scheduler. The screen that launches looks similar to Figure 5-20.
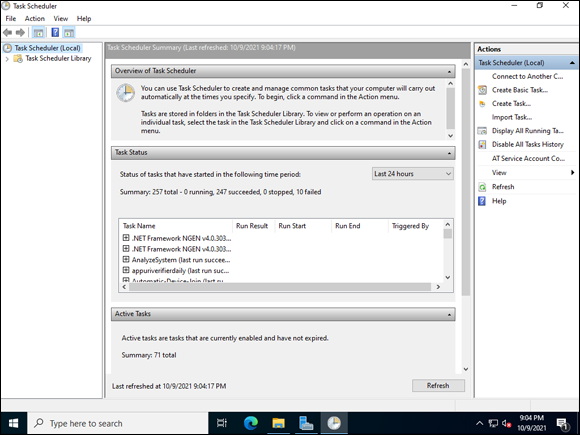
FIGURE 5-20: Task Scheduler is the central area for managing automated/scheduled tasks.
Discovering task status
If you want to know what the status of a task is, you can check the Status column after selecting Task Scheduler Library or any of the folders contained within the Task Scheduler Library. Here are some of the statuses that you may encounter:
- Ready: The scheduled task is ready for its next scheduled execution.
- Running: The scheduled task is currently running.
- Disabled: The scheduled task will not run.
Using preconfigured tasks
Windows Server 2022 comes with quite a few predefined tasks that you can choose from. For instance, Disk Cleanup runs automatically when the system starts to run low on free space. You can see in Figure 5-21 that the Status is Ready, and it gives you the last run time as well.
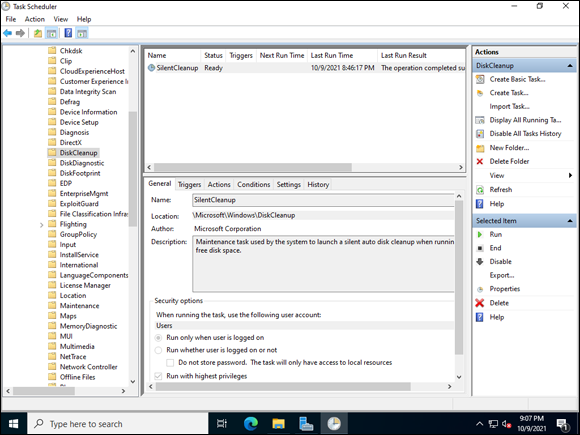
FIGURE 5-21: Configuring one of the Windows Server preconfigured tasks.
You can change the schedule that the task runs on or even delete the task if you want. There are several tabs that you should understand:
- General: The General tab contains information about the task, including who authored it and what account it will run under.
- Triggers: This tab is used to automate the task. Here, you can create a schedule if you want the task to run on a certain day at a certain time, or if you want the task to kick off when other events occur like logon, startup, or when a certain event occurs.
- Actions: The Actions tabs contains what you want the task to actually do. Typically this will be starting a program of some kind, though you can still use the deprecated options of sending an email or displaying a message.
- Conditions: The Conditions tab can place conditions on when the task will be allowed to run. For instance, you may require that the task only be able to run after the system has been idle for a predetermined amount of time.
- Settings: The Settings tab allows you to tweak settings related to how the task can run and what it should do if it runs into a failure.
- History: The History tab tells you if the task has been running successfully. If it runs into an error, it can give you valuable information on what caused the error.
To edit a preconfigured task, simply double-click the task and make your changes, and then click OK. For example, say I want to schedule the SilentCleanup task to run every evening. I would follow these steps:
- From Server Manager, choose Tools⇒ Task Scheduler.
- Expand the Task Scheduler Library.
- Go to the DiskCleanup folder and double-click SilentCleanup.
- Click the Triggers tab and then click New.
- Under Begin the Task, select On a Schedule.
- Change the settings area to Daily and select the time you want it to run at.
- Under Advanced settings, select Stop Task if It Runs Longer Than and select a reasonable time frame.
- Click OK to save the trigger.
Now the task will run every day at 7:00 p.m. in my case. You can see what this looks like in Figure 5-22.
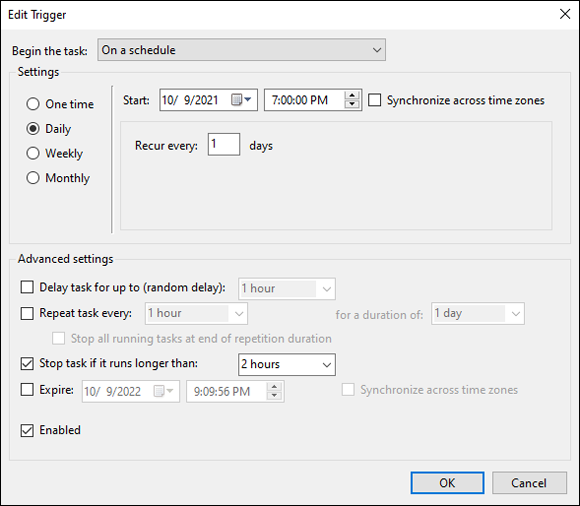
FIGURE 5-22: Changing a preconfigured task to run every day.
Creating your own tasks
Maybe the preconfigured tasks aren’t what you need to do the job. Maybe you have a custom script that you need to run on a schedule. This is where creating your own tasks can be very helpful.
To create your own task, select the Task Scheduler Library. You have the choice of creating a basic task or simply creating a task. Here are the steps to create a task:
- From Server Manager, choose Tools⇒ Task Scheduler.
- Click Task Scheduler Library.
- Select Create Task from the right-hand menu.
- On the General tab, give your task a name, select which user account you want it to run under, and select which OS you want to configure it for.
- Click the Triggers tab and then click New.
- Under Begin the Task, select On a Schedule.
- Change the settings area to Daily and select the time you want it to run at.
- Under Advanced settings, select Stop Task if It Runs Longer Than and select a reasonable time frame.
- Click OK to save the trigger.
- Click the Actions tab and select Start a Program.
- In Program/Script, click Browse and select the script that you want the task to run.
- Add any arguments you may need, and click OK.
- Click OK to save the task.
There you go, you created your first task!
Working with Remote Desktop
When you work on servers, sometimes you need to be able to see what’s going on by logging into the actual server. In these cases, Remote Desktop is the tool you want. Remote Desktop allows you to connect remotely to the console of the Windows Server system. There are several configuration options you can make that impact how the Remote Desktop session works.
On the server on which you want to use Remote Desktop, all you need to do is click the Start menu, click Windows Accessories, and choose Remote Desktop Connection. Enter the name of the system that you want to connect to and click Connect, shown in Figure 5-23.

FIGURE 5-23: Connecting to another system via a Remote Desktop Connection.
You’ll be prompted for credentials to log on to the other server. Enter a username and password and click OK.
If this is a system that you connect to often, you can save the connection settings and even tell it which username you want to use. With the Remote Desktop connection window open, click the Options arrow. Fill in the username, and then choose Save As. This will create an RDP file that you can double-click to automatically launch a future Remote Desktop session with your saved settings. Here are some of the other settings you can create, which can also be saved into this RDP file:
- Setting the display configuration: With Remote Desktop Connection open, and the Options bubble expanded, click the Display tab. From this tab, you can set the size of the remote window, you can enable support for multiple monitors, and you can choose how many colors you want. By default, it’s set to 32 bit, which is the highest quality setting.
- Accessing local resources: With Remote Desktop Connection open, and the Options bubble expanded, click the Local Resources tab. On this tab, you can configure audio, how the keyboard will react with the remote session, and which local devices you want to pass through the remote connection like printers, drives, and the clipboard.
- Optimizing performance: With Remote Desktop Connection open, and the Options bubble expanded, click the Experience tab. By default, this is set to detect the connection quality automatically. You can set it to whatever type of connection you’re using, including modem, low-speed broadband, satellite, high-speed broadband, WAN, or LAN. You can also choose whether you want the connection to reconnect if it’s dropped.
Working with Remote Server Administration Tools
Remote Server Administration Tools (RSAT) allows you to manage all the various roles and features on your server. The great thing about RSAT is that you can install it on your desktop system and manage servers remotely, just as you would if you were connected to the individual server. The interface is the familiar Server Manager interface. The main difference between this Server Manager and the one on the server is that instead of the Local Server option, you simply have the All Servers option.
Figuring out firewall rules
To use RSAT, the remote servers need to be running WinRM and the Windows Firewall must allow port 5985 so that RSAT can communicate with the remote server.
Connecting to the server
To manage a server with RSAT, you need to connect to it first. Follow these steps to add a server to Server Manager on a Windows 10 PC:
- Click Start, open Server Manager, and click All Servers.
- Right-click All Servers and choose Add Servers.
- Search for the name of the system.
- Select the server(s) that you want to add and click the arrow to move the selected server(s) to the Selected box.
- Click OK.
- Right-click the newly added server and choose Start Performance Counters.
After you follow these steps, your server will show Online under manageability (shown in Figure 5-24), and you can now manage your server remotely through the RSAT tools.
Managing your servers
To manage servers that have been added to the RSAT version of Server Manager, simply right-click the server and choose what you want to do. There are a ton of management options available to you from the Server Manager interface. You can add roles and features, restart the server, or run AD tools if the remote system is a domain controller. You can even run a remote PowerShell window. See the available options in Figure 5-25.
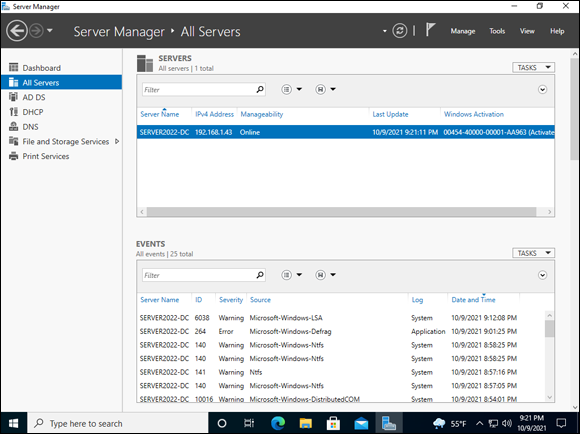
FIGURE 5-24: Using RSAT to manage remote servers from a Windows 10 client.

FIGURE 5-25: There are lots of options to manage a remote server using RSAT.
Working with Admin Center
RSAT has been the mainstay for administering remote servers for quite a while. There have been significant improvements made to RSAT, especially in Windows 10, but RSAT is still something that is locally installed. Microsoft recognized the need for a centralized console that could be served through a web browser, and Windows Admin Center was born.
You can install Windows Admin Center on a desktop if you just want to see what it’s capable of. Its strength, however, comes from installing it on a server and having that server be your management server. Administrators can connect to the web interface, and all the servers they need to manage are already there. In the following sections, I cover a few common administrative tasks using Windows Admin Center.
Focusing on firewall rules
Windows Admin Center needs port 6516 open on the server that it’s running on. When connecting on the same system, you can simply open Microsoft Edge and type https://localhost:6516. If accessing it from a remote system, you need to type https://<server name>:6516.
Connecting to a server
The default page that Windows Admin Center opens to is the All Connections screen. This screen is where you can add systems. I’m running this on a Windows 10 PC, and my PC shows up in Windows Admin Center already. Follow these steps to add a new server:
- Click Add, and then click Add Server Connection.
- Select Add One Server and enter the server’s name.
- Click Submit.
Adding servers is that simple. The connection will automatically be set to use the credentials of the logged-in user. If you don’t want it to use those credentials, select the system and choose Manage As. Enter the account you do want to use and click Continue. In Figure 5-26, you can see that both my Windows 10 PC and Windows Server 2022 system are using the administrator account.
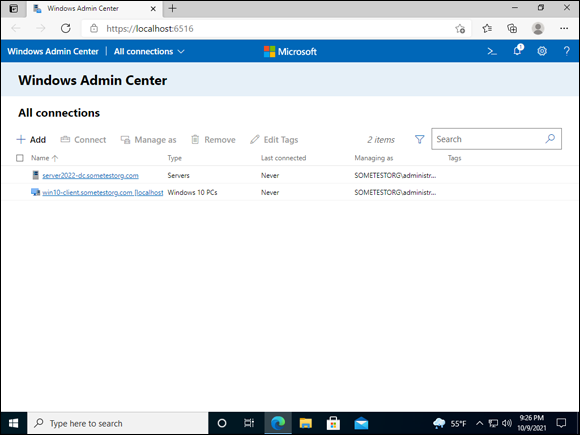
FIGURE 5-26: Connecting to a server with Windows Admin Center.
Using Windows Admin Center to manage your servers
From Windows Admin Center, click the name of the system that you want to manage. This changes your view to the Server Manager view, shown in Figure 5-27.
From here, you can manage the system, check its resource utilization, and more. You can do everything you could do in the traditional Server Manager, with several new additions. The newest version of Windows Admin Center includes lots of new Azure functionality, including the ability to manage Azure Kubernetes clusters, Azure Backups, Azure Security Center, and more.
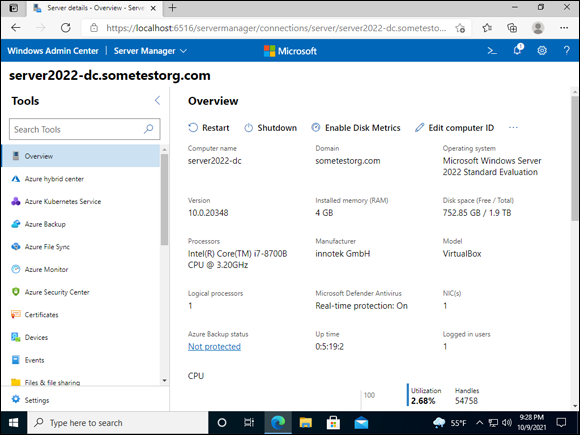
FIGURE 5-27: The Server Manager view in Windows Admin Center.
Creating a Windows Recovery Drive
A Windows Recovery drive can be very helpful if you ever have to do a bare metal restore. This can recover the operating system, custom settings, and configurations, as well as drivers. Follow these steps to create a recovery drive:
- Insert a blank USB flash drive into the system.
- Click the Start Menu, scroll down to Windows System, and choose Control Panel.
- Change View by Category to View by Large Icons.
- Select Recovery, and then click Create a Recovery Drive.
On the Create a Recovery Drive screen, click Next.
The system takes a moment, but it should find the USB flash drive.
When the system finds the driver, click Next.
On the final Create the Recovery Drive screen, you’re warned that everything on the destination drive will be deleted.
- Click Create.