
11
Managing Printing
In this chapter, we cover the following recipes:
- Installing and sharing printers
- Publishing a printer
- Changing the spooler directory
- Changing printer drivers
- Printing a test page
- Managing printer security
- Creating a printer pool
Introduction
Printing is a feature that Microsoft incorporated into various versions of the Windows operating system and has evolved over the years. Windows Server 2022 provides you with a printing platform for your organization. Printer configuration and management in Windows Server 2022 hasn't changed much from earlier versions.
When printing in Windows, the physical device that renders output onto paper is known as a print device. A printer is a queue for a print device. A print server can support multiple printers. Each print device has an associated printer driver that converts your documents to the printed form on a given print device. Some drivers come with Windows, others you need to obtain from the printer vendor. In some cases, these drivers are downloadable from the internet; in other cases, you may need to download and run a driver installation program to add the correct drivers to your print server.
Printers print to the print device using a printer port (such as USB, parallel, or network). For network printers, you need to define the port before you can create a Windows printer. Microsoft hasn't changed the basic print architecture with Windows Server 2022. Windows Server 2012 introduced a new driver architecture that Windows Server 2022 supports. This driver model enables you to use two different driver types: printer class drivers and model-specific drivers. The former provides a single driver for various printing device models. You use model-specific drivers for just a single printer model. Increasingly, print device manufacturers are implementing more generic drivers that can simplify the organizational rollout of shared printers.
Another change in Windows Server 2012, carried into Windows Server 2022, is that you no longer have to use the print server to distribute printer drivers (which is especially relevant for network printers). You can use tools such as the System Center Configuration Manager or Group Policy to distribute print drivers to clients in such cases.
This chapter covers installing, managing, and updating printers, print drivers, and printer ports on a Windows Server 2022 server. You may find that some of the administration tools used in this chapter aren't available on Windows Server Core systems. To enable full management, you need to have the full GUI (including Desktop Experience) for any GUI utilities.
In the Installing and sharing printers recipe, you install a printer and share it for others to use. In the Publishing a printer recipe, you'll publish the printer to Active Directory (AD), enabling users in the domain to search AD to find the printer. When you create a print server (by adding printer ports and printers), the default spool folder (Windows uses a folder, by default, that is underneath C:Windows) may not be in an ideal location. In the Changing the spooler directory recipe, you change the default location for the printer spool.
Sometimes, a printer can have an associated print device swapped for a different printer model. In the Changing printer drivers recipe, you change the driver for the printer you created earlier. A useful troubleshooting step when working with printers is to print a test page, as you can see in the Printing a test page recipe.
Printers, like files, can have Access Control Lists (ACLs) to specify who can use the printer. You can modify the ACL, as shown in the Managing printer security recipe. In many organizations, print devices are a shared resource.
In Windows, a printer pool is a printer that has two or more associated printing devices. This means having two or more physical printers (print devices on separate ports) that users see as just a single printer. Printer pools are useful in situations where users create large numbers of printed documents, and multiple physical printers can be deployed. In the Creating a printer pool recipe, you see how you can automate the creation of a printer pool using rundll32.exe.
Installing and sharing printers
The first step in creating a print server for your organization involves installing the print server feature, printer drivers, and printer ports. With those installed, you can create and share a printer for others to access.
In this recipe, you download and install two Xerox printer drivers. You use one of the drivers in this recipe; the other you use in the Changing printer drivers recipe. This download comes as a ZIP archive that you need to extract before using the drivers.
Note: if you're using this recipe to support other printer makes and models, you may need to make some changes. In some cases, such as with some Hewlett Packard printers, the manufacturer designed the printer drivers to be installed via a downloadable executable. You would need to run the downloaded executable, which you execute on your print server to add the drivers. Thus, this recipe may not apply to all printing devices.
Getting ready
This recipe uses a Windows Server host PSRV, a domain-joined Windows Server 2022 host on which you have installed PowerShell 7 and VS Code.
How to do it...
- Installing the
Print-Serverfeature onPSRVInstall-WindowsFeature -Name Print-Server, RSAT-Print-Services - Creating a folder for the Xerox printer drivers
$NIHT = @{ Path = 'C:FooXerox' ItemType = 'Directory' Force = $true ErrorAction = "Silentlycontinue" } New-Item @NIHT | Out-Null - Downloading printer drivers for Xerox printers
$URL='http://download.support.xerox.com/pub/drivers/6510/'+ 'drivers/win10x64/ar/6510_5.617.7.0_PCL6_x64.zip' $Target='C:FooXeroxXdrivers.zip' Start-BitsTransfer -Source $URL -Destination $Target - Expanding the ZIP file
$Drivers = 'C:FooXeroxDrivers' Expand-Archive -Path $Target -DestinationPath $Drivers - Installing the drivers
$M1 = 'Xerox Phaser 6510 PCL6' $P = 'C:FooXeroxDrivers6510_5.617.7.0_PCL6_x64_Driver.inf'+ 'x3NSURX.inf' rundll32.exe printui.dll,PrintUIEntry /ia /m "$M1" /f "$P" $M2 = 'Xerox WorkCentre 6515 PCL6' rundll32.exe printui.dll,PrintUIEntry /ia /m "$M2" /f "$P" - Adding a
PrinterPortfor a new printer$PPHT = @{ Name = 'SalesPP' PrinterHostAddress = '10.10.10.61' } Add-PrinterPort @PPHT - Adding the printer to
PSRV$PRHT = @{ Name = 'SalesPrinter1' DriverName = $m1 PortName = 'SalesPP' } Add-Printer @PRHT - Sharing the printer
Set-Printer -Name SalesPrinter1 -Shared $True - Reviewing what you have done
Get-PrinterPort -Name SalesPP |
    Format-Table -Autosize -Property Name, Description,
                           PrinterHostAddress, PortNumber
Get-PrinterDriver -Name xerox* |
    Format-Table -Property Name, Manufacturer,
                           DriverVersion, PrinterEnvironment
Get-Printer -ComputerName PSRV -Name SalesPrinter1 |
    Format-Table -Property Name, ComputerName,
                           Type, PortName, Location, Shared
How it works...
In step 1, you install both the Print-Server Windows feature and the printing Remote Server Administration Tools (RSAT), with output like this:

Figure 11.1: Installing the Print-Server feature on PSRV
In step 2, you create a new folder that you use to hold the printer driver download. In step 3, you download the drivers (as a compressed ZIP file) into the folder you just created. In step 4, you expand the ZIP files, and in step 5, you install the printer drivers. In step 6, you add a new printer port to PSRV, and in step 7, you add a new printer using the printer port you just created and making use of the Xerox printer drivers you have downloaded. Finally, in step 8, you share the printer so other users can print to it. These seven steps produce no output.
In step 5, you use the rundll32.exe console application to install the printer drivers in Windows. This command can, on occasion, generate "Operation could not be completed" error dialogs. The resolution is to wait a few seconds, then try again.
In step 9, you examine the printer ports, printer drivers, and printers available on PSRV, with output like this:

Figure 11.2: Viewing printer components on PSRV
There's more...
In this recipe, you create a printer on PSRV based on Xerox printers. The fact that you may not have this model of printer in your environment means you can't physically print to such a print device, but you can set up the printer as shown in the recipe.
In step 5, you use printui.dll and rundll32.exe. Now, printui.dll is a library of printer management functionalities. If you use the Printer Management GUI tool to manage printers, the GUI calls this DLL to perform your chosen action. Since Microsoft designed and built this DLL to support the Windows printer GUI, the DLL can create additional dialog boxes, which are not useful for automation. You can rely on the help information generated to resolve any problems.
In practice, printui.dll is a little flakey and can generate error messages with little supporting detail to help you. The solution is to retry the operation after waiting some seconds, or if the issue continues, reboot the server.
You can get helpful information on the syntax needed by printui.dll by opening a PowerShell console window and running the following command:
rundll32 printui.dll PrintUIEntry
In this recipe, you downloaded and installed two drivers. You use one driver in this recipe to create the SalesPrinter1 printer. You use the second driver in the Changing printer drivers recipe later in this chapter.
Publishing a printer
After you create and share a printer (as shown in the previous recipe), you can also publish it to Active Directory. When you publish a printer, you can also specify a physical location for the printer. Your users can then search for published printers based on location, as well as on capabilities (such as color printing). In this recipe, you publish the printer you created in the previous recipe and examine the results.
Getting ready
Before running this recipe, you need to have the PSRV printer server set up (you did this in the Installing and sharing printers recipe). Additionally, you need SalesPrinter1 created.
How to do it...
- Getting the printer to publish and store the returned object in
$Printer$Printer = Get-Printer -Name SalesPrinter1 - Viewing the printer details
$Printer | Format-Table -Property Name, Published - Publishing and sharing the printer to AD
$Printer | Set-Printer -Location '10th floor 10E4' $Printer | Set-Printer -Shared $true -Published $true - Viewing the updated publication status
Get-Printer -Name SalesPrinter1 |
  Format-Table -Property Name, Location, DriverName, Published
How it works...
In step 1, you obtain details of the printer you wish to share, and you store this into the variable $Printer, producing no output. In step 2, you examine the printer details contained in $Printer, with output like this:

Figure 11.3: Viewing the SalesPrinter1 printer on PSRV
In step 3, you publish the printer to the Reskit.Org AD, and you share the printer explicitly. This step produces no output. In step 4, you use Get-Printer to review the publication status of the printer, with output like this:

Figure 11.4: Viewing the SalesPrinter1 printer publication status
There's more...
Publishing a printer to AD allows users to locate printers near them using the Add Printer dialog to search for published printers. For example, if you log onto any computer in the domain, you can get to this dialog box by clicking Start | Settings | Devices | Printers & scanners to bring up the Add printers & scanners dialog. From this dialog box, click Add a printer or scanner. Wait until the search is complete, then click on The printer that I want isn't listed, which brings up the Add Printer dialog, like this:

Figure 11.5: Using the Add Printer dialog
From this dialog box, click on Next to bring up the Find Printers dialog, which looks like this:

Figure 11.6: Using the Find Printers dialog
In larger organizations, publishing printers to AD can be very useful in helping users to find the corporate printers available to them.
Changing the spooler directory
During the printing process, the Windows printer spooler in Windows uses an on-disk folder to hold the temporary files the printing process creates. If multiple users each print very large documents to a single printer, the print queue and the temporary folder can get quite large. By default, this folder is C:WindowsSystem32spoolPRINTERS. For a busy print server with multiple printers, you may wish to change the default spool folder.
Getting ready
This recipe uses the PSRV printer server set up as per the Installing and sharing printers recipe.
How to do it...
- Loading the
System.Printingnamespace and classesAdd-Type -AssemblyName System.Printing - Defining the required
permissions$Permissions = [System.Printing.PrintSystemDesiredAccess]::AdministrateServer - Creating a
PrintServerobject with the required permissions$NOHT = @{ TypeName = 'System.Printing.PrintServer' ArgumentList = $Permissions } $PS = New-Object @NOHT - Observing the default spool folder
"The default spool folder is: [{0}]" -f $PS.DefaultSpoolDirectory - Creating a new spool folder
$NIHT = @{ Path = 'C:SpoolPath' ItemType = 'Directory' Force = $true ErrorAction = 'SilentlyContinue' } New-Item @NIHT | Out-Null - Updating the default spool folder path
$Newpath = 'C:SpoolPath' $PS.DefaultSpoolDirectory = $Newpath - Committing the change
$Ps.Commit() - Restarting the
Spoolerto accept the new folderRestart-Service -Name Spooler - Verifying the new spooler folder
New-Object -TypeName System.Printing.PrintServer | Format-Table -Property Name, DefaultSpoolDirectory - Stopping the
SpoolerserviceStop-Service -Name Spooler - Creating a new spool directory
$SPL = 'C:SpoolViaRegistry' $NIHT2 = @{ Path = $SPL Itemtype = 'Directory' ErrorAction = 'SilentlyContinue' } New-Item @NIHT2 | Out-Null - Creating the spooler folder and configuring it in the registry
$RPath = 'HKLM:SYSTEMCurrentControlSetControl' + 'PrintPrinters' $IP = @{ Path = $RPath Name = 'DefaultSpoolDirectory' Value = $SPL } Set-ItemProperty @IP - Restarting the
SpoolerStart-Service -Name Spooler - Viewing the newly updated spool folder
New-Object -TypeName System.Printing.PrintServer |
  Format-Table -Property Name, DefaultSpoolDirectory
How it works...
In step 1, you load the System.Printing namespace, which produces no output. In step 2, you create a variable holding the desired access to the printer. In step 3, you create a PrintServer object with the appropriate permissions. Then, in step 4, you examine the default spool folder for a newly installed Windows Server 2022 host, which produces output like this:

Figure 11.7: Examining the default spool folder
In step 5, you create a new folder on PSRV to serve as your print server's spool folder. In step 6, you update the printer spool folder path. In step 7, you commit this change, and in step 8, you restart the spooler service. These four steps produce no console output.
In step 9, you re-view the printer details with output like this:

Figure 11.8: Verifying the new spooler folder
In step 1 through step 9, you set and validate the spool folder using a .NET object.
In step 10, you stop the spooler service. In step 11, you create a new folder, and in step 12, you configure the necessary registry settings to contain the path to the new spool folder. Then in step 13, you restart the spooler. These four steps produce no console output. With the changes made to the spool folder within the registry, in step 14, you can view the updated spool folder with output like this:
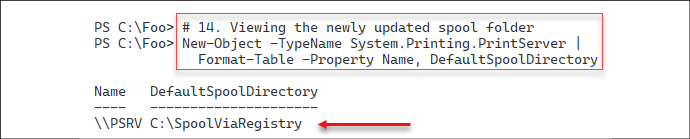
Figure 11.9: Examining the updated spool folder
There's more...
For most organizations with a larger number of shared printers, configuring the print server to use another folder for spooling is a good idea. If possible, use a separate disk drive if you can to avoid the risk of the spool folder filling up.
In this recipe, you used two different mechanisms to change the spooler folder. One uses a .NET object (which isn't loaded by default), while the other involves directly editing the registry. Needless to say, if you're rolling out printers using scripts, particularly ones that edit the registry, careful testing is vital.
Many of the steps in this recipe produce no output. This lack of output is normal when dealing directly with .NET classes and methods and editing the registry.
Changing printer drivers
On occasion, it may be necessary to change the printer driver for a printer. For example, you might be replacing an existing print device with a new or different model. In this case, you want the printer name to remain the same, but you need to update the printer's print driver. In the Installing and sharing printers recipe, you downloaded and installed two Xerox printer drivers. You used the first driver, Xerox Phaser 6510 PCL6, when you defined the SalesPrinter1 printer.
In this recipe, you change the driver for the printer and use the other previously installed driver, Xerox Phaser 6515 PCL6.
This recipe assumes that the printer name and printer port (including the printer's IP address and port number) do not change, only the driver.
Getting ready
Run this recipe on the PSRV host, set up as per the Installing and sharing printers recipe.
How to do it...
- Adding the print driver for the new printing device
$M2 = 'Xerox WorkCentre 6515 PCL6' Add-PrinterDriver -Name $M2 - Getting the Sales group printer object and storing it in
$Printer$Printern = 'SalesPrinter1' $Printer = Get-Printer -Name $Printern - Updating the driver using the
Set-Printercmdlet$Printer | Set-Printer -DriverName $M2 - Observing the updated printer driver
Get-Printer -Name $Printern |
  Format-Table -Property Name, DriverName, PortName,
                Published, Shared
How it works...
In step 1, you use the Add-PrinterDriver cmdlet to add the printer driver for the printer. In step 2, you obtain the printer details, and in step 3, you update the printer to use the updated driver. These steps produce no console output.
In step 4, you use Get-Printer to observe that you have installed the updated driver for the SalesPrinter1 printer, which looks like this:

Figure 11.10: Viewing the updated printer driver for SalesPrinter1
There's more…
As you see in this recipe, changing a printer driver is straightforward – after you install a new printer driver, you use Set-Printer to inform Windows which driver it should use when printing to the printer.
Printing a test page
There are occasions when you may wish to print a test page on a printer; for example, after changing the toner or printer ink on a physical printer or after changing the print driver (as shown in the Changing printer drivers recipe). In those cases, the test page helps you to ensure that the printer is working properly.
Getting ready
This recipe uses the PSRV print server that you set up in the Installing and sharing
printers recipe.
How to do it...
- Getting the printer objects from WMI
$Printers = Get-CimInstance -ClassName Win32_Printer - Displaying the number of printers defined on
PSRV'{0} Printers defined on this system' -f $Printers.Count - Getting the Sales group printer WMI object
$Printer = $Printers | Where-Object Name -eq 'SalesPrinter1' - Displaying the printer's details
$Printer | Format-Table -AutoSize - Printing a test page
Invoke-CimMethod -InputObject $Printer -MethodName PrintTestPage - Checking on print job
Get-PrintJob -PrinterName SalesPrinter1
How it works...
In step 1, you get details of the printers installed on PSRV using WMI and store them in the variable $Printers, producing no output. In step 2, you display how many printers you have defined on your printer server, with output like this:

Figure 11.11: Viewing the number of printers on PSRV
In step 3, you get the specific WMI instance for the SalesPrinter1 printer, creating no output. In step 4, you view the details of this printer, with output like this:

Figure 11.12: Viewing printers on PSRV
In step 5, you use Invoke-CimMethod to run the PrintTestPage method on the printer. This step generates a simple printer test page, with console output like this:

Figure 11.13: Printing a test page
In the final step in this recipe, you view the print jobs on the SalesPrinter1 printer, where you can see your test page output generated in the previous step. The output from this step looks like this:

Figure 11.14: Viewing printer jobs to observe the test page
There's more...
In this recipe, you used WMI to create a test page on the SalesPrinter1 printer. As you saw in step 6, the printer's queue has the print job. In theory, the document should appear on the print device pretty much straightaway. If you do not get any physical output, you need to carry out some routine printer troubleshooting: is the printer turned on, and is the network cable plugged in and working?
Managing printer security
Every Windows printer has a discretionary access control list (ACL). The ACL contains one or more access control entries (ACEs). Each ACE defines a specific permission for some specific group or user. You could define a group (such as SalesAdmins) and give that group the permission to manage documents, while giving another group (such as Sales) access to print to the printer.
By default, when you create a printer, Windows adds some ACEs to the printer's ACL. This includes giving the Everyone group the permission to print to the printer. For some printers, this may not be appropriate. For this reason, you may need to adjust the ACL, as shown in this recipe.
The PrintManagement module contains several cmdlets that help you manage the printers. However, there are no cmdlets for managing ACLs on printers. You can always use .NET directly to manage the ACL or use third-party scripts that do the job for you, but the code for this can be complex (and easy to mess up). Make sure you test any recipes that modify printer ACLs very carefully. Always have a way to reset any ACL back to defaults should you make a mistake and need to start again to define the printer ACL. And as ever, you can always manage the ACL using the GUI if you need to!
Getting ready
Run this recipe on the PSRV printer server VM after you have installed and configured the SalesPrinter1 printer. This recipe uses the SalesPrinter1 printer and creates two new groups, Sales and SalesAdmin, in AD.
How to do it...
- Setting up AD for this recipe
$SB = { # 1.1 Creating Sales OU $OUHT = @{ Name = 'Sales' Path = 'DC=Reskit,DC=Org' } New-ADOrganizationalUnit @OUHT # 1.2 Creating Sales Group $G1HT = @{ Name = 'SalesGroup' GroupScope = 'Universal' Path = 'OU=Sales,DC=Reskit,DC=Org' } New-ADGroup @G1HT # 1.3 Creating SalesAdmin Group $G2HT = @{ Name = 'SalesAdmins' GroupScope = 'Universal' Path = 'OU=Sales,DC=Reskit,DC=Org' } New-ADGroup @G2HT } # 1.4 Running Script block on DC1 Invoke-Command -ComputerName DC1 -ScriptBlock $SB - Creating an
NTAccountobject$GHT1 = @{ Typename = 'Security.Principal.NTAccount' Argumentlist = 'SalesGroup' } $SalesGroup = New-Object @GHT1 $GHT2 = @{ Typename = 'Security.Principal.NTAccount' Argumentlist = 'SalesAdmins' } $SalesAdminGroup = New-Object @GHT2 - Getting the group SIDs
$SalesGroupSid = $SalesGroup.Translate([Security.Principal.Securityidentifier]).Value $SalesAdminGroupSid = $SalesAdminGroup.Translate( [Security.Principal.Securityidentifier]).Value - Defining the SDDL for this printer
$SDDL = 'O:BAG:DUD:PAI(A;OICI;FA;;;DA)' + "(A;OICI;0x3D8F8;;;$SalesGroupSid)" + "(A;;LCSWSDRCWDWO;;;$SalesAdminGroupSid)" - Getting the Sales group's printer object
$SGPrinter = Get-Printer -Name SalesPrinter1 -Full - Setting the permissions
$SGPrinter | Set-Printer -Permission $SDDL - Viewing the permissions from the GUI
Open the Windows Settings applet, click on Devices, and then click on Printers & scanners. Next, click on the SalesPrinter1 printer, then click on Manage. Finally, click on Printer properties.
How it works...
In step 1, you create a new OU in the Reskit.Org domain (Sales), then create two new Universal security groups (SalesGroup and SalesAdmins).
In step 2, you create two Security.Principal.NTAccount objects with the properties of the two security groups. In step 3, you use these two objects to retrieve the Security IDs (SIDs) for each of the groups. In step 4, you create a Security Descriptor Description Language (SDDL) permission set.
In step 5, you use Get-Printer to return a WMI object that describes the printer. Then in step 6, you use Set-Printer to set the ACL for your printer. These first six steps produce no console output.
In step 7, you observe the ACL by using the Windows Printer GUI. The output looks like this:

Figure 11.15: Viewing printer security
There's more...
In this recipe, you create an ACL for the Sales group printer SalesPrinter1. The recipe makes use of a .NET object to obtain the SIDs for two security groups. Then you hand-construct the SDDL and apply it to the printer.
Unlike NTFS, there are no third-party printer ACL management tools readily available to simplify the setting of ACLs. SDDL is the default mechanism, but it is not always all that straightforward. For some details on SDDL, see https://itconnect.uw.edu/wares/msinf/other-help/understanding-sddl-syntax/.
Creating a printer pool
Windows allows you to create a printer pool, a printer with two or more print devices (each with a separate printer port). With a printer pool, Windows sends a given print job to any of the pool's printers. This feature is helpful in environments where users print large numbers of documents and need the speed that additional printers can provide without asking the user to choose the specific print device to use.
There are no PowerShell cmdlets to enable you to create a printer pool. Also, WMI does not provide a mechanism to create a printer pool. As with other recipes in this chapter, you use printui.dll and rundll32 to deploy your printer pool. This recipe is another example of utilizing older console applications to achieve your objective.
Getting ready
You run this recipe on PSRV, on which you have set up a new printer, SalesPrinter1.
How to do it...
- Adding a port for the printer
$P = 'SalesPP2' # new printer port name Add-PrinterPort -Name $P -PrinterHostAddress 10.10.10.62 - Creating the printer pool for
SalesPrinter1$Printer = 'SalesPrinter1' $P1 = 'SalesPP' # First printer port $P2 = 'SalesPP2' # Second printer port rundll32.exe printui.dll,PrintUIEntry /Xs /n $Printer Portname "$P1,$P2" - Viewing the printer pool
Get-Printer $Printer |
   Format-Table -Property Name, Type, DriverName, PortName
How it works...
In step 1, you add a new printer port, SalesPP2. In step 2, you create a new printer pool by using printui.dll and setting two printer ports. In the final step, step 3, you view the output to confirm you have set up a printer pool of two print devices/ports. The output of this final step looks like this:

Figure 11.16: Viewing the printer pool
There's more...
In step 3, you use the Get-Printer command to retrieve details about the printer to verify you have set up a printer pool. You can also view this pool using the printer GUI, which looks like this:

Figure 11.17: Viewing the printer pool from the GUI