
Chapter 4. Configuration of the Console
Information In This Chapter
This chapter continues on the networking functionality of the XBOX 360 console and provides more detail on the steps necessary to connect the console to the XBOX Live service. In addition, the social networking aspects of the console and the XBOX Live service are explored in more detail. In the latter part of the chapter, there will be an exploration of the types of devices and other network connections that can be utilized with the console, such as external hard drives and streaming media from a PC.
Keywords
Gamertag, XBOX Live, Avatar, Social Networking
Introduction
The network connectivity of the XBOX 360 presents some unique social networking features that may contain one piece of the investigative puzzle for a high-tech crime investigation. Any forensics examiner has no doubt come across social networking artifacts during the course of any dead box analysis. The XBOX 360 has the functionality to connect with many of the mainstream social networking applications that can be accessed through a normal Web browser. Accessing these sites through the applications on the XBOX 360 console is facilitated through the XBOX Live service. In order to connect to the XBOX Live service, the end user must complete his or her registration and link his or her previously created Gamertag to the console.
Getting Started
It is necessary to detail all the aspects of this linkage to the XBOX Live service in order to get a better understanding of the process to assist in the determination of digital artifacts location. There are two locations in which a user can create an XBOX Live account: from the Web site mentioned earlier, or through the console interface. In either case, the finalization of the XBOX Live account, as well as the Gamertag, is completed on the XBOX 360 console.
It is this account creation that provides the end user of the console with access to the XBOX Live portal and the networking functionality that places artifacts on the storage media. It is this communication vector that provides interest for the digital media forensic professionals for investigations and examinations.
Account creation is a straightforward process. A user must first create an account on either the XBOX 360 console or on the XBOX Live Web portal. Once this account is created, the process must be completed using the console.
A user logs into the console and is immediately prompted to configure the machine for initial use. One of the first settings presented is the language configuration. Because of the widespread market that the console enjoys, there are several different languages that are supported. Figure 4.1 provides a screenshot of the language set up page.
 |
| Figure 4.1 Configuring default language settings. |
The next setting to configure is the locale. As with the language support, there are many different markets for the console, and as such there are several different locales that can be configured. The locale is a setting that can be changed in the future if a user relocates. Changing the locale does not change the regional coding for games. Figure 4.2 provides a screenshot of the locale selection for the console.
 |
| Figure 4.2 Setting the locale. |
The next settings are for the HDTV settings to optimize video output. Figure 4.3 provides an image of the selection options for HDTV.
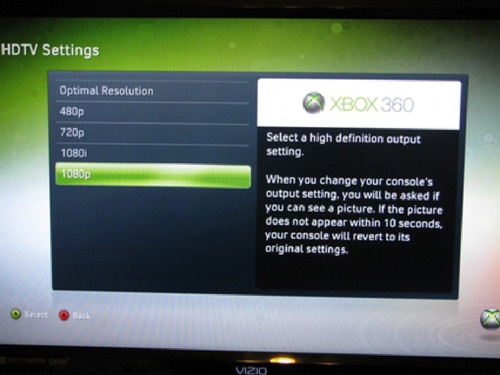 |
| Figure 4.3 Configuring HDTV settings. |
Family settings are configuration settings that allow a parent to have more control over the types of games that the family will play, based on Entertainment Software Rating Board, (ESRB) ratings. However, the settings go beyond the types of games that are allowed and include settings for a variety of features. The following setting descriptions were taken from www.xbox.com/en-US/support/familysettings/console/xbox360/consolefamilysettings.htm:
Game Ratings: Select the games you want your child to play, from EC (Early Childhood) to M (Mature)
Video Ratings: XBOX 360 recognizes ratings encoded into movies, TV shows, and other videos
Access to XBOX Live: Allow or prevent the console from connecting to XBOX Live
XBOX Live Membership Creation: Decide whether to allow or prevent the ability to create new XBOX Live memberships from the console
XBOX Live Marketplace Content: Decide whether you want to be able to see restricted content while browsing XBOX Live Marketplace. This setting also affects access to the Inside XBOX news feed from the XBOX Dashboard
Family Timer: Set the amount of time that the console can be used on a daily or weekly basis
Set Pass Code: Limit who can access or change the Family Settings on your console
Turn off Family Settings: No kids? No problem! Shut down Family Settings!
Following the video, locale, language, and family settings, the user is almost done with the initial console configuration. The next dialog box that appears informs the user that the initial console set up is complete and that the user is now ready to enjoy the “Ultimate in Games and Entertainment.” Once all the setting have been configured, the Setup Complete dialog box appears, as depicted in Figure 4.4.
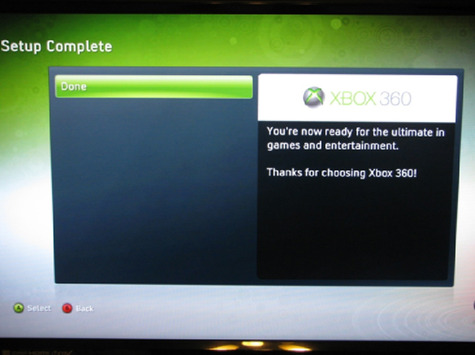 |
| Figure 4.4 Completing the console configuration. |
Network Configuration and Gamertag Recovery
Now that the initial console configuration is complete, a user could conceivably play games on the console the old-fashioned way, meaning that he or she could insert the game DVD and play the game in story mode where it is only a local game. However, the true power of the seventh generation game consoles, and the main reason that digital media analysts need to be concerned, is the network connectivity that is integrated.
For my research console, a wireless network adapter was connected before initial configuration of the console. Once the configuration was completed, the USB wireless adapter was automatically detected, and the console's operating system prompted for network configuration. Although with this particular setup, the console interface prompted for network configuration, there are manual steps that can be taken to connect the console to a network. Figure 4.5 provides an image of the dialog box that notifies of the wireless network adapter.
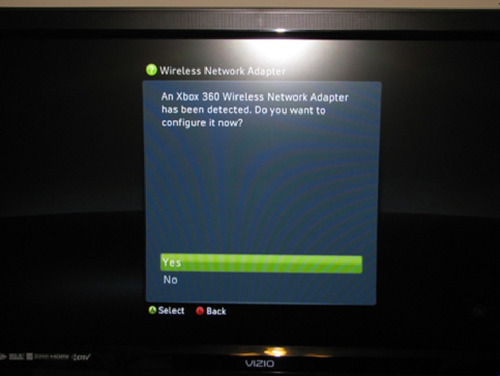 |
| Figure 4.5 Screenshot of autodetection of the wireless USB. |
Configuration of the network settings for the console is, again, a straightforward process. As with most settings for the console, there is a wizard that walks the end user through these configuration settings. The network setup can consist of many different options, as the console is geared toward being connected to any of the following:
• The Internet
• XBOX Live
• Other consoles
• A Windows-based PC
With all these options for networking connections, the accompanying functionality again reiterates that this console is simply another network node that must be considered as a source of digital media for analysis.
The initial step in network connectivity is to select the LAN settings. This is the first step that is presented to the end user with the network configuration wizard.
As you can see from the diagram in Figure 4.6, there is a multistep process to test connectivity. The first step provides for a local connection diagnostic, then there is a connection attempt to the Internet, and finally, a connection is established with the XBOX Live service. To begin the process of configuring the network connections, the user needs to select the Configure Network option from the network settings configuration wizard. This selection will launch the basic configuration tab of the network configuration. In addition to the Basic Settings tab that is launched, there is an Additional Settings tab that provides more detailed options. Figure 4.7 provides a screenshot of the Basic Settings tab.
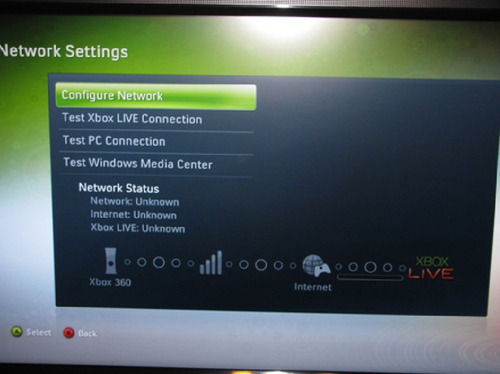 |
| Figure 4.6 Network settings wizard. |
 |
| Figure 4.7 Basic network settings. |
The green area on the screen, highlighted below, indicates the selection that is made by the end user. By moving the joysticks on the controller, the end user is able to navigate each page and make the necessary selections. In this specific case, because the wireless network adapter was connected, it was chosen to be configured in wireless mode. By highlighting this area in green and pressing the X button on the controller, we are presented with the next dialog box. The next screen prompts the end user to scan for wireless networks, similar to any other USB or integrated wireless NIC, Network Interface Card. Figure 4.8 provides a screenshot of this options window.
 |
| Figure 4.8 Scanning for wireless networks. |
Once this option is selected, it is no different than scanning for wireless networks from a PC. The wireless networks that are within range and that are “visible” to the console will be displayed for the user to connect to. Selecting the appropriate network will then prompt the user to provide more information to finalize the connection, such as the network key. The next series of figures are screenshots depicting the list of available wireless networks near the XBOX 360, the on-screen keyboard that is presented for data input, as well as the network configuration screen from Figure 4.7, but with the information that was input to connect.
The Windows Connect Now feature allows a user to input their network settings from his or her Windows-networked PC. In order to use this feature, users would have to save their network settings from their Windows PC to removable media, such as a USB drive. The steps are outlined well from the support portal for the XBOX 360 and can be located at http://support.xbox.com/support/en/us/nxe/kb.aspx?ID=962966&lcid=1033&category=xboxlive.
The following steps are from the Web page on how to use this feature on the XBOX 360 console:
1. Select System Settings.
2. Select Network Settings.
3. Select Configure Network.
4. Select Wireless Information.
Note: Make sure that your wireless adapter is connected to the rear of the console. Otherwise, this option will not be available.
5. Select Windows Connect Now.
6. Connect your USB flash drive to the USB port on your XBOX 360 console. When you receive a message that states “Windows Connect Now Settings have been found,” select OK to apply your wireless settings.
Figure 4.9 provides a screen capture of available wireless networks. Figure 4.10 and Figure 4.11 also provide images of the next configuration steps that are required.
 |
| Figure 4.9 Wireless network list. |
 |
| Figure 4.10 The on-screen keyboard for data entry. |
 |
| Figure 4.11 Depiction of the network settings with the specifics of the SSID and DNS IPs removed. |
The Additional Settings tab provides more detailed configuration if required by the specifics of the LAN. Included in this tab are PPPoE, (Point to Point Protocol over Ethernet) as well as other advanced settings. Figure 4.12 shows the options that are available under this tab. Configuring them is no different than configuring the wireless network settings. Simply highlight the selection and press the X button on the controller and follow through as the wizard prompts for end user input.
 |
| Figure 4.12 Advanced settings. |
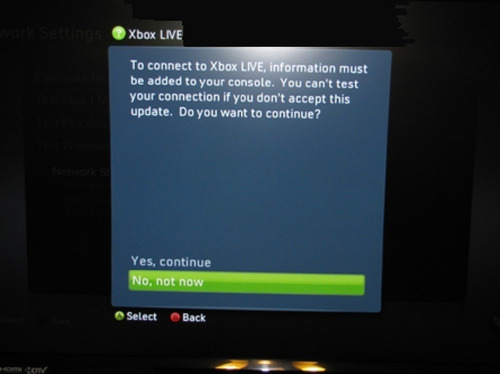
After configuring the console with the appropriate connection settings and ensuring that the connections are active, the next step is to connect the console to the XBOX Live service. In doing so, there is a dialog box that appears informing the end user that there is “information that must be added to the console in order to connect to XBOX Live.” The details of this information are not specified, and without a storage device connected, this initial connection attempt will fail. In the chapter on forensic analysis of the console, there will be an examination of the hard drive to determine what this information is. Figure 4.13 shows a screenshot of this dialog box.
 |
| Figure 4.13 Initial connection to XBOX Live. |
Once the end user accepts this addition of information to the console, the Yes, continue option in Figure 4.13, the next screen that appears is a diagram of the network test that is being performed. The test is similar to that of an Internet Control Message Protocol (ICMP), Echo request, also known as a PING test. The console first determines if the local connect is up and running. Once that test is complete and passes, then the next test is to determine if the console can connect to the Internet. If that test passes, the console continues on and attempts to connect to the XBOX Live service. Figure 4.14 provides a screenshot of the network test.
 |
| Figure 4.14 Screenshot of the network connection tests. |
As with the previous example of the XBOX Live service pushing data down to the console, the end user is again presented with a forced download from Microsoft XBOX Live. In this case, the download is billed as a system update, and if the end user declines the update, he or she will not be able to connect to the XBOX Live service. Research indicates that these two downloads are an exchange of information that is actually registering the console to the XBOX Live service as a security measure. It is thought that there is some sort of hash calculation done on the console and the hash value is sent to a database at Microsoft. This measure is thought to be a security control to prevent hacking of the hardware to circumvent the console's operating system. Figure 4.15 shows a screenshot of the update dialog box, and Figure 4.16 and Figure 4.17 show a failed update and a successful update notification, respectively.
 |
| Figure 4.15 System update. |
 |
| Figure 4.16 Update failure notification. |
 |
| Figure 4.17 Home page of the XBOX 360 Dashboard after system upgrade. |
On a successful update to the system, a reboot is forced and the end user is displayed with the default dashboard of the console. At this point, the console has been updated and the console has initiated its test to ensure connection to the network and XBOX Live. As was mentioned earlier, the functionality of the console to connect to a network and be another network node is integral to getting the most from the console and its features. The wizards make the connection a simple matter to add the console to a LAN and get it connected to the Internet and finally to the XBOX Live service.
Tour of the Dashboard, Profile Creation, and Gamertag Configuration
Now that the console is configured and it is able to connect to the XBOX Live service, there are several features that must be addressed. The first is the dashboard that is presented to the end user. This is the interactive screen that is displayed in Figure 4.17. The dashboard is the main system interface, akin to the desktop of a Windows-based PC. The dashboard interface has undergone several updates and functionality changes since its inception and seems to be evolving. The older version of the interface consisted of up to five “blades” that were umbrella categories that a user would navigate to in order to perform the desired functions.
In November 2008, the dashboard underwent an upgrade and from that point forward was referred to as the “New XBOX Experience” or the “NXE.” The upgrades to the dashboard removed the blade interface and provided an interface that is more interactive and similar in look and feel to the Windows Media Center. The console supports streaming audio, streaming video, cooperative network game play, social networking, and a wide variety of other features that are all accessed through the dashboard interface. Continuing on from the main page of the dashboard, as shown in Figure 4.17, each category has specific functionality and system settings that can be accessed through each broad category.
As the user navigates through each category, the number of subcategories is displayed in the lower left-hand corner. Each one of these subcategories is accessed by using the controller and moving the joystick in the direction of the desired category. The available panels and associated options change depending on whether the console is connected to the XBOX Live service or not. There are seven panels that are available through the NXE dashboard.
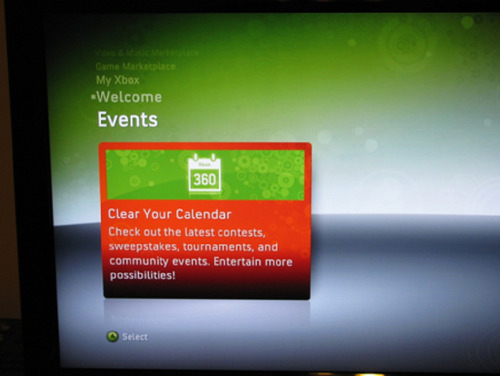
The seven panels are as follows:
• Welcome: Provides information on current happenings and hardware information.
• My XBOX: Displays information about the local machine and data storage
• Game Marketplace: Online game shopping
• Video and Music Marketplace: Online music and video shopping
• Friends: Connect to friends through Facebook, Twitter, Friends list, and so on
• Inside XBOX: Sign up for information regarding the most current XBOX 360 events
• Events: Current events on XBOX Live
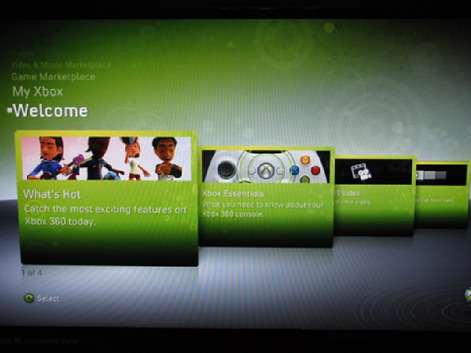
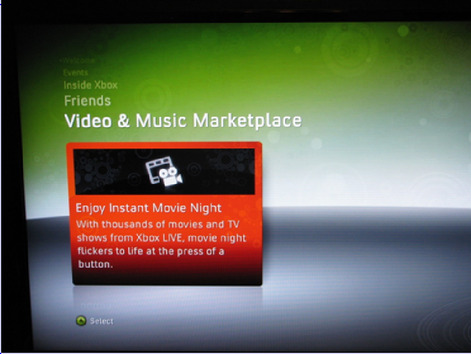
The Welcome panel or home panel is the default panel that is presented to the end user on start up. Figure 4.18 shows a screenshot of this panel. Figure 4.19, Figure 4.20, Figure 4.21, Figure 4.22, Figure 4.23 and Figure 4.24 provide screenshots of the panels as they are navigated.
 |
| Figure 4.18 Welcome panel. |
 |
| Figure 4.19 My XBOX panel. |
 |
| Figure 4.20 Game Marketplace panel. |
 |
| Figure 4.21 Video and Music Marketplace panel. |
 |
| Figure 4.22 Friends panel. |
 |
| Figure 4.23 Inside XBOX panel. |
 |
| Figure 4.24 Events panel. |
Several of these panels require the end user to have an XBOX Live account, and when an attempt it made to access the panel without being signed into XBOX Live, a dialog box appears prompting account creation and activation for XBOX Live. Each one of these options can provide digital media artifacts that will be explored in future chapters.
Connecting to XBOX Live
Connecting to XBOX Live requires the Gamertag that was created earlier. Once the user turns on the console, there are two ways in which to log into the console. The first route is to create a profile; the series of steps includes the creation of a unique identifier, the Gamertag. The second route is to have a Gamertag created through the Web site and to “recover” the Gamertag through the console interface.
The two options are displayed in panel format to remain consistent with the interface. It is a simple matter of navigating to the desired option and following the prompts from the wizard. Screenshots of the two options are provided in Figure 4.25.
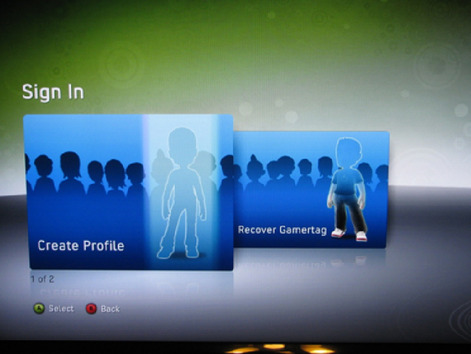 |
| Figure 4.25 Create or recover. |
In creating a profile or recovery of a Gamertag, the end user is configuring the console with more specific information that may be stored on the associated hard drive or other removable media that was connected during the time of configuration. In this particular case, we have already created a Gamertag. A Gamertag is a unique identifier that is created either through the console or through the associated Web portal. It can be assumed that the information that is provided during this creation is captured and archived by Microsoft, a similar practice that has been documented with Web-based e-mail providers. The information is limited but may include the initial IP address, date, and time.
To create a new profile for the console and a new Gamertag through the console, the first option from Figure 4.25 would be selected. The second option from Figure 4.25 is Recover Gamertag. Either option launches a wizard that walks the end user through the process.
Part of the process of the Gamertag creation or linkage of a Gamertag to the console is the creation of an avatar. This avatar is created through the customization of standard templates that are provided. Figure 4.26 and Figure 4.27 provide screen shots of the Avatar selection and customization options. Once the avatar is selected, customization can proceed, again through a wizard and user-selected choices.
 |
| Figure 4.26 Selection of the default avatar. |
 |
| Figure 4.27 Customization selection screen for the avatar. |
The next selection is the customization of the avatar. Avatar selection can be a concern, when there are online proactive investigations. The argument of entrapment is oftentimes a defense in cases of this nature, and some can argue that an avatar was suggestive in nature. Of course, these types of investigations are the type in which an investigator has his or her own Live account and is actively participating in the online community. This can be a concern in high-tech investigations as there tend to be certain policies and procedures that require avatars to be of a certain type, dress a certain way, or even appear a certain way. Investigations that may involve the avatar should at least address the need to customize the avatar to a certain extent to match the persona.
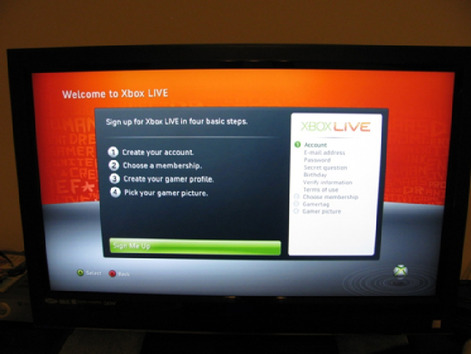
Joining Xbox Live
Once the Gamertag has either been created or associated to the console, then the connection to XBOX Live can be configured. The initial page details the four main steps that are required for this process. The four steps are as follows:
• Create account
• Choose a membership
• Create your gamer profile
• Pick your gamer picture
Creating an account is pretty straightforward and consists of entering an e-mail, one that is connected to a Live account. The next step is to determine the locale, something that is automatically filled from the console configuration. Finally, the end user needs to accept the End User License Agreement or EULA.
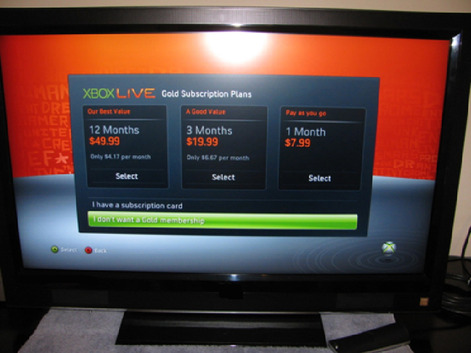
The next step in the process is to determine the membership. This was addressed in earlier chapters providing more detail than is needed here. The two memberships that are available are the Silver and Gold memberships. The Gold membership is also broken up into several different options to allow the end user to determine the amount of time they are willing to pay for. As of this writing, the first option is a full 12-month subscription, which is a retail value of $49.99. The next option is a 3-month subscription for $19.99. The last option is a Pay as you go option and is broken down to $7.99 a month.
Entering any payment information in this screen will provide digital artifacts for the high-tech investigator. Whether those artifacts are on the local machine, on removable media, or stored at Microsoft is a subject for future chapter. Figure 4.28, Figure 4.29, Figure 4.30 and Figure 4.31 provide screenshots of the steps mentioned earlier.
 |
| Figure 4.28 Welcome to XBOX Live. |
 |
| Figure 4.29 Accepting the EULA. |
 |
| Figure 4.30 XBOX Live marketing. |
 |
| Figure 4.31 Gold subscription options. |
Now that the EULA has been accepted and the type of account has been chosen, the next step is to determine whether or not the end user wishes to accept advertising e-mails from XBOX and other third-party vendors. This would again link the account to these e-mails and perhaps provide another vector for digital artifact creation and examination.
The next phase is the selection of the gamer zone. Each zone is designed to optimize the gaming experience for the end user. For instance, a person who is a novice would not want to play a game with professional video game players, as they would not do very well and it would jade their experience. There are four gamer zones, which are as follows:
• Recreation
• Family
• Pro
• Underground
The Recreation zone is designed for casual gamers, the Family zone for family oriented games, the Pro zone is geared toward competitive gamers, and the Underground zone is for a no-holds-barred experience.
The final steps include setting the time zone, entering the date of birth for ESRB ratings, and finally entering a Gamertag. Figure 4.32 shows the gamer zone selection. This entire process is for creating the Gamertag without having one already created over the Web portal. To link a Gamertag to the console, the user would use the Recover Gamertag option. With this option, the user is prompted to enter his or her Microsoft Live ID that was created through the XBOX portal. Once this information is entered, all the profile entries that were entered on the portal are configured on the console.
 |
| Figure 4.32 Choosing the gamer zone. |
The entry of the data is conducted over the on-screen keyboard, which is a fundamental interface for navigating through the various screens. Figure 4.33 shows the on-screen keyboard.
 |
| Figure 4.33 On-screen keyboard. |
Once all these processes are completed and all the wizards have been worked through, the console is ready for XBOX Live content or local machine game play. Many of these features can be altered as needed and on occasion need to be altered. Each console can have multiple profiles on the machine, and each profile can be associated to a different Gamertag. This is similar to the way in which Windows is a multiuser system and each user account is independent of the others.
Summary
In this chapter, we discussed several initial steps that must be taken by the end user of the XBOX 360 console in order for the console to be functional and to connect to the XBOX Live service. During this process, several fields are required that include personal identifying information. This information does not undergo any sort of verification, akin to the creation of a Web mail account. However, there may be some fields in which the end user enters truthful information that can be verified. Among these fields, the initial IP address may be archived by Microsoft, there may be financial information present if the end user linked his or her XBOX Live account to a credit card. Once the Gamertag is linked, then Microsoft can track the IP address that the Gamertag logs in from, giving a high-tech crime investigator another avenue to pursue.
The next few chapters will detail the steps taken for the forensic imaging and examination of the console's associated hard drive.
..................Content has been hidden....................
You can't read the all page of ebook, please click here login for view all page.