SECTION 2 Editor Insights
Tip 9: Compare Two Files Line by Line (Diff)
In version-controlled files you will notice marks in three colors: Deleted, added, and modified lines are highlighted in red, green, and blue, respectively.
|
Highlight color |
Difference |
|
Red |
Deleted lines |
|
Green |
Added lines |
|
Blue |
Modified lines |
Figure 4 shows the color coding in context. The color-coded bars along the editor’s left edge allow you to track differences between your local copy and the last repository version. Navigate quickly to modified lines by clicking the corresponding marks in the error stripe to the right.
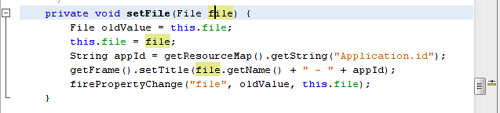
Click the vertical bars along the left edge for a pop up with inline version control actions (see Figure 5).

![]() Click the up and down arrows to navigate from one change to the next.
Click the up and down arrows to navigate from one change to the next.
![]() Click the Revert button to roll back individual changes.
Click the Revert button to roll back individual changes.
![]() Click the Diff Window button to compare two versions.
Click the Diff Window button to compare two versions.
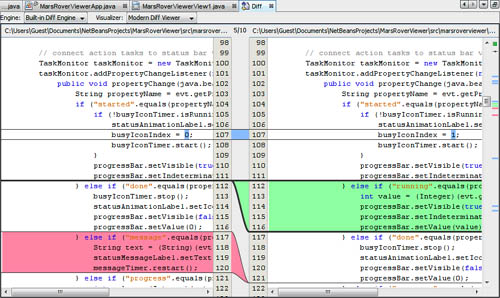
The built-in visual Diff Viewer highlights differences between two files (or two revisions of one file) side by side, line by line. Again, you can tell what type of change occurred by the color of the line. The Modern Diff Viewer in Figure 6 visualizes changes in a very intuitive way.
You can even compare two files that are not under version control: The Diff Viewer works on any pair of local files in the Projects, Files, and Favorites windows.
-
Select two similar files in the Projects (or Files or Favorites) window. Click with the Ctrl key (Mac: Command key) pressed to select the second file.
-
Right-click one of the highlighted files, and select Tools > Diff from the context menu. This menu item appears only when two files are selected.
-
The graphical Diff Viewer appears and gives you a detailed overview of all differences.
See also Tip 10, Roll Back Changes in Files Not Under Version Control (Local History), and Tip 11, Restore Deleted Files Not Under Version Control (Local History).
Tip 10: Roll Back Changes in Files Not Under Version Control (Local History)
One advantage of keeping your files under version control is that you can merge changes when you work in a team. Another advantage is that you can revert to a previous revision in case a change breaks the build. The option to roll back changes is also very handy when you work alone and you do not use a version control system.
The IDE tracks modifications to project files that are open in the editor, and keeps a local history of changes. Every time you save a file, a new revision is committed.
To get an overview of changes made to a file, select the file in the Projects or Files window. Right-click the file and choose Local History > Show Local History from the context menu. The graphical Diff Viewer opens in the main window and displays two revisions side by side. (See also Tip 9, Compare Two Files Line by Line (Diff).)
This is how you roll back changes and restore a previous revision.
-
Select a file in the Projects or Files window.
-
Right-click the file and choose Local History > Revert to... from the context menu. The Revert to... dialog opens.
-
Select a revision and click Revert to roll back all changes to the selected revision, as shown in Figure 7.

Note that you can only revert files that were open in the Files or Projects window. Local History does not cover files outside projects (e.g., in the Favorites window).
See also Tip 11, Restore Deleted Files Not Under Version Control (Local History).
Tip 11: Restore Deleted Files Not Under Version Control (Local History)
Keeping your files under version control has many advantages. Among other things, you can even restore files that you have deleted. The NetBeans IDE also offers an equivalent “undelete” action for files that are not under version control.
-
Open the Projects or Files window and locate the project to which the deleted file belonged.
-
Right-click the directory where you deleted the file and choose Local History > Revert Deleted from the context menu. All deleted files and directories are restored.
-
If you do not remember which directory the file was in, right-click the project and choose Local History > Revert Deleted. This will restore all deleted files and directories of this project.
Note that you can only restore files that were open in the Files or Projects window. Local History does not cover files outside projects (e.g., in the Favorites window).
See also Tip 10, Roll Back Changes in Files Not Under Version Control (Local History), and Tip 9, Compare Two Files Line by Line (Diff).
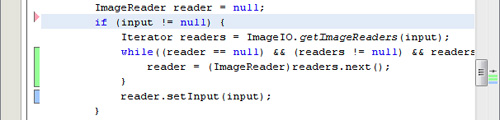
To get an overview of all exit points of a nonvoid method, place the caret on the return type in the method declaration. The editor will highlight all lines containing return statements with a tan background color.
Have a look at the error stripe at the right side of Figure 8: It displays a tan mark for each exit point. Click the marks to jump to the next exit point and place the caret in that line.
Tip Source
http://netbeans.dzone.com/news/10-handy-editor-shortcuts-netbeans-ide-60
Tip 13: Find Out Expected Method Parameters
When you need to know the arguments of a method call, press Alt-P (Mac: Command-P). A quick cheat-sheet pops up listing all possible sets of arguments for the method you are calling (see Figure 9).

http://www.antonioshome.net/blog/pivot/entry.php?id=12
You thought you were accessing an initialized field. The compiler thought you were accessing a local variable of the same name. The compiler has the last word, and you are left with an inexplicable NullPointerException. Your code is suffering from an acute case of DWIMNWIS (“Do what I mean, not what I say”).
The parser cannot guess what you really mean, but at least it can communicate what it thinks you mean. Syntactic and semantic code highlighting gives you feedback about how the parser interprets a piece of code in this context. If the interpretation is not what you expected, the bug probably starts here.
Here some examples of the colors used in Java code and what they mean:
|
Colors and Styles |
Interpretation |
|
Green |
Class fields |
|
Blue |
Reserved Java keywords and some literals ( |
|
Orange |
Strings and character literals |
|
Orange bold |
Escape sequences (such as |
|
Bold italics |
Static method declarations; enum |
|
Parse errors |
|
|
Unused variables |
|
|
Strikethrough |
Deprecated variables or methods |
|
Orange background |
Search results |
|
Yellow background |
Matching braces, matching tags |
|
Tan background |
Highlighted occurrences |
|
// Gray |
Comment, Javadoc |
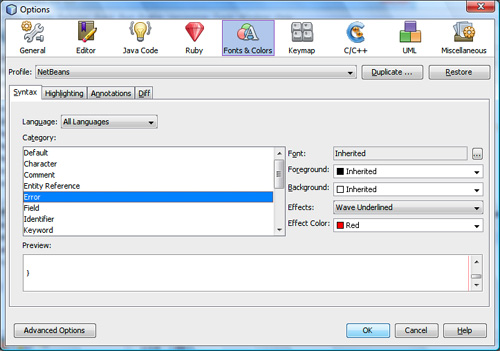
Choose Options > Fonts & Colors from the menu to configure colors and text styles using the Options window shown in Figure 10. Use the drop-down menu to customize general colorings for all languages, or colorings for only particular languages, such as Java, JavaScript, HTML, CSS, DTD, Ruby, or C/C++ (and many more). The list of semantic categories that you can highlight depends on the language you have selected.
Tip
Use the Duplicate... button at the top of the Font & Colors category to create custom color profiles. You can switch between your own profiles and the default profiles using the Profile pop-up menu.
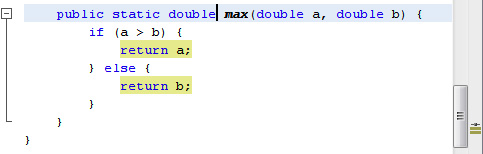
Tip 15: Mark Occurrences of Identifiers
Place the caret inside an identifier. The editor will highlight all occurrences of this identifier in the class.
Have a look at the error stripe at the right side of Figure 11: It displays a tan mark for each occurrence. Click the marks to jump to the next occurrence.