9. Further Explorations
At this point, you should have a fairly strong understanding of what 3D printers and CAD software are and what they can do. There are entry-level 3D printers like the Printrbot Simple, and there are advanced 3DPs like the Replicator 2. On the software side, you’ve got Tinkercad and the 123D family of apps that provide a lot of creative power to novices, but for users who need more features and tools, there are also dozens of “professional” level CAD applications.
Whether you now consider yourself a beginner or an expert in the field of 3D printing, hopefully this book has given you a glimpse of the possibilities available to you. I mentioned earlier in the book that many 3D printer owners find themselves purchasing or building a second 3D printer—and maybe even a third. It’s an addictive hobby. There are always bigger, crazier, and more intricate 3D models to be printed, and that often requires bigger, crazier, and more advanced 3D printers and software.
But even if you’re not yet ready to spend more money on a newer 3D printer and software, there are plenty of fun activities for you to consider. If you’re a student, a 3D printer can provide some amazing options for assignments. If you’re a parent, a 3D printer is a great way to spend family time and learn a new skill together with your kids. If you’re a hobbyist, there’s the never-ending tweaking and refining of your printing process to get the most perfect model printed.
In this chapter, I introduce some activities that you can do with your 3D printer. Some of these projects go beyond the actual use of a 3D printer into the land of additional hobbies. But that’s not a bad thing, is it? Your 3D printer is a tool, and most good tools are simply one part of a bigger (or smaller) project. Following are some projects for your consideration.
Go Bake Some Cookies
You heard me right. I want you to bake some cookies. But these aren’t just any old round cookies; these cookies will have a unique shape that you designed. Here’s how.
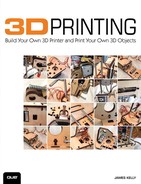
Open a web browser (one that supports WebGL—Chrome or Firefox) and point it to www.thingiverse.com/thing:116042. You’ll see a screen like the one in Figure 9.1.

Scroll down the page a bit and you’ll see the Instructions section. Make certain you’ve created a Thingiverse user account and are logged in first. After logging in to Thingiverse, click the Open Thingiverse Customizer link. After you click it, the Cookie Cutter Customizer opens, as shown in Figure 9.2.
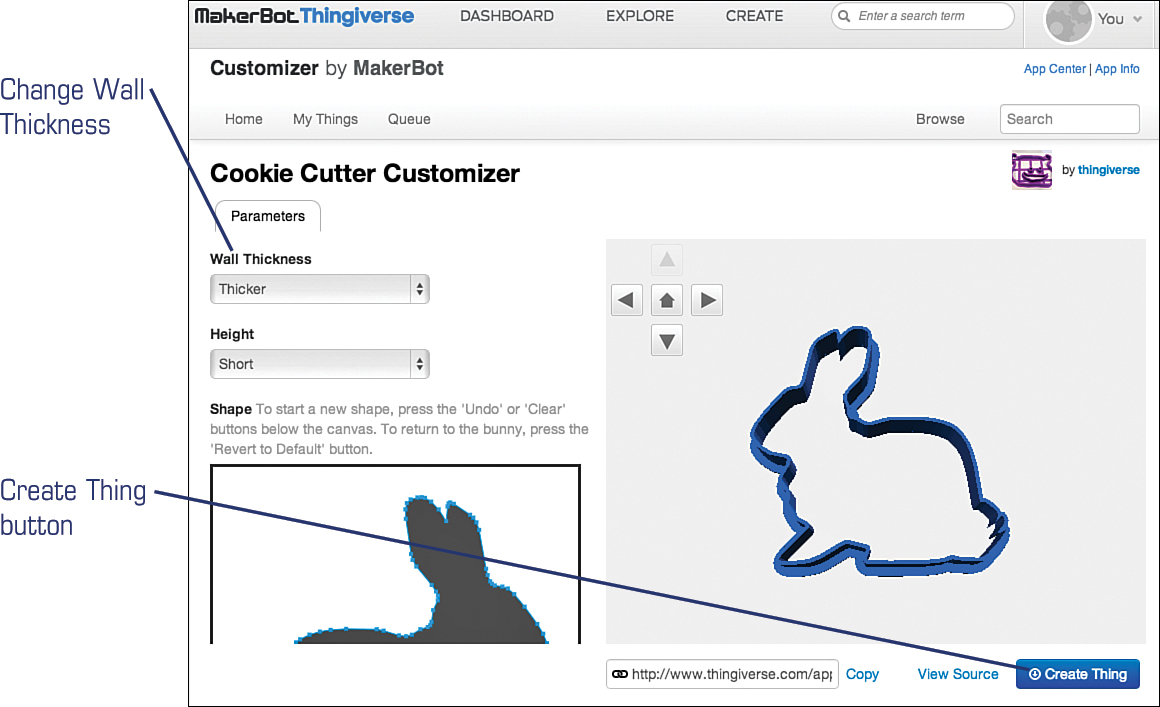
Scroll down and click the Clear button to clear out the default image. Draw your cookie cutter shape; the 3D model appears to the right, as shown in Figure 9.3. When you’re happy with the design, click the Create Thing button, and then download your STL file, suitable for printing with your 3D printer!
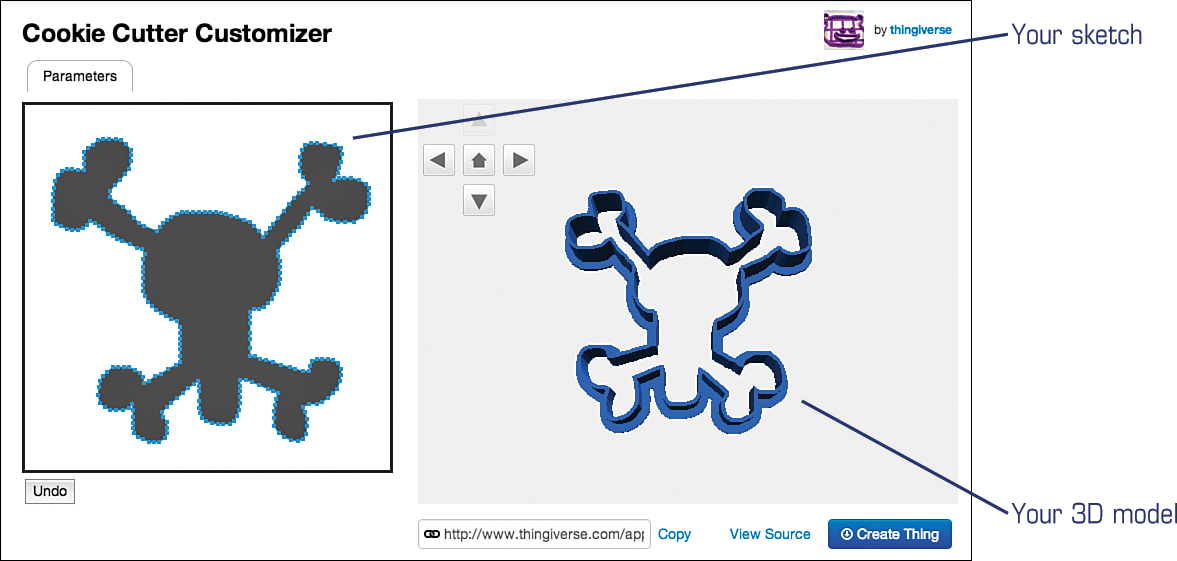
Remember that you can resize your cookie cutter inside a CAD application like Tinkercad. Open up Tinkercad and click the Import option on the right side of the screen. Click the Choose File button and browse to the location of your cookie cutter STL file and open it. The model appears in Tinkercad as shown in Figure 9.4. You might need to reduce its size for it to fit on the workspace; if so, shrink it with the Scale setting.
Don’t Forget the Youngest 3D Fans
One of the most amazing things I’ve discovered with my 3D printer is how interesting it has become to my youngest boy, age 3. The hot end can definitely burn little fingers, so I don’t let him get too close, but he loves watching the hot end move and shake and the hum of the motors.
If you’ve got a 3D printer, I encourage you to share its capabilities with your family, but don’t neglect any young children. Unfortunately, 3D printers are not in every school, so if you’re open to it, consider reaching out to your nearest elementary school and asking them if they’d like to have a 3D printer demonstration. Don’t be surprised if you get a couple dozen requests from teachers in every grade!
And if you’re looking for some good ideas for items to print that won’t take too long, point your web browser to Thingiverse and search using the keyword kids. You’ll have to spend some time sifting through all the models, but keep in mind you probably want to print something small. You can always resize an object in your CAD application, but here’s a list of some fun little models that I’ve found that would be perfect as demonstrations of a 3D printer:
• Gekko—http://www.thingiverse.com/thing:28998
• Mr. Jaws—http://www.thingiverse.com/thing:14702
• Mr. Piggy—http://www.thingiverse.com/thing:24669
• Croc Charms—http://www.thingiverse.com/thing:9831
• Space Ships—http://www.thingiverse.com/thing:32141
• Catapult—http://www.thingiverse.com/thing:11910
• Sea Creatures—http://www.thingiverse.com/thing:25276
It’s always a good idea to ask a teacher how many minutes you have for your presentation. Find an object and print it in advance so you can make certain it will print in the time allotted. Start your print job the minute you get set up and then begin your discussion. Let the kids ask questions. And take along your test print just in case the object being printed doesn’t finish in time. You’ll be able to show what the final object looks like. Finally, let the group know at the beginning that the object being printed is going to be given to the teacher or principal—you don’t want a large group of kids fighting over who gets the final printed object!
Around the House
After you’ve gotten comfortable with your 3D printer, it’s time to consider putting it to work to make your life a little easier. For example, all kinds of 3D models can provide something useful for your home or apartment. Here’s a list of some items you could print with the Simple, but there are plenty more models available on Thingiverse that you can print if you have a 3D printer with a larger print area.
• Cord Pull—www.thingiverse.com/thing:13118
• Tube Squeezer—www.thingiverse.com/thing:1009
• Bag Holder—www.thingiverse.com/thing:26767
• Tie Hanger—www.thingiverse.com/thing:922
• Chip Clip—www.thingiverse.com/thing:4227
• Large Paperclip—www.thingiverse.com/thing:655
• Outlet Cover—www.thingiverse.com/thing:11109
Showing Off
I wanted to include some amazing models that can be printed with a 3D printer, but keep in mind that many of these won’t be able to be printed with a Printrbot Simple because of the smaller print bed. If you’ve got a Simple, you can always scale the model down in size, but when you scale down, the printed model might lose some of the detail (such as a facial expression or text on an object). The only way to know for sure is to give it a try. But if you have a 3D printer with a larger print bed, you might want to try some of these if you’re feeling confident in your newfound 3D printing skills.
• Statue of Liberty—www.thingiverse.com/thing:1128
• X-Wing—www.thingiverse.com/thing:98450
• Complex Cube—www.thingiverse.com/thing:123366
• Birdhouse—www.thingiverse.com/thing:115478
• Adjustable Wrench—www.thingiverse.com/thing:87099
• Functional Microscope—www.thingiverse.com/thing:77450
• Simple Scale Mode—www.thingiverse.com/thing:121704
Thingiverse.com isn’t the only source for 3D models, however. Following are two other sources, but know that there is some cross-posting; a lot of modelers upload their models on more than one site to maximize the number of visitors who will view them.
• Shapeways—www.shapeways.com/3d_parts_database
• Ponoko—www.ponoko.com/showroom/product-plans/free
OpenSCAD
There’s a great tool called OpenSCAD that you might find useful once you get comfortable using your 3D printer and creating 3D models. It’s a bit more advanced than typical visual tools like Tinkercad or the 123D apps, but OpenSCAD can be an important tool.
First, open a web browser and point it to www.openscad.org. Before panic sets in, let me explain what you’re seeing. You probably saw the word “Programmer” on the screen and got a bit nervous (I know I did), and I will admit that OpenSCAD does create 3D models in a different manner than most 3D modeling applications.
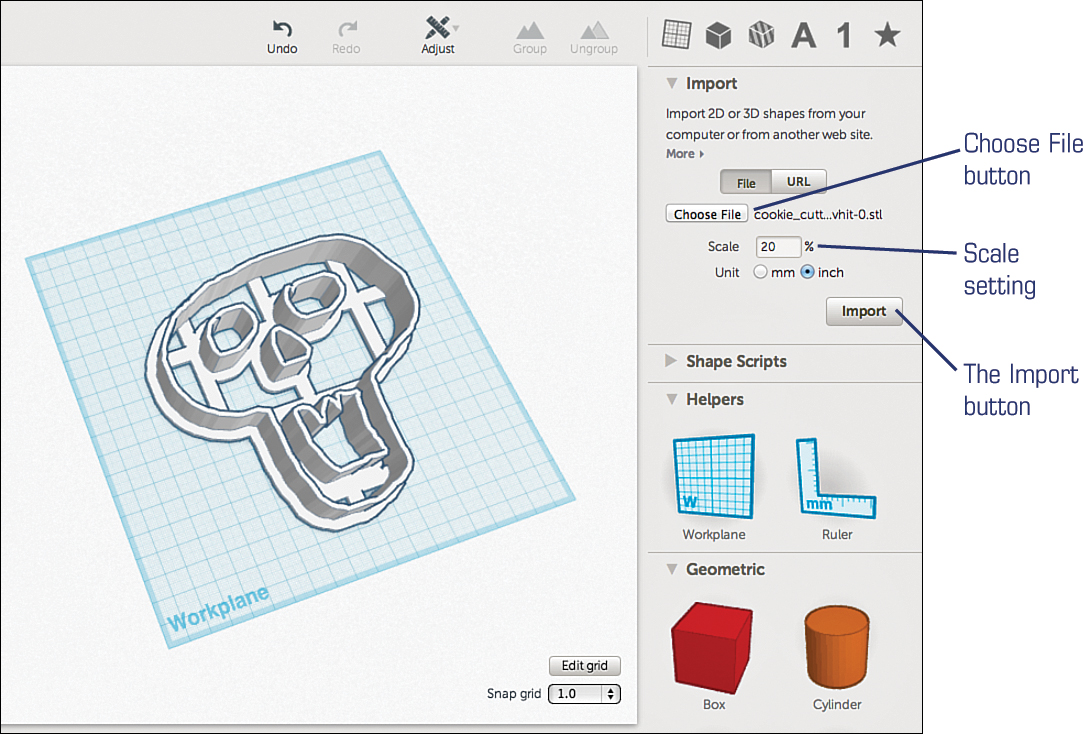
An entire book could be written on the intricacies of OpenSCAD, so I can’t go too deep into how to use this tool. But just for a moment, think back to the g-code that you saw created (back in Chapter 6, “Free 3D Modeling Software”) that instructs the 3D printer motors on how to operate. That g-code is simply text. Want the hot-end to move up 10mm? Send a g-code command of Z10. Want the hot-end to move 20mm toward the front of the print bed? Issue a g-code command of Y20. It’s just code. You get a pretty drawing on the screen of your 3D model, but behind the scenes, all those lines and curves are nothing but simple math equations as shown in Figure 9.5.

And that’s how OpenSCAD treats 3D modeling. Instead of drawing a cube or a sphere on the screen, you type in the variables that define those objects. A cube, for example, needs to have the length of one of its sides specified. An OpenSCAD command for drawing a cube with the length of each side set to 10mm would simply be cube(10). A sphere command of sphere(5) would create a sphere with a radius of 5mm. Lines are created by defining starting and end points. Circles and squares (two dimensional) can be specified with circle(radius) and square(size,center) commands. More complex commands can create curved lines, cylinders, and polyhedrons with the number of sizes specified by you in the code.
One reason a lot of hobbyists enjoy using OpenSCAD is how easy it is to modify an object’s properties (such as a square’s width) and immediately export a new model. For example, you don’t have to go into Tinkercad and drag the side of a square to the new length—just change the value from 5 to 10 (doubling its length) in the OpenSCAD program and you’re done.
Of course, OpenSCAD is so much more powerful. Just as Tinkercad allows you to combine cubes and triangles and cylinders to create larger, more complex objects, OpenSCAD works the same way—as you create more advanced objects with OpenSCAD, the actual program becomes more complex. Fortunately the OpenSCAD tool comes with a lot of tutorials and help, so if you’d like to give OpenSCAD a shot, plan on doing some reading first to familiarize yourself with the tool.