The previous chapters described everything that’s available in Eclipse and ADT by default. ADT is a plugin for Eclipse itself, without which the ABAP development in Eclipse would not be possible.
Now it is time to look at other plugins that can help you in your daily work. I present a few plugins in this chapter that will help you enjoy developing in ADT even more. Some of these plugins work independently of the programming language you use; others are useful only in ABAP.
The Eclipse Marketplace
Let’s begin the journey through the Eclipse plugins from the Eclipse Marketplace (Figure 5-1), which you can find by choosing Help ➤ Eclipse Marketplace. You can search for, install, update, or uninstall plugins that are listed on the official plugin list. Of course, as with ADT, there are many more plugins that are not available on the marketplace. When they are listed there, they are easier to find and their compatibility with new releases of Eclipse is automatically checked.
Figure 5-1
Eclipse Marketplace: ABAP plugins search
Besides the names and short descriptions of the plugins, you can also see the following attributes in the Eclipse Marketplace:
How many people have the plugin in their favorites
How many total installations were completed through the Marketplace
Home many installations happened last month through the Marketplace
The publisher of the plugin
License under which the plugin is published
The Eclipse Marketplace allows you to set up your own favorite plugins, which you can do from the Favorites tab. In order to do this, you need to create a marketplace account. Once you create an account, at each new installation of Eclipse, you can easily go to the Favorites tab and install all the previously bookmarked plugins, without needing to search for them again.
If you search for the ABAP word, you will find at the moment eight plugins:
ABAP Continues Integration
ABAP Code Insight
ABAP Search and Analysis Tools
ABAP Tags
Task Scanner for ABAP in Eclipse
ABAP Favorites
ABAP Quick Fixes
ABAP Extensions
This chapter discusses each of these plugins, and I will start by describing the one that can be used in Eclipse with all programming languages.
AnyEdit Tools
One of the first plugins that I installed in Eclipse was AnyEdit Tools. I think it is with me from the beginning of the journey with Eclipse. As you can see in Figure 5-2, it is very popular. Almost 150,000 installations is impressive, especially for a small, yet powerful, tool.
Figure 5-2
AnyEdit Tools on the Eclipse Marketplace
Let’s go through the options of this small plugin, starting from string conversion and continuing with sorting, code comparison, and saving the console output.
String Conversion
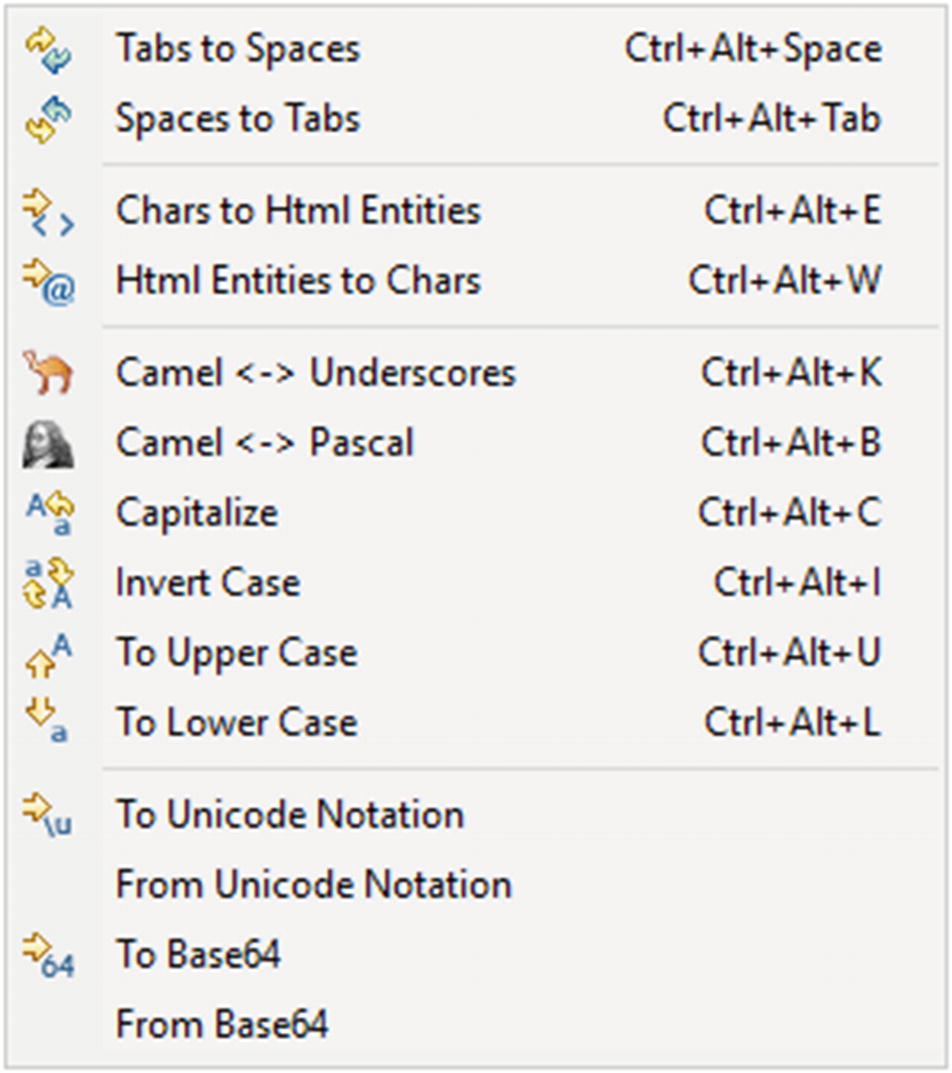
One of the best functionalities of this plugin is string conversion. You can run it using shortcuts, or after selecting a string in the editor, you can use Convert from the editor context menu (Figure 5-3) to select the action you want to do.
Figure 5-3
Convert context menu content
I use To Upper Case, To Lower Case, and Chars to Html Entities the most, but the all the others can be useful as well.
When you are using the newest NetWeaver version, you can use the Capitalize function or you can choose to keep CamelCase formatting on such backends.
Sorting
The next function that comes with the AnyEdit Tools is sorting selected text. You may wonder what you need such a function for, but when you are preparing mockups, it can be very handy. Additionally, when you deal with old code and the assignment of the structure values is spread through dozens of lines, you can sort them case-insensitively for easier readability. I use this feature often when I am dealing with old code that uses the ALV field catalog preparation.
To call sorting, you have to select lines in your editor and then use the Sort context menu option. There are a few sorting functions available there, as you can see in Figure 5-4. None of them needs a deeper explanation.
Figure 5-4
Sort menu context
Comparison
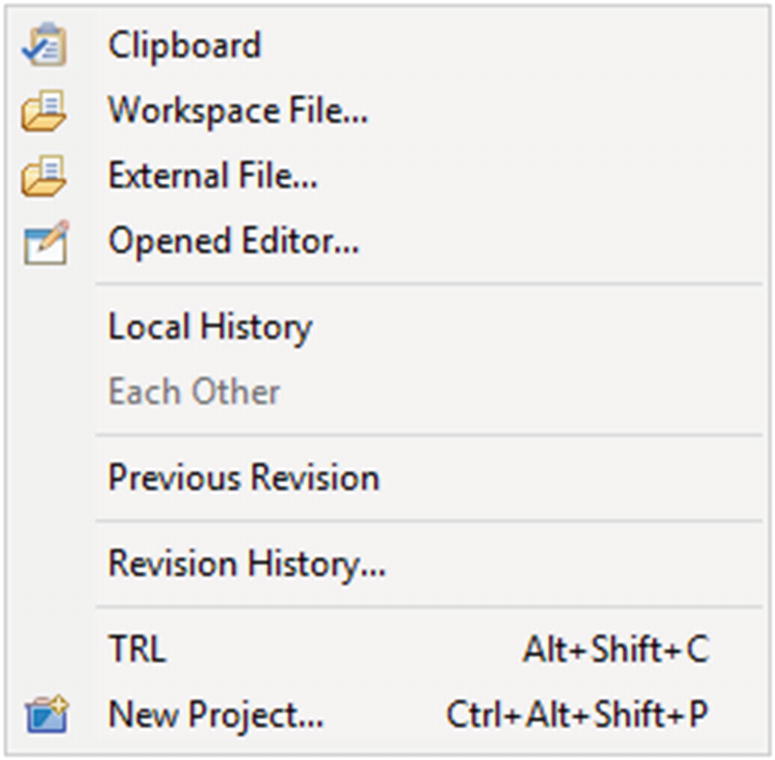
Normally you use the Compare With editor context menu to compare current code with the code available on another SAP system, revision, or local history. But AnyEdit Tools introduces another four possibilities: Clipboard, Workspace File, External File, and Opened Editor. In ABAP development, I use the comparison with other opened editor (Figure 5-5).
Figure 5-5
New Compare With menu entries
There are two scenarios in which I use this option. First, when I am dealing with one of the dozens of versions of print programs, which are in fact copies of standard SAP print programs with some adaptations. If I want to combine some of them, I use this comparison to see the places in which they differ.
The second scenario is when I am asked to do some performance improvements in legacy program. I create a copy of the existing program with the new name, then start the adaptations. When I do a lot of refactoring, I sometimes need to check what I have changed in order to be sure that I have done things correctly. Comparing two programs opened in two different tabs is very useful at that moment.
Save Console Output
The next nice function that comes with this plugin is a new button in the Console view—the Save to File button (Figure 5-6). It allows you to quickly store the output of the console in a .log or .txt file. It is most useful for ABAP cloud developers, as they use the console output a lot.
Figure 5-6
Console with additional toolbar button (save)
You may also want to go to Preferences ➤ General ➤ Editors ➤ AnyEdit Tools in order to look at the additional settings that come with this plugin.
PDE Tools
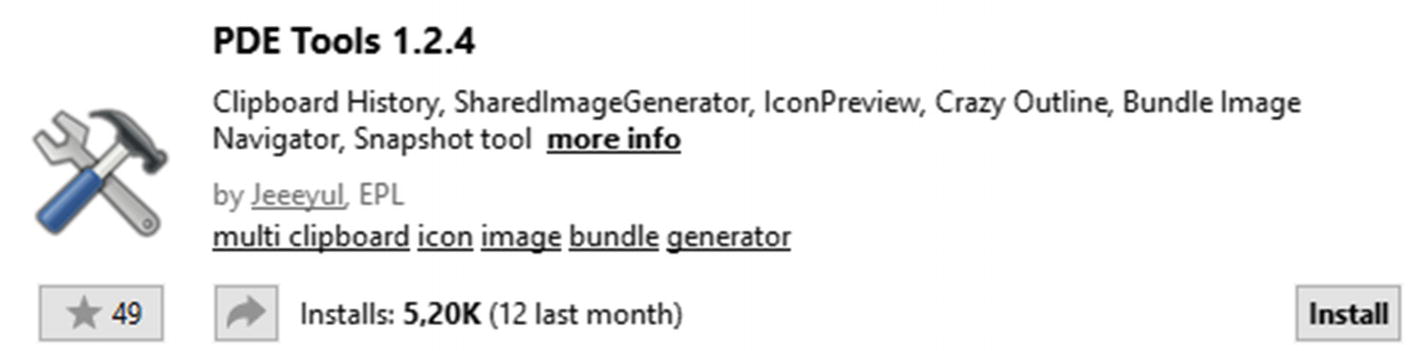
The next plugin I discuss is PDE Tools, which I have also used for a long time. It is not as popular, but that doesn’t mean it is not good. This plugin contains several views and functionalities, as listed in Figure 5-7, but I mainly use one of them: Clipboard History.
Figure 5-7
PDE Tools on the Eclipse Marketplace
Clipboard History
Having a clipboard that keeps a long history can be a huge timesaver. When you do not have such a tool installed on your OS, you can use the one from PDE Tools. It only works inside Eclipse, but isn’t that where you spend most of your time?
To call the extended clipboard, you have to use Ctrl+Shift+V. When you do so, the list of previous clipboard entries will appear (Figure 5-8). By default, the first five lines of copied text are shown in the preview. To look at the full content of the clipboard, you need to select an entry using the arrow key and look at the right popup, which will show you not only the full contents of the clipboard, but also indicate where it was captured.
Figure 5-8
Preview of the Ctrl+Shift+V Clipboard
You can use a link found in the source of the capture to navigate to the code if it was copied from the Eclipse editor. The nice thing here is that the code is copied with its formatting, so it is easy to read.
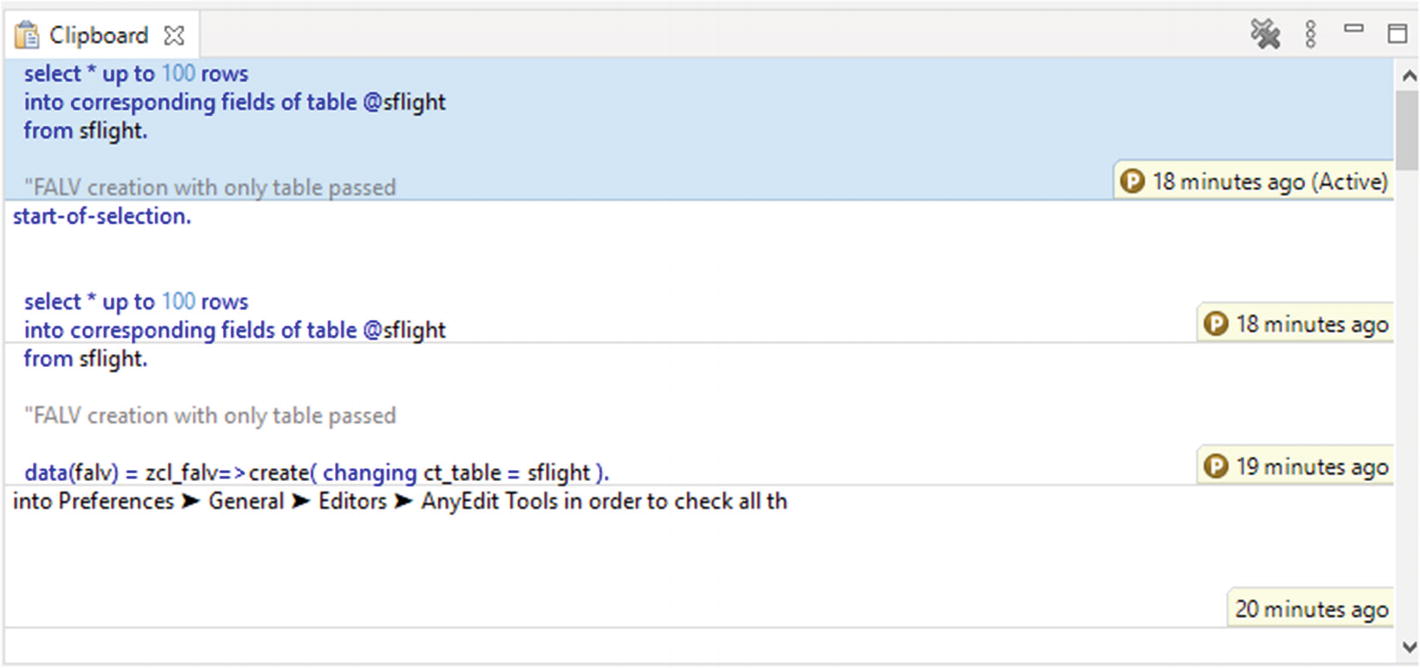
Besides the key shortcut, which you can use to call the clipboard history, you can also open a view called Clipboard (Figure 5-9). It contains the same data.
Figure 5-9
Clipboard view
If you want to change the default number of clipboards kept, or the number of lines in the preview of the clipboard, go to Preferences ➤ PDE-Tools ➤ Clipboard in order to adapt the preferences of this plugin function.
Darkest Dark (DevStyle)
When some people hear about Darkest Dark, they think only about the dark Eclipse theme that was created by the Genuitec company and given free of charge to the Eclipse community. But besides the theme itself, there are two additional functionalities that you will hopefully like as much: Icon Designer and CodeTogether.
Darkest Dark is very popular, as you can see in Figure 5-10. One and a half million installs is something extraordinary, and in my opinion it is very worth it.
Figure 5-10
Darkest Dark on the Eclipse Marketplace
When you click the Install button, you have to choose if you want to install only the core of the plugin, which is the Darkest Dark theme, or Icon Designer and CodeTogether. I recommend you install all of the features and check out the functionality they give.
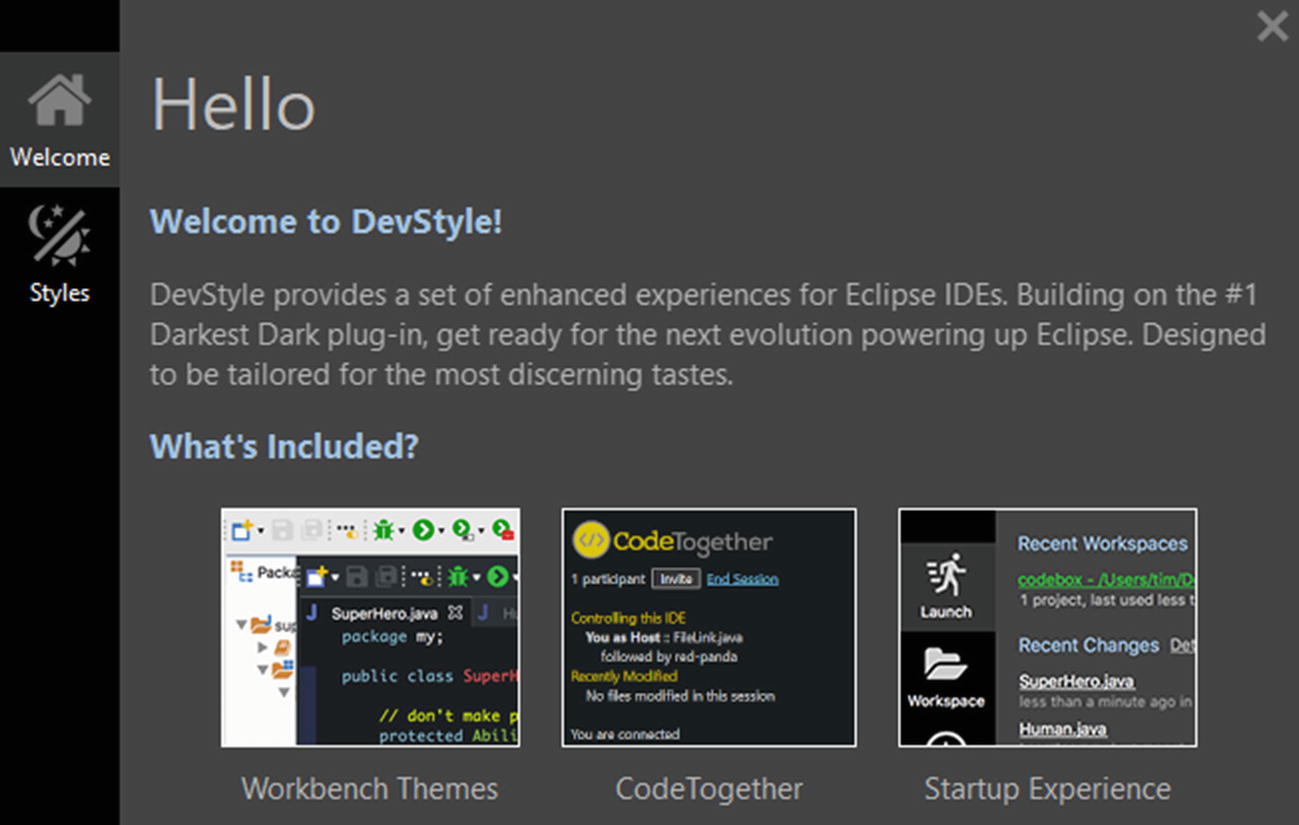
After installing and restarting the environment, you should see the DevStyle welcome screen (new name of the bundle of features), which will guide you through the plugin’s basic information (Figure 5-11).
Figure 5-11
DevStyle welcome screen
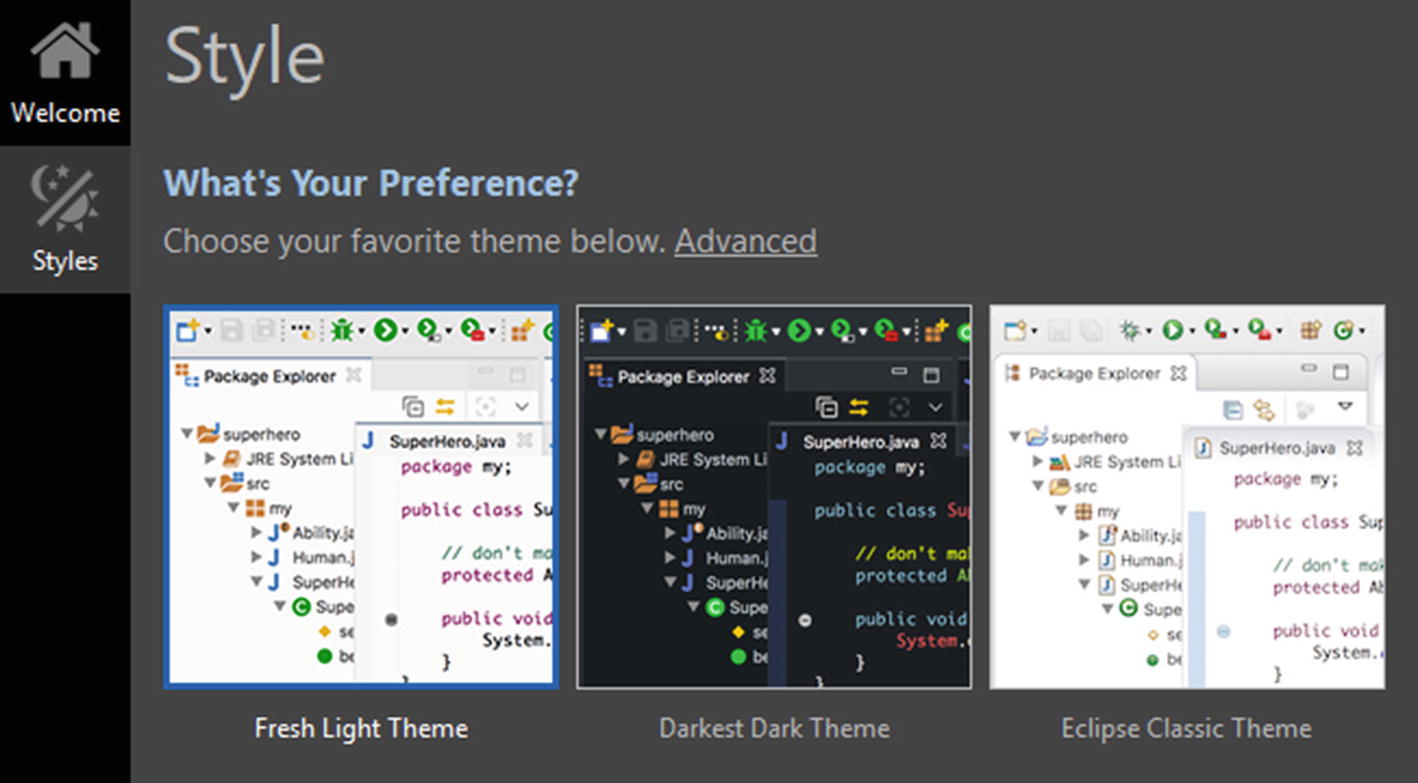
In the next step, you can choose which theme you want to use in Eclipse. There will be three possibilities on the screen (Figure 5-12), but when you will click the Advanced link, you can access more possibilities. Personally, I use the Darkest Dark Theme, but if you are a fan of light themes, select Fresh Light Theme to see the difference.
Figure 5-12
Style selection screen of DevStyle
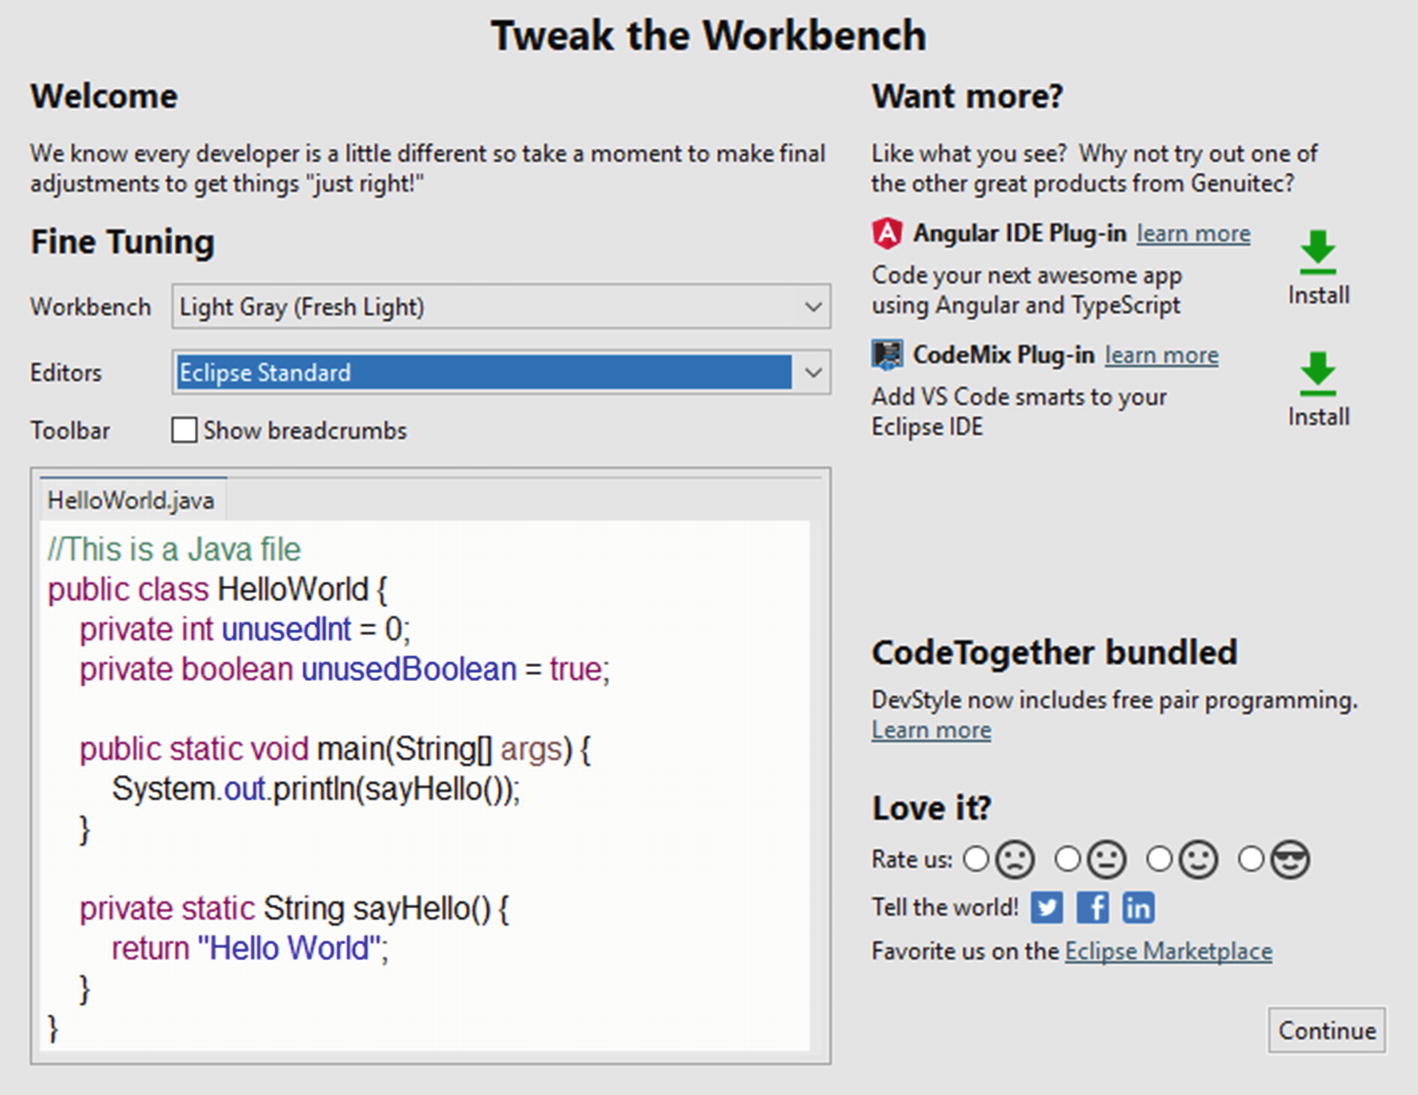
The last step is to fine-tune the workbench, where you will be able to choose the editor theme (Figure 5-13). The editor theme determines the way the syntax is colored. You can also choose from a few embedded settings, such as Notepad++, VS2010, IntelliJ, and a few more. I always use Eclipse Standard.
Figure 5-13
Tweaking the workbench
After you set up all the settings, you will finally be able to use the nice-looking Eclipse. What you can also see during startup is that, instead of the standard progress bar, you will see the one from DevStyle (Figure 5-14). I really like it because of the IT jokes that appear randomly on that bar.
Figure 5-14
DevStyle startup progress bar
Theme
If you have chosen to use one of the DevStyles themes, you will see the difference on each of the views. First of all, most of the icons are different. You can see this on the toolbar (Figure 5-15) and in any other view (Figure 5-16). You may find it difficult to use at first, especially if you use the mouse for navigation in Eclipse, but you will get used to the new look quite fast.
Figure 5-15
Toolbar look when using the Fresh Light Theme
Figure 5-16
Project Explorer look when using the Fresh Light Theme
I found these new icons more readable and clearer, but of course this is only my personal opinion. What is more important for me is that whenever I want to switch between the dark and the light themes, I do not need to set the colors of the ABAP Editor again to fit the new theme settings. DevStyle makes the changes automatically, so it saves lots of time.
Just to explain myself, since I claim to be an ambassador of using dark themes, I have to switch from time to time to a light theme. In most cases, it is due to presentations done on projectors in the conferences rooms with bad lightning. In such cases, the light theme is a better option.
Icon Designer
You can adjust and create the new icons that come with the DevStyle yourself. In the past, I made a lot of adaptations to the ADT icons, but you can always adapt the icons so that they fit your preferences.
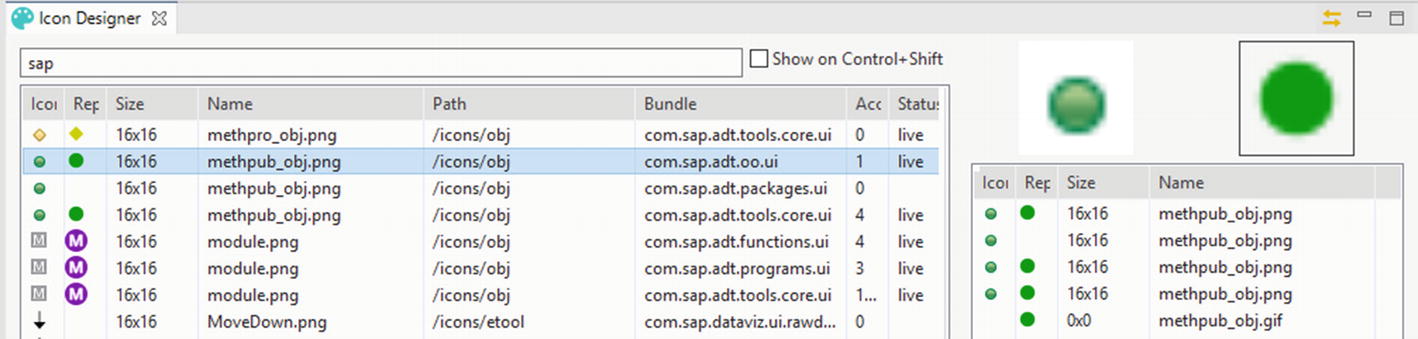
To do so, you need to call the Icon Designer view. Each time you run it, it will check your Eclipse installation and gather all the used icons. They will be listed in a table (Figure 5-17), where besides the name, origin, and preview, you will see if the icon has been replaced by the DevStyle icon (column Replacement) and if the icon is official DevStyle (status live). If you create your own icons, the status will change to custom.
Figure 5-17
Icon Designer view
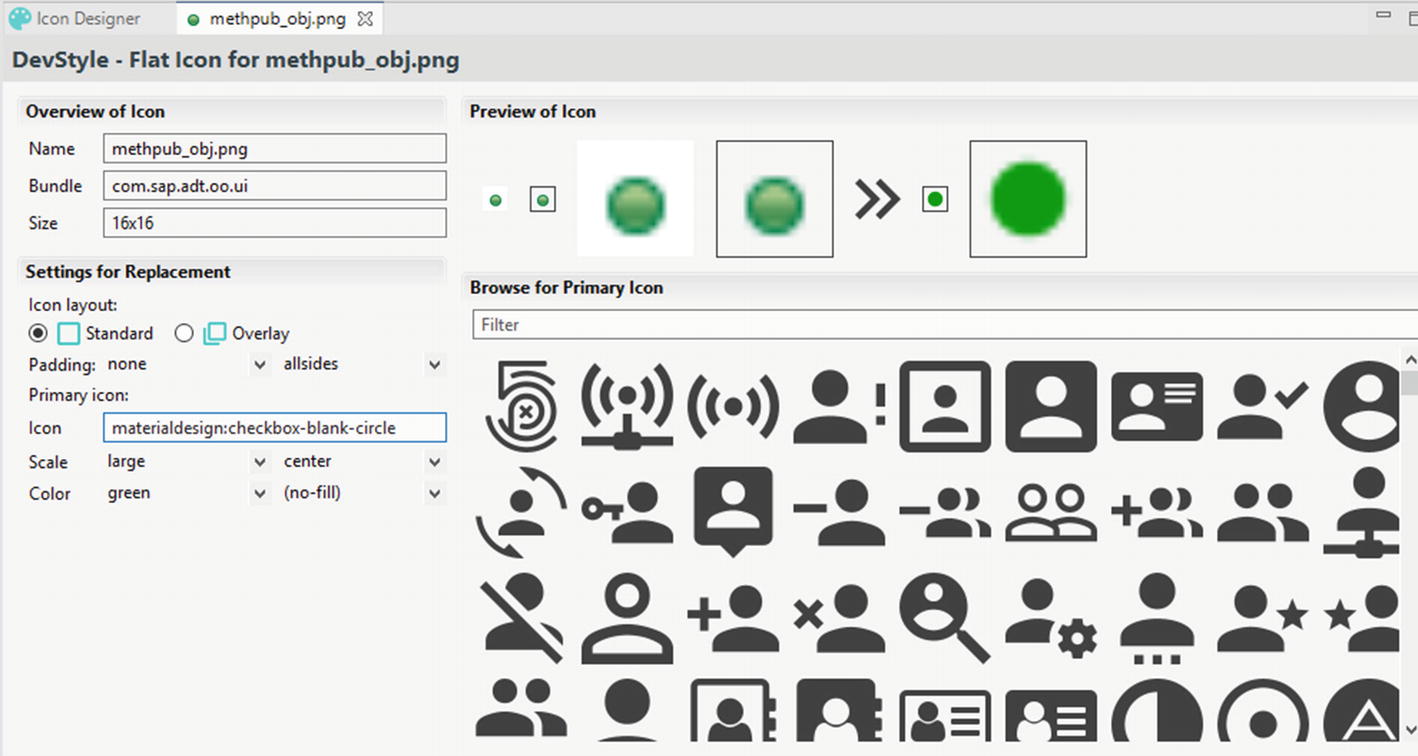
To create or edit an icon, simply double-click to open the Icon Editor (Figure 5-18). You will not be able to manually draw an icon, but you can select one from the list of icons and characters. You can also use two icons at the same time, by setting the icon layout to overlay. For each icon, you can also choose a primary color, scale, and fill color.
Figure 5-18
DevStyle Icon Editor
If you are happy with your changes, you can share the icon with the Genuitec team by using the Sync option in the Icon Designer view. When you click the Sync button, you need to pass your credentials to the Genuitec account or create a new one. Once you are logged in, your changes are sent to the Genuitec team and checked by them. If will spread the icon as a default icon to other users if they like it. I synchronized my adaptations to the icons in the past and I am glad that now, many ABAP developers are using them.
Figure 5-19
Genuitec logon screen for icon synchronization
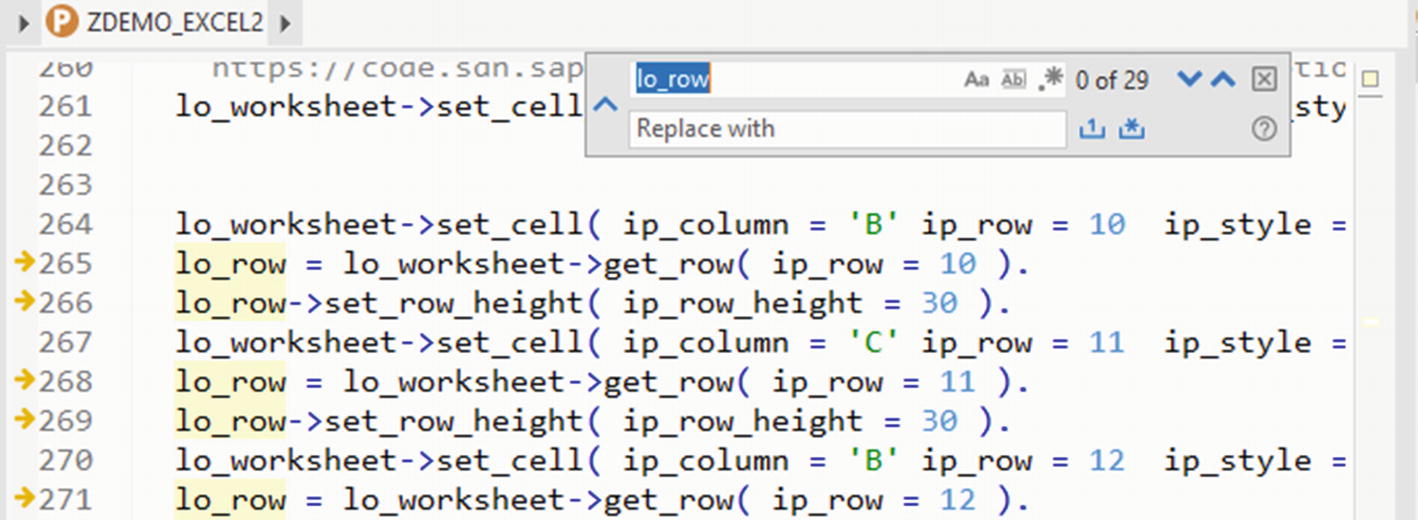
Inline Search
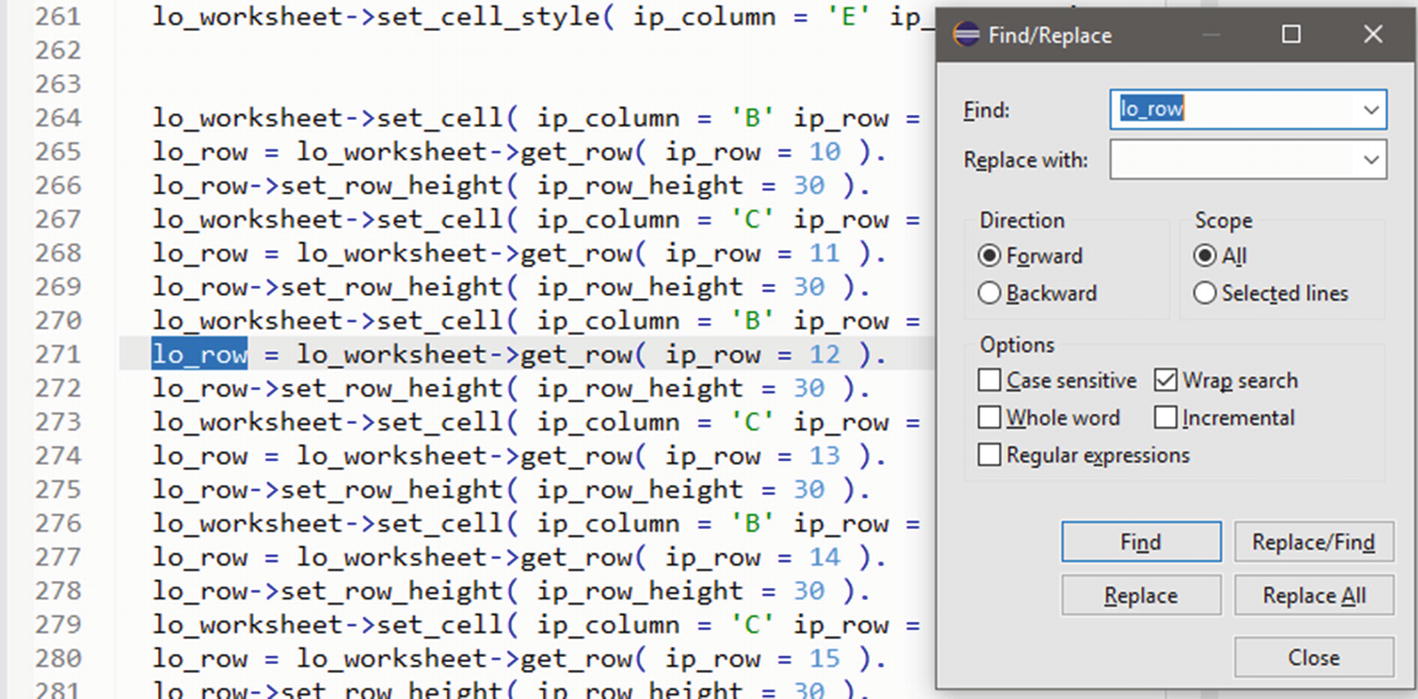
Inline Search is a small yet useful function that replaces the standard find/replace dialog of Eclipse (Figure 5-20). It is activated by default on installation of Darkest Dark. If you have worked with other IDEs, such as Visual Studio, you will be really happy with it.
Figure 5-20
Standard Eclipse search
Besides the minimal view of the inline search (Figure 5-21), it also adds the hits counter, highlights all of the results in the editor, and adds markers to the vertical and overview rulers.
Figure 5-21
Inline search
CodeTogether
In the initial versions of Darkest Dark, CodeTogether was not available. When it was published I gave it a try, as I like to discover new software. I was pleasantly surprised with the ease of code sharing with other people around the globe.
Unfortunately, in the first releases, I was not able to share the ABAP code, but for Java files it worked perfectly. I kept it in my Eclipse installation, hoping that someday I would be able to share my ABAP code. And now it is possible, allowing developers to do pair programming or solving issues with other developers without sitting next to each other.
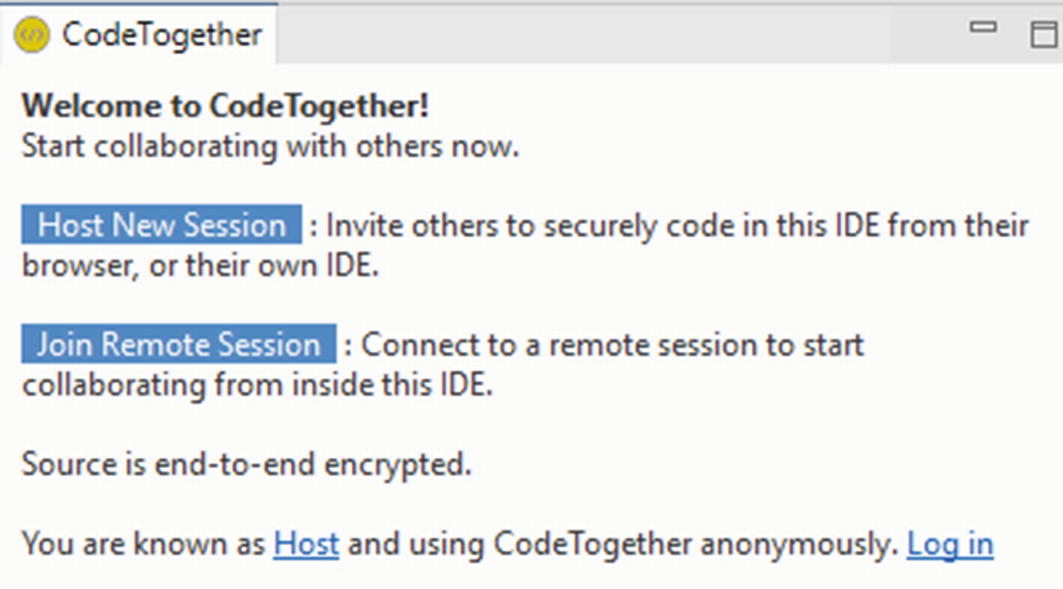
To start or join a session, you need to open CodeTogether view (Figure 5-22) and use the links.
Figure 5-22
CodeTogether view
When you choose to start a session, you will be asked to set up the parameters of that session (Figure 5-23). You can choose how you want to allow participants to join, who can lead the navigation through the code, and who can edit.
Figure 5-23
CodeTogether session options
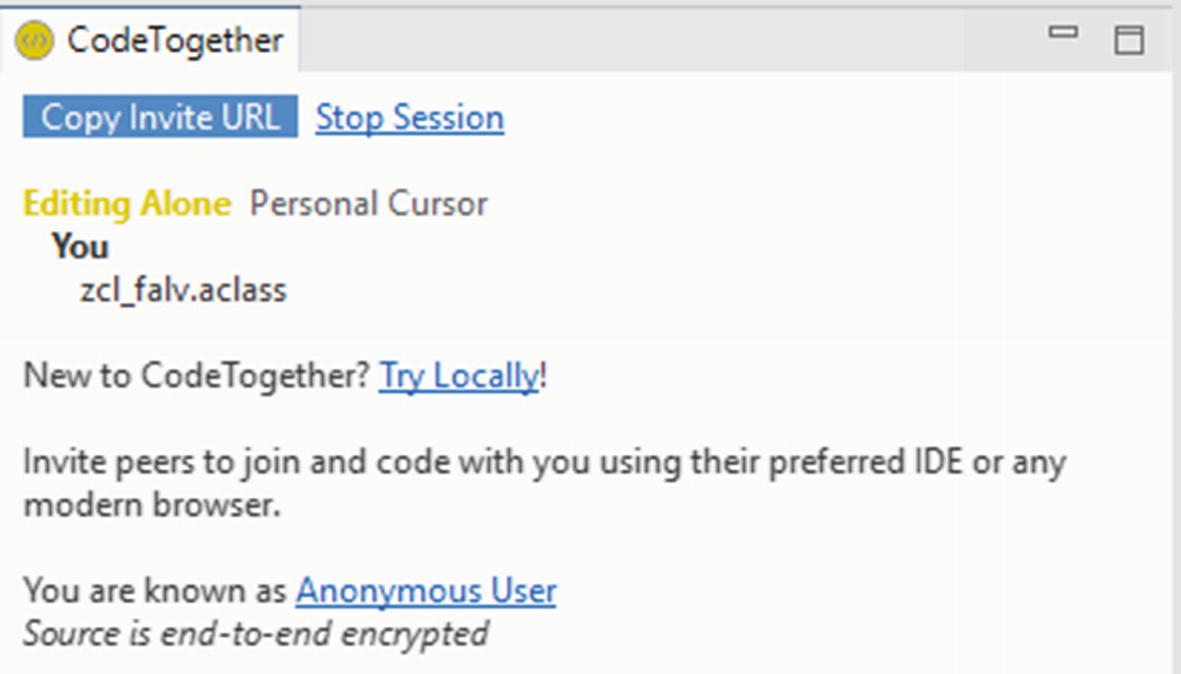
After starting the session, you will be able to copy the invite URL from the CodeTogether view (Figure 5-24). This URL can be then used in other Eclipse versions, IntelliJ, or VS Code with CodeTogether installed. The session link can also be used in any modern browser.
Figure 5-24
CodeTogether view with an active session
If the people you invited to the session want to join from Eclipse, they need to paste the invite URL and their name into the Join Session window, which is called by clicking the Join Remote Session button of the CodeTogether view.
Figure 5-25
Joining a remote session from Eclipse
Once this is done, you as a host will receive an authorization request with the name of participant (Figure 5-26).
Figure 5-26
Authorization of session participant
If your peers want to join using a web browser, they will be asked not only for their name, but also for the IDE theme and key bindings that they want to use in the remote editor (Figure 5-27).
Figure 5-27
Joining session from web browser
After starting the session in Eclipse, you will notice a green frame around the editor that is shared and an information if you are driving or following others (Figure 5-28). If you are driving, each step you take will be replicated in the remote editor for the other participants.
Figure 5-28
Eclipse: host view of a CodeTogether session
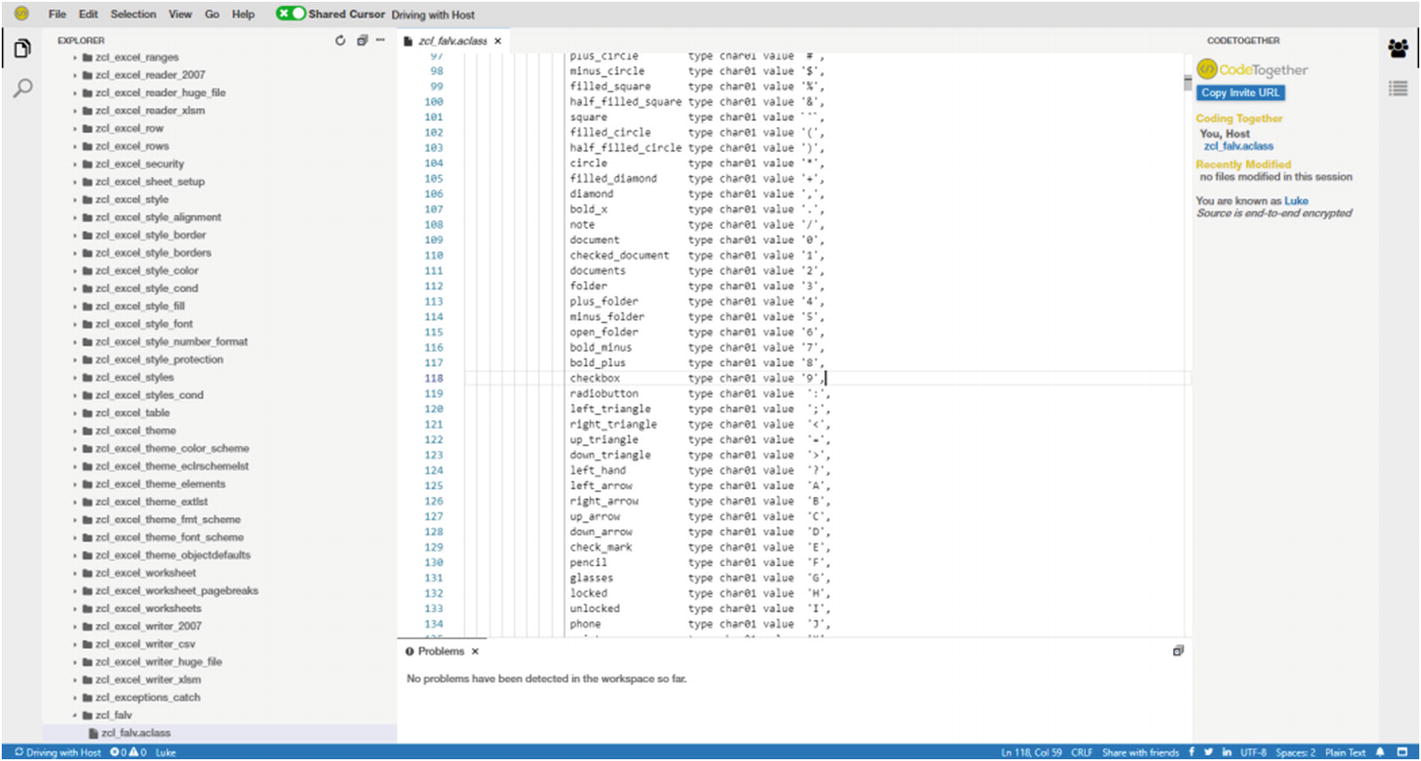
The participant view is a bit different than the host view. This is because ABAP syntax highlighting is not yet available in CodeTogether. For problem solving, this should not be an issue, but I am waiting for the day when ABAP syntax highlighting is available. As you can see in Figure 5-29, besides the shared code, the participant will have access to the Project Explorer of the host. With ABAP projects, which are virtual folders, only previously opened objects will be available, but it is still something.
Figure 5-29
Web browser view of the session participant
As I wrote before, all changes are synchronized between the host and participants, as well as the Problems view, selection of code, and cursor position (Figure 5-30). It is easy to see who is changing the code and where, as the full name or initials of the person who is editing the code is displayed next to the cursor position.
Figure 5-30
Problems highlighting in the remote editor
Code completion is not synchronized on-screen, but you can still use it on the remote editor and get the code completion results that are calculated in the session host IDE.
Figure 5-31
Code completion in a web browser
You can achieve the same using any online meeting software. But this works very fast, much faster than screen sharing, as you are exchanging code, not images. This could be extremely useful when working remotely and when the network connection is not fast.
abapGit
If you have been following the ABAP news for some years, then abapGit is not something new. But in case it is a new term to you, abapGit is a tool built by SAP Mentor Lars Hvam Petersen1 and the SAP Community, which helps share the code using Git repositories. It is widely used for open source ABAP projects and makes collaboration very easy.
I could write a separate book about abapGit, but as I am focusing on Eclipse plugins, let me introduce you to only that part of the abapGit project. Now, if you are using the ABAP in cloud, you need to install the plugin only. If you are using on-premise systems, you need to install the developer version of abapGit2 as well.
The abapGit Eclipse plugin is not available in the Eclipse Marketplace, so you need to choose Help ➤ Install New Software and paste in the URL https://eclipse.abapgit.org/updatesite/. After installation, two additional views will be available: abapGit Repositories and abapGit Staging.
abapGit Repositories
If you are already using abapGit in your backend using the ZABAPGIT transaction, all your repositories will be listed in this view (Figure 5-32), but you will not have all the functionality of the GUI transaction yet.
Figure 5-32
List of abapGit repositories
I hope that with the next updates, we will get more functionality, but so far we can do following actions:
Add new repositories using the button
Pull, to update the local version with remote
Stage and Push, to commit your local changes to a remote repository
Open Package, which opens a package linked with the repository
Open the repository in a web browser
Unlink, which will keep the objects in the system, but the link to repository will be deleted
These sets of functions are suitable for the basic actions with the Git repositories. Especially when you are only installing the repositories of others, you will not have to switch to a GUI transaction anymore. With ABAP in the cloud, you will not have GUI, so this plugin is the only way to bring ABAP repositories to your system.
Let’s now go through the process of linking a new abapGit repository to your system. First of all, you need to select the repository you want to bring into your system and copy its clone URL. If you do not have a project in mind, but you would like to try the plugin, simply go to https://dotabap.org (Figure 5-33). This is a list of ABAP open source projects with short descriptions and clone URLs.
Figure 5-33
dotabap.org is a list of ABAP open source projects
When you have the clone URL, you need to click the Link New abapGit Repository button from the view. On the first screen, you need to paste in the clone URL, just like I did in Figure 5-34.
Figure 5-34
Linking a new abapGit repository: clone URL
The second step is to select the branch and package (Figure 5-35). The changes of the linked branch are not possible in the Eclipse plugin, so pay attention to which branch you are linking your package to. If you make a mistake, you will need to unlink and recreate the link to the package. During this step, you can also decide if pulling (installing) the repository should happen directly after creating the link.
Figure 5-35
Linking a new abapGit repository: branch and package selection
The next screen that will appear is the Transport Request Selection dialog, which you should have seen a dozen times. When you click the Finish button, you should see the linked repository on your list, just like in Figure 5-36.
Figure 5-36
Linking a new abapGit repository: pulling status
Note in Figure 5-36 that there were some warnings during the installation of the repository in the backend system. You can double-click the Status column to get the details. For example, in my case, it was a message that programs are not allowed in the cloud environment, that is why they were not imported. The rest of the objects were imported and are available in the selected package.
abapGit Staging
When you want to contribute to the open source projects or create your own versions, abapGit Staging view can be useful. It is a very simple view that shows which local objects differ from the one stored in the remote repository. It allows you to commit and push the changes into a remote repository.
Despite the project type (your own or a community one), it is recommended to have your own branch for any adaptations. If you want to contribute to somebody else’s project, first fork it to your own Git repository, then link to your backend using abapGit and start the changes in code.
To commit and push the changes, you need to jump to abapGit Staging view and select the repository to check using the Switch Repository button on the view toolbar (Figure 5-37).
Figure 5-37
Switching the repository in abapGit Staging view
If there are any changes, you will see them as Unstaged Changes (Figure 5-38). Now you have to select the object you want to stage. You can do that by selecting the objects on the list and using the Stage button or choosing Stage Objects from the context menu. They will be moved to the Staged Changes tree. The last fields you need to fill in are Commit Message, Author, and Committer. At that stage, the Commit and Push button will became active.
Figure 5-38
Unstaged changes of local objects
When you commit your changes, you will be asked for the remote repository credentials. Your changes will then appear in the remote repository. There is also one additional function available here. When you use the context menu on staged or unstaged objects, you can run a comparison of the local object version with the one in the remote repository.
ABAP Continuous Integration
The next plugin from the ABAP world that I want to present is ABAP Continuous Integration. This plugin was created by SAP Champion Andreas Gautsch.3 It is available on the marketplace and, as you can see in Figure 5-39, it has already around 2500 installations, which is quite a big number for an ABAP plugin.
Figure 5-39
ABAP Continuous Integration on the Eclipse Marketplace
The plugin gives you four additional views: ABAP CI Dashboard, ABAP CI Suppressions, ABAP Continuous Integration, and ABAP Colored Projects. The last view is linked to a small functionality: coloring the IDE depending on the active project.
Coloring Projects
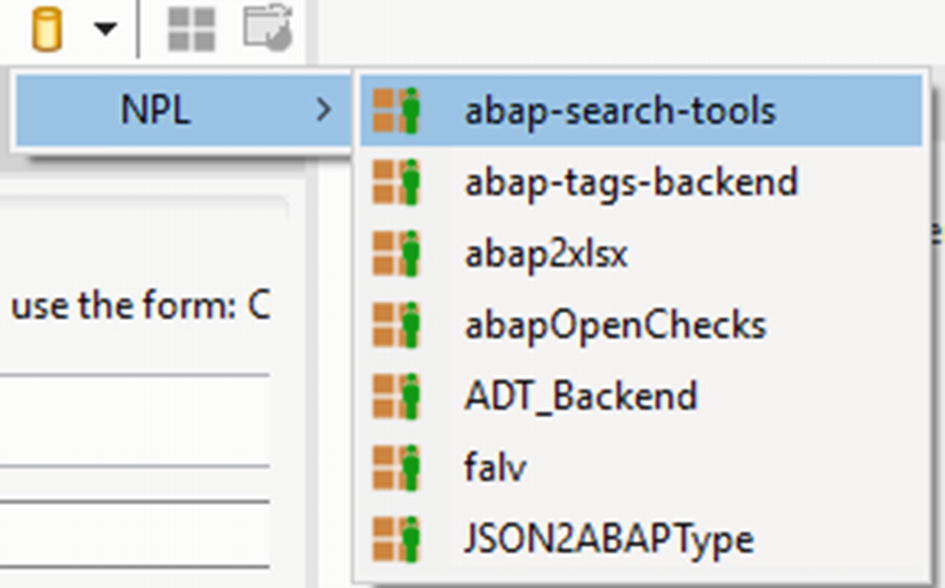
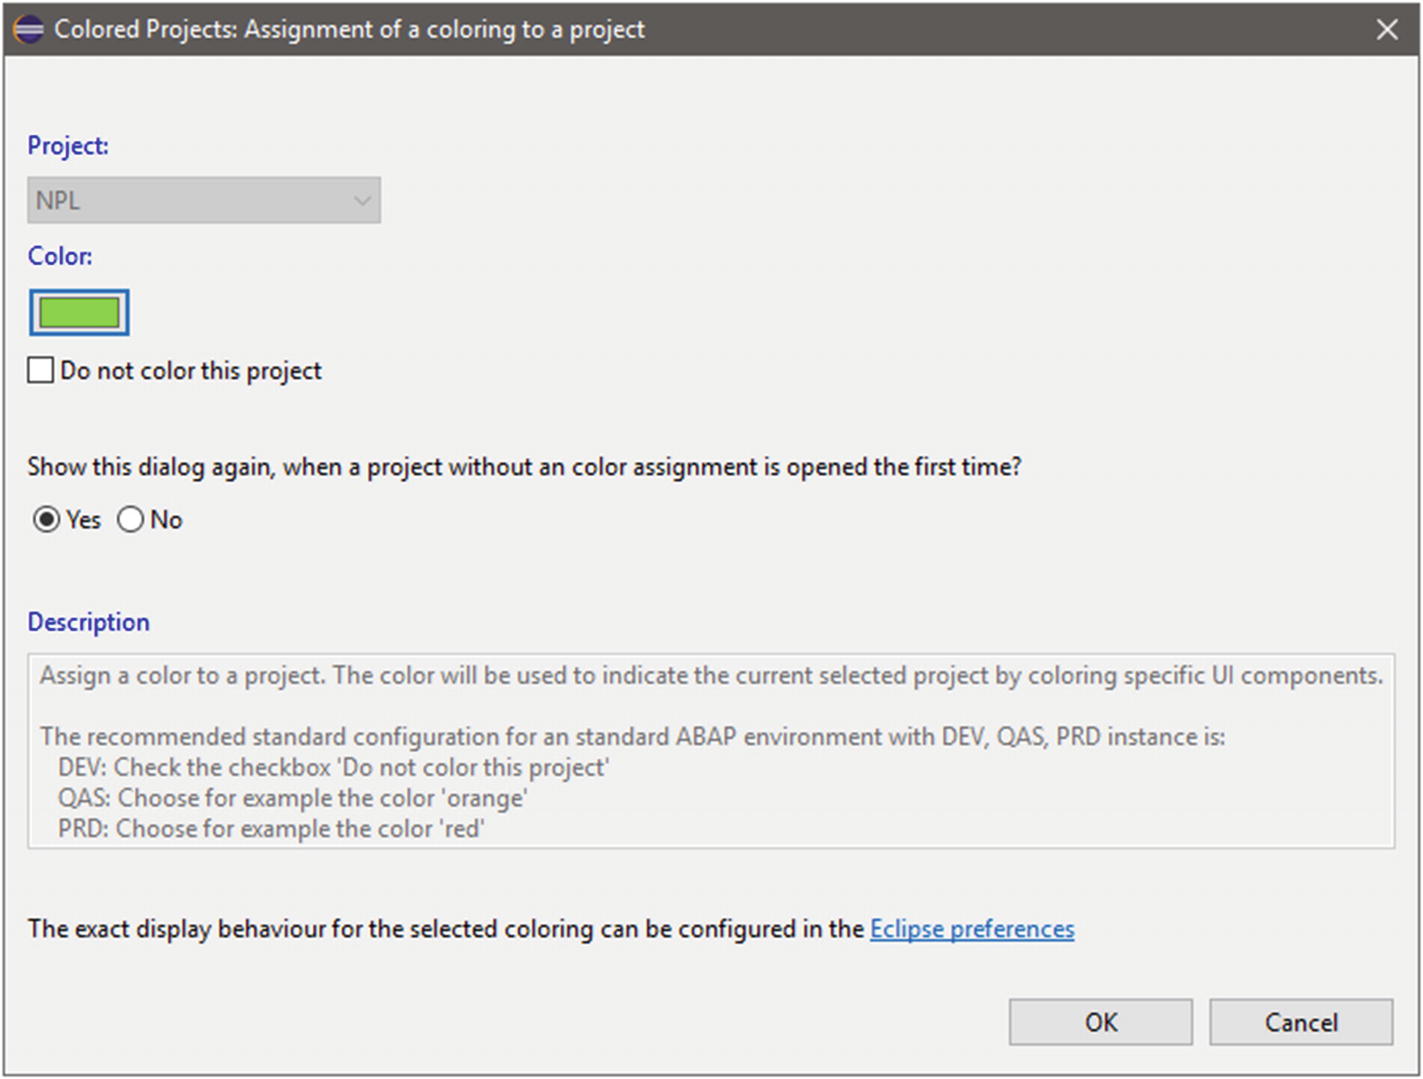
After installing the ABAP CI and restarting Eclipse, you will see the first of the popup windows that comes with the plugin. It’s a screen with the color assignment selection for the project (Figure 5-40). Color changing may be useful for quick recognition of the development, integration, or production systems. You can of course decide not to color the project. On this screen, you can also decide if it should appear when you switch to the project.
Figure 5-40
Assigning color to a project
The basic settings are set to update the status color only, as it is presented in Figure 5-41, but you can make more adaptations. My personal feeling is that when you decide to color the project, status coloring is enough.
Figure 5-41
Colored status bar
All assigned coloring projects will be listed on the ABAP Colored Projects view (Figure 5-42). From that view, you can add, edit, or delete the assignments using either the view toolbar or the context menu.
Figure 5-42
ABAP Colored Projects view
Continuous Integration
When you activate the first object after the installation of ABAP CI, you will see another screen from that plugin (Figure 5-43). This time it will be configuration of CI jobs for the package containing the object you just activated. CI jobs are done in the background after objects are activated, when you select from this screen that the package should be included in the automatic Unit Test run or the automatic ATC run.
Figure 5-43
CI job configuration screen for a package
Once you set up the package to be included in the CI jobs, you will see this package listed in the ABAP Continuous Integration view together with the last state of the Unit Tests and ATC run (Figure 5-44). From the view toolbar and context menu, you will also be able to add new packages to the list, or edit or delete the package from the CI jobs. You can also call Unit Tests and ATC Check on demand from here.
Figure 5-44
ABAP Continuous Integration view after running the CI job
The ABAP Continuous Integration view is helpful if you are activating objects from several packages, as in other case you will be also notified about the result of the last CI run in the status bar. The widget shown in the bottom-left corner of Eclipse will show you the status of the CI job, the number tests passed and failed, and the number of the ATC results (Figure 5-45). By default, when the job is be successful, the color of the widget will remain white. With failed Unit Tests, it changes to pink. With ATC issues, it becomes purple.
Figure 5-45
Source code state widget on the status bar
If you have some ATC results, they will also be listed when you hover over the widget. A sample list can be found in Figure 5-46. It can be used to look quickly at any errors you made.
Figure 5-46
Detailed info about failed ATC checks
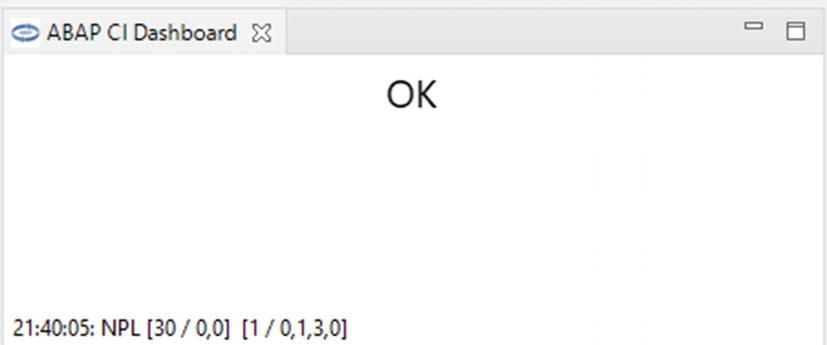
When you do not want to use the status bar widget to display the last CI job details, you can deactivate this in the plugin’s preferences. In this case, you can still follow the last calls of the job using the ABAP CI Dashboard view (Figure 5-47), which displays the same information as the status bar widget.
Figure 5-47
ABAP CI Dashboard after running a CI job
You may want to you want omit some classes from the CI jobs, but still want to check the other contents of the package. In such cases, you can use the ABAP CI Suppressions view (Figure 5-48) to exclude classes from the CI jobs run. Of course, at any stage, you can clear the list or add new objects to it using the view toolbar buttons.
Figure 5-48
ABAP CI Suppressions view
Preferences
You should be used to the fact that not everything is available directly, but after making changes in the preferences, you can get much more. The same is true with the ABAP CI plugin. When you go to Window ➤ Preferences ➤ ABAP Development ➤ Continuous Integration, you will notice that there are some nice functionalities available and you can also adjust the ones I have described.
First of all, you can choose to run a Unit Test not for whole package, but only for activated object. This should speed up the visibility of the results on the status bar widget.
You can also set up a variant for ATC. It does not need to correspond to the default variant available in your system.
The third group of settings is the visualization of the source code state in the UI, where in addition to the color customization for failed Unit Tests and ATC results, you can decide if the widget for the source code state should be shown in the status bar. Additionally, you can decide if the popup for the unconfigured CI jobs packages should appear.
If you are using the TDD approach, you may like also to activate the Show TDD Labels for Source Code State Output option (Figure 5-49). Choosing this option, instead of the test results, means the status bar widget will guide you if you should now write test, write code, or refactor. The last step appears when your unit tests pass the checks and ATC has no result. Once you achieve that, the refactor state will remain visible for the time specified in the Minimal Time The TDD Cycle Will Remain in the Refactor State option.
Figure 5-49
TDD labels configuration
The next nice possibility of the ABAP CI configuration is to allow automatic source code formatting when you activate or save an object. By default, the mandatory prefix in the source code is set to #autoformat. You would need to put this in each object you are changing in the first line in order for this function to be triggered. I guess this is something most of us would not do, but instead if you fill the mandatory prefix with <NO_FILTER> (Figure 5-50), each activated or saved object will be automatically formatted. You can also decide to clean up unused variables.
Figure 5-50
Formatting options of the ABAP CI plugin
ABAP Code Insight
The next plugin of Andreas Gautsch available on the marketplace is called ABAP Code Insight (Figure 5-51). Version 0.4.0.0 shows this is maybe not yet the final version of the plugin, but it already can bring added value, which is the inline information about ABAP code elements.
Figure 5-51
ABAP Code Insight in the Eclipse Marketplace
If you are using non-HANA releases of SAP, this plugin may look slow to you, especially if you are opening a class that contains a huge number of methods and attributes. This is because the time needed to gather the information from the backend and the amount of selected information to fetch in the preferences. When you are using it on S/4HANA or C/4HANA systems, the code insight information appears quickly.
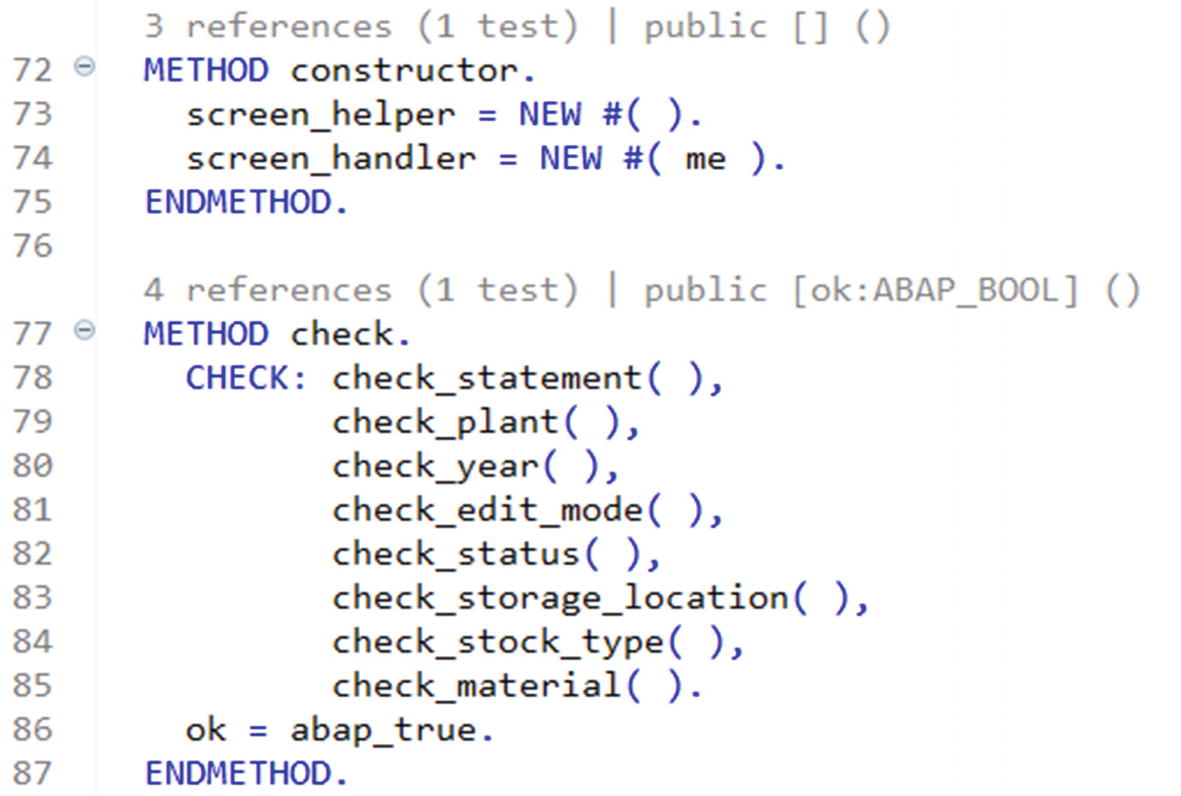
This information can be useful to you, for example the signature of the method shown before the implementation (to avoid using F2) or the reference counter including tests (Figure 5-52). The reference counters are the hyperlinks as well, so when you click them, you move to the where-used list of the given element. For me, the most important information here is whether the method is used in the test classes.
Figure 5-52
Inline ABAP code information
Personally, I use the preferences of Code Insight, which you can find in Figure 5-53. To set up your own preferences, just go to Window ➤ Preferences ➤ ABAP Development ➤ Code Insight. I recommend you also look at the Show Values of Variables in the Debug View parameter to get a surprise during debugging from time to time.
Figure 5-53
My ABAP Code Insight plugin settings
ABAP Search and Analysis Tools
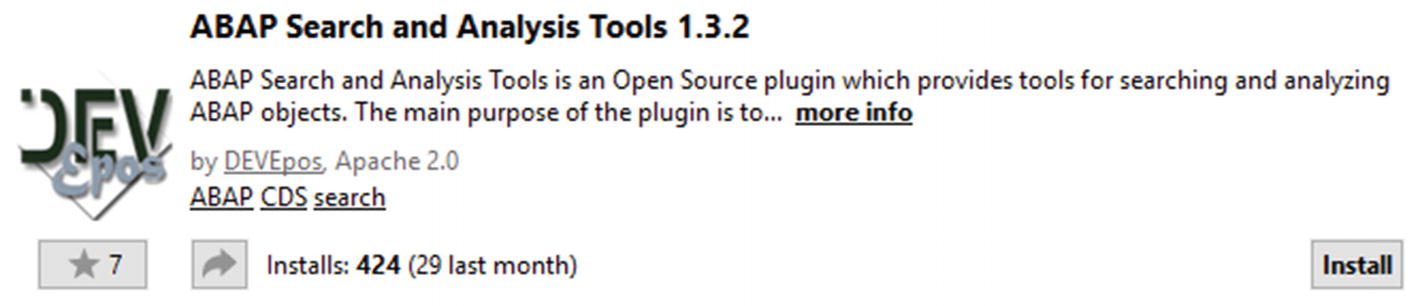
This is the first of two plugins published by Ludwig Stockbauer-Muhr.4 It has been available on the marketplace since November 2019. So far, it has only a bit more than 400 downloads (Figure 5-54), but I hope after reading about the possibilities of this plugin, it will become more popular.
Figure 5-54
ABAP Search and Analysis Tools on the Eclipse Marketplace
In order to use this plugin, besides installing it from the Eclipse Marketplace, you also need to install the backend components using abapGit and one of the branches from https://github.com/stockbal/abap-search-tools. When you enter the GitHub page of the plugin, you will see that there are separate branches for versions 7.40, 7.50, 7.51, 7.52, and newer. Remember to install the version that fits your backend.
I am sure that I cannot fully describe all the features of this plugin, that is why I encourage you to take a look at the F1 help that Ludwig has prepared whenever you think you need clarification.
Search Tools
Search Tools is a part of the plugin that extends the search capabilities for the following:
CDS Views
Database tables/views
Classes/interfaces
You can use it directly, using two new buttons on the Eclipse toolbar (Figure 5-55), or you can just run a standard Eclipse search (Ctrl+H) and switch the tab to ABAP Objects Search+.
Figure 5-55
ABAP Object Search+ and Manage Favorites for ABAP Objects Search+ buttons
The standard ADT ABAP Object Search is very limited. It only allows you to search the objects by name. ABAP Object Search+ brings the searching functionality to another level. It is limited to CDS Views, Database tables and views, classes and interfaces. It covers most of the needs of the developers. This is because it contains search filters that you will love to use.
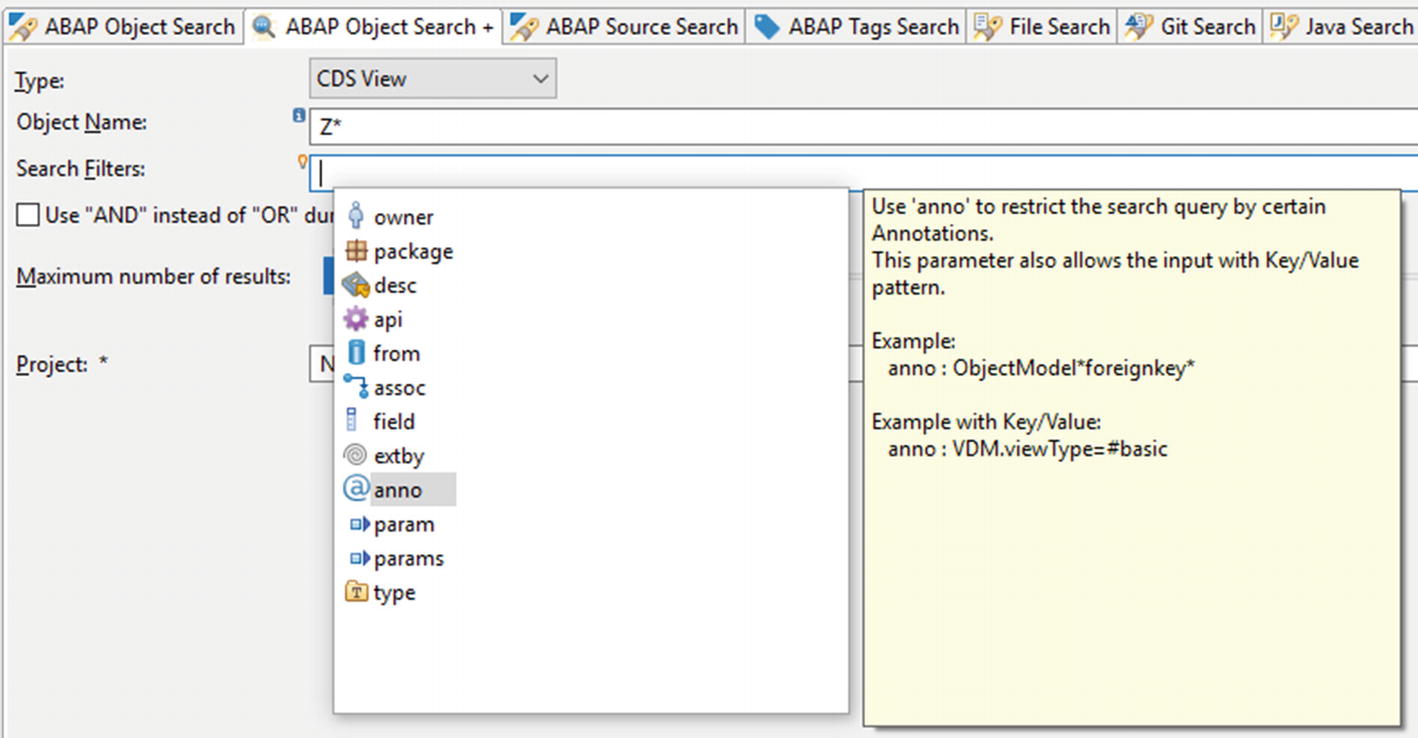
You should remember search filters from many other ADT places, such as from the ABAP Repository Trees or the Open ABAP Development Object dialog (Ctrl+Shift+A). There are quite a few more of them in this plugin (Figure 5-56).
Figure 5-56
Search Filters for CDS Views
You can use the Owner, Package, Desc (Description), and Type filters. For CDS Views and database tables/views, you can also use the Field filter, which searches each of these objects that contain a specified field name. For classes and CDS Views, you can use the API state filter. The rest of the filters are unique:
CDS View
From: Restricts the selection to CDS Views that in its SELECT statement uses the given Tables/Views/CDS Views.
Assoc: Restricts the selection to CDS Views that have associations to givenTables/Views/CDS Views.
Extby: Restricts the selection to CDS Views that are extended by given CDS Views.
Anno: Restricts the selection to CDS Views that contain the given annotations.
Param: Restricts the selection to CDS Views that have the given parameters.
Params: Restricts the selection to CDS Views that either contain or do not contain the parameters (params:true: contains parameters, params:false: have no parameters)
Class/Interfaces
Cat: Selects the category of class from General, Exit, Persistent, Persistent Factory, Exception, WD Runtime, Area Class, or Test Class.
Flag: Selects the classes that have flags, such as Abstract, Final, Test, Fixpoint, or Shared Memory.
Lang: Selects classes with the chosen ABAP Language version.
Friend: Selects classes that have a specified friend.
Supe: Selects classes that inherit from a specified class.
Intf: Selects classes that implement specified interfaces.
Meth: Selects classes or interfaces that contain methods with a specified name.
Attr: Selects classes or interfaces that contain attributes with a specified name.
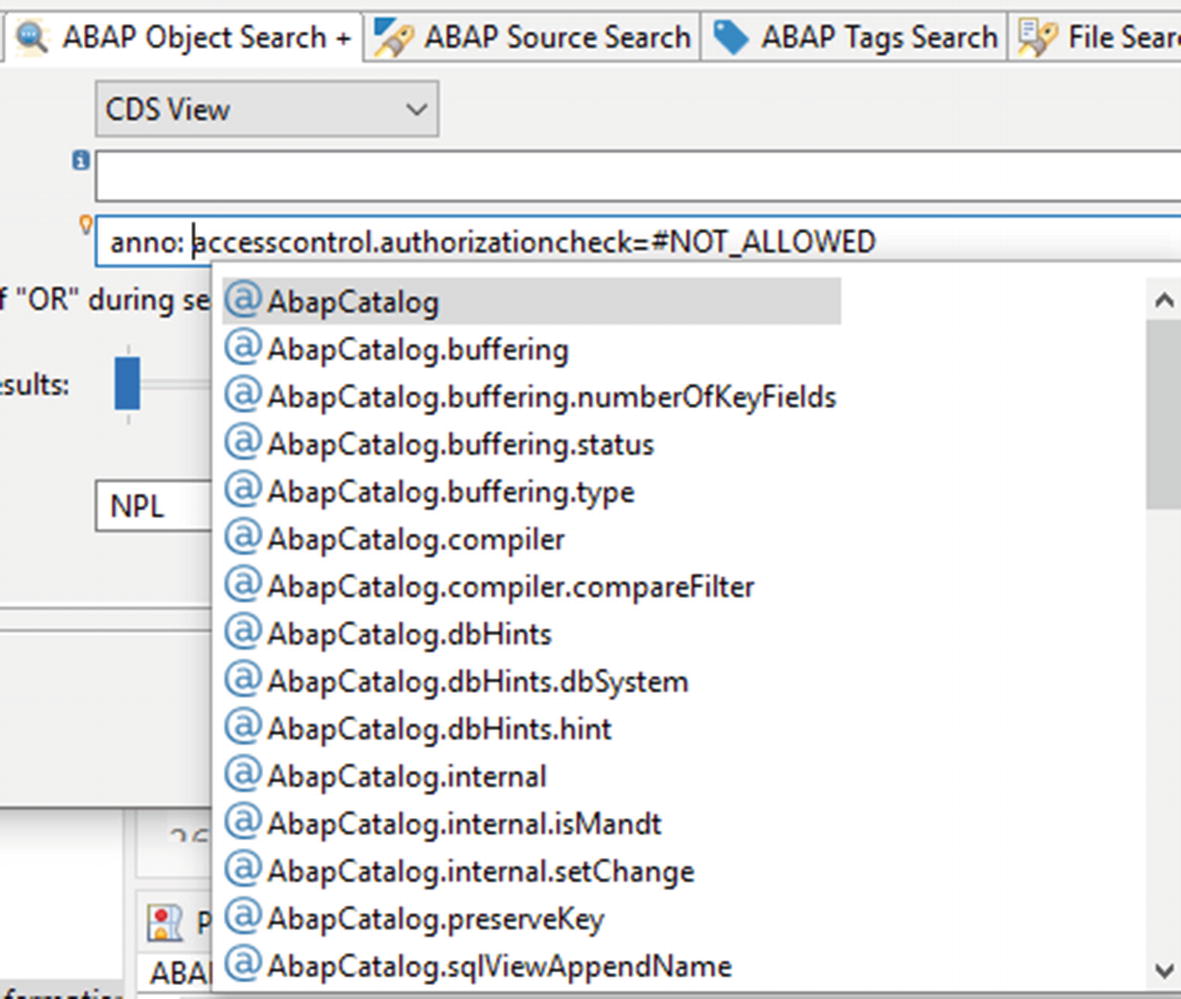
A great feature of some of the search filters is code completion. For example, for Anno or From (Figure 5-57). A few of them allow you not only to select the filter criteria, but also to enter a strict value of the filter criteria. For example, CDS View search filter anno: accesscontrol.authorizationcheck=#NOT_ALLOWED will search for only CDS Views with the annotation @Accesscontrol.authorizationCheck set to #NOT_ALLOWED.
Figure 5-57
ABAP Object Search+ with annotation code completion
You can put several search filters together and use more than one value for each filter. By default, when you put several values into one filter, they work as if they were part of an OR clause. If you want to change that behavior, click the Use “AND” instead of “OR” during search checkbox; the search results will then be more accurate. In Figure 5-58 there is an example of search of CDS Views that are having SELECTs from MARA AND MARC tables and the field called MATNR.
Figure 5-58
CDS View search with a name containing the Z* pattern, having a SELECT from the MARA and MARC tables and the MATNR field inside itself
So far, it has been all about search criteria. Now it is time to look at the results of the search (Figure 5-59). They will be visible in standard Eclipse Search view and they will contain different details for different searched object types. Ludwig has focused mostly on the CDS Views, which is why you can get a lot of details about the CDS Views.
Figure 5-59
Search results of the CDS Views with Z* name and abapCatalog.sqlviewname annotation
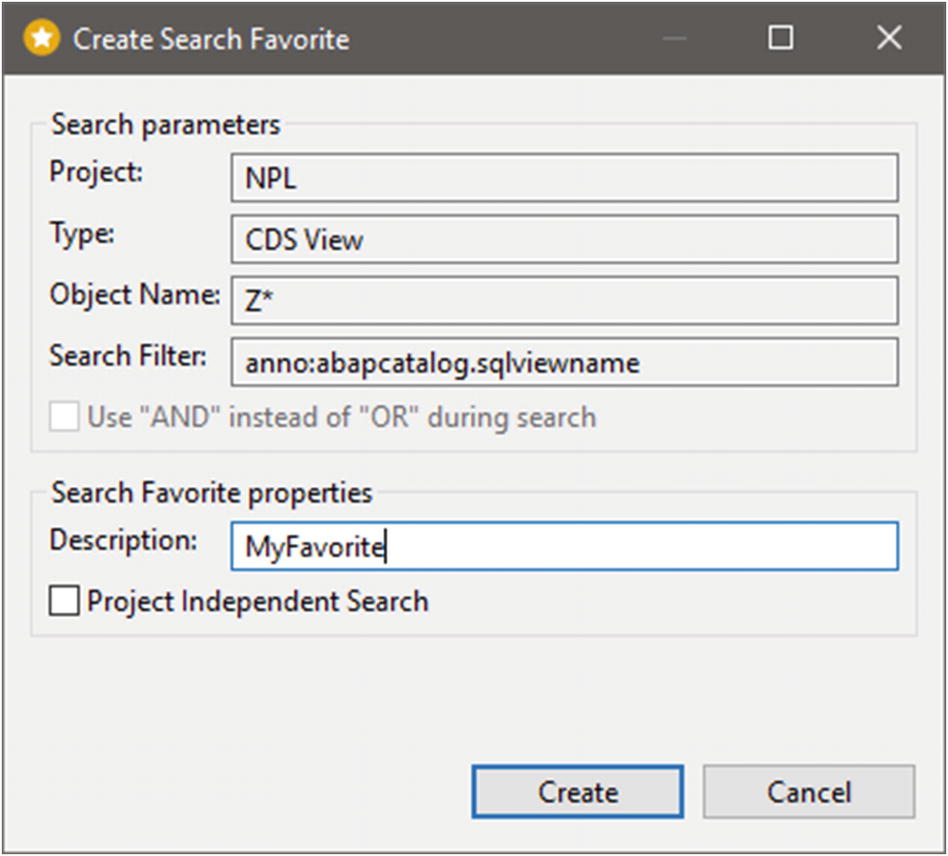
You can also mark the search as a favorite. To do that, just use the Favorite button on the Search view toolbar and select Create Favorite from Current Query (Figure 5-60). With repeatable searches, this can save you some time. Of course, this comes mostly in hand when you search for the same objects, as the standard history also saves your queries.
Figure 5-60
Creating a Search Favorite
Besides creating favorites, from the context menu of ABAP Object Search + results, you can also call the favorites organizer, the data preview, and the analysis tools that are the second part of this plugin.
Analysis Tools
With this part of the plugin, we receive the additional view called CDS Analyzer. The view itself will not work until you call the analyzer from one of three possible places:
The context menu of CDS View or Database Table Editor
The context menu of Project Explorer, when selecting CDS View or Database Table or View
The context menu of ABAP Object Search +, when CDS View or Database Table/View are used as searched object types
In each of these places, you can choose one of four possible analyses: CDS Top-Down, Used Entities, Where-Used in CDS, or Field Analysis. The first two analyses are available only for CDS Views, the other two work with database tables and views.
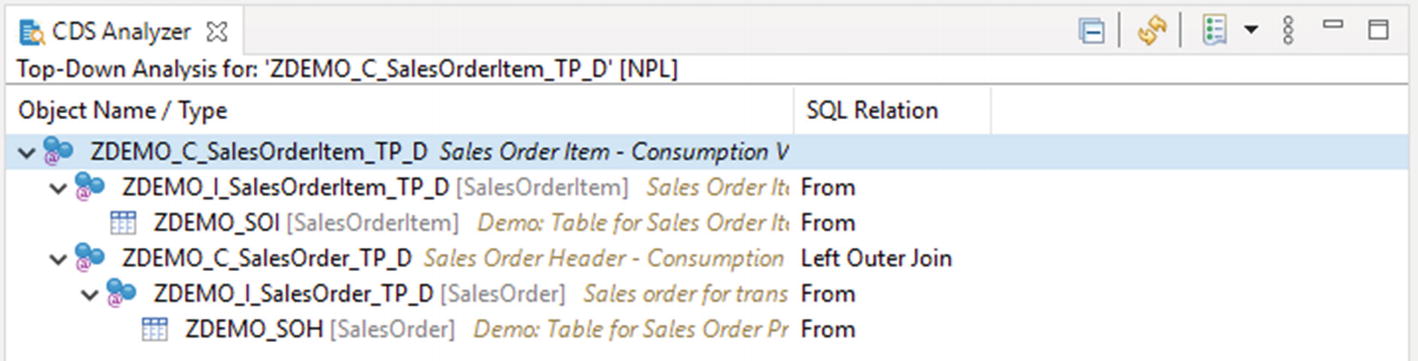
CDS Top-Down Analysis (Figure 5-61) shows you which other CDS Views, database tables, or views are used in the currently selected CDS. It drills down the usage to the last level, so you can see all types of CDS Views and the database tables used at each CDS level. This analysis can be extremely helpful when you’re working with complex, multilevel CDS Views. In the view menu, you can also enable the display of used associations.
Figure 5-61
Top-down analysis of CDS Analyzer
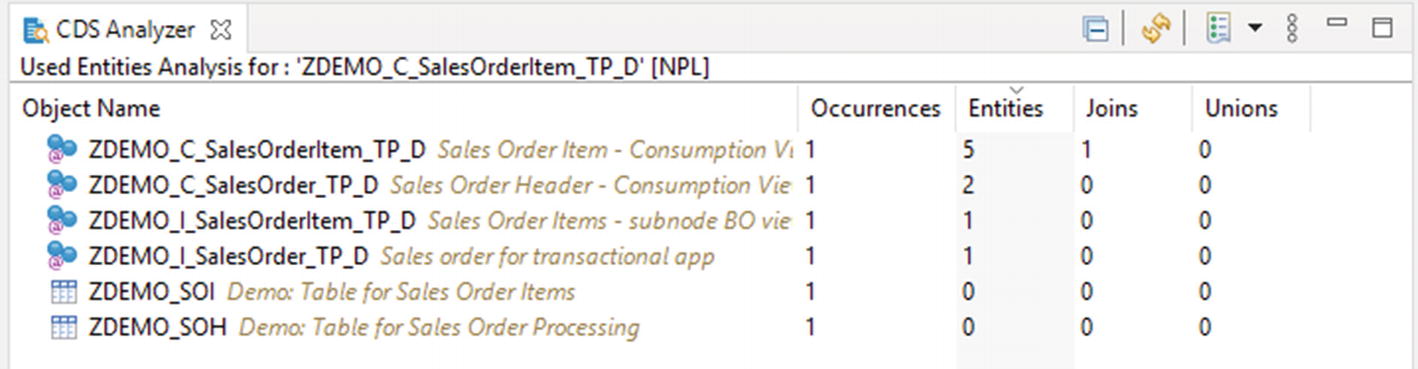
Used Entities Analysis (Figure 5-62) gives you an aggregated view of the data from the Dependency Analyzer and usage information of the CDS View. This view can be useful to determine if you need to reduce the number of used entities or transform the CDS. This view can also give you an overview about the importance of the CDS View.
Figure 5-62
Used entities analysis of CDS Analyzer
Where-used in CDS Views analysis can show you if the analyzed object is used in a SELECT or the association part of CDS Views (Figure 5-63). Using the view menu, you can choose to see only usage in CDS Views for whom the API state is set to Released. Viewing only locally defined associations can also be set in the same place.
Figure 5-63
Where-used in CDS views analysis
The last of the analysis tools is Field Analysis (Figure 5-64). It is very useful for quickly checking the origin of a CDS View field. The view for this analysis is split into two parts: Field list and Field details. The Field detail area has two modes. The Field origin mode uses a top-down approach to display the origin of field down to the database layer. It also shows the name of the field at each level in the field hierarchy. The other mode is Usages in Fields and it will show the usages of a field in other CDS Views.
Figure 5-64
Field analysis of CDS Analyzer
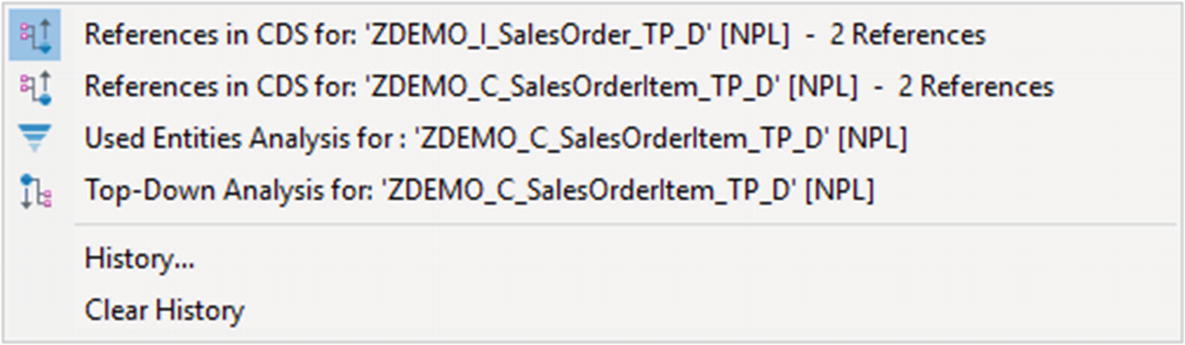
CDS Analyzer also collects the history of the analysis. Using the Show Previous Analyses button, you can return to the cached results of the previous analysis (Figure 5-65). Its behavior is exactly the same as the history on the Search view.
Figure 5-65
Drop-down menu of CDS Analyzer history
ABAP Tags
The second plugin by Ludwig Stockbauer-Muhr is called ABAP Tags. It is quite a new plugin, published on July 2020, which is why it is not that popular yet (Figure 5-66). You need to install the backend component using the abapGit repository, which can be found at https://github.com/stockbal/abap-tags-backend.
Figure 5-66
ABAP Tags plugin on the Eclipse Marketplace
After I installing the plugin and backend components, you can use the two new views (Tags, Tag Explorer) and the new search tab (ABAP Tag Search).
Tags
In order to tag the objects in ADT, you need to create them inside the Tags view (Figure 5-67). You can create user and global tags. As you can foresee, user tags are visible only for you and global tags are visible for every developer, that is using your system. Each of the tags is stored in the backend, so they are system specific.
Figure 5-67
Tags view with User and Global tags
Tags view enables you to create a tags hierarchy with multilevel tags. This can be used for example to create development project specific tags.
After creating the tags, you can start to assign them to the objects. You can do that from the Assign Tags To Object button that is found on the Eclipse toolbar, or using the context menu of the Project Explorer and ABAP Editor. You can do this also from the Tag Explorer view. In each case, a wizard for adding tags to your object is displayed (Figure 5-68). If you try to assign a sub-tag, you will also have to select the parent object of the tag. The parent object is one of the objects that is assigned to the parent tag. Using my example, if I want to assign an object to the Demo tag of the FALV node, then the FALV tag would need to be assigned to any of the objects.
Figure 5-68
The Add Tags wizard
You can find several uses for the tags. They can be useful for onboarding new developers, describing the tasks that need to be done with the object or for highlighting of the object’s purpose.
Tag Explorer
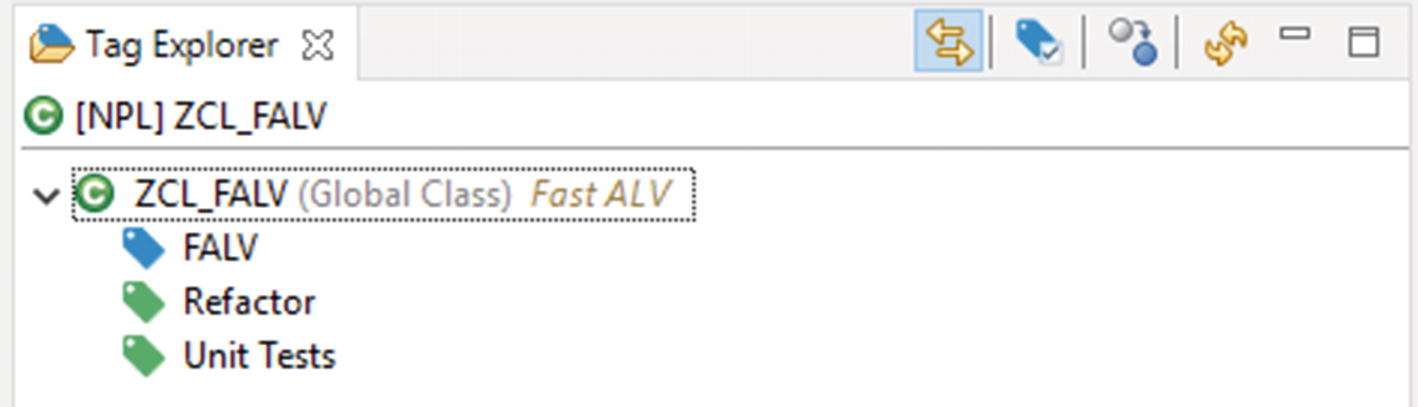
The second view that is installed with the ABAP Tags plugin is Tag Explorer (Figure 5-69). By default, it is linked with the active editor and shows all the tags that are assigned to edited objects. You can also manually select other objects to be used by clicking the Other Object button on the view toolbar. You can also assign new tags or delete linked tags from this view.
Figure 5-69
Tag Explorer with the tags assigned to the ZCL_FALV class
ABAP Tags Search
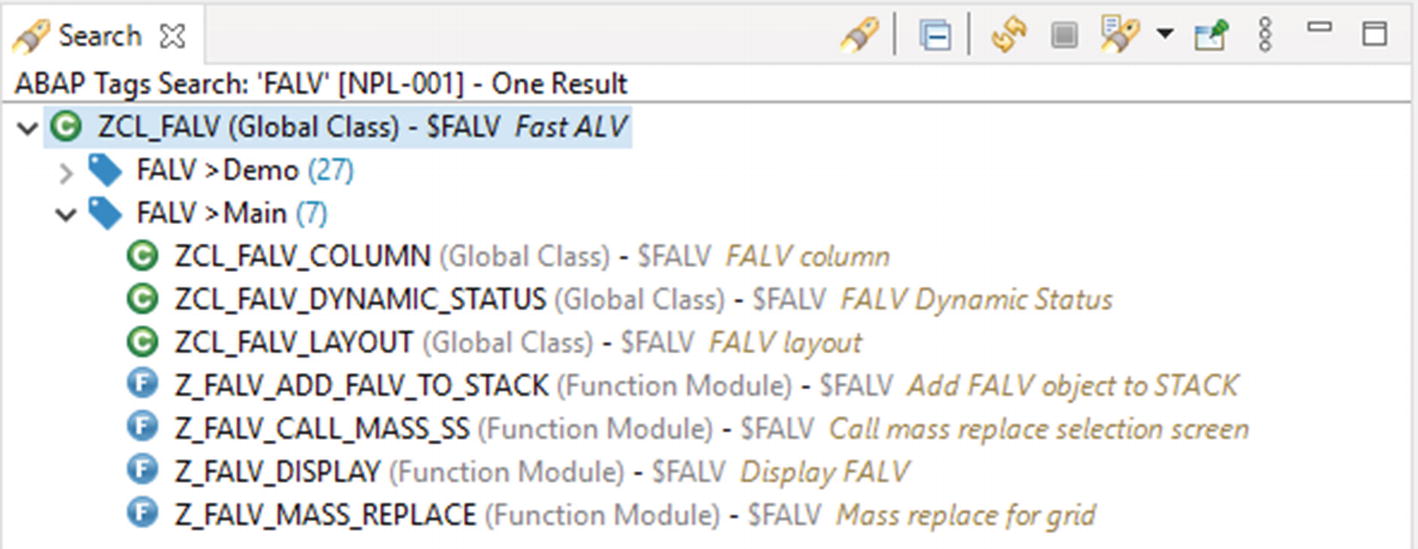
If you like to list all the objects with a specific tag, you need to use the search functionality of Eclipse (Ctrl+H) and switch the tab to ABAP Tags Search (Figure 5-70).
Figure 5-70
ABAP Tags Search tab
You can select one or more tags here and then choose if the search should only consider objects that match all the SELECT tags. After you click the Search button, the result will appear in the standard Search view. If the object is a parent of other objects, the list of liked sub-tags and the objects assigned to them will be visible after you expand the object node, as shown in Figure 5-71.
Figure 5-71
Results of a FALV tag search
The maximum number of results is set to 50 by default, but you can use the ABAP Tags preferences (Window ➤ Preferences ➤ ABAP Tags ➤ Search) to adjust this value to your needs. You will be able to adapt a few more minor options as well.
Task Scanner for ABAP in Eclipse
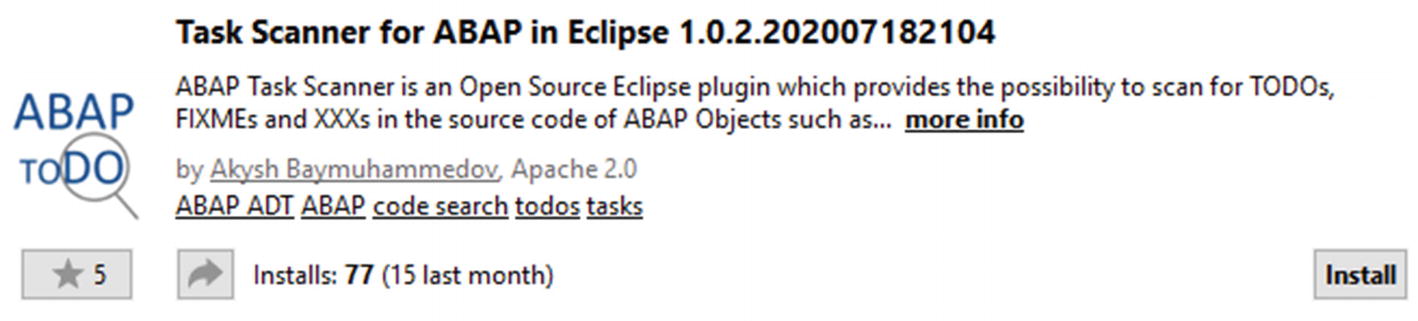
Akysh Baymuhammedov5 published another plugin for ADT in July 2020 called Task Scanner for ABAP in Eclipse. As this is also a new plugin, the number of downloads from the marketplace is not large yet (Figure 5-72), but as with any other plugins, it will definitely grow in time.
Figure 5-72
Task Scanner for ABAP in Eclipse in Eclipse Marketplace
The plugin searches for the TODO, FIXME, and XXX tasks in the source code in the backend system. That is why you need to install its backend component using abapGit. This component can be found at https://github.com/AkyshBaymuhammedov/ADT_TODO_Plugin_ABAP.
The way the plugin works is very simple. After you select an object in Project Explorer, you have to use the context menu and select Task Scanner ➤ Scan Source Code. You can select packages for the check scan as well.
Once you’re done, the background Eclipse job will run. It will extract the source code of the selected object and check for selected tasks. All the work is done in the backend system and the results are collected in the similar way as in the standard transaction CODE_SCANNER.
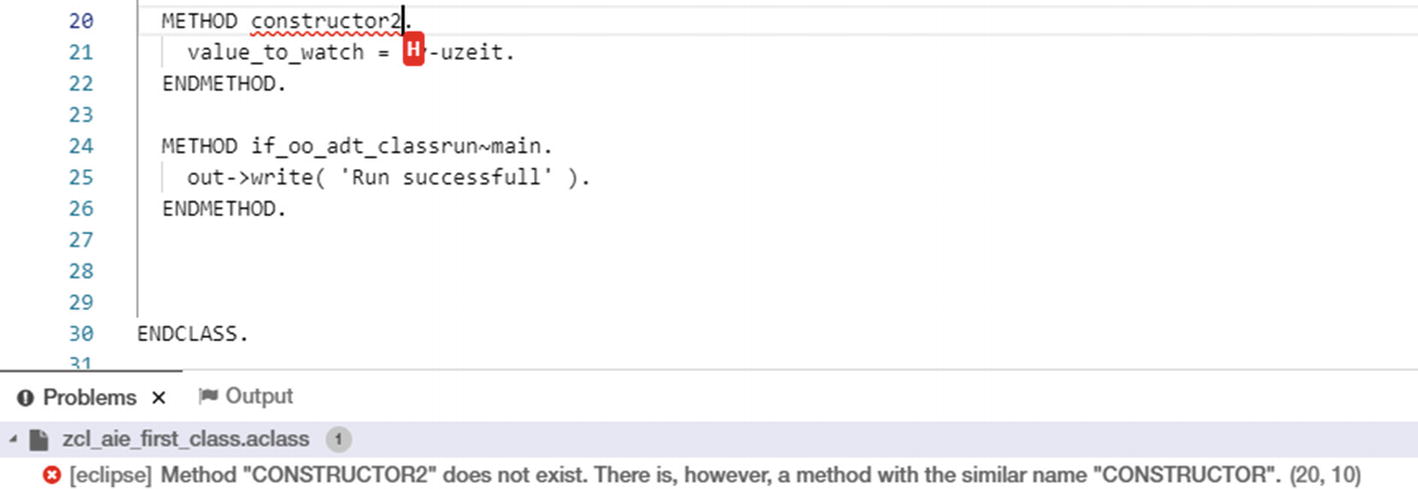
When the results are ready, they will be displayed in the Problems view as an information (Figure 5-73), together with any accompanying comments.
Figure 5-73
TODOs findings for all temporary objects
As it is with standard results in the Problems view, when you double-click one of the results, you will be navigated to the place where the task was found (Figure 5-74). An information marker will be added to the vertical ruler.
Figure 5-74
TODO finding with the marker on the source code
If you use custom markers in your ABAP code, you can add them to the preferences page of the ABAP Task Scanner, using the field Custom Text. You need to select the option Scan the Source Code for Custom text. If you want to scan several objects and keep the results in the Problems view, you need to unselect the Clean Previously Created Markers Before Scanning option.
Figure 5-75
ABAP Task Scanner preferences page
As this is the first plugin from Akysh and its initial version, I believe there are more functionalities that will be added to it. I think it is very good alternative to using ##TODO pragmas and ATC (SLIN) checks and I hope you will enjoy it also.
ABAP Favorites
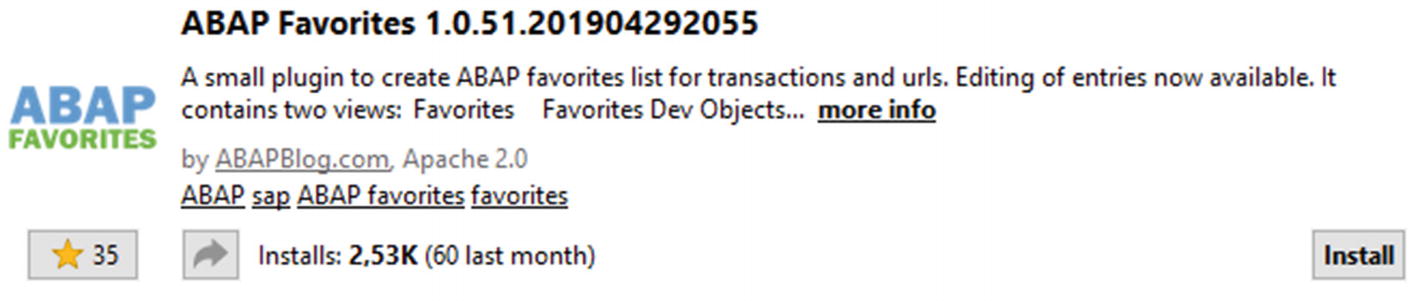
So far I have created three plugins for ADT. The first one was ABAP Favorites. I am very happy that according to the Eclipse Marketplace, it has 2530 installations so far (Figure 5-76). I know that the plugin could be written better, but as for the first touch with Java and Eclipse plugins, it is not too bad.
Figure 5-76
ABAP Favorites in the Eclipse Marketplace
The purpose of this plugin is very simple: it collects and groups favorite objects just as you can do from the SAP GUI user menu. The plugin consists of two views: Favorites and Favorites Dev Objects. The difference between these views is really small, and I will explain them soon.
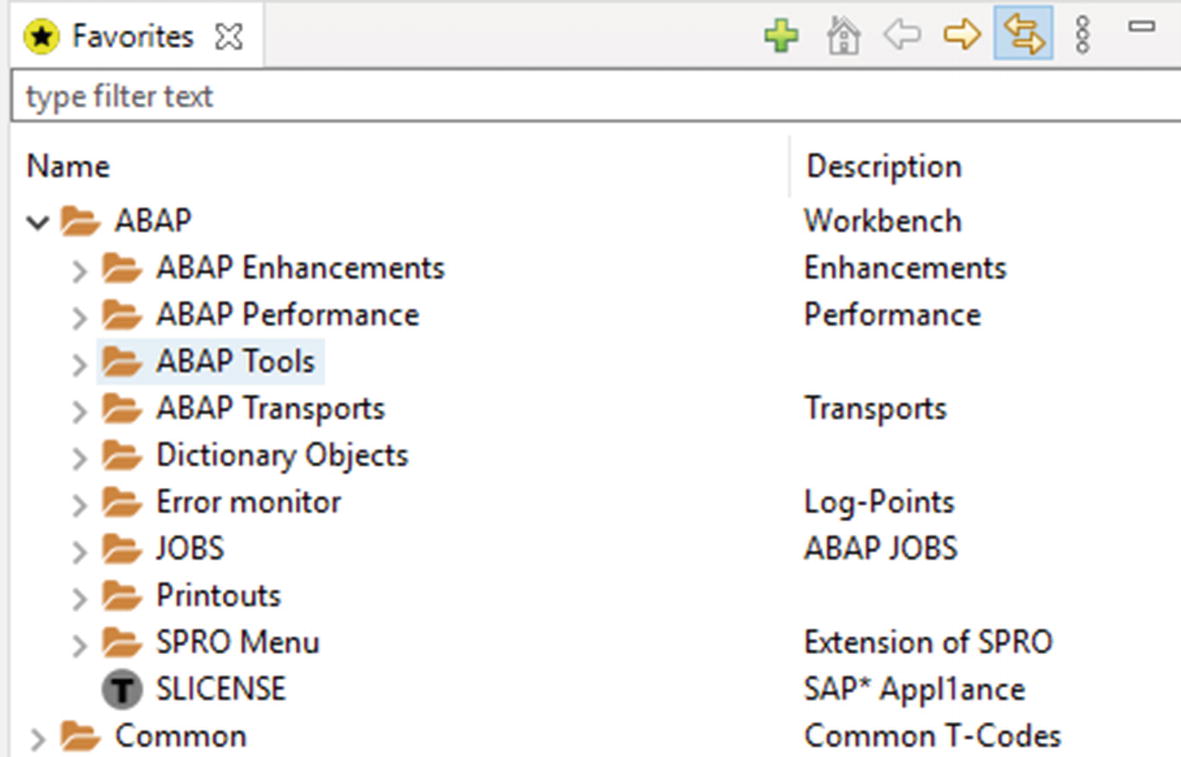
Favorites
The Favorites view is universal (Figure 5-76). It can contain both standard and Development Objects folders. Both types of folders can contain different object types and act a bit differently.
Standard folders work exactly like the user favorites menu from SAP GUI, which means when you store a program or transaction, you can double-click it to run it.
The Development Objects folders work similarly to the Favorites Objects ABAP Repository Tree that I described in previous chapters. So when you double-click one of the favorite objects, it will open in the editor. Additionally, Development Objects folders have a different icon than the standard one, for faster recognition.
Figure 5-77
Favorites view
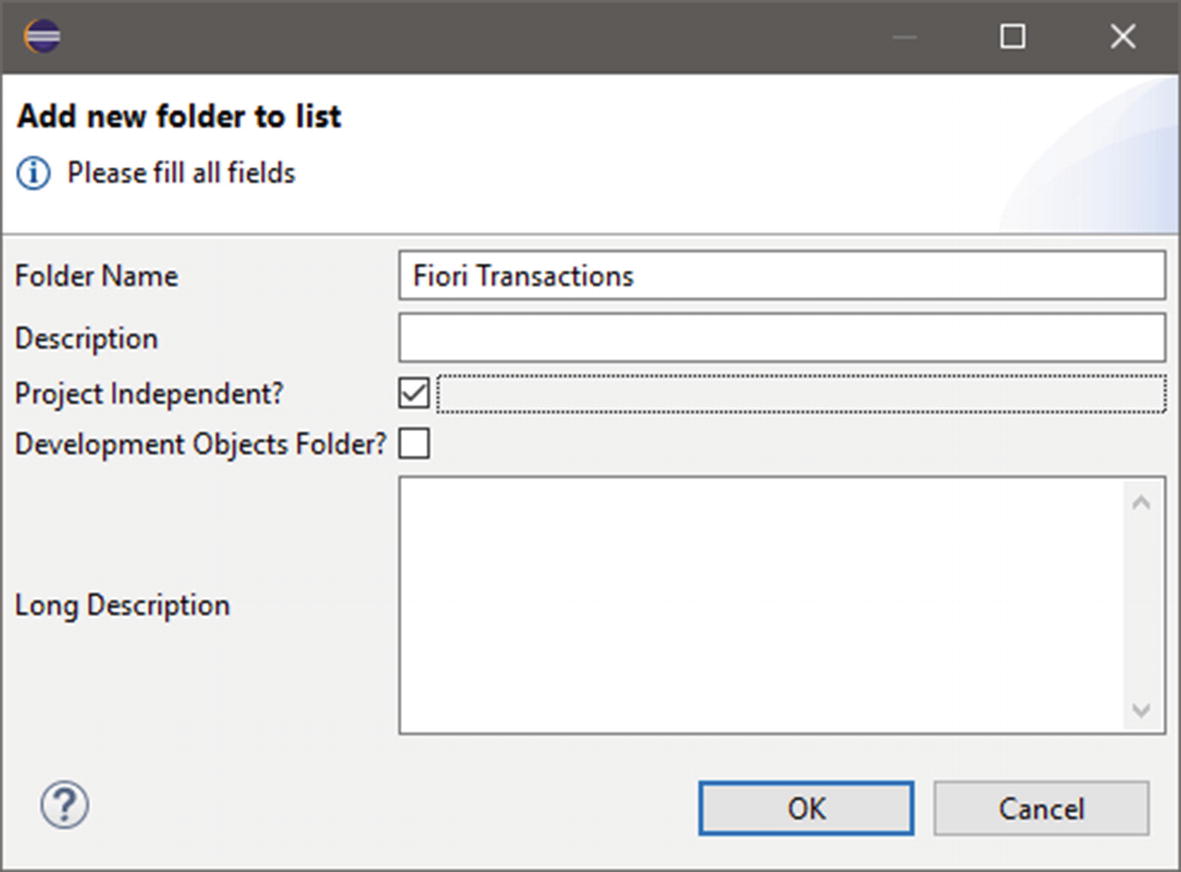
In order to assign an object to favorites, you first need to create a folder using the view toolbar or its context menu. When you create a folder (Figure 5-78), besides the name and descriptions, you can choose if the folder is project independent and the folder type. Using proper names and descriptions can help you filter the view entries.
Figure 5-78
Folder creation window for Favorites
Project independent folders are always visible on the view, while project dependent ones by default are shown only when the active editor is linked to the same project. Additionally, when you double-click the object that is linked to a specific project, it will be always opened in that project, regardless of which one is currently active. This behavior can be helpful when you work with several customer systems and they have totally different sets of transactions or when you work with different types of ABAP systems (CRM, HR, etc.) that have their own specific transaction codes. Currently there is no way to manually select the linked project; it is always currently the active project.
After creating the folder, you can start assigning objects to it. The basic option to do this is to use the context menu on the created folder and choose the selected type of object to create. After that, you will see a favorite object creation window (Figure 5-79). In all cases, besides URLs and ADT links, the name used should correspond to the real object name. For the two other kinds of objects, the name can be anything, as there is another input field to enter the whole URL or ADT link.
Figure 5-79
Popup window for entering new favorite object details
As I mentioned, you can assign specific favorites objects to different folder types. The currently supported objects are as follows:
Standard folder
Transaction
Program
URL
Development Objects Folder
Program
Class
Interface
Function Group
Function Module
Database View
Database Table
CDS View
Message Class
Search Help
Package
ADT Link
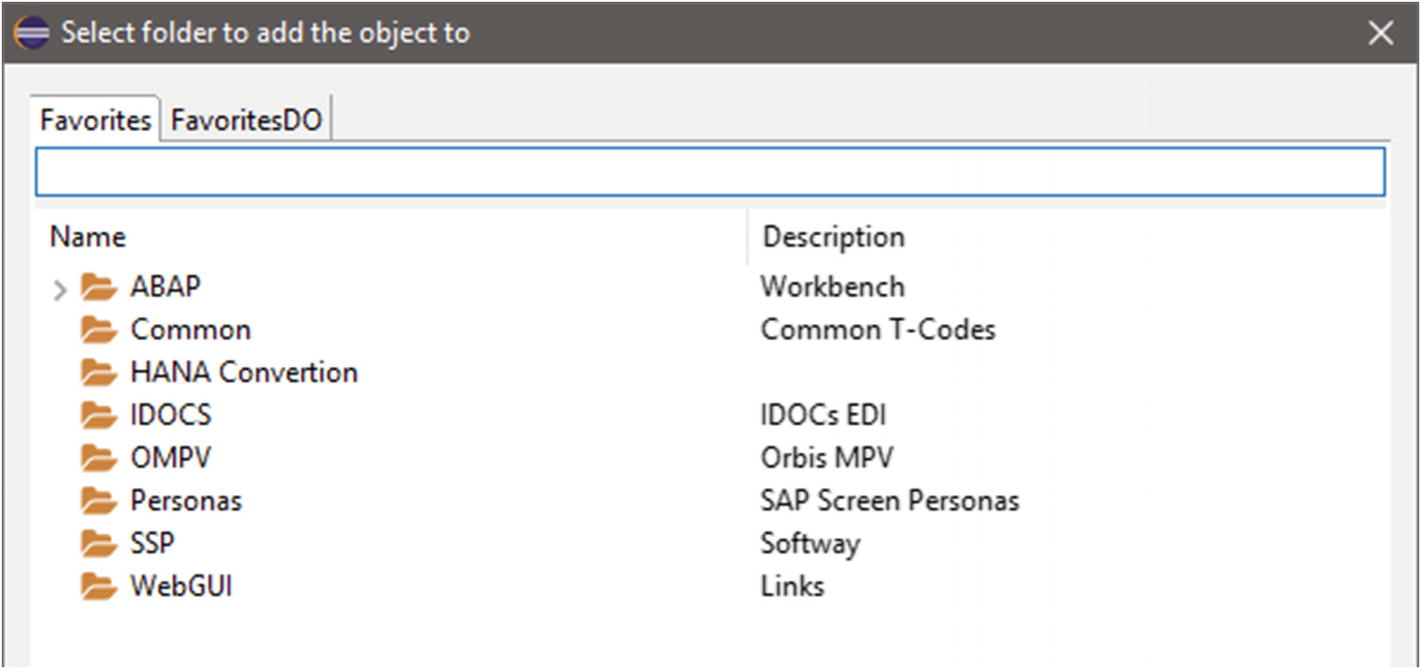
The second way to add objects to favorites is by using the Project Explorer’s or editor’s context menu. After selecting an object, simply choose Add To Favorites. The folder selection dialog will appear, just like in Figure 5-80.
Figure 5-80
Target folder selection for adding objects to Favorites from the context menu
Once you have your favorite object list, you can also open or run the elements in each of the projects that are available in your workspace. To do this, use the context menu on the object and choose Open in Project. The second possibility is to press the Ctrl button while double-clicking the object. In such cases, you will get a popup window, where you can select the project to which the objects should be opened. This functionality was added by Ludwig Stockbauer-Muhr and it is extremely helpful when you have a long list of projects in your workspace.
If you create the object in the wrong folder, you can drag and drop the favorite to the correct place.
Favorites Dev Objects
The second view of the plugin is Favorites Dev Objects (Figure 5-81). It has the same behavior as the Favorites, but with one difference—you can only create Development Objects folders here. This split for two different views was done to enable developers to choose their own way, with one view containing both types of folders or using two views with separation of the folder types. Personally, I use the second approach.
Figure 5-81
Favorites Dev Objects view
Preferences
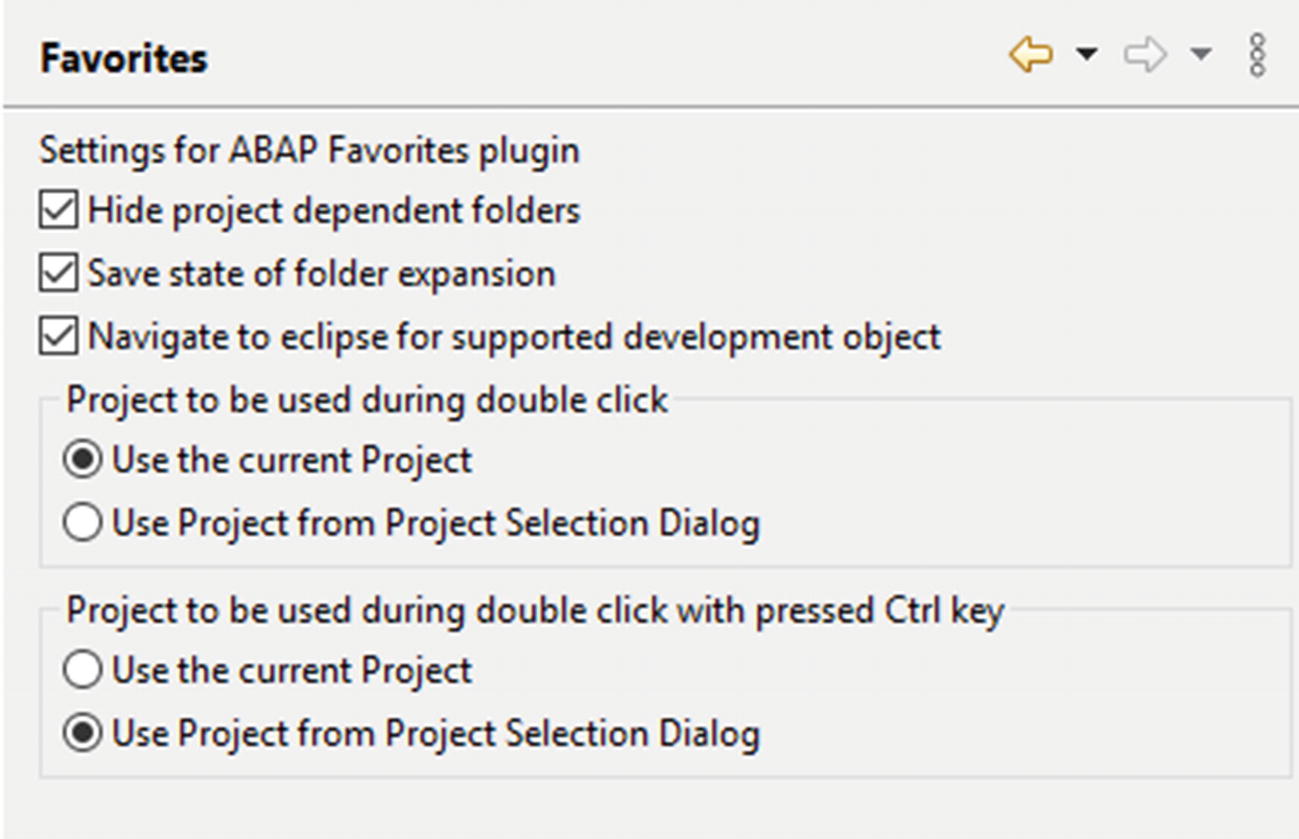
For flexibility of usage, I’ve created a preferences page for Favorites. It can be found in ABAP Development ➤ Favorites (Figure 5-82) and consists of five settings so far.
Figure 5-82
Preferences page for ABAP Favorites
The Hide Project Dependent Folders option is set by default, but when you deselect it, your project-dependent folders will be always visible in the views. However, when you double-click, it will open or run the object in the linked object.
The Save state of folder expansion setting is deselected by default, but if you select it, the expansion of the Favorites tree will be saved when Eclipse is closed and restored during the next start.
The Navigate to Eclipse for Supported Development object is also set by default. When you deselect it, instead of the Eclipse editor, the development objects will be opened in the SAP GUI transactions.
The last two radio buttons groups are responsible for the behavior of double-click and double-click with the Ctrl key pressed. You can decide which behaviors should be the defaults.
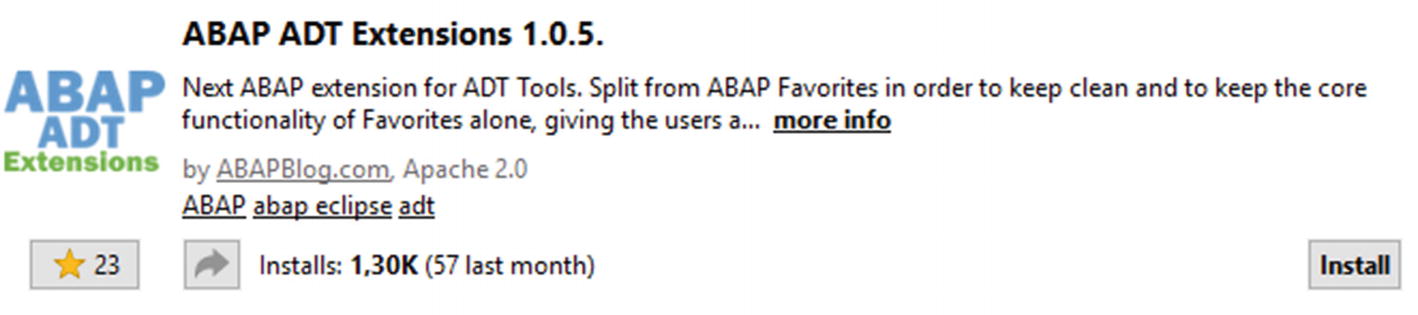
ABAP ADT Extensions
The second of my plugins is called ABAP ADT Extensions (Figure 5-83). At the beginning, it was part of the ABAP Favorites plugin, but after a suggestion, I moved it to a separate plugin in order to keep the Favorites plugin linked to its name.
Figure 5-83
ABAP Extensions on the Eclipse Marketplace
The plugin has two functionalities: changing the project settings and automatic logon (without SSO). Both are described next.
Project Settings
When you create an ABAP project in Eclipse, you are not able to change the client, language, or user. That is the standard behavior of the ADT. If you install ABAP ADT Extensions, you can however update each of these preferences using the Project Explorer’s context menu (Figure 5-84).
Figure 5-84
ABAP Project on the context menu of Project Explorer
When you choose a change action, a proper window will appear, where you can enter a new value for the changed parameter. So far there is no completion of the possible entries, so you need to be sure you are entering them correctly.
Figure 5-85
Logon language change
To change the settings, all currently opened objects from the changed project will be closed. So make sure that you have saved your work before adopting those settings.
Personally, I like the Change of Language option the best, and sometimes I also change the user on the integration systems. This is because I do not like to have several systems as different projects in Eclipse. I keep one project for one system and adjust the logon settings when necessary.
Automatic Logon
When your company does not have single sign-on (SSO) enabled for your SAP systems, starting Eclipse might be boring. Especially if you have dozens of systems to which you need to log in, or maybe you have to remember the passwords to many customer systems. In such cases, I think you will like this part of the ABAP ADT Extensions plugin.
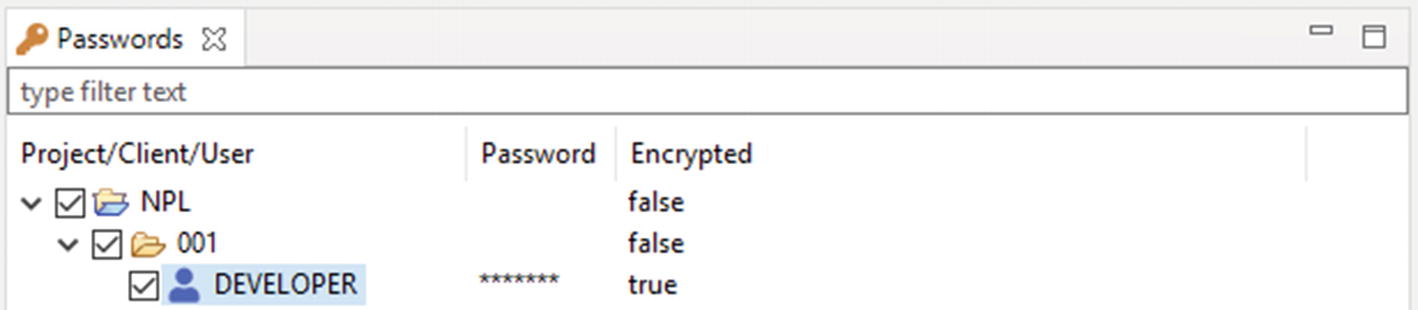
You can now use the Passwords view (Figure 5-86) to store the passwords of each of your projects. When you install the plugin, it will read the workspace’s configuration and add all the projects, clients, and users to the Passwords view.
Figure 5-86
Passwords view
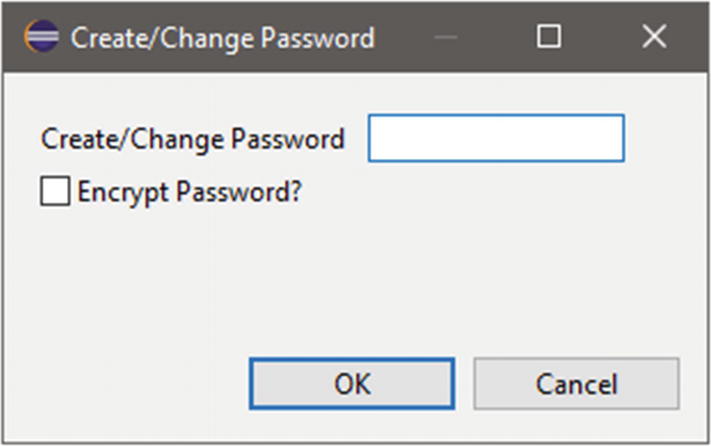
You can then find the system, client, and user for which you want to use automatic logon. You double-click the username and enter a password (Figure 5-87). If your instance is not the developer edition of SAP with the default password for the DEVELOPER user, I recommend you use the Encrypt Password option. That way, no one will be able to read it.
Figure 5-87
Create/Change Password window
The passwords are stored in Secure Storage. You can check this by going to Window ➤ Preferences ➤ General ➤ Security ➤ Secure Storage. Under the storage called com.abapblog.adt.extension.passwords, you will find all your projects and assigned clients and users (Figure 5-88).
Figure 5-88
Secure storage entries of Passwords view
Now each time you start your Eclipse workspace, you will automatically be logged in to these systems. All the logon is happening in the background job, so you might have to wait a bit if you have dozens of system to log on, to. This behavior is visible if you have a slow connection to the backend systems.
This standard behavior of this plugin can be configured using the preference page of Automatic Logon, which can be found in the ABAP Development preferences node (Figure 5-89). You can resign from automatic logon at start or by raising a save password popup for each new created ABAP project. You can also decide if you want to log on to all ABAP systems, not only to those for which you have a password saved. In such a case, if the plugin finds a system that has no password stored, it will raise the standard ADT logon widget.
The Logon Automatically For All Stored Users setting can be useful if you want to restrict the automatic logon at start for only some of the systemclientuser combinations. In this case, the checkboxes found on the Passwords view will tell the plugin which systemclientuser it should log on to automatically.
Figure 5-89
Automatic Logon preferences page
When you disable automatic logon at the start of Eclipse, I suggest you keep the Logon Automatically at Expand of the Project Setting enabled. In this case, whenever you need to log on to a system and save your credentials, it is enough to expand the project folder on Project Explorer. The other option for logging on is to use the same context menu as for project settings, but then select the Logon with Secure Storage (logon only to selected system) or Logon to All SAP Systems option.
ABAP Quick Fix
The last of my plugins that was published so far is called ABAP Quick Fix. It is the youngest of my plugins, but it is doing quite well so far, as you can see in Figure 5-90.
Figure 5-90
ABAP Quick Fix on the Eclipse Marketplace
The idea behind the plugin is to give more Quick Fixes (or Quick Assists) to ABAP. I am a very big fan of Quick Fixes, which you could feel in Chapter 3, but if you have something good, you always want more. That is why I deep-dived into the Quick Assist topic and created a plugin.
The first two proposals were Removing All Comments From the Source Code (leaving ABAPDoc and pseudo-comments) and Removing Comments from Selection. I know the first one may sound strange to you, but I use it from time to time. The second one is very helpful when you work with someone’s code who likes to keep unused parameters of function modules or methods as a comment, or when you just want to get rid of unnecessary comments from a block of code.
The next proposal for selected comments is Translate Selection into English (Figure 5-91). This proposal works only if you have an Internet connection, as it calls an external API to do the translation. What is nice here is that the source language does not matter; it is recognized automatically. When you hover over the proposal, on the right side you will see the translated text. You can use this popup for translation help when investigating programs on integration or productive systems.
Figure 5-91
Translate selection to English
Besides the proposals for comments, you can find a number of code change proposals. All of them were built on regex patterns, but so far I have not noticed any issues with them.
The list of all included Quick Assists is as follows:
Remove all comments (do not delete pseudo-comments and ADT comments)
Remove all comments in a selection (do not delete pseudo-comments and ADT comments)
Replace icon literals with constants
Translate comments into English
Replace READ TABLE with ASSIGN
Replace READ TABLE with REF #( )
Replace READ TABLE with Table Expression
Replace READ TABLE TRANSPORTING NO FIELDS with LINE_EXISTS
When you face problems with the Translate Selection into English proposal, for example because of a slow Internet connection, you can switch to Quick Fix from the Preferences page. You can also decide to hide the Remove All Comments proposal if it bothers you. These settings can be again found as a sub-node of the ABAP Development preferences (Figure 5-92).
Figure 5-92
Quick Fix preferences page
Summary
There are quite a few nice plugins that you can use right now. You learned that most of them were created by SAP Community members as open source projects to which you can contribute, raise issues, or improve requests. It would be nice if you would leave feedback for the creators on the Eclipse Marketplace or the Git repository, so they feel that their work is not in vein.
The next chapter covers basic information about creating own plugins for Eclipse. After reading it, you’ll understand how to create the plugins, what you can extend them, how to test them, and what to do to publish your plugins, so other developers can use them.


 button