
Chapter 10: Performance Enhancement with Redis
Caching is a common technique to boost the performance of an application. Typically, we encounter caching in Content Delivery Network (CDN), HTTP caching, and database caching. Caching speeds up data retrieval performance by minimizing the need to access the underlying slower data storage layer. The caching technologies that we will learn about in this chapter are in-memory caching and distributed caching.
We will cover the following topics in this chapter:
- In-memory caching in ASP.NET Core
- Distributed caching
- Setting up and running Redis
- Implementing Redis in ASP.NET Core 5
Technical requirements
Here is what you need to complete this chapter:
- Visual Studio 2019, Visual Studio for Mac, or Rider
- Redis
- AnotherRedisDeskTopManager, found at https://www.electronjs.org/apps/anotherredisdesktopmanager
Here is the link to the final code of this repository: https://github.com/PacktPublishing/ASP.NET-Core-and-Vue.js/tree/master/Chapter10.
In-memory caching in ASP.NET Core
Using in-memory caching allows developers to store data in the server's resources, specifically in memory. Hence, it helps developers improve performance by removing unnecessary HTTP requests to external data sources.
Implementing in-memory caching in ASP.NET Core is dead simple. However, we will not be applying this in our application. We will opt for a more scalable way of caching, that is, distributed caching. We will just look at the parts of how to implement in-memory caching so you'll have an idea.
Enabling in-memory caching in ASP.NET Core
I repeat, we're not going to apply the code from this section to our application. Anyway, you can enable in-memory caching in ConfigureServices of Startup.cs:
public void ConfigureServices(IServiceCollection services)
{
…
services.AddMemoryCache();
}
The extension method adds a non-distributed in-memory implementation in .NET. You can start using in-memory cache without installing any NuGet packages. Then inject IMemoryCache in a controller that needs caching:
[Route("api/[controller]")]
[ApiController]
public class CacheController : ControllerBase
{
private readonly IMemoryCache _memoryCache;
public CacheController(IMemoryCache memoryCache)
{
_memoryCache = memoryCache;
}
}
After injecting IMemoryCache from the Microsoft.Extensions.Caching.Memory namespace, you can then start using it. The following code block simply checks whether the cake list exists in cache and returns from there if it is true. Otherwise, it will use the service and store the result:
[HttpGet("{cakeName}")]
public async Task<List<string>> Get(string
cakeName)
{
var cacheKey = cakeName.ToLower();
if (!_memoryCache.TryGetValue(cacheKey, out
List<string> cakeList))
{
cakeList = await Service.GetCakeList(
cakeName);
var cacheExpirationOptions =
new MemoryCacheEntryOptions
{
AbsoluteExpiration =
DateTime.Now.AddHours(6),
Priority = CacheItemPriority.
Normal,
SlidingExpiration =
TimeSpan.FromMinutes(5)
};
_memoryCache.Set(cacheKey, cakeList,
cacheExpirationOptions);
}
return cakeList;
}
You will also notice in the code block that there's an expiration in cache. AbsoluteExpiration is for a definite expiration date, while SlidingExpiration is for monitoring the cache's inactive status or merely to put when the last time it was used was.
Although in-memory caching consumes its server's resources, in-memory is faster than distributed caching because it is physically attached to a server, but is not ideal for large and multiple web servers.
A piece of advice here. In-memory caching is not recommended when running multiple instances of one solution because data will not be consistent. There's a better caching method when working on multiple servers, which is discussed in the next section.
Distributed caching
A distributed cache or global cache is a single instance or a group of cache servers with a dedicated network. As the applications hit the distributed cache, if cached data related to the application's request does not exist, the request redirects to the database to query the data. Otherwise, the distributed cache will simply respond with the data needed by the applications.
Here's a diagram of two servers sharing the same Redis instance for distributed caching:

Figure 10.1 – Distributed caching
The preceding diagram shows the requests from two servers hitting a Redis cache first before deciding whether to query from the database or not.
What happens if one of your services crashes? Nothing really because everyone is going to be querying the distributed cache anyway. And because the cache is distributed, it's going to be maintaining the data consistency. We can offload all that information and all that headache to the distributed cache, which is Redis most of the time. Distributed cache is slower than in-memory, but it's more accurate.
One of the reasons why you would need a distributed cache is for higher accuracy. For instance, if a server crashes, it doesn't take its data to its grave. It is more resilient in that way.
Another reason is that you can scale the distributed cache, or your Redis cache, independently. You can scale the Redis instance independently while keeping your web services running properly without using their resources for caching.
Setting up and running Redis
Redis officially supports Linux and macOS but not Windows because the engineers who wrote Redis use BSD Unix. The Windows port was written by some volunteer developers called the Microsoft Open Tech group.
Let's install Redis on Windows, macOS, and Ubuntu. The following are the steps, depending on your OS.
For Windows users
- Go to https://github.com/microsoftarchive/redis/releases/tag/win-3.0.504 to download the installer of Redis for Windows:
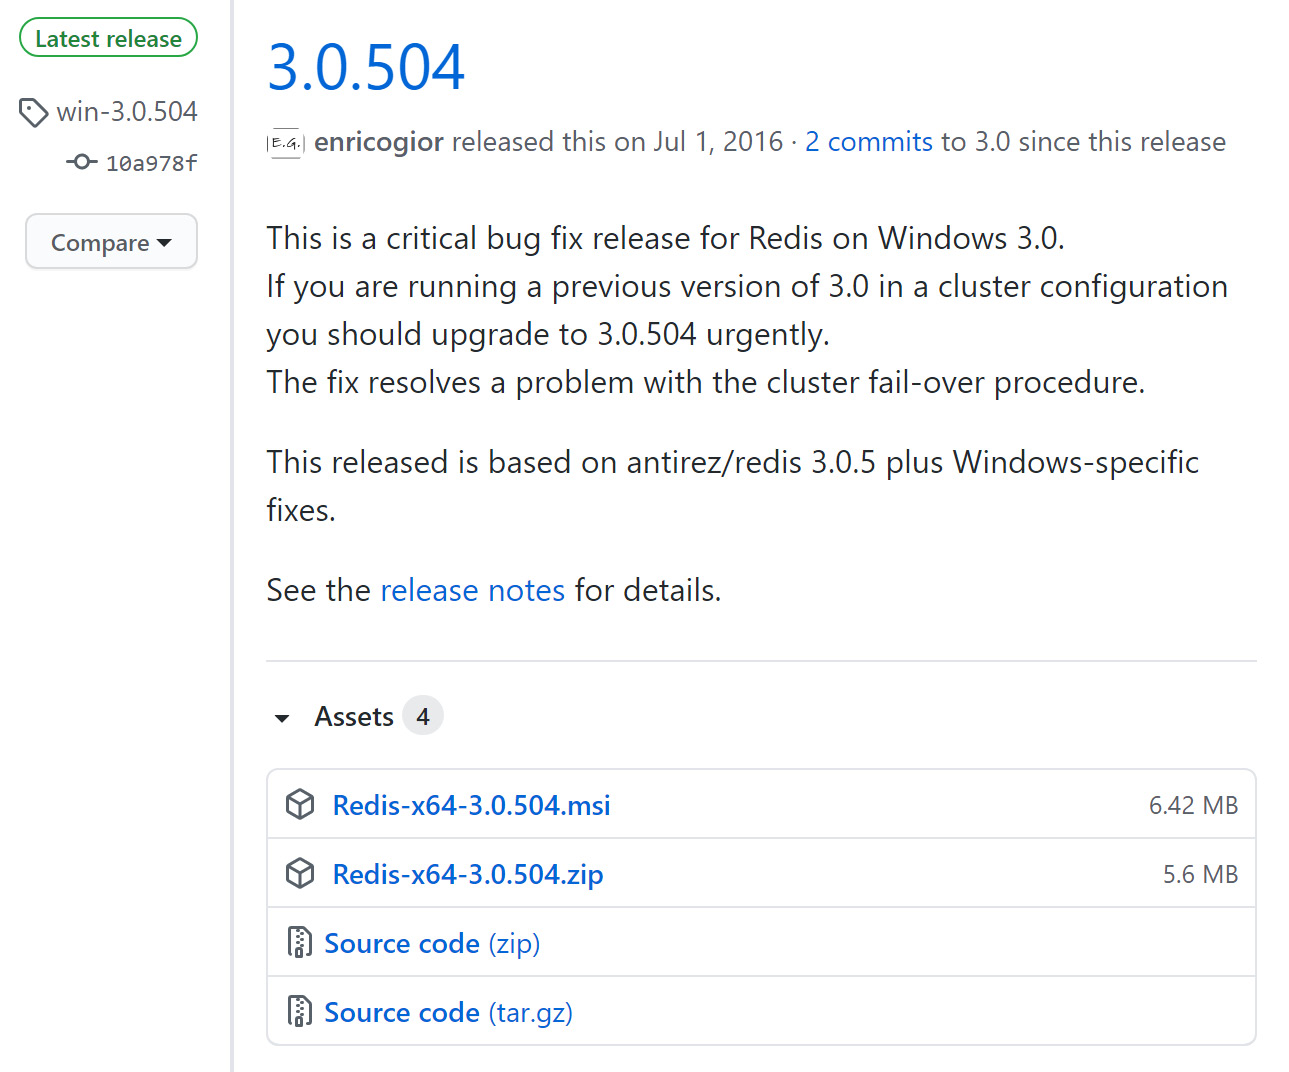
Figure 10.2 – Redis MSI installer and ZIP file
- Download and extract the Redis ZIP. Double-click the redis-server file. Allow the permission dialog box that will pop up by accepting Yes. The Redis instance will automatically start.
To check whether the installation is complete, run the following command in your terminal:
redis-cli ping
redis-cli is the CLI for Redis functionalities. You should see a pong response from the terminal.
The following is another way to install Redis by using the msi file from the download link.
Download and install the msi file by just clicking it. Allow the permission dialog box that will pop up by accepting Yes. The Redis instance will automatically start.
To check whether the installation is complete, run the following command in your terminal:
redis-cli ping
redis-cli is the CLI for Redis functionalities. You should see a pong response from the terminal:
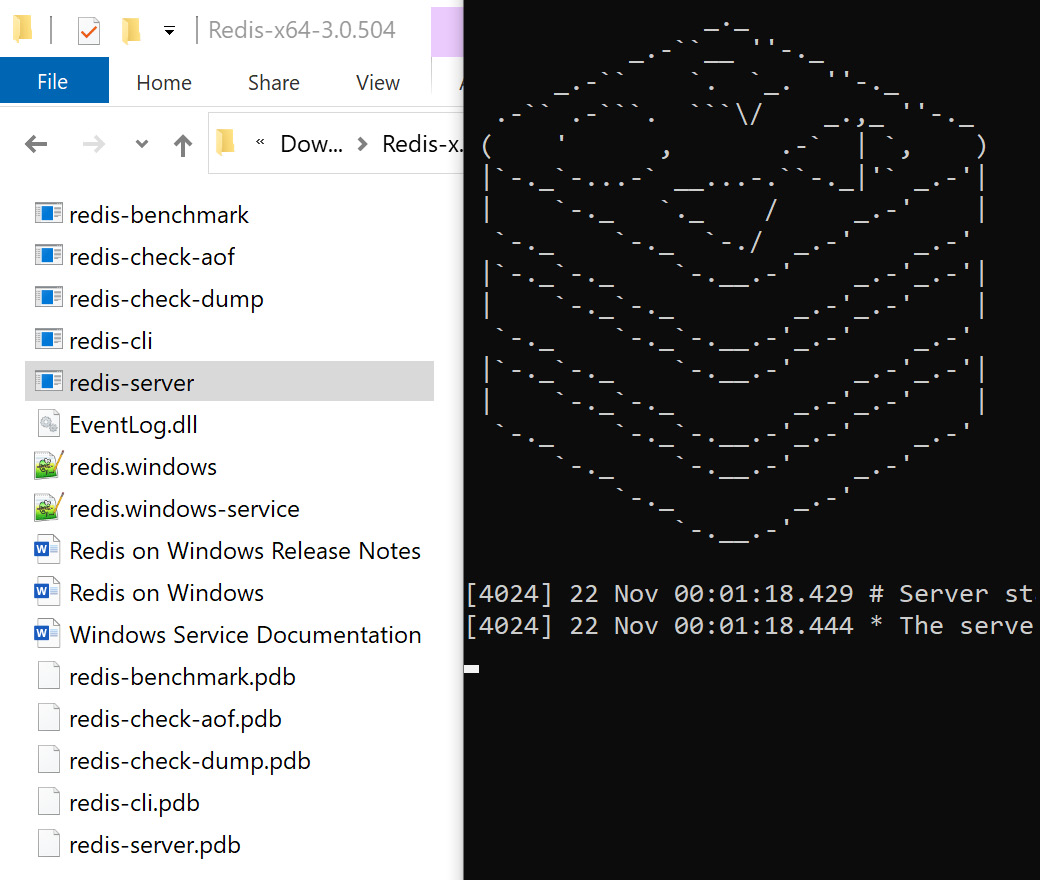
Figure 10.3 – Extracted files and the running Redis instance on the Windows terminal
Here are the extracted files from the ZIP file and CMD in Windows, which shows the Redis image after clicking the redis-server file.
If you are thinking of using the Chocolatey package manager for installing Redis, the URL is broken at the time of writing. I received an error saying 404 not found.
That's it. Redis is now installed on your Windows 10 system.
For macOS users
You can quickly install Redis on Mac using brew:
- First, update brew by running the following command:
brew update
- Next, we install Redis by running the following command:
brew install redis
- Then, let's start the installed Redis by running the following command:
brew services start redis
- Now run the following command to check whether Redis is running and reachable:
redis-cli ping
redis-cli is the CLI for Redis functionalities. You should see a pong response from Terminal.
Note:
The Redis installation using brew works in macOS Big Sur, which has had the biggest change since the original macOS.
That's it. Redis is now installed on your macOS.
For Linux or Ubuntu users
It's simple to install Redis in Linux:
- Let's update our resources first by running the following command:
sudo apt update
- Then install Redis by running the following command:
sudo apt install redis-server
- Now run the following command to check whether Redis is running and reachable:
redis-cli ping
redis-cli is the CLI for Redis functionalities. You should see a pong response from Terminal. That's it. Redis is now installed on your Linux machine.
So, that's installing the Redis server on Windows, macOS, and Linux machines. Now let's use Redis in ASP.NET Core 5.
Implementing Redis in ASP.NET Core
So, let's use the Redis we just installed on our machines by integrating it with our existing ASP.NET Core 5 solution. Here are the steps:
- Go to the Travel.Application project and install these NuGet packages. The following NuGet package is a distributed cache implementation of the Microsoft.Extensions.Caching.StackExchangeRedis namespace using Redis:
Microsoft.Extensions.Caching.StackExchangeRedis
The following NuGet package helps us retrieve the configuration in appsettings.json:
Microsoft.Extensions.Configuration
The following NuGet package is a JSON framework for .NET:
Newtonsoft.Json
- Next, we update the DependencyInjection.cs file of the Travel.Application project with the following code:
namespace Travel.Application
{
public static class DependencyInjection
{
public static IServiceCollection
AddApplication(this IServiceCollection
services, IConfiguration config)
{
services.AddAutoMapper(Assembly.GetExecutingAssembly());
services.AddValidatorsFromAssembly(Assembly.
GetExecutingAssembly());
services.AddMediatR(Assembly.GetExecutingAssembly());
services.AddStackExchangeRedisCache(options =>
{
options.Configuration = config.GetConnectionString("RedisConnection");
var assemblyName = Assembly.
GetExecutingAssembly().GetName();
options.InstanceName = assemblyName.
Name;
});
…
return services;
}
}
}
The dependency injection implementation of the preceding Travel.Application now requires an IConfiguration parameter. We are adding the Redis distributed caching services to the dependency injection container. The name of the connection string is RedisConnection, which we will set up in the next step.
- Next is to go to the Travel.WebApi project and update appsettings.json with the following code:
{
"AuthSettings": {
"Secret": "ReplaceThsWithYour0wnSecretKeyAnd
StoreItInAzureKeyVault!"
},
"ConnectionStrings": {
"DefaultConnection": "Data Source=
TravelTourDatabase.sqlite3",
"RedisConnection": "localhost:6379"
},
"Logging": {
…
},
"MailSettings": {
…
},
"AllowedHosts": "*"
}
- We are adding connection strings for Redis and SQLite3 in this code. Consequently, we are also going to update DependencyInjection.cs of Travel.Data. So, let's update that with the following code:
namespace Travel.Data
{
public static class DependencyInjection
{
public static IServiceCollection
AddInfrastructureData(this IServiceCollection
services, IConfiguration config)
{
services.AddDbContext<ApplicationDbContext>(options
=> options
.UseSqlite(config.GetConnectionString("DefaultConnecti
on")));
…
}
}
}
The dependency injection file of Travel.Data now has the DefaultConnection configuration defined in appsettings.json.
- Another thing to do here is to update the Startup.cs file of Travel.WebApi. Go to that file and update it with the following code:
public void ConfigureServices(IServiceCollection services)
{
services.AddApplication(Configuration);
…
services.AddHttpContextAccessor();
services.AddControllers();
…
}
We are now passing the IConfiguration Configuration in the AddApplication extension method. By doing so, Travel.Application can access RedisConnection in appsettings.json.
- Now let's use Redis to cache the response of the localhost:5001/api/v1.0/TourLists endpoint to its consumers sending a GET request. To do this, we will update the handler of api/v1.0/TourLists for the GET request, which is GetToursQuery.
GetToursQuery can be found at Travel.Application/TourLists/Queries/GetTours/GetTours/GetToursQuery.cs. Update GetToursQuery.cs with the following code:
…
using Microsoft.Extensions.Caching.Distributed;
using Newtonsoft.Json;
…
namespace Travel.Application.TourLists.Queries.GetTours
{
public class GetToursQuery : IRequest<ToursVm> { }
public class GetToursQueryHandler :
IRequestHandler<GetToursQuery, ToursVm>
{
private readonly IApplicationDbContext
_context;
private readonly IMapper _mapper;
private readonly IDistributedCache
_distributedCache;
public GetToursQueryHandler(
IApplicationDbContext context, IMapper
mapper, IDistributedCache distributedCache)
{
_context = context;
_mapper = mapper;
_distributedCache = distributedCache;
}
public async Task<ToursVm> Handle(
GetToursQuery request, CancellationToken
cancellationToken)
{
…
}
}
}
We are injecting IDistributedCache from the Microsoft.Extensions.Caching.Distributed namespace into the constructor of GetToursQueryHandler. We will use distributedCache inside the Handle method's logic, which I truncated for readability purposes.
The following code is the updated business logic of the Handle method:
public async Task<ToursVm> Handle(GetToursQuery
request, CancellationToken cancellationToken)
{
const string cacheKey = "GetTours";
ToursVm tourLists;
string serializedTourList;
var redisTourLists = await
_distributedCache.GetAsync(cacheKey,
cancellationToken);
if (redisTourLists == null)
{
tourLists = new ToursVm
{
Lists = await _context.TourLists
.ProjectTo<TourListDto>(_mapper.
ConfigurationProvider)
.OrderBy(t => t.City).
ToListAsync(
cancellationToken)
};
serializedTourList =
JsonConvert.SerializeObject(tourLists);
redisTourLists =
Encoding.UTF8.GetBytes(serializedTourList);
var options = new DistributedCacheEntryOptions()
.SetAbsoluteExpiration(DateTime.Now.AddMinutes(5))
.SetSlidingExpiration(TimeSpan.FromMinutes(1));
await _distributedCache.SetAsync(
cacheKey,redisTourLists, options, cancellationToken);
return tourLists;
}
serializedTourList = Encoding.UTF8.GetString(
redisTourLists);
tourLists = JsonConvert
.DeserializeObject<ToursVm>(serializedTourList);
return tourLists;
}
The preceding block of code is the updated logic of the GetToursQuery handler. We have "GetTours" as cacheKey, and we are going to use that to retrieve data from the cache and save data from the cache. cacheKey will be used for the lookup when searching for a particular cache.
We are also checking whether there is an existing cache or not through _distributedCache.GetAsync. If there is no data, we serialize the tourLists object and save it in the cache, _distributedCache.SetAsync, before returning tourLists. We are caching the data in Redis, but we are putting an expiration. SetAbsoluteExpiration sets an absolute expiration time while SetSlidingExpiration sets how long the entry can be inactive.
If there's data, we return a deserialized tourLists.
Now, before we move on to Vue.js in the next chapter, Chapter 11, Vue.js Fundamentals in a Todo App, let's clean up the Startup.cs file because it is starting to look messy.
What we are going to do is move the Swagger configuration into its directory and files, and then arrange all services and remove all unnecessary using statements.
- So, go to Travel.WebApi and create a folder named Extensions in the root directory of the project. Create two C# files named AppExtension.cs and Services.Extensions.cs. We are moving the Swagger code from Startup.cs to these two files like so:
// AppExtension.cs
…
namespace Travel.WebApi.Extensions
{
public static class AppExtensions
{
public static void UseSwaggerExtension(this
IApplicationBuilder app,
IApiVersionDescriptionProvider provider)
{
app.UseSwagger();
app.UseSwaggerUI(c =>
{
...
});
}
}
}
Here, we migrated two middleware from the Configure method, namely app.UserSwagger() and app.UseSwaggerUI(), to the AppExtension.cs file.
// ServicesExtensions.cs
…
namespace Travel.WebApi.Extensions
{
public static class ServicesExtensions
{
public static void AddApiVersioningExtension(
this IServiceCollection services)
{
services.AddApiVersioning(config =>
{
...
});
}
public static void
AddVersionedApiExplorerExtension(this
IServiceCollection services)
{
services.AddVersionedApiExplorer(options
=>
{
...
});
}
public static void AddSwaggerGenExtension(this
IServiceCollection services)
{
services.AddSwaggerGen(c =>
{
...
});
}
}
}
Here, we migrated the services.AddApiVersion(), services.AddVersionedApiExplorer(), and services.AddSwaggerGen() services from the ConfigureServices method to ServicesExtensions.cs.
- After moving the code to the Extensions directory, let's refactor Startup.cs by calling the extension methods that we created like so:
public void ConfigureServices(IServiceCollection services)
{
services.AddApplication(Configuration);
services.AddInfrastructureData(Configuration);
services.AddInfrastructureShared(Configuration);
services.AddInfrastructureIdentity(Configuration);
services.AddHttpContextAccessor();
services.AddControllers();
services.AddApiVersioningExtension();
services.AddVersionedApiExplorerExtension();
services.AddSwaggerGenExtension();
services.AddTransient<IConfigureOptions<SwaggerGenOpti
ons>, ConfigureSwaggerOptions>();
}
Now, let's see the middleware of our application:
public void Configure(IApplicationBuilder app,
IWebHostEnvironment env,
IApiVersionDescriptionProvider provider)
{
if (env.IsDevelopment())
{
app.UseDeveloperExceptionPage();
app.UseSwaggerExtension(provider);
}
app.UseHttpsRedirection();
app.UseRouting();
app.UseMiddleware<JwtMiddleware>();
app.UseAuthorization();
app.UseEndpoints(endpoints =>
{
endpoints.MapControllers();
});
}
The preceding code is the refactored block of middleware of Startup.cs. The middleware is now cleaner than it was.
Again, remove the unused using statements that you'll find in the Startup.cs file.
Let's run the application to see whether Redis is working correctly:
- Send a GET request to /api/v1.0/TourLists using Postman. Don't forget to include your JWT. The following screenshot shows the response time of the first request to the ASP.NET Core 5 application, which is more than 2 seconds:
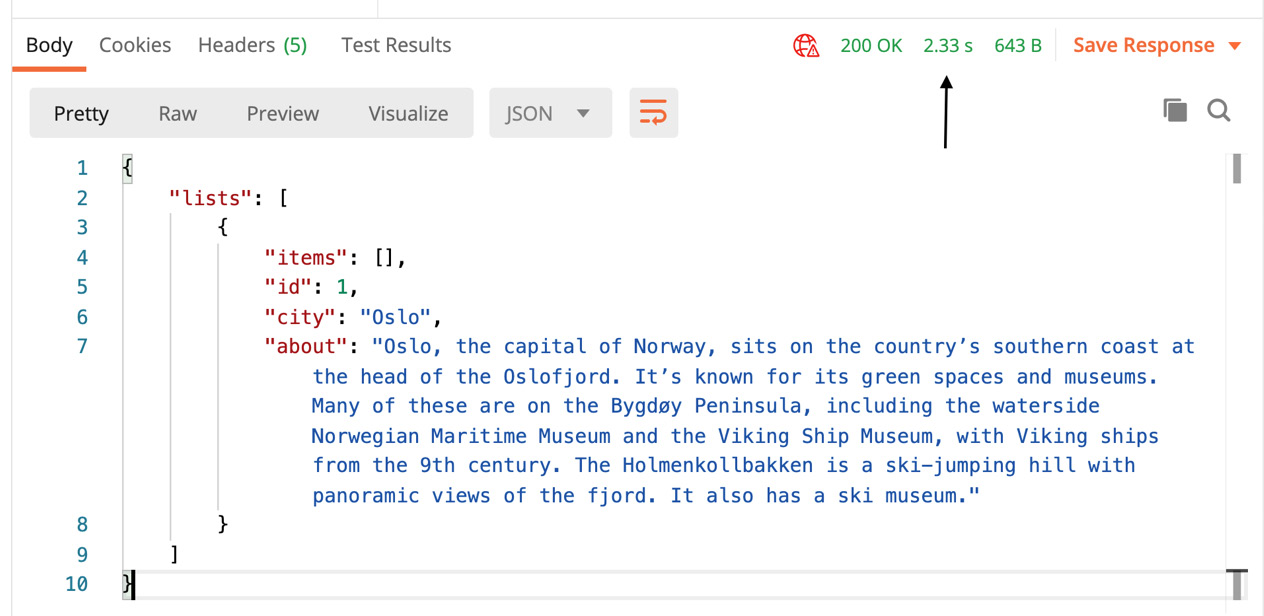
Figure 10.4 – API response without Redis cache
- Let's send the same request to the same API to see whether the response time will be shorter:

Figure 10.5 – API response with Redis cache
The preceding screenshot shows the shorter response time, 33 milliseconds, of the second GET request due to the cache that was stored during the first GET request to the same API.
- To see the cache in Redis, you can use a Redis manager tool. Here's a free Redis manager tool that you can download and install, https://www.electronjs.org/apps/anotherredisdesktopmanager, and the paid version is found at https://rdm.dev/. RDM is a paid app for Windows and macOS users, but not for Linux users.
- After running the Redis manager tool, send a new request to the /api/v1.0/TourLists API and check your Redis manager tool.
Let's check the cache in Windows 10 v20H2, macOS Pro Big Sur, and Ubuntu v20.10 Groovy Gorilla. These OSes are the latest versions at the time of writing this book.
The following screenshot shows AnotherRedisDeskTopManager running on Windows:

Figure 10.6 – Another Redis DeskTop Manager on Windows
The following screenshot shows AnotherRedisDeskTopManager running on macOS:

Figure 10.7 – Another Redis DeskTop Manager on macOS
The following screenshot shows the Redis GUI running on Ubuntu:
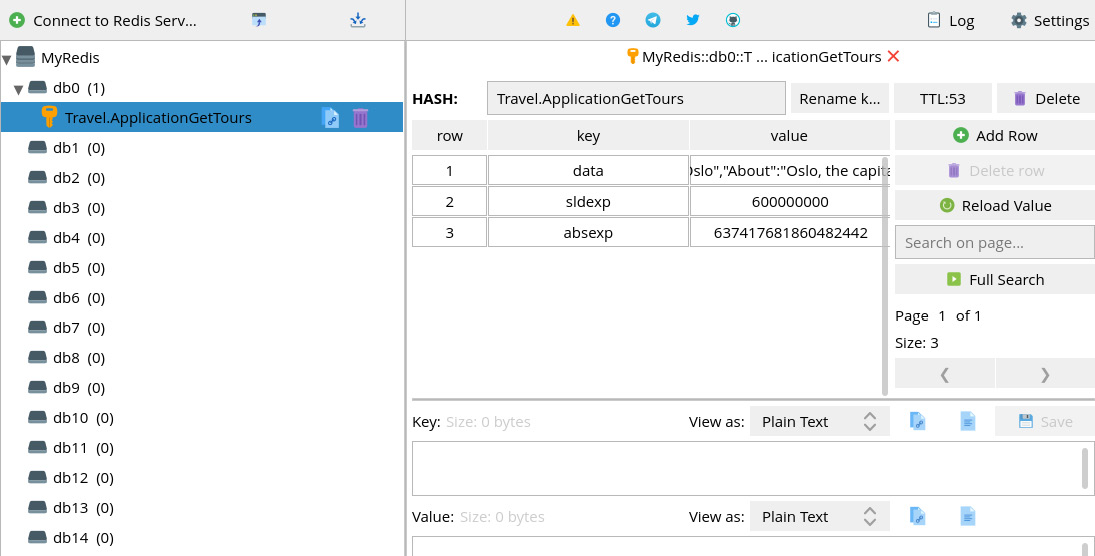
Figure 10.8 – Redis GUI on Ubuntu
If you don't like any dashboard or GUI for Redis, you can also use a CLI command to debug or monitor every command processed by your Redis server. Run the following command to enable monitoring:
redis-cli monitor
The following screenshot shows you how your request would look in the command line after running redis-cli monitor:
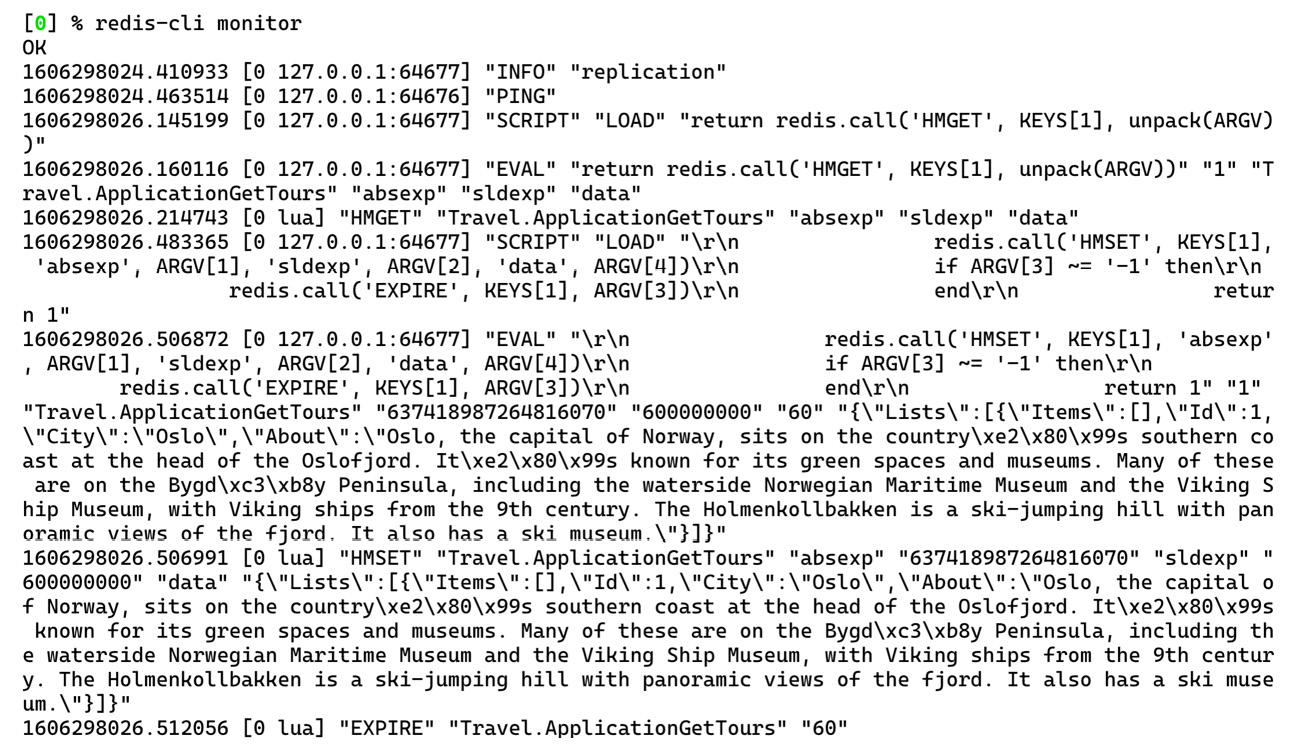
Figure 10.9 – redis-cli monitor
Code update
Next, we update some of our code in the application and change the naming convention, which is mostly trivial for the frontend preparation.
The following are the paths that have projects, directories, and files that you need to update. So, go to the GitHub repo of this chapter and write what's missing in your file, or you can copy the code from GitHub and paste it into your code.
Again, these are simple changes in the naming convention, new properties, and classes.
Travel.Domain/Entities/TourList.cs:
public TourList()
{
TourPackages = new List<TourPackage>();
}
public IList<TourPackage> TourPackages { get; set; }
The preceding code is updating Tours in the TourList class.
Travel.Domain/Entities/User.cs:
public string Email { get; set; }
The preceding code is updating Username in the User class.
Travel.Application/Dtos/Tour/TourPackageDto.cs:
…
public string WhatToExpect { get; set; }
public float Price { get; set; }
public string MapLocation { get; set; }
public void Mapping(Profile profile)
{
profile.CreateMap<TourPackage,
TourPackageDto>()
.ForMember(tpDto =>
tpDto.Currency, opt =>
opt.MapFrom(tp =>
(int)tp.Currency));
}
The preceding code is updating the TourPackageDto class.
Travel.Application/Dtos/Tour/TourListDto.cs:
public TourListDto()
{
TourPackages = new List<TourPackageDto>();
}
public IList<TourPackageDto> TourPackages { get; set; }
public string Country { get; set; }
The preceding code is updating the TourListDto class.
Travel.Application/Dtos/User/AuthenticateRequest.cs:
public string Email { get; set; }
The preceding code is updating Username in the AuthenticateRequest class.
Travel.Application/Dtos/User/AuthenticateResponse.cs:
public string Email { get; set; }
…
Email = user.Email;
The preceding code is updating Username in AuthenticateResponse.
Travel.Application/TourLists/Commands/CreateTourList/CreateTourListCommand.cs:
var entity = new TourList { City = request.City, Country =
request.Country, About = request.About };
The preceding code is adding properties in CreateTourListCommand.
Travel.Application/TourLists/Commands/UpdateTourList/UpdateTourListCommand.cs:
entity.Country = request.Country;
entity.About = request.About;
The preceding code is adding properties in UpdateTourListCommand.
Create a new folder inside the TourPackages directory and name it Queries. Inside the Queries, create two new C# files and name them GetTourPackagesQuery.cs and GetTourPackagesValidator.cs.
Travel/Application/TourPackages/Queries/GetTourPackagesQueryValidator.cs:
using System.Collections.Generic;
… // for brevity, please see the code in the Github
using Travel.Application.Dtos.Tour;
namespace Travel.Application.TourPackages.Queries
{
public class GetTourPackagesQuery : IRequest
<List<TourPackageDto>>
{
public int ListId { get; set; }
}
public class GetTourPackagesQueryHandler :
IRequestHandler<GetTourPackagesQuery, List<
TourPackageDto>>
{
private readonly IApplicationDbContext _context;
private readonly IMapper _mapper;
public GetTourPackagesQueryHandler(
IApplicationDbContext context, IMapper mapper)
{
_context = context;
_mapper = mapper;
}
public Task<List<TourPackageDto>>
Handle(GetTourPackagesQuery request,
CancellationToken cancellationToken)
{
var tourPackages = _context.TourPackages
.Where(tp => tp.ListId == request.ListId)
.OrderBy(tp => tp.Name)
.ProjectTo<TourPackageDto>(_mapper.
ConfigurationProvider)
.ToListAsync(cancellationToken);
return tourPackages;
}
}
}
There is nothing new in the preceding code. The new file simply adds a query for getting a tour package.
Travel.Application/TourPackages/Queries/GetTourPackagesQueryValidator.cs:
using FluentValidation;
namespace Travel.Application.TourPackages.Queries
{
public class GetTourPackagesQueryValidator :
AbstractValidator<GetTourPackagesQuery>
{
public GetTourPackagesQueryValidator()
{
RuleFor(x => x.ListId)
.NotNull()
.NotEmpty().WithMessage("ListId is
required.");
}
}
}
The preceding lines of code add a new validator before querying a tour package.
Travel.Identity/Services/UserService.cs:
Email = "[email protected]",
var user = _users.SingleOrDefault(u => u.Email ==
model.Email &&
…
u.Password == model.Password);
…
Subject = new ClaimsIdentity(new[] { new Claim("sub",
user.Id.ToString()), new Claim("email", user.Email) }),
The preceding code is updating the UserService class.
Travel.Identity/Helpers/JwtMiddleware.cs:
var userId = int.Parse(jwtToken.Claims.First(c => c.Type ==
"sub").Value);
The preceding code is updating the AttachUserToContext method of the JwtMiddleware class.
Travel.WebApi/Controllers/v1/TourPackagesController.cs:
[HttpGet]
public async Task<ActionResult<List<TourPackageDto>>>
GetTourPackages([FromQuery] GetTourPackagesQuery query)
{
return await Mediator.Send(query);
}
The preceding code is a new Action method of TourPackagesController.
Now, after the updating of the code in your repository, it's time to challenge yourself.
Exercise/practice time:
To enforce your learning here and before proceeding to the frontend part, I'd like you to create an ASP.NET Core 5 application. The application should use all the things you have learned in this book so far, such as clean architecture, CQRS, API versioning, OpenAPI, and distributed caching, without authentication or with authentication, or using an Identity as a Service such as Auth0 to save you time. An application that I can think of right now is an online store of video games. The entities could be Developer, Game, GameReviews, Genre, Publisher, and so on. This exercise is an easy task that you will be able to finish within a week. I know that you can do it. Good luck!
OK, so let's summarize what you have learned in this chapter.
Summary
You have finally reached the end of this chapter, and you have learned a lot of stuff. You have learned that in-memory caching is faster than distributed caching because it's closer to the server. However, it's not suitable for multiple instances of the same server.
You've learned that distributed caching solves in-memory caching in multiple instances because it provides a single source of truth of cached data for all the server instances.
You've learned how to install and run Redis on PCs, macOS, and Linux machines and how to integrate Redis into an ASP.NET Core Web API to improve the application's performance and bring a better user experience to the end users.
In the next chapter, you are going to build your first single-page application using Vue.js 3.