
4. Adding Animation
• Animate the position, scale, and rotation of objects
• Adjust the pacing and timing of your animation
• Animate transparency and special effects
• Change the path of an object’s motion
• Create animation inside symbols
• Change the easing of the motion
• Animate in 3D space
This lesson will take approximately two hours to complete. If needed, remove the previous lesson folder from your hard drive and copy the Lesson04 folder onto it.
Use Flash Professional CS6 to change almost any aspect of an object—position, color, transparency, size, rotation, and more—over time. Motion tweening is the basic technique of creating animation with symbol instances.
Getting Started
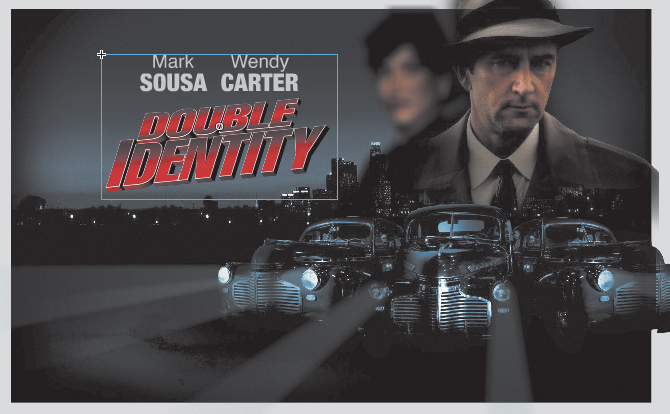
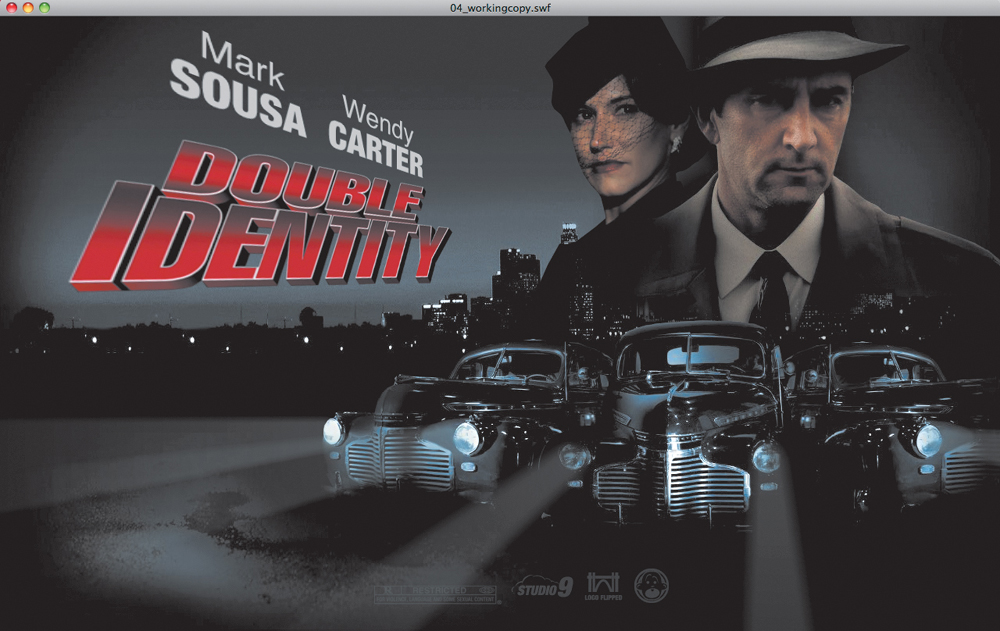
Start by viewing the finished movie file to see the animated title page that you’ll create in this lesson.
1. Double-click the 04End.html file in the Lesson04/04End folder to play the animation in a browser.
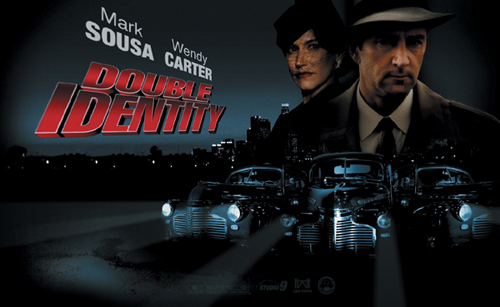
The project is an animated splash page for an imaginary soon-to-be-released motion picture. In this lesson, you’ll use motion tweens to animate several components on the page: the cityscape, the main actors, several old-fashioned cars, and the main title.
2. Close the 04End.html file.
3. Double-click the 04Start.fla file in the Lesson04/04Start folder to open the initial project file in Flash. This file is partially completed and already contains many of the graphic elements imported into the Library for you to use.
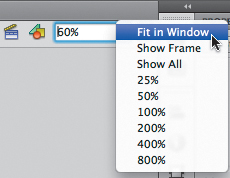
4. From the view options above the Stage, choose View > Magnification > Fit in Window so that you can see the entire Stage on your computer screen.
5. Choose File > Save As. Name the file 04_workingcopy.fla, and save it in the 04Start folder.
Saving a working copy ensures that the original start file will be available if you want to start over.
About Animation
Animation is the movement, or change, of objects through time. Animation can be as simple as moving a box across the Stage from one frame to the next. It can also be much more complex. As you’ll see in this lesson, you can animate many different aspects of a single object. You can change an object’s position on the Stage, change its color or transparency, change its size or its rotation, and even animate the special filters that you saw in the previous lesson. You also have control over an object’s path of motion, and even its easing, which is the way an object accelerates or decelerates.
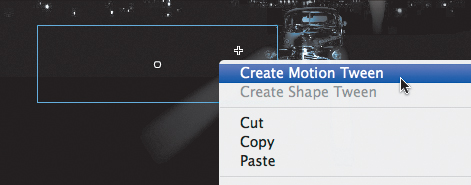
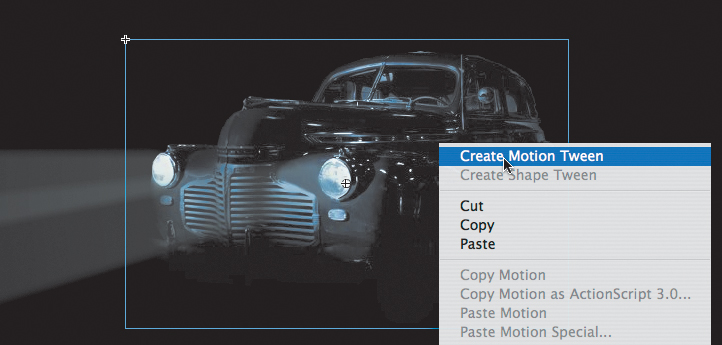
In Flash, the basic workflow for animation goes like this: Select an object on the Stage, right-click/Ctrl-click, and choose Create Motion Tween. Move the red playhead to a different point in time and move the object to a new position. Flash takes care of the rest.
Motion tweens create animation for changes in position on the Stage and for changes in size, color, or other attributes. Motion tweens require you to use a symbol instance. If the object you’ve selected is not a symbol instance, Flash will automatically ask to convert the selection to a symbol. Flash also automatically separates motion tweens on their own layers, which are called Tween layers. There can be only one motion tween per layer without any other element in the layer. Tween layers allow you to change various attributes of your instance at different key points over time. For example, a spaceship could be on the left side of the Stage at the beginning keyframe and at the far-right side of the Stage at an ending keyframe, and the resulting tween would make the spaceship fly across the Stage.
The term “tween” comes from the world of classic animation. Senior animators would be responsible for drawing the beginning and ending poses for their characters. The beginning and ending poses were the keyframes of the animation. Junior animators would then come in and draw the “in-between” frames, or do the “in-betweening.” Hence, “tweening” refers to the smooth transitions between keyframes.
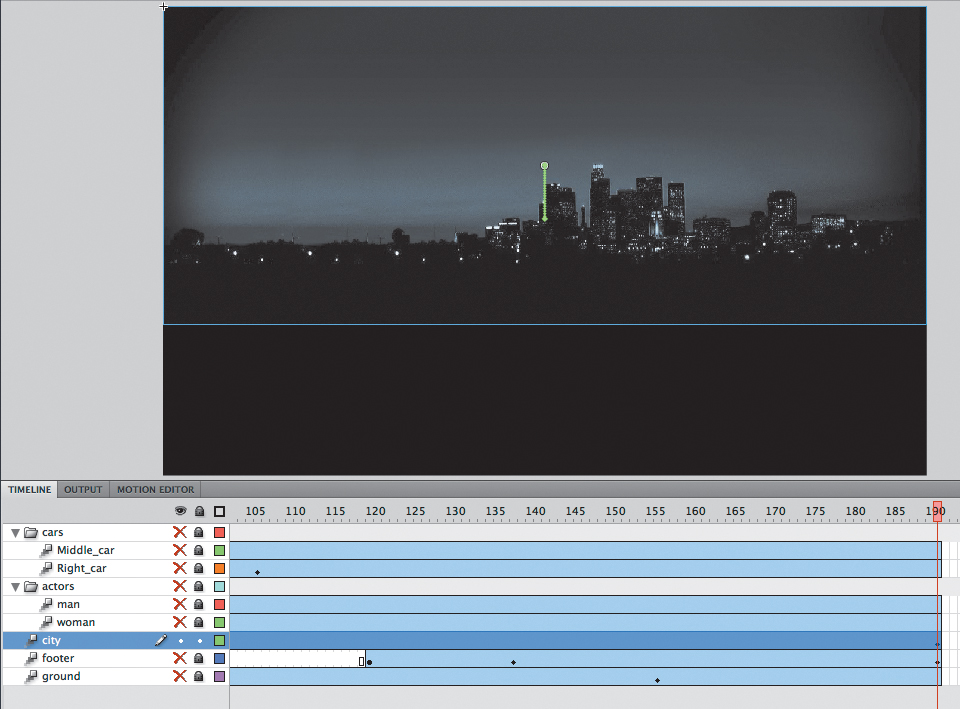
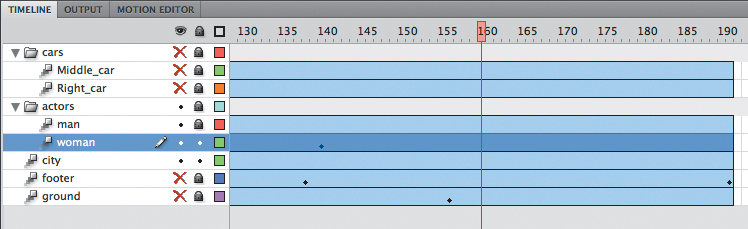
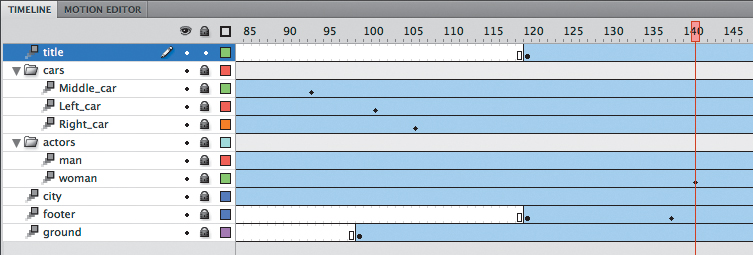
Understanding the Project File
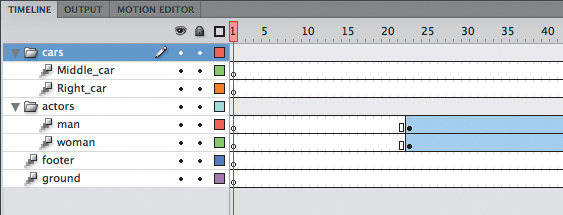
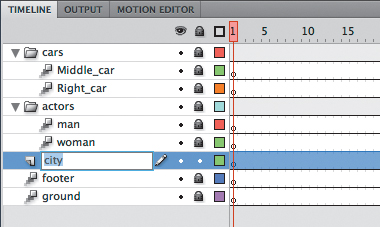
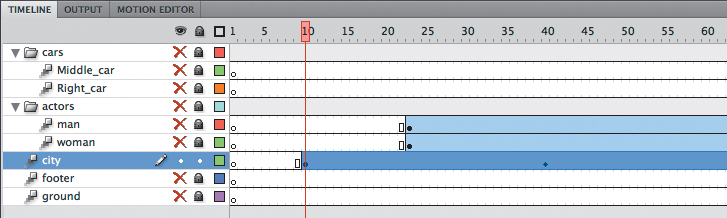
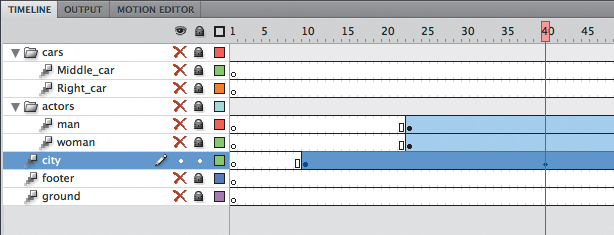
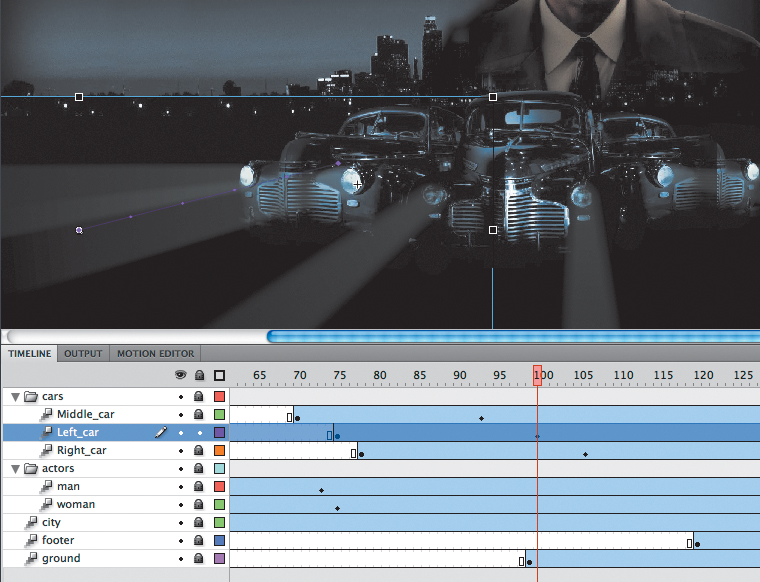
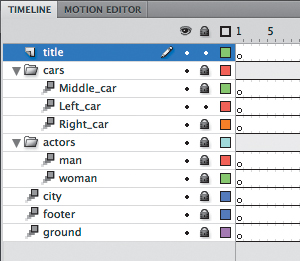
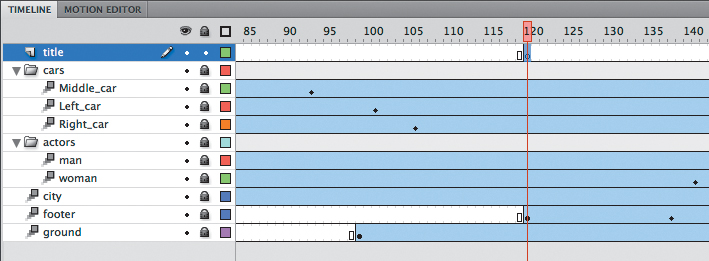
The 04Start.fla file contains a few of the animated elements already or partially completed. Each of the six layers—man, woman, Middle_car, Right_car, footer, and ground—contains an animation. The man and woman layers are in a folder called actors, and the Middle_car and Right_car layers are in a folder called cars.
You’ll be adding more layers to add an animated cityscape, refining the animation of one of the actors, as well as adding a third car and a 3D title. All the necessary graphic elements have been imported into the Library panel. The Stage is set at a generous 1280 pixels by 787 pixels to fill up a high-resolution monitor, and the Stage color is black. You might need to choose a different view option to see the entire Stage. Choose View > Magnification > Fit in Window from the view options at the top-right corner of the Stage to view the Stage at a magnification percentage that fits your screen.
Animating Position
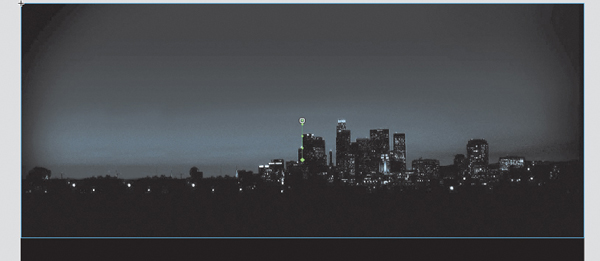
You’ll start this project by animating the cityscape. It will begin slightly lower than the top edge of the Stage, and then rise slowly until its top is aligned with the top of the Stage.
1. Lock all the existing layers so you don’t accidentally modify them. Create a new layer above the footer layer and rename it city.
2. Drag the bitmap image called cityBG.jpg from the bitmaps folder in the Library panel to the Stage.
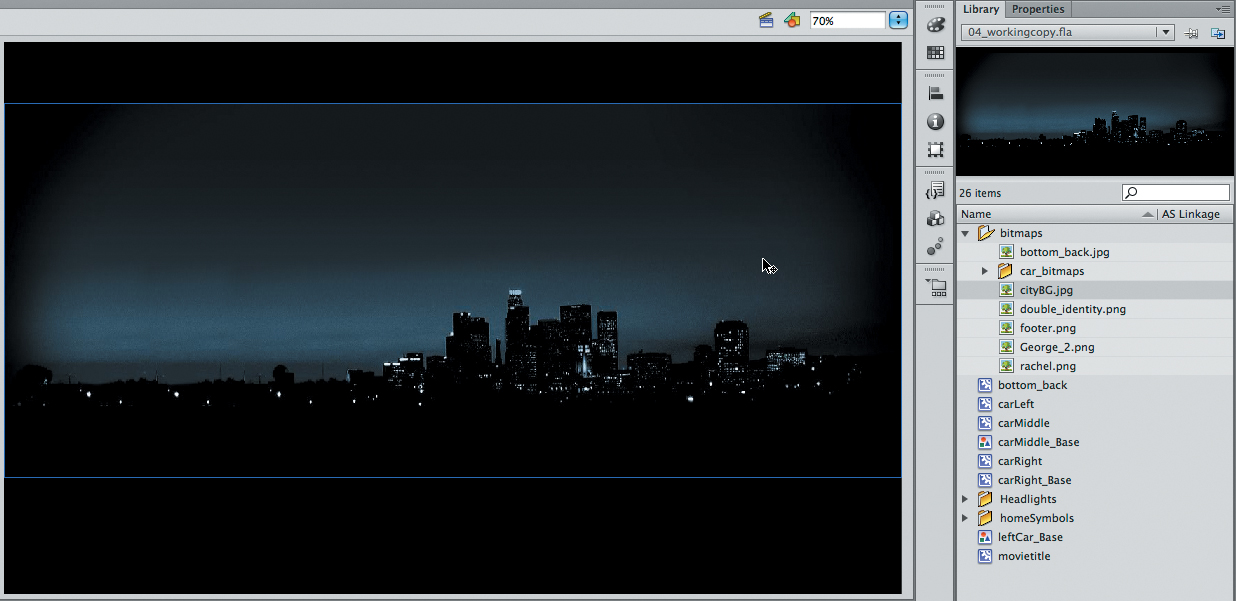
3. In the Properties inspector, set the value of X to 0 and the value of Y to 90.

This positions the cityscape image just slightly below the top edge of the Stage.
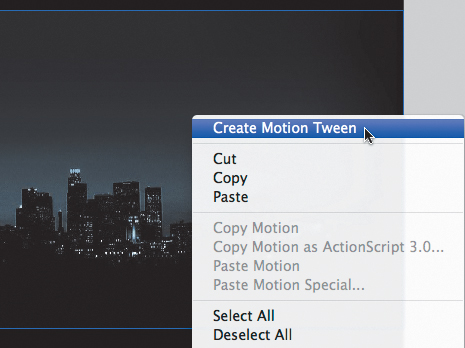
4. Right-click/Ctrl-click on the cityscape image and choose Create Motion Tween. From the top menu, you can also select Insert > Motion Tween.
5. A dialog box appears warning you that your selected object is not a symbol. Motion tweens require symbols. Flash asks if you want to convert the selection to a symbol so it can proceed with the motion tween. Click OK.
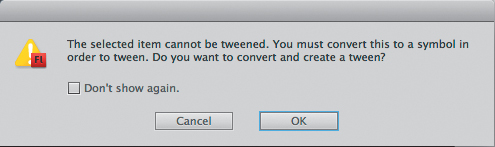
Flash automatically converts your selection to a symbol, which is stored in your Library panel. Flash also converts the current layer to a Tween layer so you can begin to animate the instance. Tween layers are distinguished by a special icon in front of the layer name, and the frames are tinted blue. Tween layers are reserved for motion tweens, and hence, no drawing is allowed on a Tween layer.
6. Move the red playhead to the end of the tween span at frame 190.
7. Select the instance of the cityscape on the Stage, and while holding down the Shift key, move the instance up the Stage.
Holding down the Shift key constrains the movement to right angles.
8. For more precision, set the value of Y to 0 in the Properties inspector.
A small black diamond appears in frame 190 at the end of the tween span. This indicates a keyframe at the end of the tween. Flash smoothly interpolates the change in position from frame 1 to frame 190 and represents that motion with a motion path. Hide all the other layers to see the results of the motion tween on the cityscape.
9. Drag the red playhead back and forth at the top of the Timeline to see the smooth motion. You can also choose Control > Play (Enter) to make Flash play the animation.
Animating changes in position is simple, because Flash automatically creates keyframes at the points where you move your instance to new positions. If you want to have an object move to many different points, simply move the red playhead to the desired frame, and then move the object to its new position. Flash takes care of the rest.
Note
Remove a motion tween by right-clicking/Ctrl-clicking the motion tween on the Timeline or the Stage and choosing Remove Tween.
Using the Controller to Preview the Animation
The Controller panel allows you to play, rewind, or go step-by-step backward or forward through your Timeline to review your animation in a controlled manner.
Choose Window > Toolbars > Controller to display a separate controller panel, or use the playback controls that are integrated at the bottom of the Timeline.
1. Click any of the playback buttons on the controller below the Timeline to go to the first frame, go to the last frame, play, stop, or move forward or backward one frame.
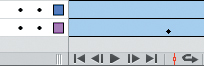
2. Choose the loop option and click the play button.
The playhead loops, allowing you to see the animation over and over for careful analysis.
3. Move the front or rear brackets on the Timeline to define the range of frames that you want to see looped.

The playhead loops within the bracketed frames. Click on the loop option again to turn it off.
Changing the Pacing and Timing
You can change the duration of the entire tween span or change the timing of the animation by clicking and dragging keyframes on the Timeline.
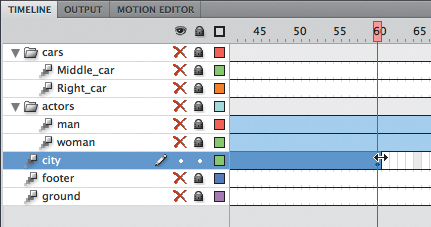
Changing the animation duration
If you want the animation to proceed at a slower pace, taking up a much longer period of time, you need to lengthen the entire tween span between the beginning and end keyframes. If you want to shorten the animation, you need to decrease the tween span. Lengthen or shorten a motion tween by dragging the ends on the Timeline.
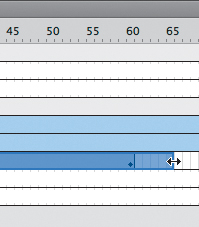
1. Move your mouse cursor close to the end of the tween span in the city layer.
Your cursor changes to a double-headed arrow, indicating that you can lengthen or shorten the tween span.
2. Click and drag the end of the tween span back toward frame 60.
Your motion tween shortens to 60 frames, so now the cityscape takes a much shorter time to move.
3. Move your mouse cursor close to the beginning of the tween span (at frame 1).

4. Click and drag the beginning of the frame span forward to frame 10.
Your motion tween begins at a later time, so it now plays only from frame 10 to frame 60.

Note
If you have multiple keyframes in a tween, dragging out your tween spans will distribute all your keyframes uniformly. The timing of your entire animation remains the same; only the length changes.
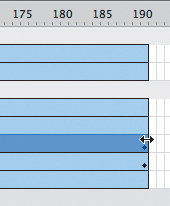
Adding frames
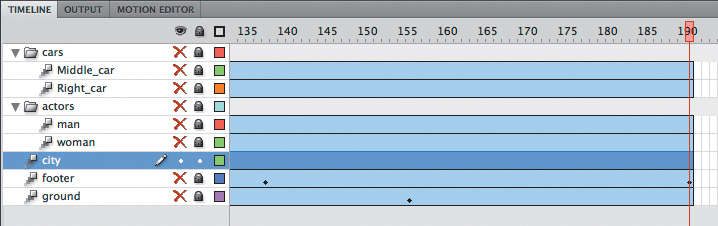
You’ll want the last keyframe of your motion tween to hold for the remainder of the animation. Add frames by Shift-dragging the end of a tween span.
1. Move your mouse cursor close to the end of the tween span.
2. Hold down the Shift key and click and drag the end of the tween span forward to frame 190.
Note
You can also add individual frames by choosing Insert > Timeline > Frame (F5) or remove individual frames by choosing Edit > Timeline > Remove Frames (Shift+F5).
The last keyframe in the motion tween remains at frame 60, but additional frames are added to frame 190.
Moving keyframes
When you click on a motion tween on the Timeline, the entire span is selected. This allows you to move the entire motion tween forward or backward in time as a single unit. However, if you want to move particular keyframes within a motion tween to change the pacing of the animation, you have to select individual frames. Holding down the Ctrl (Windows)/Command (Mac) key will let you select single frames or a span of frames within a motion tween.
1. Ctrl-click/Command-click on the keyframe at frame 60.
Just the keyframe at frame 60 is selected. A tiny box appears next to your mouse cursor indicating that you can move the keyframe.
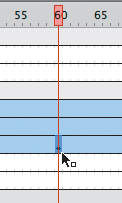
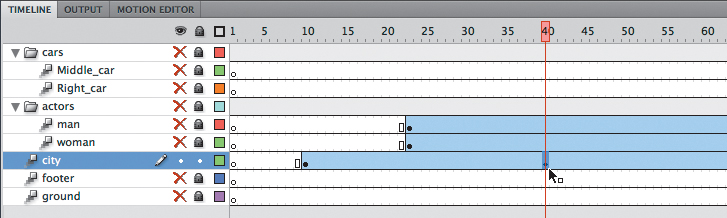
2. Click and drag the keyframe to frame 40.
The last keyframe in the motion tween moves to frame 40, so the motion of the cityscape proceeds quicker.
Animating Transparency
In the previous lesson, you learned how to change the color effect of any symbol instance to change the transparency, tint, or brightness. You can change the color effect of an instance in one keyframe and change the value of the color effect in another keyframe, and Flash will automatically display a smooth change, just as it does with changes in position.
You’ll change the cityscape in the beginning keyframe to be totally transparent but keep the cityscape in the ending keyframe opaque. Flash will create a smooth fade-in effect.
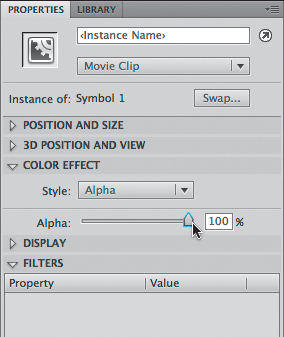
1. Move the red playhead to the first keyframe of the motion tween (frame 10).
2. Select the cityscape instance on the Stage.
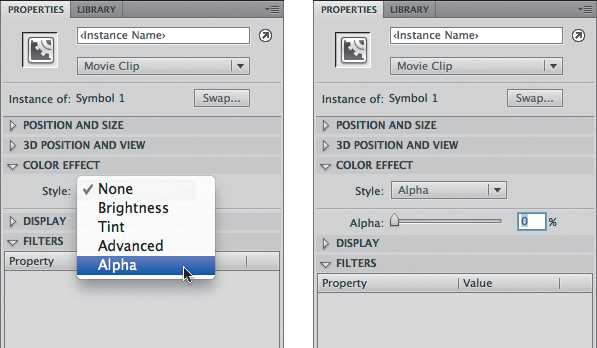
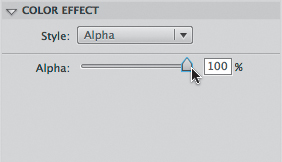
3. In the Properties inspector, choose the Alpha option for Color Effect.
Note
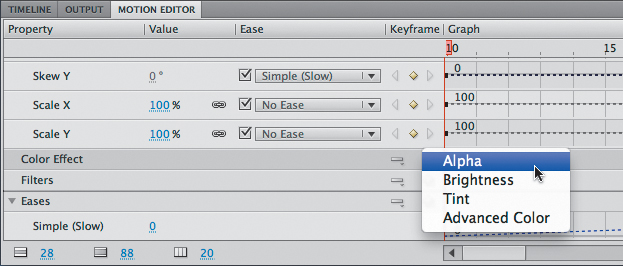
You can also apply a Color Effect through the Motion Editor, as explained later in this lesson. Click the Motion Editor tab next to the Timeline. Click the plus sign next to Color Effect and select Alpha.
The cityscape instance on the Stage becomes totally transparent.
5. Move the red playhead to the last keyframe of the motion tween (frame 40).
6. Select the cityscape instance on the Stage.
7. In the Properties inspector, under Color Effect, set the Alpha value to 100%.
The cityscape instance on the Stage becomes totally opaque.
8. Preview the effect by choosing Control > Play (Enter).
Flash interpolates the changes in both position and transparency between the two keyframes.
Animating Filters
Filters, which give instances special effects such as blurs and drop shadows, can also be animated. You’ll refine the motion tween of the actors next by applying a blur filter to one of them to make it appear as if the camera changes focus. Animating filters is no different from animating changes in position or changes in color effect. You simply set the values for a filter at one keyframe and set different values for the filter at another keyframe, and Flash creates a smooth transition.
1. Make the actors layer folder on the Timeline visible.
2. Lock all the layers on the Timeline except the woman layer.
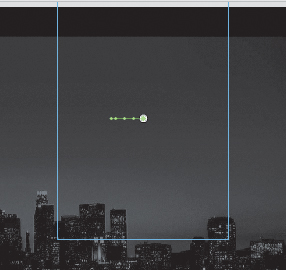
3. Move the red playhead to the beginning keyframe of the motion tween in the woman layer—at frame 23.
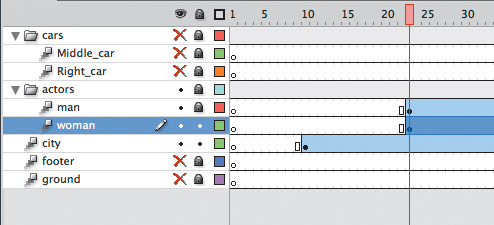
4. Select the instance of the woman on the Stage. You won’t be able to see her because she has an alpha value of 0% (totally transparent), but if you click on the top-right side of the Stage, the transparent instance will be selected.
5. In the Properties inspector, expand the Filters section.
6. Click the Add filter button at the bottom of the Filters section and select Blur.
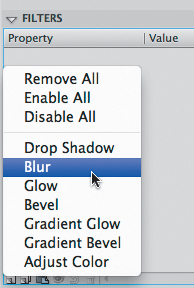
The Blur filter is applied to the instance.

Note
You can also apply a Filter through the Motion Editor, as explained later in this lesson. Click the Motion Editor tab next to the Timeline. Click the plus sign next to Filters and select Blur.
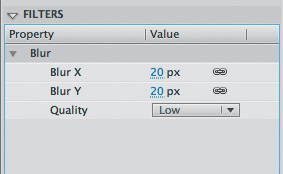
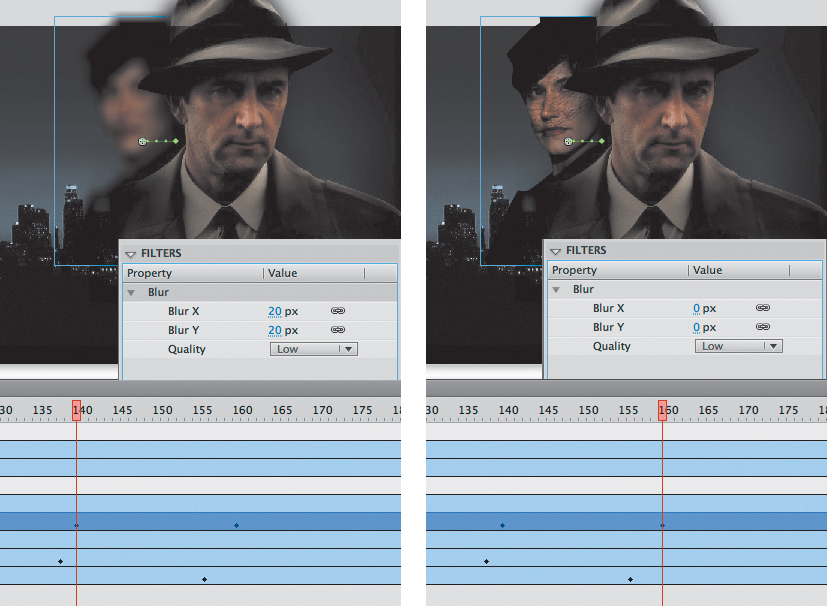
7. In the Filters section of the Properties inspector, click the link icon to constrain the blur values to both the x and y directions equally. Set the X and Y Blur values to 20 pixels.
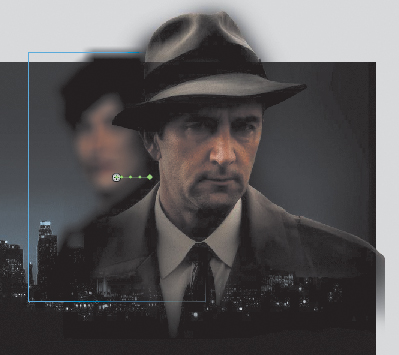
8. Move the red playhead across the entire Timeline to preview the animation.
The 20-pixel Blur filter is applied to the woman instance throughout the motion tween.
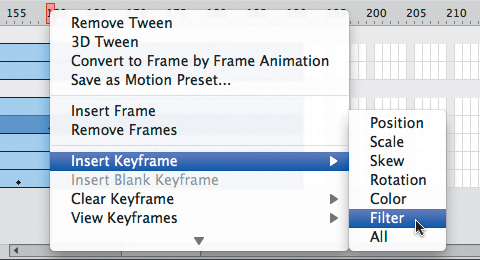
9. Position the playhead at frame 140 and right-click/Ctrl-click on the woman layer there. Then choose Insert Keyframe > Filter.

A keyframe for filters is established at frame 140.
10. Move the red playhead to frame 160.
11. Select the instance of the woman on the Stage.
12. In the Properties inspector, change the value of the Blur filter to X=0 and Y=0.
The Blur filter changes from the keyframe at frame 140 to the keyframe at 160. Flash creates a smooth transition from a blurry instance to an in-focus instance.
Animating Transformations
Now you’ll learn how to animate changes in scale or rotation. These kinds of changes are made with the Free Transform tool or with the Transform panel. You’ll add a third car to the project. The car will start small, and then become larger as it appears to move forward toward the viewer.
1. Lock all the layers on the Timeline.

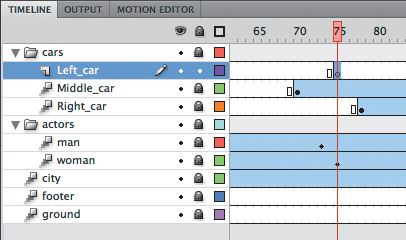
2. Insert a new layer inside the Cars folder and rename it Left_car.
3. Select frame 75 and insert a new keyframe (F6).
4. Drag the movie clip symbol called carLeft from the Library panel to the Stage at frame 75.
5. Select the Free Transform tool.
The transformation handles appear around the instance on the Stage.
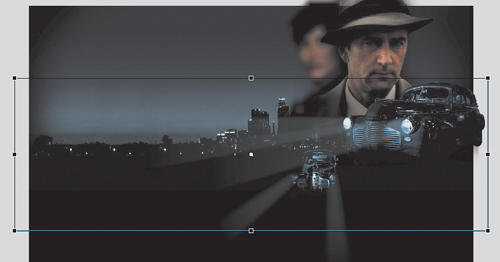
6. While holding down the Shift key, click and drag the corner handle inward to make the car smaller.
7. In the Properties inspector, make sure that the width of the car is about 400 pixels.
8. Alternatively, you can use the Transform panel (Window > Transform) and change the scale of the car to about 29.4%.
9. Move the car to its starting position at about X=710 and Y=488.
10. In the Properties inspector, select Alpha for the Color Effect.
11. Set the value of the Alpha to 0%.

The car becomes totally transparent.
12. Right-click/Ctrl-click on the car on the Stage and select Create Motion Tween.
The current layer becomes a Tween layer.
13. Move the red playhead on the Timeline to frame 100.

14. Select the transparent instance of the car, and in the Properties inspector, change the Alpha value to 100%.
A new keyframe is automatically inserted at frame 100 to indicate the change in transparency.
15. Select the Free Transform tool if it’s not already selected.
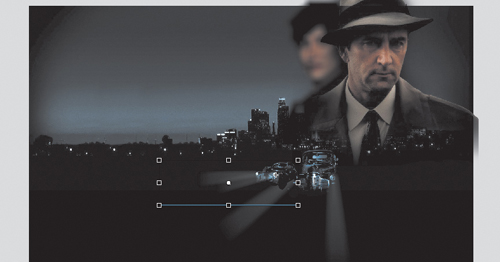
16. While holding down the Shift key, click and drag the corner handle outward to make the car larger. For more precision, use the Properties inspector and set the dimensions of the car to width=1379.5 pixels and height=467.8 pixels.
17. Position the car at X=607 and Y=545.
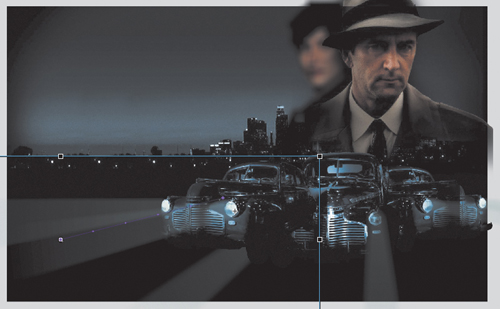
18. Move the Left_car layer in between the Middle_car and Right_car layers so that the car in the center overlaps the cars on the side.
Flash tweens the change in position and the change in scale from frame 75 to frame 100. Flash also tweens the change in transparency from frame 75 to frame 100.
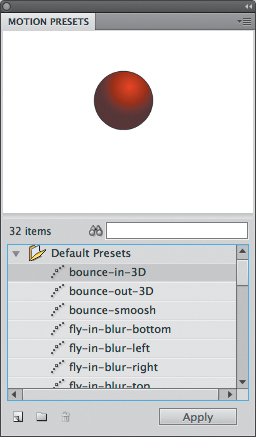
1. Select the first motion tween on the Timeline or the instance on the Stage.
2. In the Motion Presets panel, click the Save selection as preset button at the bottom of the panel.
3. Name your motion preset, and it will be saved in the Motion Presets panel.
4. Select a new instance on the Stage and choose the motion preset.
5. Click Apply and your saved motion preset will be applied to the new instance.
Changing the Path of the Motion
The motion tween of the left car that you just animated shows a colored line with dots indicating the path of the motion. The path of the motion can be edited easily so that the car travels in a curve, or the path can be moved, scaled, or even rotated just like any other object on the Stage.
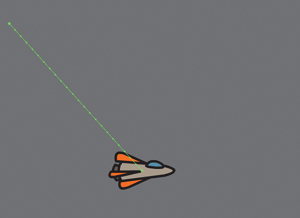
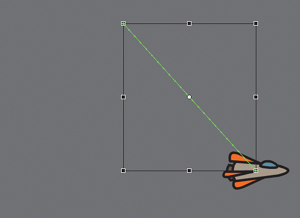
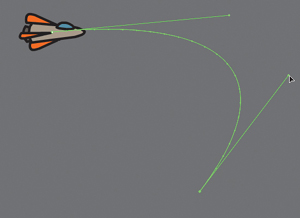
To better demonstrate how you can edit the path of the motion, open the sample file 04MotionPath.fla in the 04Start folder. The file contains a single Tween layer with a rocket ship moving from the top left of the Stage to the bottom right.
Moving the path of the motion
You will move the path of the motion so the relative movement of the rocket ship remains the same but its starting and ending positions change.
1. Choose the Selection tool.
2. Click on the path of the motion to select it.
The path of the motion becomes highlighted when it is selected.
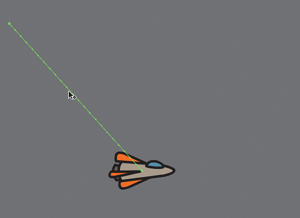
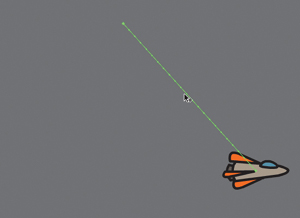
3. Click and drag the motion path to move it to a different place on the Stage.
The relative motion and timing of the animation remain the same, but the starting and ending positions are relocated.
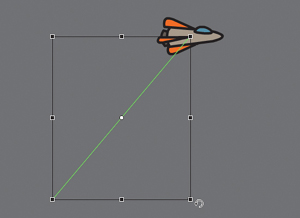
Changing the scale or rotation of the path
The path of the motion can also be manipulated with the Free Transform tool.
1. Select the path of the motion.
2. Choose the Free Transform tool.
Transformation handles appear around the path of the motion.
3. Scale or rotate the path of the motion as desired. You can make the path smaller or larger, or rotate the path so the rocket ship starts from the bottom left of the Stage and ends at the top right.
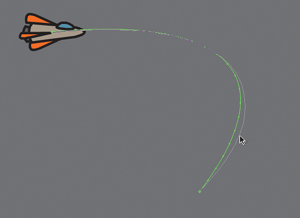
Editing the path of the motion
Making your objects travel on a curved path is a simple matter. You can either edit the path with Bézier precision using anchor point handles, or you can edit the path in a more intuitive manner with the Selection tool.
1. Choose the Convert Anchor Point tool, which is hidden under the Pen tool.
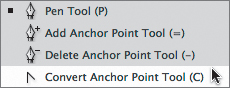
2. Click on the starting point or the ending point of the motion path on the Stage and drag the control handle out from the anchor point.
The handle on the anchor point controls the curvature of the path.
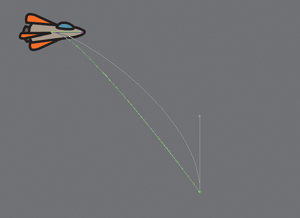
3. Choose the Subselection tool.
4. Click and drag the handle to edit the curve of the path. Make the rocket ship travel in a wide curve.
Note
The path of the motion can also be directly manipulated with the Selection tool. Choose the Selection tool and move it close to the path of the motion. A curved icon appears next to your cursor indicating that you can edit the path. Click and drag the path of the motion to change its curvature.
Orienting objects to the path
Sometimes the orientation of the object traveling along the path is important. In the motion picture splash page project, the orientation of the car is constant as it rumbles forward. However, in the rocket ship example, the rocket ship should follow the path with its nose pointed in the direction in which it is heading. The Orient to path option in the Properties inspector gives you this option.
1. Select the motion tween on the Timeline.
2. In the Properties inspector, under Rotation, select the Orient to path option.
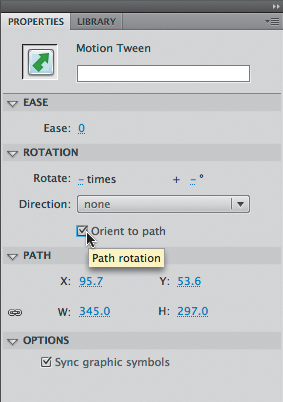
Flash inserts keyframes for rotation along the motion tween so that the nose of the rocket ship is oriented to the path of the motion.
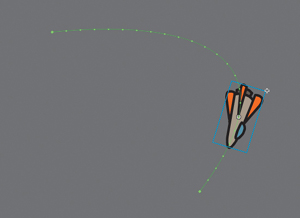
Note
To direct the nose of the rocket ship, or any other object, along the path of its motion, you must orient its position so that it is facing in the direction that you want it to travel. Use the Free Transform tool to rotate its initial position so that it is oriented correctly.
Swapping Tween Targets
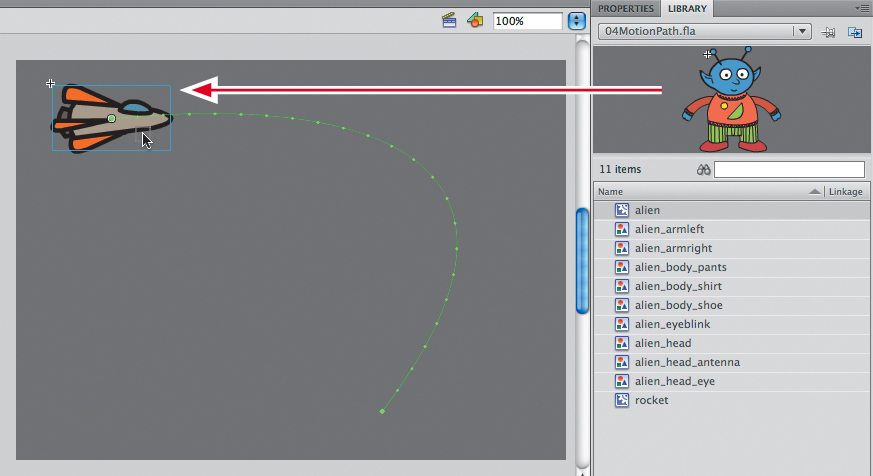
The motion tween model in Flash Professional CS6 is object based. This means that an object and its motion are independent of each other, and you can easily swap out the target of a motion tween. If, for example, you’d rather see an alien moving around the Stage instead of a rocket ship, you can replace the target of the motion tween with an alien symbol from your Library panel and still preserve the animation.
1. Select the rocket ship on the Stage to select the motion tween.
2. Drag the movie clip symbol of the alien from the Library panel onto the rocket ship.
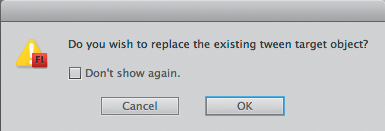
Flash asks you if you want to replace the existing tween target object with a new object.
Flash replaces the rocket ship with the alien. The motion remains the same, but the target of the motion tween has been swapped.
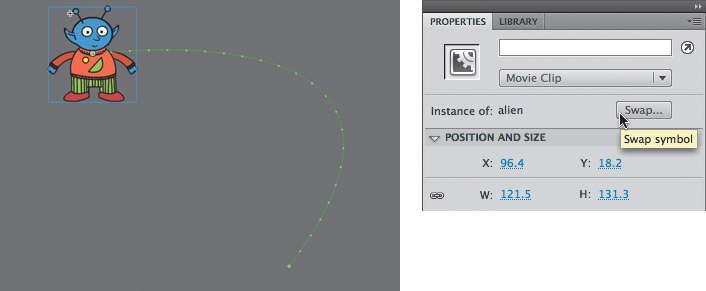
Note
You can also swap instances in the Properties inspector. Select the object that you want to swap on the Stage. In the Properties inspector, click the Swap button. In the dialog box that appears, choose a new symbol and click OK. Flash will swap the target of the motion tween.
Creating Nested Animations
Often, an object that is animated on the Stage will have its own animation. For example, a butterfly moving across the Stage will have an animation of its wings flapping as it moves. Or the alien that you swapped with the rocket ship could be waving his arms. These kinds of animations are called nested animations, because they are contained inside the movie clip symbols. Movie clip symbols have their own Timeline that is independent of the main Timeline.
In this example, you’ll make the alien wave his arms inside the movie clip symbol, so he’ll be waving as he moves across the Stage.
Creating animations inside movie clip symbols
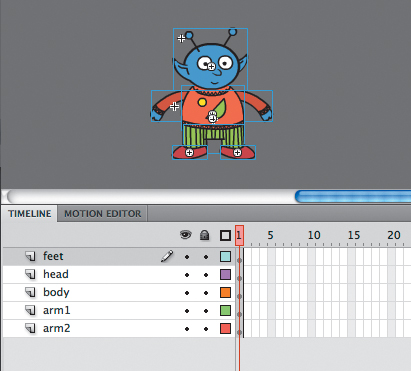
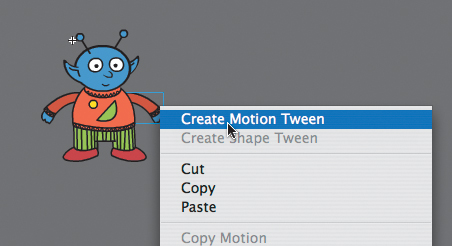
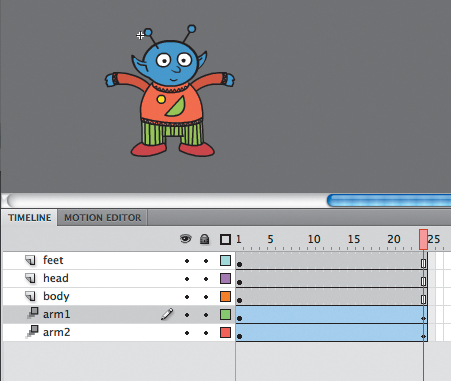
1. In the Library panel, double-click the alien movie clip symbol icon.
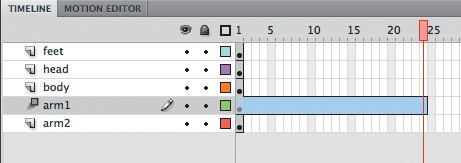
You are now in symbol-editing mode for the alien movie clip symbol. The alien is in the middle of the Stage. In the Timeline, the parts of the alien are separated in layers.
2. Choose the Selection tool.
3. Right-click/Ctrl-click on the alien’s left arm and choose Create Motion Tween.
Flash converts the current layer to a Tween layer and inserts one second worth of frames so you can begin to animate the instance.
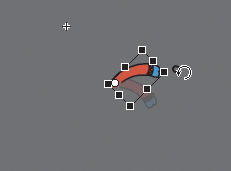
4. Choose the Free Transform tool.
5. Drag the corner rotation control points to rotate the arm upward to the alien’s shoulder height.
A keyframe is inserted at the end of the motion tween. The right arm rotates smoothly from the resting position to the outstretched position.
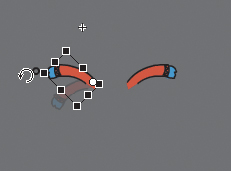
6. Move the red playhead back to frame 1.
7. Now create a motion tween for the alien’s other arm. Right-click/Ctrl-click on his right arm and choose Create Motion Tween.
Flash converts the current layer to a Tween layer and inserts one second worth of frames so you can begin to animate the instance.
8. Choose the Free Transform tool.
9. Drag the corner rotation control points to rotate the arm upward to the alien’s shoulder height.
A keyframe is inserted at the end of the motion tween. The arm rotates smoothly from the resting position to the outstretched position.
10. Select the last frame in all the other layers and insert frames (F5) so that the head, body, and feet all remain on the Stage for the same amount of time as the moving arms.
Note
Animations inside of movie clip symbols won’t play on the main timeline. Choose Control > Test Movie > in Flash Professional to preview nested animations.
Note
Animations inside movie clip symbols will loop automatically. To prevent the looping, you need to add ActionScript to tell the movie clip Timeline to stop on its last frame. You’ll learn more about ActionScript in Lesson 6, “Creating Interactive Navigation.”
11. Exit symbol-editing mode by clicking the Scene 1 button at the top left of the Stage.
Your animation of the alien raising his arms is complete. Wherever you use the movie clip symbol, the alien will continue to play its nested animation.
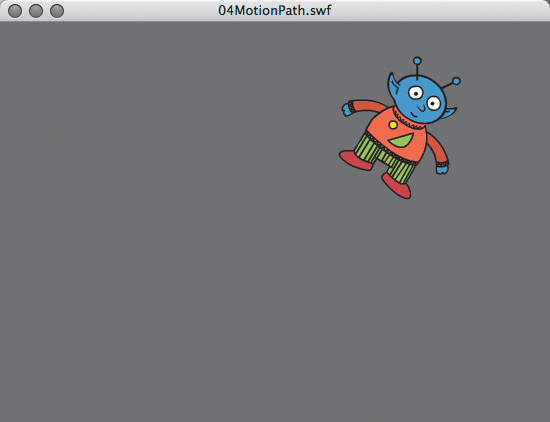
12. Preview the animation by choosing Control > Test Movie > in Flash Professional.
Flash opens a window showing the exported animation. The alien moves along the motion path while the nested animation of his arms moving plays and loops.
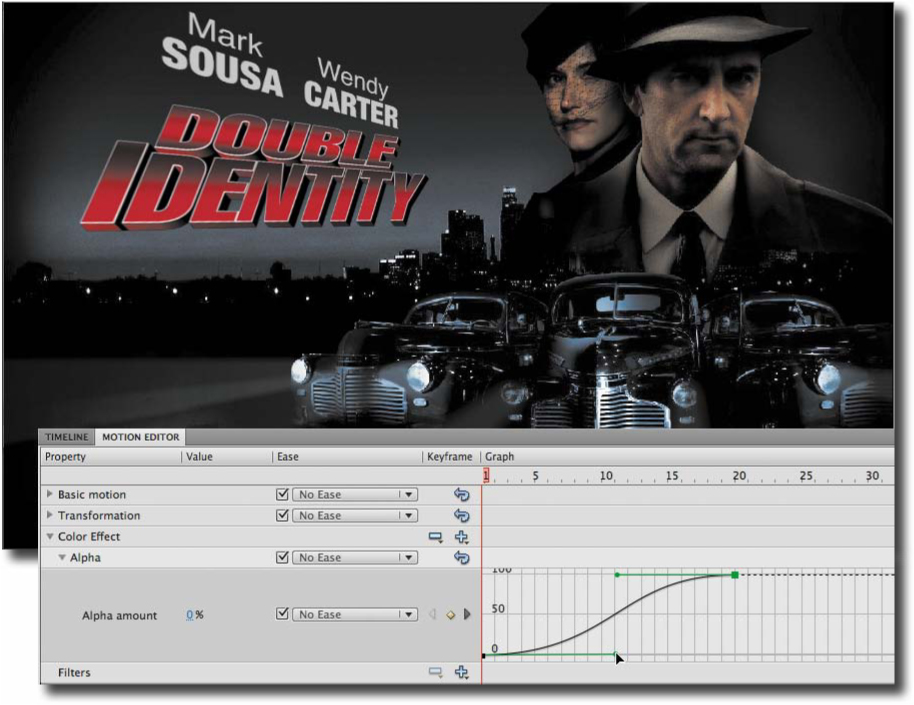
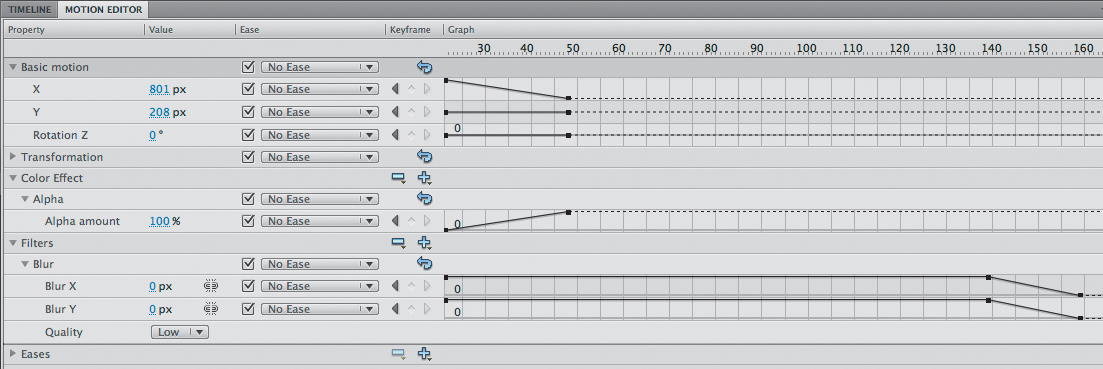
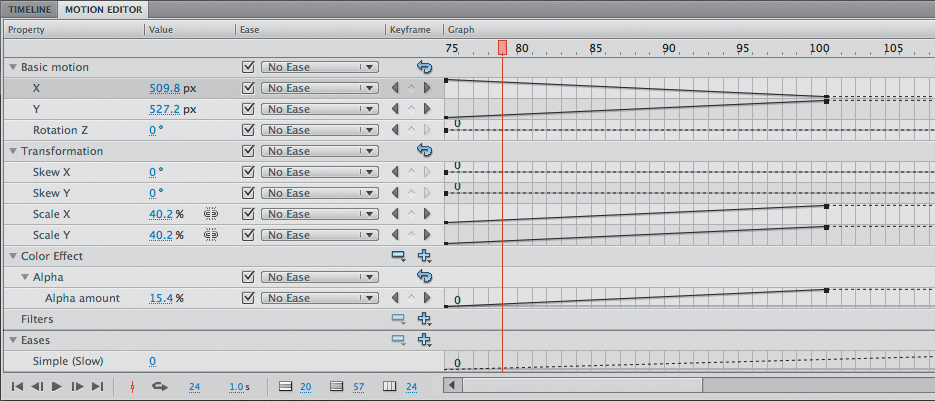
Using the Motion Editor
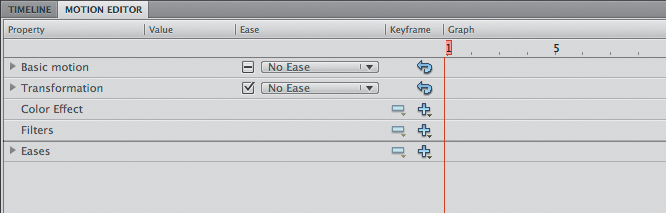
The Motion Editor panel provides in-depth information and editing capabilities for all the properties of a motion tween. The Motion Editor is located behind the Timeline and can be accessed by clicking the top tab or by choosing Window > Motion Editor. The animated object on the Stage or the tween on the Timeline must be selected in order for the Motion Editor to display its information.
On the left side of the Motion Editor, an expandable list of properties is displayed along with those properties’ values and easing options. On the right side, a timeline shows various lines and curves representing how those properties change.
Setting the Motion Editor display options
Options for displaying the Motion Editor are listed at the bottom of the panel.
1. Select the alien on the Stage.
2. Open the Motion Editor panel if it is not already visible.
3. Move your cursor over the gray horizontal bar separating the Motion Editor from the Stage.
Your cursor changes to a double-headed arrow indicating that you can increase or decrease the height of the Motion Editor panel.
4. Click and drag the horizontal bar to increase the height of the Motion Editor panel.
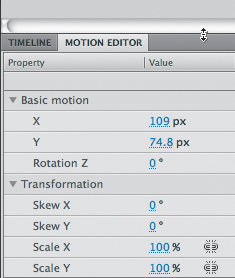
5. Click the triangles to collapse all the properties categories on the left. You can expand or collapse the categories to see only those categories you are interested in.
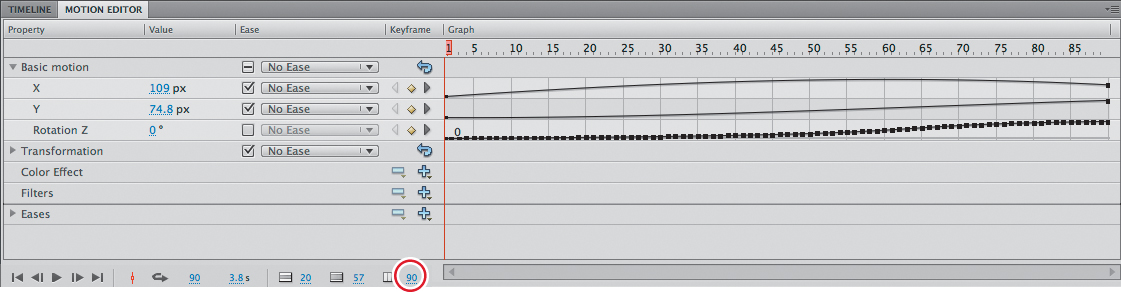
6. Click and drag the number next to the Viewable Frames icon at the bottom of the Motion Editor to change the number of frames that appear in the graph. Set the Viewable Frames value to the maximum to see the entire motion tween.
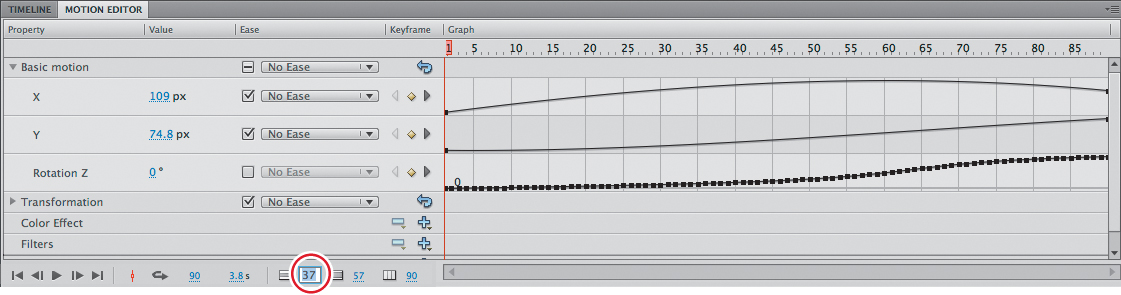
7. Click and drag the number next to the Graph Size icon at the bottom of the Motion Editor to change the vertical height of each property that is listed on the left.
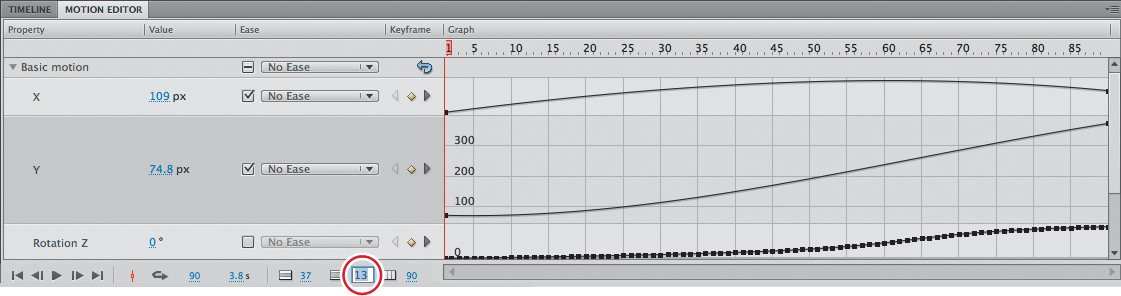
8. Click and drag the number next to the Expanded Graph Size icon at the bottom of the Motion Editor to change the vertical height of each selected property.
To see how the Expanded Graph Size option affects the display, click the X property under Basic motion. The larger the Expanded Graph Size value, the more of the selected property you can view.
Changing property values
You will change another property of your flapping alien with the Motion Editor and see how easy it is to animate multiple properties independently. For this example, you’ll create a fade-in effect by changing the Alpha property.
1. Next to the Color Effect property, click the Plus icon and choose Alpha.
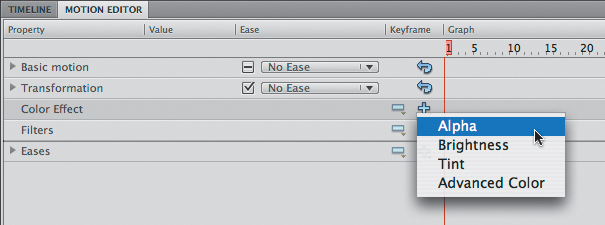
The Alpha property appears in the Motion Editor under the Color Effect category.
2. Select the Alpha amount.
The Alpha property expands, displaying a black-dotted horizontal line at 100% extending from frame 1 to the end of the timeline. This line represents the opacity of the alien throughout the motion tween.
3. Click on the first keyframe, which is indicated by a black square, and drag it down to 0%. You can also change the Alpha value by clicking and dragging the value next to the Alpha amount.
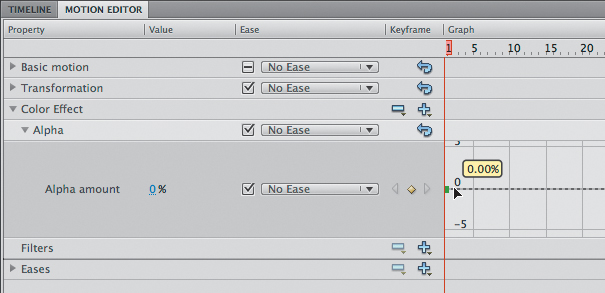
The alien becomes transparent beginning at frame 1.
Inserting keyframes
Inserting keyframes is easy.
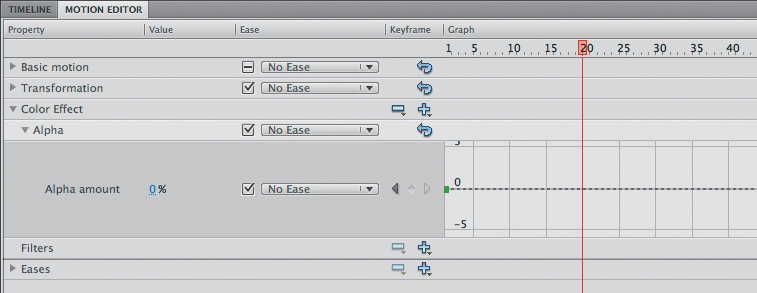
1. In the Motion Editor, move the red playhead to frame 20.
2. Click the diamond icon to add a keyframe at that point in time for the Alpha property. You can also right-click/Ctrl-click on the graph and choose Insert Keyframe.
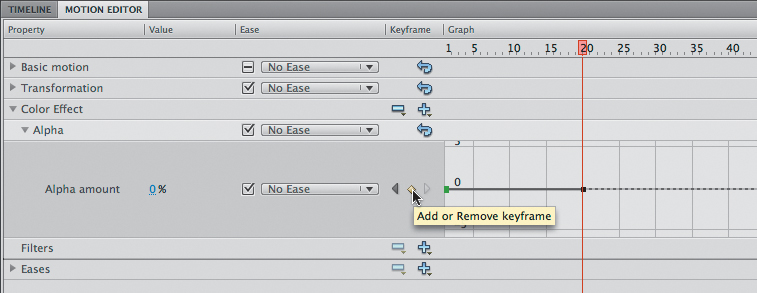
A new keyframe for the Alpha property is inserted at frame 20 indicated by a black square on the graph.
3. Click on the second keyframe.
The selected keyframe becomes highlighted.
4. Drag the second keyframe up to change the Alpha value to 100%.
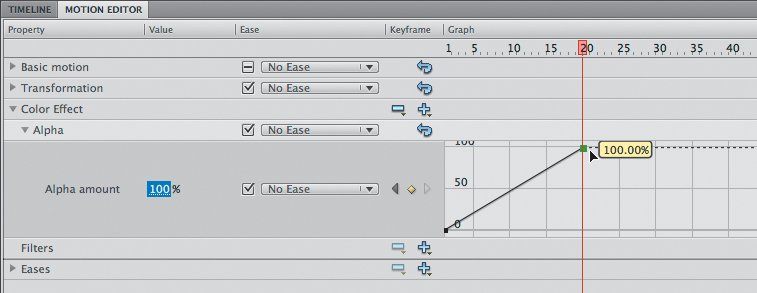
Flash animates the smooth transition of transparency from frame 1 to frame 20.
Editing keyframes
You can easily navigate keyframes and remove them, and you can move keyframes to control the precise timing of each of your transitions.
• Click the left or right arrow beside the diamond-shaped icon to move quickly between keyframes.
• Right-click/Ctrl-click on any keyframe and choose Remove Keyframe to delete a keyframe.
• Select a keyframe and click the yellow diamond to delete the keyframe.
• Shift-click to select multiple contiguous keyframes and move them together.
Resetting values and deleting properties
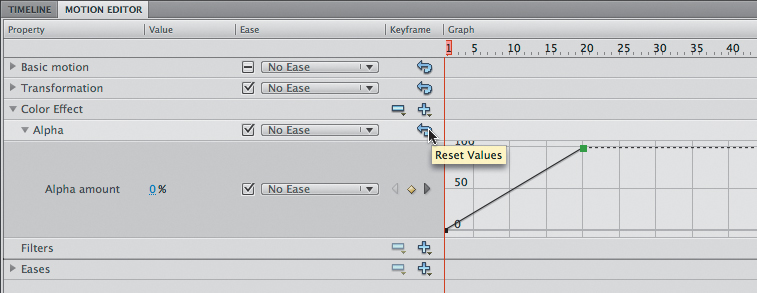
If you’ve made a mistake in setting a property, you can easily reset its value or delete it from the Motion Editor entirely so the property won’t be animated.
1. Click the Reset Values button to reset the property to its default values.
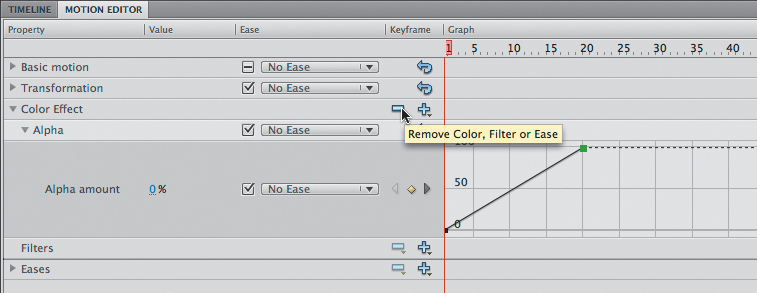
2. Click the Minus button and select Alpha to delete the property from the Motion Editor.
Choose Edit > Undo (Ctrl-Z/Cmd-Z) to restore the Alpha property because you’ll be working with it in the next section.
Easing
Easing refers to the way in which a motion tween proceeds. In the most basic sense, it can be thought of as acceleration or deceleration. An object that moves from one side of the Stage to the other side can start off slowly, then build up momentum, and then stop suddenly. Or, the object can start off quickly, and then gradually come to a halt. But easing can also be more complicated. It can describe motion that oscillates, bounces, and does other complex patterns. Your keyframes still indicate the beginning and end points of the motion, but the easing determines how your object gets from one keyframe to the next.
Easing is best visualized in the Motion Editor. The graphs that connect one keyframe to another are usually straight lines, which indicate that the change from one value to the next value proceeds linearly. However, if you want a more gradual change from the starting position (known as an ease-in), the line would be curved near the beginning keyframe, indicating a slower start. A gradual slowdown (known as an ease-out) would be represented by a curve near the ending keyframe.
Setting eases of a motion tween
You can create an ease by customizing the curvature of the property graph in the Motion Editor.
1. In the Motion Editor, right-click/Ctrl-click the second keyframe in the Alpha property and choose Smooth point.
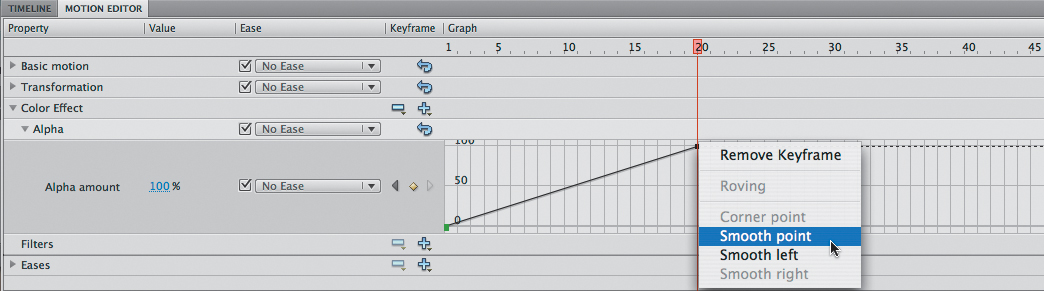
Control handles appear from the keyframe, which you can move to change the curvature of the line.
2. Click and drag the control handle to create a smooth curve approaching the 100% Alpha value.
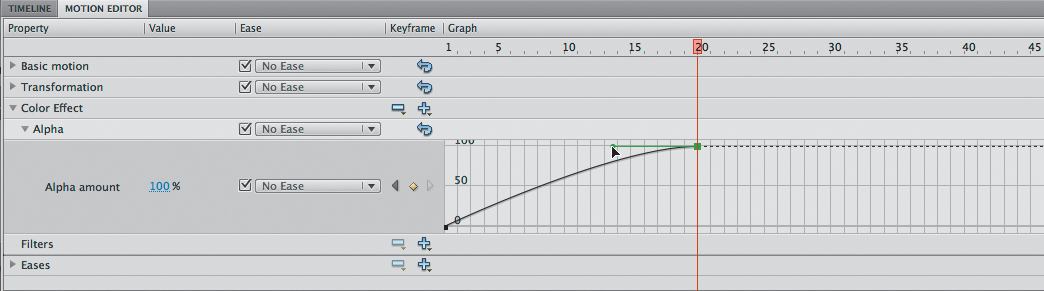
The transition from 0% to 100% Alpha slows down as it approaches 100% (ease-out).
3. Right-click/Ctrl-click the first keyframe in the Alpha property and choose Smooth point.
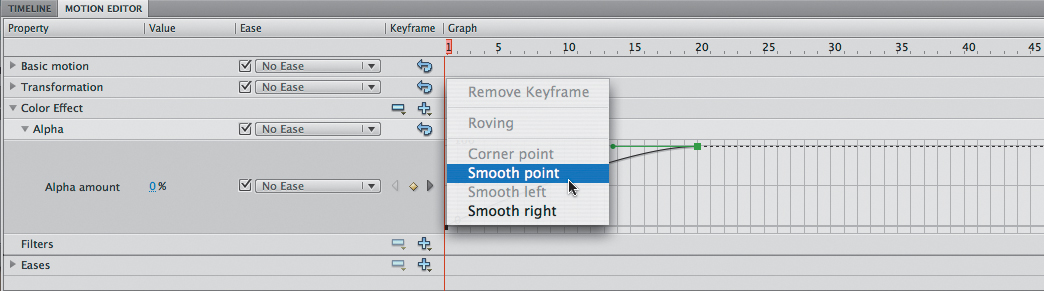
Control handles appear from the keyframe, which you can move to change the curvature of the line.
4. Click and drag the control handle to create a smooth curve as the line begins from 0%.
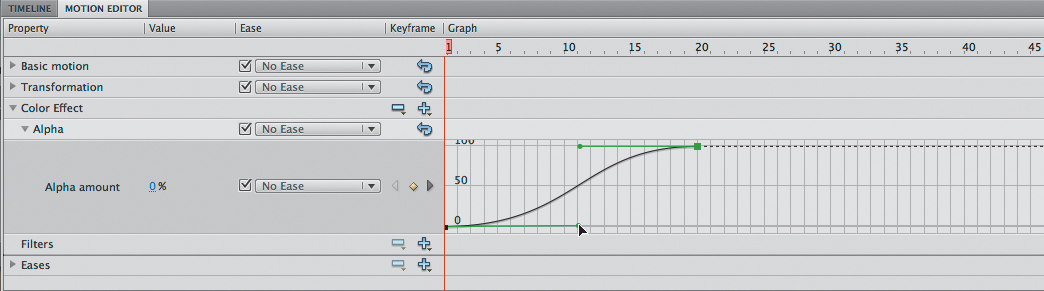
The transition from 0% to 100% Alpha begins gradually from 0% in addition to slowing down. The total effect of the S-shaped curve is both an ease-in and an ease-out effect.

Note
You can also apply ease-in and ease-out effects from the Properties inspector. In the Timeline (not the Motion Editor), select the motion tween. In the Properties inspector, enter an easing value between –100 (ease-in) to 100 (ease-out).
Note
Easing values applied via the Properties inspector will be applied globally to all the properties throughout the entire motion tween. With the Motion Editor, you have precise control over individual properties and eases between keyframes.
Using preset eases
Easing can be very powerful and can be used to create many specialized motions. For example, a bouncing motion can be created with just two positional keyframes and an ease that moves the object back and forth between the two positions.
For the next example, you’ll return to the motion picture project and add a preset ease to the motion of the car. You’ll make the car shudder up and down to mimic the motion of an idling car. The motion tween will be created inside the movie clip symbol of the car.
1. Continue with your Flash project in progress, 04_workingcopy.fla.
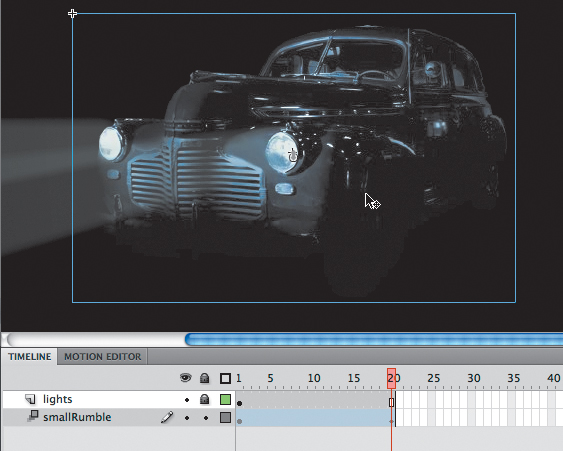
2. In the Library panel, double-click the movie clip symbol called carLeft.
Flash takes you to symbol-editing mode for the movie clip symbol. Two layers are inside this symbol: the top layer called lights, and the bottom layer called smallRumble.

3. Lock the top lights layer.
4. Right-click/Ctrl-click on the car and choose Create Motion Tween.
Flash converts the current layer to a Tween layer so you can begin to animate the instance.
5. Move the red playhead to the end of the Timeline.
7. Move the car down about 5 pixels.
Flash creates a smooth animation of the car moving down slightly.
8. Click on the motion tween in the Timeline and open the Motion Editor.
9. Click the Plus icon on the Eases category and choose Random.
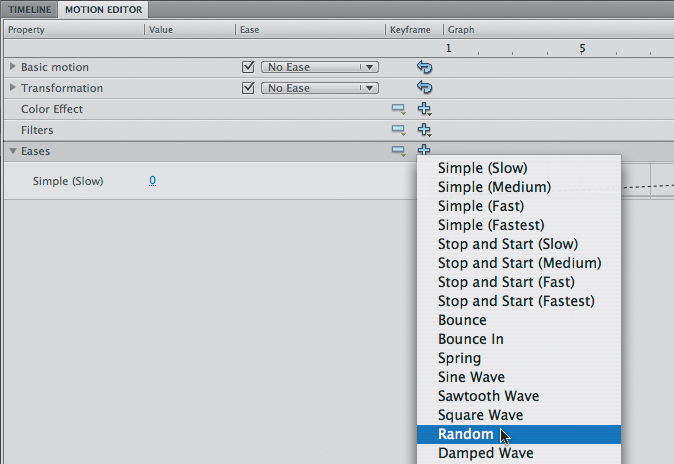
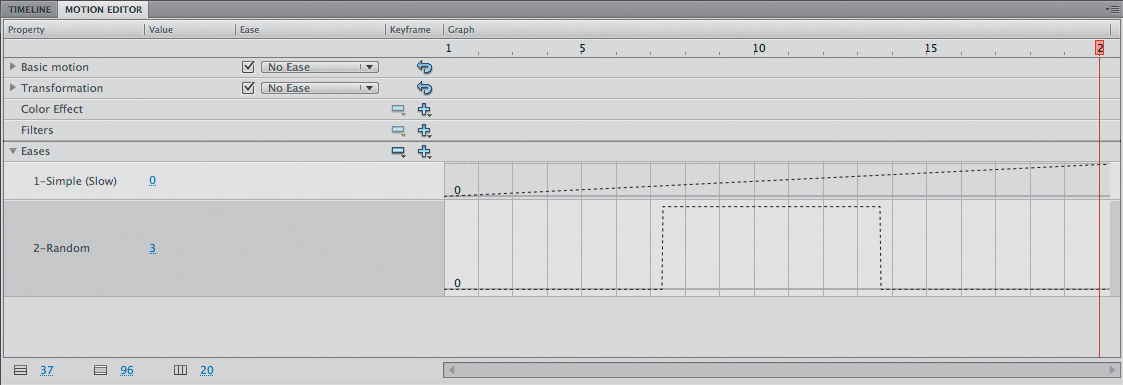
The Random preset ease appears.
The Random ease jumps from one value to the next in random intervals. This is shown graphically as a series of abrupt stair steps.
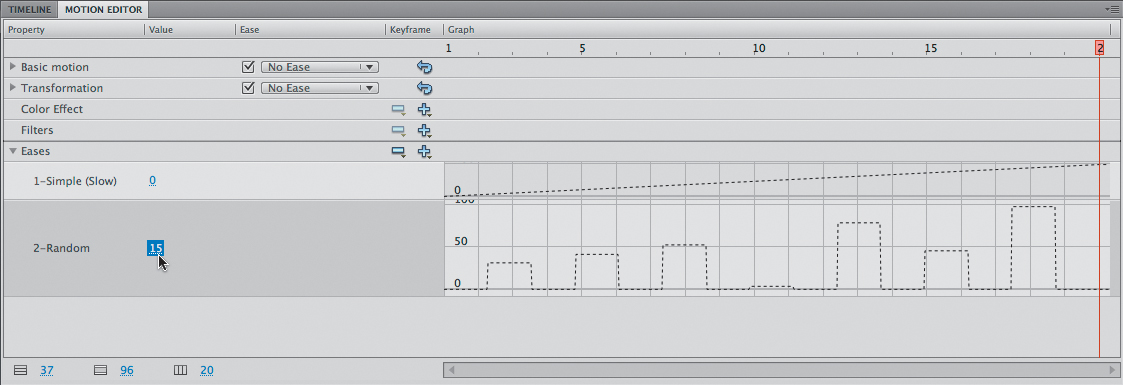
11. Change the Random value to 15.
The frequency of random jumps increases based on the Random value.
12. Select the Basic motion category.
13. In the Ease pull-down menu next to the Basic motion category, choose 2-Random.
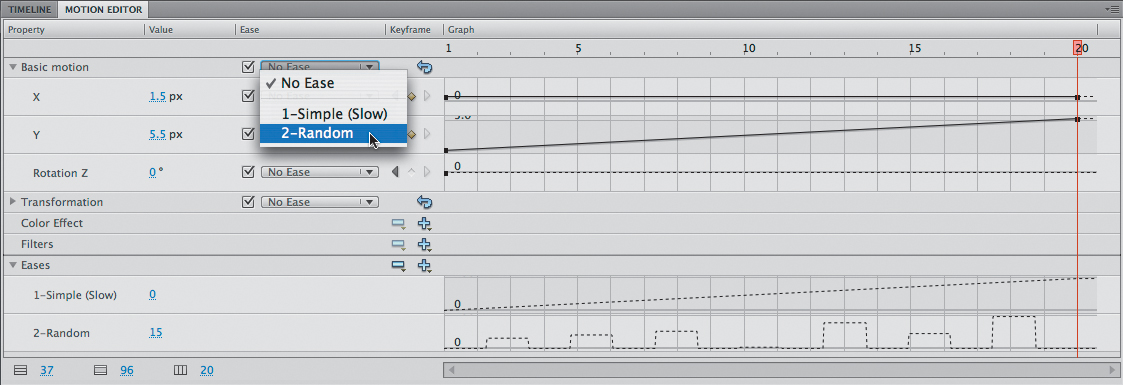
Flash applies the Random ease to the positional changes of the motion tween. Instead of a smooth change in the y-position, Flash makes the car jerk up and down randomly between the values of the keyframes, simulating a rumbling, idling car. Since the animation is nested in a movie clip, choose Control > Test Movie > in Flash Professional to preview the motion.

Animating 3D Motion
Finally, you’ll add a title and animate it in 3D space. Animating in 3D presents the added complication of a third (z) axis. When you choose the 3D Rotation or 3D Translation tool, you need to be aware of the Global Transform option at the bottom of the Tools panel. The Global Transform option toggles between a global option (button depressed) and a local option (button raised). Moving an object with the global option on makes the transformations relative to the global coordinate system, whereas moving an object with the local option on makes the transformations relative to itself.
1. Click on Scene 1 to return to the main timeline and insert a new layer at the top of the layer stack and rename it title.
2. Lock all the other layers.
3. Insert a new keyframe at frame 120.
4. Drag the movie clip symbol called movietitle from the Library panel onto the Stage.
The movie title instance appears in your new layer in the keyframe at frame 120.
5. Position the title at x=180 and y=90.
6. Right-click/Ctrl-click on the movie title and choose Create Motion Tween.
Flash converts the current layer to a Tween layer so you can begin to animate the instance.
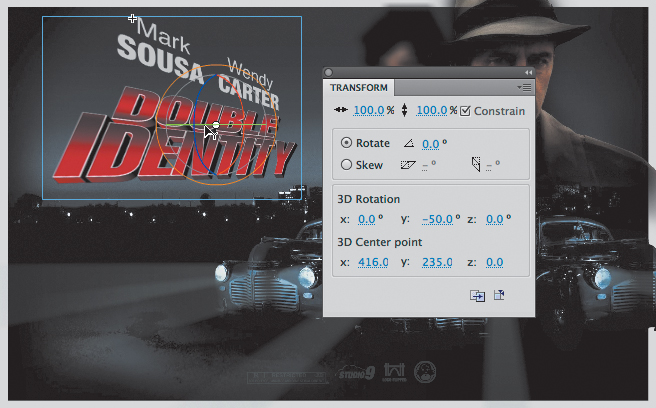
7. Move the red playhead to frame 140.
8. Select the 3D Rotation tool.
9. Deselect the Global Transform option at the bottom of the Tools panel.
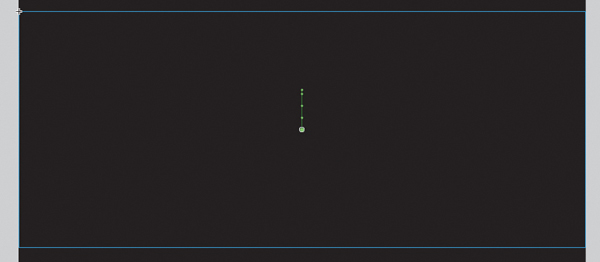
10. Click and drag the title to rotate it around the y-axis (green) so that its angle is at about –50 degrees. You can check the rotation values in the Transform panel (Window > Transform).
11. Move the red playhead to the first keyframe at frame 120.
12. Click and drag the title to rotate it around the y-axis in the opposite direction so that the instance looks like just a sliver.
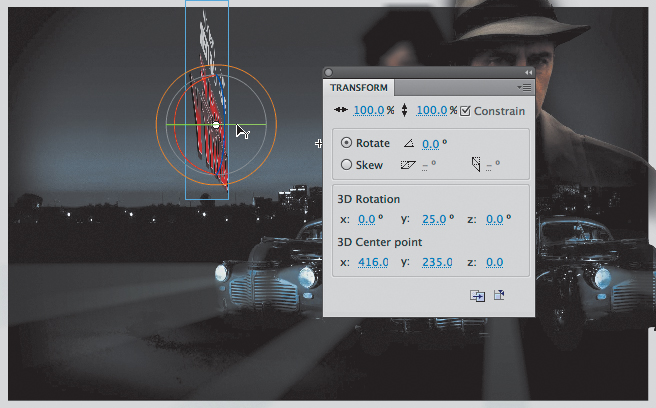
Flash motion tweens the change in the 3D rotation, so the title appears to swing in three dimensions.
Testing Your Movie
You can quickly preview your animation by “scrubbing” the red playhead back and forth on the Timeline or by choosing Control > Play. You can also use the integrated controller at the bottom of the Timeline or choose Window > Toolbars > Controller to display a separate controller panel.
Note
The exported SWF in Test Movie mode will loop automatically. To prevent the looping in Test Movie mode, choose Control > Loop to deselect the loop option.
However, to preview your animation as your audience will see it and to preview any nested animations within movie clip symbols, you should test your movie. Choose Control > Test Movie > in Flash Professional.
Flash exports a SWF file and saves it in the same location as your FLA file. The SWF file is the compressed, final Flash media that you would embed in an HTML page to play in a browser. Flash displays the SWF file in a new window with the exact Stage dimensions and plays your animation.
Note
If you’ve targeted a different publishing platform in the Publish Settings (such as Adobe AIR), those options will be available for you in the Control > Test Movie menu.
To exit Test Movie mode, click the Close window button.
You can also preview your animation by choosing Control > Test Movie > in Browser, and Flash will export a SWF file and open it automatically in your default browser.
Review Questions
1. What are two requirements of a motion tween?
2. What kinds of properties can a motion tween change?
3. What are property keyframes, and why are they important?
4. How can you edit the path of an object’s motion?
5. What are three ways to add easing to a motion tween?
Review Answers
1. A motion tween requires a symbol instance on the Stage and its own layer, which is called a Tween layer. No other tween or drawing object can exist on the Tween layer.
2. A motion tween creates smooth transitions between different keyframes of an object’s location, scale, rotation, transparency, brightness, tint, filter values, or 3D rotation or translation.
3. A keyframe marks a change in one or more of an object’s properties. Keyframes are specific to each property, so that a motion tween can have keyframes for position that are different from keyframes for transparency.
4. To edit the path of an object’s motion, choose the Selection tool and click and drag directly on the path to bend it. You can also choose the Convert Anchor Point tool and Subselection tool to pull out handles at the anchor points. The handles control the curvature of the path.
5. Three ways to add easing to a motion tween include the following:
• Select the motion tween on the Timeline and change the Ease value in the Properties inspector.
• In the Motion Editor, right-click/Ctrl-click on any keyframe to pull out control handles and change the curvature of the graph.
• Add a preset ease to the Ease category of the Motion Editor and apply it to a property.