6. Working with Graphic Styles and Effects
What You’ll Do
Introduction
One of the great things about working with Muse is that it gives you the ability to apply graphic effects, such as drop shadows, bevels, and glows. There is no need to apply these effects in a separate application, such as Photoshop, Fireworks, or Illustrator.
In this chapter, you’ll learn how to enable these effects in the Effects panel. You’ll also learn how to choose effect options, such as drop shadow color, bevel size, glow opacity, and more.
In addition, this chapter shows you how to create text wraps by placing graphics as an inline objects in a text frame. It also explains how to apply rounded edges to all four corners of a rectangle at once, as well as to the individual corners.
In the final sections of this chapter, you’ll learn how to save your favorites combinations of object style attributes—such as fill color, wrap spacing, and effects—as a graphic style. By doing so, you can apply these attributes to other objects in your websites with the single click of a mouse button.
Creating a Text Wrap
A text wrap enables you to place a graphic next to a body of text and force the lines of text to wrap around the shape of the graphic. To create this effect in Muse, you must first select the graphic and cut it to the Clipboard. You can then use the Text tool to place the graphic as an inline object in the text frame. After you place the graphic in the body of text, you can choose the preferred position and offset options from the Wrap panel.
Choose wrap options for placed inline graphics
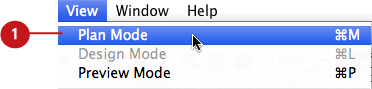
![]() Choose Plan Mode from the View menu.
Choose Plan Mode from the View menu.

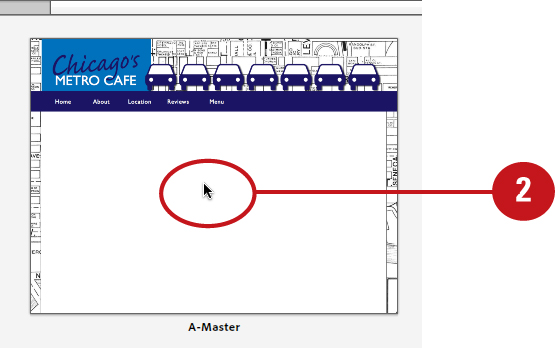
![]() From the sitemap, double-click the thumbnail of the page on which you’d like to create a text wrap.
From the sitemap, double-click the thumbnail of the page on which you’d like to create a text wrap.
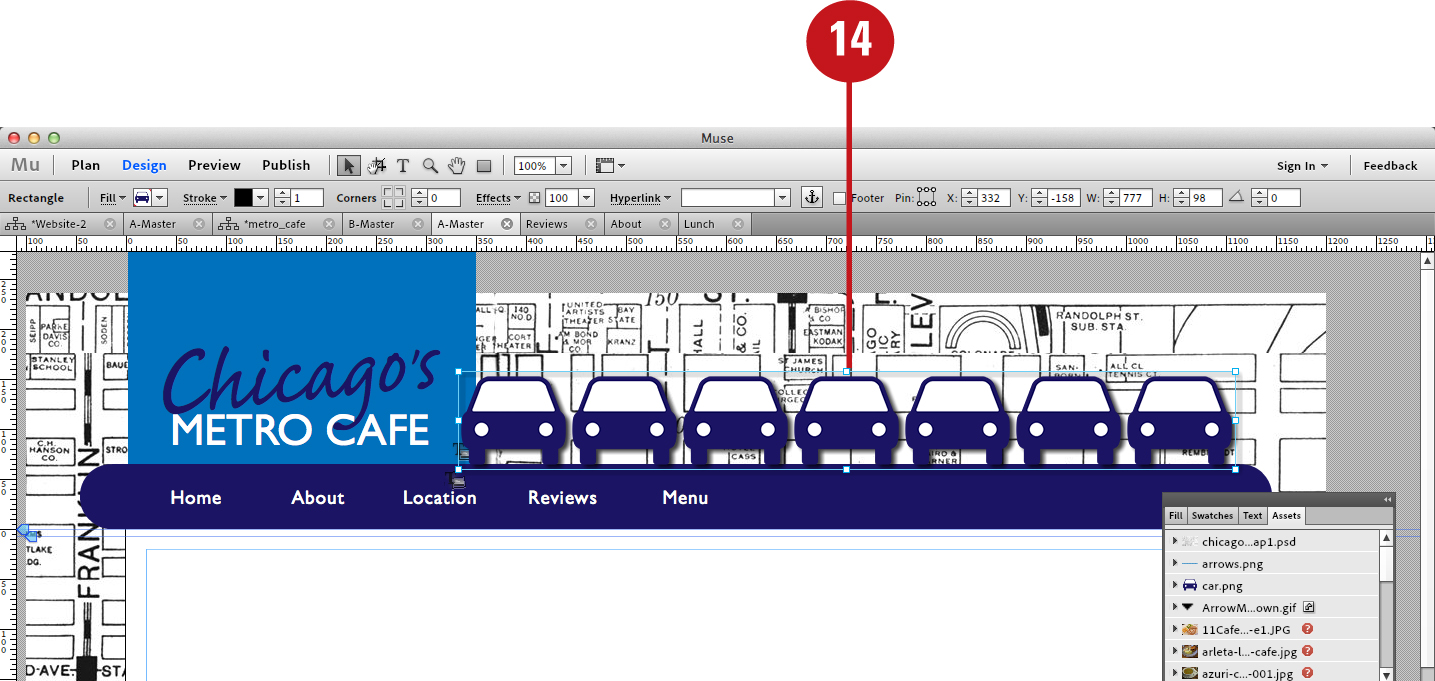
Muse opens the page in Design Mode.
![]() Click the Selection Tool icon at the top of the Design Mode interface.
Click the Selection Tool icon at the top of the Design Mode interface.

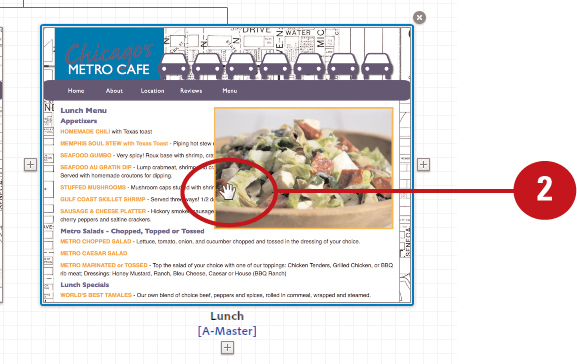
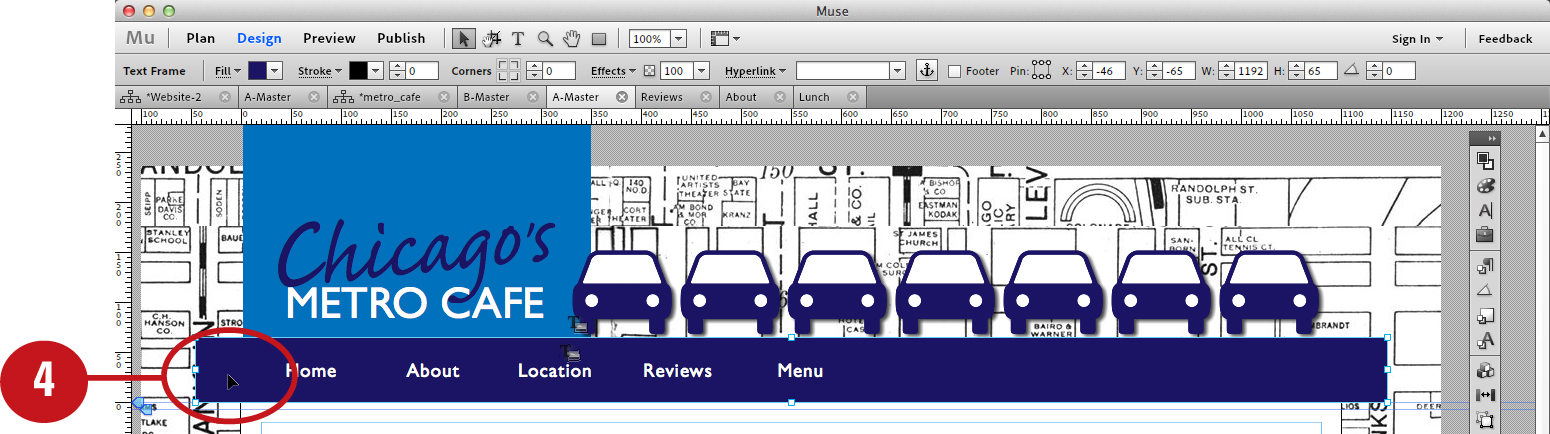
![]() To select the graphic you’d like to add a text wrap to, click it with the Selection tool.
To select the graphic you’d like to add a text wrap to, click it with the Selection tool.
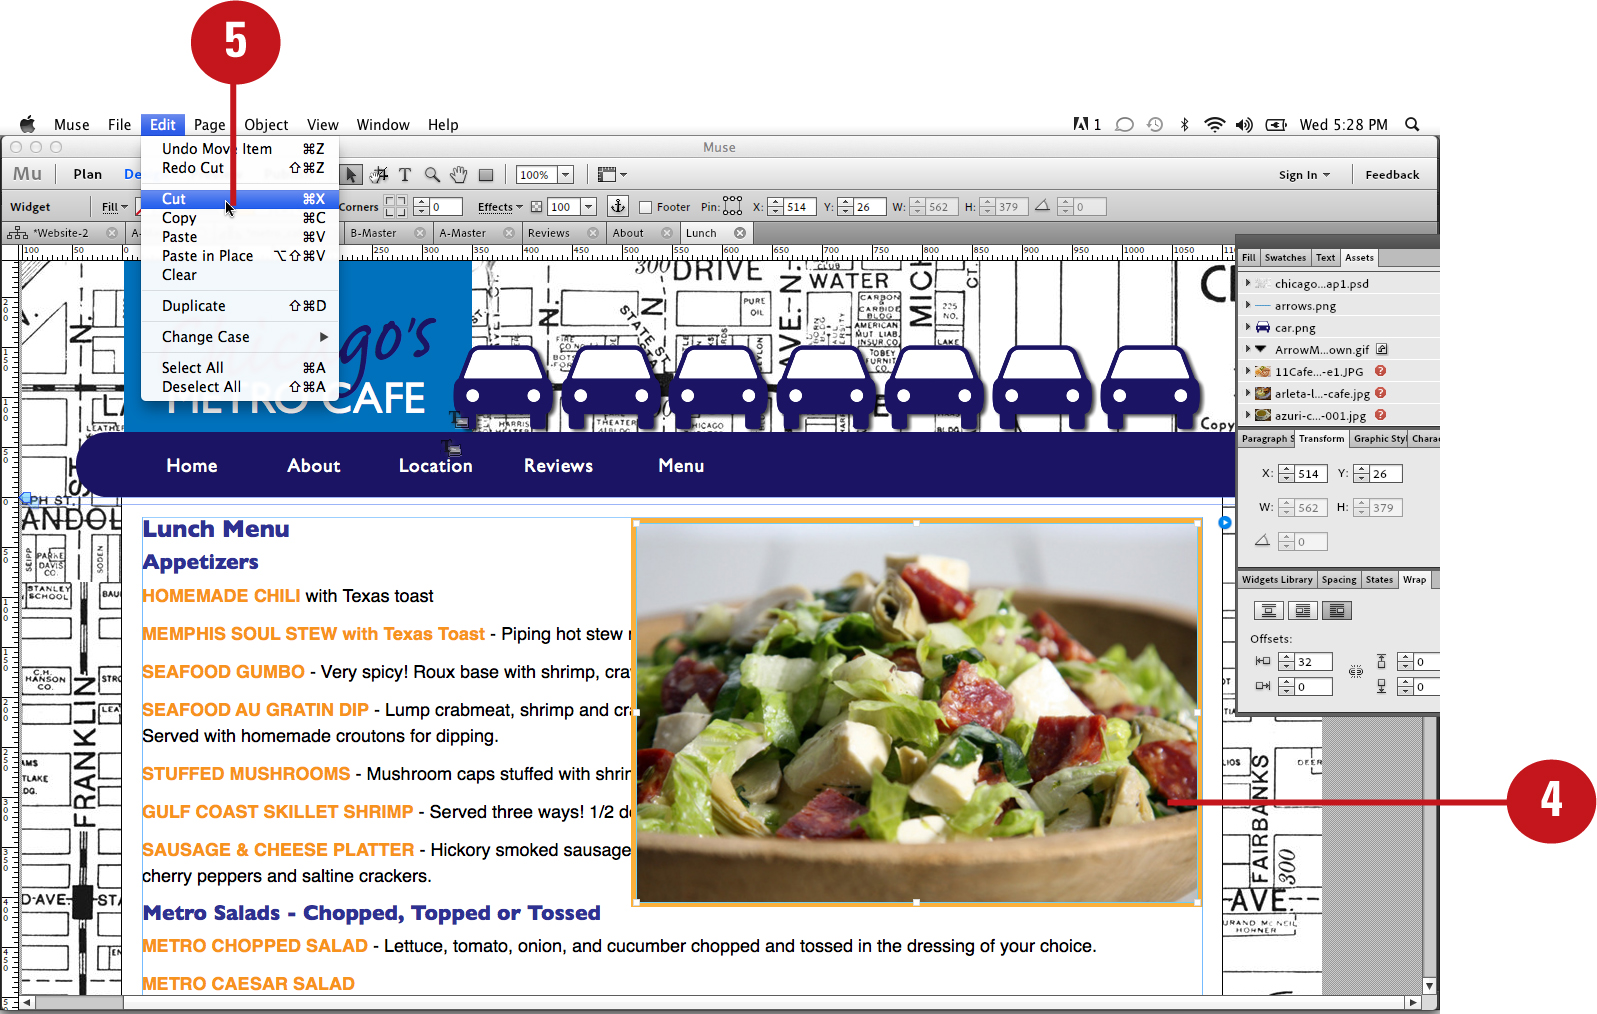
![]() Choose Edit > Cut to copy the graphic to the Clipboard and remove it from the page.
Choose Edit > Cut to copy the graphic to the Clipboard and remove it from the page.
![]() Click the Text Tool icon at the top of the Design Mode interface.
Click the Text Tool icon at the top of the Design Mode interface.
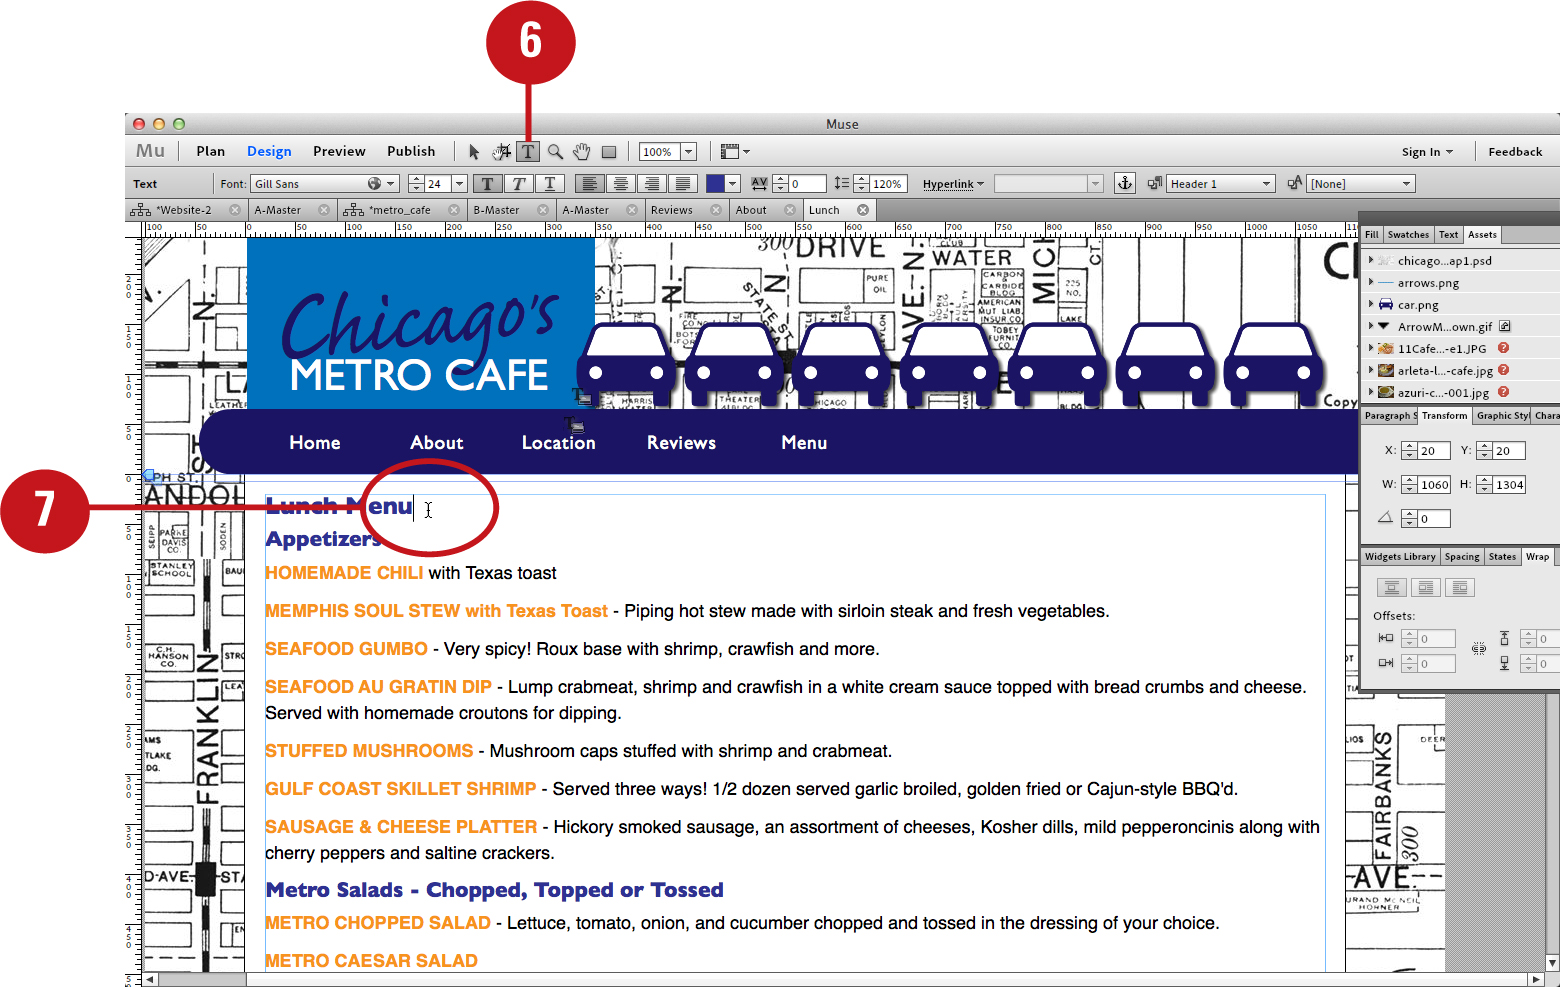
![]() To define an insertion point for the graphic, place the Text tool cursor in a text frame.
To define an insertion point for the graphic, place the Text tool cursor in a text frame.
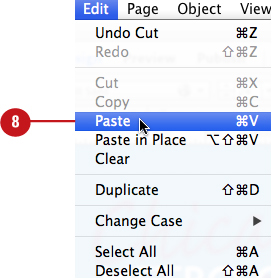
![]() Choose Edit > Paste to insert the graphic as an inline object in the paragraph.
Choose Edit > Paste to insert the graphic as an inline object in the paragraph.
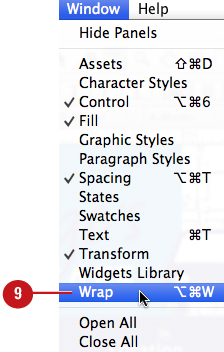
![]() Choose Window > Wrap to display the Wrap panel.
Choose Window > Wrap to display the Wrap panel.
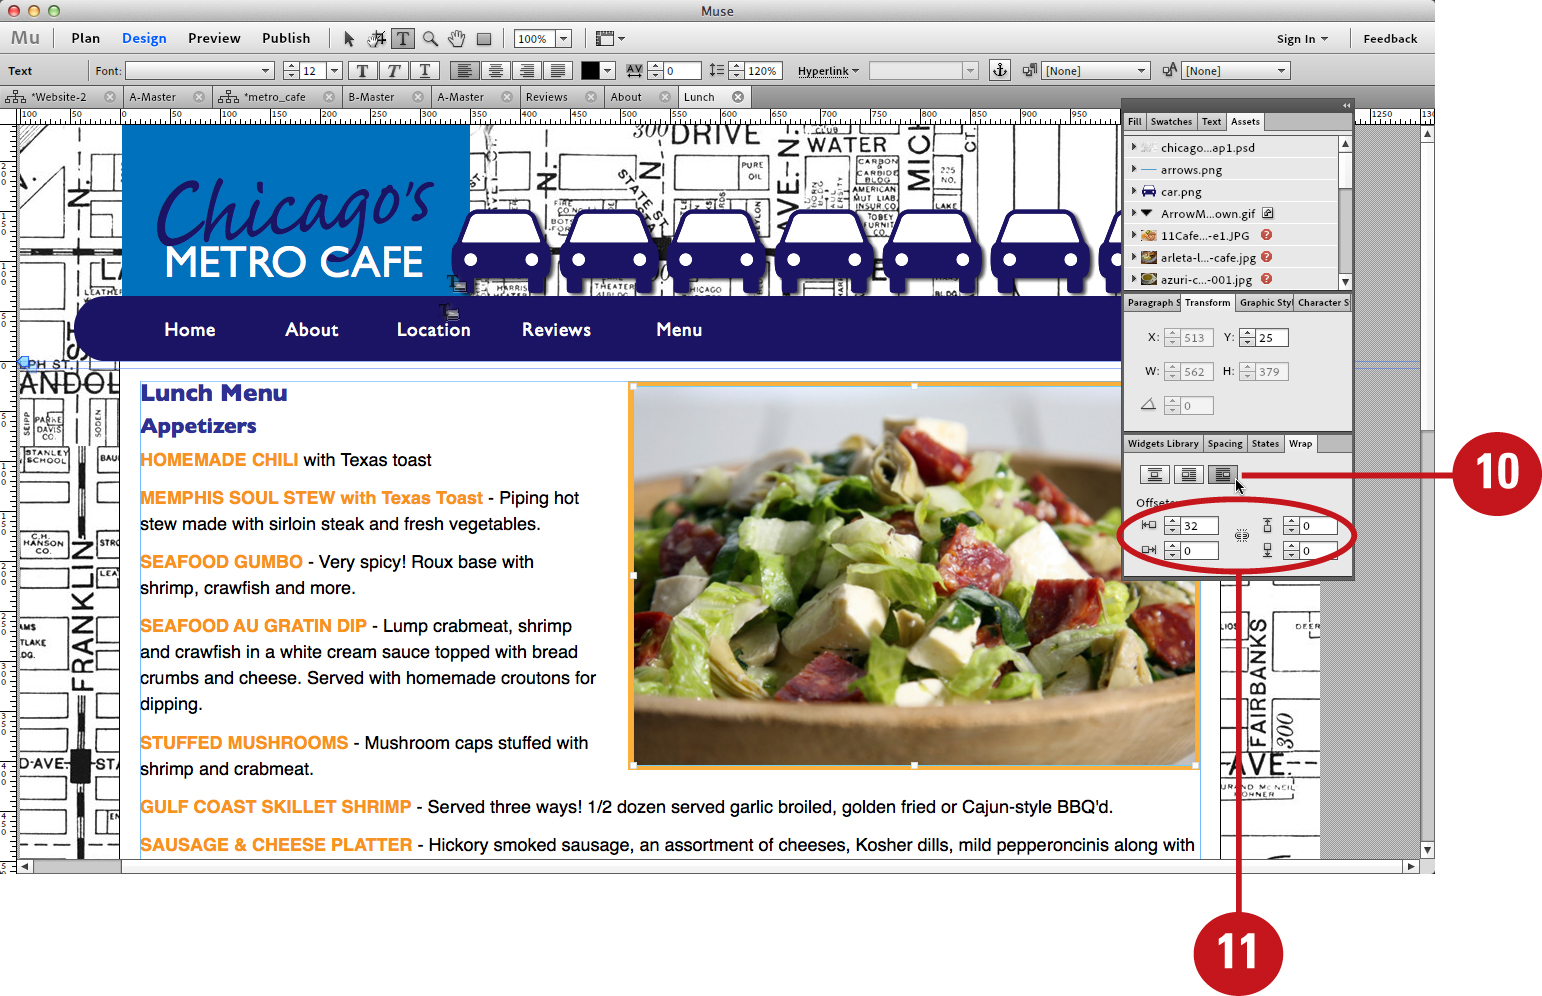
![]() Choose an inline position for the graphic by clicking one of the Position buttons located at the top of the Wrap panel. Options include: Position Object In-Line with Text, Position Object to the Left of Text, Position Object to the Right of Text.
Choose an inline position for the graphic by clicking one of the Position buttons located at the top of the Wrap panel. Options include: Position Object In-Line with Text, Position Object to the Left of Text, Position Object to the Right of Text.
![]() To apply padding around the inline graphic, enter numeric values in the Offset fields of the Wrap panel (top, bottom, left, right).
To apply padding around the inline graphic, enter numeric values in the Offset fields of the Wrap panel (top, bottom, left, right).
Applying Corner Effects
Another popular design effect you can apply in Muse is corner effects. With corner effects, you can apply rounded corners to rectangular frames. By selecting a frame and entering a radius value in the Control panel Corners field, you can round all four corners of the frame at once. To round a single corner, click the corresponding Corners button in the Control panel and enter a radius value in the neighboring field.
Enable the corner radius buttons
![]() Choose Plan Mode from the View menu.
Choose Plan Mode from the View menu.
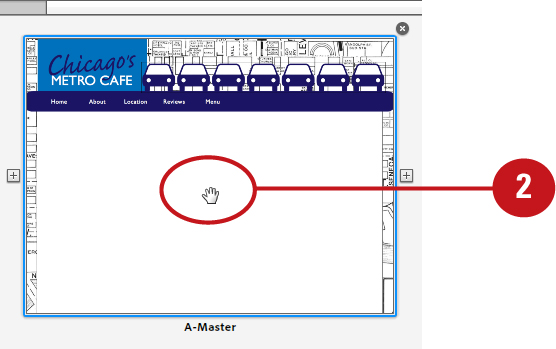
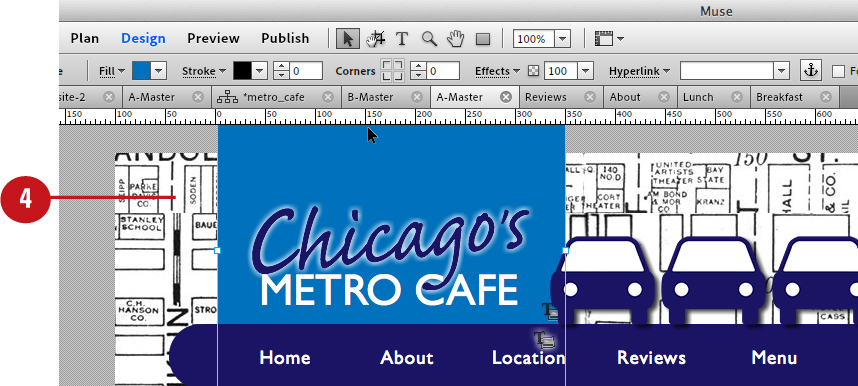
![]() From the sitemap, double-click the thumbnail of the page whose frame you’d like to edit.
From the sitemap, double-click the thumbnail of the page whose frame you’d like to edit.
Muse opens the page in Design Mode.
![]() Click the Selection Tool icon at the top of the Design Mode interface.
Click the Selection Tool icon at the top of the Design Mode interface.

![]() To select the frame you’d like to apply corner effects to, click it with the Selection tool.
To select the frame you’d like to apply corner effects to, click it with the Selection tool.
![]() To apply the same corner radius to all four corners, enter a value in the Control panel Corners field.
To apply the same corner radius to all four corners, enter a value in the Control panel Corners field.

![]() To apply a corner radius to a specific corner, click one of the four Corners buttons in the Control panel.
To apply a corner radius to a specific corner, click one of the four Corners buttons in the Control panel.
Muse applies the default radius (10) to the chosen corner.
![]() To increase or decrease the corner radius, enter a value in the Control panel Corners field or click the neighboring up/down arrows.
To increase or decrease the corner radius, enter a value in the Control panel Corners field or click the neighboring up/down arrows.


Applying a Drop Shadow
With Muse, it is not necessary to apply drop shadows to your graphics in a separate application, such as Photoshop, Fireworks, or Illustrator. You can apply this popular design effect to selected graphics directly in Muse by enabling the effect from the drop-down Effects panel. The panel also lets you choose familiar shadow options, such as color, opacity, size, angle, and distance.
Enable the shadow effect
![]() Choose Plan Mode from the View menu.
Choose Plan Mode from the View menu.

![]() From the sitemap, double-click the thumbnail of the page whose object you’d like to apply an effect to.
From the sitemap, double-click the thumbnail of the page whose object you’d like to apply an effect to.
Muse opens the page in Design Mode.
![]() Click the Selection Tool icon at the top of the Design Mode interface.
Click the Selection Tool icon at the top of the Design Mode interface.

![]() To select the object you’d like to apply an effect to, click it with the Selection tool.
To select the object you’d like to apply an effect to, click it with the Selection tool.
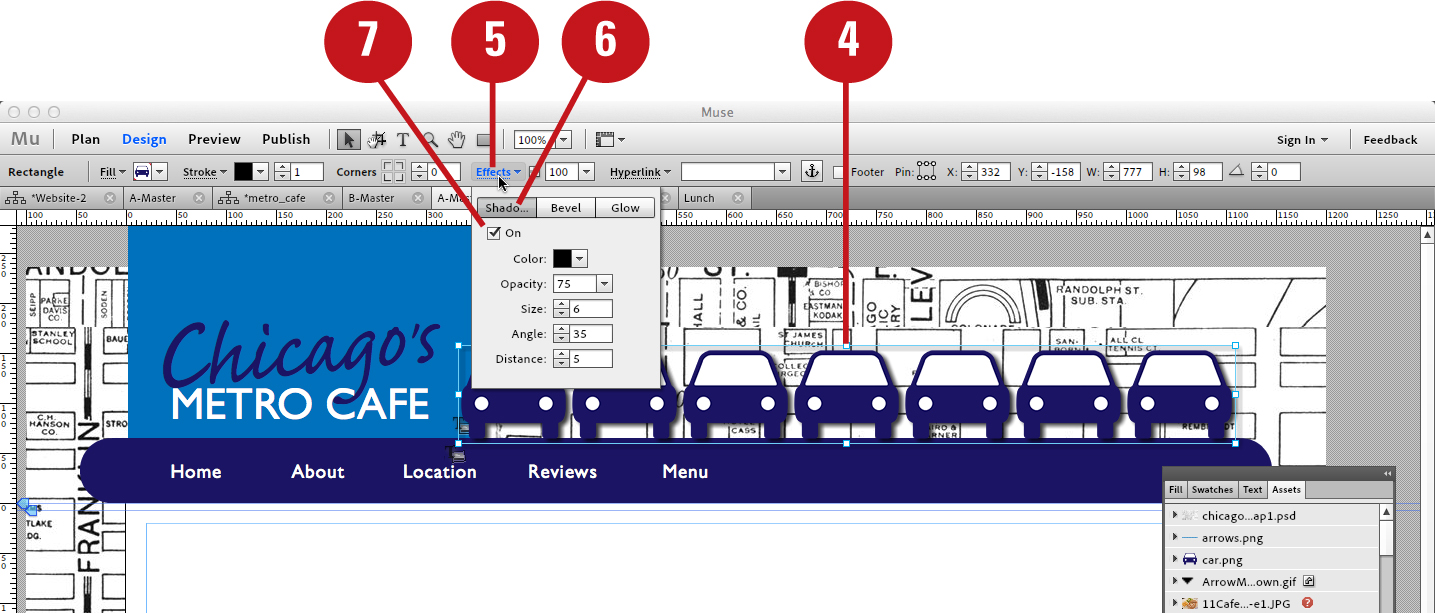
![]() Click the Effects button in the Control panel to display a drop-down Effects panel.
Click the Effects button in the Control panel to display a drop-down Effects panel.
![]() Click the Shadow button in the upper-left corner of the drop-down Effects panel.
Click the Shadow button in the upper-left corner of the drop-down Effects panel.
![]() Enable the effect by placing a check in the On checkbox.
Enable the effect by placing a check in the On checkbox.
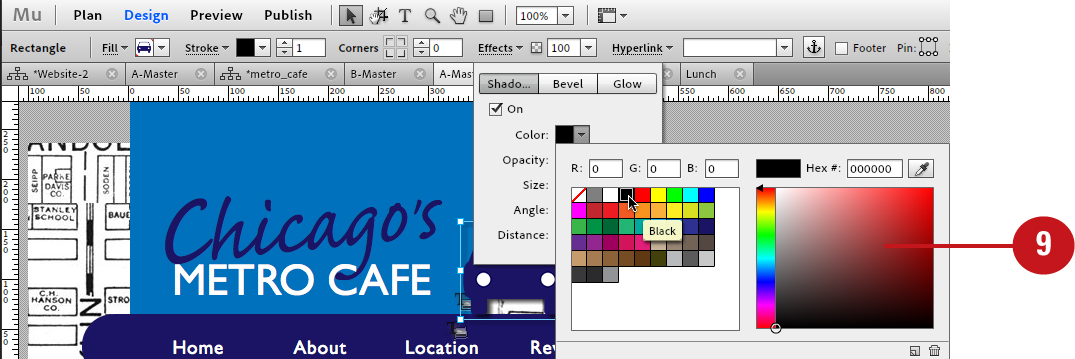
![]() Click the Color Swatch icon in the drop-down Effects panel.
Click the Color Swatch icon in the drop-down Effects panel.
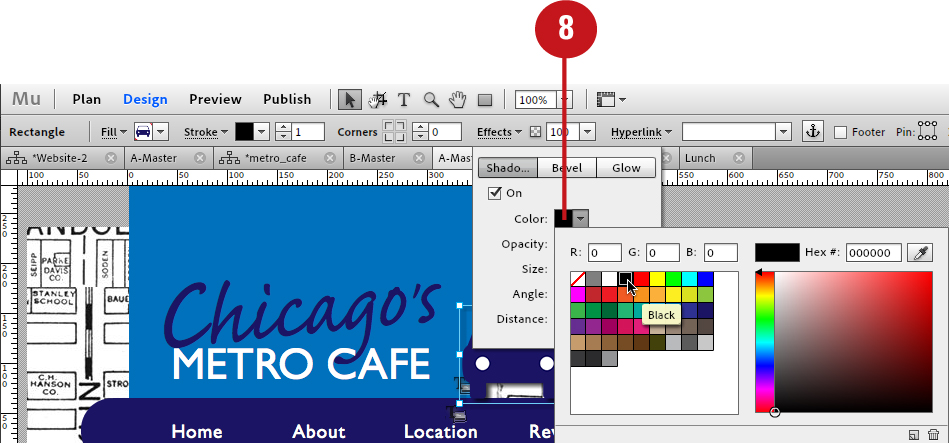
Muse displays a drop-down Color Picker.
![]() Choose a shadow color with the Color Picker via any of the following methods:
Choose a shadow color with the Color Picker via any of the following methods:
• Enter values into the RGB fields.
• Enter a hexadecimal code in the Hex# field.
• Click a swatch from the saved color swatch list.
• Drag the Hue slider up or down to select a color hue. Then click in the color field to the right of the Hue slider to determine the saturation and brightness of the selected color.
• Click the Sample Color Tool icon. To sample a color for the shadow, proceed to click anywhere on the page—including in a placed photo or graphic.
![]() Enter a value in the Opacity field, or click and drag the drop-down Opacity slider.
Enter a value in the Opacity field, or click and drag the drop-down Opacity slider.
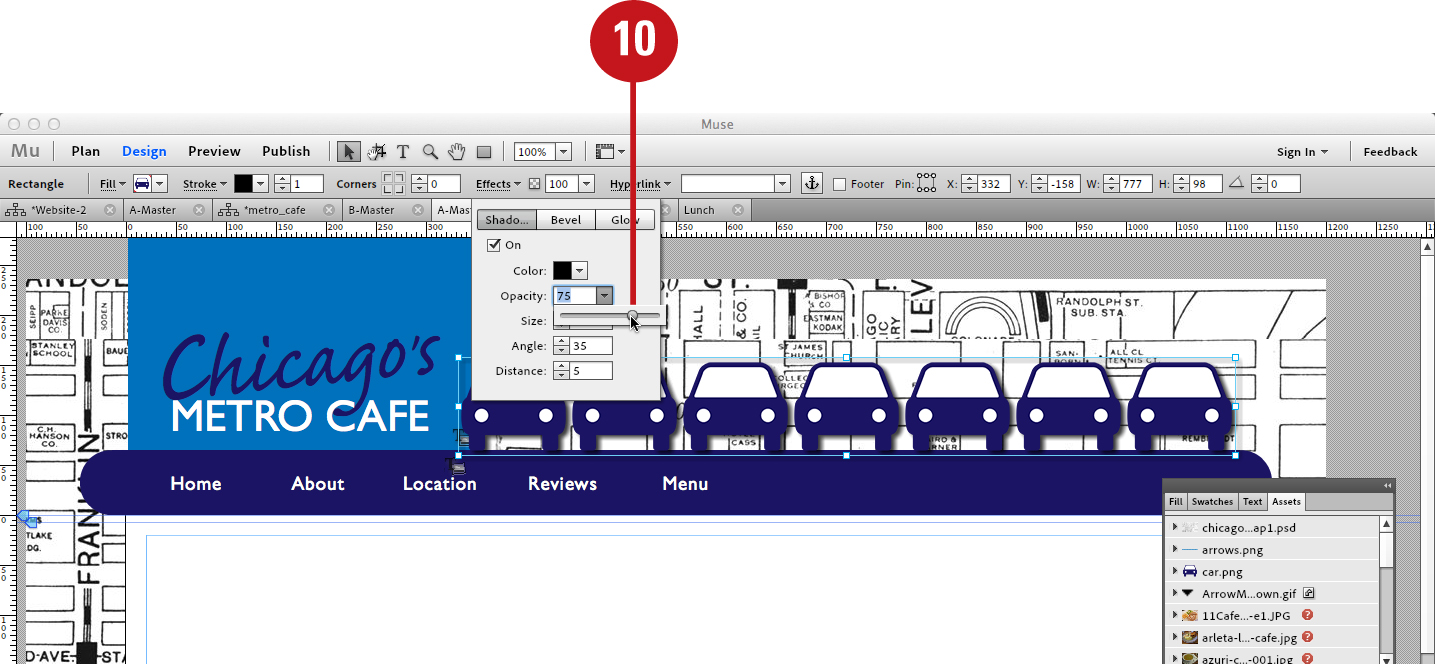
![]() Determine the softness/hardness of the shadow by entering a value in the Size field. Higher values produce softer shadows; lower values produce harder shadows.
Determine the softness/hardness of the shadow by entering a value in the Size field. Higher values produce softer shadows; lower values produce harder shadows.
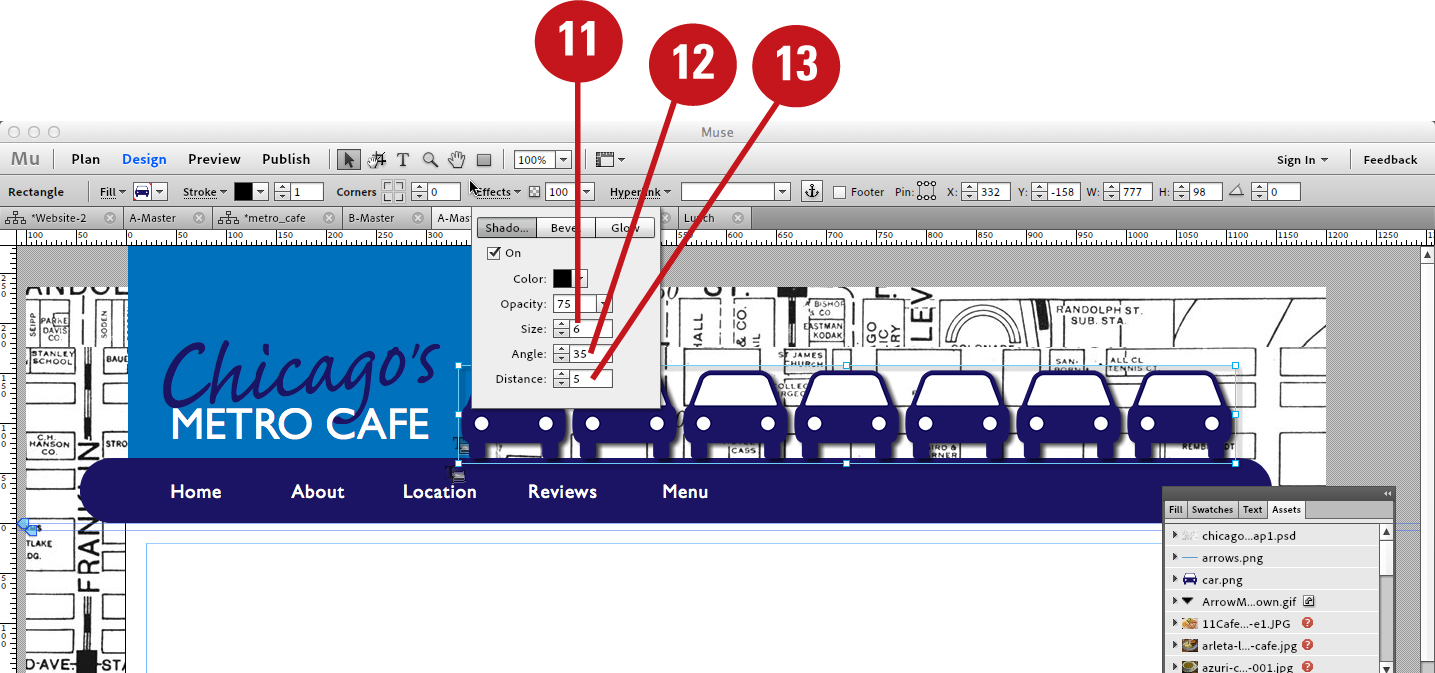
![]() Determine the angle of the shadow by entering a value in the Angle field.
Determine the angle of the shadow by entering a value in the Angle field.
![]() Determine the shadow distance by entering a value in the Distance field.
Determine the shadow distance by entering a value in the Distance field.
![]() Click away to close the drop-down Effects panel and view the effect.
Click away to close the drop-down Effects panel and view the effect.
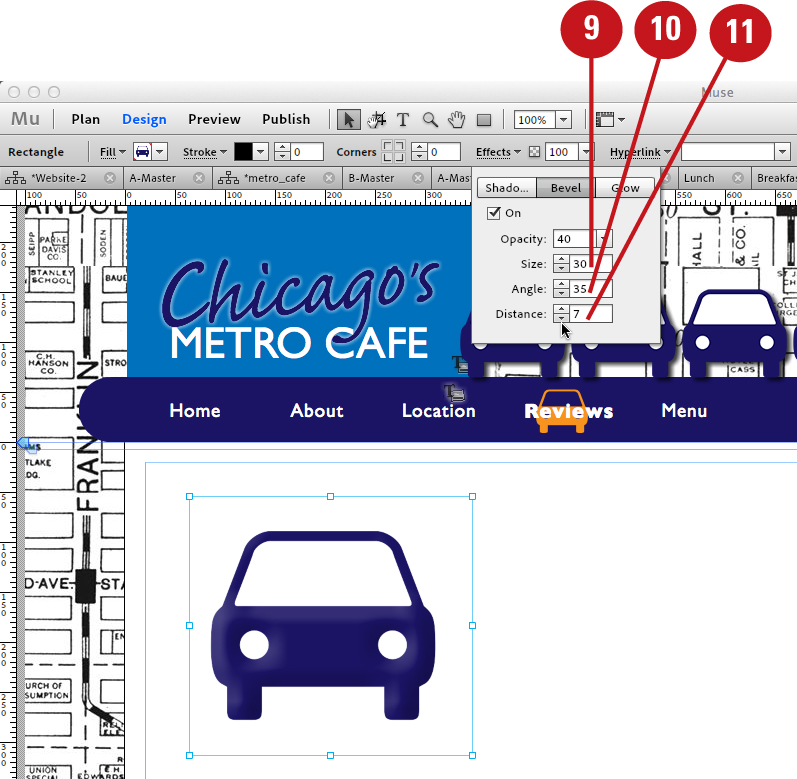
Applying a Bevel
A bevel effect creates the appearance of a sloped surface or edge. Bevel effects are often used to enhance buttons and other small web icons. As it is with drop shadows, you do not need to apply bevels using an outside application such as Photoshop, Fireworks, or Illustrator. You can apply bevels directly in Muse by selecting the graphic and enabling the option from the Effects panel. The panel also lets you choose familiar bevel options, such as opacity, size, angle, and distance.
Enable the bevel effect
![]() Choose Plan Mode from the View menu.
Choose Plan Mode from the View menu.

![]() From the sitemap, double-click the thumbnail of the page whose object you’d like to apply an effect to.
From the sitemap, double-click the thumbnail of the page whose object you’d like to apply an effect to.

Muse opens the page in Design Mode.
![]() Click the Selection Tool icon at the top of the Design Mode interface.
Click the Selection Tool icon at the top of the Design Mode interface.

![]() To select the object you’d like to apply an effect to, click it with the Selection tool.
To select the object you’d like to apply an effect to, click it with the Selection tool.
![]() Click the Effects button in the Control panel to display a drop-down Effects panel.
Click the Effects button in the Control panel to display a drop-down Effects panel.
![]() Click the Bevel button in the upper portion of the drop-down Effects panel.
Click the Bevel button in the upper portion of the drop-down Effects panel.
![]() Enable the effect by placing a check in the On checkbox.
Enable the effect by placing a check in the On checkbox.
![]() Enter a value in the Opacity field, or click and drag the drop-down Opacity slider.
Enter a value in the Opacity field, or click and drag the drop-down Opacity slider.
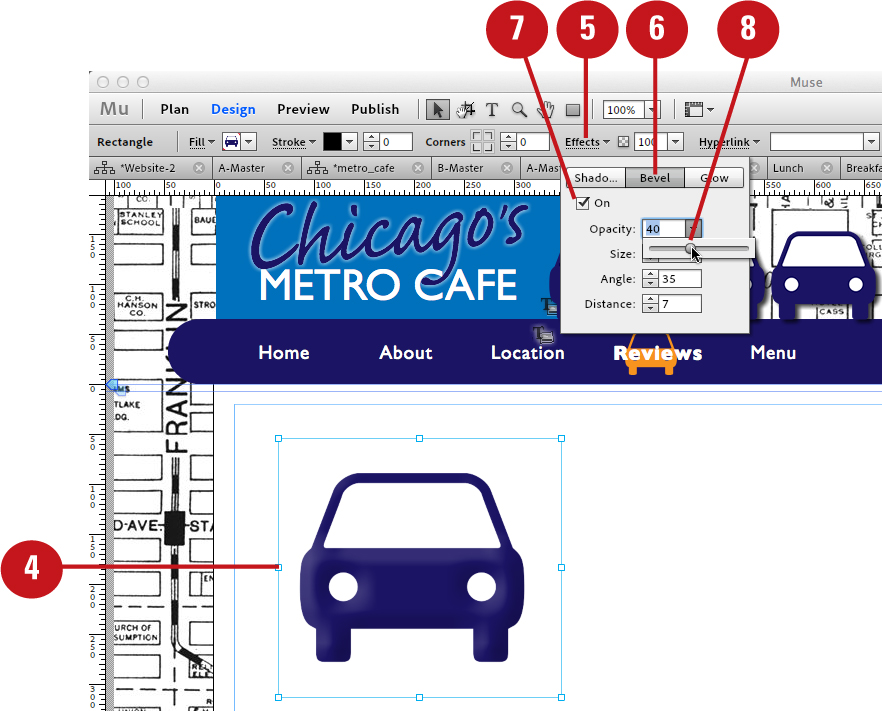
![]() Determine the softness/hardness of the bevel by entering a value in the Size field. Higher values produce softer bevels; lower values produce harder bevels.
Determine the softness/hardness of the bevel by entering a value in the Size field. Higher values produce softer bevels; lower values produce harder bevels.
![]() Determine the angle of the bevel by entering a value in the Angle field.
Determine the angle of the bevel by entering a value in the Angle field.
![]() Determine the bevel depth by entering a value in the Distance field.
Determine the bevel depth by entering a value in the Distance field.
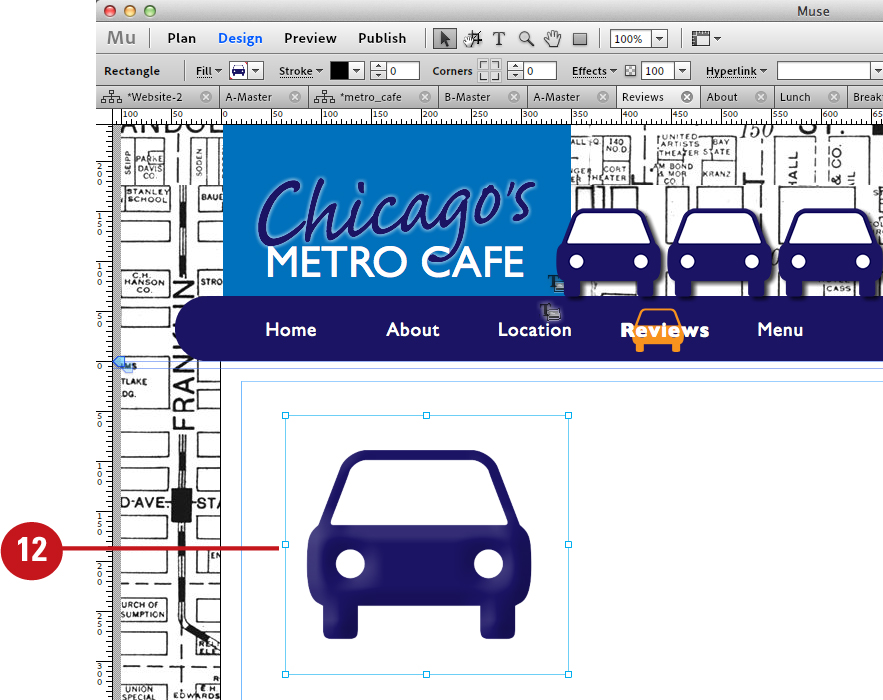
![]() Click away to close the drop-down Effects panel and view the effect.
Click away to close the drop-down Effects panel and view the effect.
Applying a Glow
By applying a glow effect, you can help graphics and text objects “pop” off the page. They’re great for making objects stand out over a busy or dark background. Just like with shadows and bevels, it is not necessary to apply glow effects using an outside application, such as Photoshop, Fireworks, or Illustrator. You can apply this effect directly in Muse by enabling it from the drop-down Effects panel. The panel also lets you choose familiar glow options, such as color, opacity, and size.
Enable the glow effect
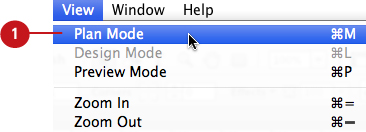
![]() Choose Plan Mode from the View menu.
Choose Plan Mode from the View menu.
![]() From the sitemap, double-click the thumbnail of the page whose object you’d like to apply an effect to.
From the sitemap, double-click the thumbnail of the page whose object you’d like to apply an effect to.

Muse opens the page in Design Mode.
![]() Click the Selection Tool icon at the top of the Design Mode interface.
Click the Selection Tool icon at the top of the Design Mode interface.

![]() To select the object you’d like to apply an effect to, click it with the Selection tool.
To select the object you’d like to apply an effect to, click it with the Selection tool.
![]() Click the Effects button in the Control panel to display a drop-down Effects panel.
Click the Effects button in the Control panel to display a drop-down Effects panel.
![]() Click the Glow button in the upper-right corner of the drop-down Effects panel.
Click the Glow button in the upper-right corner of the drop-down Effects panel.
![]() Enable the effect by placing a check in the On checkbox.
Enable the effect by placing a check in the On checkbox.
![]() Click the Color Swatch icon in the drop-down Effects panel.
Click the Color Swatch icon in the drop-down Effects panel.
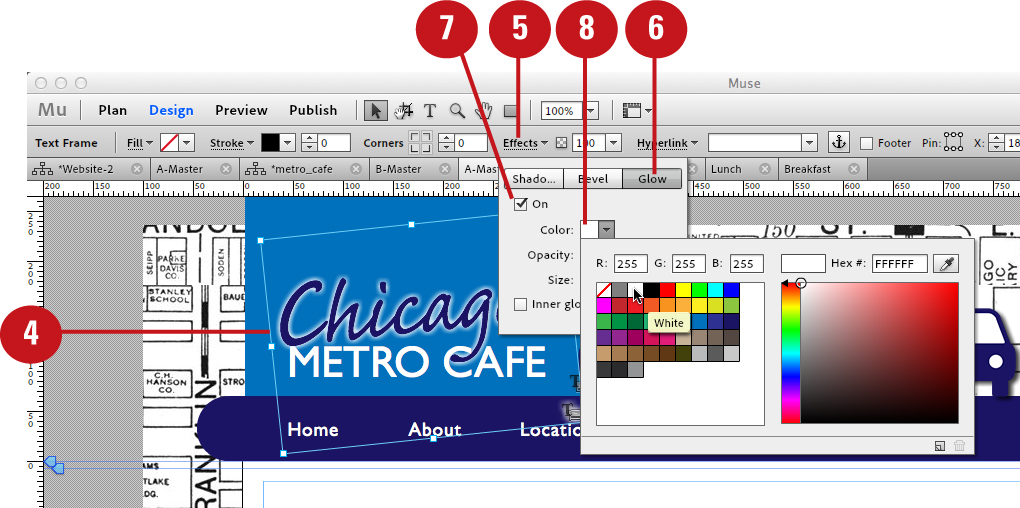
Muse displays a drop-down Color Picker.
![]() Choose a shadow color with the Color Picker via any of the following methods:
Choose a shadow color with the Color Picker via any of the following methods:
• Enter values into the RGB fields.
• Enter a hexadecimal code in the Hex# field.
• Click a swatch from the saved color swatch list.
• Drag the Hue slider up or down to select a color hue. Then click in the color field to the right of the Hue slider to determine the saturation and brightness of the selected color.
• Click the Sample Color Tool icon. To sample a color for the shadow, proceed to click anywhere on the page—including in a placed photo or graphic.
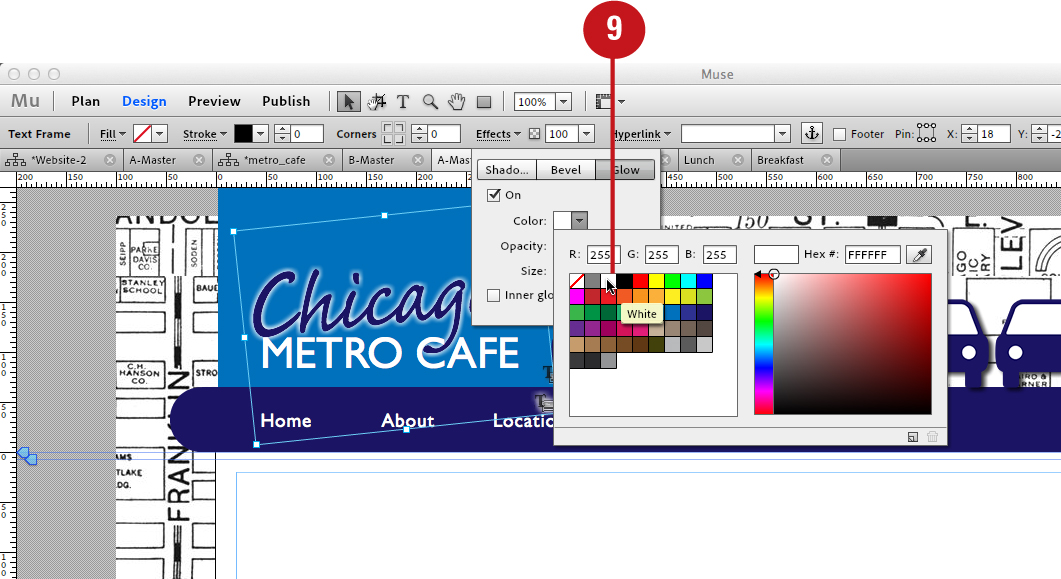
![]() Enter a value in the Opacity field, or click and drag the drop-down Opacity slider.
Enter a value in the Opacity field, or click and drag the drop-down Opacity slider.
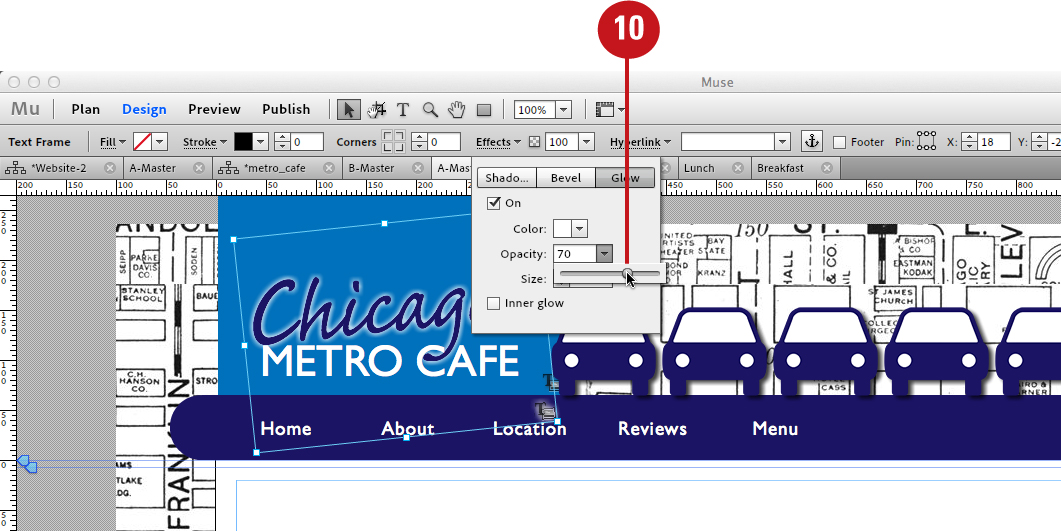
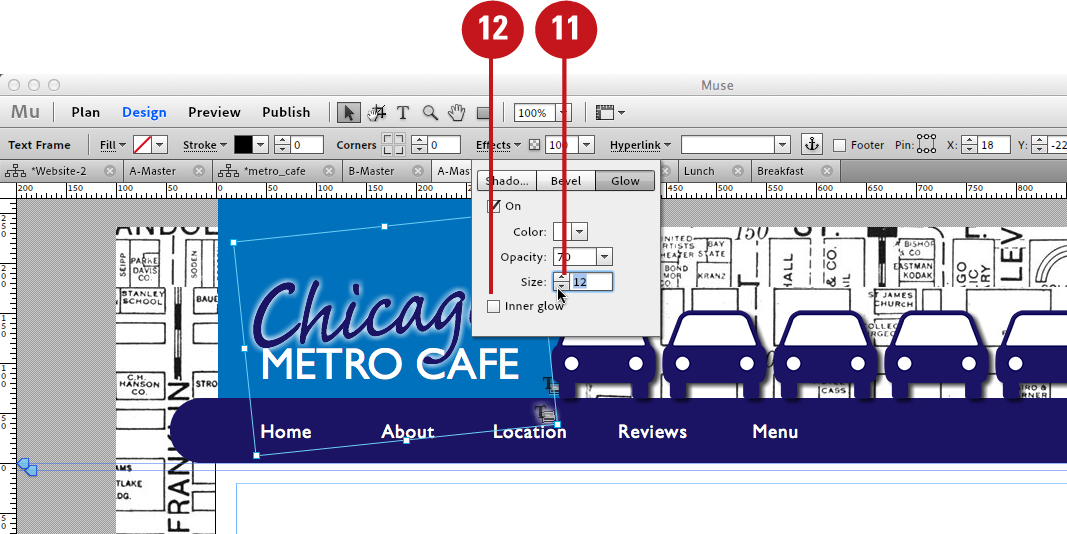
![]() Determine the softness/hardness of the glow by entering a value in the Size field. Higher values produce softer glows; lower values produce harder glows.
Determine the softness/hardness of the glow by entering a value in the Size field. Higher values produce softer glows; lower values produce harder glows.
![]() By default, Muse applies an outer glow effect. To create an inner glow effect, enable the Inner Glow option in the drop-down Effects panel.
By default, Muse applies an outer glow effect. To create an inner glow effect, enable the Inner Glow option in the drop-down Effects panel.
![]() Click away to close the drop-down Effects panel and view the effect.
Click away to close the drop-down Effects panel and view the effect.
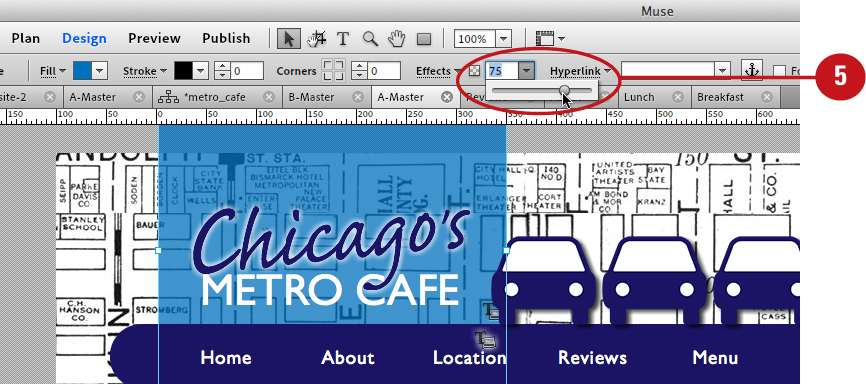
Changing Opacity
With Muse, you can adjust the opacity of any object on a page, including rectangles with a fill color applied, placed graphics, and editable text objects. By default the opacity setting for all objects is 100% (completely opaque). Lowering a selected object’s opacity setting enables you to see through it to the objects underneath. To change an object’s opacity, enter a precentage value in the Opacity field of the Control panel.
Enter a percentage in the opacity field
![]() Choose Plan Mode from the View menu.
Choose Plan Mode from the View menu.
![]() From the sitemap, double-click the thumbnail of the page whose object you’d like to adjust.
From the sitemap, double-click the thumbnail of the page whose object you’d like to adjust.

Muse opens the page in Design Mode.
![]() Click the Selection Tool icon at the top of the Design Mode interface.
Click the Selection Tool icon at the top of the Design Mode interface.

![]() Select the object by clicking it with the Selection tool.
Select the object by clicking it with the Selection tool.
![]() Enter a percentage in the Control panel Opacity field.
Enter a percentage in the Control panel Opacity field.
Muse applies the opacity setting to the selected object.
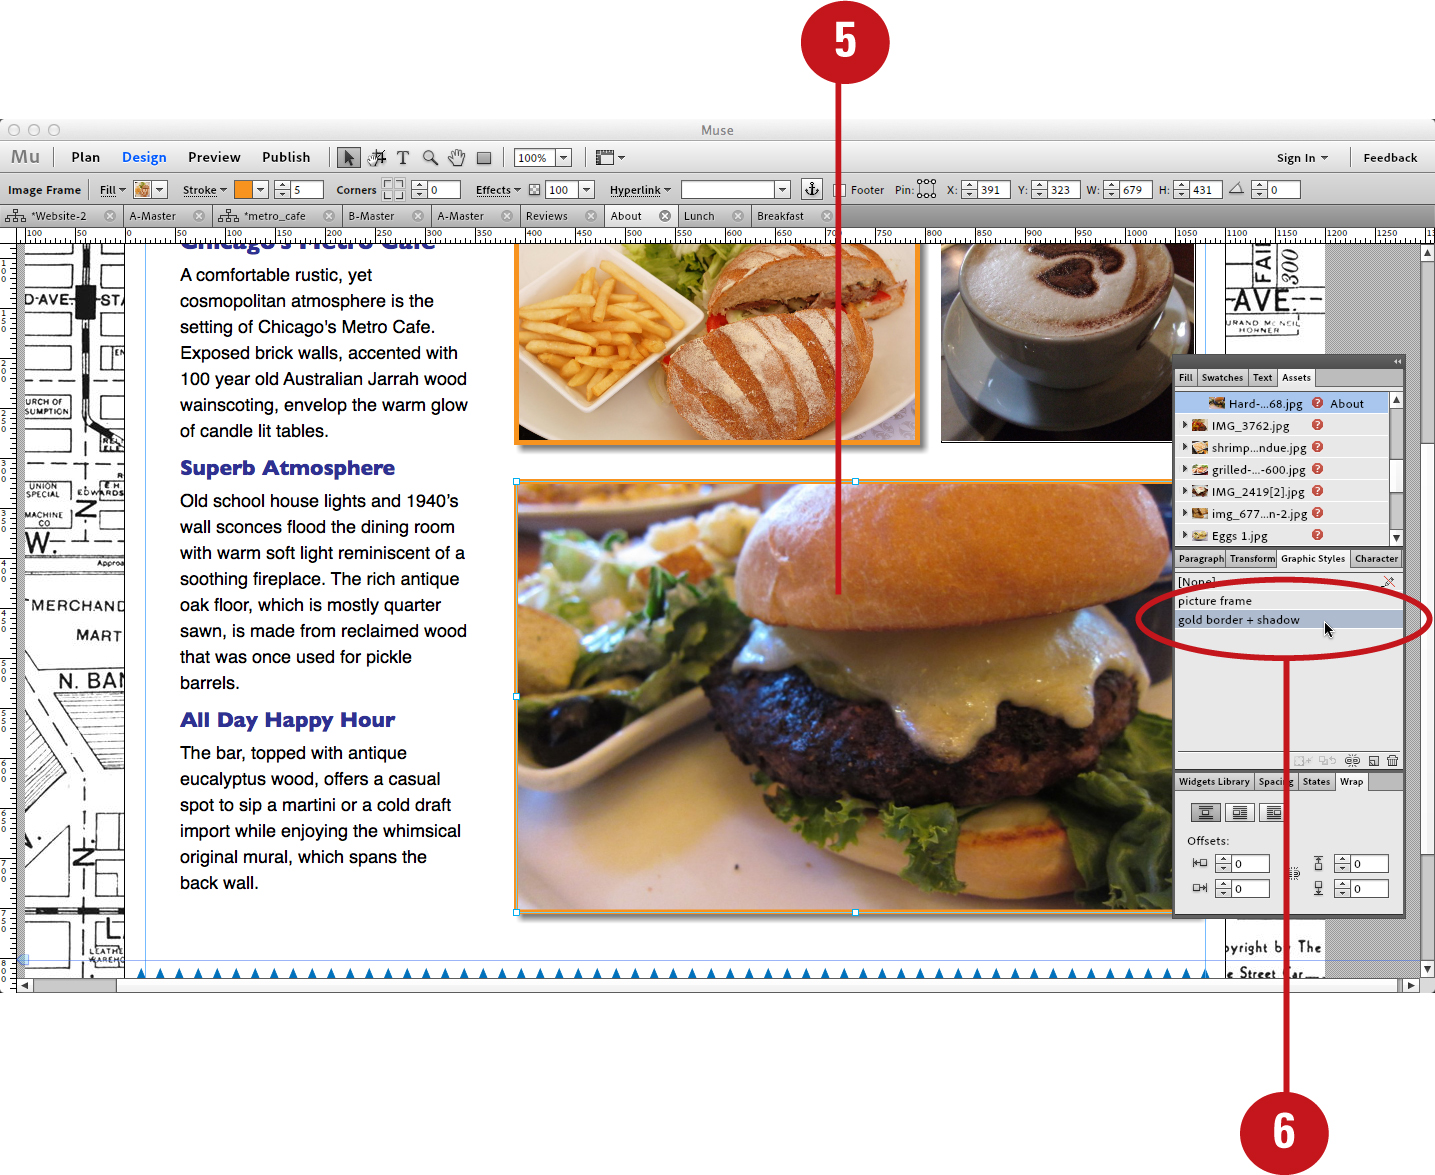
Saving a Graphic Style
Graphic styles enable you to save your favorite combinations of object attributes, such as fill and stroke color, wrap offset and alignment, drop shadows, bevels, glows, and more. After you save a graphic style, you can apply the attributes to a selected object with a single click of the mouse. You can create a graphic style by selecting an object that already has the attributes applied and clicking the new style button located at the bottom of the Graphic Styles panel.
Click the Create a New Style from Applied Attributes button
![]() Choose Plan Mode from the View menu.
Choose Plan Mode from the View menu.

![]() From the sitemap, double-click the thumbnail of a page whose objects contain attributes you’d like to save as a graphic style.
From the sitemap, double-click the thumbnail of a page whose objects contain attributes you’d like to save as a graphic style.

Muse opens the page in Design Mode.
![]() Click the Selection Tool icon at the top of the Design Mode interface.
Click the Selection Tool icon at the top of the Design Mode interface.

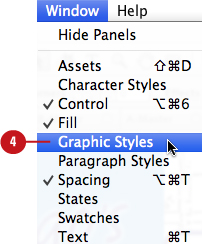
![]() To display the Graphic Styles panel, choose Window > Graphic Styles.
To display the Graphic Styles panel, choose Window > Graphic Styles.
You can unlink an object from its applied graphic style. To do so, select the object with the Selection tool. Muse highlights the name of the applied style in the Graphic Styles panel. To unlink the object from the style, click the Unlink Style button located at the bottom of the panel.
![]() Select the object by clicking it with the Selection tool.
Select the object by clicking it with the Selection tool.
![]() Click the Create a New Style from Applied Attributes button, located at the bottom of the Graphic Styles panel.
Click the Create a New Style from Applied Attributes button, located at the bottom of the Graphic Styles panel.

Muse saves the attributes currently applied to the selected graphic as a style. By default, Muse names the new style, Style 1.
![]() To rename the style, access the contextual menu by right-clicking or Control-clicking (Mac) Style 1 in the Graphic Styles panel and choose Rename Style.
To rename the style, access the contextual menu by right-clicking or Control-clicking (Mac) Style 1 in the Graphic Styles panel and choose Rename Style.
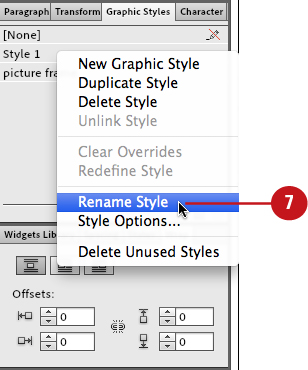
Muse highlights the style name in the Graphic Styles panel.
Always use the contextual menu to rename or edit style options. Double-clicking the style name in the Graphic Styles panel applies the style to the currently selected object. If no objects are selected, Muse applies the style to the entire page.
![]() Enter a name for the style and press Return (Mac) or Enter (Win).
Enter a name for the style and press Return (Mac) or Enter (Win).
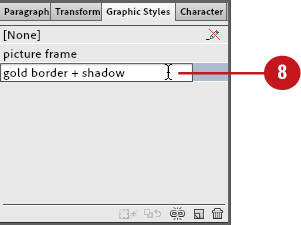
Muse applies the new style name.
The plus symbol means there is a style override. When you see a plus symbol (+) next to a style name in the Graphic Styles panel, this indicates that additional attributes—that are not part of the stlye—have been applied to the object.
Applying a Graphic Style
Applying graphic styles in Muse is just as easy as creating them. After you save your favorite object attributes as a graphic style, you can apply them to a selected object by clicking the style name in the Graphic Styles panel. Any additional attributes that you apply to an object after applying the graphic style are considered overrides. You can clear style overrides by Option-(Mac) or Alt-(Win) clicking the style name in the Graphic Styles panel or by clicking the Clear Overrides button located at the bottom of the panel.
Click the style name in the Graphic Styles panel
![]() Choose Plan Mode from the View menu.
Choose Plan Mode from the View menu.
![]() From the sitemap, double-click the thumbnail of a page whose objects you’d like to apply a graphic style to.
From the sitemap, double-click the thumbnail of a page whose objects you’d like to apply a graphic style to.
Muse opens the page in Design Mode.
![]() Click the Selection Tool icon at the top of the Design Mode interface.
Click the Selection Tool icon at the top of the Design Mode interface.
![]() To display the Graphic Styles panel, choose Window > Graphic Styles.
To display the Graphic Styles panel, choose Window > Graphic Styles.

The only way to edit a graphic style is to redefine it. To add overrides to the style definition, select the object and click the Redefine Style button located at the bottom of the Graphic Styles panel (it’s the second icon from the left), or choose the command from the contextual menu.
![]() Select the object by clicking it with the Selection tool.
Select the object by clicking it with the Selection tool.
![]() Click the style name in the Graphic Styles panel.
Click the style name in the Graphic Styles panel.
Muse applies the saved graphic style attributes to the selected object.
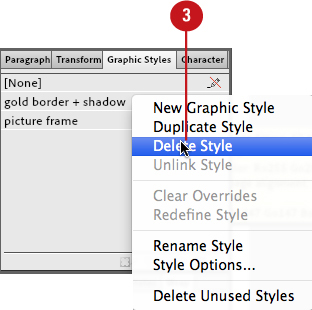
Deleting a Graphic Style
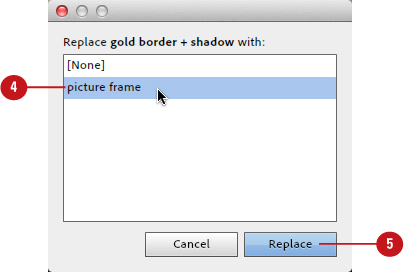
To delete a style from the Graphic Styles panel, hover the cursor over the style name in the panel and right-click or Control-click (Mac) to access the contextual menu. Choose Delete Style to remove the style from the panel. If the style you are deleting is currently applied to any objects in the site, Muse asks you what style you would like to use to replace it. Choose a replacement style from the Replace Style list and click Replace.
Choose the Delete Style command
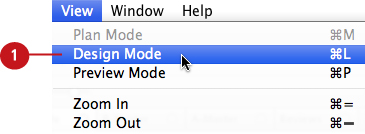
![]() Choose Design Mode from the View menu.
Choose Design Mode from the View menu.
Muse opens the current page in Design Mode.
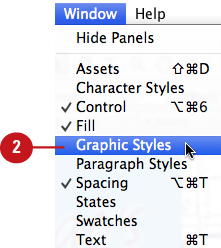
![]() To display the Graphic Styles panel, choose Window > Graphic Styles.
To display the Graphic Styles panel, choose Window > Graphic Styles.
![]() Access the contextual menu by right-clicking or Control-clicking (Mac) the style name in the Graphic Styles panel, and choose Delete Style.
Access the contextual menu by right-clicking or Control-clicking (Mac) the style name in the Graphic Styles panel, and choose Delete Style.
If the style is being used anywhere in the site, Muse displays the Replace Style window.
![]() Select a style from the Replace Style list.
Select a style from the Replace Style list.
![]() Click Replace.
Click Replace.
Any objects that were stylized by the now deleted style assume the attributes of the replacement style.