
In this lesson, you’ll learn how to do the following:
<objective>Draw rectangles, ovals, and lines
</objective> <objective>Understand the difference between drawing modes
</objective> <objective>Modify the shape, color, and size of drawn objects
</objective> <objective></objective> <objective></objective> <objective></objective> <objective></objective> <objective>Group elements
</objective> <objective></objective> </feature>This lesson will take approximately 90 minutes to complete. If needed, remove the previous lesson folder from your hard drive and copy the Lesson02 folder onto it.

Start by viewing the finished movie to see the animation you’ll be creating in this lesson.
Double-click the 02End.swf file in the Lesson02/02End folder to view the final project.

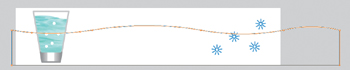
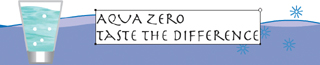
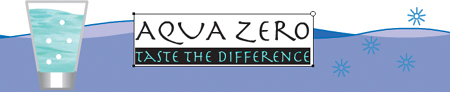
The project is a simple static illustration for a banner ad. This illustration is for Aqua Zero, a fictional company. In this lesson, you’ll draw the shapes, modify them, and learn to combine simple elements to create more complex visuals. You won’t create any animation just yet. After all, you must learn to walk before you can run! And learning to create and modify graphics is an important step before doing any Flash animation.
Choose File > New. In the New Document dialog box, choose Flash File (ActionScript 3.0).
In the Property inspector, make the Stage size 700 pixels by 150 pixels and make the color of the Stage a light blue.
Choose File > Save. Name the file 02_workingcopy.fla and save it in the 02Start folder. Saving your file right away is a good working habit and ensures that your work won’t be lost if the application or your computer crashes.
Every graphic in Flash starts with a shape. A shape is made of two components: the fill, or the insides of a shape, and the stroke, or the outline of the shape. If you can always keep these two components in mind, you’re well on your way to creating beautiful and complicated visuals.
The fill and the stroke are independent of each other, so you can modify or delete either without affecting the other. For example, you can create a rectangle with a blue fill and a red stroke, and then later change the fill to purple and delete the red stroke entirely. All you’ll be left with is a purple rectangle without an outline.
Flash includes several drawing tools, which work in different drawing modes. Many of your creations will begin with simple shapes such as rectangles and ovals, so it’s important that you’re comfortable drawing them, modifying their appearance, and applying fills and strokes.
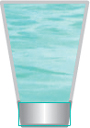
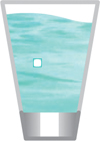
You’ll begin by drawing the glass of fizzy drink.
Select the Rectangle tool
 from the Tools panel. Make sure the Object Drawing mode icon
  is not selected.
Choose a stroke color
 and a fill color
  from the bottom of the Tools panel. The stroke and fill can be any color, but make sure a color is selected for each.
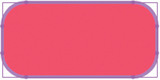
On the Stage, draw a rectangle that is about twice as tall as it is wide. You’ll specify the exact size and position of the rectangle in step 6.

Select the Selection tool.
Drag the Selection tool around the entire rectangle to select the stroke and the fill. When a shape is selected, Flash displays it with white dots. You can also double-click a shape, and Flash will select both the stroke and fill of the shape.

In the Property inspector, type 95 for the width and 135 for the height. Press Enter/Return to apply the values.

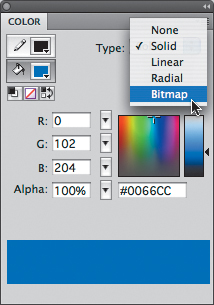
The fill is the interior of the drawn object. You can apply a solid color, a gradient, or a bitmap image (such as a TIFF, JPEG, or GIF file) as a fill in Flash, or you can specify that the object has no fill. For this lesson, to give the glass the appearance of holding liquid, you’ll import an image of water to use as the fill. You can import a bitmap file in the Color panel.
Make sure the entire rectangle is still selected. If necessary, drag the Selection tool around it again.
Open the Color panel (Window > Color). In the Color panel, click the Fill Color icon
 .
.Select Bitmap from the Type menu.
In the Import to Library dialog box, navigate to the Water.tif file in the Lesson02/02Start folder.
Select the Water.tif file and click Open.
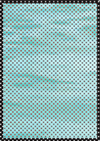
The rectangle fills with the water image.
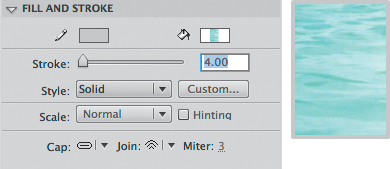
The stroke is the outline of the object, in this case a rectangle. You can apply attributes to the stroke that are different from those of the fill; you can also specify that the object has no stroke. You’ll give the rectangle a solid gray outline.
Select the rectangle on the Stage, if it isn’t already selected.
In the Property inspector, click the Stroke Color box
.In the Color Picker, select the fourth box down on the left, a gray color. Or, type #999999 in the box.

Note
Each color has a hexadecimal value in Flash, HTML, and many other applications. Light gray is #999999; white is #FFFFFF; black is #000000. Appendix A lists the colors with their hexadecimal values. You may find it handy to memorize the values for the colors you use most often.
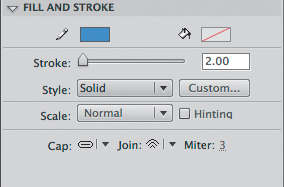
Type 4 in the Stroke Height box, and press Enter/Return to apply the value.
The rectangle should now have the water bitmap fill and a thick gray stroke.
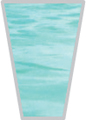
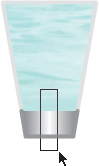
Now you’ll make the rectangle look more like a drinking glass. You’ll use the Free Transform tool to nudge the bottom corners inward. With the Free Transform tool, you can adjust points on lines and shape outlines.
In the Tools panel, select the Free Transform tool
 .
.Drag the Free Transform tool around the rectangle on the Stage to select it.
Transformation handles appear on the rectangle.

Press Ctrl/Command+Shift as you drag one of the corners inward. Pressing these keys lets you move both corners the same distance simultaneously.
Click outside the shape to deselect it.
The bottom of the rectangle is narrow, and the top is wide. It now looks more like a drinking glass.
Flash Drawing Modes
Flash provides three drawing modes, which determine how objects interact with each other on the Stage and how you can edit them. By default, Flash uses merge drawing mode, but you can enable object drawing mode or use the Rectangle Primitive or Oval Primitive tool to use the primitive drawing mode.
<division> <title>Merge drawing mode</title>In this mode, Flash merges drawn shapes, such as rectangles and ovals, where they overlap, so that multiple shapes appear to be a single shape. If you move or delete a shape that has been merged with another, the overlapping portion is permanently removed.

In this mode, Flash does not merge drawn objects; they remain distinct and separate, even when they overlap. To enable object drawing mode, select the tool you want to use, and then click the Object Drawing icon in the options area of the Tools panel.
To convert an object to shapes (merge drawing mode), select it and press Ctrl/Command+B. To convert a shape to an object (object drawing mode), select it and choose Modify > Combine Object > Union.

When you use the Rectangle Primitive tool or the Oval Primitive tool, Flash draws the shapes as separate objects. Unlike regular objects, however, you can modify the corner radius of rectangle primitives, as well as the start and end angle and the inner radius of oval primitives using the Property inspector.
In a gradient, one color gradually changes into another. Flash can create linear gradients, which change color horizontally, vertically, or diagonally; or radial gradients, which change color moving outward from a central focal point. You’ll use a linear gradient fill to add weight and depth to the base of the drinking glass.


By default, a linear gradient moves from one color to a second color, but you can use up to 15 color transitions in a gradient in Flash. A color pointer determines where the gradient changes from one color to the next. Add color pointers beneath the gradient definition bar to add color transitions.
You’ll add a color pointer and adjust the existing pointers to create a gradient that moves from black to white to black in the base of the glass.
Click beneath the gradient definition bar to create a new color pointer.

Drag the new color pointer to the middle of the gradient.
Select the new color pointer (the triangle above it turns black when selected), and then type #FFFFFF in the Hex value field to specify white for the pointer. Press Enter/Return to apply the color.
Select the far-right color pointer, and then click the black area in the grayscale range above it, or type #000000.
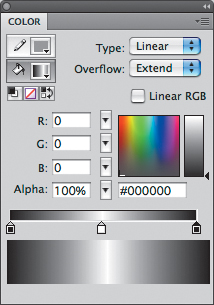
The gradient fill at the base of the glass changes from black to white to black.
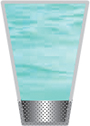
In addition to positioning the color pointers for a gradient, you can adjust the size, direction, or center of a gradient fill. To stretch the gradient in the glass, you’ll use the Gradient Transform tool.
Select the Gradient Transform tool. (The Gradient Transform tool is grouped with the Free Transform tool.)

Click in the glass base. Transformation handles appear.
Drag the square handle on the side of the bounding box to stretch the gradient until the gradient color matches the stroke color of the glass. The gradient fill should blend into the edge of the glass.

To modify an object, you must first select it. In Flash, you can make selections using the Selection, Subselection, or Lasso tool. Typically, you use the Selection tool to select an entire object or a section of an object. The Subselection tool lets you select a specific point or line in an object. With the Lasso tool, you can draw a freeform selection.
To give the base of the glass a stronger highlight, you’ll select a section of it and apply a white fill. But first, to prevent accidentally selecting or modifying any part of the water fill, you’ll make the glass base section into a group. A group holds together a collection of shapes and other graphics to preserve their integrity. Use groups to organize your drawing.
Select the Selection tool.
Double-click the gradient at the base of the glass to select the fill and the connected strokes.

Choose Modify > Group.
Double-click the newly created group to edit it.
Notice that all the other elements on the Stage dim, and the top horizontal bar above the Stage displays Scene 1 Group. This indicates that you are now in a particular group and can edit its contents.
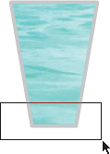
With the Selection tool, select the center area of the base shape. Start the selection area from outside the group—either above or below it—to prevent moving the entire base.
Click the Fill Color icon in the Tools panel, and select white or type #FFFFFF in the Color Picker. The selected portion becomes white.
Click the Scene 1 icon in the horizontal bar at the top of the Stage to return to the main scene.

To make the drink more believable, you’ll curve or slope the top of the liquid in the glass. The Lasso tool is an ideal tool for this job because you can use it to make an irregular selection.
Select the Lasso tool
 . Make sure the Polygon Mode icon
  is not selected.
Draw a closed shape around the top of the glass fill. Overlap the ends, and then release the mouse.

Click the Color Fill icon in the Tools panel, and select white in the Color Picker. The water bitmap is replaced with a solid white fill in the selected area.

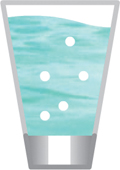
The drink is complete! Rename the layer containing the drink glass. All that’s left to do is to add bubbles and fizz.
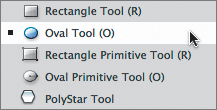
The Oval tool is similar to the Rectangle tool, except, of course, it draws ovals. You’ll use the Oval tool to draw a bubble in the drinking glass.
Select the Oval tool, which is grouped with the Rectangle tool.
In the Property inspector, set the Stroke color to No Color
 and the Fill color to white (#FFFFFF).
While holding down the Shift key, click and drag the Oval tool on the Stage to draw a circle. Draw the circle outside of the glass so you can keep it intact. When you press the Shift key, the Oval tool draws a perfect circle.
You probably can’t see your circle since it is white and you have a white Stage. Drag the Selection tool around the entire circle to select both the fill and the stroke.

Select the Free Transform tool to resize the bubble.
Hold down the Shift key to retain the bubble’s proportions and drag a corner handle inward to make the bubble smaller. The resized circle should be about 8 pixels wide and 8 pixels tall. You may find it easier to resize the bubble if you zoom in on it with the Zoom tool. (The Property inspector displays the bubble’s height and width.)

Note
By default, the object is scaled relative to the upper-left corner. If you press Alt or Option, the object is scaled relative to its transformation point, represented by the circle icon. When in Free Transform mode, you can drag the transformation point anywhere in the object or even outside of the object.
While the bubble is still selected, choose Modify > Group to turn the bubble into a group. By grouping the bubble, you can move it over the glass and reposition it without clipping the shape of the glass or any shapes below it.
Move the bubble over the glass.
Choose Edit > Paste in Center. Another bubble appears on the Stage. Move the second bubble over the glass. Repeat the copy and paste process until you have as many bubbles as you like.
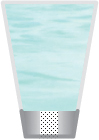
You can make intricate patterns with the Deco tool ![]() , which is a new feature in Flash CS4. Several options allow you to quickly and easily build symmetrical designs, grids, or branching-type flourishes. In this lesson, you’ll use the Deco tool to create a symmetrical starburst-like design for the fizzy shapes around the glass.
, which is a new feature in Flash CS4. Several options allow you to quickly and easily build symmetrical designs, grids, or branching-type flourishes. In this lesson, you’ll use the Deco tool to create a symmetrical starburst-like design for the fizzy shapes around the glass.
Before you can use the Deco tool, you must create a symbol to be used as the base shape that will repeat. You’ll learn more about symbols in the next lesson.
From the top menu, choose Insert > New Symbol.
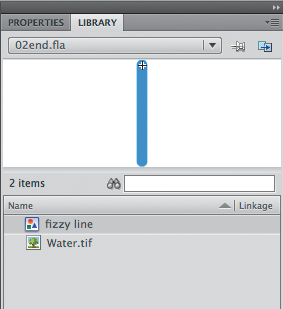
In the Create New Symbol dialog box that appears, enter fizzy line for the name and choose the Graphic type symbol. Click OK.

Flash immediately takes you to Symbol-editing mode. Notice the top horizontal bar above the Stage, which indicates you are currently editing the symbol called fizzy line. You will now draw a line for this symbol.

Select the Line tool
 .
.Select a blue color for the stroke and a stroke height of 2.
Hold down the Shift key while you draw a line across the center of the Stage, where you see a crosshair representing the center point of your symbol. Make the line about 25 pixels high.

Click on Scene 1 on the horizontal bar above the Stage to return to the main Timeline. Your new symbol called fizzy line has been created and is stored in your Library for later use.
You’ll create a star shape with the Deco tool.
On the Timeline, insert a new layer and name it fizz. You’ll draw your fizzy shapes in this layer.
In the toolbar, select the Deco tool
 .
.In the Property inspector, choose the Symmetry Brush option.
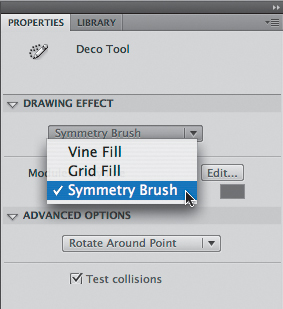
Click the Edit button next to Module to change the shape that will repeat.
In the Swap Symbol dialog box, choose the fizzy line symbol. Click OK.

Under the Advanced Options, choose Rotate Around Point.

With these Deco tool options, you can create a repeating pattern of the fizzy line symbol that is symmetrical around a point. A green guide appears on the Stage that shows the center point, the main axis, and a secondary axis that determines how frequently the symbol is repeated.
Click on the Stage to place your symbol and move it around the green guides until you get the radial pattern you desire. The initial line should be vertical.
Drag the secondary green axis closer to the main axis to increase the repetitions.

When you’re done, select the Selection tool to exit the Deco tool.
The resulting pattern is a group consisting of a number of the fizzy line symbols.

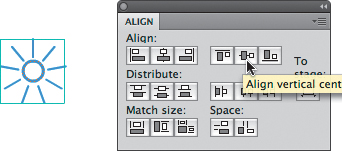
Now you’ll create a center bubble for the fizzy radiating lines. The bubble should be located exactly in the center of the radiating lines, and for that, you can turn to the Align panel. The Align panel, as you might guess, aligns any number of selected objects horizontally or vertically. It can also distribute objects evenly.
Select the Oval tool.
Select a blue color for the stroke and no fill. Select a stroke thickness of 2.
Select the fizz layer. Hold down the Shift key while you draw a small circle on the Stage.

Now select the Selection tool.
Drag the Selection tool over both the star-shaped group and the newly drawn oval. You might have to lock the lower layer so you don’t accidentally select the shapes in the lower layers.

Open the Align panel (Window > Align).
Click on the Align horizontal center.
The star-shaped group and the oval become aligned horizontally.

Click on the Align vertical center.
The star-shaped group and the oval become aligned vertically.
You used the Deco tool to create the group of radiating lines and the Align panel to center the bubble with the lines. Now you’ll group the fizzy shape into a single entity. To do so, you’ll break apart the group of radiating lines and regroup them with the oval.
With the Selection tool, drag a selection around the entire star so that all the lines and the circle are selected.
Choose Modify > Break Apart.
The group of lines breaks into its component parts and becomes a collection of fizzy line symbols.

Choose Modify > Break Apart one more time.
The collection of fizzy line symbols breaks into its component parts and becomes a collection of lines.

The lines and center circle become a group.

Copy and paste the fizz group to create multiple sparkles around the Stage.

Ovals and rectangles are a good start, but to make more sophisticated graphics, you’ll need to create and edit shapes with curves. You can use the Selection tool to pull and push on the edges of shapes to intuitively make curves, or you can use the Pen tool ![]() to have more precise control.
to have more precise control.
Now you’ll create a soothing, wave-like background graphic.
Choose Insert > Timeline > Layer, and name the new layer dark blue wave.
Drag the layer to the bottom of the layer stack.
Lock all the other layers.

In the Tools panel, select the Pen tool
 .
.Set the Stroke color to blue.
Begin your shape by clicking on the Stage to establish the first anchor point.
Click on another part of the Stage to indicate the next anchor point in your shape. When you want to create a smooth curve, click and drag with the Pen tool.
A handle appears from the anchor point, indicating the curvature of the line.

Continue clicking and dragging to build the outline of the wave. Make the width of the wave wider than the Stage.

Close your shape by clicking on the first anchor point. Don’t worry about getting all the curves perfect. It takes practice to get used to the Pen tool. You’ll also have a chance to refine your curves in the next part of the lesson.
Select the Paint bucket.
Set the Fill color to a dark blue.
Click inside the outline you just created to fill it with color.

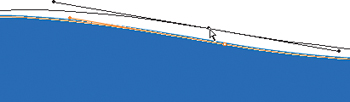
Your first try at creating smooth waves probably won’t be very good. Use the Selection tool or the Subselection tool to refine your curves.
Choose the Selection tool.
Hover over a line segment and look at the curve that appears near your cursor. This indicates that you can edit the curve. If a corner appears near your cursor, this indicates that you can edit the vertex.
Drag the curve to edit its shape.

In the Tools panel, select the Subselection tool
 .
.Click on the outline of the shape.
Drag the anchor points to new locations or move the handles to refine the overall shape.
Use the hidden tools under the Pen tool to delete or add anchor points as needed.

Next, you’ll create a second wave to overlap the first wave. You’ll make the second wave slightly transparent to create more overall depth. Transparency can be applied to either the stroke or the fill. Transparency is measured as a percentage and is referred to as alpha. An alpha of 100% indicates that a color is totally opaque, whereas an alpha of 0% indicates that a color is totally transparent.
Select the shape in the dark blue wave layer.
Choose Edit > Copy.
Choose Insert > Timeline > Layer and name the new layer light blue wave.

Choose Edit > Paste in Place.
The Paste in Place command puts the copied item in the exact same position from where it was copied.
Choose the Selection tool and move the pasted shape slightly to the left or to the right so the crests of the waves are somewhat offset.

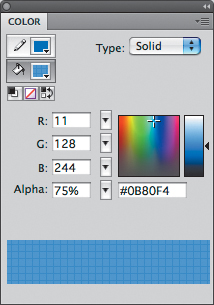
In the Color panel (Window > Color), set the fill color to a slightly different blue hue, and then change the Alpha value to 75%.

The color swatch at the bottom of the Color panel previews your newly selected color. Transparencies are indicated by the gray pattern that appears behind the color swatch.
If you want to match a color exactly, you can use the Eyedropper tool ![]() to sample a fill or a stroke. After you click on a shape with the Eyedropper tool, Flash automatically provides you with the Paint Bucket tool or the Ink Bottle tool with the selected color and associated properties that you can apply to another object.
to sample a fill or a stroke. After you click on a shape with the Eyedropper tool, Flash automatically provides you with the Paint Bucket tool or the Ink Bottle tool with the selected color and associated properties that you can apply to another object.
In the Tools panel, choose the Eyedropper tool.
Click on the blue fill of the shape in the dark blue wave layer.
Your tool automatically changes to the Paint Bucket with the sampled fill color.
Click on the shape in the light blue wave layer.

The fill in the light blue wave layer changes to match that of the one in the dark blue wave layer.
Finally, let’s add text to complete this illustration. Flash has many text options. For display text that does not change, use Static Text. Two other options, Dynamic Text and Input Text, are reserved for text that can be controlled with ActionScript.
When you create static text on the Stage and publish your project, Flash automatically includes all the necessary fonts to display the text correctly. That means you don’t have to worry about your audience having the required fonts to see the text as you intended it.
Select the light blue wave layer.
Choose Insert > Timeline > Layer and name the new layer text.
Choose the Text tool
 .
.In the Property inspector, select Static Text.

Under the Paragraph options, you have additional choices for formatting the text such as justification, spacing, or orientation.
Click on the Stage and begin typing. Enter Aqua Zero Taste the Difference. Alternately, you can click and drag out a text box to define the maximum width of your text.
Exit the Text tool by choosing the Selection tool.
Text remains editable as long as you don’t break it apart (Modify > Break Apart). If you break apart text, it results in a collection of individual characters. If you break those individual characters apart, they become simple shapes.
Choose the Selection tool and double-click the text you want to edit. Or, choose the Text tool and click on the text you want to edit.
Highlight the individual characters you want to edit.
In the Property inspector, change the text options. In this lesson, change the first line of text to be 48 points and black and the second line of text to be 26 points and red.

Flash makes it easy to create a hyperlink in static text. When a piece of text is hyperlinked, a user can click on it to go to a Web site. You’ll link the title of this fictional company to its Web site so users can quickly get more information.
Choose the Text tool and click on the text.
Highlight the characters in the first line of text.

In the Property inspector, under the Options section, enter a URL in the Link field. Be sure to include http:// before the Web site address.
In the Target field, choose _blank so that the Web site loads in a new browser window. Choose _self if you want the Web site to replace the contents of the current browser window.

Filters are special effects that you can apply to text and to certain symbols. They can quickly help you add a little pizzazz to an otherwise ordinary title. For example, you can add bevels or a glow effect to your text. In this lesson, you’ll add a drop shadow to the text to make it appear as if it is floating above the illustration.
Choose the Selection tool and click on your text.
In the Property inspector, expand the Filters section.
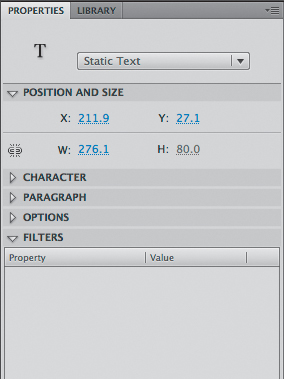
From the bottom of the Filters section, click the Add Filter button and select Drop Shadow.
The Drop Shadow filter appears in the window with all the options to customize its appearance.
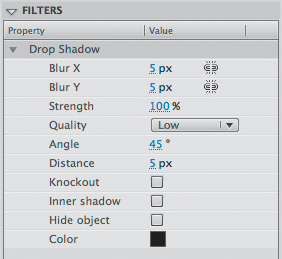
Your selected text automatically displays a drop shadow. Move it around and continue to edit the text, and the filter will still apply.
