
Lesson 9. Anchored Frames and Graphics
You can draw illustrations in FrameMaker 7.0 or import them. When you need to keep an illustration with particular document text, you place the illustration in an anchored frame that’s positioned in the column of text or in the page margin.
In this lesson, you’ll learn how to do the following:
• Import graphics into anchored frames.
• Anchor graphics below a paragraph, at the bottom of a column, in the page margin, in a line of text, and run into a paragraph.
• Copy and reuse anchored frames.
• Create a drop cap.
Editing text containing anchored frames
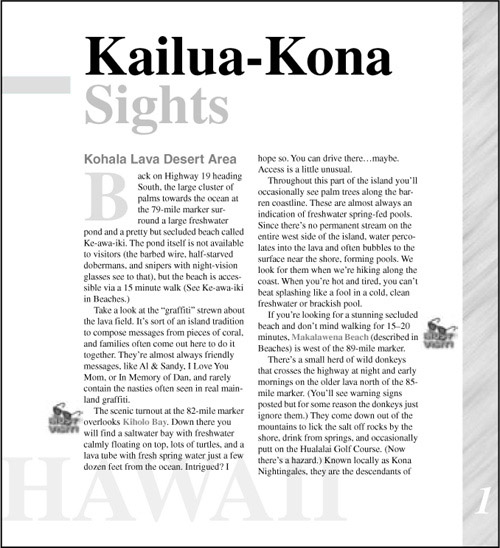
Throughout this lesson, you’ll add graphics to a travel guide on Hawaii. To see the different positions in which you can place graphics and how they move as you edit text, you’ll begin by looking at the finished document.
1. If necessary, copy the Lesson09 folder from the FrameMaker 7.0 Classroom in a Book CD and start FrameMaker 7.0.
2. If FrameMaker 7.0 is not in standard mode, choose File > Preferences > General, and then select FrameMaker from the Product Interface pop-up menu.
3. Open Finished.fm in the Lesson09 folder.

4. Use the Next Page button (![]() ) and Previous Page button (
) and Previous Page button (![]() ) in the status bar to page through the document.
) in the status bar to page through the document.
Each graphic in the document is in an anchored frame; that is, a frame attached to the text. This means that when you edit the text, the frame and the graphic in it move with the text.
The graphics in this document appear in several positions. One graphic is anchored to a spot in the body text, but positioned in the page margin (the “must visit” graphic on pages 1 and 3). Another is run into the paragraph (the flower on pages 2 and 6). Several graphics are anchored between paragraphs or at the bottom of the page (pages 3 through 6). Even text, such as the drop cap on page 1, can be in an anchored frame.
5. Go back to page 1.
6. To see how the graphics move with the text, click at the end of the first body paragraph on page 1 to place the insertion point, and then press Return several times.
The two pieces of art in the margin move down when you press Return. When you press Return enough times, the first piece of art in the margin moves from the left side of the page to the right.
7. Close Finished.fm without saving your changes.
Importing a graphic
Anchors.fm already contains several graphics. You’ll add a few more to finish the document. First, you’ll add a graphic between two paragraphs in the text column.
1. Open Anchors.fm in the Lesson09 folder.
2. Choose File > Save As, enter the filename Anchors1.fm, and click Save.
3. Choose View > Borders and View > Text Symbols to turn on the display of borders and text symbols.
4. Go to page 3 of Anchors1.fm.
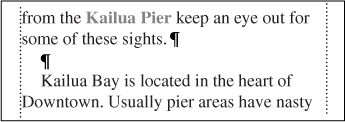
5. Click at the end of the first paragraph on the page (at the end of the line some of these sights).

6. Press Return to create an empty paragraph.
7. At the right side of the document window, click the Paragraph Catalog button (¶).

Paragraph Catalog button
8. In the Paragraph Catalog, click Anchor. The properties of the Anchor paragraph format control the spacing around the graphic.
You could create the anchored frame and then import the graphic into it, but you’ll usually find it faster to import the graphic at the insertion point. FrameMaker 7.0 will create the anchored frame for you.
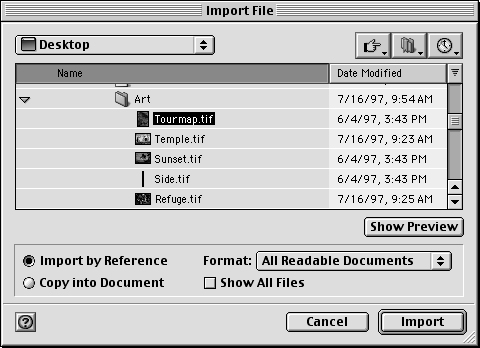
9. Choose File > Import > File.
10. Open the Art folder in the Lesson09 folder and select the Tourmap.tif file.
11. Select Import by Reference and click Import.
When you import by reference, the graphic file isn’t stored in the document. Instead, the document contains a pointer to the graphic file, keeping the file size down. The graphic in the document will be updated automatically whenever the stored file is changed.
12. The Import Graphic Scaling dialog box appears. If it isn’t already set to this, select Custom and enter 144 in the Custom dpi text box to specify the size of the graphic. Click Set.

If you had entered 72 dpi, the graphic would have appeared full-sized. You specified twice as many dots per inch (144), so the graphic appears at half of its full size.
FrameMaker 7.0 supports import and export of many types of graphics file formats, including SVG and movies. For more information about file formats, see Chapter 18, “Importing, Linking, and Exporting,” in the Adobe FrameMaker 7.0 User Guide.
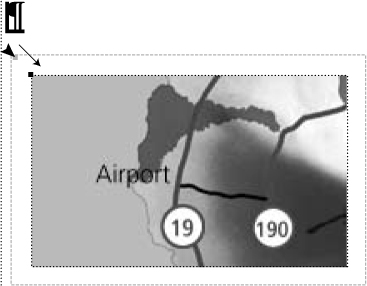
The imported graphic appears in an anchored frame below the empty paragraph. Handles appear around the anchored frame to indicate that the frame is selected. Also, an anchor symbol (![]() ) appears at the insertion point, although it’s hard to see here at the beginning of the line. The text moves down to accommodate the graphic.
) appears at the insertion point, although it’s hard to see here at the beginning of the line. The text moves down to accommodate the graphic.

For the graphic to appear in the correct position, you’ll need to change the properties of the anchored frame. First you’ll eliminate the white space between the anchored frame and the graphic by resizing the anchored frame.
13. Display the Graphics menu to see whether Snap is on or off. If it’s on, as indicated by a check mark or check box next to it, turn Snap off by selecting it.
14. Drag the top-left handle of the anchored frame until the edges of the anchored frame line up with the edges of the graphic.
15. Drag the bottom-right handle of the anchored frame until the edges of the anchored frame line up with the edges of the graphic.

Now you’ll change the anchoring position of the frame.
16. With the anchored frame still selected, choose Special > Anchored Frame.
If the anchored frame is no longer selected, the first button at the bottom of the dialog box is New Frame rather than Edit Frame. If this is the case, click Cancel, click the frame’s border, and try again.
17. Choose At Insertion Point from the Anchoring Position pop-up menu.
18. Change the Distance above Baseline to 0 (zero) and click Edit Frame. The anchor moves to the bottom of the anchored frame.

Importing a second graphic
Now you’ll import a second graphic on the same page.
1. Click at the end of the first body paragraph in the right column (the paragraph ending with Kamehamaha insisted).
2. Press Return.
3. In the Paragraph Catalog, click Anchor. Then close the catalog.
4. Choose File > Import > File.
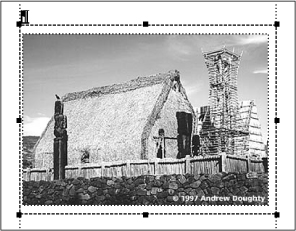
5. Open the Art folder in the Lesson09 folder and select the Temple.tif file.
6. Make sure Import by Reference is still selected and click Import.
7. Make sure the Custom option is still set to 144 dpi and click Set.
You could change the properties of the anchored frame as you did in the previous section. This time, though, you’ll use a shortcut that places the anchored frame into the paragraph and resizes the anchored frame so the graphic just fits inside it. (This is called shrinkwrapping.)
8. Make sure the anchored frame is still selected, press Esc m p (the Esc key followed by the letters m and p in sequence). The graphic now appears with the correct spacing above and below.
Anchoring graphics in the column
Next you’ll position a graphic at the bottom of the column. It’s a wide graphic, so it will span both columns.
1. Go to page 4.
2. Click at the end of the heading Elsewhere Along Alii Drive.
This graphic will appear at the bottom of the column, so you won’t need a separate paragraph for it.
3. Choose File > Import > File.
4. Select the Sunset.tif file in the Art folder (within the Lesson09 folder).
5. Click Import and then click Set. The graphic appears in an anchored frame below the heading. An anchor symbol (![]() ) appears at the end of the heading.
) appears at the end of the heading.

Anchor symbol
The graphic is wider than the column, and is cropped by the column. You’ll turn off the cropping effect so you can display the entire graphic, and then change the anchoring position.
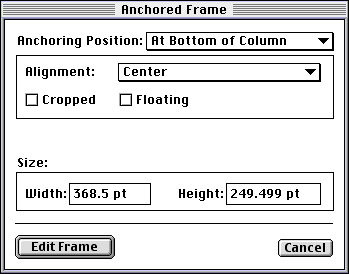
6. With the anchored frame still selected, choose Special > Anchored Frame.
7. Choose At Bottom of Column from the Anchoring Position pop-up menu.
8. Turn off Cropped and click Edit Frame.
The anchored frame moves to the bottom of the page, and the rest of the graphic appears.
9. Drag the top-left handle of the anchored frame down and to the right until the edges of the anchored frame line up with the edges of the graphic.

10. Drag the bottom-right handle of the anchored frame up and to the left until the edges of the anchored frame line up with the edges of the graphic.
Using art in the margin
Next you’ll add some art in the margin of the page to call attention to several top tourist attractions.
1. Go back to page 1 of Anchors1.fm.
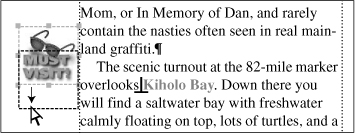
2. In the last paragraph in the left column, click just to the left of Kiholo Bay. (It appears in blue.)
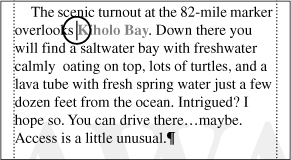
3. Choose File > Import > File.
4. Select the Mustvisi.tif file in the Art folder (within the Lesson09 folder) and click Import.
5. In the Import Graphic Scaling dialog box, verify or enter 144 in the custom dpi value box. Then click Set. The graphic appears in an anchored frame below the text.
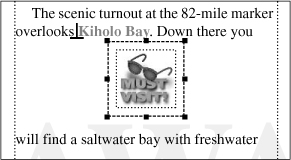
You’ll use the same shortcut you used before to shrinkwrap the anchored frame.
6. With the anchored frame still selected, press Esc m p. The anchored frame appears in the line of text, and the insertion point appears to the right of the anchored frame.
The Line Spacing property for the paragraph format is set to Fixed. As a result, the line height of the text doesn’t increase to accommodate the height of the frame, and the frame obscures the text. Because you don’t want the anchored frame to appear at the insertion point, you’ll use the Anchored Frame command to change the anchoring position.
7. Click the border of the anchored frame to select the frame, not the graphic. Handles appear on the frame. (If no handles appear, you probably selected the graphic, not the frame.)
8. Choose Special > Anchored Frame.
9. Choose Outside Column from the Anchoring Position pop-up menu.
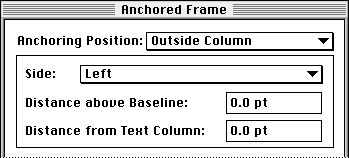
You want to be able to add text above the frame, and if the frame moves to the right column, you want the graphic to appear on the right side of the column. To do this, you’ll change the Side setting.
10. Choose Side Closer to Page Edge from the Side pop-up menu, and then click Edit Frame. The graphic moves to the left edge of the column.
Next, you’ll move the anchored frame down to align the graphic’s text with the line of text that contains the anchor symbol.
11. With the anchored frame still selected, point on the bottom of the frame between two handles (not on a handle) and Shift-drag the frame downward until the baseline of the word MUST is approximately aligned with the baseline of the line of text that contains the anchor symbol. (If you accidentally select and move the graphic inside the frame instead of moving the frame, choose Edit > Undo and try again.)
Shift-drag the anchored frame.
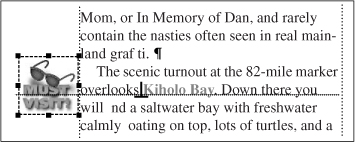
Text is aligned.
![]() Press Control + l (lower case L) for a quick way to redraw or refresh the display after a format edit.
Press Control + l (lower case L) for a quick way to redraw or refresh the display after a format edit.
Copying anchored frames
You’ll use this same graphic in two other locations in the document. You could import and position the graphic each time, but you can save time by copying and pasting the anchored frame and graphic.
1. With the anchored frame still selected, choose Edit > Copy.
2. In the right column on page 1, click just to the left of Makalawena Beach, which appears in blue.
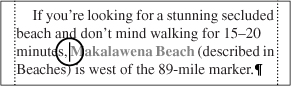
3. Choose Edit > Paste. Because you specified that the graphic should appear on the side closer to the page’s edge, the graphic appears at the right side of the column. The frame’s Anchoring Position setting, and its vertical position with respect to the anchor symbol, are already set appropriately, so you don’t need to adjust the frame’s position.
4. Go to page 3 of Anchors1.fm.
5. Under the heading Downtown Kailua-Kona, click just to the left of Ahu‘ena Heiau.
6. Choose Edit > Paste. The graphic appears at the left side of the column.
Using inline graphics
Now you’ll add a few small graphics in lines of text.
1. Go to the last page of Anchors1.fm.
The coffee information at the bottom of the page appears in a frame that’s anchored at the bottom of the column. The text appears in a text frame that’s drawn inside the anchored frame, and the picture of coffee beans is in an anchored frame that’s run into the paragraph.
2. Click just to the left of Kona Coffee in the first sentence of coffee information.

3. Choose File > Import > File.
4. Select the Mug.tif file in the Art folder (within the Lesson09 folder) and click Import.
5. In the Import Graphic Scaling dialog box, verify that 144 dpi is selected and click Set.
The graphic appears in an anchored frame under Kona Coffee.

6. With the anchored frame still selected, press Esc m p. The anchored frame appears in the line of text, and the insertion point appears to the right of the anchored frame.

7. Press the spacebar to add a space between the frame and Kona.
The graphic is sized correctly, but appears too high in the line.
8. Click the frame’s border to select the frame.
You could drag the frame downward or use the arrow keys to reposition the frame, but you’ll use the Anchored Frame command this time.
9. Choose Special > Anchored Frame.
10. Enter -11 (type a hyphen, then the number eleven) in the Distance above Baseline text box to move the frame down 11 points. Then click Edit Frame.

Reusing anchored frames
Now you’ll import two more small pieces of art. Because the anchored frame is already positioned the way you want it, you’ll reuse it by copying and pasting the frame elsewhere in your document.
1. With the anchored frame still selected, choose Edit > Copy.
2. Click in the second sentence of the same paragraph, just to the left of the word world.
3. Choose Edit > Paste. A copy of the anchored frame, with the graphic of the coffee mug, appears at the insertion point.
4. Press the spacebar to add a space between the frame and the following word.

5. Click just to the left of the words from many in the fourth sentence of the final paragraph.
6. Choose Edit > Paste and press the spacebar.

Now you’ll replace the coffee mugs in the two pasted frames with the correct art.
7. Click on the second coffee mug to select it. (Click inside the frame, not on the frame’s border.) Notice that the handles on the graphic appear inside the border of the anchored frame.

8. Choose File > Import > File. If you selected the graphic correctly, you’ll see the Replace button instead of the Import button in the dialog box.
9. Select the Globe.tif file in the Art folder (within the Lesson09 folder), click Replace, then click Set in the Import Graphic Scaling dialog box.
The graphic appears in the frame.

10. Click on the last coffee mug to select it.

11. Choose File > Import > File.
12. Select the Coffeebe.tif file in the Art folder (within the Lesson09 folder) and click Replace.
13. Click Set in the Import Graphic Scaling dialog box.
![]() Alternatively, you can double-click on the .tif file name to select and replace the file in a single step.
Alternatively, you can double-click on the .tif file name to select and replace the file in a single step.
The appropriate graphic now appears in the frame.

Using run-in art
Next you’ll add a graphic that’s run into the beginning of a paragraph.
1. Go to page 2 of Anchors1.fm.
2. Click at the beginning of the first paragraph under the heading Kailua Area.

3. Choose File > Import > File.
4. Select the Flower.tif file in the Art folder (within the Lesson09 folder), click Import, then click Set in the Import Graphic Scaling dialog box.
The graphic appears in the frame.
Unlike the graphics in the previous section, the graphic you imported here is too large, so you’ll scale it down.
5. Click the graphic to select it.

6. Choose Graphics > Scale, enter 69 in the Factor text box to scale it to 69 percent of its current size, and click Scale.
Note
FrameMaker 7.0 allows you to scale or resize an imported graphic relative to the original size of the original graphics file.
7. Press Esc m p to resize the frame to fit the graphic.
8. Select the frame border and choose Special > Anchored Frame.
9. Choose Run into Paragraph from the Anchoring Position pop-up menu.
10. Enter 2 in the Gap text box and click Edit Frame. The frame now runs into the beginning of the paragraph. FrameMaker 7.0 uses a 2-point gap between the frame and the surrounding text.

11. Save the document.
12. FrameMaker 7.0 also supports drag and drop functions for importing graphics that are specific to the Windows, Mac OS, and UNIX platforms. See chapter 9, “Graphics,” in the Adobe FrameMaker 7.0 User Guide for platform-specific information.
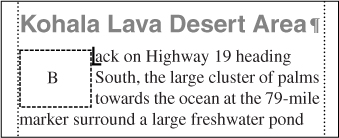
Creating a drop cap
A drop cap is a large capital letter that drops down into the text. The last art you’ll add is a drop cap at the beginning of this document. This time, you’ll create the anchored frame first. Then you’ll add the drop cap afterward.
1. Go to page 1 of Anchors1.fm.
2. Delete the letter B at the beginning of the first paragraph of body text (beginning with Back on Highway 19).
3. With the insertion point still at the beginning of the paragraph, choose Special > Anchored Frame.
4. Make sure that Anchoring Position is still set to Run into Paragraph and that the Gap is set to 2 points.
5. Click New Frame. An empty anchored frame appears at the insertion point.
6. At the right side of the document window, click the Tools button.
Tools button
7. In the Tools palette, click the text line tool (![]() ). This tool lets you create a single line of text that FrameMaker 7.0 treats independently from other text. You can apply character formats to this kind of text, but not paragraph formats.
). This tool lets you create a single line of text that FrameMaker 7.0 treats independently from other text. You can apply character formats to this kind of text, but not paragraph formats.
8. Click inside the anchored frame and type the letter B.
9. Close the Tools palette.
10. Do one of the following to select the text line:
• (Windows and UNIX) Control-click the letter B.
• (Mac OS) Option-click the letter B.
Now you’ll apply a preset group of font properties to the letter.
11. At the right side of the document window, click the Character Catalog button.

Character Catalog button
12. In the Character Catalog, click DropCap. Then close the Character Catalog.
The letter B should still be selected.
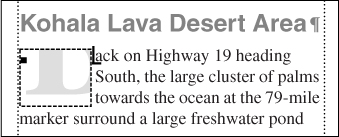
13. Drag the letter until it’s positioned at the top-left corner of the anchored frame.
14. Select the anchored frame and drag its bottom-right handle until the edges of the anchored frame line up with the edges of the letter.

The drop cap is done and you’ve finished adding graphics to the document.
15. To see how the document will look when printed, choose View > Borders and View > Text Symbols, and page through the document. When done, save and close Anchors1.fm.
Importing movies into documents
Adding motion pictures to your documents can enhance them. In the last lessons of this Classroom in a Book, you’ll learn to develop publications for the Adobe Acrobat, HTML, and other formats. Multimedia is an exciting component of designing for these uses.
Windows media in FrameMaker 7.0 files
You can add movies, animation, and other multimedia segments into your documents by embedding .avi, .mov (if you have QuickTime installed), or other types of files.
Here you’ll add a movie file to a document.
1. Start a new default portrait document by choosing File > New Document.
2. In the New Document window, select Portrait, and a new document appears.
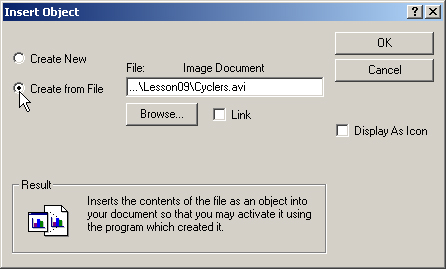
3. Choose > File > Import Object.
The Import Object dialog box appears.
4. Choose Create from File.
5. Browse to the Lesson09 Art folder, select Cyclers.avi, click Open to insert the file name into the dialog box. Click OK.
6. The movie is imported like any other graphic. The difference is that you have now embedded an active object into the document. To watch the movie, double-click the imported graphics frame.

Sample Windows movie playing in a FrameMaker 7.0 document window.
Don’t rotate the movie. You won’t be able to play it until you return it to its original orientation.
![]() For more information, see “Using OLE (Windows)” in Chapter 18 of the Adobe FrameMaker 7.0 User Guide.
For more information, see “Using OLE (Windows)” in Chapter 18 of the Adobe FrameMaker 7.0 User Guide.
When you print a document containing an object, only the object’s title appears.
Don’t move or delete the original .avi movie file. The entire movie is not copied into your document. Instead, it is played in your document through linking to the movie as a reference.
Mac OS media files in FrameMaker 7.0 files
You import a QuickTime® movie in the same way that you import other graphics. On the Mac OS, Flash and other types of media files must be converted to one of the QuickTime output formats in order for Adobe FrameMaker 7.0 to recognize them for import into a document.
Here you’ll add a QuickTime movie (.mov) file to a document.
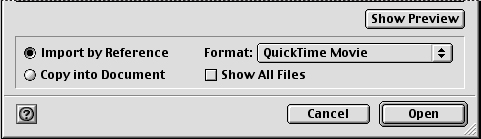
1. Start a new default portrait document. Choose > File > Import File. Locate the Lesson09 Art folder, where you will find Cyclers.mov to import. If you have a movie you would like to try out and QuickTime is installed in your system, import that.
![]() To help you quickly navigate through your disk system, try changing the import format you are seeking to QuickTime Movie. Only importable movies will display in your lists.
To help you quickly navigate through your disk system, try changing the import format you are seeking to QuickTime Movie. Only importable movies will display in your lists.
2. To play the movie in the document, double-click the film icon. The graphic frame will convert to a movie player. (Make your frame a little bit taller if it does not reveal the whole set of player controls.) Click on the Play button.
Don’t rotate the movie—you won’t be able to play it until you return it to its original orientation.

View of an imported movie.
3. Choose Graphics > Object Properties. Change the Height to 204 pt and click Set. This will allow the movie’s player controls to be completely visible when you play it.
4. To watch the movie, double-click the film icon.
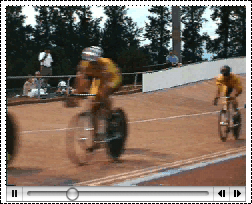
Sample movie playing in a FrameMaker 7.0 document window.
When you print a document containing a QuickTime movie, only the movie’s title appears.
Don’t move or delete the original QuickTime movie file, even if you used the Copy into Document option when you imported it. Even with this option, the entire QuickTime movie is not copied into your document. Instead it is played in your document through linking to the movie as a reference.
For details, see “Using the Import command to import graphics” in Chapter 18 of the Adobe FrameMaker 7.0 User Guide.
Using graphic insets (UNIX)
A graphic inset is a graphic created in a special UNIX application—a graphic inset editor—and then inserted in a document. You use the inset editor to create or modify the graphic inset, or you can start the editor from within FrameMaker.
Moving on
You’ve completed this lesson. For in-depth information on anchored frames, see Chapter 10, “Anchored Frames,” in the Adobe FrameMaker 7.0 User Guide. For in-depth information on importing graphics, see Chapter 18, “Importing, Linking, and Exporting,” in the Adobe FrameMaker 7.0 User Guide.
Review questions
1. What is an anchored frame? How is an anchored graphics frame useful?
2. Name three kinds of places a graphic can be positioned in a document.
3. If a graphic has a resolution of 72 dpi, and you import it at 144 dpi, what happens to the size of the imported graphic?
4. Why might you want to reuse—that is, copy and paste—an anchored frame?
5. What is a drop cap?
6. What does the text line tool do?
7. What is the shortcut for resizing a frame to fit a graphic?
8. How do you import a QuickTime® movie into a document?
Answers
1. An anchored frame is a frame that can contain a graphic or text and is anchored to the text. The frame and its contents move with the anchor, so you don’t have to reposition the graphic or text when you edit the document.
2. Graphics can appear in several positions, such as between words; between paragraphs; anchored to a spot in the text, but positioned in the page margin; or relative to a spot on the page (such as at the top).
3. Doubling the dpi makes the imported graphic half the size of the original.
4. It might contain the graphic that you want to use. It might also have properties that you want to apply to another graphic, such as size and position.
5. A drop cap is a large capital letter set into a piece of body text. It usually occurs at the beginning of a section of text.
6. The text line tool lets you create a single line of text that FrameMaker 7.0 treats independently from other text.
7. Press Esc m p to resize the frame to fit the graphic.
8. Start a new default portrait document. Choose > File > Import File and locate the movie file to import.