
Lesson 13. Conditional Text

If you’re preparing several versions of a document, each with minor differences, you can use a single FrameMaker 7.0 document for all the versions. When you later revise the contents, you’ll be revising all the versions at the same time. The one document can contain both conditional text and conditional graphics.
This lesson’s sample is a card that’s designed to be attached to office furniture. The card already contains information about the ModuLine CEO office chair. You’ll use conditional text to add information about a second model, the ModuLine Professional. When you’re finished, the two versions of the card will be contained in one document.
In this lesson, you’ll learn how to do the following:
• Create condition tags and assign condition indicators.
• Apply condition tags to text, graphics, and table rows.
• View different versions of a conditional document.
• Save versions of conditional documents.
Viewing conditional text
Before you add information about the ModuLine Professional, you’ll take a look at the finished document.
1. In the Lesson13 folder, open Finished.fm.

Finished.fm already contains information about both models of office chairs. The information on the CEO office chair is visible, and the information on the Professional office chair is hidden.
2. Choose Special > Conditional Text.
3. Click Show/Hide.
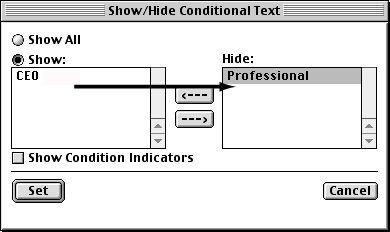
You’ll now swap the two conditions—showing the one that’s hidden, and hiding the one that’s shown.
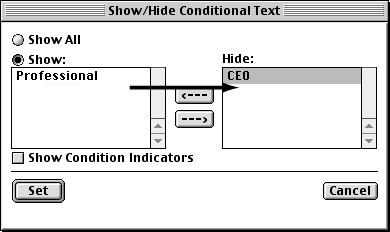
4. In the Show/Hide Conditional Text dialog box, double-click CEO to move it from the Show scroll list to the Hide scroll list.
5. Double-click Professional to move it from the Hide scroll list to the Show scroll list.
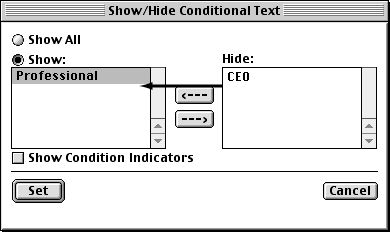
6. Click Set.
Now the information on the Professional office chair is visible, and the information on the CEO office chair is hidden. Notice that some of the text is different, that the picture of the chair is different, and that the available coverings are different.

The same document showing the Professional condition (left) and the CEO condition (right)
7. Click Show/Hide.
8. Select Show Condition Indicators, then click Set.
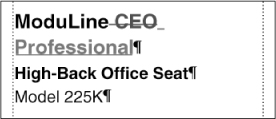
The text that is specific to the Professional chair appears underlined and in blue.
Condition indicators (in this example, the blue underlining) are present so that you can easily identify what text is in which condition. When the document is ready for final printing, you would turn these indicators off.
9. Close Finished.fm without saving your changes. Leave the Conditional Text dialog box open because you’ll use it often during this lesson.
Setting up your document
The document you’ll be working with contains only the information on the CEO office chair. You will add the conditional information on the Professional model.
1. Open Condit.fm in the Lesson13 folder.
2. Choose File > Save As, enter the filename Condit1.fm, and click Save.
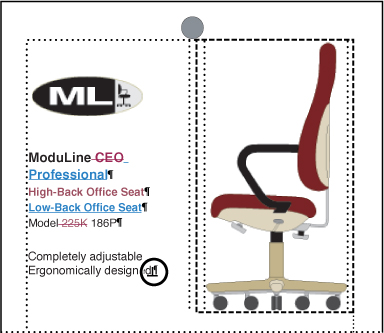
When working with conditional text, it is often helpful to have borders and text symbols showing.
3. Choose View > Borders and then choose View > Text Symbols.
4. Before you begin working with conditional text, take a few moments to explore the document. Notice the following:
• The gray circle at the top (indicating the location of a hole to be drilled in the card) is drawn on the master page, so you can’t select it or modify it here.
• The ModuLine corporate logo is also not selectable because it is included as part of the format of the paragraph just below it (ModuLine CEO). The logo is selectable only on a special reference page, from which FrameMaker 7.0 copies it to this body page. Placing often-used graphics on a reference page and making them part of a format reduces file size because the graphic only needs to be copied into the document once.
• The card is laid out in two columns; the descriptive paragraph in the middle of the page spans both body columns.
• The illustration of the chair is in an anchored frame that’s anchored to the preceding paragraph, Ergonomically designed.
• The colors and coverings at the bottom of the card are arranged in tables. Each color swatch in the table is in an anchored frame.
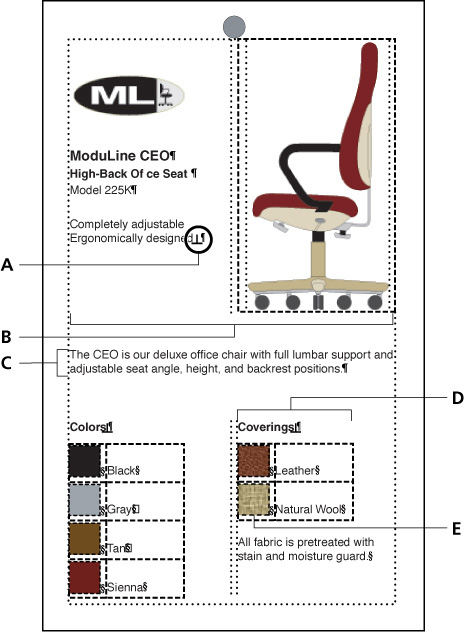
A. Anchor symbol B. Two-columns C. Paragraph spans columns D. Table E. Anchored frame
Now that you’re more familiar with the document, you’re ready to begin working with conditional text.
Creating condition tags
First you’ll create the condition tags that will indicate the new version of this document.
1. If the Conditional Text dialog box isn’t open, choose Special > Conditional Text.
2. Click Edit Condition Tag.
3. Replace the contents of the Tag text box with Professional.
4. Choose Underline from the Style pop-up menu and Blue from the Color pop-up menu.

5. Click Set. The new condition tag appears in the Conditional Text dialog box.

6. Click Edit Condition Tag again.
7. This time, replace the contents of the Tag text box with CEO. Then choose Strikethrough from the Style pop-up menu and Burgundy from the Color pop-up menu.

8. Click Set. The new condition tag appears in the Conditional Text dialog box.
The document contains a third condition tag (Comment). You won’t need this tag, so you’ll delete it.
9. Select Comment in the Not In scroll list and then click Edit Condition Tag.
10. Click Delete. Now only two tags appear in the Conditional Text dialog box.
11. Save the document.
Adding conditional text
Now you’re ready to add some conditional text. You’ll be selecting text as you work, so click the Zoom In button (![]() ) in the status bar whenever you want to magnify the document window contents.
) in the status bar whenever you want to magnify the document window contents.
Adding the model name
First you’ll add conditional text for the model name.
1. Place the insertion point at the end of the ModuLine CEO paragraph, under the logo.

2. Press the spacebar and then type Professional.
3. Select CEO and the space before it.

4. In the Conditional Text dialog box, double-click CEO to move it to the In scroll list.
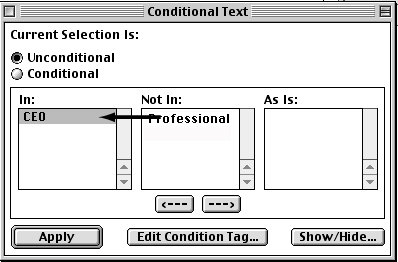
5. Click Apply. The selected text appears in the strikethrough style and the color burgundy. (To see the text more clearly, click anywhere in the document to deselect the text.)
6. Now select Professional and the space before it. (Drag from the right of Professional back to the end of the word CEO.)

Be careful not to select the paragraph symbol (¶). If you accidentally make the paragraph symbol conditional, the next paragraph will run into the current one when you show only the CEO version of the card.
7. In the Conditional Text dialog box, double-click Professional to move it to the In scroll list.
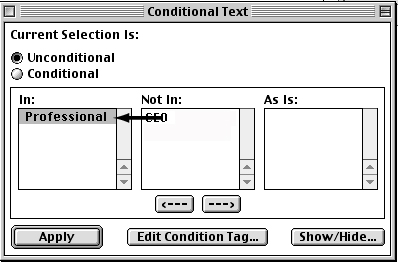
8. Click Apply.
9. Click anywhere to deselect the conditional text, which is now underlined and blue (which indicates the Professional condition).
Now you’ll change the conditional text settings to see the results of your work.
10. In the Conditional Text dialog box, click Show/Hide.
11. Double-click Professional to move it to the Hide scroll list, and then click Set.
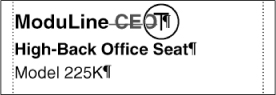
The text that’s specific to the Professional version is now collapsed into a special marker (![]() ). When you edit a document that contains hidden conditional text, be careful not to delete these markers. If you do, you’ll delete hidden text.
). When you edit a document that contains hidden conditional text, be careful not to delete these markers. If you do, you’ll delete hidden text.
12. In the Conditional Text dialog box, click Show/Hide.
13. Double-click Professional to move it to the Show scroll list.
14. Double-click CEO to move it to the Hide scroll list. Then click Set.
The text that’s specific to the CEO version is now hidden.

You’ll now show both conditions before adding more conditional text.
15. Click Show/Hide. Then click Show All and click Set.
Adding a brief description
Now you’ll add an entire paragraph of conditional text.
Place the insertion point at the end of the second paragraph, High-Back Office Seat.
1. Press Return and type Low-Back Office Seat.

2. Triple-click High-Back Office Seat to select the entire paragraph (including the paragraph symbol).

3. In the Conditional Text dialog box, double-click CEO to move it to the In scroll list. Then click Apply.
4. Triple-click Low-Back Office Seat to select the entire paragraph (including the paragraph symbol).
5. In the Conditional Text dialog box, double-click Professional to move it to the In scroll list. Then click Apply.

Adding a model number
Next you’ll add the model number of the Professional chair.
1. Click at the end of the paragraph containing the model number, Model 225K.
2. Press the spacebar and then type 186P.
3. Select 225K and the space before it.

4. In the Conditional Text dialog box, double-click CEO to move it to the In scroll list. Then click Apply.
5. Now select 186P and the space before it. (Drag from the right of 186P back to the end of the 225K. Dragging back from the end of the line prevents you from selecting the paragraph symbol.)

6. In the Conditional Text dialog box, double-click Professional to move it to the In scroll list. Then click Apply.
7. Experiment with showing different conditions to make sure that the conditional text works the way you want. You can also turn off borders and text symbols. When you’re finished, show all conditional text again, and make sure that borders and text symbols are visible.

CEO version (left) and the Professional version (right)
Adding more conditional text
Finally, you’ll add some conditional text to the body paragraph below the graphic. (Make sure that borders, text symbols, and all conditions are visible.)
1. Click to the right of the word CEO in the body paragraph that spans both columns.

2. Press the spacebar, type Professional, and press the spacebar again.
3. Click to the right of the word deluxe in the same paragraph.
4. Press the spacebar, type standard, and press the spacebar again.
5. Use the Conditional Text dialog box to apply the CEO tag to the words CEO and deluxe, and to apply the Professional tag to the words Professional and standard.
Be sure to apply the tag to the space before each word as well as to the word itself. If you don’t, some versions of the document may have too many spaces and others may have too few.

Tagging text as you type
If you need to work extensively with conditional text, you may find it easier to use keyboard shortcuts to apply and remove condition tags. Next, you’ll use keyboard shortcuts to add conditional text to the body paragraph.
1. Click to place the insertion point at the end of the body paragraph that spans both columns.

First you’ll type a sentence using the CEO condition tag.
2. Press Control+4. The status bar changes to prompt you for a condition tag.
![]()
3. Type the letter C. Because the CEO condition tag is the only one that begins with the letter C, the prompt changes to indicate that tag.
![]()
In Windows and on UNIX systems, you don’t need to type the letter C, because the first condition tag in alphabetical order appears in the Tag area of the status bar when you press Control+4.
4. Press Return. The condition tag is applied to the text at the insertion point.
5. Press the spacebar and type Comes standard with armrests. Then type a period to end the sentence.
Notice that the status bar shows the CEO condition tag in parentheses. If you type more text at the insertion point, the text will continue to use the CEO condition. Next you’ll type a sentence that uses the Professional condition, so you’ll need to remove the CEO condition. You’ll use a keyboard shortcut that removes all conditions.
6. Press Control+6. The status bar now shows no condition tags, which means text you type at this point would be unconditional.
7. Press Control+4, then type the letter P. The status bar prompt changes to the Professional tag.
![]()
8. Press Return. Now the Professional condition tag is applied at the insertion point.
9. Press the spacebar and type Available with or without armrests. Then type a period to end the sentence.
10. Save the document.
Adding a conditional graphic
The card currently contains a graphic of the CEO office chair. The graphic is in an anchored frame whose anchor symbol appears at the end of the paragraph Ergonomically designed.
For this document to work as the single source for the cards for both the CEO chair and the Professional chair, the graphic as well as the text needs to be conditional. You’ll do this next by importing a graphic for the Professional chair, and then making the graphic’s anchored frame conditional.
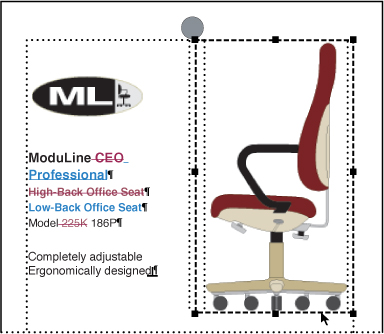
1. Click the bottom border of the anchored frame to select the frame. Handles appear around the anchored frame.
Be sure you click at the edge of the anchored frame to select the frame and not the graphic. If you can’t see all eight handles around the selected frame, you probably accidentally clicked the graphic instead of the frame.
2. Choose Edit > Copy.
3. Click to the right of the paragraph Ergonomically designed to place the insertion point to the right of the anchor symbol.

4. Choose Edit > Paste. Now the document contains two anchored frames. Don’t worry about their placement. When you display only one condition tag, the document will be formatted correctly.

5. Click the graphic that appears in the new anchored frame (the one on the left) to select it. (Don’t select the anchored frame.)
6. Choose File > Import > File.
7. Select Pro.tif in the scroll list and click Replace.
8. In the Imported Graphic Scaling dialog box, click 72 dpi to indicate the dots per inch for the graphic, and then click Set.
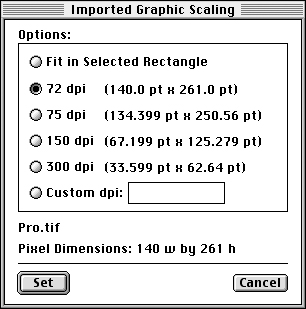
The graphic of the Professional office chair now appears in the left-hand anchored frame, replacing the original.
The bottom of the graphic is slightly cropped by the anchored frame. You’ll reposition it to fix this.
9. Display the Graphics menu to make sure that Snap is turned off. If it’s not turned off, choose Graphics > Snap.
10. Drag the graphic a bit up and to the left until it’s no longer cropped.

Now you’ll make the graphics conditional by selecting the anchored frames and then applying the appropriate condition tag.
11. Click the bottom edge of the anchored frame that contains the graphic of the CEO chair (the one with armrests). This selects the anchored frame. Don’t select the graphic itself.
12. Press Control+4, type the letter C, and press Return.
13. Select the anchored frame that contains the graphic of the Professional chair (the one without armrests).
14. Press Control+4, type the letter P, and press Return.
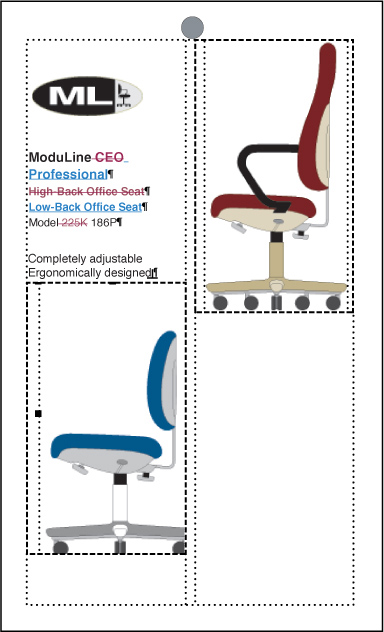
15. Experiment with showing different conditions to see how the conditional text and graphics work together. You can also turn off borders, text symbols, and condition indicators.

CEO version (left) and Professional version (right)
16. Show all conditional text again, and make sure that borders, text symbols, and condition indicators are visible.
17. Save the document.
Adding conditional table rows
Just one more change is needed before the document is fully conditionalized. The CEO model is available in several types of chair coverings, but the Professional model is available in only one. For this reason, you’ll need to make one of the rows in the Coverings table conditional.
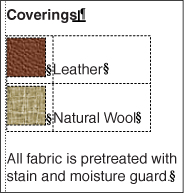
When you make a table row conditional, the entire row disappears when you hide its condition. (If you were to apply a condition to the contents of a table cell instead of the row itself, the text would disappear when you hide the condition, but the empty table cell would remain.)
1. Click the Next Page button (![]() ) in the status bar to display page 2.
) in the status bar to display page 2.
2. Drag from the table cell containing the word Leather into the cell to its left, containing the leather swatch. Both cells are selected.

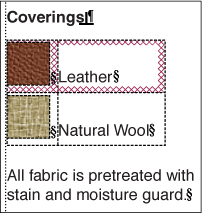
3. Press Control+4, type the letter C, and press Return.
4. Click anywhere on the page to deselect the row. The row appears with a cross-hatched border whose color indicates the condition (in this case, the CEO condition).
5. Click the Previous Page button (![]() ) in the status bar to display page 1.
) in the status bar to display page 1.
6. Experiment with showing different conditions to see how the conditional table row works. When you’re finished, show all conditional text again.
7. Save the document.
Saving versions of a conditional document
When a conditional document is complete, you may want to create a separate document for each of the versions. For example, you may need to hand off the files to a commercial printer or to someone who might be confused by the presence of the conditional markers in the text. Always retain the original conditional document, so you can edit the versions easily if the need arises.
Saving the CEO version
First you’ll save a CEO version of the document. You’ll do this by deleting the conditional text and graphic for the Professional version.
1. Use the File > Save As command to save the document as CEO.fm.
2. In the Conditional Text dialog box, select Professional in a scroll list and click Edit Condition Tag.
3. In the Edit Condition Tag dialog box, click Delete.
4. In the Delete Condition Tag dialog box, click Delete the Text.
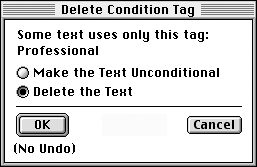
5. Click OK. The document now contains just the CEO version.
6. If condition indicators are visible, click Show/Hide in the Conditional Text dialog box, turn off Show Condition Indicators, and click Set.
7. Choose View > Borders and View > Text Symbols to see how the document will look when printed.
8. Save and close CEO.fm.
Saving the Professional version
Now you’ll save a Professional version by deleting the conditional text and graphic for the CEO version.
1. Open Condit1.fm again.
2. Use the File > Save As command to save the document as Pro.fm.
3. In the Conditional Text dialog box, select CEO in a scroll list and click Edit Condition Tag.
4. In the Edit Condition Tag dialog box, click Delete.
5. In the Delete Condition Tag dialog box, click Delete the Text and then click OK. The document now contains just the Professional version.
6. If condition indicators are visible, click Show/Hide in the Conditional Text dialog box, turn off Show Condition Indicators, and click Set.
7. Choose View > Borders and then View > Text Symbols.
8. Save and close Pro.fm.
9. Close the Conditional Text dialog box.
Moving on
You’ve completed this lesson. For in-depth information about conditional text, see Chapter 16, “Conditional Text,” in the Adobe FrameMaker 7.0 User Guide.
Review questions
1. What are the advantages of a conditional document?
2. Why is it useful to work with condition indicators showing?
3. Why is it important to apply conditions to spaces and paragraph symbols carefully?
4. How can you tell if text is conditional?
5. How can you apply a condition to text?
6. How can you make text unconditional?
7. How do you make a graphic conditional?
8. What is the main difference between conditionalizing the contents of a table cell and conditionalizing the entire row?
Answers
1. A conditional document lets you work in a single source but different versions of the same document. This reduces redundancy and improves efficiency.
2. Condition indicators make it easy to see what text is in which condition. This reduces the chances of errors when editing.
3. If the spaces surrounding conditional text are not also conditional, there may be too many or too few spaces in the versions. Making a paragraph symbol conditional means that the paragraph return will be hidden when that condition is hidden—resulting in the paragraph running into the next.
4. If text is conditional, then the status line displays the condition tag for the selected text or the insertion point.
5. You can apply a condition to text by pressing Control+4, typing the letters of the condition tag until it appears in the status line, and then pressing Return. You can also use the Special > Conditional Text command, moving the condition tag to the In scroll list, and then clicking Apply.
6. You can make text unconditional by pressing Control+6.
7. You make a graphic conditional by placing it in an anchored frame, selecting the frame, and then applying a condition to the frame just as you would with text.
8. When you hide a condition that has been applied to the contents of a table cell, the contents disappear but the cell remains. When you hide a condition that has been applied to the entire row of a table, the whole row disappears.