
10 Importing and Modifying Graphics
Lesson overview
In this lesson, you’ll learn how to do the following:
Distinguish between vector and bitmap graphics.
Manage imported graphic files using the Links panel.
Adjust the display quality of graphics.
Import Adobe Photoshop and Adobe Illustrator graphics using different techniques.
Use various sizing and fitting techniques.
Work with different types of dropped backgrounds.
Adjust the appearance of graphics by manipulating paths and layers.
Create an anchored graphics frame that flows with text.
Create and use libraries of objects.
This lesson will take about 75 minutes to complete. Please log in to your account on peachpit.com to download the lesson files for this chapter, or go to the “Getting Started” section at the beginning of this book and follow the instructions under “Accessing the Lesson Files and Web Edition.” Store the files on your computer in a convenient location. Your Account page is also where you’ll find any updates to the lessons or the lesson files. Look on the Lesson & Update Files tab to access the most current content.

Adobe InDesign CC makes it easy to enhance your document with photographs and artwork imported from Adobe Photoshop, Adobe Illustrator, and other graphics applications. If these imported graphics change, InDesign can notify you that a newer version of a graphic is available. You can update or replace imported graphics at any time.
Getting started
In this lesson, you’ll work on a three-panel folding brochure for a CD by importing, manipulating, and managing graphics from Adobe Photoshop and Adobe Illustrator. The insert is designed so that after printing and folding, it fits into a CD case.
This lesson includes steps that you can perform using Photoshop if you have it installed on your computer.
![]() Note
Note
If you have not already downloaded the project files for this lesson to your computer from your Account page, make sure to do so now. See “Getting Started” at the beginning of the book.
To ensure that the preferences and default settings of your InDesign program match those used in this lesson, move the InDesign Defaults file to a different folder following the procedure in “Saving and restoring the InDesign Defaults file” on pages 4–5.
Start Adobe InDesign. To ensure that the panels and menu commands match those used in this lesson, choose Window > Workspace > [Advanced], and then choose Window > Workspace > Reset Advanced.
Choose File > Open, and open the 10_Start.indd file in the Lesson10 folder, located inside the Lessons folder within the InDesignCIB folder on your hard drive. A message appears saying that the document contains links to sources that have been modified.
Click Don’t Update Links. You will fix the modified links later in the lesson.
If necessary, close the Links panel so that it doesn’t obscure your view of the document. The Links panel opens automatically whenever you open an InDesign document that contains missing or modified links.
To see what the finished document looks like, open the 10_End.indd file in the same folder. If you prefer, you can leave the document open as you work to act as a guide. If you leave it open, choose 10_Start.indd from the Window menu or click the 10_Start.indd document tab to return to that document.
 Note
NoteAs you work through the lesson, move panels around or change the magnification to a level that works best for you. For more information, see “Changing the magnification of a document” in Lesson 1, “Introducing the Workspace.”

Choose File > Save As, rename the file 10_cdinsert.indd, and save it in the Lesson10 folder.
Adding graphics from other programs
InDesign supports many common graphic file formats. While this means that you can use graphics that were created using a wide range of applications, InDesign works best with other Adobe professional graphics applications, such as Photoshop, Illustrator, and Acrobat.
By default, imported graphics are linked to an InDesign document, which means that InDesign displays a preview of the graphic file in your layout without actually copying the entire graphic file into the InDesign file.
There are three major advantages to linking graphic files. First, it reduces the size of InDesign files because they don’t need to include embedded image data. Second, it saves disk space, and third, you can edit a linked graphic in the application you used to create it and then simply update the link in the InDesign Links panel. Updating a linked file that has been modified maintains the current location and settings for the graphic file and replaces the preview image in InDesign with the updated graphic.
All linked graphics and text files are listed in the Links panel (Window > Links), which provides buttons and commands for managing links. When you print an InDesign document or export a document as an Adobe Portable Document Format (PDF) file, InDesign uses the links to produce the highest level of quality available from the original, externally stored versions of the placed graphics.
Comparing vector and bitmap graphics
The drawing tools of Adobe InDesign and Adobe Illustrator create vector graphics, which are made up of shapes based on mathematical expressions, like plotting points on a graph. Vector graphics consist of smooth lines that retain their clarity when resized. They are appropriate for illustrations, type, and graphics such as logos, all of which are typically scaled to different sizes. Vector graphics can be scaled to any size with no loss of quality.
Bitmap images, or raster graphics, are made up of a grid of pixels and are typically created with digital cameras and scanners and then modified using an image-editing application, such as Adobe Photoshop. In working with bitmap images, you edit pixels rather than objects or shapes. Raster graphics are appropriate for continuous-tone images, such as photographs and artwork created in painting applications. A disadvantage of raster graphics is that they lose definition and appear “jagged” when enlarged. Additionally, bitmap images are typically larger in file size than a similar vector graphic. Raster graphics do lose quality when enlarged.

Logo drawn as vector art (left) and rasterized as 300 dpi bitmap art (right).
In general, use vector-drawing tools to create art or type with clean lines that look good at any size, such as a logo used on a business card and also on a poster. You can create vector artwork using the InDesign drawing tools, or you might prefer to take advantage of the wider range of vector-drawing tools available in Illustrator. Use Photoshop to create bitmap images that have the soft edges of painted or photographic art, to retouch or alter photographs, and to apply special effects to artwork.
Managing links to imported files
When you opened the lesson file, you saw an alert message about problems with the linked files. You’ll resolve those issues using the Links panel, which provides complete information about the status of all linked text and graphic files in a document.
![]() Note
Note
By default, InDesign does not create links to imported text files and spreadsheet files. You can change this behavior in the File Handling section of the Preferences dialog box by selecting Create Links When Placing Text And Spreadsheet Files.
You can use the Links panel to manage placed graphics and text files in many other ways. For example, you can update graphics and text files that have been modified since they were placed, and you can replace graphic and text files with different files.
Identifying imported images
To identify some of the graphics that have already been imported into the document, you’ll use two different techniques involving the Links panel. Later in this lesson, you’ll also use the Links panel to edit and update imported graphics.

Center page 4 in the document window by choosing it from the Page Number box at the lower-left corner of the document window. Chose View > Fit Page In Window.
If the Links panel is not visible, choose Window > Links.
Using the Selection tool (
 ), select the Songs of the Garden logo type on page 4. (Click outside the content grabber in the center of the frame so that you select the frame and not the graphic.) Notice that the graphic’s filename, Title.ai, becomes selected in the Links panel when you select the graphic in the layout.
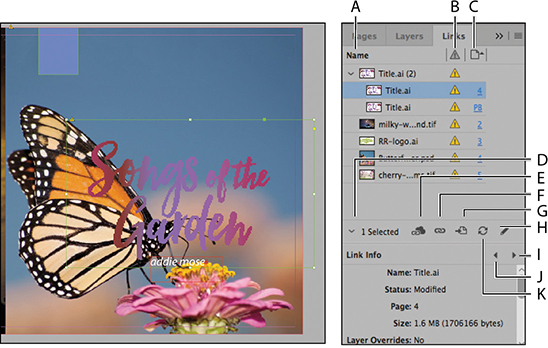
A. Filename column
B. Status column
C. Page column
D. Show/Hide Link Information button
E. Relink From CC Libraries button
F. Relink button
G. Go To Link button
H. Edit Original button
I. Select Next Link In The List button
J. Select Previous Link In The List button
K. Update Link buttonNow you’ll use the Links panel to locate another graphic in the layout.
 Tip
TipYou can click the page number to the right of a filename in the Links panel to jump to that link and center it in the document window.
In the Links panel, select milky-way-background.tif, and then click the Go To Link button (
 ). The graphic becomes selected and centered on the screen. This is a quick way to find a graphic in a document when you know its filename.
These techniques for identifying and locating linked graphics are useful throughout this lesson and whenever you work with a large number of imported files.
Viewing information about linked files
The Links panel makes it easy to work with linked graphics and text files and to display additional information about linked files.
![]() Tip
Tip
You can detach the Links panel from its group of panels by dragging its tab. Once you’ve detached the panel, you can resize it by dragging an edge or lower corner.
Make sure that the graphic named milky-way-background.tif is selected in the Links panel. If you cannot see the names of all the linked files without scrolling, drag the horizontal divider bar in the Links panel downward to enlarge the top half of the panel so that all the links are visible. The Link Info section at the bottom half of the panel displays information about the selected link.
In the Links panel, click the Select Next Link In The List triangle (
 ) to view information about the following file in the Links panel list, RR-logo.ai. You can quickly examine all the links in the list this way. Currently, every link displays an alert icon (
 ) in the Status column. This icon indicates a linking problem, which you’ll address later. After you’ve examined the link information for various images, choose Edit > Deselect All, and then click the Show/Hide Link Information button (
 ) above Link Info to hide the Link Info section.
By default, files are sorted in the Links panel by page number, with files used multiple times in a document listed at the top. You can sort the file list in different ways by clicking on the column headings. Next, we’ll add more column headings to make more information available at a glance.
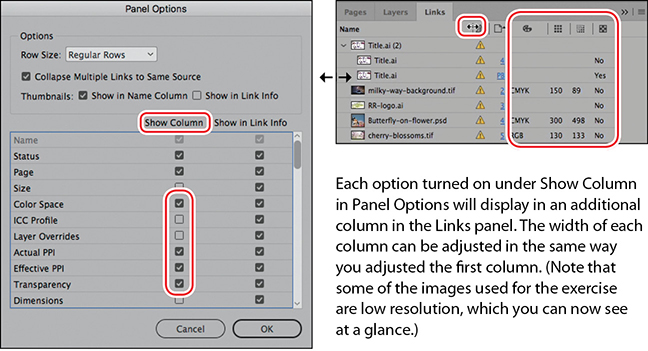
Another and faster way to view link information is to customize the information displayed in the Links panel columns. Click the flyout menu in the Links panel and choose Panel Options. Click Color Space, Actual PPI, Effective PPI, and Transparency, under Show Column. Click OK. (The important information in your workflow may vary from this example.)
TipEffective resolution combines the actual resolution of the image with the amount it’s been enlarged or reduced in size within InDesign. The standard minimum resolution for high-quality printing is 300 for the effective resolution. Therefore, caution must be used when enlarging images so that the effective resolution does not fall below 300.
Pull out the panel to the left to see the new columns. The Links panel now shows this information in additional columns. Drag the first column divider to the right to make the first column wide enough to see the filenames. This customized view is a fast way to see important information about imported graphics, such as whether something has been scaled up so much that it will look bad (jagged edges, blurry, or pixelated) when printed.
Showing files in Explorer (Windows) or Finder (macOS)
Although the Links panel gives you information about the attributes and location of a specific imported graphic file, it does not let you make changes to the file or change the name of the file. You can access the original file of an imported graphic file by using the Reveal In Explorer (Windows) or Reveal In Finder (macOS) option.
![]() Note
Note
The Reveal In Explorer (Windows) or Reveal In Finder (macOS) command is not available for missing links.
![]() Tip
Tip
You can also choose Reveal In Bridge from the Links panel menu to locate an imported graphics file.
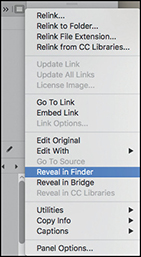
Select milky-way-background.tif. From the Links panel flyout menu, choose Reveal In Explorer (Windows) or Reveal In Finder (macOS). The folder where the linked file is currently stored on your computer opens, and the file is selected. This feature is useful for locating files on your hard drive.
Close the window and return to InDesign.
Updating revised graphics
Even after you place text or graphic files in your InDesign document, you can still use other applications to modify those files. The Links panel indicates which files have been modified outside of InDesign and gives you the choice of updating your document with the latest versions of those files.
In the Links panel, the file Title.ai has an alert icon (![]() ), indicating that the original file has been modified. This is one of the files that caused the alert message to appear when you first opened this document. You’ll update the link for this file so that the InDesign document uses the current version.
), indicating that the original file has been modified. This is one of the files that caused the alert message to appear when you first opened this document. You’ll update the link for this file so that the InDesign document uses the current version.
![]() Tip
Tip
You can update multiple instances of a graphic at the same time by updating when the disclosure triangle is closed.
If necessary, click the disclosure triangle (
 ) in the Links panel to the left of the file Title.ai to reveal two instances of the imported file. Select the instance of the Title.ai file that’s on page 4, and click the Go To Link button () to view the graphic in magnified view. You don’t have to do this step, but it’s a quick way to double-check which imported file you are about to update and see the results.
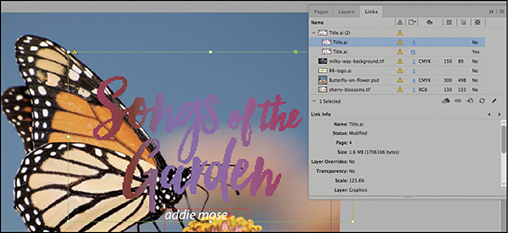
TipYou can also double-click the modified alert icon in the Links panel or click the modified alert icon displayed in the upper-left corner of the graphics frame to update the link.
Click the Update Link button (
 ). The appearance of the image in the document changes to represent its newer version, the modified alert icon is no longer displayed in the Links panel, and the icon near the upper-left corner of the graphics frame changes from Modified () to OK (
 ).
).
To update the rest of the modified graphic files, choose Update All Links from the Links panel flyout menu.
Now you’ll replace the image of the butterfly on the first spread (pages 2–4) with a modified image. You’ll use the Relink button to reassign the link to another graphic.
Go to pages 2–4 (the first spread), and choose View > Fit Spread In Window.
Use the Selection tool (
) to select the Butterfly-on-flower.psd image on page 4. (If you click on the content grabber, you’ll select the graphic rather than the frame, but for this task, you can select either.) You can tell when you’ve selected the right image because the filename becomes selected in the Links panel.
NoteWhen you relink the image, an animated tool tip may pop up that introduces a new feature in InDesign CC 2019 called Content-Aware Fit. You’ll learn about this feature later in the lesson. For now, click OK to close the animation.
Click the Relink button (
 ) in the Links panel.
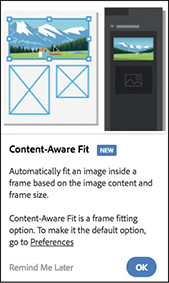
Browse to find the Cover-PinkFlower.psd file in the Lesson10 folder, and then click Open. The new image replaces the original image, and the Links panel is updated accordingly.
Click a blank area of the pasteboard to deselect all the objects on the spread.
Choose File > Save to save your work.
A linked file can appear in the Links panel in any of the following ways:
In the Status column, an up-to-date graphic displays only the filename and the page on which it’s used.
A modified file displays a yellow triangle with an exclamation point (
). This icon means that the version of the file on disk is more recent than the version in your document. For example, this icon appears if you place a Photoshop graphic into InDesign, and then you or someone else edits and saves the original graphic in Photoshop. To update a modified graphic, select it in the Links panel, and then choose Update Link from the panel menu, double-click the modified alert icon in the panel or on the graphic frame, or click the Update Link button ().A missing file displays a red hexagon with a question mark (
 ). This icon means the graphic is no longer in the location from which it was placed, although it may still exist somewhere. Missing links can happen if someone deletes the original file or moves it to a different folder or server after it’s been placed in the document. You can’t know whether a missing file is up to date until its original is located. If you print or export a document when this icon is displayed, the file will not print or export at full resolution. To fix a missing graphic, select it in the Links panel and then choose Relink from the panel menu. Use the Relink dialog box to locate the correct graphic file, and then click Open.
A graphic that has been embedded in the InDesign document (by selecting the filename in the Links panel and choosing Embed Link from the panel menu) displays an embedded icon (
 ). Embedding the contents of a linked file suspends management operations for that link. Unembedding the file restores management operations to the link.
Adjusting display quality
Now that you’ve resolved all of the links, you’re ready to start adding more graphics. First, however, you will adjust the view quality of the Illustrator file (Title.ai) that you updated earlier in this lesson.
When you place an image in a document, InDesign automatically creates a low-resolution (proxy) view of it, corresponding to the current settings in the Display Performance section of the Preferences dialog box. The images in this document are currently low-resolution proxies, which is why they appear to have jagged edges. Reducing the onscreen quality of placed graphics enables pages to display faster and doesn’t affect the quality of the final output. You can control the degree of detail InDesign uses to display placed graphics.
In the Links panel, select the Title.ai file you updated in the previous exercise (the instance on page 4). Click the Go To Link button (
) to view the graphic in magnified view.Right-click the Songs of the Garden graphic, and then choose Display Performance > High Quality Display from the context menu. The image appears at full resolution. You can use this process to confirm the clarity, appearance, and position of a placed graphic in your InDesign layout.

TipOn older computers and for designs with many imported graphics, this setting can sometimes result in slower screen redraw. In many cases, it is advisable to set your Display Performance to Typical Display and then change the display quality of individual graphics as needed.
To change the display performance for the entire document, choose View > Display Performance > High Quality Display. All graphics are displayed at the highest quality.
Importing and sizing graphics
The simplest way to import a graphic into InDesign is to use File > Place. There are several ways to use this feature, which this lesson will introduce.
Import, size, and crop
![]() Note
Note
If necessary, after you zoom in, navigate to the top of the page with a bit of the pasteboard visible.
Navigate to page 2 and press Ctrl+Plus Sign (Windows) or Command+Plus Sign (macOS) a couple of times to zoom in. Open the Layers panel and click the Photos layer so that the imported images will be placed on that layer. Choose File > Place and navigate to the Lesson10 folder. Select the file Blue-Hydrangea.psd and click Open.
Move the loaded raster graphics icon (
 ) into the pasteboard area just above the page and click once. This places the graphic independently of any existing frame. InDesign automatically creates a frame around the graphic and scales it to actual size (100%).
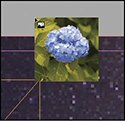
This photo is much too large at actual size, so you’ll need to resize it. In this case, it needs to be scaled down. To do this, you can type a percentage or measurements in the Control panel and InDesign will scale the graphic to those numbers, in the direction of the selected reference point. Or, you can scale the graphic visually. Choose the Selection tool (
) and hold down Shift+Ctrl (Windows) or Shift+Command (macOS). Drag the lower-right handle up and to the left. Watch the Control panel Size and Scale (or the numbers in the gray box next to the Selection tool) until the image is about 2 inches high. Holding down the Ctrl or Command key while dragging scales both the frame and the image within. Adding the Shift key keeps the image proportions so that the image is not distorted while it’s changing size.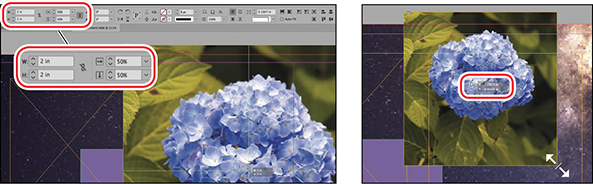
Move the image down and to right until you see the Smart Guide appear that shows the top aligned with the empty frame to the left.
Now we want to crop out most of the leaves. To do this, you change the size of the frame without changing the size of the graphic inside. Drag the lower-right corner handle in toward the flower so that most of the leaves are no longer visible. Then click the Content Grabber icon (
 ) and notice that the handles of the image are now much larger than the frame, indicating that the image is larger than the frame. Drag the image up and to the left so that the flower is centered in the frame.
Place a graphic into an existing frame and use frame fitting options
The next way to use File > Place is to place a graphic into an existing frame.
Click the empty frame to the left of the Blue-Hydrangea.psd image. Choose File > Place, select Sunflower.jpg, and click Open. This time the image is imported into the frame. Once again, it’s at actual size (100%) and that’s too large since the intention is to show the whole flower.
TipAll frame fitting options are also available as buttons on the Control panel.
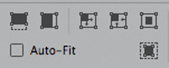
Choose Object > Fitting > Fit Content To Frame, which seems like the right choice. But examine the result: the image is indeed within the frame, but the sunflower is distorted (stretched vertically). Confirm this by clicking the Content Grabber icon (
) in the center of the frame (so that you are viewing data about the image rather than the frame), and then look at the scale values in the Control panel. The horizontal and vertical numbers are very different, showing the distortion.

To scale the image without distortion, choose Object > Fitting > Fit Content Proportionally. The image is not distorted, but now it’s too small. Choose Object > Fitting > Fill Frame Proportionally. This option sizes the image without distortion within the frame, and it crops part of the image if it’s a different shape than the frame (as in this case). However, the main part of the flower is still cropped out of the frame.

InDesign CC has a new frame-fitting feature: Content-Aware Fit. This feature intelligently fits the best part from the image when you place it inside a frame by evaluating various parts of the image. Choose Object > Fitting > Content-Aware Fit. The sunflower is now nearly centered in the frame automatically. You can nudge it over if you’d like.

Select the circular picture frame in the lower left and place the image Calla-Lilly.psd. This frame was set up to center the image at 100% size. The picture is centered within the frame, but the subject of the photo (the flower) is not centered in the photo itself. Select either the circular frame or the image within and choose Object > Fitting > Content-Aware Fit. The flower is now centered in the circle.

Place a graphic into an existing frame by dropping from the desktop
Another way to import graphics is to drop them onto a page from your desktop. Switch to File Explorer (Windows) or the Finder (macOS), and open the Lesson10 folder, which contains the Starflower.jpg file.
Resize and arrange your File Explorer window (Windows) or Finder window (macOS) and your InDesign window, as needed, so that you can simultaneously see the list of files in the Lesson10 folder and the InDesign document window. Make sure that the right side of page 2 in your document is visible.
Select the empty frame to the right of the circular frame. Drag the Starflower.jpg file over this empty frame and release the mouse button.
This picture is smaller than the placeholder frame. Choose Object > Fitting > Fit Frame To Content. Then with the Selection tool, move the picture to a pleasing position in the group as you wish.
Using Adobe Bridge to import graphics
Adobe Bridge is a separate application available to Creative Cloud users with an All Apps subscription. Adobe Bridge is a cross-platform application that lets you browse your local and networked computers for graphics and then place them into an InDesign layout. (You can also use Bridge to import text files.) This is just one of many features the application provides. (If you don’t have Bridge available, you can complete this section using the Place command in the File menu.)
![]() Note
Note
If you do not already have Bridge installed, Creative Cloud will install it when you choose Browse In Bridge.
Choose File > Browse In Bridge to launch Adobe Bridge. Click the folder icons in the Favorites panel or double-click in the Folder panel to navigate to the Lesson10 folder.
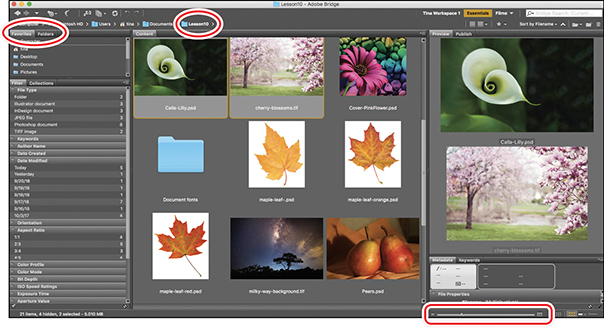
Adobe Bridge lets you view the thumbnails of all your images. Use the slider in the lower right to make the previews larger or smaller.
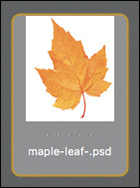
Adobe Bridge provides an easy way to locate and rename files. Because you see a preview, you can locate graphics visually without knowing the exact name. Click the graphic maple-leaf-.psd once, and then click the filename to select the filename box. Rename the file maple-leaf-yellow, and press Enter or Return to commit the change.
TipTo learn more about what you can do with Bridge, start at the Bridge page on the Adobe website: https://helpx.adobe.com/support/bridge.html.
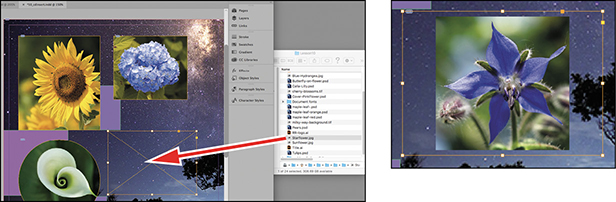
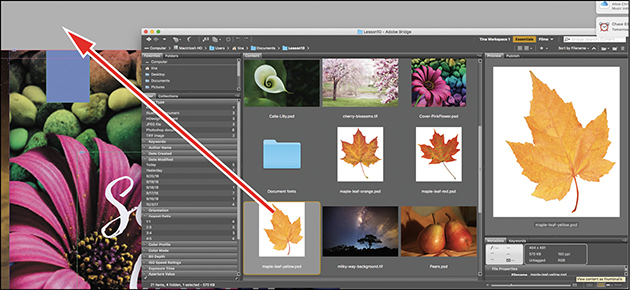
Make the Bridge window smaller by dragging the lower-right corner, and position it so that you can see page 4 of the InDesign document. Drag the maple-leaf-yellow.psd file into your InDesign document and onto an open area of the pasteboard. Click the pasteboard to place the image at full size and return to InDesign (Windows), or click the pasteboard to return to InDesign, and then click the pasteboard again to place the image at full size (macOS).
Use the Selection tool (
) to position the leaf graphic in the upper-left corner of page 4, on top of the empty Blue-Bright frame. Press Shift+Ctrl (Windows) or Shift+Command (macOS) and drag a corner of the frame to scale both the frame and its contents. Scale to about the size of the empty Blue-Bright frame. Align the top and right edges of the graphic frame with the top and right edges of the Blue-Bright frame.A very useful feature of dragging photos from Bridge is that you can quickly change pictures in a frame, while seeing the new image in Bridge and then the result in InDesign. This is very useful in projects where the layout repeats but you need to import different pictures. You’ll try this now.
With the yellow maple leaf still selected, bring the Bridge window to the front again (if needed) and choose the file maple-leaf-red.psd. Drag and drop it right over the yellow maple leaf. InDesign retains the scaling, and now you’ve switched out the image with the new one, in position, in just a few seconds. Try it again with maple-leaf-orange.psd. Select the image with the content grabber and set the Reference Point to the center position (
 ). Then rotate the image within the frame a bit to the left, to about 6 degrees. Drag and drop the red leaf again. The image is switched while both the scaling and rotation are retained.
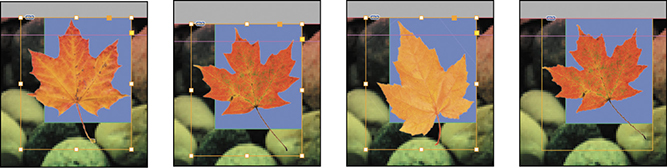
To see how the Reference Point affects the center of rotation, experiment with rotating the image again using different reference points, such as the upper left or lower right.
Choose File > Save to save your work.
Editing placed pictures
The quickest way to make a change to an imported graphic while you’re working in InDesign is to use the Edit Original feature. This opens the graphic in the corresponding image program (usually Adobe Illustrator or Adobe Photoshop). You can make the desired changes, save the file, and it will be automatically updated in InDesign.
![]() Note
Note
The Edit Original button may open an image in an application other than Photoshop or the application in which it was created. When you install software, some installer utilities change your operating system’s settings that associate file types with applications. The Edit Original command uses these settings for associating files with applications. To change these settings, see the documentation for your operating system.
Using the Selection tool (
), select the Blue-Hydrangea.psd image you imported onto page 2.If the Links panel is not already open, choose Window > Links. The image filename appears selected in the Links panel. Click the page number following the name to center it in your window.
In the Links panel, click the Edit Original button (
 ). This opens the image in an application that can view or edit it. This image was saved from Photoshop, so if Photoshop is installed on your computer, InDesign starts Photoshop and opens the selected file.
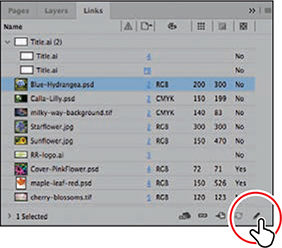
In Photoshop, make a change to the image such as applying a filter or making a dramatic change with an Adjustment Layer. Save the file, and it is automatically updated in InDesign. In the example you see in the 10_End.indd file, a filter was applied to blur the background more than it was originally.
In many workflows, the situation arises where the linked files for a project are moved to a new location. When you open that InDesign project, all of the links are broken and the missing icon (![]() ) shows in the Links panel for many images. InDesign can handle that situation in two ways.
) shows in the Links panel for many images. InDesign can handle that situation in two ways.
One, when you relink one image, InDesign looks for all other missing images in the new folder to which you just relinked that one image. Be sure to click the Search For Missing Links In This Folder option at the bottom of the relink window. It is turned on by default.
Two, select the missing images in the Links panel and use the Relink To Folder option from the panel flyout menu. Navigate to the folder where the links are now, select its name, and click Choose.
Working with dropped backgrounds
There are two basic types of images with white, or “dropped,” backgrounds, both of which are widely used. The difference is whether the edge between the foreground and background is a crisp, sharp edge or a soft, blending edge. The type of edge used depends on what is appropriate for the image content.
![]() Tip
Tip
A mask is a shape that’s used to contain and crop an image. The portion of the image within the mask shape is visible; any areas outside the mask shape are not visible.
Images with sharp edges between the foreground and background can use a vector path to separate the foreground from the background. This is called a clipping path.
If you draw a path in Photoshop and save it with the image, you can choose this path in InDesign, and you can choose different paths from within the same image.
If the image has a relatively light or white background (or a relatively dark background if the subject matter is light), InDesign can automatically detect the edge between the subject and the background and create a clipping path. However, this technique works best for simple shapes or for creating a path to use for Text Wrap, as we did in Lesson 4.
Images with a soft, blending edge between the foreground and background use transparency and soft brushes to delete the background in Photoshop.
Working with clipping paths from Photoshop in InDesign
Navigate to page 7 of the document by double-clicking page 7 in the Pages panel, and choose View > Fit Page In Window.
In the Layers panel, make sure that the Photos layer is selected so that the imported image is placed on that layer. You can lock the Background photos layer to be sure you don’t accidentally click into that frame. Choose File > Place, and double-click the file Pears.psd in the Lesson10 folder.
TipIf you accidentally click within the existing frame, choose Edit > Undo Place and try again.
Position the loaded raster graphics icon (
 ) outside the blue square in the center of page 7—to the left and slightly below the top edge (make sure you are not placing the pointer in the square itself)—and click to place an image of two pears. If you need to reposition the graphics frame to match the following image, do so now.
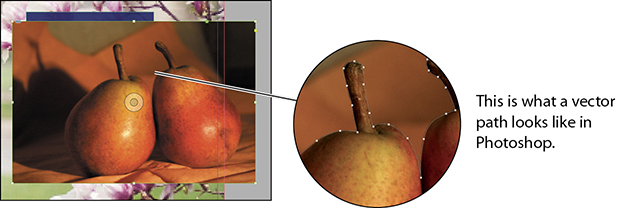
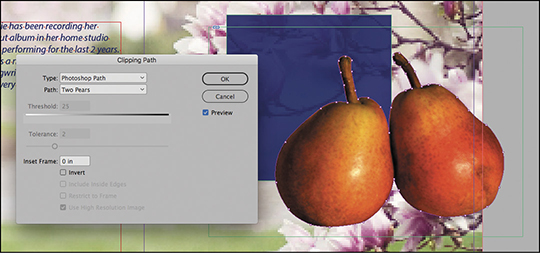
Choose Object > Clipping Path > Options. Move the Clipping Path dialog box, if necessary, so that you can see the pear image.
Choose Photoshop Path from the Type menu. Choose the path named “Two Pears.” If Preview is not selected, select it now. The background is now hidden, or clipped out, by the path.
Click OK.
Switch to the Selection tool (
) and click the lower-right corner handle. Press Shift+Ctrl (Windows) or Shift+Command (macOS) and drag up and to the left to scale both the frame and its contents. Make the pears fit inside the purple box as shown. Then choose Object > Fitting > Fit Frame To Content, and then use the Selection tool to move the pears toward the bottom of the blue square.
Press Alt (Windows) or Option (macOS) and drag up and to the right. This creates a copy of the image. Choose Object > Clipping Path > Options, and choose Photoshop Path from the Type menu. This time choose the path named “Right Pear” and click OK. Then choose Object > Fitting > Fit Frame To Content. Switch back to the Selection tool (
), click to select the frame, and use the same technique to scale this pear to about 80% of the original size (the Control panel shows the scale amount as you scale the object). Then move the pointer outside the bounding box until it changes to the Rotate Pointer ( ). Rotate the photo to the right about –28 degrees and move it down and slightly inside the box as shown.
NoteNotice the double arrows that appear when you press Alt (Windows) or Option (macOS) and click an object, indicating that a copy of the object will be made when you drag, leaving the original object in place.
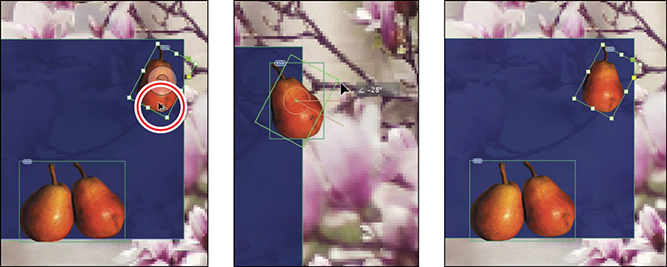
Press Alt (Windows) or Option (macOS) and drag down and to the left to create a copy of the single pear. Choose Object > Clipping Path > Options and choose Photoshop Path from the Type menu. This time choose the path named “Left Pear” and click OK. Then choose Object > Fitting > Fit Frame To Content. Switch back to the Selection tool, click to select the frame, and move the pointer outside the bounding box until it changes to the Rotate Pointer (
). Rotate the photo to the left about 22 degrees and move it down and a little to the right.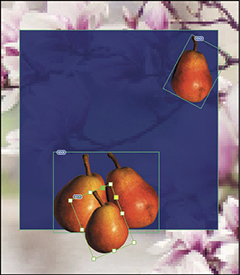
Notice how a clipping path allows an image to overlap multiple other objects. You can also move images in front of or behind other objects. Take a few moments to experiment.
Choose File > Save to save the file.
Working with transparent backgrounds from Photoshop in InDesign
Navigate to page 5 of the document by sliding page 7 to the right. Do this by holding down the spacebar. The hand icon (
 ) appears. Keep the spacebar pressed and drag until page 5 is centered in your window.
Select the Rectangle Frame tool (
 ) in the Tools panel and draw a frame in the lower area as shown, crossing over the border between page 5 and page 6.
Then choose Object > Fitting > Frame Fitting Options. Choose Fit Content Proportionally and then click the top center point in the Align From area. Click OK.
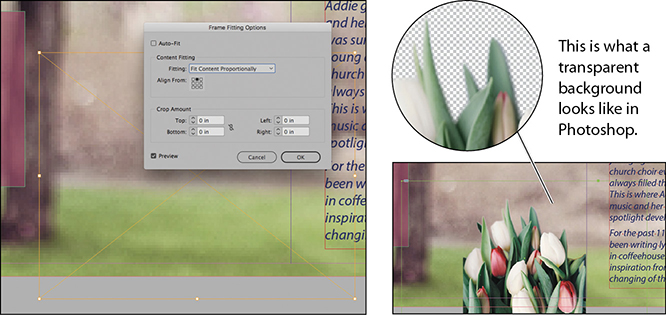
Choose File > Place and double-click the Tulips.psd file in the Lesson10 folder. InDesign fits the image proportionally to the frame as specified. Choose Edit > Deselect All.
Now we want to scale the picture without scaling the frame. Switch to the Selection tool, and notice that when you move the pointer over the right area of the picture, the red frame of the text lights up. This is because the Text layer is above the Graphics layer. Open the Layers panel and lock the Text layer so that you can easily work with the photo. Click the photo over the circle of the content grabber (
) to select the contents of the frame, in this case the photo of the tulips. The handles of the bounding box of the photo (not the frame) will be active. In the Control panel, set the Reference Point to the upper center ( ) position, type 70% in the Scale box, and Press Enter (Windows) or Return (macOS). Use the arrow keys to nudge the photo up slightly. Use the Selection tool to make the frame wider if necessary. Most of the image will be cropped out, with just the tops of the flowers and leaves showing.
Notice how different the edges of the tulip image are compared to the edges of the pears image. Here, the edges blend softly into the background. This is the purpose of using transparency in Photoshop to remove a background: to create a soft edge by painting away the background with a soft-edge brush.

Importing native Adobe graphic files
InDesign allows you to import files saved from Adobe applications, such as Photoshop (.psd), Illustrator (.ai), and Acrobat (.pdf), in unique ways and provides options for controlling how the files are displayed. For example, you can adjust the visibility of Photoshop and Illustrator layers in InDesign.
Working with a Photoshop file with layers
In the previous exercise, you worked with a Photoshop file with several saved paths; however, the file had only a single background layer. When you work with a layered Photoshop file, you can adjust the visibility of the individual layers. If you locked the Background photos layer in the previous exercise, go to the Layers panel and unlock it now.
In the Links panel, click the link for Cover-PinkFlower.psd, and click the Go To Link button (
) to select the file and center it in your document window. This file, which you relinked in a previous exercise, has four layers.Choose Object > Object Layer Options to open the Object Layer Options dialog box. This dialog box allows you to show and hide layers.
Move the Object Layer Options dialog box so that you can see as much as possible of the selected image. Select the Preview option to view changes while keeping the dialog box open.
In the Object Layer Options dialog box, click the eye icon (
 ) to the left of the Cobblestones layer. This turns off the layer, leaving only the Pink Flower layer visible.
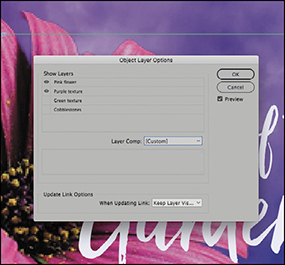
Click the eye icon (
) to the left of the Green Texture layer to turn the layer on. Turn that layer off and turn on Purple Texture layer. Click OK.Choose File > Save to save your work so far.
Creating an anchored graphics frame
An anchored graphics frame moves with the text to which it’s anchored if editing causes the text to reflow. In this exercise, you’ll anchor the CD title to a text frame on page 6.
In the Pages panel, double-click the second spread, and choose View > Fit Spread In Window. Open the Layers panel and unlock the Text layer if necessary. At the bottom of the pasteboard is the Songs of the Garden logo. You’ll insert this graphic into a paragraph on the page.
TipIf the Anchored Object Control square is not visible when selecting the logo, choose View > Extras > Show Anchored Object Control.
Press and hold Z to temporarily access the Zoom tool, or select the Zoom tool (
 ) and click so that you can see the logo and the text frame above it.
Using the Selection tool (
), click the logo. (Be careful to click outside the content grabber so that you select the frame and not the graphic within.) Notice the small, solid-red square near the upper-right corner of the frame. You can drag this square into a text frame to anchor an object to text.
NoteShowing hidden characters is not a necessary step when placing anchored graphics; it is used here to help identify the structure of the text.
Choose Type > Show Hidden Characters to view the spaces and paragraph returns in the text. This helps you locate where you want to anchor the frame.

Select the Type tool (
 ) and click in front of the word “Addie” at the beginning of the second paragraph. Press Enter (Windows) or Return (macOS) so that the anchored graphic will be in a paragraph by itself.
Use the Selection tool and click the logo again. Hold down the Shift key and drag the red square near the upper right of the logo to the beginning of the second paragraph. Holding the Shift key creates an inline graphic that flows with the text (as opposed to floating outside the text frame). You’ll see a bold cursor indicating the point where the graphic anchor will be inserted. After the graphic is anchored, the red square on the graphic frame changes to an anchor symbol. Now if the text in the paragraph above is edited, the graphic will stay where you positioned it between the two paragraphs without you having to adjust its position.

Now you’ll create space between the graphic and the surrounding text with the Space Before option. Once a graphic is anchored, you can select it with the Type tool and apply text attributes that affect its position.
Select the Type tool (
) and then click to the right of the inline graphic to establish the insertion point in that paragraph.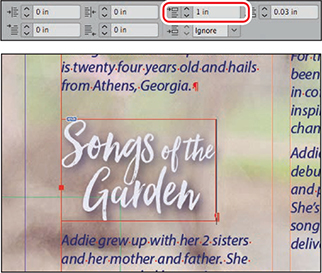
TipWhen you hold down the Shift key and click the arrow button, InDesign changes the measurement in larger increments than when you do not hold down the Shift key. The amount varies with the measurement units you are using. When using inches, the amount is .25 in. versus .0625 in. without the Shift key; when you are using millimeters, the amount is 10 mm. versus 1 mm.
Click the Paragraph Formatting Controls button (
 ) in the Control panel. In the Space Before option (
 ), hold down the Shift key and click the up arrow button to the right of the icon to change the value to 1 in. As you increase the value, the anchored graphics frame and the text below it shift downward.
To see how the anchored graphic flows when text is edited, click to the right of the period that ends the first paragraph, and then press Enter or Return twice. Notice how the graphic moves down each time you press the key. Press Backspace (Windows) or Delete (macOS) twice to remove the extra paragraph returns.
Choose File > Save to save your work so far.
Adding text wrap to an anchored graphics frame
You can easily add text wrap to an anchored graphics frame. Text wrap allows you to flow text around a graphic frame or the shape of the graphic within using many different options.
Using the Selection tool (
), select the graphics frame with the Songs of the Garden logo you placed in the previous exercise.Press Shift+Ctrl (Windows) or Shift+Command (macOS), and drag the upper-right handle of the frame up and to the right until you’ve scaled the graphic and its frame roughly 20% across the second column. With the graphic still selected, drag it downward so that the top is below the first paragraph.
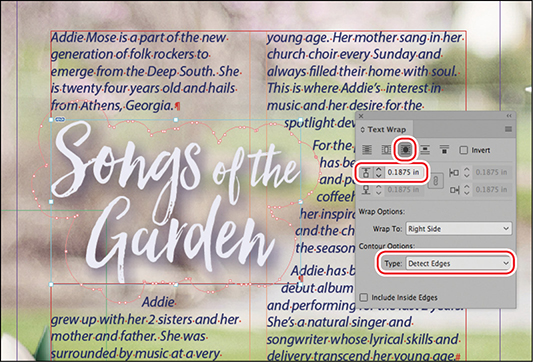
Choose Window > Text Wrap to access the Text Wrap panel. In the Text Wrap panel, select Wrap Around Object Shape (
 ) to add text wrap to the graphic.
To increase space around the bounding box of the graphic, click the up arrow button in the Top Offset option (
 ) and change the value to 0.1875 in.
Text can also wrap around a graphic’s shape rather than around the rectangular bounding box.
In the Text Wrap panel under Contour Options, choose Detect Edges from the Type menu. Detect Edges creates a vector path. Because this image is a vector graphic, the text wrap is determined by the shape formed by the letters.
To view the document clearly, choose Edit > Deselect All, and choose Type > Hide Hidden Characters to hide the paragraph returns and spaces.
Using the Selection tool (
), select the graphics frame with the Songs of the Garden logo again.In the Text Wrap panel, experiment with the available options from the Wrap To menu. Keep Largest Area as your final choice. The text moves into the largest area to one side of the text wrap boundary.
The path created when using the Detect Edges contour option is an editable path. For example, you can manually adjust the anchor points by dragging them to a new position. You can also add or delete points, and convert them from corner points to smooth points (and vice versa) with the Pen tool (
 ). You can change the shape of curves by adjusting the anchor point handles with the Direct Selection tool (
 ).
).Select the Direct Selection tool (
), and then click the graphic to view the anchor points used for the text wrap. Experiment with moving individual points and notice how that reflows the text.
TipWhen you hover over an anchor point with the Pen tool, the icon adds a minus sign to indicate that if you click that point, it will be deleted.
Examine this path in the 10_End.indd file, where many points along the bottom of the graphic were deleted to better control the text flow of the first line of the next paragraph.
Close the Text Wrap panel.
Choose File > Save.
Importing an Illustrator file
InDesign takes full advantage of the smooth edges of vector graphics, such as those from Adobe Illustrator. Most vector graphics don’t require a clipping path, because most applications save them with transparent backgrounds. In this section, you’ll place an Illustrator graphic into your InDesign document.
![]() Tip
Tip
When you use High Quality Display setting, vector graphics and type appear with smooth edges at any size or magnification.
In the Layers panel, select the Graphics layer. Choose Edit > Deselect All to make sure nothing is selected in your document.
Choose View > Fit Spread In Window to see the entire spread.
Choose File > Place, and select the Illustrator file Garland.ai from the Lesson10 folder. Make sure that Show Import Options is not selected. Click Open.
NoteIf an Illustrator file imports with a white background, delete it and import it again, but turn on Show Import Options and then turn on Transparent Background.
Click in the upper-left corner of page 5 with the loaded vector graphics icon (
 ) to add the Illustrator file to the page. Use the Selection tool () to position it as shown here. Graphics created in Illustrator have transparent backgrounds by default.
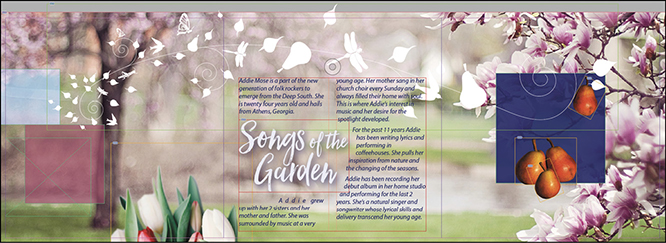
Choose File > Save to save your work.
Importing an Illustrator file with layers
You can import native Illustrator files with layers into an InDesign layout and control the visibility of the layers and reposition the graphic. However, you cannot edit the paths, objects, or text.
Deselect all objects by clicking in the pasteboard of the document window. Click the empty frame to the left of the red box on the far left of the spread.
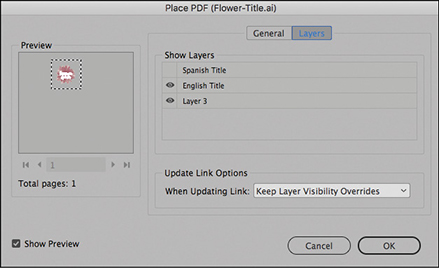
Choose File > Place. In the lower-left corner of the Place dialog box, select Show Import Options. Select the file Flower-Title.ai, and click Open. The Place PDF dialog box appears when Show Import Options is selected (because Illustrator files are written in PDF file format).
In the Place PDF dialog box, make sure that Show Preview is selected. In the General tab choose Bounding Box (All Layers) from the Crop To menu and make sure that Transparent Background is selected.
Click the Layers tab to view the layers. This file has three layers: a background image of a flower (Layer 3), a layer of text in English (English Title), and a layer of text in Spanish (Spanish Title).
Although you can designate now which layers you would like to display in the imported graphic, the small Preview area makes it difficult to see the results.
Click OK. You’ll select the layers to display while working in the layout.
Use the Zoom tool (
) to zoom in on the graphic.
In the Control panel, click the center Reference Point (
) and then click the content grabber. Enter 70% for the scale.Switch to the Selection tool (
) and drag or nudge with the arrow keys to position the graphic so that it is visually centered over the red box.With the graphic still selected, choose Object > Object Layer Options. Move the dialog box if necessary so that you can see the graphic in the document.
Select Preview, and then click the eye icon (
 ) next to the English Title layer to turn it off.
Click the empty box next to Spanish Title to turn on that layer. Click OK, and then choose Edit > Deselect All.
Using layered Illustrator files allows you to repurpose illustrations without having to create separate files for each variation.
Choose File > Save to save your work.
Using an InDesign library to manage objects
Object libraries let you store and organize graphics, text, and design elements that you use frequently. InDesign libraries are stored as files on your hard drive or a shared device. You can also add ruler guides, grids, drawn shapes, and grouped images to a library. Each library appears as a separate panel that you can group with other panels any way you like. You can create as many libraries as you need—for example, different libraries for each of your projects or clients. In this section, you’ll import a graphic currently stored in a library, and then you’ll create your own library.
![]() Tip
Tip
You might use a library to store boilerplate text, a photo of each writer who contributes to a publication, or frequently used page elements such as a logo or an image with a caption.
If you’re not already on page 5, type 5 into the Page Number box at the bottom of the document window, and then press Enter or Return to go to that page.
Choose View > Fit Page In Window to see the entire page.
NoteWhen you open it, the Lesson_10_Elements Library may be grouped with the default Sample Buttons And Forms library. You can drag the default library off the docked panel and close it.
Choose File > Open, select the file Lesson_10_Elements.indl in the Lesson10 folder, and then click Open to open the library file. Drag the lower-right corner of the Lesson_10_Elements Library panel to reveal all of the items it contains.
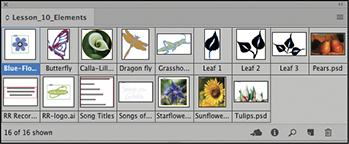
In the Lesson_10_Elements Library panel, select the Show Library Subset button (
 ). In the last box for the Parameters option, type flower, and click OK. This searches the library for all objects that have the word “flower” in their name. Three objects are found.
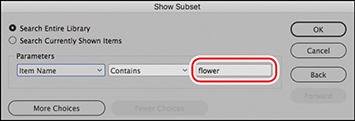
NoteAfter you drag the flower image onto the page, the Links panel may display a missing link icon (
) or a modified link icon () because you moved the Blue-Flower.ai file from its original location to your hard drive. To remove the warning, click the Update Link button in the Links panel, or click the Relink button in the Links panel and navigate to the Lesson10 folder to find Blue-Flower.ai.In the Layers panel, make sure the Graphics layer is selected. Open the Links panel.
Of the three objects visible in the Lesson_10_Elements Library panel, drag Blue-Flower.ai anywhere on page 5. The file is added to the page. Notice that the filename appears in the Links panel.

Using the Selection tool (
), position the Blue-Flower.ai image so that it’s on top of the light blue background frame on the far left of the page.Choose File > Save to save your work.
Creative Cloud Libraries make your favorite assets available to you anywhere. You can use CC Libraries to create and share colors, character and paragraph styles, graphics, Adobe Stock assets, and more using your favorite Creative Cloud desktop and mobile apps and then access them across other Creative Cloud apps whenever you need them. You can also share libraries with anyone who has a Creative Cloud account, so it’s easy to collaborate, keep designs consistent, and even create style guides to use across projects.
CC Libraries work much like the InDesign libraries you use in this lesson. To create a new CC Library, follow these steps:
Choose Window > CC Libraries to display the CC Libraries panel, or click the CC Libraries panel icon (
 ).
).Click the Library panel menu, and choose Create New Library.
Enter CD Elements in the Create New Library field, and then click Create.
NoteThe CC Libraries menu includes several commands that let you create and manage CC Libraries and control how library elements are displayed in the panel.
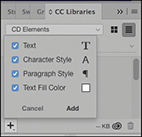
Use the Type tool to select all of the text in the address at the bottom of page 3, click the plus sign at the bottom of the CC Library panel, and then click the Add button. Both the text and the paragraph style will be added to the library. You can add both formatted and unformatted text to a library, as well as the styles and color associated with the text.
Use the Selection tool (
) to select the “Songs of the Garden” graphic on page 4, and then drag it into the library window. Double-click the name “Artwork 1” and type to change the name to Songs of the Garden logo. Be sure to click the name and not the icon of the graphic itself. Drag another graphic to the library and name it, such as the red maple leaf at the top of page 4. Examine the organization of the library.
TipWhen you add an asset to a CC Library, it’s assigned a default name. If you want to change the name of an asset, double-click its name and then enter a new one.
After you’ve saved assets to a CC Library, you can use them in other InDesign documents, as well as in other Adobe CC applications, such as Photoshop and Illustrator.
Choose File > New > Document to open a new InDesign document. Click Create to use the default settings.
Drag the “Address” asset in the CC Library to the page. The Address paragraph style uses Paper as the fill color, so you’ll need to add a fill color to the text frame to see the white text. The Address paragraph style is also added to the list of styles in the Paragraph Styles panel.
Drag the “Songs of the Garden logo” asset from the CC Library to the page, and then click with the loaded graphics icon to place the graphic.
Close the document without saving changes and return to the document you were working on.
You can also share CC Libraries with team members and other colleagues. For more information, see the “Exploring on your own” section at the end of this lesson.
Creating an InDesign library
Now you’ll create your own library and add text and a graphic to it. When you add a graphic to an InDesign library, the original graphic file is not copied into the library; instead, InDesign maintains a link to the original source file. Graphics stored in a library still require the original, high-resolution file for high-resolution display and printing.
Choose File > New > Library. (If the CC Libraries alert displays asking whether you want to try out CC libraries now, click No.) Type CD Projects as the library filename, navigate to the Lesson10 folder, and click Save.
Navigate to page 3. Using the Selection tool (
), drag the Ricky Records logo to the library you just created. The logo is now saved in the library for use in other InDesign documents.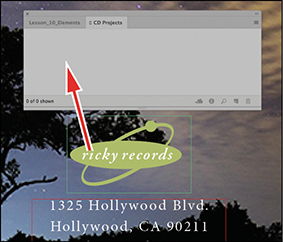
TipIf you Alt-drag (Windows) or Option-drag (macOS) an object into a library, the Item Information dialog box appears as soon as you drag the item into the library, and you can assign a name to the object as you add each item.
In the CD Projects library, double-click the Ricky Records logo. For Item Name, type Ricky Records Logo, and click OK.
Using the Selection tool, drag the address text block to the CD Projects library.
In the CD Projects library, double-click the address text block. For Item Name, type Ricky Records Address, and click OK. Click the panel flyout menu and choose Large Thumbnail View so that it’s easier to see the items.
Now your library contains both text and graphics. As soon as you make changes to the library, InDesign saves the changes.
Close both libraries by clicking the close button at the top of the library panel group.
Congratulations! You have completed this lesson.
Exploring on your own
Now that you’ve had some practice working with imported graphics, here are some exercises to try on your own:
Place different file formats with Show Import Options selected in the Place dialog box, and see what options appear for each format. You can use any of the sample graphics files for this lesson or any other lessons or any other available graphics. For a full description of all the options available for each format, see InDesign Help.
Place a multiple-page PDF file or an Adobe Illustrator (.ai) file with multiple artboards with Show Import Options selected in the Place dialog box, and import different pages from the PDF or different artboards from the Illustrator file.
Create libraries of text and graphics for your work.
During this lesson, you created a CC Library named “CD Elements.” In addition to being able to access assets in CC Libraries using several Adobe graphics applications, you can share these libraries with team members and other colleagues to ensure that everyone is using the latest iterations.
Choose Window > CC Libraries to open the CC Libraries panel, and then select CD Elements from the Libraries menu at the top of the panel. Choose Collaborate from the panel menu. In the Invite Collaborators window that opens in your browser, enter the email addresses of the colleagues with whom you want to share your library. Choose Can Edit or Can View from the menu to specify whether recipients can view and edit elements (Can Edit) or view only (Can View). Click Invite. The recipients will receive an email invitation to collaborate on the library.
Another way to import Illustrator graphics into InDesign is to copy the vector shapes from Illustrator and switch over to InDesign and paste. The Illustrator vector objects are converted into InDesign vector objects. You can use these objects as if you had drawn them in InDesign. If you have Illustrator, try this yourself. After you paste the objects into InDesign, change the color with the colors from your InDesign Swatches panel. Then use the Pen tool to select points and change the vector shape.
If you do not have Illustrator, you can use the vector art of a butterfly that is in the pasteboard of the Start.indd file, to the left of page 2.
Experiment further with the Object > Fitting options, especially the new option Content-Aware Fit. Use the pictures from this lesson or any other lesson, or use other images you have.
Review questions
1 How can you determine the filename of an imported graphic in your document?
2 What is the difference between dropping a background with a clipping path versus with transparency?
3 What is the difference between updating a graphic file’s link and relinking the file?
4 When an updated version of a graphic becomes available, how do you make sure that it’s up to date in your InDesign document?
5 How do you scale an imported graphic and its frame at the same time?
6 What is a quick technique to make a duplicate of an object and place it in position at the same time?
Review answers
1 Select the graphic, and then choose Window > Links to see the graphic’s filename highlighted in the Links panel. The graphic appears in the Links panel if it was imported by choosing File > Place or dragged into the layout from Explorer (Windows), Finder (macOS), or Bridge.
2 Clipping paths are vector drawn paths that create a crisp, sharp edge. Photoshop images that use transparency to remove the background create a soft, blended edge using soft-edge brushes to paint away the background.
3 Updating a file’s link simply uses the Links panel to update the onscreen representation of a graphic so that it represents the most recent version of the original. Relinking a selected graphic uses the Place command to allow you to insert a different graphic in place of the selected graphic. You might do this, for example, to replace a PNG graphic with an identical graphic in the JPEG format.
4 In the Links panel, make sure that no alert icon is displayed for the file. If an alert icon is displayed, you can simply select the link and click the Update Link button. If the file has been moved, you must locate it again using the Relink button.
5 Press Shift+Ctrl (Windows) or Shift+Command (macOS) and drag to scale either larger or smaller.
6 With the Selection tool, press Alt (Windows) or Option (macOS) and drag to the desired location. A copy of the object is created at the new location and the original object remains in place.