In this lesson, you’ll learn how to do the following:
Differentiate between bitmap and vector graphics.
Draw straight and curved paths using the Pen tool.
Convert a path to a selection, and convert a selection to a path.
Save paths.
Draw and edit layer shapes.
Draw custom layer shapes.
Import and edit a Smart Object from Adobe Illustrator.
This lesson will take about 90 minutes to complete. Copy the Lesson08 folder onto your hard drive if you haven’t already done so. As you work on this lesson, you’ll preserve the start files. If you need to restore the start files, copy them from the Adobe Photoshop CS4 Classroom in a Book CD.
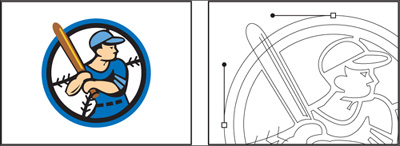
Unlike bitmap images, vector images retain their crisp edges at any enlargement. You can draw vector shapes and paths in your Photoshop images and add vector masks to control what is shown in an image.
Before working with vector shapes and vector paths, it’s important to understand the basic differences between the two main categories of computer graphics: bitmap images and vector graphics. You can use Photoshop to work with either type of graphic; in fact, you can combine both bitmap and vector data in an individual Photoshop image file.
Bitmap images, technically called raster images, are based on a grid of colors known as pixels. Each pixel is assigned a specific location and color value. In working with bitmap images, you edit groups of pixels rather than objects or shapes. Because bitmap graphics can represent subtle gradations of shade and color, they are appropriate for continuous-tone images such as photographs or artwork created in painting programs. A disadvantage of bitmap graphics is that they contain a fixed number of pixels. As a result, they can lose detail and appear jagged when scaled up onscreen or printed at a lower resolution than they were created for.
Vector graphics are made up of lines and curves defined by mathematical objects called vectors. These graphics retain their crispness whether they are moved, resized, or have their color changed. Vector graphics are appropriate for illustrations, type, and graphics such as logos that may be scaled to different sizes.

In Photoshop, the outline of a vector shape is a path. A path is a curved or straight line segment you draw using the Pen tool, Magnetic Pen tool, or Freeform Pen tool. Of these tools, the Pen tool draws paths with the greatest precision; the Magnetic Pen tool and Freeform Pen tool draw paths as if you were drawing with a pencil on paper.

Tool tips from the Photoshop evangelist

Each tool in the Tools panel has a single-letter keyboard shortcut. Type the letter, get the tool. For example, press P to select the Pen tool. Press Shift with the key to cycle though any nested tools in a group. So press Shift+P to toggle between the Pen and Freeform Pen tools.
Paths can be open or closed. Open paths (such as a wavy line) have two distinct endpoints. Closed paths (such as a circle) are continuous. The type of path you draw affects how it can be selected and adjusted.
Paths that have not been filled or stroked do not print when you print your artwork. This is because paths are vector objects that contain no pixels, unlike the bitmap shapes drawn by the Pencil tool and other painting tools.
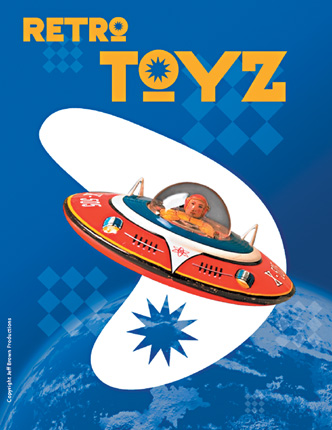
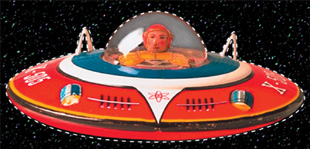
Before you begin, you’ll view the image you’ll be creating—a poster for a fictitious toy company.
Start Adobe Photoshop, holding down Ctrl+Alt+Shift (Windows) or Command+Option+Shift (Mac OS) to restore the default preferences. (See “Restoring default preferences” on page 4.)
When prompted, click Yes to confirm that you want to reset preferences.
Click the Launch Bridge button (
 ) in the application bar to open Adobe Bridge.
In the Favorites panel in the upper-left corner of Bridge, click the Lessons folder, and then double-click the Lesson08 folder in the Content panel.
View the 08End.psd file in the Content panel. To see larger thumbnails, drag the thumbnail slider at the bottom of the window.
To create this poster, you’ll work with the image of the toy spaceship and practice making paths and selections using the Pen tool. As you create the background shapes and type, you’ll learn advanced methods of using path and vector masks, as well as ways to use Smart Objects.
When you’ve finished looking at 08End.psd, double-click the Saucer.psd file to open it in Photoshop.
Choose File > Save As, rename the file 08Working.psd, and click Save. Click OK in the Photoshop Format Options dialog box.

You’ll use the Pen tool to select the flying saucer. The saucer has long, smooth, curved edges that would be difficult to select using other methods.
You’ll draw a path around the saucer and create two paths inside it. You’ll convert the paths to selections, and then subtract one selection from the other so that only the saucer and none of the starry sky is selected. Finally, you’ll make a new layer from the saucer image and change the image that appears behind it.
When drawing a freehand path using the Pen tool, use as few points as possible to create the shape you want. The fewer points you use, the smoother the curves are and the more efficient your file is.
Creating paths with the Pen tool
You can use the Pen tool to create paths that are straight or curved, open or closed. If you’re unfamiliar with the Pen tool, it can be confusing to use at first. Understanding the elements of a path and how to create them with the Pen tool makes paths much easier to draw.
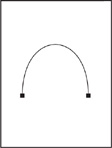
To create a straight path, click the mouse button. The first time you click, you set the starting point. Each time that you click thereafter, a straight line is drawn between the previous point and the current point. To draw complex straight-segment paths with the Pen tool, simply continue to add points.

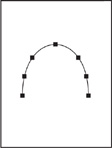
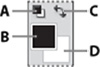
To create a curved path, click to place an anchor point, drag to create a direction line for that point, and then click to place the next anchor point. Each direction line ends in two direction points; the positions of direction lines and points determine the size and shape of the curved segment. Moving the direction lines and points reshapes the curves in a path.
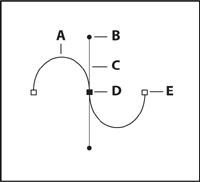
A. Curved line segment B. Direction point C. Direction line D. Selected anchor point E. Unselected anchor point
Smooth curves are connected by anchor points called smooth points. Sharply curved paths are connected by corner points. When you move a direction line on a smooth point, the curved segments on both sides of the point adjust simultaneously, but when you move a direction line on a corner point, only the curve on the same side of the point as the direction line is adjusted.
Path segments and anchor points can be moved after they’re drawn, either individually or as a group. When a path contains more than one segment, you can drag individual anchor points to adjust individual segments of the path, or select all of the anchor points in a path to edit the entire path. Use the Direct Selection tool to select and adjust an anchor point, a path segment, or an entire path.
Creating a closed path differs from creating an open path in the way that you end the path. To end an open path, click the Pen tool in the Tools panel. To create a closed path, position the Pen tool pointer over the starting point and click. Closing a path automatically ends the path. After the path closes, the Pen tool pointer appears with a small x, indicating that your next click will start a new path.
As you draw paths, a temporary storage area named Work Path appears in the Paths panel. It’s a good idea to save work paths, and it’s essential if you use multiple discrete paths in the same image file. If you deselect an existing Work Path in the Paths panel and then start drawing again, a new work path will replace the original one, which will be lost. To save a work path, double-click it in the Paths panel, type a name in the Save Path dialog box, and click OK to rename and save the path. The path remains selected in the Paths panel.
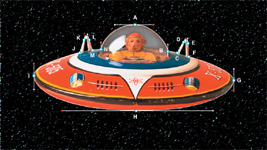
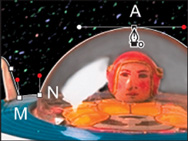
You’ll use the Pen tool to connect the dots from point A to point N, and then back to point A. You’ll set straight segments, smooth curve points, and corner points.
The first step is to configure the Pen tool options and the work area. Then you’ll trace the outline of a flying saucer using a template.
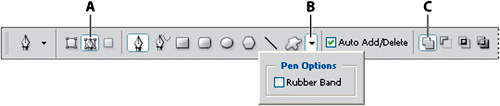
In the Tools panel, select the Pen tool (
 ).
).In the options bar, select or verify the following settings:
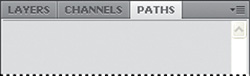
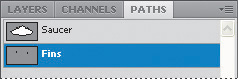
Click the Paths tab to bring that panel to the front of the Layers panel group.
The Paths panel displays thumbnail previews of the paths you draw. Currently, the panel is empty because you haven’t started drawing.
If necessary, zoom in so that you can easily see the lettered points and red dots on the shape template. Make sure you can see the whole template in the image window, and be sure to reselect the Pen tool after you zoom.
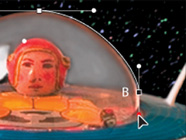
Click point A (the blue outlined box) and drag to the right to the red dot. Release the mouse. You’ve set the first anchor point and the direction of the curve.
Click point B (again, the blue outlined box) and drag down to the red dot. Release the mouse.
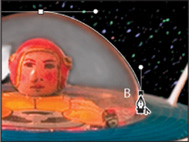
At the corner of the cockpit (point B), you’ll need to convert the smooth point to a corner point to create a sharp transition between the curved segment and the straight one.
Alt-click (Windows) or Option-click (Mac OS) point B to convert the smooth point into a corner point and remove one of the direction lines.
Click point C to set a straight segment (don’t drag).
If you make a mistake while you’re drawing, choose Edit > Undo to undo the step. Then resume drawing.
Click point D and drag up from point D to its red dot. Then, click point E and drag down from point E to its red dot. Next, click point F.
Set curve points at G, H, and I by clicking each point and dragging from the point to its red dot, each in turn.
Click point J.
Set curve points at K and L by clicking each point and dragging from each one to its respective red dot.
Click point M.
Click point N and don’t release the mouse button. Press Alt (Windows) or Option (Mac OS) and drag from point N to the red dot to add one direction line to the anchor point at N. Then, release the mouse button and the Alt or Option key.
Move the pointer over point A so that a small circle appears in the pointer icon, indicating that you are about to close the path. (The small circle may be difficult to see because the image is dark and the circle is faint.) Drag from point A to the red dot, and then release the mouse button to draw the last curved line.
In the Paths panel, double-click the Work Path, type Saucer in the Save Path dialog box, and click OK to save it.
Choose File > Save to save your work.

Now, you’ll create a second path using a different method. First, you’ll use a selection tool to select a similarly colored area, and then you’ll convert the selection to a path. (You can convert any selection made with a selection tool into a path.)
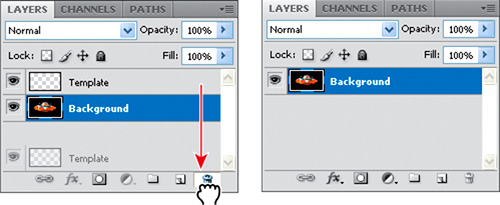
Click the Layers tab to display the Layers panel, and then drag the Template layer to the Delete button at the bottom of the panel. You no longer need this layer.
Select the Magic Wand tool (
 ) in the tool box, hidden under the Quick Selection tool.
In the options bar, make sure the Tolerance value is 32.
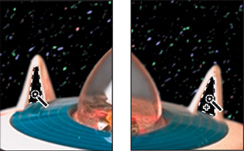
Carefully click the black area inside one of the saucer’s vertical fins.
Shift-click inside the other fin to add that black area to the selection.
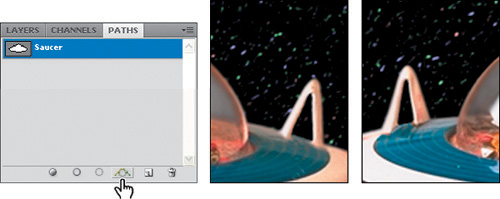
Click the Paths tab to bring the Paths panel forward. Then, click the Make Work Path From Selection button (
 ) at the bottom of the panel.
The selections are converted to paths, and a new work path is created.
Double-click the path named Work Path, name it Fins, and then click OK to save the path.
Choose File > Save to save your work.
Just as you can convert selection borders to paths, you can convert paths to selections. With their smooth outlines, paths let you make precise selections. Now that you’ve drawn paths for the spaceship and its fins, you’ll convert those paths to a selection and apply a filter to the selection.
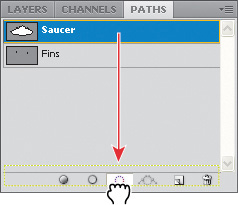
In the Paths panel, click the Saucer path to make it active.
Choose Make Selection from the Paths panel menu, and then click OK to convert the Saucer path to a selection.
Tip
You can also click the Load Path As Selection button at the bottom of the Paths panel to convert the active path to a selection.
Next, you’ll subtract the Fins selection from the Saucer selection so that you can see the background through the vacant areas in the fins.
In the Paths panel, click the Fins path to make it active. Then, from the Paths panel menu, choose Make Selection.
In the Operation area of the Make Selection dialog box, select Subtract From Selection, and click OK.
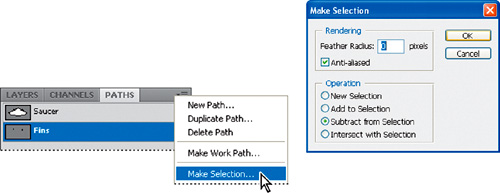
The Fins path is simultaneously converted to a selection and subtracted from the Saucer selection.
Leave the paths selected, because you’ll use them in the next exercise.
Now, you’ll see how creating the selection with the Pen tool can help you achieve interesting effects. Because you’ve isolated the saucer, you can create a duplicate of it on a new layer. Then, you can copy it to another image file—specifically, to the image that is the background for the toy store poster.
Make sure that you can still see the selection outline in the image window. If you can’t, repeat the previous exercise, “Converting paths to selections.”
Choose Layer > New > Layer Via Copy.
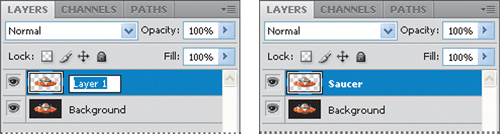
Click the Layers tab to bring the Layers panel to the front. A new layer appears in the Layers panel, called Layer 1. The Layer 1 thumbnail shows that the layer contains only the image of the flying saucer, not the space background of the original layer.
In the Layers panel, rename Layer 1 Saucer, and press Enter or Return.
Choose File > Open, and double-click the 08Start.psd file in the Lessons/Lesson08 folder.
The 08Start.psd file has a graduated blue background with a planet in the lower part of the image. You’ll use this as the background for the flying saucer.
Click the Arrange Documents button in the application bar, and select a 2 Up layout so that you can see both the Saucer.psd and 08Start.psd files. Click the 08Working.psd image to make it active.
Select the Move tool (
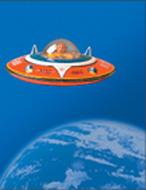
 ), and drag the saucer from the 08Working.psd image window to the 08Start.psd image window so that the saucer appears to be hovering over the planet.
Close the 08Working.psd image without saving changes, leaving the 08Start.psd file open and active.
Now you’ll position the flying saucer more precisely in the poster background.
Select the Saucer layer in the Layers panel and choose Edit > Free Transform.
A bounding box appears around the saucer.
Position the pointer near any corner handle until it turns into the rotate cursor (
 ), then drag to rotate the saucer until it’s at about a 20-degree angle. For precise rotation, you can enter the value in the Rotate box in the options bar. When you’re satisfied, press Enter or Return.
Make sure that the Saucer layer is still selected, and then use the Move tool to drag the saucer so that it grazes the top of the planet, as in the following image.
Choose File > Save As, rename the file 08B_Working.psd, and click Save. Click OK in the Photoshop Format Options dialog box.


Many posters are designed to be scalable, either up or down, while retaining a crisp appearance. This is a good use for vector shapes. Next, you’ll create vector shapes with paths, and use masks to control what appears in the poster. Because they’re vectors, the shapes can be scaled in future design revisions without a loss of quality or detail.
You’ll begin by creating a white kidney-shaped object for the backdrop of the poster.
Choose View > Rulers to display the horizontal and vertical rulers.
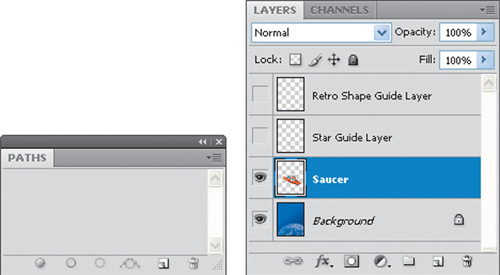
Drag the tab for the Paths panel out of the Layers panel group so that it floats independently. Since you’ll be using the Layers and Paths panels frequently in this exercise, it’s convenient to have them separated.
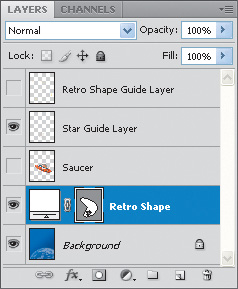
Hide all of the layers except the Retro Shape Guide layer and the Background layer by clicking the appropriate eye icons in the Layers panel. Select the Background layer to make it active.
The guide layer will serve as a template as you draw the kidney shape.
Set the foreground and background colors to their defaults (black and white, respectively) by clicking the Default Foreground And Background Colors button (
 ) in the Tools panel (or type the keyboard shortcut D), and then swap the foreground and background colors by clicking the Switch Foreground And Background Colors button () (or type X). Now the foreground color is white.
In the Tools panel, select the Pen tool (
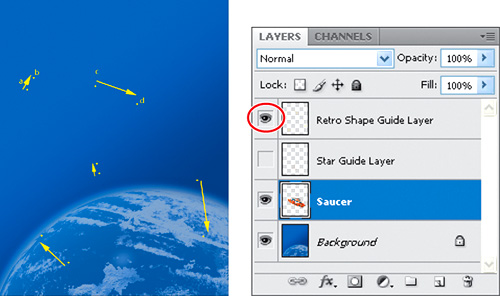
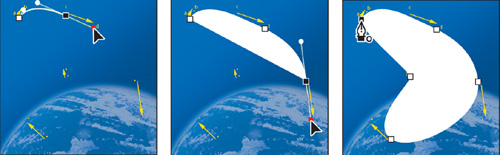
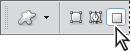
). Then, in the options bar, select the Shape Layers option.Create the shape by clicking and dragging as follows:
Click point A and drag a direction line up and to the left of point B, and then release.
Click point C and drag a direction line toward and above point D, and then release.
Continue to draw curved segments in this way around the shape until you return to point A, and then click on A to close the path.
Note
If you have trouble, open the saucer image again and practice drawing the path around the saucer shape until you get more comfortable with drawing curved path segments. Also, be sure to read the sidebar, “Creating paths with the Pen tool.”
Notice that as you drew, Photoshop automatically created a new layer, Shape 1, just above the active layer in the Layers panel.
Double-click the Shape 1 layer name, rename the layer Retro Shape, and press Enter or Return.
Choose File > Save to save your work.
You may need to deselect paths to see the appropriate options in the options bar when you select a vector tool. Deselecting paths can also help you view certain effects that might be obscured if a path is highlighted.
Notice that the border between the white kidney shape and the blue background has a grainy quality. What you see is actually the path itself, which is a nonprinting item. This is a visual clue that the Retro Shape layer is still selected. Before proceeding to the next exercise, you’ll make sure that all paths are deselected.
A shape layer has two components: a fill and a shape. The fill properties determine the color (or colors), pattern, and transparency of the layer. The shape is a layer mask that defines the areas in which the fill can be seen and those areas in which the fill is hidden.
In the layer you’ve just created, the fill is white. The fill color is visible within the shape you drew and is not visible in the rest of the image, so the background sky can be seen around it.
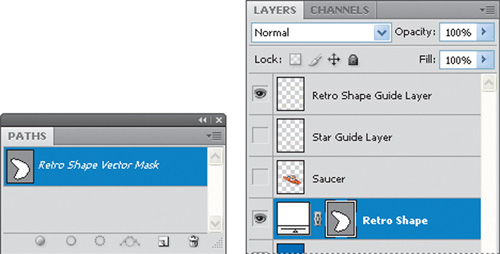
In the Layers panel, the Retro Shape layer sits above the Background layer because the background was selected when you started to draw. The shape layer has three items along with the layer name: two thumbnail images and a link icon between them.

The Fill thumbnail on the left shows that the entire layer is filled with the white foreground color. The nonfunctioning small slider underneath the thumbnail symbolizes that the layer is editable.
The Mask thumbnail on the right shows the vector mask for the layer. In this thumbnail, white indicates the area where the image is exposed, and gray indicates the areas where the image is blocked.
The icon between the two thumbnails shows that the layer and the vector mask are linked.
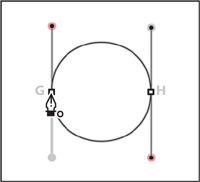
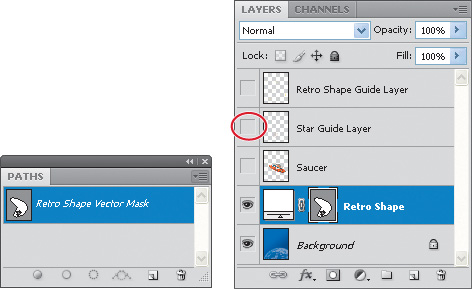
After you create a shape layer (vector graphic), you can set options to subtract new shapes from the vector graphic. You can also use the Path Selection tool and the Direct Selection tool to move, resize, and edit shapes. You’ll add some interest to the retro shape by subtracting a star shape from it, allowing the outer space background to show through. To help you position the star, you’ll refer to the Star Guide layer, which has been created for you. Currently, that layer is hidden.
In the Layers panel, show the Star Guide layer, but leave the Retro Shape layer selected. The Star Guide layer is now visible in the image window.
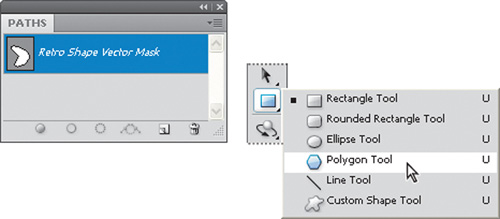
In the Paths panel, select the Retro Shape vector mask.
In the Tools panel, select the Polygon tool (
 ), hidden under the Rectangle tool (
 ).
).On the options bar, do the following:
For Sides, type 11.
Click the arrow immediately to the left of the Sides option to display the Polygon Options window. Select Star, and type 50% in the Indent Sides By box. Then click anywhere outside the Polygon Options window to close it.
Select the Subtract From Shape Area option (
 ), or press either the hyphen or minus key to select it with a keyboard shortcut. The pointer now appears as cross hairs with a small minus sign (
 ).
).
Click on the orange dot in the center of the orange circle in the image window, and drag outward until the tips of the star rays touch the circle’s perimeter.
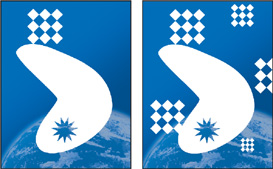
When you release the mouse, the star shape becomes a cutout, allowing the planet to show through.
Notice that the star has a grainy outline, reminding you that the shape is selected. Another indication that the shape is selected is that the Retro Shape vector mask thumbnail is highlighted (outlined in white) in the Layers panel.
In the Layers panel, hide the Star Guide layer.
Notice how the thumbnails have changed in the panels. In the Layers panel, the left thumbnail for the Retro Shape layer is unchanged, but the mask thumbnails in both the Layers panel and Paths panel show the retro shape with the star-shaped cutout.
Select the Path Selection tool (
 ) and click the Dismiss Target Path button (
 ) in the options bar to deselect the star and retro shape paths.
The paths are now deselected, and the grainy path lines have disappeared, leaving a sharp edge between the blue and white areas. Also, the Retro Shape Vector Mask path is no longer highlighted in the Paths panel.
Choose File > Save to save your work.


Another way to use shapes in your artwork is to draw a custom or preset shape. Doing so is as easy as selecting the Custom Shape tool, picking a shape from the Custom Shape picker, and drawing in the image window. You’ll do just that to add checkerboard patterns to the background of your poster for the toy store.
Make sure the Retro Shape layer is selected in the Layers panel. Then click the New Layer button (
 ) to add a layer above it. Rename the new layer Pattern, and then press Enter or Return.
In the Tools panel, select the Custom Shape tool (
 ), which is hidden under the Polygon tool ().
In the options bar, select the Fill Pixels option.
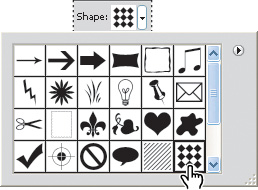
In the options bar, click the arrow next to the Shape option to open the Custom Shape picker.
Double-click the checkerboard preset on the right side of the Custom Shape picker (you may need to scroll or drag the corner of the picker to see it) to select it. Click outside the picker to close it.
Make sure that the foreground color is white. Then press Shift and drag diagonally in the image window to draw and size the shape so that it’s about 2 inches square. (Pressing Shift constrains the shape to its original proportions.)
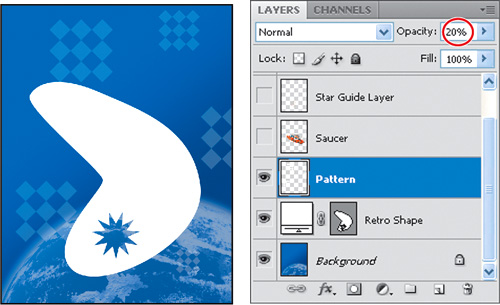
Add five more checkerboards of various sizes until your poster resembles the following figure.
In the Layers panel, reduce the opacity of the Pattern layer to 20%.
Your poster background is now complete.
In the Layers panel, show the Saucer layer so you can see the whole composition.
Choose File > Save to save your work.

Smart Objects are layers that you can edit in Photoshop nondestructively; that is, changes you make to the image remain editable and do not affect the actual image pixels, which are preserved. Regardless of how often you scale, rotate, skew, or otherwise transform a Smart Object, it retains its sharp, precise edges.
You can import vector objects from Adobe Illustrator as Smart Objects. If you edit the original object in Illustrator, the changes will be reflected in the placed Smart Object in your Photoshop image file. You learned a bit about Smart Objects in earlier lessons. You will explore them more now by placing text created in Illustrator into the toy store poster.
The toy store name was created in Illustrator. You’ll add it to the poster now.
Select the Saucer layer and choose File > Place. Navigate to the Lessons/Lesson08 folder, select the Title.ai file, and click Place. Click OK in the Place PDF dialog box that appears.
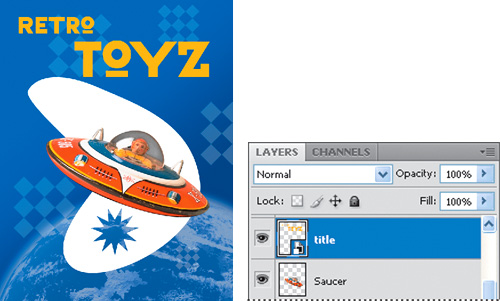
The Retro Toyz text is added to the middle of the composition, inside a bounding box with adjustable handles. A new layer, title, appears in the Layers panel.
Drag the Retro Toyz object to the upper-right corner of the poster, and then press Shift and drag a corner to make the text object proportionally larger—so that it fills the top portion of the poster, as in the following figure. When you’ve finished, either press Enter or Return, or click the Commit Transform button (
 ) in the options bar.
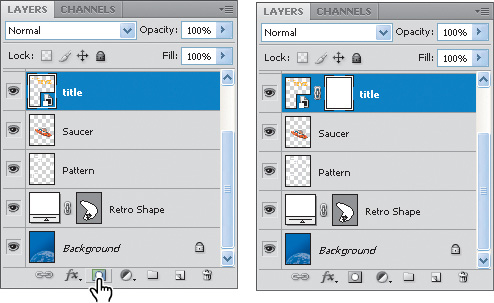
When you commit to the transformation, the layer thumbnail icon changes to reflect that the title layer is a Smart Object.
Because the Retro Toyz title is a Smart Object, you can continue to edit its size and shape, if you’d like. Simply select the layer and choose Edit > Free Transform to access the control handles, and drag to adjust them. Or, select the Move tool (![]() ), and check Show Transform Controls in the options bar. Then adjust the handles.
), and check Show Transform Controls in the options bar. Then adjust the handles.
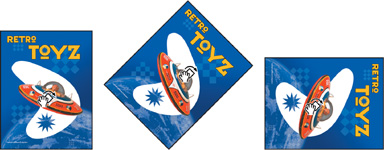
For a fun effect, you’ll turn the center of each letter “O” in the title into a star that matches the cutout you created earlier. You’ll use a vector mask, which you can link to a Smart Object in Photoshop CS4.
Select the title layer, and then click the Add Layer Mask button at the bottom of the Layers panel.
Select the Polygon tool (hidden beneath the Custom Shape tool). The options you used earlier to create the star should still be in effect. The Polygon tool holds your settings until you change them again. If you need to reset the options, refer to “Subtracting shapes from a shape layer.”
Click the Switch Foreground And Background Colors button in the Tools panel, so that black is the foreground color.
Click in the center of the “O” in “Toyz” and drag the cursor outward until the star covers the center of the “O.”
Repeat step 3 to add a star in the small “O” in Retro.

You’ve been working with the image with “Retro Toyz” at the top of the work area and the planet at the bottom. But if your video card supports OpenGL, you can rotate the work area to draw, type, or position objects from a different perspective. You’ll rotate the view as you add a copyright statement along the side of the image. (If your video card doesn’t support OpenGL, skip this section.)
First, you’ll type the text.
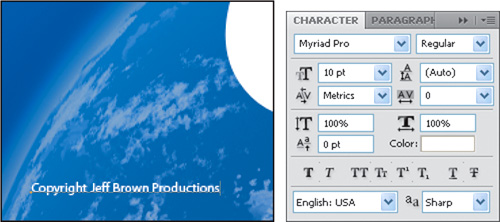
Choose Window > Character to open the Character panel. Select a serif font such as Myriad Pro with a small text size such as 10 pt, and set the color to white.
Select the Horizontal Type tool, and then click in the lower-left corner of the image. Type Copyright YOUR NAME Productions, substituting your own name.
You want the copyright to run along the left side of the image. You’ll rotate the canvas to make it easier to place.
Select the Rotate View tool (
 ), hidden beneath the Hand tool (
 ).
).Press the Shift key as you drag the tool in an arc to rotate the canvas 90 degrees clockwise. Pressing the Shift key restrains the rotation to 45-degree increments.
Select the Copyright text layer, and then choose Edit > Transform > Rotate 90 Deg CCW.
Use the Move tool to align the text along the top edge of the image, which will be the left edge when it is in its usual position.
Select the Rotate View tool again, and then click Reset View in the options bar.
Choose File > Save to save your work.

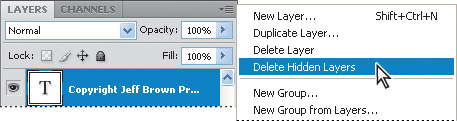
As a final step, clean up the Layers panel by deleting your guide template layers.
Make sure that the Copyright, title, Saucer, Pattern, Retro Shape, and Background layers are the only visible layers in the Layers panel.
Choose Delete Hidden Layers from the Layers panel pop-up menu, and then click Yes to confirm the deletion.
Choose File > Save to save your work.
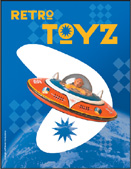
Congratulations! You’ve finished the poster.
It should look similar to the following image. (The title text will only be stroked if you complete the Extra Credit task, which follows.)
Extra Credit
If you have Adobe Illustrator CS or later, you can go even further with the Retro Toyz text Smart Object—you can edit it in Illustrator, and it will update automatically in Photoshop. Try this:
Double-click the Smart Object thumbnail in the title layer. If an alert dialog box appears, click OK. Illustrator opens and displays the Retro Toyz Smart Object in a document window.
Using the Direct Selection tool, drag a marquee around the type to select all of the letters.
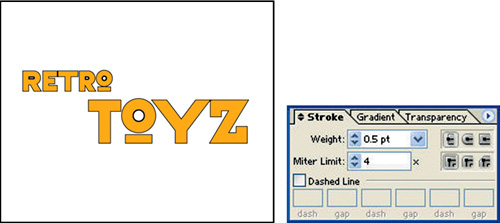
Double-click the Stroke button in the Tools panel to open the Color Picker. Select black, and click OK.
In Illustrator CS3 or later, in the options bar, choose 0.5 pt from the Stroke menu. If you are using an earlier version of Illustrator, open the Stroke panel and specify a 0.5 pt stroke.
A 0.5-point black stroke appears around the Retro Toyz type.
Close the Vector Smart Object document, and click Save when prompted. Click OK if an alert box appears.
Switch back to Photoshop. The Retro Toyz poster image window updates to reflect the stroked type.