
Chapter 10
Channeling the Outside World through Your Android Device
- Understanding the capabilities of your device to access the outside world
- Opening a browser from your app
- Incorporating a browser view in your application
- Accessing information on the web using a web service
- Finding your phone's location
- Incorporating maps into your app
- Understanding design issues with web and location-based apps
Your Android device is your portal to the world. You can use it to interact with other people, see what else is going on in the rest of the world, and find out what's around you — shopping, dining, and local points of interest, for example.
Your Android device can do all this because of apps that can use the web, location-based services provided by a variety of providers (in particular, Google), and the device's own, built-in, location-finding capability.
We cover many topics in this chapter, from simply launching a browser from a URL, to embedding a browser in your application, to embedding and controlling a map based on device location. It's exciting stuff! This chapter first shows you how to write apps that can, for example, browse the web, call web services that provide you with specific services and information, present maps of places that might interest you, and indicate where you are on a map. The chapter also reveals the true potential of Android apps, by describing the capabilities that exist on your device and on the Internet to use external services — in particular, mapping and location-based services.
Launching a Browser from Your App
In our first (and simplest) example of channeling the outside world, the sample application launches the built-in browser on a specific web page identified by a Universal Record Locator (the familiar URL). We illustrate this concept within (what else?) the Tic-Tac-Toe application, by providing a means of opening the Wikipedia page that describes, from within the Help screen, the game of tic-tac-toe (http://en.wikipedia.org/wiki/Tictactoe). The Help screen itself is shown in Figure 10-1.
Figure 10-1: The Tic-Tac-Toe Help screen.
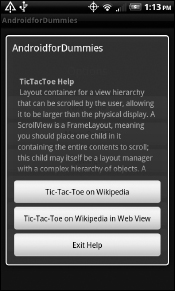
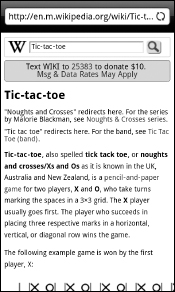
Pressing the Tic-Tac-Toe on Wikipedia button opens a browser on the Wikipedia website that describes the game of tic-tac-toe, as shown in Figure 10-2.
Figure 10-2: Tic-tac-toe on Wikipedia in the Android browser.
 Networking basics
Any collection of interconnected computers is a network. The network can consist of computers in your house or workplace that are connected in a local-area network (LAN) or across the Internet in a wide-area network (WAN).
For different kinds of communications, computers also “speak” a communication language that follows a specific set of rules, or protocol. It's a formal description of the digital formats of the messages that are exchanged and the rules (signaling and acknowledgements, for example) for exchanging those messages.
We blur some technical distinctions here, but an Android device is supplied with the capability to speak, essentially, three kinds of protocols: Bluetooth, TCP/IP, and Hypertext Transfer Protocol (or HTTP), a higher-level protocol. Bluetooth is used for device-to-device communication in close range. TCP/IP is the most widely used protocol for computer-to-computer communication on the Internet. Layered on TCP/IP is the HTTP protocol, on which most web-based applications are built. Layered on top of HTTP are some capabilities that the Android framework itself provides. These capabilities (such as launching a web browser) hide even HTTP from you, making things even simpler.
This book describes only applications that you can build by using the HTTP protocol. Unless you're building a performance-critical application (such as a multiplayer game) that requires large numbers of messages to be exchanged in real-time, the HTTP protocol is the only one you need. Also, we've left out developing Bluetooth-based applications, as being too complicated for a For Dummies book.
The code for this task is straightforward. As we recommend in earlier chapters, open the code in Eclipse and follow along as you read this section. We begin by showing you the relevant code segments from Help.java. First, the following onClick(…) method is called whenever a button on the Help screen is pressed:
public void onClick(View v) {
     switch(v.getId())
     …
     case R.id.button_lookup_wikipedia:
         if (hasNetworkConnection()){
             LaunchBrowser(“http://en.wikipedia.org/wiki/Tictactoe”);
         }else{
             noNetworkConnectionNotify();
         }
         break;
   …
}
URLs and URIs
A Uniform Resource Identifier, or URI, is a string that identifies a resource on the web. You can think of a URI as the International Standard Book Number (ISBN) of a book in the library. A Uniform Resource Locator, or URL, is a URI plus a means of gaining access to the resource, and potentially acting on it. You can think of this term as an ISBN number plus a library location plus, potentially, a means (such as snail mail) of delivering the book to you. In most cases, you can consider the terms URL and URI to be interchangeable.
Now take a look at the LaunchBrowser(…) method:
private void LaunchBrowser(String URL){
    Uri theUri = Uri.parse(URL);
    Intent LaunchBrowserIntent = new Intent(Intent.ACTION_VIEW, theUri);
    startActivity(LaunchBrowserIntent);
}
Yes, it's that simple! The built-in browser on your Android device has declared an intent filter stating that it will accept the action ACTION_VIEW on data consisting of a web resource identified by a uniform resource identifier (or URI) and accessible using the HTTP protocol. Thus, when the intent containing this action-data pair is broadcast using startActivity(…), the browser picks it up and launches itself on the specified www.wikipedia.org URL.
The URL http://en.wikipedia.org/wiki/Tictactoe is being automatically redirected to http://en.m.wikipedia.org/wiki/Tictactoe, which is the Tic-Tac-Toe web page for mobile devices (a page that doesn't use frames and has fewer embedded graphics, for example). Note also that the Back button on your device must be pressed twice to return to the Help activity in Tic-Tac-Toe. Because the browser application is being relaunched on the page for mobile devices, two browser activities are on the top of the activity stack. Also, all you can do is launch the browser so that it takes over the entire screen and then exits. For finer-grained control, you must embed the browser as a view in your application, which we describe in the next section.
Embedding a Browser in Your Android Application
The Android framework provides you with a View subclass named WebView that you can embed in your application's user interface. We show you this concept by implementing a new activity named HelpWithWebView that will have WebView as part of its view. This activity is launched from the onClick method of the Help activity. Its code is shown here:
public void onClick(View v) {
    switch(v.getId())
    …
    case R.id.button_lookup_wikipedia_in_web_view:
        if (hasNetworkConnection()){
            LaunchWebView(“http://en.wikipedia.org/wiki/Tictactoe”);
        }else{
            noNetworkConnectionNotify();
        }
        break;

…
}
LaunchWebView(…) uses the same Wikipedia URL to launch the HelpWithWebView(…) activity, by using the following code snippet:?
private void LaunchWebView(String URL){
    Intent launchWebViewIntent = new Intent(this, HelpWithWebView.class);
    launchWebViewIntent.putExtra(“URL”, URL);
    startActivity(launchWebViewIntent);
}
We're showing you something new in this example: how data can be passed from the launching activity to the launched activity via the Intent. You can use the putExtra(…) method to insert extra data in the form of name-value pairs. In the example, the Wikipedia URL is being embedded with the key “URL”. Now take a look at the onCreate(…) method of the following HelpWithWebView activity:
protected void onCreate(Bundle savedInstanceState) {
    String URL=null;
    super.onCreate(savedInstanceState);
    setContentView(R.layout.helpwithwebview);
    WebView helpInWebView=null;
    helpInWebView = (WebView) findViewById(R.id.helpwithwebview);

    View buttonExit = findViewById(R.id.button_exit);
    buttonExit.setonClickListener(this);
    Bundle extras = getIntent().getExtras();
    if(extras !=null)URL = extras.getString(“URL”);
    helpInWebView.loadUrl(URL);
}
Finally, we show you the layout for the user interface of the HelpWith WebView activity in which the WebView is embedded:
<?xml version=“1.0” encoding=“utf-8”?>
<ScrollView
    xmlns:android=“http://schemas.android.com/apk/res/android”
    android:layout_width=“match_parent”
    android:layout_height=“match_parent”
    android:padding=“10dip” >
    <LinearLayout xmlns:android=“http://schemas.android.com/apk/res/android”
        android:orientation=“vertical”
        android:layout_width=“match_parent”
        android:layout_height=“match_parent”>
    <WebView
        android:id=“@+id/helpwithwebview”
        android:layout_width=“match_parent”
        android:layout_height=“200dip”
        android:layout_weight=“1.0”/>
               <Button
        android:id=“@+id/button_exit”
        android:layout_width=“match_parent”
        android:layout_height=“wrap_content”
        android:text=“Exit”/>
    </LinearLayout>
</ScrollView>
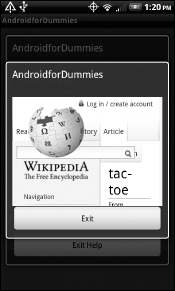
This example shows that we have simply embedded WebView along with an Exit button inside LinearLayout, as shown in Figure 10-3.
Figure 10-3: Showing a web page in an embedded web view.
Providing Maps and Location-Based Services
A smartphone is usually an integral part of its owner's life, and one that's used for many tasks — personal conversations, location-based activities, and buying decisions, for example. Because this mobile device is also a computer that can record and remember details, it retains intimate knowledge about the person — names of friends (from the address book and calling patterns) and common haunts, for example — that can be used to provide personalized, circumstance-specific, and highly targeted context-based services that appear to have been created just for the device owner.
A vital component of context is location, one that a smart Android device is especially capable of providing because it has the capability to be located, either via a built-in GPS device or a cellular phone tower or Wi-Fi hotspot. Because the device generally goes everywhere the user does, its location is also the user's location.
By using the Android framework's location-finding services, you can write apps that provide location-based services. These services have many uses, such as giving directions to places a user has never visited or providing information about points of interest (such as dining or popular sights) near the user's location.
All these location-based services have four fundamental components:
- Open a map.
- Invoke the service (a restaurant or point of interest, for example).
- Navigate the map to various positions or make a calculation related to the two positions (such as directions).
- Find out (from the device) the user's coordinates.
(We describe these four fundamental components in greater detail in the next few sections.)
We have implemented an activity in Tic-Tac-Toe, named WhereAmI (why not?), that makes use of the functionality we just described. This activity starts by displaying a map within the Android MapClass (a subclass of the View class). This map has zoom controls, so that the user can pan to different locations by dragging the map in any direction. Also, the user can enter a location name and ask the map to navigate to the location. Finally, the user can ask the map to navigate to his current location. The application determines where the device is by invoking the location services on the device and then positioning the map on that location.
Isn't it cool to watch the map orient itself to a location?!
Installing the necessary development components for writing map apps
The standard Android libraries don't contain the Google Map libraries you need in order to write map applications. Thus, if you build using only the standard Android SDK libraries (the ones named SDK Platform such and such — for example, SDK Platform 3.2 API 13, revision 1, in the SDK and AVD Manager), you will see build errors. Even if you build against the right libraries (see the next paragraph), but run your map-based application on an emulator that has only the Android SDK as a target, you will see a runtime error whenever you try to use the map-based functionality.
This problem isn't a big deal, though — you simply have to install the Google API library and build the app and the emulator with this library as the target instead. This library contains both the Android libraries and the Google Maps API.
Incidentally, the AndroidManifest.xml file then has to be modified with an entry for the Google Maps library. To do this, place the following line inside the <application> … </application> element in the manifest file:
<uses-library android:name=“com.google.android.maps” />
Do not place this line outside the <application> element by mistake, or you will spend hours trying to debug your map functionality!
Next, request these permissions:
<uses-permission android:name=“android.permission.ACCESS_NETWORK_STATE”/>
<uses-permission android:name=“android.permission.ACCESS_COARSE_LOCATION” />
<uses-permission android:name=“android.permission.ACCESS_FINE_LOCATION” />
Finally, if you're embedding maps in your application using MapView, you need a Google Maps API key. For information on how to obtain a map key, see http://code.google.com/android/add-ons/google-apis/mapkey.html. To briefly reiterate the instructions on this page, you must first create a certificate for your application by using Eclipse (see Chapter 13 or http://developer.android.com/guide/publishing/app-signing.html#ExportWizard on how to do this) and then use the MD5 fingerprint of your certificate to generate the map key online. Then you put the map key in the layout file specifically for the activity that seeks to use an embedded map view. (We show you where in the following section.)
Displaying a map by using MapView
We now illustrate how to display the map by walking you through part of the WhereAmI activity. (Again, feel free to follow along in Eclipse.) To start with, take a look at its layout file:
<Rajiv: Clarified>
<?xml version=“1.0” encoding=“utf-8”?>
<LinearLayout xmlns:android=“http://schemas.android.com/apk/res/android”
       android:id=“@+id/whereamiframe”
       android:orientation=“vertical”
       android:layout_width=“match_parent”
       android:layout_height=“match_parent”>
       <com.google.android.maps.MapView
       android:id=“@+id/whereamiview”
       android:apiKey=“0gnB1it3gGRvFkdhjqBahvgiSsVwUKuuNTXuUeA”
       android:layout_width=“match_parent”
       android:layout_height=“200dip”
       android:clickable=“true”/>
   <TableLayout
       xmlns:android=“http://schemas.android.com/apk/res/android”
       android:layout_width=“match_parent”
       android:layout_height=“100dip”
       android:stretchColumns=“1”>
       <TableRow>
            <Button
               android:id=“@+id/button_locate”
               android:layout_width=“match_parent”
               android:layout_height=“wrap_content”
               android:text=“Find”/>
            <EditText
                android:id=“@+id/location”
                android:layout_column=“1”
                android:text=“Enter
                address …”
                android:layout_width=“match_parent”
                android:padding=“3dip” />
     </TableRow>
     <TableRow>
        <Button
                android:id=“@+id/button_locate_me”
                android:layout_width=“match_parent”
                android:layout_height=“wrap_content”
                android:text=“Locate Me”/>
         <TextView
                android:id=“@+id/my_location”
                android:layout_column=“1”
                android:text=“Where
                am I …”
                android:layout_width=“match_parent”
                android:padding=“3dip”/>
     </TableRow>

        </TableLayout>
        <Button
               android:id=“@+id/button_exit”
               android:layout_width=“match_parent”
               android:layout_height=“wrap_content”
               android:text=“Exit”
        />
</LinearLayout>
Note the line android:apiKey=<long unintelligible set of characters> inside the MapView element — that's where you would insert the generated map key. (By the way, this is a made-up key, so don't try to use it!)
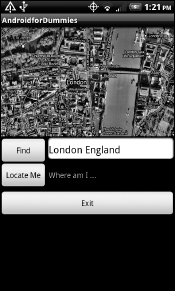
This layout file generates the user interface for the WhereAmI activity, as shown in Figure 10-4.
Figure 10-4: Using an embedded MapView.
Finally, look at the WhereAmI class (including the imports and the class header) and the onCreate(…) method for this activity:
package com.wiley.fordummies.androidsdk.tictactoe;

import com.google.android.maps.GeoPoint;
import com.google.android.maps.MapController;
import com.google.android.maps.MapView;
import com.google.android.maps.MapActivity;

import android.location.Location;

import android.os.Bundle;
import android.view.View;
import android.view.View.onClickListener;
import android.widget.EditText;

import android.widget.TextView;

import com.wiley.fordummies.androidsdk.tictactoe.R;

public class WhereAmI extends MapActivity implements onClickListener {
    private MapController whereAmIController=null;
    private EditText locationEditableField=null;
    private TextView myLocationField=null;
    private GeoLocation myGeoLocator = null;
    private int locationQueryCount=0;

    protected void onCreate(Bundle savedInstanceState) {
        super.onCreate(savedInstanceState);
        setContentView(R.layout.whereami);

        MapView whereamiView=null;
        whereamiView = (MapView) findViewById(R.id.whereamiview);
        whereamiView.setSatellite(true);
        whereamiView.setBuiltInZoomControls(true);
        whereAmIController = whereamiView.getController();

        locationEditableField= (EditText)findViewById(R.id.location);

        View buttonLocate = findViewById(R.id.button_locate);
        buttonLocate.setonClickListener(this);

        View buttonExit = findViewById(R.id.button_exit);
        buttonExit.setonClickListener(this);

        myLocationField= (TextView)findViewById(R.id.my_location);
        View buttonLocateMe = findViewById(R.id.button_locate_me);
        buttonLocateMe.setonClickListener(this);

        myGeoLocator = new GeoLocation(this);
      }
…
}
In this example, you see a bunch of imports that start with com.google.android.maps as well as android.location.location. You need this special set of imports in order to use location finding and maps.
Next, you see that WhereAmI extends MapActivity rather than Activity. Make a note of this because the Android framework handles MapActivity differently. For example, it starts up background threads to display the MapView so that the rest of the app doesn't get stuck waiting for the map to display. Also, look at the code for the onCreate method. The first part is pretty normal activity stuff. But then you will see that the code gets a handle to the MapView control and sets various parameters, such as setting it to Satellite View mode (other view modes are Street View mode and Traffic View mode) and turning on zoom controls. The code also gets a handle to a MapController object, which is used to navigate the map to different locations.
Finally, it gets a handle to an instance of the GeoLocation class. We discuss the GeoLocation class in the section “Determining the location of your device.”
That's it! When you launch the WhereAmI activity (by clicking the Where Am I button on the GameOptions screen), a map opens in MapView. We describe what you can do with this MapView in the next section.
Calling a geocoding web service and navigating the map
In this section, we show you how to call a web service to translate a location name to a map coordinate and how to navigate the map to the coordinate.
We start by demonstrating the application feature and then drilling into how it's implemented. Run the Tic-Tac-Toe application and launch the WhereAmI activity (refer to Figure 10-4). Enter an address — or the name of any reasonably well-known location, such as Central Park New York City or London England. Then tap the Find button to see the map navigate to the location.
To see how the map is made to navigate to the location, begin by looking at the onClick method of the WhereAmI activity. We list the relevant segment here:
public void onClick(View v) {
    switch(v.getId()){
        case R.id.button_locate:
        try{
            String locationName = this.locationEditableField.getText().
               toString();
            GeoPoint point = myGeoLocator.getGeoPointFromName(locationName);
            whereAmIController.setZoom(16);
            whereAmIController.animateTo(point);
        } catch (Exception e){
            e.printStackTrace();
         }
     …
   }
 …
}
The method myGeoLocator.getGeoPointFromName(locationName) returns the geocoding of the location (in a GeoPoint data structure, which contains the latitude and longitude of the location in microdegrees. (Using these millionths of degrees helps avoid the use of inaccurate floating-point arithmetic in map calculations, such as distance calculations.) Then whereAmIController.animateTo(point) navigates the map to that location, and whereAmIController.setZoom(16) sets a reasonable zoom level. The zoom value ranges from 1 to 21. Not all zoom levels apply in a given geographic area. This is because each zoom level navigates to a layer of the map. If a layer corresponding to a level does not exist in the map database, zooming to that level will fail and will keep the map at the current level.
The following snippet of code shows myGeoLocator.getGeoPointFrom-Name, which we describe next:
public GeoPoint getGeoPointFromName(String locationName) {
    GeoPoint tempGeoPoint=null;
    String cleanLocationName = locationName.replaceAll(“ ”,“%20”);
    HttpGet httpGet = new HttpGet(
                         http://maps.google.com/maps/api/geocode/json?address=
                       + cleanLocationName
                       + “&sensor=false”);
    HttpClient client = new DefaultHttpClient();
    HttpResponse response;
    StringBuilder stringBuilder = new StringBuilder();
    try {
        response = client.execute(httpGet);
        HttpEntity entity = response.getEntity();
        InputStream stream = entity.getContent();
        int b;
        while ((b = stream.read()) != -1) {
            stringBuilder.append((char) b);
        }
        JSONObject jsonLocation= new JSONObject();
        jsonLocation= new JSONObject(stringBuilder.toString());
        tempGeoPoint = getGeoPointFromJSON(jsonLocation);
    } catch (Exception e) {
        e.printStackTrace();
    }
    return tempGeoPoint;
}
The HttpGet call is a call to a REST-based (or RESTful) web service. The representational state transfer (or REST) technique retrieves data from a website by providing a URL that's processed by the site to return data in either XML format or JavaScript Object Notation (JSON) format, as in this case. This particular service returns the geocoded coordinates of the location in JSON format, from which the latitude and longitude are extracted and then converted to a GeoPoint.
The code for extracting the geo coordinates is shown here (only for completeness because this code isn't Android-specific):
private static GeoPoint getGeoPointFromJSON(JSONObject jsonObject) {
    GeoPoint returnGeoPoint=null;
    try {
        Double longitude = new Double(0);
        Double latitude = new Double(0);
        longitude = ((JSONArray)jsonObject.get(“results”)).
                        getJSONObject(0).
                        getJSONObject(“geometry”).
                        getJSONObject(“location”).
                        getDouble(“lng”);
        latitude = ((JSONArray)jsonObject.get(“results”)).
                        getJSONObject(0).
                        getJSONObject(“geometry”).
                        getJSONObject(“location”).
                        getDouble(“lat”);
        returnGeoPoint = new GeoPoint((int)(latitude*1E6),(int)(longitude*1E6));
    } catch (Exception e) {
        e.printStackTrace();
    }
    return returnGeoPoint;
}
We also show you an example JSON string (containing the geocoded location of London, England) from which the latitude and longitude can be extracted using the preceding code snippet:
{ “results” : [ { “address_components” : [ { “long_name” : “London”,
              “short_name” : “London”,
              “types” : [ “locality”,
                  “political”
                ]
            },
            { “long_name” : “Westminster”,
              “short_name” : “Westminster”,
              “types” : [ “administrative_area_level_3”,
                  “political”
                ]
            },
            { “long_name” : “Greater London”,
              “short_name” : “Greater London”,
              “types” : [ “administrative_area_level_2”,
                  “political”
                ]
            },
            { “long_name” : “England”,
              “short_name” : “England”,
              “types” : [ “administrative_area_level_1”,
                  “political”

                ]
            },
            { “long_name” : “United Kingdom”,
              “short_name” : “GB”,
              “types” : [ “country”,
                  “political”
                ]
            }
          ],
        “formatted_address” : “Westminster, London, UK”,
        “geometry” : { “bounds” : { “northeast” : { “lat” : 51.704064700000004,
                    “lng” : 0.15022949999999999
                  },
                “southwest” : { “lat” : 51.349352799999998,
                    “lng” : -0.37835800000000003
                  }
              },
            “location” : { “lat” : 51.500152399999997,
                “lng” : -0.12623619999999999
              },
            “location_type” : “APPROXIMATE”,
            “viewport” : { “northeast” : { “lat” : 51.704064700000004,
                    “lng” : 0.15022949999999999
              },
            “southwest” : { “lat” : 51.349352799999998,
                “lng” : -0.37835800000000003
              }
          }
      },
     “types” : [ “locality”,
         “political”
      ]
   } ],
 “status” : “OK”
}
Determining the location of your device (or, wherever you go, there you are)
Android provides three types of location-finding capabilities as part of the Android SDK:
- GPS: The most accurate type is GPS, which uses a permanent ring of satellites to locate devices containing GPS receivers. However, GPS doesn't work (well) indoors, consumes a hefty amount of battery power, and sometimes takes a while to determine the location of the device.
- Cell towers: Cell towers that the device (if it's a phone) is communicating with know the approximate location, via triangulation based on signal direction and strength.
- Wi-Fi access points: Similar to cell towers, Wi-Fi access points that the device is connected to serve as approximate proxies for the device.
Despite the emergence of powerful mobile devices with embedded GPS components, and the availability of satellite GPS service, challenges in device location remain. All three of the techniques we described above are still approximations. Plus, as a user moves around or moves from outdoors to indoors, or as the weather changes, the different types of location services could become available or unavailable. Also, these services vary in accuracy depending on where the device is located and on environmental conditions (such as cloudy weather for GPS services or the material composition of the walls between the device and an access point). Thus, what was the most accurate location provider at a given instance of time may no longer be so a few minutes later.
To illustrate this concept, we show you some of the methods inside the GeoLocation class we have written. We start with the imports, the class header, and the constructor:
…
import com.google.android.maps.GeoPoint;
import android.content.Context;
import android.location.*;
import android.os.Bundle;

public class GeoLocation implements LocationListener {
    private Context thisContext=null;
    private LocationManager manager=null;
    private String bestProvider=null;
    private Location thisLocation=null;
    thisContext = theContext;

    manager = (LocationManager)
               thisContext.getSystemService(Context.LOCATION_SERVICE);
    Criteria criteria = new Criteria();
    bestProvider = manager.getBestProvider(criteria, true);
    registerForLocationUpdates();
}
To begin with, note that the class imports three packages within the Android framework that provide location services. Next, the GeoLocation class implements the LocationListener interface, which specifies the notification methods needed in order to let the location service notify your application when the location or another element of the service changes (such as a provider becoming disabled). Finally, the constructor of the class gets a handle to a location manager (the current best provider) and registers for location updates. Here's the code for registerForLocationUpdates:
The method getBestCurrentLocation, shown in the following code snippet, gets the current location of the device from what is now the best location provider:
public Location getBestCurrentLocation(){
    Location myLocation=null;
    myLocation = manager.getLastKnownLocation(bestProvider);
    if (myLocation == null){
        myLocation =
            manager.getLastKnownLocation(LocationManager.NETWORK_PROVIDER);
    }
    if (myLocation != null){
        System.out.println(“GeoLocation is >”+myLocation.toString()+“<”);
        thisLocation = myLocation;
    }
    return thisLocation;
}
After an app has registered for location updates, the location service on the Android device calls one or more of the following methods as characteristics of the service change:
public void onLocationChanged(Location location) {
    thisLocation = location;
}
public void onProviderDisabled(String provider) {
    // TODO Auto-generated method stub
}
public void onProviderEnabled(String provider) {
    // TODO Auto-generated method stub
}
public void onStatusChanged(String provider, int status, Bundle extras) {
    // TODO Auto-generated method stub
}
The most important method in this example is onLocationChanged because here's where the new location is set.
Building Them Right — Design Considerations for Web and Location-Based Apps
When you reach out to the web from your device to invoke a service or read data, you're essentially traveling into the wide blue yonder. Keep in mind the many things that can go wrong, such as losing connectivity or (worse, usually) suffering through a data connection with an extremely low bandwidth (because it neither fails so the app can report an error and move on, nor does a good job of transferring data). Your application must handle these situations and still provide a good user experience. The following two sections show you how.
Checking for connectivity
Obviously, the first thing you have to do in order to deal with connectivity issues is to check whether connectivity exists in the first place. If you take a look at the code for the onClick method in the Help activity, you see a section like this one:
…
case R.id.button_lookup_wikipedia:
    if (hasNetworkConnection()){
        LaunchBrowser(”http://en.wikipedia.org/wiki/Tictactoe”);
    }else{
        noNetworkConnectionNotify();
     }
…
The application is using hasNetworkConnection() to check to see whether an Internet connection is available before launching the browser. hasNetworkConnection() consists of the following chunk of code:
private boolean hasNetworkConnection(){
    ConnectivityManager connectivityManager = (ConnectivityManager)
           getSystemService(Context.CONNECTIVITY_SERVICE);
    NetworkInfo networkInfo =
           connectivityManager.getNetworkInfo(ConnectivityManager.TYPE_WIFI);
    boolean isConnected = true;
    boolean isWifiAvailable = networkInfo.isAvailable();
    boolean isWifiConnected = networkInfo.isConnected();

    networkInfo =
           connectivityManager.getNetworkInfo(ConnectivityManager.TYPE_MOBILE);
    boolean isMobileAvailable = networkInfo.isAvailable();

    boolean isMobileConnnected = networkInfo.isConnected();
    isConnected = (isMobileAvailable&&isMobileConnected)||(isWifiAvailable
       &&isWifiConnected);
    return(isConnected);
}
Note how the Android framework provides a simple way to check connectivity. The key call in this example is the one to get ConnectivityManager by calling an Android system service.
Using threading
The earlier section “Checking for connectivity” describes how to check for connectivity. If no connectivity exists, then the app can simply let the user know to try the operation again later.
However, the hasNetworkConnection() method we described in the previous section returns true if any connectivity exists, even if the connection is poor and has low bandwidth. So how do you deal with this situation? Essentially, you have to launch every call that involves data transfer over the Internet in its own thread. Then, despite the slow connection, your app won't appear to “hang” while the call is in progress.
We explain threading in Chapter 8, so head over to that chapter if you have to implement threads. Do note that, in many cases, you don't have to manage threads directly for apps that require communication with the outside world, such as apps that explore the web or location-based apps, because the Android framework takes care of this task for you. For example, when you launch WebView inside the HelpWithWebView activity — or when you open MapView in the WhereAmI activity — the Android framework creates threads in the background to complete this task so that the rest of the app remains responsive. (You can test it by clicking the Exit button on either activity screen — the activity exits immediately.) However, if the Android framework does not handle threading for the specific task you have to implement, you have to manage your own threads.
Understanding the SDK Components Used in This Chapter
After you follow our examples of how to work with browsers, maps, and web and location services, we give you a little more detail about the components (packages and classes) of the Android framework and its add-ons that provide the functionality we cover in this chapter. We don't go into great detail because Google provides web pages that are more comprehensive than we are, but we at least give you an idea of what the component can do and provide any insights we have.
SDK components for incorporating web pages into your application
The WebView subclass of View is used to display web pages or, more correctly, HTML-formatted text. WebView is built on the WebKit rendering engine. (It's part of the android.webkit package; see http://developer.android.com/reference/android/webkit/packagesummary.html.) WebView includes methods to handle hyperlinks (so that the new page opens in WebView rather than launches a browser), navigate forward and backward in a history list, and zoom in and out, for example. Visit http://developer.android.com/reference/android/webkit/WebView.html to find complete WebView details (and more examples).
The AndroidManifest.xml file must contain the following two lines for any app that accesses the Internet:
<uses-permission android:name=“android.permission.INTERNET”/>
<uses-permission android:name=“android.permission.ACCESS_NETWORK_STATE”/>
SDK components for maps
The page at http://code.google.com/android/add-ons/googleapis/reference/index.html provides details of the Google add-on API that provides mapping functionality (the page at http://code.google.com/android/add-ons/google-apis/maps-overview.html provides an overview).
A core class in the map API is the GeoPoint support class that represents a geographical location, with latitude and longitude stored as integers representing micro-degrees (or millionths of a degree). The methods for GeoPoint include the constructor GeoPoint(int latitudeE6, int longitudeE6), which — given the latitude and longitude — constructs a GeoPoint. Also included are the accessor methods getLatitudeE6() and getLongitudeE6() to extract latitude and longitude values from an instance of GeoPoint. Visit http://code.google.com/android/addons/google-apis/reference/com/google/android/maps/GeoPoint.html to find details about this class.
The MapView subclass of the Android View is specifically intended to display and manage maps. (See http://code.google.com/android/add-ons/google-apis/reference/com/google/android/maps/MapView.html.) MapView is supplied with methods to set it in one of three modes — Satellite, Traffic, and Street — namely, setSatellite(boolean), setTraffic(boolean), and setStreetView(boolean), respectively (note that, although they are presented in the API as separate modes, the traffic and street views are simply overlays on the map or satellite view). You can add built-in zoom controls by using setBuiltInZoomControls(boolean). You also get a handle to its controller — by using getController() — in order to manage the map through code (for example, to position, pan, and zoom it).
MapView must be used only within a class that extends MapActivity. This is because the MapActivity base class manages the threads and the state for MapView as part of its own life cycle. (When MapActivity is paused, for example, it saves the MapView state and shuts down the threads, and then it restores the state and resumes the threads when it starts up again.)
 Don't forget to put a Map API key (see http://code.google.com/android/add-ons/google-apis/mapkey.html) in the layout file for MapView as the value for the attribute android:apiKey. Using MapView requires it.
The MapController class (at http://code.google.com/android/add-ons/google-apis/reference/com/google/android/maps/MapController.html) handles all control aspects of MapView. You first have to get a handle to the MapView controller by using getController(). Then you can
- Call animateTo(GeoPoint geoPoint) to navigate the map to a particular location.
- Set the center of the map to a specified location using setCenter(GeoPoint point).
- Zoom to a level (a number between 1 and 21) using setZoom(int zoomLevel), for example.
Maps consist of sections known as tiles at each of several levels. When you zoom to a level (using setZoom()), the map is actually zoomed to a tile within it. Not all tiles are necessarily available at all levels. When a tile isn't available, the closest tile is either enlarged or shrunk, sometimes causing distortion of the map image.
The MapActivity base class has the code needed to manage any activity that displays MapView, such as the setup and teardown of the threads and other elements and linking the MapView management to its own life cycle. As with other subclasses of Activity, the onCreate(…) method is where the activity is initialized — with any state — and its view is created. You may need to provide implementations for two methods that are special to this activity: isRouteDisplayed() and isLocationDisplayed(). They report to the Google server whether you are (respectively) displaying any routes or using the sensors (GPS, for example) to discover the device's current location. These methods simply return true or false. isRoute Displayed() is an abstract method in the MapActivity class, so you must provide an implementation. isLocationDisplayed() has a default implementation that you can override, if necessary.
 Once again, do not forget to insert <uses-library android:name=“com. google.android.maps”/> inside the <application> … </application> element in the AndroidManifest.xml file or else you receive a classnotfound exception when you try to use any map-related class. (Been there, done that.)
One somewhat complex capability we don't illustrate in this book is the creating and drawing of map markers and overlays. Refer to the second section in http://developer.android.com/resources/tutorials/views/hello-mapview.html for a tutorial on overlays.
SDK components for finding locations
The Android framework provides a complete set of classes for using your device's location within your app in android.location package. (Details are at http://developer.android.com/reference/android/location/package-summary.html.) This package contains two primary classes (Location and LocationManager) and two useful support classes (Address and Criteria). The GeoCoder class is intended to convert location names to coordinates, and vice versa, but you would experience intermittent failures using these methods, especially on an emulator. You can instead “roll your own” lookup and reverse-lookup methods, which work consistently. They make web-service calls directly to the Google map services and therefore serve to illustrate the use of REST-based web services.
The Location class (see details at http://developer.android.com/reference/android/location/Location.html) represents a geographical fix — the geographical location returned by a location provider at a particular time and consisting of these attributes:
- Latitude
- Longitude
- Timestamp
- (Optional) Information about altitude, speed, and bearing
These attributes can be retrieved from a location using the accessor methods getLatitude(), getLongitude(), getBearing(), and so on. Latitude and longitude are provided as double-precision values accurate to five decimal places. (We don't know why micro-degrees weren't used here.) This class also provides two methods that can compute distance:
- distanceTo(Location newLocation)
- distanceBetween(double startLatitude, double start-Longitude, double endLatitude, double endLongitude, float[] results)
Additional information relevant to a particular provider or class of providers can be retrieved by the application by using getExtras, which returns a Bundle of key/value pairs.
An instance of the LocationManager class (see details at http://developer.android.com/reference/android/location/LocationManager.html) is retrieved by using Context.getSystemService (Context.LOCATION_SERVICE). This class provides access to location providers via getAllProviders() and getBestProvider(Criteria criteria, boolean enabledOnly) and provides information about them — for example, via isProviderEnabled(String provider). The LocationManager also provides a controller that objects implementing the LocationListener interface can register with — using one of the request LocationUpdates(…) methods that are provided — in order to automatically receive location updates from a specific provider or by using specific criteria.
The Address class is essentially a data structure used to completely represent all aspects of an address, ranging from its latitude and longitude all the way to its locality, region, and country, for example. The methods of this class consist of get and set accessor methods for all fields.
The Criteria class is also a data structure that can be used to specify (at a fine grain) which criteria must be met in order to satisfy a location request to LocationManager — in other words, the accuracy of the latitude, longitude, bearing, speed, and altitude, for example, or the amount of power it might expend in providing the location. Whenever a location manager is asked for a fix, the location or locations it returns must live up to the specified criteria.