
Chapter 13
Selling Your Application on the Market
- Setting up your application for publishing
- Publishing your application to the Android Market
- Selling your app on other marketplaces
- Marketing and support hints to make your application commercially successful
Android is by itself a platform on which mobile phone applications run. Android needs apps in order to be useful, because the platform is only as successful as the apps that are created for it. As a relative latecomer to the mobile phone market, Google realized that in order to compete with Apple and others in this area, it had a lot of catching up to do. Rather than try to become an app developer and app seller, Google, like Apple, decided to let its users become its app developers, and they completed the deal by making it easy for users to sell (or at least give away) apps to other users.
Because Google wants to establish market share as quickly as possible, it has tried to make publishing and selling apps as easy as possible: Though it has set up its own, well-known electronic marketplace, known as the Android Market, it also allows almost anyone else to set up a marketplace for Android apps. A major player, Amazon.com, has recently taken advantage of this policy to set up a portal for selling (and buying) Android apps. Two other major marketplaces for Android apps are AppBrain (at www.appbrain.com) and GetJar (at www.getjar.com), which serves up free apps for more platforms than just Android. Consistent with Google's open approach to Android so far (and, unlike with iPhone apps), you can distribute your applications directly to your users, by allowing them to download your apps from your website — you don't have to use the Android Market. However, if you want to make your applications available to the masses, publishing to a market is the best route to take.
Another way Google makes selling apps easier is that, unlike iPhone apps sold at the Apple App Store, no long process for vetting apps is required by Google. (Essentially, every marketplace can set its own policy; the Amazon Appstore has an approval process.) Google's own Android Market, in particular, doesn't vet apps: After you upload your app, it almost immediately becomes visible on the Market.
In this chapter, we first cover the tasks you need to complete to prepare your app for all markets. Then we detail how to publish your app at the main Google marketplace: Android Market. We also briefly cover other online marketplaces for Android: Amazon Appstore, AppBrain, and GetJar. Finally, we give you some guidance on how to help your application gain market acceptance.
Preparing Your App for the Market
In this section, we walk you through all the tasks you need to complete to prepare your application (and yourself) for the various app marketplaces.
Testing your application
We describe how to test Android apps in Chapter 12, and in this chapter, we reemphasize testing. We can't emphasize this point enough: Make your application as bug-free as possible, and ensure that it works well (see Chapter 8) and is safe and secure (see Chapter 9). The quality of an app is the primary determinant of its long-term success in the market.
Because Android devices come in many shapes and sizes, and with different screen resolutions and different versions of the operating system, you have to be sure to test your app on a wide range of devices. You don't have to own a bunch of devices in order to test them (although most software companies that build Android apps usually have extensive labs featuring all kinds of devices — old and new, small and large). You can simply use different emulators to ensure that your application runs reasonably well on the range of devices you want to target. However, make at least one complete test on a physical phone: Handling one in a real-life environment is a different experience from using an emulator and you have to make sure that your app is easy to use on a real device. Also, on a real device operating in the real world, your app may have to deal with several issues such as low network bandwidth, a complete loss of connectivity, loss of battery power, low-light situations, errors in GPS locations, difficulty in using the tiny buttons on the keypad, and so on. If you develop and test only on an emulator, you simply won't see these issues in order to be able to deal with them.
After you're satisfied with the quality (including the user experience of your app), you're ready to move on.
Naming and versioning your application
To finalize the package name of your application, pick a name that makes sense and that is general enough that it doesn't lose its applicability even as the app evolves, say by adding more features or by changing its look and feel. Most folks follow the format below for the package name:
com.businessname.applicationname
Note that every application must have a unique package name that is the primary identifier of the application in the Android Market.
 After an app is on the market, the package name cannot be changed — not easily, anyway. To change the package name of an app, you would have to remove the app from the market and force all users to uninstall it (a proposition that isn't easy to enforce) and then put it on the market again as a new app.
The package name is entered into the AndroidManifest.xml file (for details on the AndroidManifext.xml file, see Chapter 2). Here's a snippet from this file that shows a package name entry and where it needs to be placed:
<manifest xmlns:android=”http://schemas.android.com/apk/res/android”
      package=”com.wiley.fordummies.androidsdk.tictactoe”
      android:versionCode=”15”
      android:versionName=”Uno.1.0.1”>
…
</manifest>
Next, you have to take care of versioning your application for two reasons:
- ”Pest” control: When users report a bug, they can report it against the correct version. Or, whenever a bug is fixed, you can tell potential and new users which version fixes the bug.
- Marketing: Every time you upload a new version, you can advertise it, thus keeping your app in the consciousness of your potential users.
Two version fields, both in the AndroidManifest.XML file, must be set for your application:
- android:versionCode: Think of this number (and it must be an integer) as the release count (known sometimes as the “minor” version). Increment this number every time you release the app after any change, be it a significant change such as the addition of a new feature or a bug fix for a customer, or even a minor change that does not change the behavior of the app at all, such as the removal of a few unused variables or package declarations. If you are putting out a new release of the app, change this number.
- android:Name: A string — think of this entry as a descriptive version string.
For android: Name, we recommend that you use a three-part string, with the parts separated by periods:
<major-version>.<minor version>.<maintenance release>
Here's what you do with this name. Periodically, you should review the code for all hastily fixed bugs and refactor the app to deal with all the things you fixed in a proper way (you might have also released different patches to different customers; this is the step in which you consolidate all these patches into a single release). After you have done so, increment the maintenance release number before releasing the app again. Next, if you add a few new features, increment the minor version. If you make a major design change to the application, change the major version. That's about it!
Some folks (Google, for example) often add a “marketing” name android:versionName. So, if you like, give your app a cool name and prepend it to the three-part string you created for android:versionName.
 Android names its operating system versions after desserts, in alphabetical order: Cupcake (1.5), Donut (1.6), Eclair (2.0), Froyo (2.2), Gingerbread (2.3), Gingerbread maintenance release (2.3.3), and Honeycomb (3.0).
Globalizing your application
You're most likely building an application for one market, such as speakers of a certain language. However, if you want to provide an application for multiple markets — for people who speak different languages, for example — you must set up display strings in your application for all markets (in this case, languages) that your application must work with.
The res folder in your Android project becomes a factor now. (Read more about this folder in Chapter 2.) Assuming that you haven't hard-wired strings into your code, the values of all strings are in the file res/values/strings.xml. Follow these steps:
values-<language suffix>
where <language suffix> is the suffix for the language you want to target.
 For a list of allowed language suffixes, go to http://developer.android.com/sdk/android-2.3.html#locs to see the suffixes along with a region code (for example, ar_EG for Arabic, as written in Egypt).
The region code isn't required. If you omit it (when naming the values directory for a language), the default version of the language is used.
Dealing with devices that have limited capabilities
Suppose that you have built a useful app that's feature-rich and uses a wide range of capabilities, such as the camera, touchscreen, accelerometer, and light sensors. As a result, your application requires a full-featured Android device on which to run. You need to at least warn potential users about — if not prevent them from — installing your app on devices that lack all the capabilities necessary for all the features of your app to work properly. Android provides you with a way to specify the capabilities your app needs: the AndroidManifest.xml file. These specifications may (this is not a requirement) then be looked at by the installer of your app (such as the Android Market application), which may either require you to approve the installation or simply filter out the apps that require capabilities your device doesn't have.
You specify required capabilities by using two XML elements: uses-configuration and uses-feature. As you can likely guess, uses-configuration lets you state which input devices are needed, or preferred, for your app.
Suppose that your application requires a trackball. Add the following line to AndroidManifest.xml:
<uses-configuration android:reqNavigation=”trackball”/>
You can find the full set of allowable configurations online at
http://developer.android.com/guide/topics/manifest/uses-configuration-element.html
For other capabilities you need — hardware devices such as the camera or software versions such as the OpenGL library version — you use uses-feature. For example, to state that your application needs Bluetooth and OpenGL (for embedded systems) version 2.1, add the following entries to the AndroidManifest.xml file:
<uses-feature android:name=”android.hardware.bluetooth” />
<uses-feature android:glEsVersion=”0x00020001” />
The full set of features that you can specify is listed at
http://developer.android.com/guide/topics/manifest/uses-feature-element.html
Setting permissions requests
 The capability elements described in the preceding section are used to ensure compatibility, but they are guidelines that may be considered by applications that install apps — such as Android Market — yet are not automatically enforced by the Android framework.
However, those elements are different from permissions requests, such as requests to gain access to system functionality in order to prevent the device from sleeping when your app is playing. (We cover permissions requests in depth in Chapter 9.) To recap, these requests are specified using the uses-permission element:
<uses-permission android:name=”android.permission.WAKE_LOCK”/>
When the app is being installed, the user is asked to grant these permissions. (Figure 13-1 shows you an example from the popular, and addictive, Angry Birds game.) These permissions are indeed enforced by the Android runtime. If the user doesn't grant permission, certain features of the application don't work.
Signing your application
Google requires that every application package (or APK) be signed with a certificate establishing that you're providing the application and certifying it. You must create a new certificate for every application. Every certificate is encrypted by a private key that you provide — and should keep private. All your certificates are stored in a keystore file on your development computer. This keystore file is password-protected.
Figure 13-1: Granting permissions to an app.

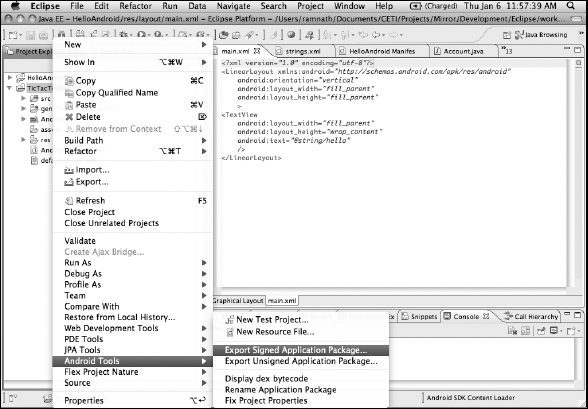
You use the Java tools keytool, jarsigner, and zipalign, all of which are available in your development environment, to create the keystores and certificates. Because you're using Eclipse with the Android Development Toolkit (ADT) plug-in (see Chapter 3), we show you how to sign your app using Eclipse, by using the Export Android Application Wizard to export a signed APK (and even create a new keystore, if necessary). This wizard will perform all the necessary interactions with the Java tools.
To create a signed .apk in Eclipse, follow these steps:
- Right-click on the project and choose Android Tools
 Export Signed Application Package (as shown in Figure 13-2).
 - After the wizard launches, click Next.
The wizard will walk you through the process of signing your package.
Using embedded maps
If (and only if) you're using the Android MapView class to embed maps in your application, you need to get a separate MapView API key. You do this from the command line because the ADT plug-in doesn't yet provide a wrapper for this task. Find all the details at
http://code.google.com/android/add-ons/google-apis/mapkey.html
Briefly, you must first generate the certificate for the app and then get the Map key by registering the certificate with the Google Maps service. Next, you have to modify the layout file for MapView to include the key and then export the program again.
Figure 13-2: Exporting a signed application package using Eclipse.
Publishing on the Android Market
The Android Market, which is Google's own online store for buying and selling Android applications, is the most well-known marketplace for Android apps. According to Google bloggers (at http://googleblog.blogspot.com/2011/05/android-momentum-mobile-and-more-at.html), hundreds of thousands of applications are now available on the Android Market, more than half of them free.
The Android Market has two components: a website (www.android.com/market) and the Android Market application, installed on most Android phones. The website, shown in Figure 13-3, serves as a publicity site that showcases “featured” and highly ranked apps that are available on the Android Market. It also provides a link that walks developers through the process of putting apps on the store.
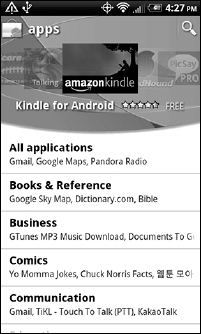
The Android Market app, shown in Figure 13-4, is how potential users of Android devices can browse the Marketplace and download Android apps for free or by purchasing them. The Market app is free and comes installed on all Android devices purchased from “accepted” vendors — such as service providers (Sprint, T-Mobile, and others) — and from Google.
Figure 13-3: Home page of the Android Market website.
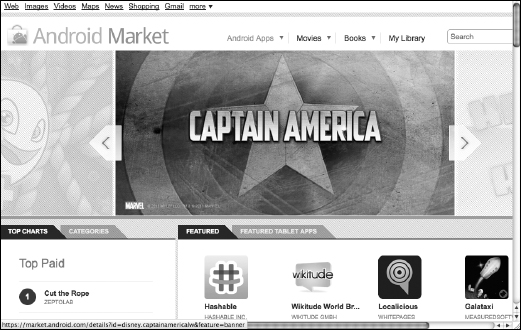
Figure 13-4: Browsing the Android Market by using the Market app.
Let us just add in passing that if the Market app isn't installed on your device (because you bought your device from someplace other than a Googleaccepted vendor), you have to find the install package for the Market app on the web. Just Google the term “vending.apk” to find sites that have this package for download and manually install it on your device. We can't vouch for the provenance of the package or the sites, so do this at your own risk. A less risky approach may be to extract vending.apk from a device on which it has been pre-installed and copy it to your device. Once again, in the interest of full disclosure, let us state that Google has not explicitly forbidden (or allowed) doing this! So once again, do this at your own risk.
In later sections, we give you a tour of the Android Market and show you how to prepare and then publish your application to it.
Before you can publish your apps to the Android Market, you have to complete a couple of steps, as described next.
Creating a developer account
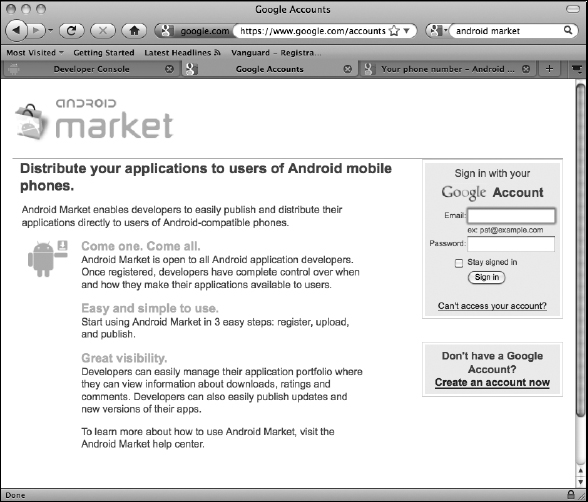
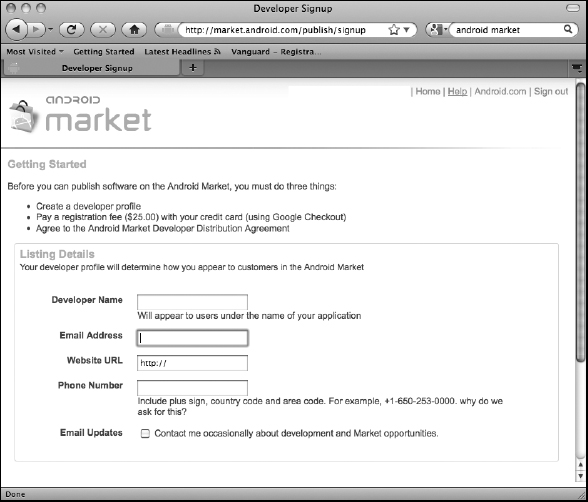
The first step before publishing an app to the Android Market is to create a developer account: Navigate to http://developer.android.com/ and click on Learn more … in the Publish section of the page (you may also directly use the http://market.android.com/publish link). This opens the page shown in Figure 13-5. Sign in to your Google account. (Or create a Google account and then sign in, if you don't already have an account.) The page is essentially a wizard that guides you through the account creation steps.
Figure 13-5: The Developer account login page.
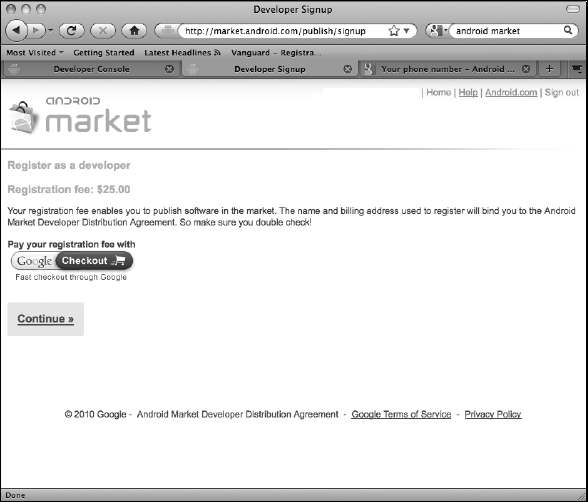
On the Getting Started page, shown in Figure 13-6, set your developer profile. Completing certain fields is mandatory, such as your e-mail address and valid phone number. Google requires a telephone number only in case someone there needs to call you, but Google promises to not reveal your phone number to anyone else. A web page is also required. Of course, if you have a dedicated web page that applies to (and can promote) your application, enter its link. However, any valid URL is accepted. A final note: You have to pay a small one-time registration fee ($25, as of this writing, see http://www.google.com/support/androidmarket/developer/bin/answer.py?hl=en&answer=113468) to create a developer account.
Figure 13-6: Creating a developer profile.
Creating a merchant account
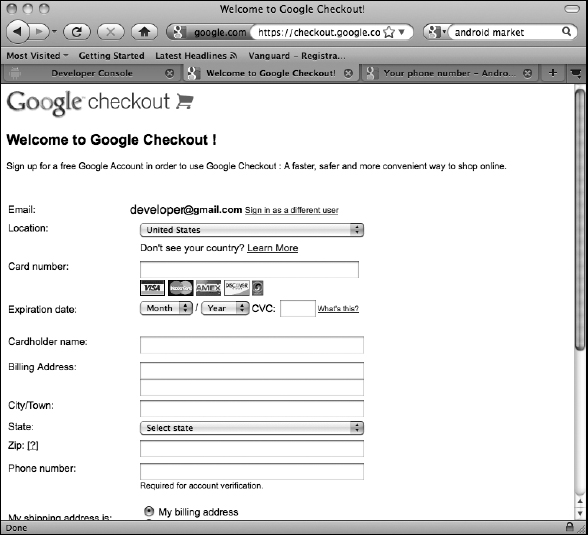
After you create a developer account, you must create a merchant account in Google Checkout, the payer site that all customers must complete. (Google has said that other payer sites, such as PayPal, will be allowed, but at the time this book was written, they weren't.) Figures 13-7 and 13-8 show the landing page and the account creation page, respectively, in Google Checkout.
Figure 13-7: The Google Checkout landing page.
When you create an account, we suggest that you provide a support e-mail address — one that your customers can use to contact you for support — and that is separate from the e-mail address you normally use for regular communications with friends and family.
Figure 13-8: The Google Checkout account creation page.
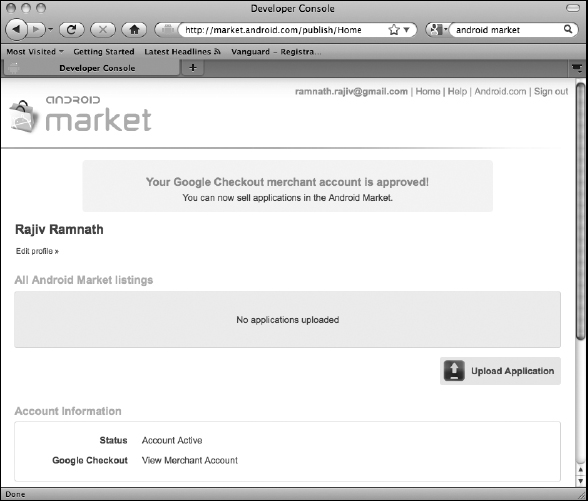
After you do all this, you see the page shown in Figure 13-9, which means that you're ready to upload your application to the market. This page is known as the Developer Console.
After you upload your app to the market, it almost immediately becomes visible. You don't have to endure a long validation period.
Now that you know what to do to sell your app, you can find out about other information — such as how to prepare your app and check out some legalities.
Figure 13-9: The Android Market management page on the Developer Console.
Understanding the Android Market license agreements
Placing your app in the Android Market binds you to legal agreements with Google in order for it to continue to permit you to sell your app there. In this section, we summarize these agreements for you, but you should still look at the documents. In spite of the fair bit of legalese, the agreements are reasonable. We see nothing that would qualify as an impediment to your selling your app as long as you act in good faith. Incidentally, the developer account creation page (refer to Figure 13-6) guides you through the various legal agreements; you don't have to manually find and click through every agreement.
In addition to perusing some branding guidelines, you should consider three legal agreements, as discussed in the following sections.
The Google Terms of Service agreement
The first agreement you have to consider is the Google Terms of Service (ToS) agreement. You can find it in its entirety at www.google.com/accounts/TOS. It governs your “use of Google's products, software, services and web sites,” — in other words, you consent to abide by this agreement whenever you use any Google service, such as Gmail or Google Groups, Sites, or Docs or whenever you access Google Maps from within your application. In a nutshell, the ToS agreement says that Google
- Makes no guarantees of how well the service will work
- Can update or change its products in any way it sees fit
- Is used at your own risk
Your content is your responsibility, and it is up to you to behave responsibly. You get an assurance that Google doesn't own your content; however, you give Google a license to host it and to show it to others to whom you give access. Finally, you may not disclose any Google trade secrets, in case you run across them as you use its services.
The Android Market Developer Distribution agreement
The most relevant agreement to you as an Android app developer is the Android Market Developer Distribution agreement, available at
www.android.com/us/developer-distribution-agreement.html
Wherever overlap occurs, the terms of this agreement override the ToS agreement (see the preceding section) or the Google Checkout Merchant agreement (see the following section). As the name of this agreement indicates, the Android Market Developer Distribution agreement is composed of the terms that govern you when you place an app on the Android Market, for sale or as a free app, including these terms:
- You must have a developer account in good standing. Google hasn't closed your account because you did something bad, and you're legally allowed to use and develop Android software.
- If you charge for your app, you must also have an account with a “payment processor” affiliated with Android Market. That way, payments, refunds, and similar transactions can take place, and a transaction fee (currently 30 percent), payable to Google, can be charged.
- The Android Market Developer Distribution agreement overrides any agreement with the payment processor.
- If your application has a free version along with an upgraded version you charge for, you must process the charge through the aforementioned payment processor so that Google can take its cut when you get paid, in return for allowing you to market your free app on the Market.
- If you have an app advertised as free, you may not charge a subscription for it. Essentially, free means free.
- Buyers can download and install your app as many times as they want unless you remove your app from the Market. They can also “return” your app for a full refund within 48 hours. Of course, they must also uninstall it from their devices, but, as far as we know, Android has no means of ensuring that they do so.
- You (more accurately, your app) must protect the information of its users, and it must not use any user information without permission.
- Google may display product ratings given to your app by your customers.
- You must provide accurate information about your product, such as what it does, including the permissions it needs on your device. You also may not spam the Market with repetitive information.
- You may not (obviously) break any laws via your application; display sexually explicit material or hate speech; allow gambling; or engage in deceptive practices (such as impersonating the operating system) or in malicious activity (such as transmitting viruses).
The Google Checkout Merchant agreement
Another agreement you have to consider is the one between you and the payment processor. At the time of this writing, Google Checkout is the only payment processor affiliated with the Android Market, so the Google Checkout Merchant agreement is the only payment processor agreement that governs you. It's posted here:
https://checkout.google.com/termsOfService?type=SELLER
The merchant agreement basically says that
- Google is only a payment processor. It neither warrantees your product nor guarantees the buyer a good product, nor does it endorse the buyer in any way.
- You must process payment only when the product has been shipped or otherwise transferred to the buyer.
- There is no minimum or maximum payment amount.
- Google Checkout transfers funds by the second business day. It can issue a chargeback if the credit card or bank requests one.
- Google states that collecting sales tax is not its responsibility, so you have to collect the sales tax appropriate to your state. A good resource for calculating sales tax is BizTaxLaw.com (specifically, http://biztaxlaw.about.com/od/typesofbusinesstaxes/ht/statesalestax.htm).
- You may promote your association with Google Checkout, and it can promote you. However, see the next bullet.
- Every party retains the right to its brand and features.
- You're responsible for protecting buyer information, if you gather it.
Branding restrictions
Google has the following rules for branding your app, available online at
http://www.android.com/branding.html
- You may not use Android or Droid in any name.
- You may describe your app using Android or Droid — for example, Tic-Tac-Toe for Android — but Android must be in a smaller font than the name of your application so that it's clear that Android (or Droid) is only a descriptor.
- You may not use fonts from the Android custom typeface in your marketing material.
Uploading your application to the Android Market
After you process and deal with everything in this chapter (whew!), you're ready for the final step: literally uploading your app to the Market. This part is easy. Go to the Developer Console (refer to Figure 13-9) and upload your app. As we say elsewhere, there's no long waiting period where Google checks out your app (unlike the Apple Store, for example). Your app almost immediately shows up. Keep a couple of points in mind when you upload:
- Set the Locations to All Current and Future Countries with Payment for paid apps and All Current and Future Locations for free apps. You might as well sell your app everywhere.
- Turn off copy protection. This option is useless because it's just an inconvenience and a determined user can simply work around it.
Taking Advantage of Other Marketplaces for Android Apps
In this section, we describe other online marketplaces for Android apps, including a look at the Amazon Appstore and a couple of mostly niche sites.
The Amazon Appstore for Android
The Amazon Appstore for Android (navigate to http://www.Amazon.com and select Appstore For Android in the menu down the left side, or directly click on http://www.amazon.com/mobile-apps/b/ref=sa_menu_adr_app4?ie=UTF8&node=2350149011 as of this writing) debuted in March 2011. Given Amazon's presence and reach, this online marketplace for Android apps is likely to become a serious, mainstream competitor to Google's Android Market.
The developer sign-up process is straightforward. To begin with, your developer account is also your Amazon customer account (the one you use to buy items from Amazon.com), so you don't have to set up a seller account, as you have to do with the Android Market. For every application, you have to provide a description of the application and a few other bits of information, such as its category, the form factor of the targeted device, the date you plan to release the app, its content rating, and your support contact information. You can also upload any promotional material you want to make available about the app — icons used in the app, screen shots, and any other images and videos. You pay a yearly registration charge of $99 to set up a developer account on the Appstore; however, it's waived for the first year.
Buyers from the Appstore also use an app as their way into the store. However, this app doesn't come preinstalled on any Android device. Instructions for installing the app have been provided by Amazon. Essentially, you have to request a link to the app to be sent to you from Amazon (www.amazon.com/app-email) and then install the app from that link. You can also enter the link from a browser on your device. You might have to change a setting on your device to allow the installation of applications from sources other than the Android Market: First, open Settings on your device, tap Applications, and then select Unknown Sources if it's deselected.
Your legal relationship with the Amazon Appstore
As with Google, placing your app on the Amazon Appstore binds you to a legal relationship with Amazon. The complete agreement may be found at https://developer.amazon.com/settings/docs.html after you click Get Started and sign in. You will see that the agreement is quite similar to the one you enter into with Android Market.
To begin with, Amazon pays you a royalty on the sale of every copy of your app, and it takes care of collecting and remitting sales taxes on the sale. You have to make sure that the app you place on the Amazon Appstore is the latest version for sale anywhere else and is priced no higher than anywhere else. Next, to continue to have the rights to your software, and Amazon to theirs, you must make sure that you have rights to use any digital material you use in your app (ranging from the code to any bitmaps, music, video, or other elements), and Amazon has the right to use this material to promote your app and its store. This is, of course, obvious, but you may not use your app as spyware, and you must adequately protect private user information that your app may have access to. Finally, you must adequately support your app. You must respond within 24 hours to any critical support request and within five business days for other requests.
Amazon Web Services — cloud services from Amazon
Just as Google has done with Google Maps, Amazon has tried to sweeten the pot for developers by providing cloud-based services — known as Amazon Web Services, or AWS — that developers can use within their apps. These services are provided via the AWS Android Library that hides, according to Amazon, “much of the lower-level plumbing, including authentication, request retries, and error handling.” In addition, these services may be used to access Amazon's existing cloud services, such as Amazon Simple Storage Service (Amazon S3), SimpleDB, Simple Queue Service (Amazon SQS), and Amazon Simple Notifications Service (Amazon SNS). Included in the AWS SDK are code samples and documentation.
We have to tell you that because all this AWS information is new, we haven't had the opportunity to include examples of using the AWS in this book. However, check this book's website later, because we hope to have examples showcasing these services soon.
Other marketplaces for Android apps
Two other online Android app marketplaces worth mentioning are AppBrain (www.appbrain.com) and GetJar (www.getjar.com). AppBrain isn't a marketplace but, rather, an enhanced portal into the Android Market. As its marketing material says, “AppBrain is a website which makes sense out of the high number of Android apps available in the Google Android market!” Apps are easier to find. Also, using the downloadable AppBrain app means that any updates to apps you already have are automatically downloaded and installed, thus keeping your device in sync with the latest versions of your stuff. (Now you can see how the versioning information we cover earlier in this chapter can be useful in interesting ways!)
The GetJar site (at http://www.getjar.com) provides apps on a range of platforms — Android, of course, but also Blackberry and Windows Mobile. Apps on GetJar are free.
Becoming Successful in the Market
Here's our two cents’ worth on how to be successful in the Android Market.
Fee or free?
We believe that the predominance of free apps will slowly change over the next few years as Android Market comes into the commercial mainstream (like the Apple Store) and as (or if) larger companies (with many more employees to pay) start putting their wares on the Android Market.
So what should you do? Offer a free app or ask people to pay for it? Make a free app paid after a time? People complain like crazy if you make an app paid that was once free, so our advice is to offer two versions from the start: a free version with limited functionality and a paid version with all the bells and whistles. You can certainly make a paid app free, but don't do it too often, either, lest people simply wait for your app to become free before buying it.
Your free app can help upsell your paid app by incorporating Android Market itself. As we talk about in Chapter 3 (where we cover intents), you can even invoke the Android Market app! So, from an appropriate activity in your free app, you can ask the user to upgrade to the Pro version, and if the answer is yes, you fire off the Market app with an intent with an embedded Search key that takes you directly to your paid app. Below are two code snippets for the intent creation. If you want to search for the app by giving part of its name (for example if you want to let the user select between multiple versions of paid apps), use:
Intent intent =
    new Intent(Intent.ACTION_VIEW,            Uri.parse(“market://
               search?q=pname:MY_PAID_APP_NAME_SUBSTRING”));
               startActivity(intent);
If you want to use the exact name of the app, the intent creation code is shown below:
Intent intent =
    new Intent(Intent.ACTION_VIEW,            Uri.parse(“market://
               search?q=pname:MY_PAID_APP_NAME”)); startActivity(intent);
How to drive customers to your app
Most books we have read about apps say that if you do the fly-right things we mention in this book, your app has a good chance of doing well.
We think you have to do that, of course. But you have to do more to give your app commercial legs. Clayton Christensen, the guru of disruptive innovation theory, says that people buy stuff not because they're members of certain demographic groups (teenagers, seniors) but, rather, because they want to address certain circumstances (such as peer pressure). Geoffrey Moore, another guru with respect to how start-ups succeed, says you must create a “whole product” — something that addresses a need completely. He also says that after you're able to sell to the key players in a market segment, the others will fall like bowling pins in a tornado. (Yes, we're paraphrasing heavily!) But their points are well taken. For your app to sell well, you have to do more than have a cool idea; you have to use that cool idea to target a circumstance that people want to address, such as tracking appointments, or even emotional circumstances such as boredom or peer pressure. If you plan to create a paid-for app, make sure it solves someone's circumstance in as complete a manner as you can make it, and then find a way to market it — outside the Android Market itself — to key people who want that need addressed and that others think of as players to be imitated.
Good citizenship: Providing good service
After you create a high-quality (stable, usable, high-performing) product that works as expected, be a good seller. In the information about the app you provide on the store, you obviously want to advertise your app's capabilities in order to sell it, but also be transparent about what your application does, which capabilities it needs, and why it needs them. That way, when customers install the app, they aren't surprised by what it wants to do.
Be responsive to customer requests and feedback. Fix bugs promptly. Be polite to your elders! And, of course, don't do anything illegal in your app.
A few more hints
Even if you haven't targeted your app for selling outside the United States, you might as well sell it in all countries and take advantage of any long tail, if one exists. We show you how to do this for the Android Market earlier in this chapter.
Always watch the ratings for your app and be sure to respond quickly with updates and fixes if you see them start to drop.