
Hour 20. Say Cheese! Working with Cameras
As you have seen, Android devices come in different sizes and have different features. Most Android phones and many Android tablets include a camera. Some have two cameras. A front-facing camera faces the user and enables apps for video chatting as well as self-portraits. Cameras on Android devices take both photos and videos. In this hour, you learn how to take photos and videos easily using the built-in camera app and how to control the camera directly.
Capturing Media
Whether you use the built-in camera app or write code to control the camera directly, you follow some common procedures to handle the media. Videos and full-size photos contain a significant amount of data. Typically, the media data is stored in a file. This section goes through the details of defining a file for use in media storage.
Note: Capturing a Photo in Memory
Android provides an intent for capturing photos. That intent can be used to capture a photo in memory or to a file. The catch with capturing an image to memory is that only a thumbnail-sized photo is captured. In practice, photos are captured to files.
Android has a mechanism called the media scanner service that makes media-like photos available via a content provider. Apps such as the Gallery app access the MediaStore (android.provider.MediaStore) content provider to obtain available images and videos. When an app creates a new image, the media scanner discovers that image and makes the image available in the MediaStore content provider. After you create a new photo or video, you can make it immediately available to the media scanner by adding a few lines of code.
The Hour 20 App project contains this source code.
Common Steps When Capturing Media
Whenever you capture media in this hour, you:
![]() Create a file for storage using a timestamp and proper extension
Create a file for storage using a timestamp and proper extension
![]() Create a URI from the file
Create a URI from the file
![]() Use the URI to invoke media scanner
Use the URI to invoke media scanner
Specifying a File for Media Storage
The first step to take when capturing a photo or video is to specify the file that will hold the captured content. Since API version 8, a specific directory is available for storing public pictures. If you have an app that creates pictures, an app user might want the pictures even if he or she deletes the app. Placing the pictures in the public pictures directory ensures that they are accessible and will be retained even if the user deletes the app.
Each media file will be given a unique name. You can use a naming scheme for photos and videos that adds a timestamp. Photos are stored as JPGs, and videos are stored as MP4s.
In Listing 20.1, a directory named Hour 20 is created within the public pictures directory, and the current date and time are used to create a unique filename.
The sample application uses the code from Listing 20.1 in several places. It is used each time you want to capture an image or video.
To save files to external storage, you must set the android.permission.WRITE_EXTERNAL_STORAGE in the AndroidManifest.xml file.
LISTING 20.1 Snippet to Create Picture File
1: File mediaStorageDir = new File(Environment.getExternalStoragePublicDirectory(
2: Environment.DIRECTORY_PICTURES), "Hour20");
3: if (!mediaStorageDir.exists()){
4: mediaStorageDir.mkdirs();
5: }
6: String timeStamp = new SimpleDateFormat("yyyyMMdd_HHmmss").format(new Date());
7: mDisplayFolder = "Pictures" + File.separator +"Hour20"
8: + File.separator +"IMG_"+ timeStamp + ".jpg";
9: mPhotoFile = new File(mediaStorageDir.getPath() + File.separator +"IMG_"
10: + timeStamp + ".jpg");
Lines 1 and 2 use the Environment.getExternalStoragePublicDirectory() method to define the app’s Hour 20 directory within the public pictures directory. The first parameter to this method, Environment.DIRECTORY_PICTURES, specifies to use the pictures directory. Other available public directories in the Environment class are DIRECTORY_DOWNLOADS, DIRECTORY_MOVIES, DIRECTORY_MUSIC, DIRECTORY_NOTIFICATIONS, DIRECTORY_PODCASTS, and DIRECTORY_RINGTONES.
Lines 3–5 create this directory if it does not exist.
On line 6, the Java SimpleDateFormat(java.text.SimpleDateFormat) class is used in conjunction with the Date (java.util.Date) class to create a timestamp string. SimpleDateFormat provides many options for transforming Date objects. In this case, the result is specified by the string "yyyyMMdd_HHmmss" where y refers to year, M to month, d to day, and so on for hours, minutes, and seconds.
On lines 7 and 9, the variable mDisplayFolder is populated. It is a string that displays to the user.
Lines 9 and 10 populate the File variable mPhotoFile. This File object contains the name of the file where the photo will actually be stored. To create the File, you pass the directory path, the name of the file specified by IMG and the timestamp, and the .jpg file extension. For a video, you would specify the file using VID, the timestamp, and the .mp4 file extension.
At this point, you have learned to define a File in which to save a captured photo. The process for defining a File for capturing a video is similar.
Creating the URI and Invoking the Media Scanner
The following sections cover several ways to capture photos and videos. In each case, you want to make the captured media available to the MediaStore and apps such as the Gallery app that display this content.
You invoke the media scanner via an Intent. The key piece of information that is required is the name of the file where the media is stored.
Listing 20.1 showed how to create the variable mPhotoFile for storing a photo. Assuming the file now contains a captured photo, you create a Uri from the mPhotoFile variable using the Uri.fromFile() method. When you create the file, you’ll also create a URI:
mPhotoFileUri=Uri.fromFile(mPhotoFile);
You then use this URI to invoke the media scanner via an Intent:
Intent mediaScanIntent = new Intent(Intent.ACTION_MEDIA_SCANNER_SCAN_FILE);
mediaScanIntent.setData(mPhotoFileUri);
this.sendBroadcast(mediaScanIntent);
The ACTION_MEDIA_SCANNER_SCAN_FILE Intent scans the media file. The setData() method is used to specify the URI to scan. You use the sendBroadcast() method to invoke the media scanner.
Each time you capture a photo or video, you invoke the media scanner in this way.
Note: Hiding Images from Media Scanner
The media scanner will eventually discover media files even if it is not directly called as it is in Listing 20.3. That means that images written to the external file system in the app will be made available in the gallery app. To prevent images from being discovered, do not use a public folder such as Environment.DIRECTORY_PICTURES and include a file in your private folder called .nomedia. Note the dot in the filename.
The recommended approach for storing media files and using the media scanner is as follows:
![]() If your app takes photos the user might want to save, put them in
If your app takes photos the user might want to save, put them in DIRECTORY_PICTURES and invoke the media scanner.
![]() If those photos are for other purposes (for example, an attachment for a message, or to change the user profile), then it should go into the app’s private data directory and that directory should have a .nomedia file to prevent the media scanner from indexing it.
If those photos are for other purposes (for example, an attachment for a message, or to change the user profile), then it should go into the app’s private data directory and that directory should have a .nomedia file to prevent the media scanner from indexing it.
![]() Any other image file the app might include, or save, or download, or generate, should be in a directory with a .nomedia file unless you’re certain the user might want to browse it in the gallery, in which case it should be in one of the standard locations provided by
Any other image file the app might include, or save, or download, or generate, should be in a directory with a .nomedia file unless you’re certain the user might want to browse it in the gallery, in which case it should be in one of the standard locations provided by Environment.
Using Intents to Take Photos and Videos
In this hour, you learn to capture photos and videos in two ways. First, you see how to use the built-in camera app to capture images and videos by using intents. You then learn to create your own simple camera activities to capture photos and videos.
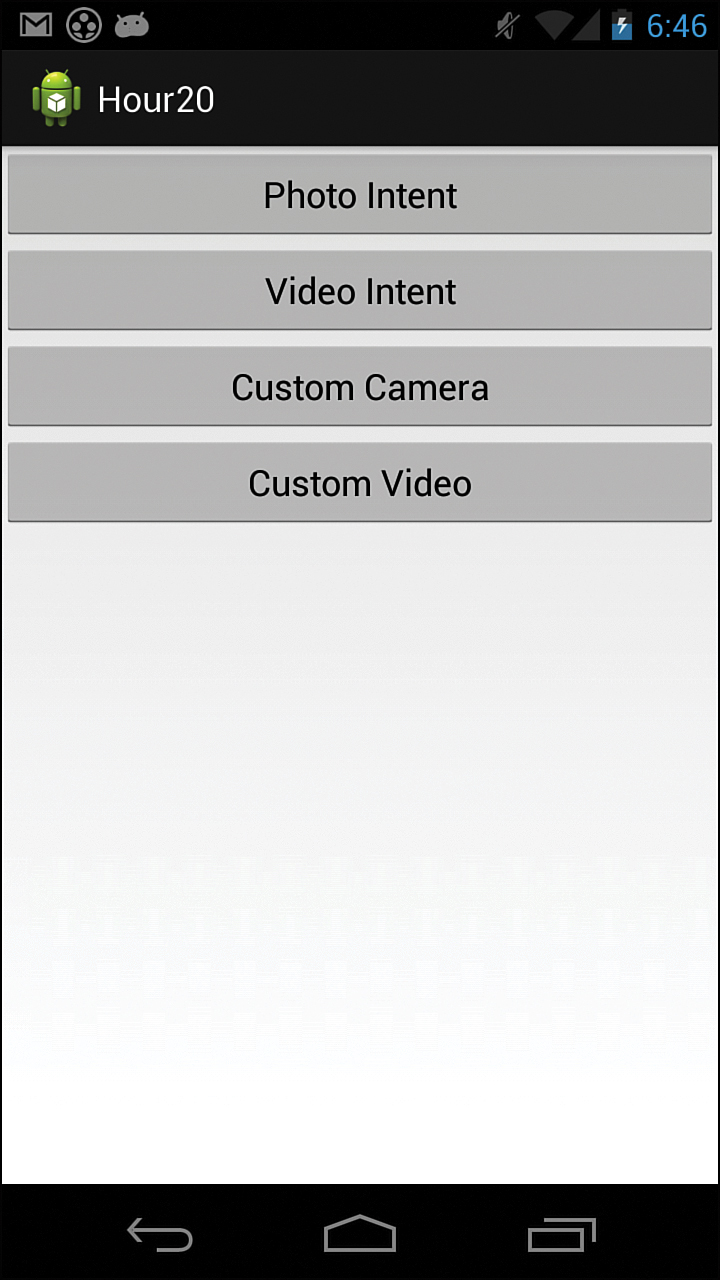
The example app launches an activity called MainActivity.java. That activity displays four buttons. The first two buttons use intents to capture photos and videos. That intent code is in the onClickListener() methods for the buttons in MainActivity.java. The last two buttons launch your custom camera activities.
You invoke these intents using the StartActivityForResult() method. You used the StartActivityForResult() method in Hour 2 when you started an Activity and then handled the result in the onActivityResult() method. When you capture a photo or video, the captured media is made available in the onActivityResult() method. Figure 20.1 shows the app when it launches.
Taking a Photo Using an Intent
When you launch an activity with the startActivityForResult() method, you handle the result in the onActivityResult() method. These two methods are linked by the use of a common request code parameter. You include the request code provided to startActivityForResult() as a parameter to the onActivityResult() method. Use CAPTURE_IMAGE_REQUEST_CODE as your request code variable for photo capture. It is defined in MainActivity.java:
private static final int CAPTURE_IMAGE_REQUEST_CODE = 1;
Launching the Camera with an Intent
The first button defined in MainActivity.java is the takePhotoButton. In the OnClickListener() method for takePhotoButton, you define an intent for capturing a photo and call the StartActivityForResult() method.
Listing 20.2 shows the entire onClickListener() method for the takePhotoButton. To create this intent, you use MediaStore.ACTION_IMAGE_CAPTURE (see line 4).
Lines 5–14 include the code for defining a file for media capture. This code is the same as in Listing 20.1. With the intent and the filename, you can put together the image capture request. Line 16 sets the media file as an extra value for the intent, and on line 17, the startActivityForResult() begins the image capture. It is there that the CAPTURE_IMAGE_REQUEST_CODE is used.
In line 15, you set mPhotoFileUri. This field is used later for the media scanner.
LISTING 20.2 Capturing a Photo via an Intent
1: Button takePhotoButton = (Button) findViewById(R.id.photoIntentButton);
2: takePhotoButton.setOnClickListener(new OnClickListener() {
3: public void onClick(View v) {
4: Intent intent = new Intent(MediaStore.ACTION_IMAGE_CAPTURE);
5: File mediaStorageDir = new File(Environment.
getExternalStoragePublicDirectory(
6: Environment.DIRECTORY_PICTURES), "Hour20");
7: if (! mediaStorageDir.exists()){
8: mediaStorageDir.mkdirs();
9: }
10: String timeStamp = new SimpleDateFormat("yyyyMMdd_HHmmss").format(new
Date());
11: mDisplayFolder = "Pictures" + File.separator +"Hour20"
12: + File.separator +"IMG_"+ timeStamp + ".jpg";
13: mPhotoFile = new File(mediaStorageDir.getPath()
14: + File.separator +"IMG_"+ timeStamp + ".jpg");
15: mPhotoFileUri=Uri.fromFile(mPhotoFile);
16: intent.putExtra(MediaStore.EXTRA_OUTPUT,mPhotoFileUri );
17: startActivityForResult(intent, CAPTURE_IMAGE_REQUEST_CODE);
18: }
19: });
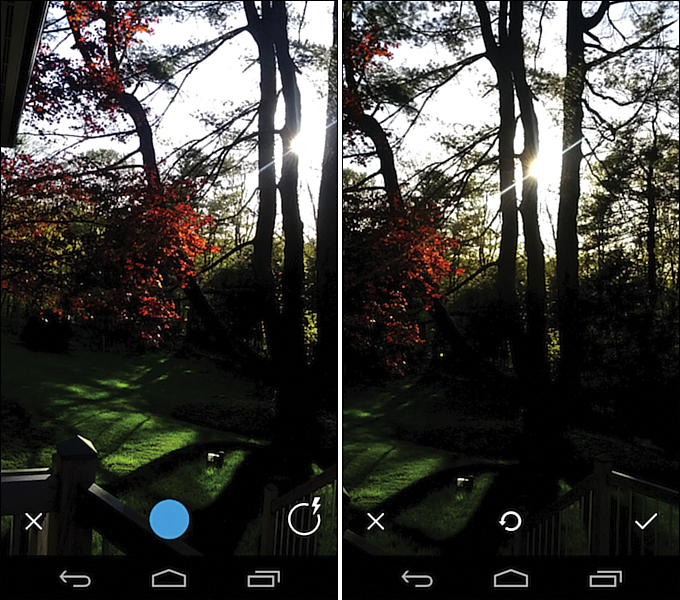
When the ACTION_IMAGE_CAPTURE intent fires, the built-in camera app appears.
The user can take a picture and either accept or reject the picture for use. If the picture is rejected, the user can take another picture (see Figure 20.2).
Handle the Resulting Image in onActivityResult()
You saw how to use the onActivityResult() method in Hour 2 in a basic example to handle data returned from an activity. The parameters for onActivityResult() are for requestCode, resultCode, and data. You use the requestCode to match the activity result that you are handling to the original request. The resultCode indicates a result with RESULT_OK or that the user cancelled the request with RESULT_CANCELLED.
For a photo capture, if RESULT_OK is returned in onActivityResult(), you can rely on the filename and URI that was set up when you made the request to get the photo data.
In MainActivity.java, you defined the field mDisplayFolder as a String. Listing 20.2 shows that during the Intent creation, mDisplayFolder was populated with the name of the folder and file for the image. The field mPhotoFileUri was also defined and assigned the URI that corresponds to the file.
The onActivityResult() method shown in Listing 20.3 uses both of these fields.
Line 3 compares the requestCode to the CAPTURE_IMAGE_REQUEST_CODE value. A match means that this is the capture image event. Line 4 checks to see whether the resultCode matches RESULT_OK. If this is the result of an image capture event and the result is OK, two things happen:
![]() Lines 5 and 6 use the previously defined
Lines 5 and 6 use the previously defined mDisplayFolder String to display a Toast.
![]() Lines 7–10 invoke the media scanner. Line 7 defines an
Lines 7–10 invoke the media scanner. Line 7 defines an Intent for media scanning using the previously defined mPhotoFileUri for the data, and calls the sendBroadcast method. This immediately makes the image data available to the media scanner.
LISTING 20.3 Handle the Captured Photo in onActivityResult()
1: @Override
2: protected void onActivityResult(int requestCode, int resultCode, Intent data)
{
3: if (requestCode == CAPTURE_IMAGE_REQUEST_CODE) {
4: if (resultCode == RESULT_OK) {
5: Toast.makeText(this, "Image saved to:
" +
6: mDisplayFolder, Toast.LENGTH_LONG).show();
7: Intent mediaScanIntent = new Intent(Intent.ACTION_MEDIA_SCANNER_SCAN_
FILE);
8: mediaScanIntent.setData(mPhotoFileUri);
9: this.sendBroadcast(mediaScanIntent);
10: } else if (resultCode == RESULT_CANCELED) {
11: } else {
12: Toast.makeText(this, "Something went wrong", Toast.LENGTH_LONG).show();
13: }
14: } . . .
Listings 20.2 and 20.3 show the steps in using an intent to capture a photo:
![]() Create a
Create a File object with a unique filename to hold the captured image
![]() Create a URI pointing at that unique filename
Create a URI pointing at that unique filename
![]() Create an intent using
Create an intent using MediaStore.ACTION_IMAGE_CAPTURE
![]() Use
Use StartActivityForResult() to launch the intent
![]() Use
Use onActivityForResult() to handle the results of the intent
![]() Check to see whether the result is for the image capture intent
Check to see whether the result is for the image capture intent
![]() Check to see whether the result is successful
Check to see whether the result is successful
![]() Invoke the media scanner intent by passing the URI for the image
Invoke the media scanner intent by passing the URI for the image
Taking a Video Using an Intent
The structure of the code for taking a video using an intent is just like that for taking a photo. The steps are the same. The differences are that you use a different filename, file extension, and intent to capture video.
Listing 20.4 shows the onClickListener() code for the shootVideoButton from MainActivity.java. The intent to capture video is MediaStore.ACTION_VIDEO_CAPTURE (see line 4). You use the same directory for storing videos as for storing photos, but the filename begins with VID and the file extension is .mp4.
LISTING 20.4 Capturing a Video Using an Intent
1: Button shootVideoButton = (Button) findViewById(R.id.videoIntentButton);
2: shootVideoButton.setOnClickListener(new OnClickListener() {
3: public void onClick(View v) {
4: Intent intent = new Intent(MediaStore.ACTION_VIDEO_CAPTURE);
5: File mediaStorageDir = new File(Environment.
getExternalStoragePublicDirectory(
6: Environment.DIRECTORY_PICTURES), "Hour20");
7: if (! mediaStorageDir.exists()){
8: mediaStorageDir.mkdirs();
9: }
10: String timeStamp = new SimpleDateFormat("yyyyMMdd_HHmmss").format(new
Date());
11: mDisplayFolder = "Pictures" + File.separator +"Hour20"
12: + File.separator +"VID_"+ timeStamp + ".mp4";
13: mVideoFile = new File(mediaStorageDir.getPath()
14: + File.separator +"VID_"+ timeStamp + ".mp4");
15: mVideoFileUri=Uri.fromFile(mVideoFile);
16: intent.putExtra(MediaStore.EXTRA_OUTPUT, mVideoFileUri);
17: startActivityForResult(intent, CAPTURE_VIDEO_REQUEST_CODE);
18: }
19: });
Handling the result from capturing a video is also similar to capturing a photo. Listing 20.5 shows this. The check is made for the requestCode CAPTURE_VIDEO_REQUEST_CODE. If the result is RESULT_OK, a Toast appears and the video becomes available to the media scanner. The intent for the media scanner, shown on line 5, is the same for images and videos.
LISTING 20.5 Handle the Captured Video in onActivityResult()
1: if (requestCode == CAPTURE_VIDEO_REQUEST_CODE) {
2: if (resultCode == RESULT_OK) {
3: Toast.makeText(this, "Video saved to:
" +
4: mDisplayFolder, Toast.LENGTH_LONG).show();
5: Intent mediaScanIntent = new Intent(Intent.ACTION_MEDIA_SCANNER_SCAN_FILE);
6: mediaScanIntent.setData(mVideoFileUri);
7: this.sendBroadcast(mediaScanIntent);
8: } else if (resultCode == RESULT_CANCELED) {
9: } else {
10: Toast.makeText(this, "Something went wrong", Toast.LENGTH_LONG).
show();1: 11: }
11: }
12: }
Advantages of Using Intents for Capturing Media
Using an intent is much easier than creating a custom camera application. Using an intent allows a developer to minimize the number of permissions that are required for the app.
When using an Intent, the camera apps on the device will be used. A user who has more than one camera app will be given the choice to use the one he prefers. The user does not need to learn about a new app. In many cases, the user will choose the default camera app.
The default camera app will likely take advantage of all the features for a particular API level. More camera features are available in Ice Cream Sandwich and Jelly Bean than in Froyo.
Developing a Camera App
You might have a creative or novel idea for an app that goes beyond using an intent to capture an image or a video. This section shows basic examples of activities that do this. Figure 20.1 shows Custom Camera and Custom Video buttons. These buttons both launch activities. The first button launches CustomCameraActivity.java and the second button launches CustomVideo.java.
Some common elements exist between these two activities. Permissions are required when using the camera and in both cases, you need to support a preview feature for the image or video. This section covers these common elements and then examines the individual activities.
Permissions for Capturing Media
When saving media to external storage, you need the WRITE_EXTERNAL_STORAGE permission. To use the camera directly, you must include the CAMERA permission. That is not the case when you use an intent to launch the camera. Video capture requires the RECORD_AUDIO permission.
These permissions are set as follows in the AndroidManifest.xml file:
<uses-permission android:name="android.permission.WRITE_EXTERNAL_STORAGE" />
<uses-permission android:name="android.permission.CAMERA"/>
<uses-permission android:name="android.permission.RECORD_AUDIO" />
Creating a Camera Preview Class
In a physical camera, a photographer looks through a viewfinder to determine what picture to take. When you create a camera app, your job is to provide the viewfinder, which you do via the CameraPreview.java class. CameraPreview’s job is to show the scene as the photographer sees it.
You use the CameraPreview class in the CustomCameraActivity and the CustomVideoActivity. The preview function works the same in both.
The CameraPreview class extends a SurfaceView (android.view.SurfaceView). A SurfaceView provides a surface for drawing. When you use it with the camera, the SurfaceView displays what the camera sees.
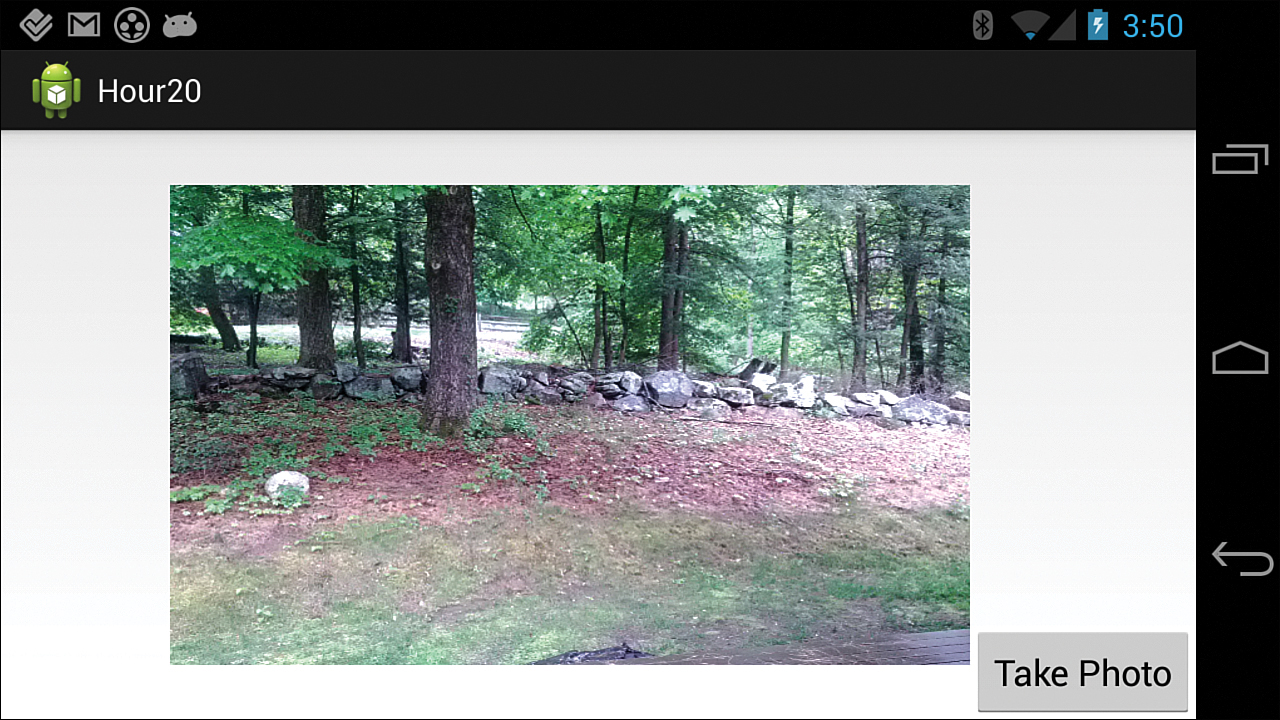
Figure 20.3 shows the CustomCameraActivity. The CameraPreview class shows the display.
Associate a Camera with the SurfaceView
You want the CameraPreview class to have the device’s camera show a preview. CameraPreview extends a SurfaceView that you use for displaying the content. You must associate the device’s camera with the view, which you do in the constructor for CameraPreview. Listing 20.6 shows the constructor.
LISTING 20.6 Constructor for CameraPreview
1: public CameraPreview(Context context, Camera camera) {
2: super(context);
3: mCamera = camera;
4: mHolder = getHolder();
5: mHolder.addCallback(this);
6: }
In Listing 20.6, a Camera object is passed as a parameter. On Line 3, that camera object is assigned to the mCamera field in the CameraPreview class. CameraPreview extends SurfaceView. To actually enable drawing on the SurfaceView, you must access the SurfaceHolder interface that is provided via the getHolder() method. That is done on line 4 and the SurfaceHolder.
You can monitor changes to the SurfaceHolder via a callback. Line 5 tells the SurfaceHolder mHolder to use the CameraPreview class itself for callbacks.
Implementing SurfaceHolder.Callback
The CameraPreview class implements SurfaceHolder.Callback. The declaration for the class is as follows:
public class CameraPreview extends SurfaceView implements SurfaceHolder.Callback {
With the SurfaceHolder.Callback, you must implement methods that handle different states of the SurfaceHolder, which are surfaceCreated(), surfaceDestroyed(), and surfaceChanged().
In surfaceCreated(), you begin the camera preview and display it on the SurfaceHolder. In the surfaceChanged() method, you stop and then restart the Camera preview. You must implement the surfaceDestroyed() method, but nothing is done in the method.
Listing 20.7 shows the surfaceCreated() method from CameraPreview.java. Line 3 associates the preview display of the Camera with the SurfaceHolder that is passed as a parameter. Line 4 starts the Camera preview.
LISTING 20.7 SurfaceHolder.Callback onSurfaceCreated()
1: public void surfaceCreated(SurfaceHolder holder) {
2: try {
3: mCamera.setPreviewDisplay(holder);
4: mCamera.startPreview();
5: } catch (IOException e) {
6: Log.d(TAG, "Error setting camera preview: " + e.getMessage());
7: }
8: }
At this point, you have a class that you can use for previewing. CameraPreview is a SurfaceView that is created by passing a Camera object. The preview of that Camera is shown in the view.
Now you can use this class for both the CustomCameraActivity and CustomVideoActivity. CameraPreview is the same whether you take a picture or shoot a video.
Creating a Custom Camera Activity
You use the CameraPreview class when you create the activity CustomCameraActivity.java.
The layout file associated with CustomCameraActivity.java is activity_custom_camera.xml. The layout includes a FrameLayout with the id previewFrameLayout and a Button with the id takePictureButton. In CustomCameraActivity, you display the CameraPreview within previewFrameLayout.
The following steps occur in CustomCameraActivity:
1. Open the camera.
2. Create the camera preview.
3. Show the camera preview in the FrameLayout.
4. Get a list of possible sizes for the camera preview.
5. Determine the appropriate preview size and update the layout.
6. Take a picture when the user clicks the Take Picture button.
7. Save the picture.
The Camera object includes a set of parameters that you can access. Those parameters include a list of possible sizes for the preview. By using one of these preview sizes, you can be assured that the preview displays appropriately.
Displaying a Preview
The code shown in Listings 20.8–20.10 appears in this same order in the onCreate() method of CustomCameraActivity.java.
In Listing 20.8, you call Camera.open() to access the camera on the device. This method can return null if no back-facing camera is available. After you obtain a Camera object, you use the CameraPreview class that you created earlier in this hour. On line 3 of Listing 20.8, the CameraPreview object is created. In line 4, you create a FrameLayout with the findViewById() method using the id previewFrameLayout from activity_custom_camera.xml.
After you initialize the Camera, CameraPreview, and FrameLayout and the objects on lines 2 and 4, you add the CameraPreview object to the layout (see line 5). The method preview.addView() adds the CameraPreview class mPreview to the FrameLayout preview that was defined in line 4.
This ties the Camera object to the CameraPreview class and places it within a layout for the activity.
LISTING 20.8 SurfaceHolder.Callback onSurfaceCreated()
1: //open the Camera and display the Preview in the FrameLayout preview
2: mCamera = Camera.open();
3: mPreview = new CameraPreview(this, mCamera);
4: FrameLayout preview = (FrameLayout) findViewById(R.id.previewFrameLayout);
5: preview.addView(mPreview);
You can set the size of the preview by changing the width and height of the FrameLayout named preview. To get the best size for the preview for the display, you get a list of possible preview sizes from the camera and select the one that fits the screen display best.
Listing 20.9 shows how this is done. Line 2 retrieves the camera’s current parameters with a call to Camera.getParameters(). The Camera.Parameters object allows you to get and set many camera features including zoom level, white balance, and many others. For now, focus on the possible sizes that you can use for preview.
You get that list of sizes on line 3 by calling the Camera.Parameters method getSupportPreviewSizes(). A list of Camera.Size objects is returned. Camera.Size objects include a width and height value. The values in the list are returned in no particular order. On line 5 of Listing 20.9, the list is sorted. The class OrderByHeight is defined in CustomCameraActivity.java. It compares two Camera.Size objects to sort in ascending order by height. That is important because you must compare the possible preview sizes to the current display size to get the best fit for the preview display.
Lines 9–11 get the current display width and height.
Lines 12–16 iterate through the possible preview sizes and set the best fit. In this logic, the best size is the largest height and width that fits in the display. Looking at line 15, the check is whether the current size.height is less than the display height and greater than the current best size. If the current size.width and size.height are greater than the current best size and are not bigger than the whole display, then you use those values for the best size.
LISTING 20.9 Determine Preview Size
1: //Get the possible sizes for preview
2: Camera.Parameters currentParameters = mCamera.getParameters();
3: List<Camera.Size> sizes = currentParameters.getSupportedPreviewSizes();
4: //Sort size by ascending Height
5: Collections.sort(sizes, new OrderByHeight());
6: //Set bestSize to the smallest
7: Camera.Size bestSize = sizes.get(0);
8: //Get size of the display
9: Display display = getWindowManager().getDefaultDisplay();
10: int width = display.getWidth();
11: int height = display.getHeight();
12: // Make the best size the largest one whose height appears in the display
13: for (Camera.Size size: sizes){
14: System.out.println("size is " + size.width+"," +size.height);
15: if (size.height< height && size.height > bestSize.height
16: && size.width < width && size.width > bestSize.width){
17: bestSize = size;
18: }
19: }
Having determined the best size for the display, you use the width and height to programmatically set the width and height of the FrameLayout that is displaying the camera preview. You do this on lines 3 and 4 of Listing 20.10 where you instantiate a RelativeLayout.Params object using bestSize.width and bestSize.height as parameters. You can add rules to a RelativeLayout.Params object. In line 5, you make the layout CENTER_VERTICAL and on line 6, you make the layout to the LEFT_OF the picture button. That is how to get the layout shown in Figure 20.3.
LISTING 20.10 Set Preview Size
1: //Get the possible sizes for preview
2: // Set the layout parameters
3: RelativeLayout.LayoutParams layoutParams = new RelativeLayout.LayoutParams
4: (bestSize.width, bestSize.height);
5: layoutParams.addRule(RelativeLayout.CENTER_VERTICAL);
6: layoutParams.addRule(RelativeLayout.LEFT_OF, R.id.takePicture);
7: preview.setLayoutParams(layoutParams);
You’ve done a lot of work to obtain the Camera object and associate the preview of the Camera with a view in your activity. You created a CameraPreview object that extended SurfaceView and added that CameraPreview object to a FrameLayout within the activity.
The Camera and preview are available in the activity. Now you can concentrate on taking a photo.
Taking a Picture
The two parts to taking a photo are to call Camera’s takePicture() method and to create a callback for handling the picture. Taking a picture is a straightforward process. This code creates a takePictureButton and calls mCamera.takePicture() method when the button is clicked. The mPicture field is the callback function. When the picture becomes available, mPicture runs as the callback method:
Button takePictureButton = (Button) findViewById(R.id.takePicture);
takePictureButton.setOnClickListener(new OnClickListener() {
public void onClick(View v) {
mCamera.takePicture(null, null, mPicture);
}
});
Listing 20.11 shows how mPicture is defined. On line 3, you see that the picture’s data is passed as a byte array parameter. You define a file as you have previously, and on lines 16–18, you write the picture data to the file. As done previously, you initiate the media scanner by invoking an Intent on lines 21–23.
LISTING 20.11 Implementing Camera.PictureCallback()
1: mPicture= new Camera.PictureCallback() {
2: @Override
3: public void onPictureTaken(byte[] data, Camera camera) {
4: File mediaStorageDir = new File(Environment.getExternalStoragePublicDirectory(
5: Environment.DIRECTORY_PICTURES), "Hour20");
6: if (! mediaStorageDir.exists()){
7: mediaStorageDir.mkdirs();
8: }
9: String timeStamp = new SimpleDateFormat("yyyyMMdd_HHmmss").format(new Date());
10: String displayFolder = "Pictures" + File.separator +"Hour20"
11: + File.separator +"IMG_"+ timeStamp + ".jpg";
12: File photoFile = new File(mediaStorageDir.getPath()
13: + File.separator +"IMG_"+ timeStamp + ".jpg");
14: Uri photoFileUri=Uri.fromFile(photoFile);
15: try {
16: FileOutputStream fos = new FileOutputStream(photoFile);
17: fos.write(data);
18: fos.close();
19: Toast.makeText(CustomCameraActivity.this, "Image saved to:
" +
20: displayFolder, Toast.LENGTH_LONG).show();
21: Intent mediaScanIntent = new Intent(Intent.ACTION_MEDIA_SCANNER_SCAN_FILE);
22: mediaScanIntent.setData(photoFileUri);
23: CustomCameraActivity.this.sendBroadcast(mediaScanIntent);
24: mCamera.startPreview();
25: } catch (FileNotFoundException e) {
26: Toast.makeText(CustomCameraActivity.this, "Something went wrong",
27: Toast.LENGTH_LONG).show();
28: } catch (IOException e) {
29: Toast.makeText(CustomCameraActivity.this, "Something went wrong",
30:Toast.LENGTH_LONG).show();
31: }
32: }
33: };
You have now created a simple, but useful custom camera application. You’ve taken into consideration the size and aspect ratio of the preview and shown that you can take a picture. This introduces the necessary concepts for building a camera app.
To make this app more robust, you can check for specific camera features, availability, and the number of cameras. If only a front-facing camera were available, you could use it. In that case, the call to Camera.open() would specify the front-facing camera. By default, Camera.open() does not include a front-facing camera.
Creating a Custom Video Activity
MainActivity.java includes a Button to initiate an Activity called CustomVideoActivity.java, which shows a camera and a Start Recording button. When the user chooses the Start Recording button, video recording is initiated and the button text changes to Stop Recording.
In many ways, CustomVideoActivity.java is similar to CustomCameraActivty.java. The differences are with recording video rather than taking a picture.
When recording video, a MediaRecorder object is created. You must control MediaRecorder in a specific way to record videos.
You use the MediaRecorder object with the Camera object. The Camera object is locked and unlocked for use with the MediaRecorder. The following code shows the MediaRecorder instantiated, the Camera associated with the MediaRecorder, and the key MediaRecorder settings initialized:
mMediaRecorder = new MediaRecorder();
mCamera.unlock();
mMediaRecorder.setCamera(mCamera);
mMediaRecorder.setAudioSource(MediaRecorder.AudioSource.DEFAULT);
mMediaRecorder.setVideoSource(MediaRecorder.VideoSource.CAMERA);
mMediaRecorder.setProfile(CamcorderProfile.get(CamcorderProfile.QUALITY_HIGH));
You create a file for storing the video as you did previously. You set that file as the output file for the MediaRecorder using setOutputFile():
mMediaRecorder.setOutputFile(mVideoFile.toString());
To show the preview of what is being recorded, you use the MediaRecorder’s setPreviewDisplay() method:
mMediaRecorder.setPreviewDisplay(mPreview.getHolder().getSurface());
Much of the remainder of the CustomVideoActivity code handles the state of starting and stopping a video.
Summary
This hour showed you how to take a photo and record a video using intents. These intents are easy to use and take full advantage of the camera’s features. You created an activity to control the camera and take a picture. A key component of taking a picture is creating a preview for the display. You did that by creating a CameraPreview class that extended a SurfaceView. You used the CameraPreview class on both the CustomCameraActivity and the CustomVideoActivity.
Q&A
Q. In what cases does controlling the camera directly and not using an intent for capturing media make sense?
A. Some great apps control the camera directly. There is no rule of thumb, but if taking a picture or shooting a video is not the core functionality of your app using an intent makes.
Q. What other features can be added in a camera app?
A. Camera updates have been included in many recent Android updates. Ice Cream Sandwich added continuous focus, image zoom, and the ability to capture still images during video play. Faces can be detected and tracked in preview. For Jelly Bean, support for detecting whether the shutter sound can be disabled, providing an alternate shutter sound, and for High Dynamic Range (HDR) images was added.
Workshop
Quiz
1. After an image has been scanned by the media scanner, where can it be seen?
2. Why is the EXTERNAL_WRITE_PERMISSION needed in custom camera apps?
Answers
1. The image can be seen in the Gallery app. Technically, the image is being made available via the MediaStore content provider.
2. When you create photos and videos in a custom camera app, you save the media content to the file system. To do that, you need permission to write to the file system. EXTERNAL_WRITE_PERMISSION means you can write to the external file system.
Exercise
Create a new Android project with the goal of creating a standalone camera app. Use the CameraPreview and CustomCameraActivity classes from this hour as a starting point. At a minimum, launch the CustomCameraActivity as the main activity for the app. Look at the documentation for camera parameters and try setting various features.