
Automated E2E testing is an invaluable asset if the underlying framework supports it. As the size of an app grows, automated E2E testing can save a lot of manual effort. Without automation it's just a never-ending battle to make sure the app is functional. However, remember that in an E2E setup, not everything is automatable; it may require a lot of effort to automate. With due diligence, we can offload a good amount of manual effort but not everything.
The process of E2E testing a web-based application is about running the application in a real browser and asserting the behavior of the application based on the user interface state. This is how an actual user does testing.
Browser automation holds the key here and modern browsers have become smarter and more capable in terms of supporting automation. Selenium tools for browser automation are the most popular option out there. Selenium has the WebDriver (http://www.w3.org/TR/2013/WD-webdriver-20130117/) API that allows us to control the browser through automation API that modern browsers natively support.
The reason behind bringing up Selenium WebDriver is due to the fact that the Angular E2E testing framework/runner Protractor also uses WebDriverJS, which is a JavaScript binding of WebDriver on Node. These language bindings (like the preceding JavaScript binding) allow us to use the automation API in the language of our choice.
Let's discuss Protractor before we start writing some integration tests for our app.
Protractor is the de facto test runner for E2E testing in Angular. Protractor uses Selenium WebDriver to control a browser and simulate user actions.
A typical Protractor setup has the following components:
- A test runner (Protractor)
- A Selenium Server
- A browser
We write our test in Jasmine and use some objects exposed by Protractors (which is a wrapper over WebDriverJS) to control the browser.
When these tests run, Protractor sends commands to the Selenium server. This interaction happens mostly over HTTP.
The Selenium server, in turn, communicates with the browser using the WebDriver Wire Protocol and internally the browser interprets the action commands using the browser driver (such as ChromeDriver in the case of Chrome).
It is not that important to understand the technicalities of this communication, but we should be aware of the E2E testing setup. Check the article from Protractor documentation at http://angular.github.io/protractor/#/infrastructure to learn more about this flow.
Another important thing to realize when using Protractor is that the overall interaction with the browser or the browser control flow is asynchronous in nature and promise-based. Any HTML element action, be it sendKeys, getText, click, submit, or any other, does not execute at the time of invocation; instead the action is queued up in a control flow queue. For this precise reason, the return value of every action statement is a promise that gets resolved when the action completes.
To handle this asynchronicity in Jasmine tests, Protractor patches Jasmine and therefore assertions like these work:
expect(element(by.id("start")).getText()).toBe("Select Workout");They work despite the getText function returning a promise and not the element content.
With this basic understanding of how Protractor works, let's set up Protractor for E2E tests.
To install Protractor globally, run this command in the console:
npm install -g protractor
This installs two command-line tools: Protractor and webdriver-manager. Run the following command to make sure Protractor is set up correctly:
protractor --version
Webdriver-manager is a helper tool to easily get an instance of a running Selenium server. Before we start the Selenium server, we need to update the driver binaries with the following call:
webdriver-manager update
Finally, run this command to start the Selenium server:
webdriver-manager start
Protractor tests send requests to this server to control a local browser.
Protractor also needs to be configured like Karma and has a configuration file. Copy the protractor.config.js file from the tests folder under chapter7/checkpoint2/ to our local tests folder. The Protractor configuration file we just added contains three settings that we want to make sure are configured according to our local app setup, and these include the following:
|
Key |
Description |
|---|---|
|
|
Location of the specification files (the E2E test files). The current assigned value |
|
|
The base URL where the app is running. Change the server name and port to match your local setup. Navigate to the URL to make sure the app is running. |
|
|
The base URL where the Selenium server is running. Unless you have reconfigured the selenium server settings, the default value should work. |
Note
The configuration file documentation on the Protractor website (https://github.com/angular/protractor/blob/master/docs/referenceConf.js) contains details on the other supported configurations.
That is enough to start testing with Protractor. Let's begin writing and executing some tests.
Let's start in a simple manner and test our app start page (#/start). This page has some static content, a workout listing section with search capabilities, and the ability to start a workout by clicking any workout tile.
Add a new file workout-runner.spec.js to the e2e folder under tests with the following code:
 describe("Workout Runner", function () {
    describe("Start Page", function () {
        beforeEach(function () {
            browser.get("");
        });
        it("should load the start page.", function () {
            expect(browser.getTitle()).toBe("Personal Trainer");
            expect(element(by.id("start")).getText())
       .toBe("Select Workout");
        });
    });
});
Before we execute our first test, make sure the Selenium server is running (webdriver-manager start) and the app is running.
Now from the command line run the following command and see the browser dance to our tunes:
protractor tests/protractor.conf.js
Protractor will open the browser; navigate to the start page; wait for the page, the scripts, and the framework to load; and then perform the test. It finally logs the results of the test in the console. That is pretty awesome!
Let's walk through this simple test.
The first interesting piece is inside the beforeEach block. The browser object is a global object exposed by Protractor and is used to control the browser-level actions. Underneath, it is just a wrapper around WebDriver. The browser.get("") function navigates the browser to start the app page every time before the start of the test.
The actual test verifies whether the title of the page is correct. It also checks whether some random content is present on the page.
The preceding test employs two new globals: element and by, that are made available by Protractor:
element: This function returns anElementFinderobject. The primary job ofElementFinderis to interact with the selected element. We will be using theelementfunction to selectElementFinderextensively in our tests.Note
Refer to the documentation for
ElementFinder(http://angular.github.io/protractor/#/api?view=ElementFinder) andwebdriver.WebElement(http://angular.github.io/protractor/#/api?view=webdriver.WebElement) to know more about element manipulation API support. Functions such asgetText()are actually defined on WebElement, but are always accessed usingElementFinder. As the documentation forElementFindersuggests,ElementFindercan be treated asWebElementfor most purposes.by: This object is there to locate elements. It has functions that create locators. In the preceding test, a locator is created to search for elements withid=start. There are a number of locators that can be used to search for a specific element. These include by class, by ID, by model (ng-model), by binding, and many more. Refer to the Protractor documentation on locators at http://angular.github.io/protractor/#/locators to learn about the supported locators.
This simple test highlights another salient feature of Protractor. It automatically detects when the Angular app is loaded and when data is available for testing. There are no ugly hacks to delay testing (using timeouts) that may otherwise be required in standard E2E testing scenarios.
Remember, this is a SPA; full-page browser refresh does not happen, so it is not that simple to determine when the page is loaded and when data that is rendered for AJAX calls is available. Protractor makes it all possible.
Note
Protractor may still timeout while trying to assess whether the page is available for testing. If you are hitting timeout errors with Protractor, this article in the Protractor documentation can be really helpful (http://angular.github.io/protractor/#/timeouts) in debugging such issues.
Let's do something more interesting. Why don't we test whether the search box in the start page is working fine?
Testing the search functionality is going to be a tricky affair. Since this is E2E testing, we need some data to test searches. Therein lies the challenge: not only do we need some data to test searches, but we need a fixed data set. This implies that the backend should always return a constant data set. From an E2E test perspective, the workouts returned by a MongoLab instance should always be the same.
What options do we have to handle E2E tests that involve some initial data setup?
Setting up backend data for E2E testing is a challenge, irrespective of the E2E framework we employ for testing. The ultimate aim is to assert the behavior of an application against some data and unless the data is fixed, we cannot verify behavior that involves getting or setting data.
One approach to set up data for E2E tests is to create a test data store specifically for E2E tests with some seed data. Once the E2E tests are over, the data store can be reset to its original state for future testing. For Personal Trainer, we can create a new database in MongoLab dedicated exclusively to E2E testing.
This may seem a lot of effort, but it is necessary. Who said E2E testing is easy! In fact, this challenge is there even if we do manual testing. For a real app, we always have to set up data stores/databases for every environment—be it dev, test, or production.
Having said that, we plan to do something different! We will again mock the backend!
Before your hands go up in protest, let me remind you that this too is a viable option. If setting up a new data store is expensive and time-consuming and/or the backend API is well tested, there is at least an option to mock data. Another reason to use a mock backend is to learn about the mocking capabilities of Angular in the context of E2E testing.
The service that is again going to help in this case is $httpBackend, but this time the service comes from the ngMockE2E module, instead of ngMock.
Setting up the HTTP mock backend is an intrusive process and requires some changes to the existing application code. To plug in a mock backend we need to perform the following steps:
- Create a new module with dependency on the main app module (named
app) and thengMockeE2Emodule. - Add the mock HTTP implementation in this module using the
$httpBackend.when*functions. These methods are similar to the ones we used in unit tests. - Rewire the
ng-appdeclaration inindex.htmlto use the newngMockeE2Emodule instead of the existingappmodule. The app bootstrapping process will usengMockeE2Enow, and the mock backend setup in thengMockeE2Emodule will override the standard HTTP requests that the app makes to get data.
Note
The overall process explained in the preceding steps is intrusive, because it rewires the app to use the mock backend with mock data. To revert to the original backend, we need to reconfigure the app.
This may seem to be a deal breaker, but most modern build systems (such as Grunt) allow us to do dynamic file transformations based on build deployment configurations.
Let's rewire our app to use mock backend. Copy appe2e.js from chapter7/checkpoint2 into the same location where app.js resides. This file declares the new module that we use (appe2e). It also contains a mock data setup for our backend, which is nothing but a series of $httpBackend.when* calls to set up the backend endpoint to respond to and the data to return.
$http in Angular is used for all types of HTTP communication. This includes loading view partials too. We do not want to mock such requests to our backend. The good thing about the when API is that it does allow us to pass through any request to the real backend if desired, and the following command does just that:
$httpBackend.whenGET(/^partials///).passThrough();
Any request made to the /partials path is served from the real backend; in this case, this is the path to our HTML partials views. This is possible due to the fact that the URL to the when function allows regex pattern matching.
Even the index.html file needs to change as we need to use the new module now. Update the existing ng-app declaration in index.html to:
<body ng-app="appe2e" ng-controller="RootController">
Add the following two script references in the script section:
<script src =... angular-animate.js"></script>
<script src = "http://ajax.googleapis.com/ajax/libs/angularjs/1.3.3/angular-mocks.js"></script>
//Other scripts
<script src="js/app.js"></script>
<script src="js/appe2e.js"></script>
We add references to appe2e.js and angular-mocks.js that contain the ngMockE2E module definition.
Load the app again! If the app start page (/start) loads correctly and shows two workouts, then the mock backend is working fine. Check out the following screenshot:
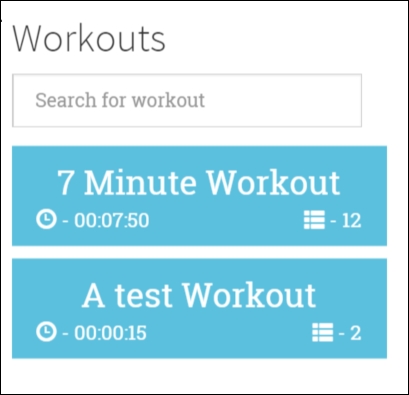
The app is now working on mock data and is ready to be tested.
Let's get back to testing workout search features on the start page. Our mock backend returns two fixed workouts and we can assert search behaviors against these. Add this test after the existing test in workout-runner.spec.js:
it("should search workout with specific name.", function () {
var filteredWorkouts = element.all(by.repeater("workout in workouts"));
expect(filteredWorkouts.count()).toEqual(2);

var searchInput = element(by.model("workoutSearch"));
   searchInput.sendKeys("test");

   expect(filteredWorkouts.count()).toEqual(1);
     expect(filteredWorkouts.first().element(by.css(".title")).getText()).toBe("A test Workout");
});
The test uses ElementFinder and Locator API to look for elements on the page. Check the first line; there is a locator for ng-repeat: by.repeater! The by.repeat locator together with the element.all function does a multi-element match and the next line asserts the element count.
The test then gets hold of the search input, but uses another Angular-specific locator by.model that looks for the ng-model binding. The sendKeys function is used to simulate data entry in the search input.
The last two expect operations check for the count of elements in ng-repeat again, and they check whether the correct workout is filtered based on the span text. The last expect statement also highlights how we can chain element filtering and get hold of child elements in HTML.
Run the test again (protractor tests/protractor.conf.js) and once again observe the magic of browser automation as two tests run one after another.
Can we automate E2E testing for Workout Runner? Well, we can try.
One of the major challenges with testing Workout Runner is that everything is time-dependent. With unit testing, at least we were able to use the mock $interval service—but not anymore. Testing exercise transitions and workout completion is definitely difficult.
However, before we tackle this problem or try to find an acceptable workout, let's digress and learn about an important technique to manage E2E testing: page objects!
The concept of page objects is simple. Encapsulate the representation of page elements into an object so that we do not have to litter our E2E test code with ElementFinder and locators. If any page element moves, we just need to fix the page object.
Here is how we can represent our Workout Runner page:
var WorkoutRunnerPage = function () {
this.description = element(by.binding("currentExercise.details.description"));
this.steps = element(by.binding("currentExercise.details.procedure"));
this.videos = element.all(by.repeater("video in currentExercise.details.related.videos"));
this.pauseResume = element(by.id("pause-overlay"));
   this.exerciseHeading = element(by.binding("currentExercise.details.title"));
this.workoutTimeRemaining = element(by.binding("workoutTimeRemaining"))
this.exerciseTimeRemaining = element(by.binding("currentExercise.duration-currentExerciseDuration"));
};
This page object now encapsulates all the elements that we want to test. By organizing the element selection code in one place, we increase the readability and hence maintainability of E2E tests.
Add the WorkoutRunnerPage function inside the describe block of Workout Runner at the top and we can now add a test for Workout Runner.
Add the following describe block as a nested child of describe( "Workout Runner"):
describe("Workout Runner page", function () {
     beforeEach(function () {
         browser.get("#/workout/testworkout");
     });

     it("should load workout data", function () {
         var page = new WorkoutRunnerPage();
         expect(page.description.getText())
    .toBe("The basic crunch is a abdominal exercise in a
     strength-training program.");
         expect(page.exerciseHeading.getText())
      .toBe("Abdominal Crunches");
         expect(page.videos.count()).toBe(2);
     });
 });
The workout that we load for this test is testworkout. This workout has two exercises with a 5-second duration and the rest period is 5 seconds too. The overall duration is 15 seconds! This workout was set in appe2e.js while setting up the mock backend earlier in the chapter.
The test verifies that the workout is loaded and the correct data is shown. We make full use of the page object that we defined earlier. Run the test and verify whether it passes.
Let's get back to the challenge of testing code based on $interval or $timeout. Add the following test to the current test suite:
it("should transition exercise when time lapses.", function () {
     var page = new WorkoutRunnerPage();
     browser.sleep(5000);
     page.pauseResume.click();
     expect(page.videos.count()).toBe(0);
     expect(page.description.getText()).toBe("Relax a bit!");
     expect(page.exerciseHeading.getText()).toBe("Relax!");
 });
This test checks whether the exercise transition happened. It does so by adding a browser.sleep function for 5 seconds, and then verifying from the UI state whether exercise-related content of Rest is visible. The problem with this test is that it is not very accurate. It can confirm the transition is happening but cannot confirm it happened at the right time.
A plausible explanation for this behavior is in the way Protractor works. Before Protractor can start a test, it first waits for the page to load. If the test involves any action (such as getText), it again waits till Angular synchronizes the page. During page synchronization, Angular waits for any pending HTTP requests or any timeout-based operations to complete before it starts the test. As a result, when the browser.sleep function is invoked and when the browser actually goes to sleep cannot be predicted with great accuracy.
As described earlier, Angular waits for any operation based on $timeout to lapse before starting the test. If you do want Angular to wait for the timeout, use the $interval service: $interval(fn, delay,1).
The bottom line is that the Workout Runner app workflow is indeed difficult to test. Compared to Workflow Runner, other things are far easier to test as we saw with the start page testing.
It's time now to wrap up the chapter and summarize our learning.