
Lesson Files | GarageBand 3 Lessons > Lesson_02 > 2-1 Alaska Sunrise |
Time | This lesson takes approximately 1 hour to complete. |
Goals | Understand tracks |
Work with the Track Info pane | |
Use the time display as a reference | |
Add and extend a loop region in the Timeline | |
Use the onscreen keyboard | |
Add a Software Instrument track | |
Record a basic Software Instrument part | |
Create a cycle region | |
Delete a region from the Timeline | |
Change a track’s icon and instrument | |
Save a project |
In this lesson, you’ll learn how to work with tracks. Sure, that doesn’t sound like much fun—until you get a better perspective on the power of tracks. Have you ever heard of a 4-track recorder? In its time, the 4-track revolutionized the music industry as much as the mouse revolutionized computers. The 4-track recorder made it possible to record four different instrument tracks one at a time, and play them back all mixed together. Eventually, 4-track recorders were replaced by 8-track recorders, and finally by digital recording.
What does that mean to you? For one thing, you don’t have to limit your songs to four tracks. In fact, you can have up to 255 Real Instrument tracks or 64 Software Instrument tracks, depending on the speed of your computer. Chances are, most of your songs can be arranged in 10 or fewer tracks, but it’s nice to know that if you need more tracks, they’re there for you.
This lesson focuses on the different types of tracks. You’ll learn to add, delete, and change tracks, as well as evaluate tracks to determine how well they fit with the song.
Think of the tracks in your Timeline as the different musicians in your band. Each musician plays a different instrument and is represented by a separate track. As the leader of your band, you can decide which instruments are used in a song and how you want to record them. If you don’t like an instrument part, you can always fire the musician—or in this case, just delete the track. If you really like the way a part sounds, you can clone the musician, or just double that track in the Timeline.
The best way to understand tracks is to work with them, so let’s get started.
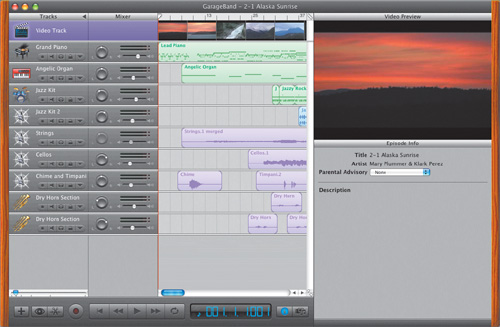
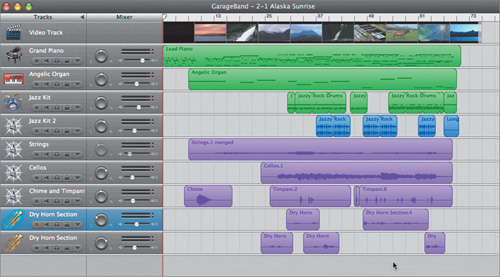
Open project 2-1 Alaska Sunrise from the Lesson_02 folder. This is the same project you were working on in the previous lesson. You may continue working with 1-1 Alaska Sunrise if you prefer.
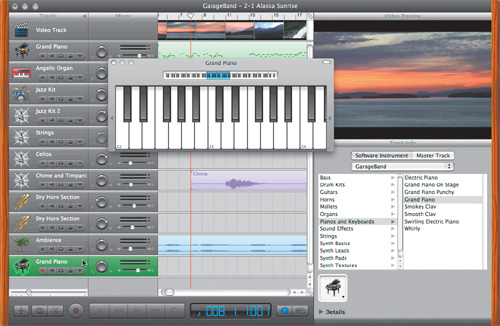
At the end of Lesson 1 you dragged the Movies for GarageBand folder to the Media Browser, then added the Alaska movie to the Video Track in your project. Now that you know how to add a video file and play it in the Video Preview pane, you’re probably wondering how to close it when you don’t need it. The Video Preview pane is directly above the Track Info pane (labeled Episode Info when a video track is selected). Anytime the Track Info pane is showing, you’ll also see the video preview of your project.
The Track Info pane shows information for any selected track. There are three primary ways you can show or hide the Track Info pane:
Before we hide the Track Info pane, let’s select a music track to see its details.
Select the Video Track, if it is not already selected. If the Track Info pane is not showing on the right side of the window, press Cmd-I.
Select the Grand Piano track to show the track info for that track.
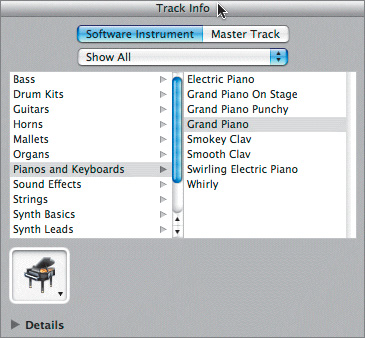
The Track Info pane shows that you have selected a track that is a Software Instrument track, Pianos and Keyboards instrument category, Grand Piano instrument.
The lower-left corner of the Track Info pane also shows the track’s icon, which in this case is a Grand Piano.
Select one of the Dry Horn Section tracks.
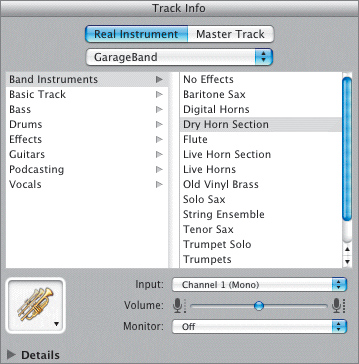
The Track Info pane now shows that you’ve selected a Real Instrument track, Band Instruments category, Dry Horn Section as the instrument. Even the track’s icon illustrates that the track includes horns.
Note
The Real Instrument Track Info pane also includes recording information for the track, including Input, Volume, and Monitor. You’ll work more with Real Instrument recording in Lesson 6.
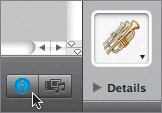
Press Cmd-I, or click the Track Info button, to hide the Track Info pane.
Remember the Forest sound effect loop you auditioned in the last lesson? Well, it’s time to add it to the project 2-1 Alaska Sunrise. First, you’ll need to find it again in the Loop Browser and make room for it at the beginning of the song.
Click the Loop Browser button, or press Cmd-L, to open the Loop Browser.
If the Loop Browser displays a view other than Podcast Sounds, click the Podcast Sounds View button to list the Podcast Sounds.

Select Sound Effects > Ambience > Forest to hear the Forest sound effect loop.
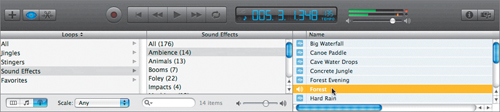
In the last lesson, you auditioned (listened to) the Forest sound effect with the project. Now that we are ready to add the loop to the project, let’s audition it one more time to be sure.
Press Return or Z to move the playhead to the beginning of the Timeline.
Press the spacebar to begin playback of the project.
Click the Forest sound effect to play it along with the project.
The birds seem a bit loud, but you can always turn down the sound effect once you add it to the Timeline. You can also use the Preview Volume slider to turn down the volume of the loops as you listen to them in the Loop Browser.
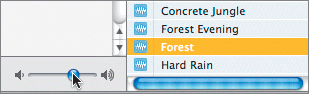
Drag the Preview Volume slider toward the left to lower the preview volume of the Forest sound effect.
Press the spacebar to pause playback when the song ends.
The sound effect is cheerful, and it definitely adds a natural and relaxing feel to this New Age instrumental song. Trouble is, the music starts at the very beginning of the project, and it would be better if the project started with the forest sounds to set the mood, then had the music join in. No problem, you’ll just move the existing song over a measure or two.
Normally, you might move one or two regions at a time. In this case, to move them all, you’ll select all the regions at once and move them toward the right. Keep in mind, the video clip will not be moved, and it always starts at the beginning of the project, regardless of where the first audio region starts in the Timeline.
Press Cmd-L, or click the Loop Browser button, to hide the Loop Browser.
You won’t lose the selection when you close the Loop Browser. Instead, the Loop Browser remembers the last selection as long as you don’t close the project.
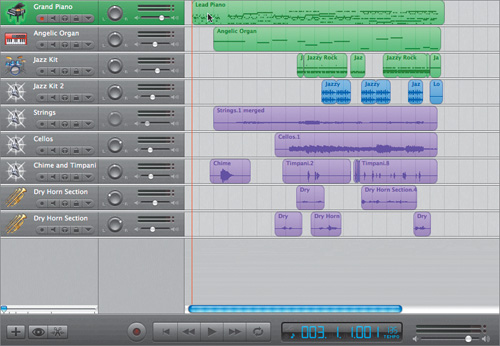
Press Ctrl-left arrow several times to zoom out of the Timeline until you can see the beginning and end of the project in the Timeline.
Choose Edit > Select All, or press Cmd-A, to select all of the regions in the project.
The selected regions become darker in color in the Timeline.
Move the playhead to the beginning of the Timeline (001.1.1.001 in the time display).
Press the right arrow key two times to move the playhead two measures to the right (003.1.1.001).
This is the new starting position for the song.
Click any of the selected regions and drag toward the right until the Lead Piano region begins at the playhead position.
Click any empty gray space in the Timeline to deselect all of the regions.
Now that you’ve selected and moved everything over so the song starts at the beginning of the 3rd measure, it’s time to add the sound effect to the project.
Since you’re working with prerecorded Apple Loops, you don’t have to add a track to the Timeline first. A track will be created automatically when you add the loop to the Timeline.
The easiest way to add a prerecorded loop to the Timeline is to drag it there.
Press Cmd-L to reopen the Loop Browser.
The Forest sound effect should still be showing in the Loop Browser. If for some reason it’s not showing, select Sound Effects, Ambience, Forest before moving on to the next step.
You’ll add the loop to the empty gray space below the lowest track in the Timeline.
Drag down the vertical blue scroller until you can see below the lowest Timeline track.
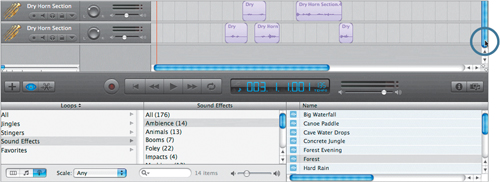
Drag the Forest loop from the results list in the Loop Browser to the Timeline and release it at the beginning of the Timeline below the bottom track.
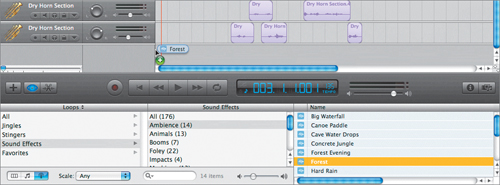
The green circle with the plus sign in it shows that you’re adding a loop to the Timeline.
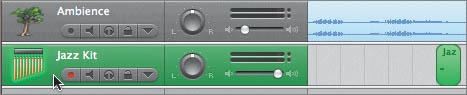
A new track appears at the bottom of the Timeline with the Forest region starting at the beginning of the track. Notice that the track color is blue, indicating that you added a Real Instrument loop, and therefore created a Real Instrument track.
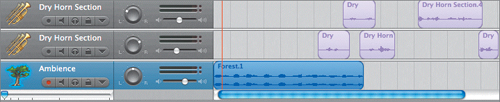
The new track is named after the loop’s category, Ambience, and the loop maintains its original name, Forest.1.
As you can see, adding a prerecorded loop to the Timeline is as easy as select, drag, and release.
Note
The .1 after the region’s name in the Timeline indicates that this is the first instance of the Forest loop in the project. If you add a second Forest loop, or copy and paste the current loop to a different position in the Timeline, the number will change to reflect which numbered copy it is within the project.
Close the Loop Browser.
Press the spacebar to listen to a few measures of the Ambience track with the rest of the song. Press the spacebar again to stop playback.
It works, but as expected, the volume level of the Ambience track is way too high for this project. It sounds more like musicians trying to perform in a bird sanctuary than a subtle touch of nature added to an existing song.
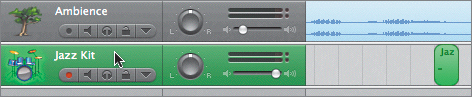
Fortunately, each track includes a mixer with a Volume slider, Pan wheel, and level meters. You can click the disclosure triangle above the Timeline track headers to show or hide the mixer.
Drag the Ambience track’s Volume slider toward the left to around –32.

A handy yellow tooltip appears to show you the Volume level as you adjust the slider. The lowest Volume level in GarageBand is –144.0 dB (silence); the highest level is +6. You’ll work more with volume and panning controls in Lesson 7 later in this book.
Play the beginning of the song again to hear it with the lowered ambient sound. While the song is playing, press Cmd-I to open the Track Info pane to see the video while you preview the first part of the song.
So, what did you think of the Ambience track? I think it really complements the song’s light and down-to-nature feel, especially when you see it with the video clip. Music is extremely subjective, and everyone has different tastes in what they like. If the forest ambience doesn’t work for you, feel free to delete that track after you finish this lesson.
Now all you need to do is extend the Forest loop to make it last until the end of the song. The whole process is incredibly easy. Loop regions are designed to repeat (loop) over and over seamlessly. To extend a loop region, all you have to do is click the upper-right corner and pull.
First, let’s close the Track Info pane to maximize your workspace. Then, you’ll move the playhead so you can use it as a guide for extending the loop region.
Close the Track Info pane.
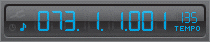
Drag the playhead through the Beat Ruler to the beginning of the 73rd measure. (This is also the end of the Lead Piano region.)
Check the time display to make sure your playhead is in the right location.
Move your pointer over the upper-right corner of the Forest loop region.
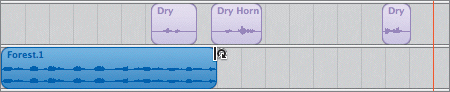
The pointer becomes a loop pointer, a vertical line next to a curved arrow, which indicates the pointer is in the correct position to drag the loop to repeat.
Drag the upper-right corner of the Forest loop region and extend it to the playhead position (the beginning of the 73rd measure).
You don’t have to extend a loop for the full length of the original region. If you make the looped section shorter than the original, you will only hear the notes included in the new loop segment.
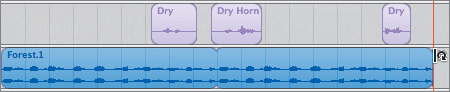
Notice that as the loop repeats, you can see notches that show the beginning and end of the original loop within the new region.
The project is really coming together. However, I’m beginning to have second thoughts about the intensity of the chime sound at the beginning of the song. The other instrumentation is very delicate—even the birds in the Forest ambience are light—yet the chime seems overly dramatic. The whole piece is supposed to start delicately to go with the whole sunrise and nature theme. I still like the idea of a chime here, just not this particular recording. Looks like we’ll have to record a new wind chime, and delete the old one.
You can record Software Instruments in GarageBand using a USB music keyboard or a MIDI synthesizer-type keyboard. You can also use Musical Typing, which allows you to use the keys on your computer keyboard to play music. You’ll learn more about recording with external devices and Musical Typing in the next lesson.
For this exercise, you’ll work with the handy built-in onscreen keyboard that comes with GarageBand.
There are two ways to open the built-in onscreen keyboard:
Let’s use the menu method so you’ll know where to find the keyboard in the future.
Choose Window > Keyboard.
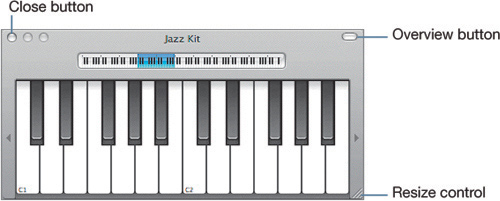
A small window opens that looks like a music keyboard.
You can move the onscreen keyboard by dragging the gray space in the upper half of the window.
Drag the onscreen keyboard to a different location on the Timeline. Placing it under the green Software Instrument tracks offers easy access to the tracks and the keyboard.
For some of you, this may be your first fully functional MIDI keyboard controller. What is a MIDI keyboard controller? MIDI is an acronym that stands for Musical Instrument Digital Interface. MIDI is a standard protocol that is used by computers to communicate with electronic musical instruments and vice versa.
The instruments you play using a MIDI keyboard are either synthesized or professional samples. Each note you press on the keyboard triggers a synthesized sound, or a sampled digital recording.
What’s the difference between sampled and synthesized sounds? Sampled instruments are made from actual recordings of real musical instruments, while synthesized instruments are generated mathematically by the computer. Just like some processed foods contain pieces (samples) of actual fruit along with other ingredients, others use artificial (synthesized) fruit flavors created in a lab and contain no actual fruit. Both examples may taste like fruit, but only one actually came from fruit somewhere along the way.
Now that you have your onscreen keyboard open, let’s test it out. The onscreen keyboard works only with Software Instruments, so you will need to select a Software Instrument track.
Select the Grand Piano track.
The instrument name changes at the top of the onscreen keyboard to match the selected Software Instrument track.
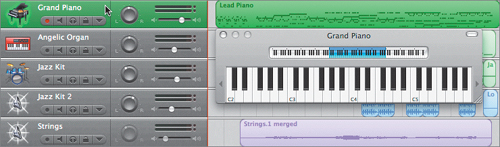
Click any of the keys with your mouse to trigger the sampled Grand Piano notes.
The keys turn blue as you select them.
There are only 12 different musical notes (white and black keys on the keyboard) before the same note repeats either higher or lower. If you move 12 notes to the right, you will be moving an octave higher. If you move 12 notes to the left, you will be moving an octave lower.
Click the small arrow at the left of the keyboard to move an octave lower.

Click several keys on the keyboard to hear the change in octave.
Drag your pointer across several keys to play them one after another.
Select the Angelic Organ track to switch to a different Software Instrument.
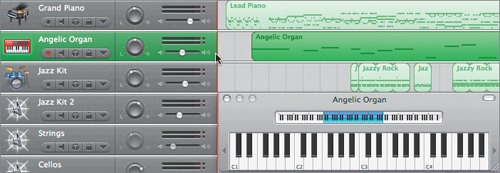
Click several notes to trigger the Angelic Organ synthesized notes.
Click and hold one note.
The note will keep playing (sustain) until you release the mouse.
Release the mouse to stop the note.
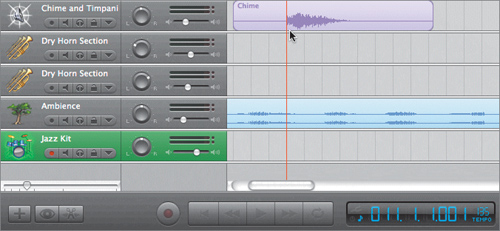
Select the Chime and Timpani track.
The onscreen keyboard becomes disabled because the Chime and Timpani track is a Real Instrument track instead of a Software Instrument track.
Remember, the onscreen keyboard works only for Software Instrument tracks. Real Instrument tracks (blue and purple) are recorded instrument tracks.
Select the Jazz Kit track to trigger the drum samples.
Play several notes using the drum samples.
Each white or black key represents a different sampled drum or percussion instrument. The drum samples are packaged with additional percussion instruments that usually accompany a drum kit.
MIDI drum and percussion samples are assigned to the same notes, so the cymbals, bass drum, kick, snare, whistle, and even cowbell sounds are always the same key on any MIDI keyboard.
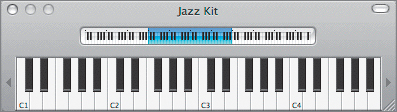
You’ve had a chance to test out the onscreen keyboard’s basic click-and-play functionality. However, it also comes with other, less obvious but very cool features. Did you know that you can also change the size of the keys, quickly change the range of notes that the keys play, and control the velocity (loudness) of the note events? Really. All that in a little keyboard window.
Drag the lower-right corner of the onscreen keyboard (resize control) downward to increase the size of the keys. You can choose either the larger (middle) key size, or the full (largest) size.
Original key size
Larger key size
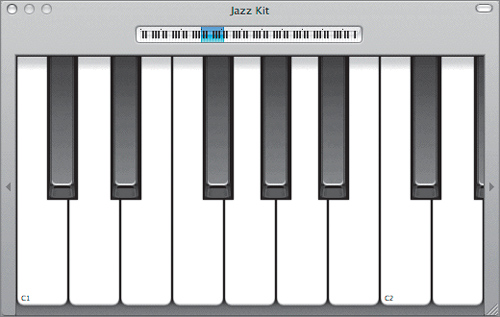
Full key size
By default, the onscreen keyboard displays four octaves of keys at the original (smallest) key size. You can resize the keyboard to display up to 10 and a half octaves.
Drag the resize control toward the right to extend the length of the keyboard.
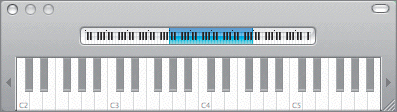
Click the Overview button to show the overview (if it is not already showing).
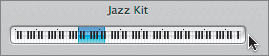
The overview looks like a miniature keyboard, illustrating a global view of all the keys from the lowest to the highest notes. The blue region illustrates the range of keys currently selected on your keyboard. You can drag the blue region toward the right or left to quickly change the range of notes the keys play.
Drag the blue region of the overview toward the right or left to change the range of notes on the keyboard.
Drag the blue region of the overview to the middle to select the middle range.
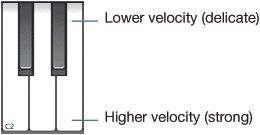
OK, so you know how to resize the keys and change the range of notes. There is something else to know about the keyboard: The keys are sensitive to the touch so that you can modify the velocity (loudness) of a MIDI note event as it is played. In the real world, keyboard sensitivity is gauged by how hard you depress a key as you play it. With the GarageBand onscreen keyboard, you play the keys by clicking the mouse, and the computer can’t tell how hard you click. Instead, the velocity is determined by where you click on the note.
So, let’s experiment with the velocity of the notes as you click the keys.
Click one of the onscreen keyboard’s keys on the bottom (highest velocity) portion of the key.
A percussion instrument plays in response to selecting the key.
Click the same key on the top (lowest velocity).
The percussion instrument plays at a much lower volume.
If you start at the top and continue clicking toward the bottom of the key, you can clearly hear the difference in velocity. The changes are most prominent toward the upper half of each key. The larger keys’ size makes it easier to select the desired note and gives you a greater range of velocity as you play (click) the notes with the mouse.
Now that you’ve adjusted the keyboard, take a moment to familiarize yourself with the various percussion samples. Click each of the onscreen keyboard keys to hear the different drum and percussion sounds.
You can change octaves by either clicking the right and left arrows on either side of the onscreen keyboard, or by using the keyboard overview. When the octaves get too high or too low, you will no longer hear percussion samples. That’s because MIDI samples are only assigned to keys within a certain range of the keyboard.
Your overall goal is to eventually record a new wind chime sound, so while you’re experimenting try to locate the key that triggers the wind chime sound. (Hint: It’s somewhere in the upper middle range of keys.)
To record the new wind chime part, you’ll need to create a new Software Instrument track in the Timeline.
There are three ways to add a new Software Instrument track:

For this exercise, you’ll use the Add Track button.
Click the Add Track button. (It looks like a plus sign [+].)
The New Track dialog appears.

The New Track dialog lets you choose either a Real Instrument track or a Software Instrument track. The default setting is a Grand Piano Software Instrument track.
Select Software Instrument, if it is not already selected, and click Create.
A new Grand Piano Software Instrument track appears at the bottom of the Timeline, and the Track Info pane opens so you can assign a new instrument to the track.
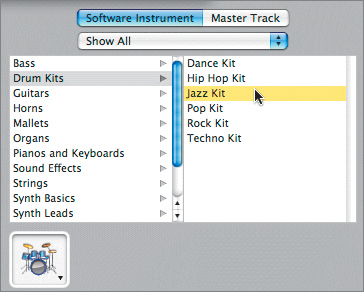
Since your goal is to record a wind chime sound, the drum kits would be a good place to start.
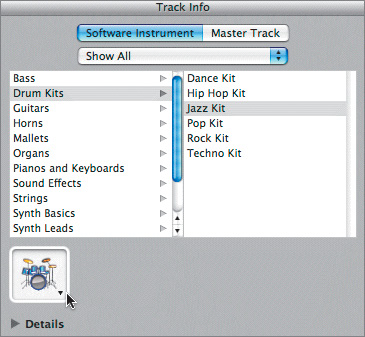
In the Track Info pane, select Drum Kits from the list of Software Instruments.
A list of different drum kits appears in the column on the right.
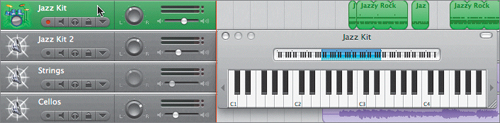
Select Jazz Kit from the list.
Press Cmd-I to close the Track Info pane.
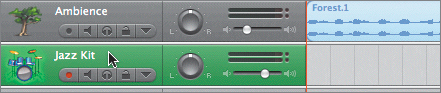
The onscreen keyboard name changes to Jazz Kit, and the new track at the bottom of the Timeline changes to Jazz Kit.
Click the octave change arrows on the onscreen keyboard, or change the range in the keyboard overview until you see the key labeled C5.
Click the C5 key to play the wind chime sample on the keyboard.
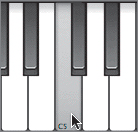
C5 is the note that triggers the wind chime sound.
Note
C5 will trigger the wind chime sound on any of the Software Instrument drum kits. The sound will vary slightly between kits, just as it will for any drum sound.
Next, to record the wind chime sound, you need to move the playhead to the position on the Timeline where you want to start recording. This is not always where you want the first recorded note to appear in the Timeline.
Move the playhead to the beginning of the 11th measure.
This is where the chime waveform in the Chime and Timpani track starts.
Press the left arrow twice to move the playhead to the beginning of the 9th measure in the Beat Ruler. Check your playhead position in the time display.
Why the 9th measure if we actually want the wind chime to start later in the song? Because the final recorded region will start whenever you click the first note. If you back your playhead up a few measures and then click Record, it’s like giving yourself time to count in and prepare—one, two, three, go. If you click Record exactly where you need to record the first note, you start on go! The finished recorded region will resize to start with the first played note event, regardless of the playhead position when you started recording.
It’s always a good idea to start your recording a measure or two before the point at which you actually need to record a part. That gives you a chance to follow along with the music and get into the groove of the song before you have to perform.
Click the C5 note again to practice clicking and holding the wind chime sound.
Practice is always a good idea, even if it is only a wind chime. Also, to avoid confusion, you should also mute the Chime and Timpani track so you won’t hear the existing chime while you’re recording.
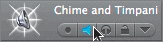
In the Chime and Timpani track, click the Mute button.
The regions within the muted track turn light gray, indicating that they have been muted.

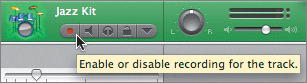
Select the Jazz Kit track, if it is not already selected.
Note
Before you can actually record, make sure the Record Enable button is on (red). Selecting the track automatically turns on Record Enable. The Record Enable button doesn’t start recording, it only enables a track for the possibility of recording. To actually record to a track, you need to click the Record button in the transport controls.
Tip
Move the onscreen keyboard so it is above the track you want to record. This way, you can see the keyboard, the new track, and the time display without having to look away from what you’re doing.
Understand the part you’re about to record. Your goal is to record a new wind chime sound that starts around the beginning of the 11th measure and stops when the piano part starts again in the 13th measure. Watch the time display for your cue, and when you get to the 11th measure, click the C5 note. Release the note when you get to the beginning of the 13th measure.
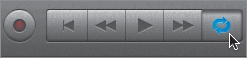
The Record button is the red button at the left end of the transport controls.
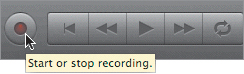
Click the Record button to start recording.
Select and hold the C5 note at the beginning of the 11th measure.
Release the mouse to stop the note when you reach the beginning of the 13th measure.
Press the spacebar to stop recording and playback.
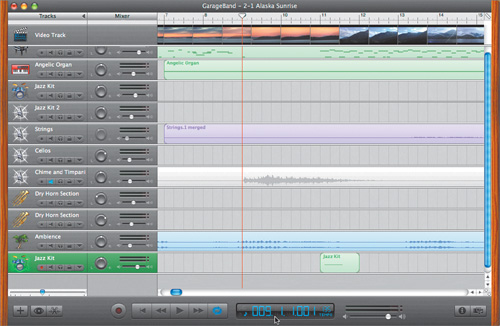
Your finished recording should look something like the following picture:

Don’t let the look of the recorded region fool you. The note, albeit only a single bar in the Software Instrument region, includes the entire performance.
Fortunately, GarageBand—like most software—has an Undo feature. Undo allows you to move back one step in your project to the way it was before the last thing you did.
In this case, we recorded a part. Undo will reset the project to the way it was before that recording. Not that there is anything wrong with your recording. This is just a good time to show you the Undo feature.
If you undo a recording immediately, before you save the song file, you delete the recording from memory. If you keep a recorded region in the Timeline, it can be saved with your project file data and remains part of the project.
There are two ways to undo the last step:
Since you will be using the Undo feature frequently throughout your recording career, Cmd-Z is a good keyboard shortcut to memorize.
Press Cmd-Z to undo the last recording.
Move your playhead back to the beginning of the 9th measure.
Repeat steps 13 through 16 from the previous exercise to rerecord the wind chime part. Make sure the Jazz Kit track is selected before you click the Record button.
Listen to the song with your new recording. If you’re satisfied with your recording, move on to the next task. If you want to try again, press Cmd-Z to undo and repeat the process to record again.
Press Cmd-K, or click the Close button, to close the onscreen keyboard.
Now that you have successfully recorded a Software Instrument region, it’s a good idea to save the changes you’ve made to the song.
You can also Save As to save a new version of the song with a different name. Let’s try that for this exercise.
To Save As, you can either press Shift-Cmd-S, or choose File > Save As.
Choose File > Save As.
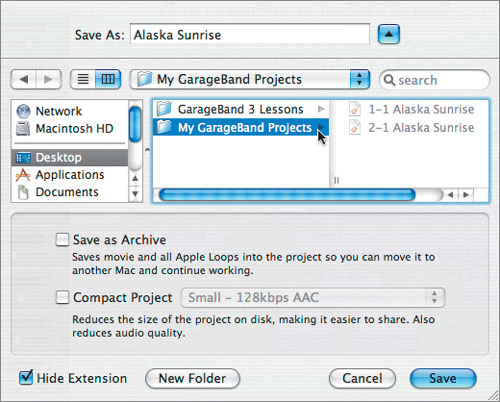
A Save As window appears so you can change the song name and location.
Change the name to Alaska Sunrise (delete the 2-1) in the Name field.
If you have been working with 1-1 Alaska Sunrise from Lesson 1, change the name to Alaska Sunrise also.
Click the blue downward-pointing arrow to the right of the Save As field for an expanded view of the Save As window (if it is not already expanded).

The window extends to show the expanded view. If you were already looking at the expanded view, clicking the upward-pointing arrow takes you back to the minimized view. Click the downward-pointing arrow again to see the full window.
Select the My GarageBand Projects folder on your computer’s Desktop as the destination for your files.
Note
Creating the My GarageBand Projects folder was part of the last exercise in Lesson 1. If you didn’t complete Lesson 1 and don’t have a My GarageBand Projects folder, click the Desktop in the sidebar, then click the New Folder button at the bottom of the Save As window and create the folder.
GarageBand offers several additional save options. The first save option is to Save as Archive, which saves all of the media for a project into the project, including the movie and all loops, so that you can move it to another Mac and continue working. Saving a file as an archive is only necessary at the end of a project, or if you’re moving it. So you can leave this option deselected until needed.
The Compact Project option, new in GarageBand 3, lets you reduce the size of a project to make it easy for sharing. You’ll work with this feature in Lesson 10. For now, leave this option deselected as well.
Make sure the Hide Extension option is selected. If it isn’t, select it now.

Now the .band extension will be hidden from your saved project.
Note
The .band extension is useful if you are copying your projects to a computer or server that may not have the application installed. The .band extension makes it easier for the new computer to recognize or maintain the GarageBand file format. However, since you will be using one computer for the lessons in this book, let’s leave the Hide Extension option selected to hide the extension on all the files you save as GarageBand projects. (Note that the default setting for GarageBand is to hide the .band extension.) Hiding the extension is not the same as deleting the extension. You never want to delete a file extension from a filename because then applications won’t recognize or open the file.
Click Save to save the song into the My GarageBand Projects folder.
You’ve finished recording and saving a new wind chime region. Next, you’ll need to decide if it is an improvement for the song. If so, you can delete the Chime region that was originally recorded in the Chime and Timpani track. To make the process easier, we’ll set up a cycle region in the Timeline.
A cycle region is a specific portion of the Timeline that you want to repeat (cycle) over and over. Cycle regions are very useful for tasks such as auditioning, or evaluating parts so you don’t have to keep stopping and resetting the playhead every time the song ends.
In the transport controls, click the Cycle button.
The Beat Ruler extends to reveal the Cycle Region Ruler.

To select a specific part of the Timeline to cycle, click and drag in the Cycle Region Ruler below the Beat Ruler. The cycle region appears as a yellow bar. You can move a cycle region by clicking in the middle of the yellow bar and dragging forward or backward in the Cycle Region Ruler. You can extend or shorten the cycle region by dragging the left or right edge of the yellow bar.
Press the spacebar to begin playback of the cycle region.
Notice that only the (yellow) cycle region plays and repeats (cycles).
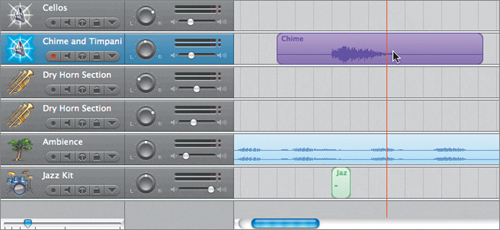
Now let’s create a new cycle region. First, let’s zoom in to the Timeline for a clear view of the 9th through the 14th measures and the chime regions. This is the area of the Timeline where you’ll create the cycle region.
Move the playhead to the beginning of the 9th measure (bar 9).
Press Ctrl-right arrow to zoom in until you clearly see the 9th through the 14th measures in the middle of the Beat Ruler.
Click and hold the cycle area below the Beat Ruler at the beginning of the 9th measure. Don’t release the mouse.
This is two measures before the break in the piano part of the song.
While holding down the mouse button, drag through the Cycle Region Ruler to the 14th measure. Release the mouse.
A new yellow cycle region appears from the 9th to the 14th measures.
You can only have one cycle region at at time. By creating a new cycle region later in the Timeline, the original cycle region at the beginning of the Timeline disappears.

Play the new cycle region.
The playhead will play only the portion of the song marked by the yellow cycle region. The cycle region is played over and over until you stop playback.
Stop playback.
Click the Mute button on the Jazz Kit track with your recording, and unmute the Chime and Timpani track.
Play the cycle region, and listen to the original chime part with the song.
What do you think of the first recording now? It’s a nice chime recording, but it feels more like rain than a delicate chime, and I still think it’s too intense for the beginning of this song.
Unmute the Jazz Kit track, and mute the Chime and Timpani track.
Repeat the muting and unmuting steps until you have successfully evaluated both chime recordings. Then pause playback. What do you think of the new chime recording?
Click the Cycle button to close the cycle region, then turn off all Mute buttons.
Now that you have recorded a new wind chime region and evaluated it against the original recording, you no longer need the original Chime region.
There are two ways to delete a selected region from the Timeline:
Press the Delete key.
Choose Edit > Delete.
Zoom out until you can see the entire Chime region in the Chime and Timpani track (if it is not already fully in view).
In the Chime and Timpani track, click the Chime region to select it.
Note
When you press Delete, all selected regions will be deleted. Make sure you have selected only the regions you want to delete. If you selected the Chime and Timpani track, all regions within that track become selected as well. Click the empty track area to the left of the Chime region to deselect all regions in the track. Then click only the Chime region to select it.
Press Delete on your keyboard to delete the selected region.
Press Z or the Home key to move the playhead to the beginning of the song.
Play your new and improved version of the finished song.
Nice job on the wind chime recording! It sounds a lot better than the original wind chime I recorded from my synthesizer.
There’s one last thing to do to this song before we move on to another lesson. Let’s change the icon for the Jazz Kit track to reflect the instrument you actually recorded in that track. The track icon is the picture of an instrument on the left side of the track header.
To change a track’s icon, you first need to open the Track Info pane. An easy way to open the Track Info pane is to double-click a track’s header.
Double-click the track header for the Jazz Kit track that contains your chime recording.
The Track Info pane for the Jazz Kit track opens.
In the Track Info pane, click the track icon to reveal the Track Icon menu.
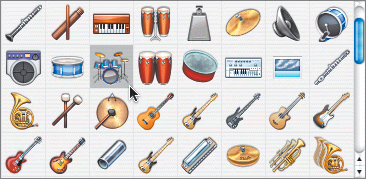
Drag the vertical scroller to locate the Wind Chime icon.
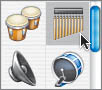
The Wind Chime icon is located in the upper-right corner of the Track Icon menu.
Click the Wind Chime icon to select it for the track. Close the Track Info pane.
Now let’s change the name of the track itself from Jazz Kit to Wind Chime.
Click the Jazz Kit track header to select the entire track, if it is not already selected.
On the Jazz Kit track header, click the track name to select it. Hold the pointer over the name momentarily.
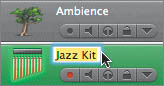
When the name appears highlighted, you can type a new name in the name field.
Type Wind Chime in the track’s name field, then press Return.
The track has now been renamed.
Press Cmd-I to hide the Track Info pane.
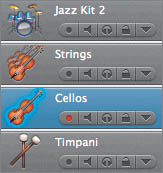
Now it’s your turn to change another track name and several track icons. In this exercise, you’ll change the name of the Chime and Timpani track to Timpani. Then change the track icons for the Timpani, Jazz Kit 2, Strings, and Cellos tracks. Feel free to try these changes on your own. If you need assistance, refer to the following steps. Keep in mind a track’s icon doesn’t have to exactly match the instrument in the track, it’s just something to help you visually recognize the instrument type in a track.
Click and pause over the Chime and Timpani track name. Then change the track’s name to Timpani.
Double-click the Timpani track header to see it in the Track Info pane, then open the Track Icon menu and select the icon that looks like two padded mallets (drum sticks) used to play timpani drums.
In the Timeline, select the Jazz Kit 2 track header and select a new icon from the Track Icon menu.
Repeat step 3 for the Strings and Cellos tracks.
You’re now finished with the song Alaska Sunrise. Let’s save the project one last time.
That’s it. You’re ready to move on to the next lesson where you’ll work extensively with Software Instruments to create the theme song to use for the opening of a show or podcast.