 CHAPTER 1
BASIC SKETCHING
Great Dane
In steps 1 and 2, use an HB pencil to block in the dog’s head. Notice the droopy lips and eyelids. Refine the shapes, and lightly shade with a 2B pencil to bring out the form and contours of the head in step 3. Minimal shading will give the coat a smooth appearance.
Add darker values in the center of the ear and around the muzzle and eyes to create form. Darken the outlines around the head.
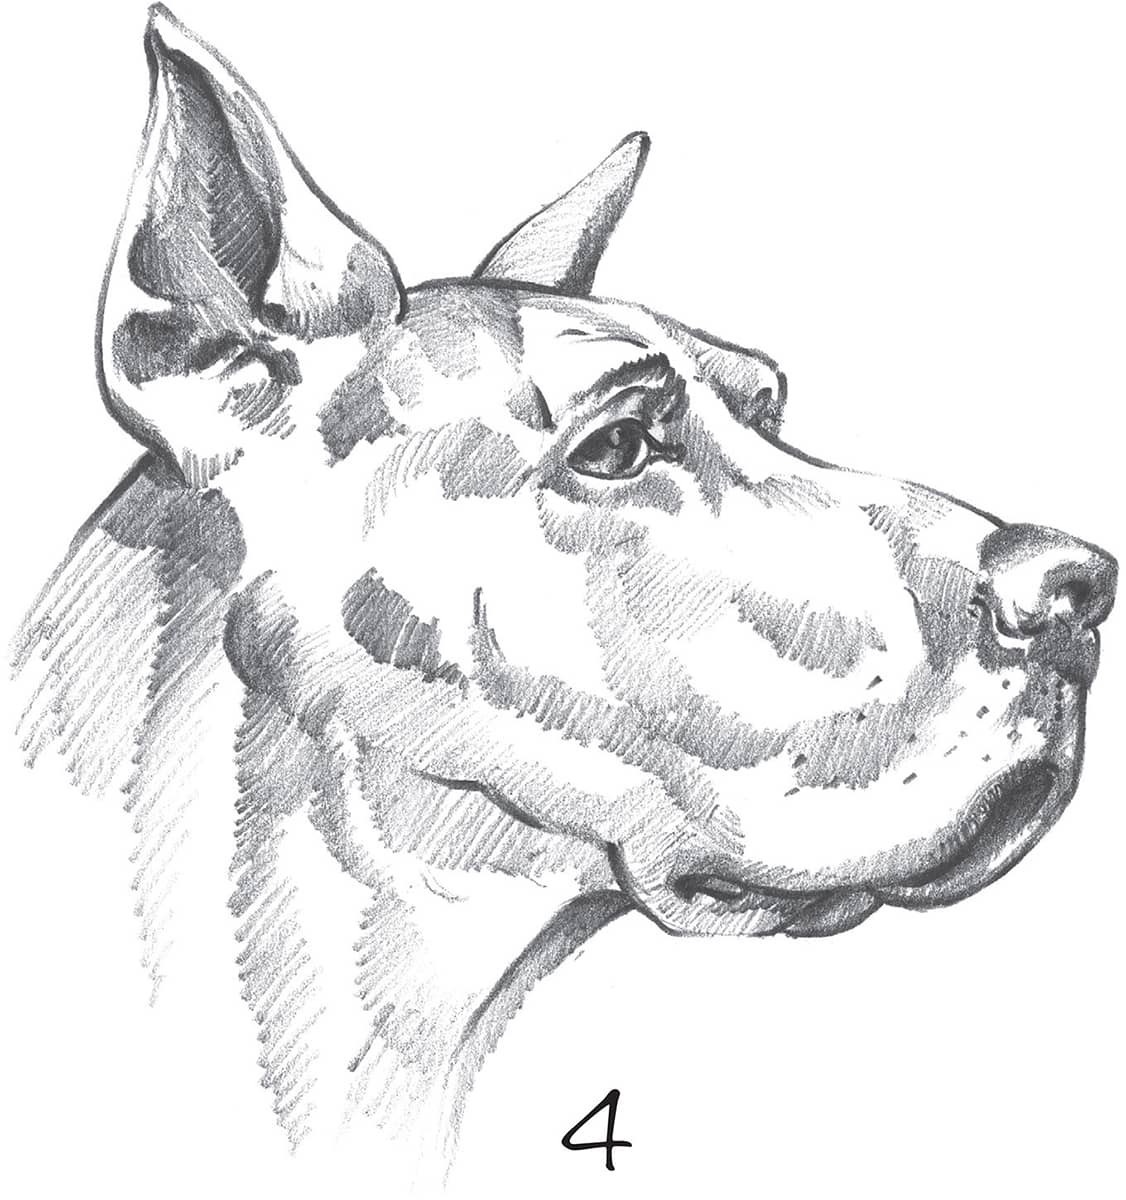
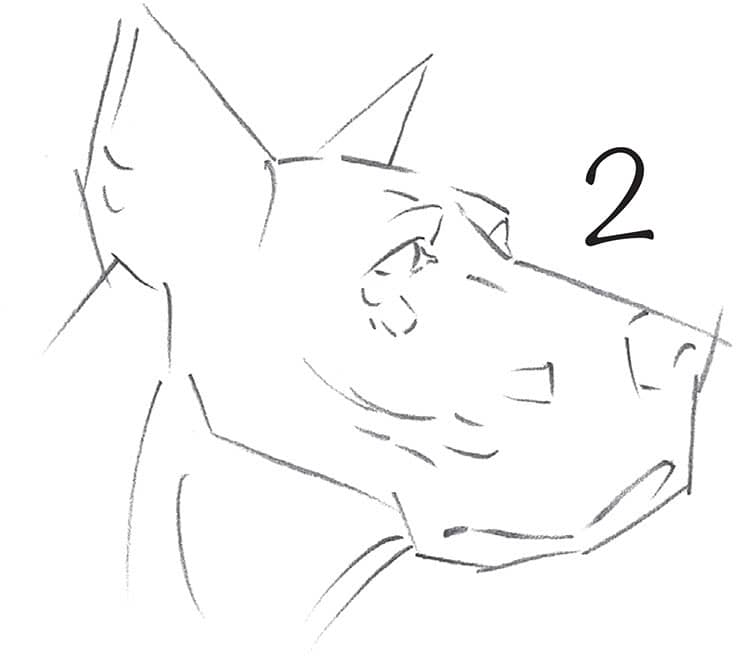
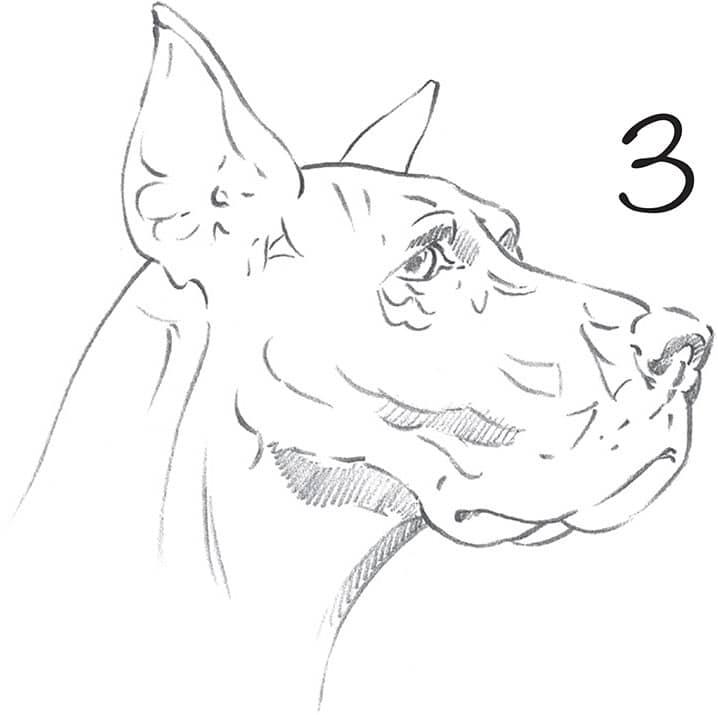
Doberman Pinscher
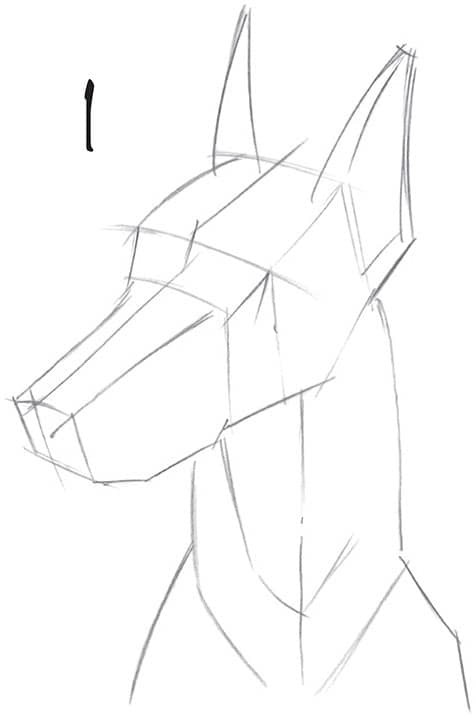
1 With a sharp HB pencil, block in the boxy shape of the head and shoulders with straight lines to establish dimension and form.
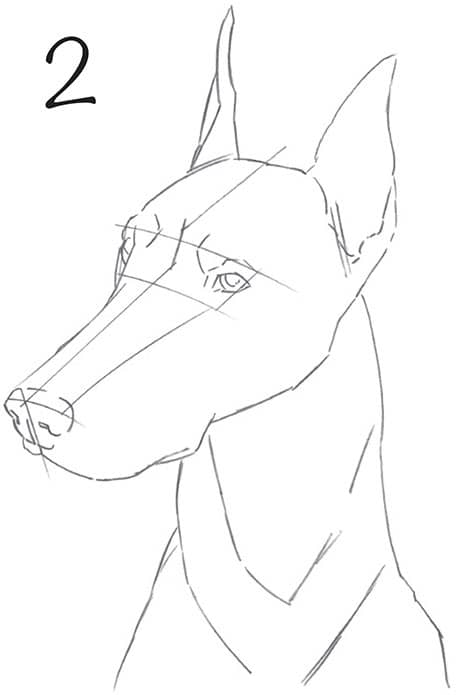
2 Refine the ears, head, and neck to give them a more contoured appearance. Then add the eyes and nose, following the facial guidelines. Refine the outline of the muzzle.
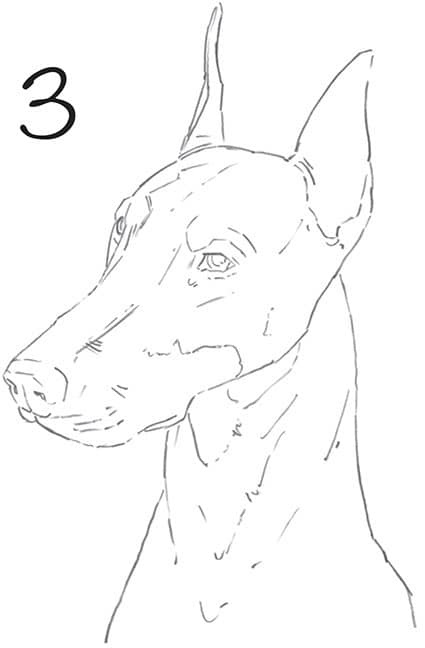
3 Erase any guidelines that are no longer needed. Draw light sketch lines to indicate the value changes in the coat.
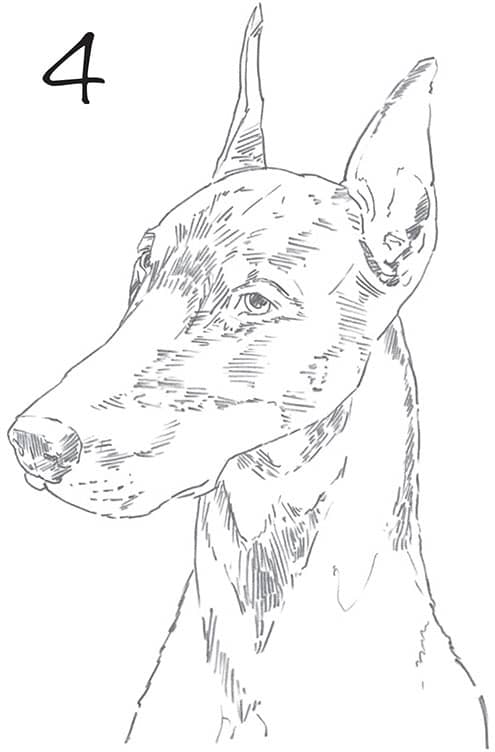
4 Use small, dark hatch marks to establish the coat. Fill in the darks of the eyes and eyebrows, and dot in a few light.
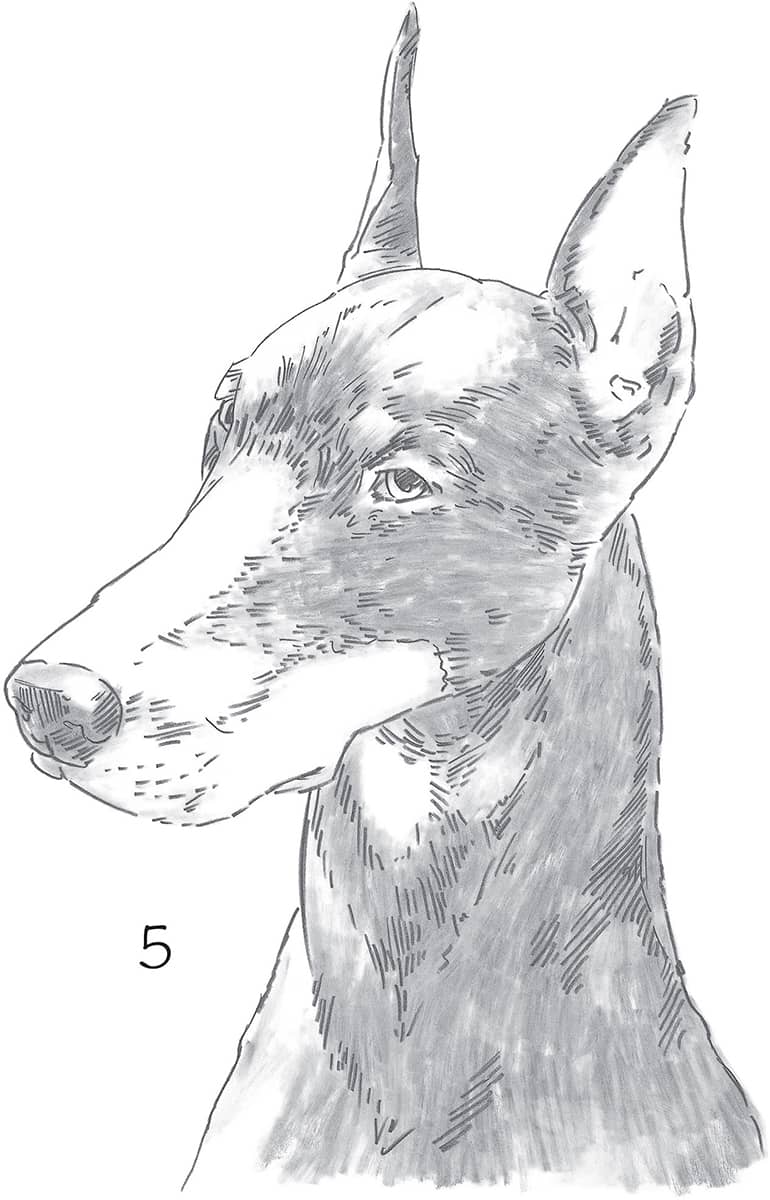
5 To add shading, create some graphite dust by rubbing the pencil over a sheet of fine sandpaper. Pick up the dust with a medium-sized blending stump and shade in the dark areas of the fur and nose. Blend to create soft gradations where the values meet.
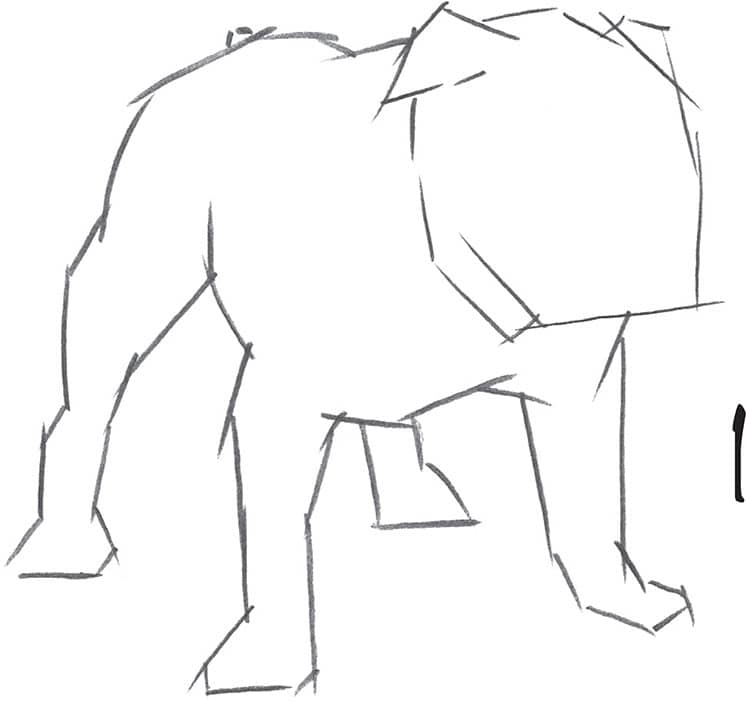
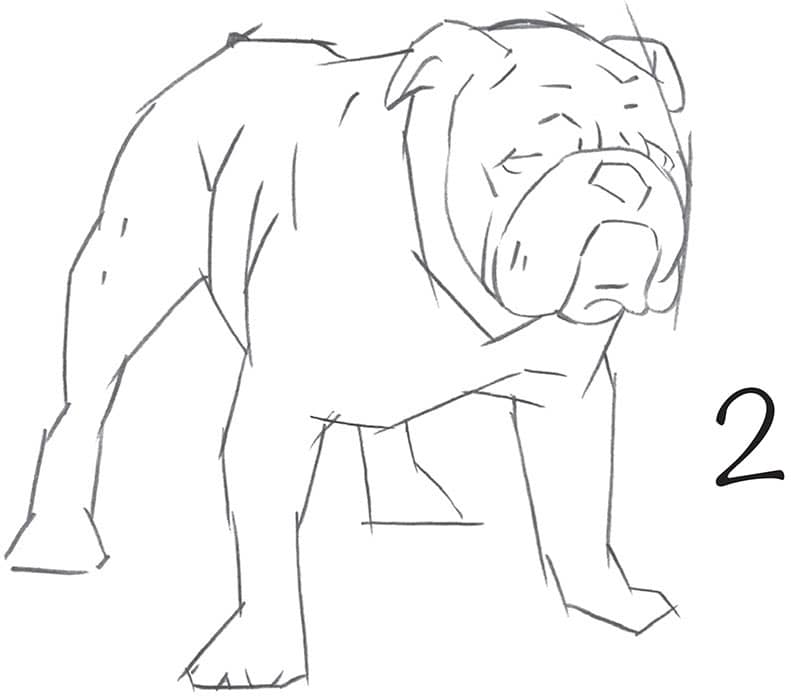
English Bulldog
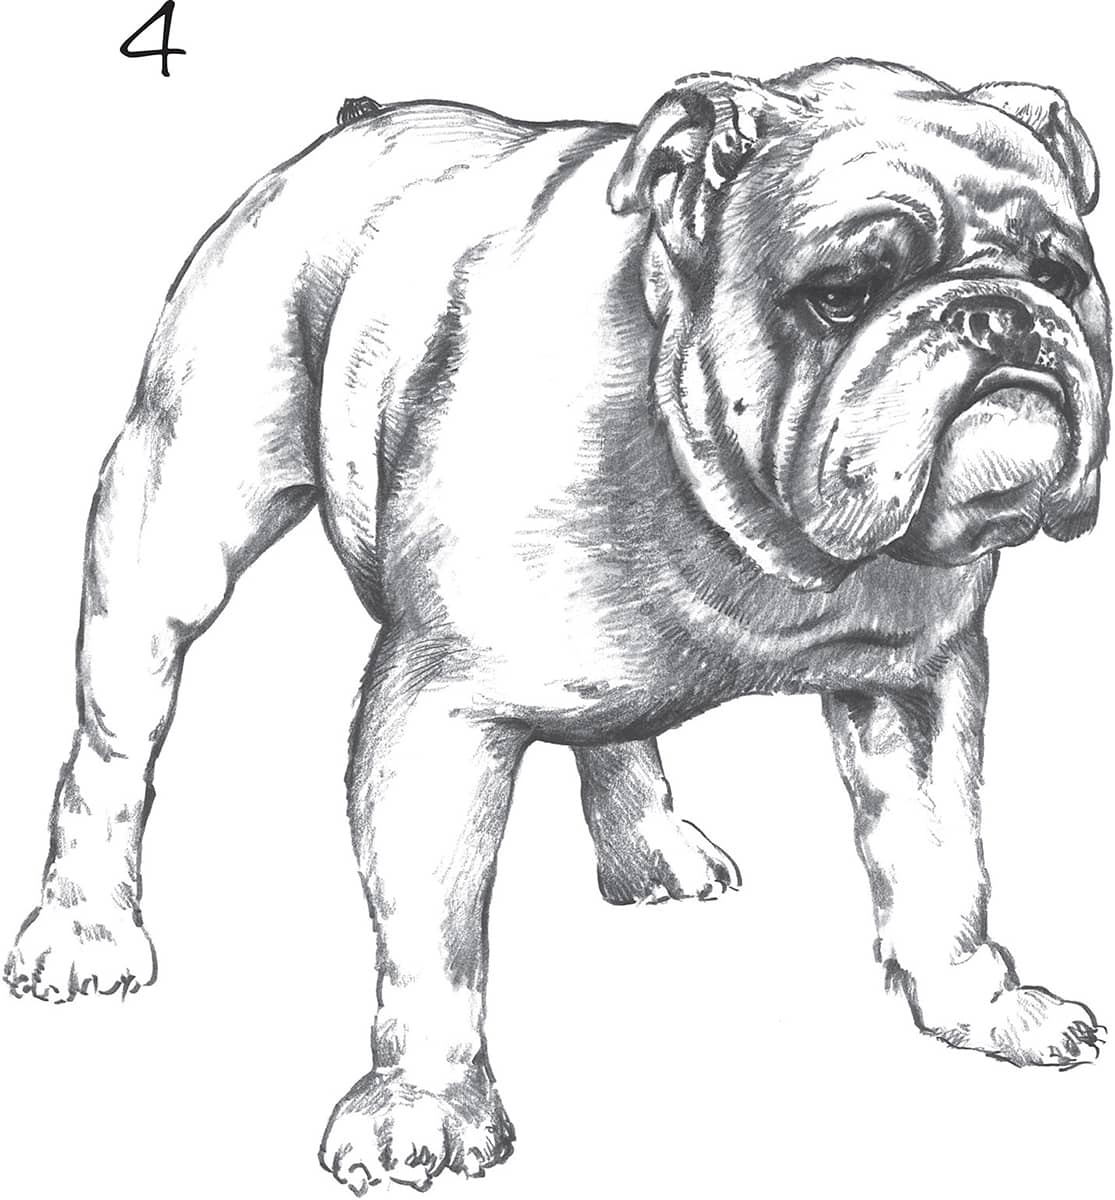
In steps 1 through 3, block in the outline with short, straight lines. Keep the legs short and bowed to give the dog its stocky appearance. As you sketch the features, study the low placement of the eyes, as well as how the nose is pushed into the face. Refine the details in Step 3.
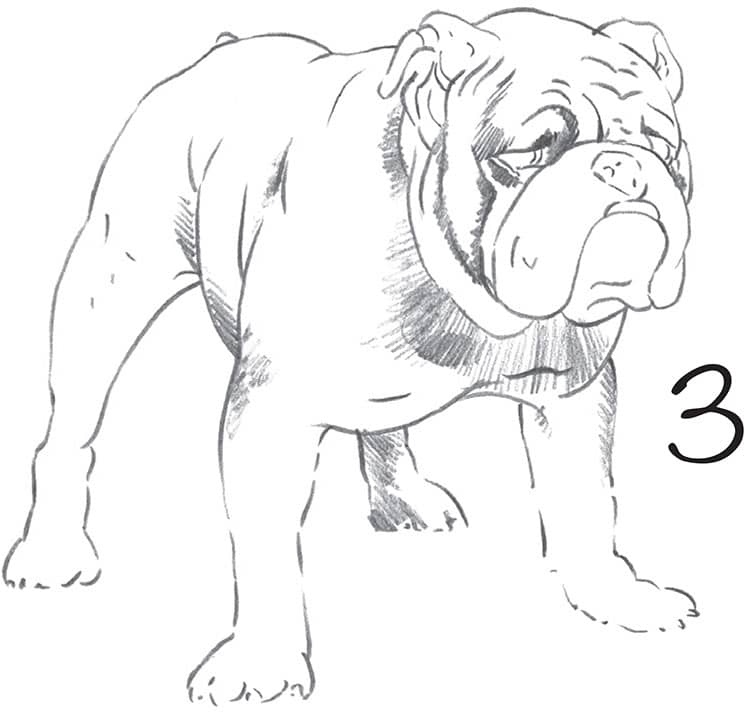
Begin shading with a sharp 2B pencil, developing the folds on the face and the contours and shadows along the body. Keep the pencil fairly sharp to make the folds distinct and the fur smooth. Use a sharp pencil to add details to the eyes.
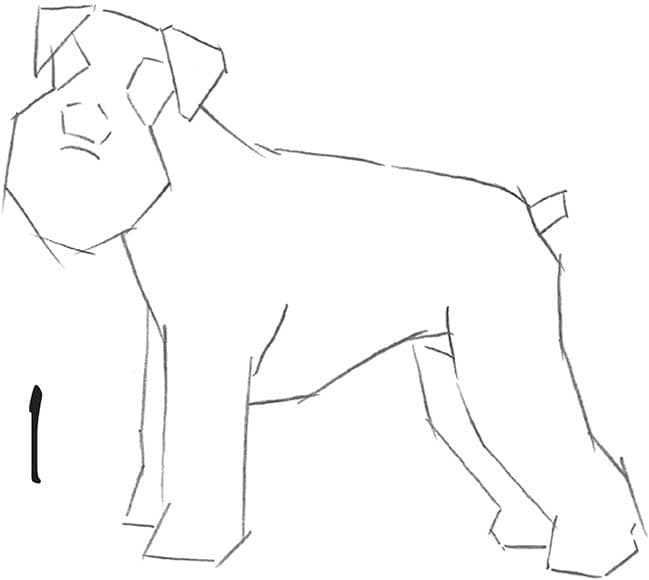
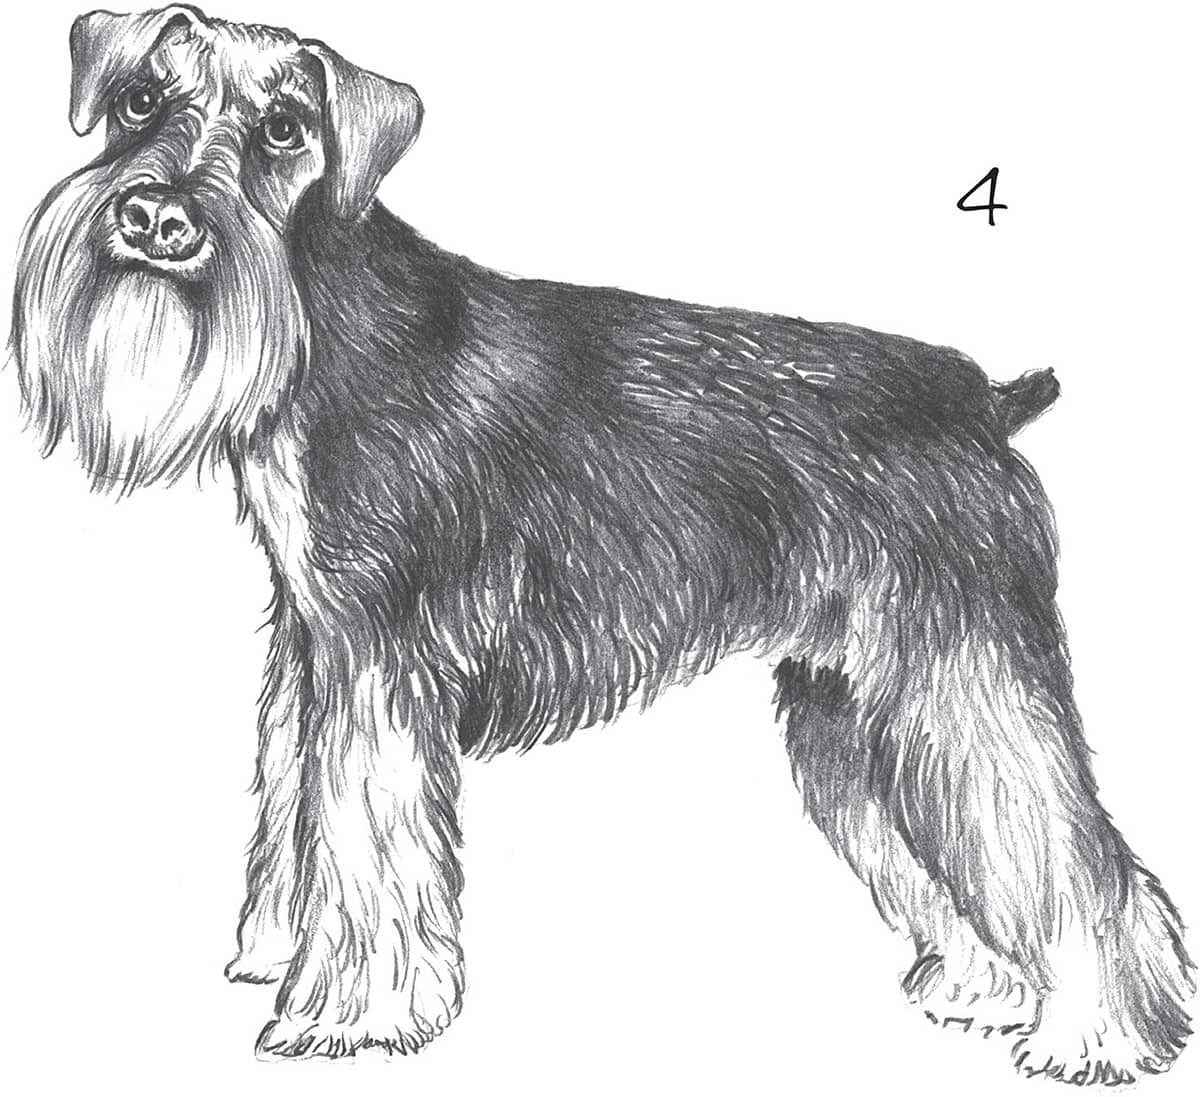
Miniature Schnauzer
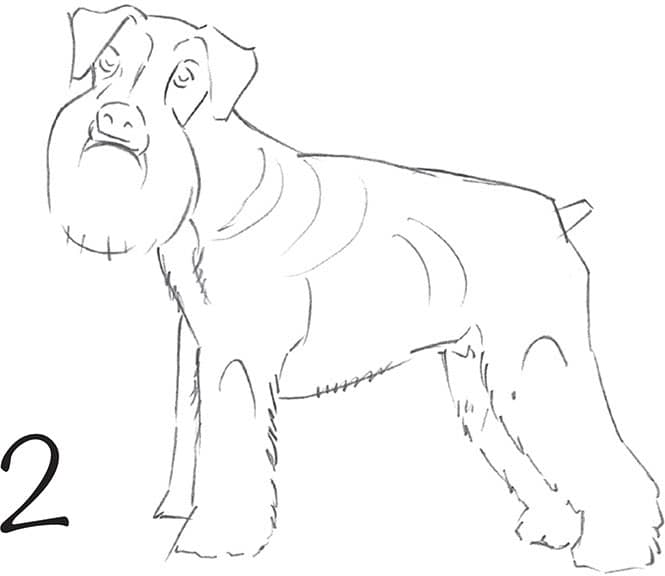
As you block in the body in step 1, make the face wider around the cheeks to accommodate the full beard. Add triangle shapes so the ears appear to flop forward. In step 2, place the wide-set eyes and broad nose, and suggest a furry outline.
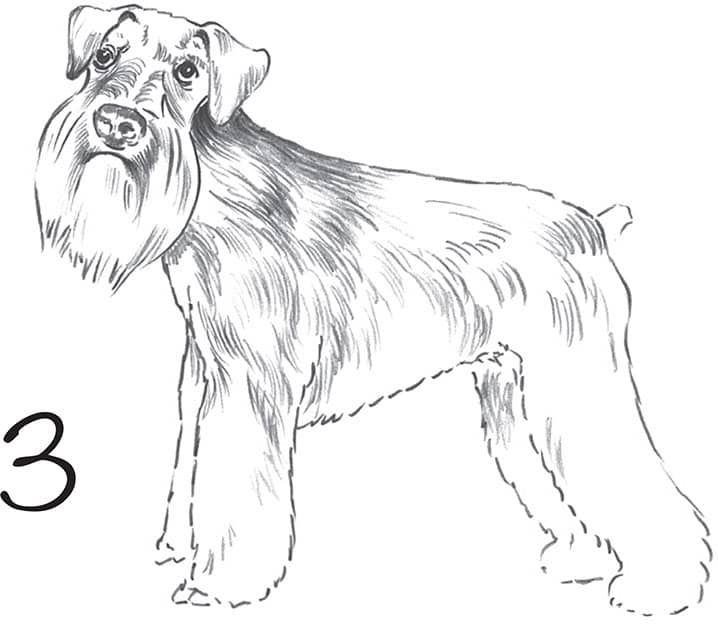
Slowly lay in the coat with quick strokes along the back in step 3. Make certain the hair closest to the face is darker, so the outline of the face is visible. Continue to shade as needed. Use a kneaded eraser to create highlights.
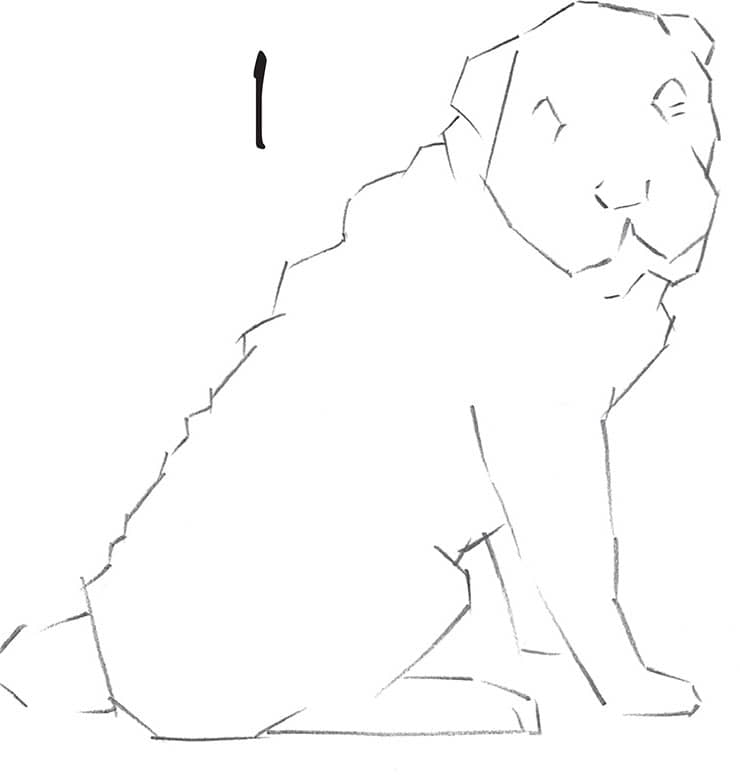
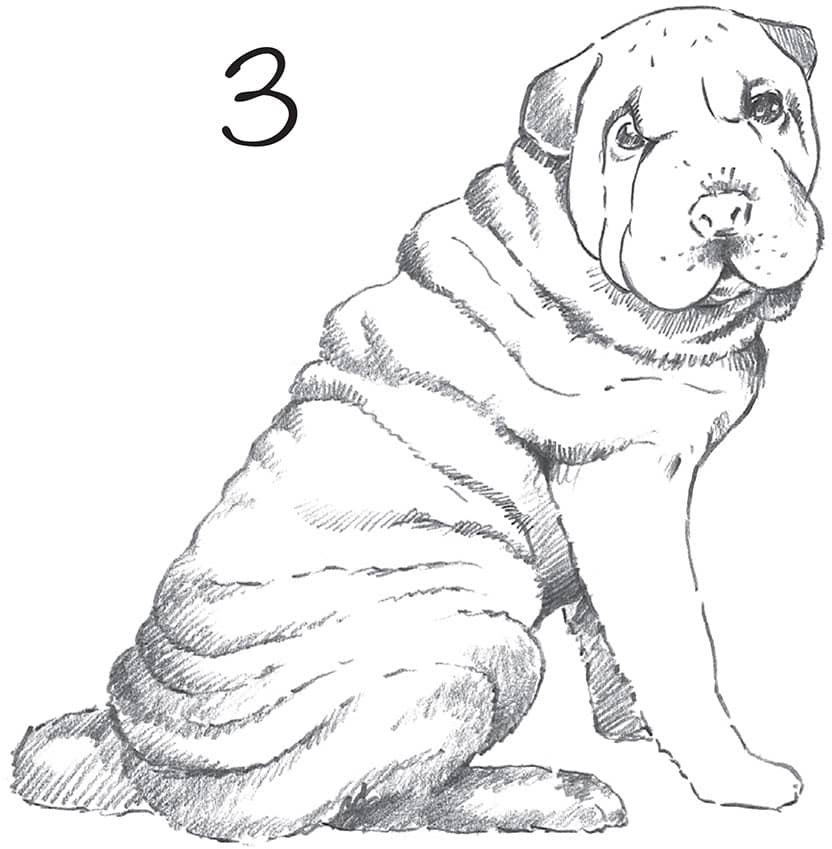
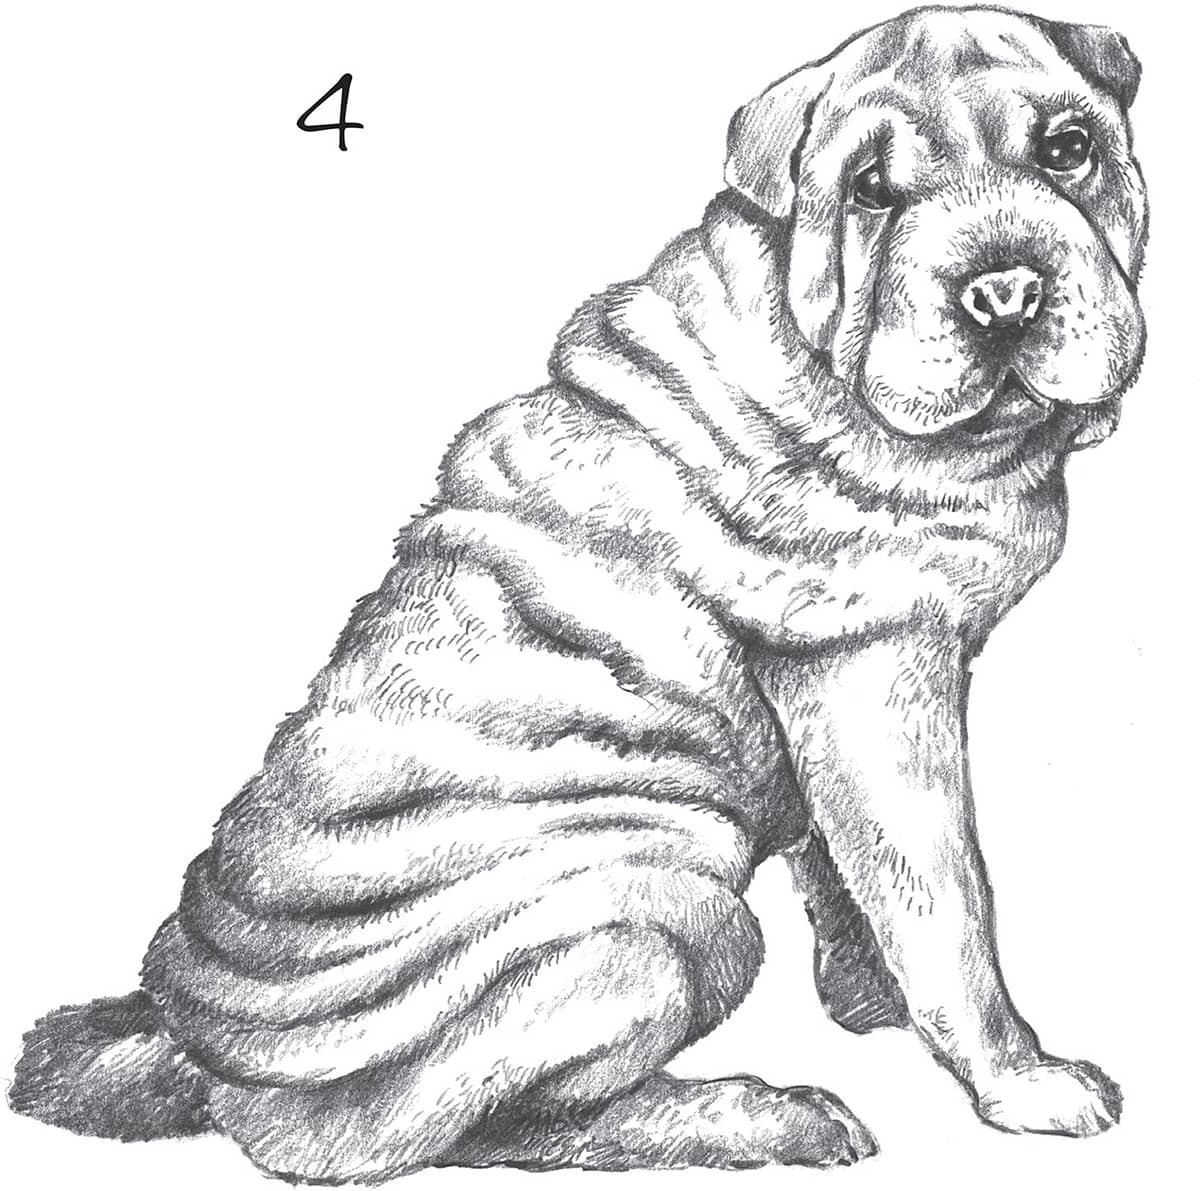
Shar-Pei Puppy
In step 1, use short strokes placed at wide angles to sketch the outline. To develop the folds in step 2, start by lightly shading inside the creases. Give equal attention to each fold so the dog appears realistic. Continue to develop the shading with short slash marks in step 3, keeping the values darker between the folds. Refine the details in Step 4.

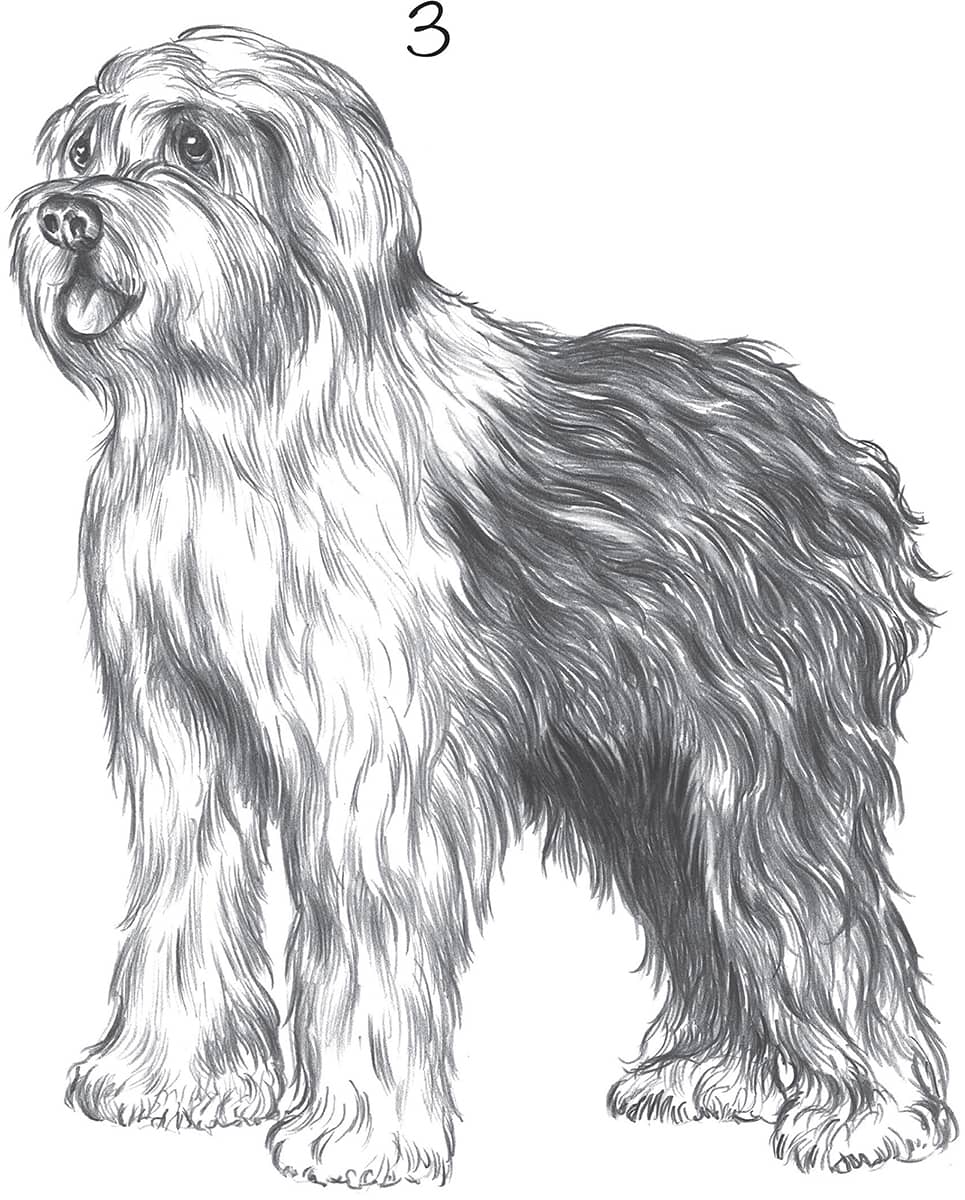
Old English Sheepdog

Lay down a basic outline in step 1, adding some suggestions of hair in step 2. Keep your lines loose and free. As you begin to develop the coat in Step 3, notice how the nose, tongue, and eyes differ in texture. Use a blunt-pointed pencil to lay in the hair, adding more shading layers to the back end of the body to indicate the darker color.
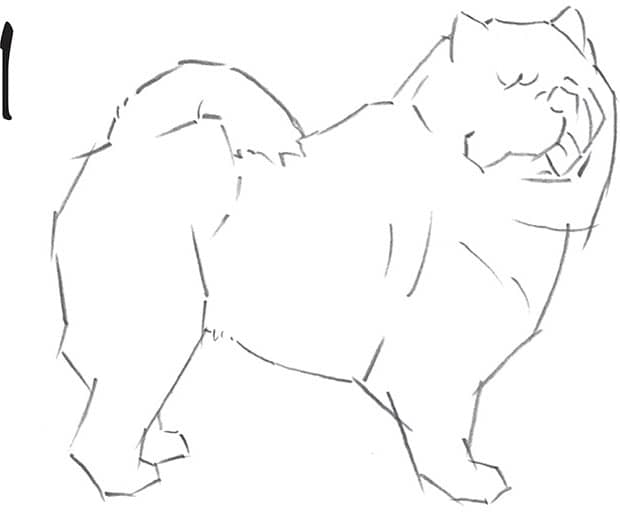
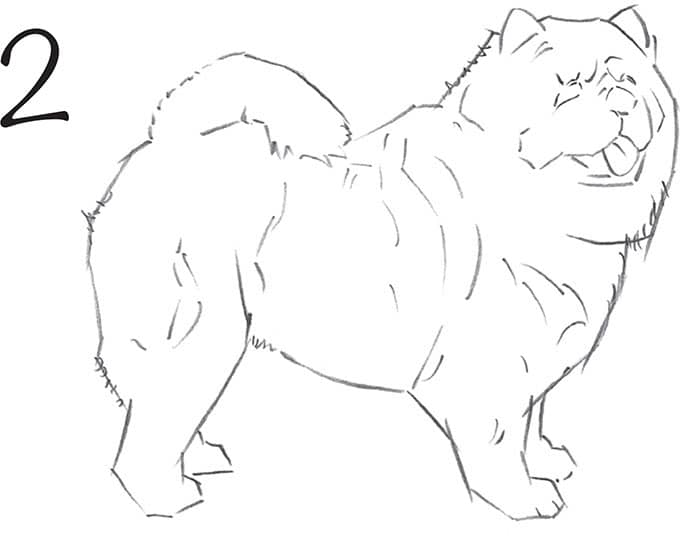
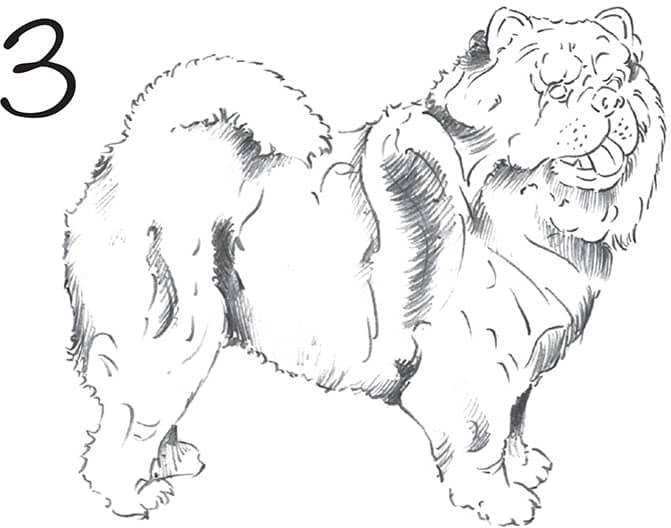
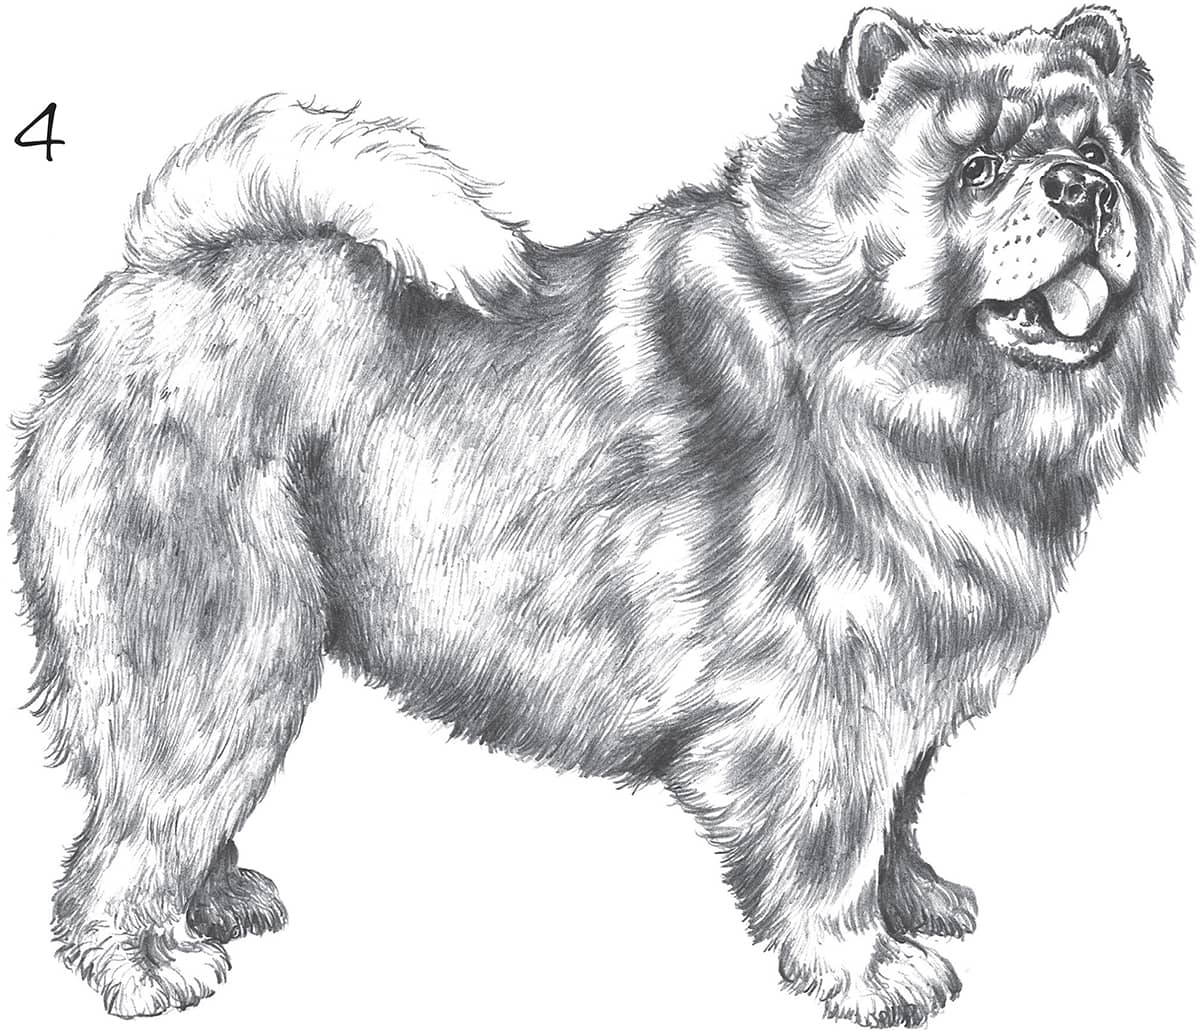
Chow Chow
In steps 1 and 2, sketch the outline and add the facial features. With a sharp pencil, begin shading the darkest areas in step 3. This fur texture shows many highlights, so the kneaded eraser will be useful for enhancing the drawing.
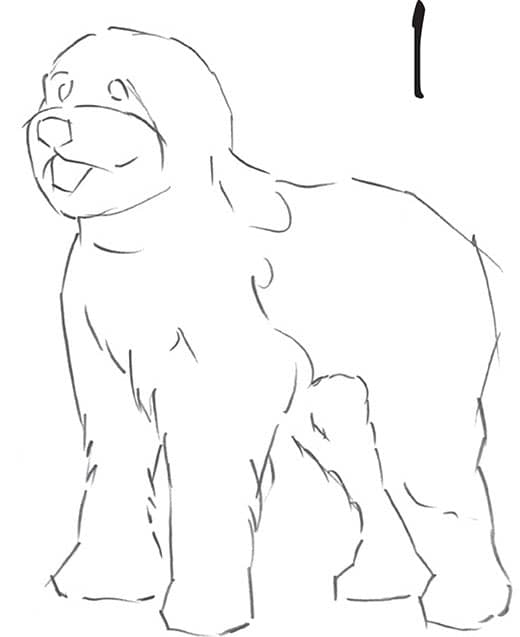
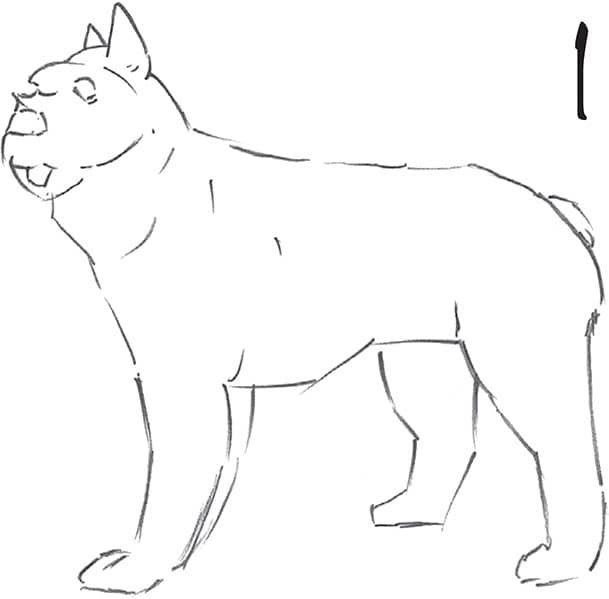
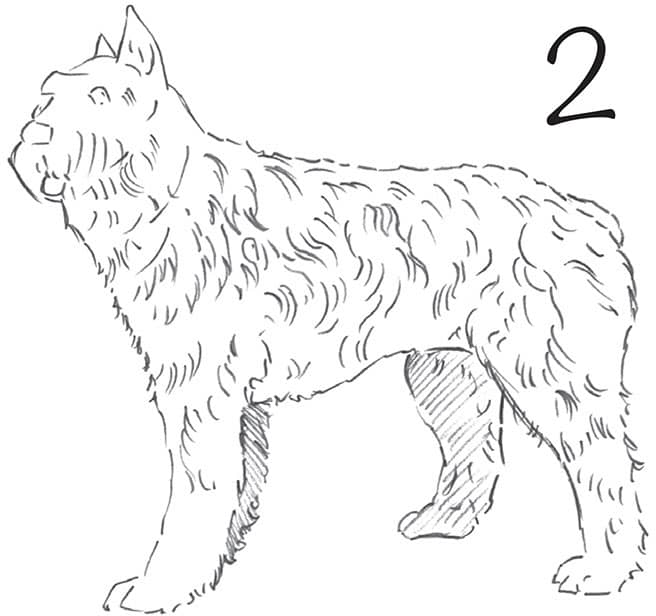
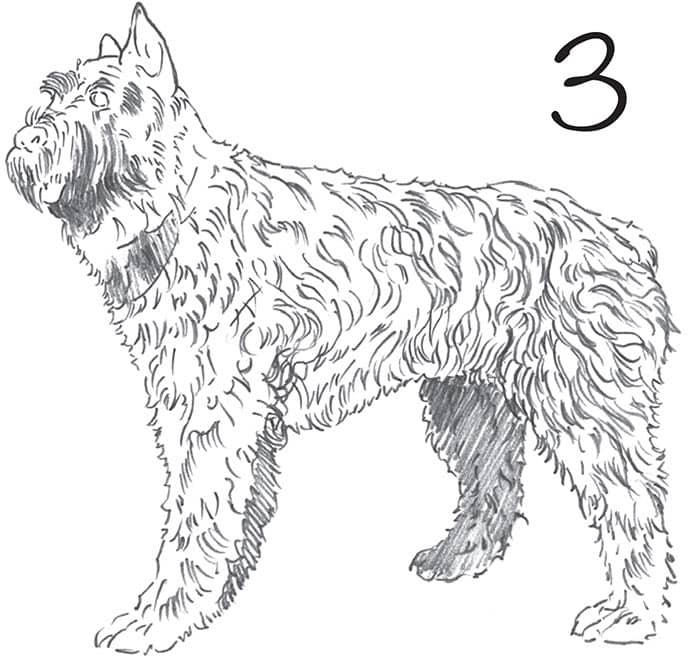
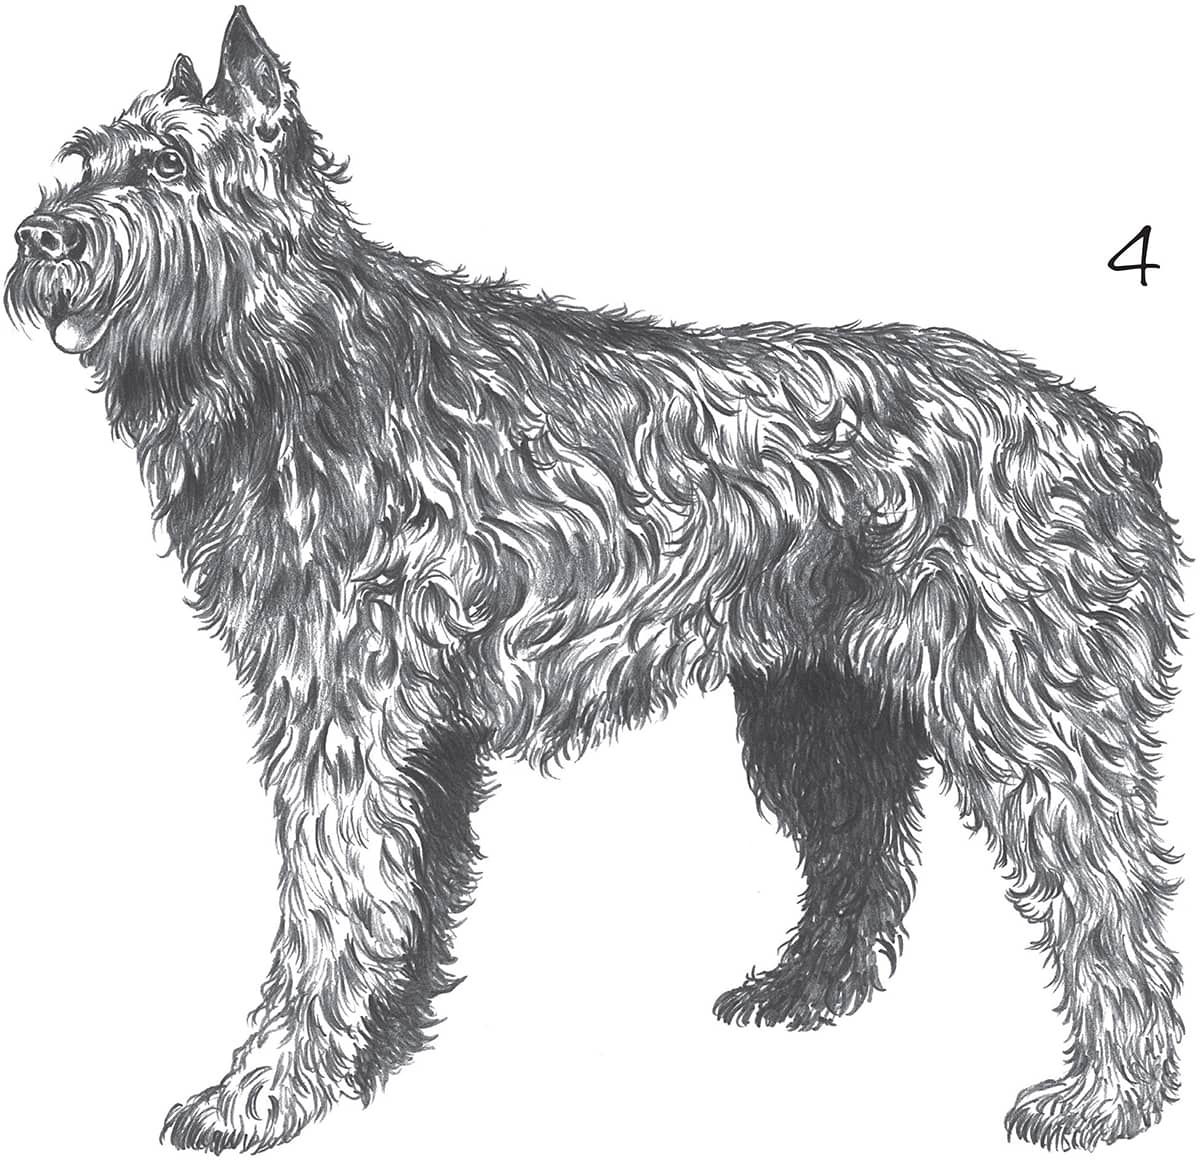
Bouvier des Flandres
In step 1, block in the outline of the dog’s body. Develop the thick, shaggy coat as shown in steps 2 and 3. Allow some of the paper to show through as highlights, or use a kneaded eraser to create them.
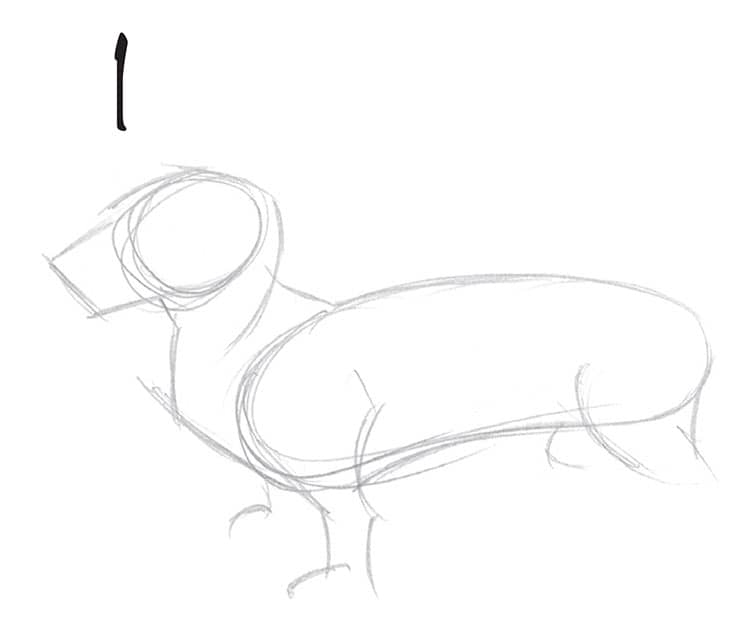
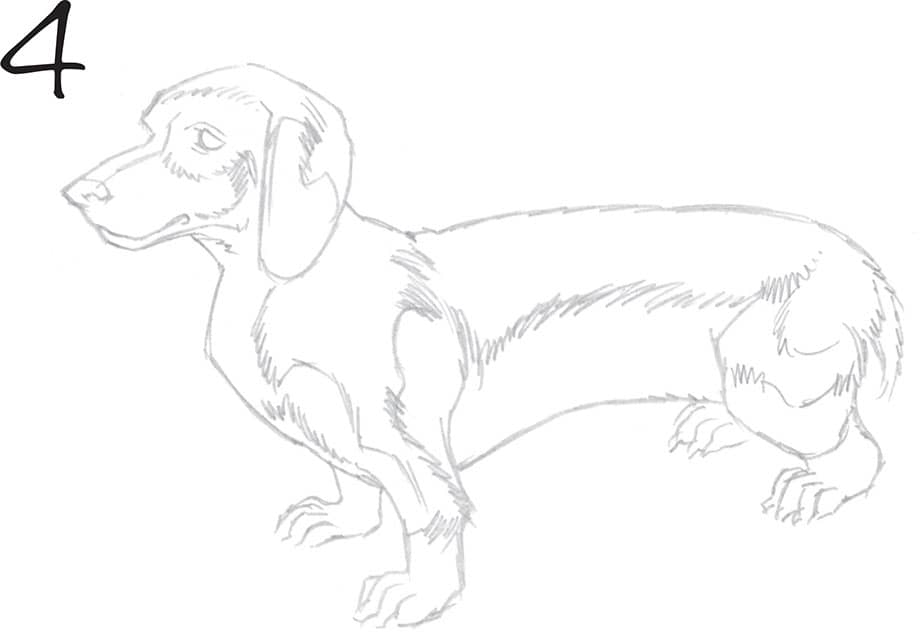
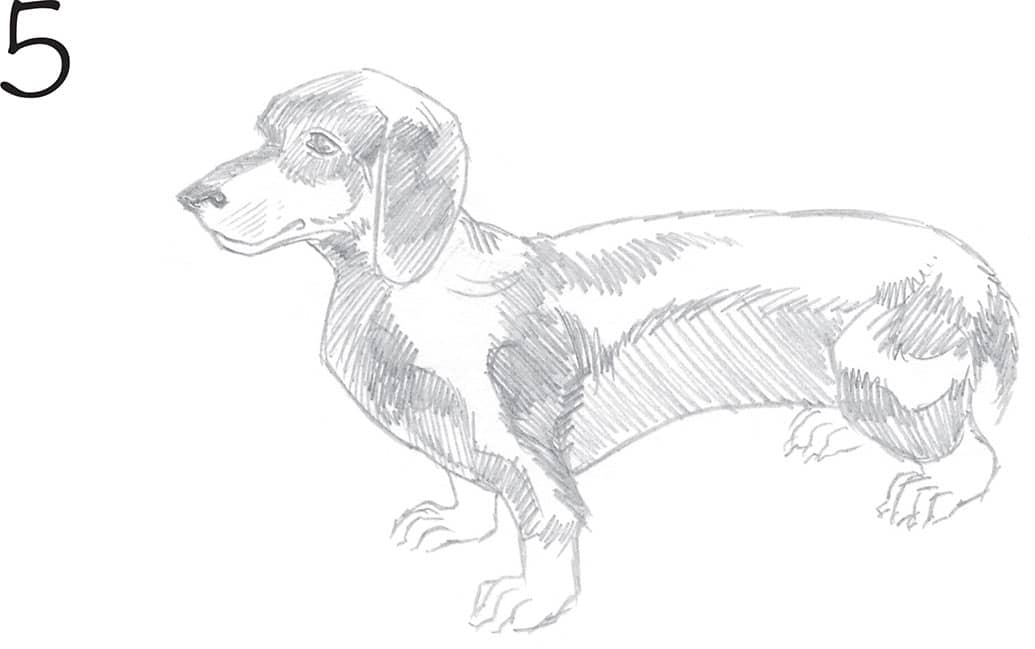
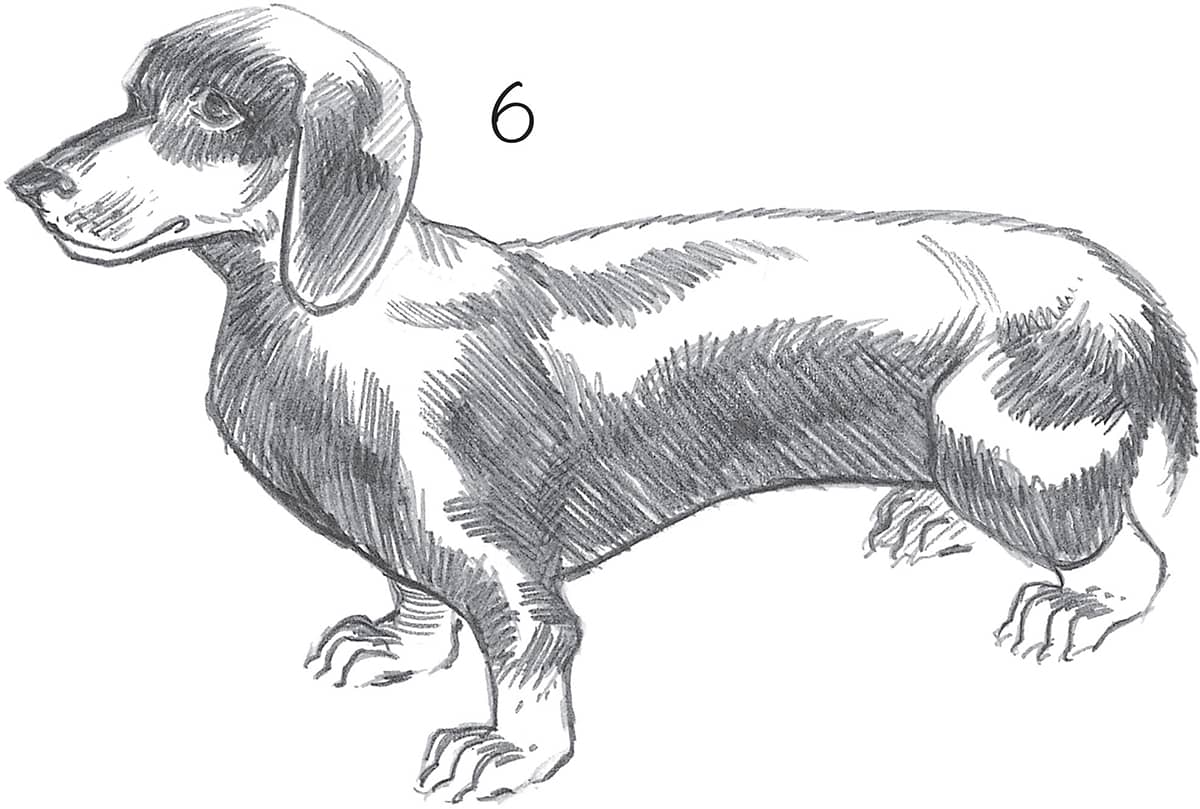
Dachshund
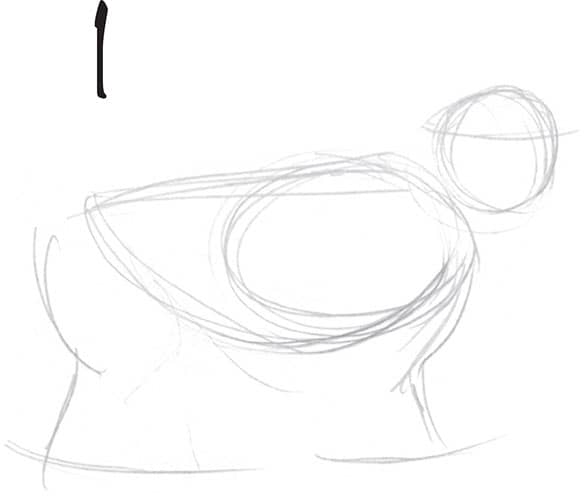
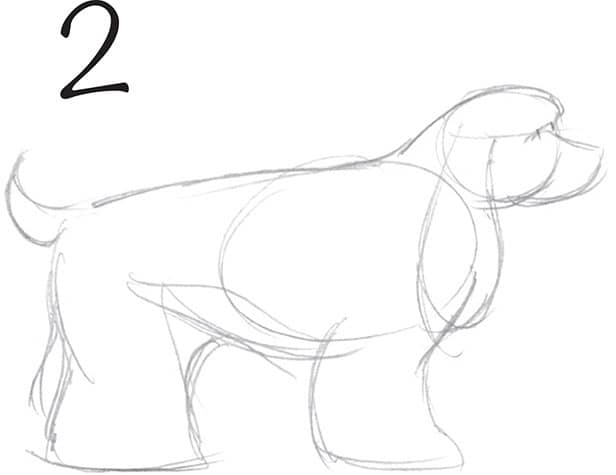
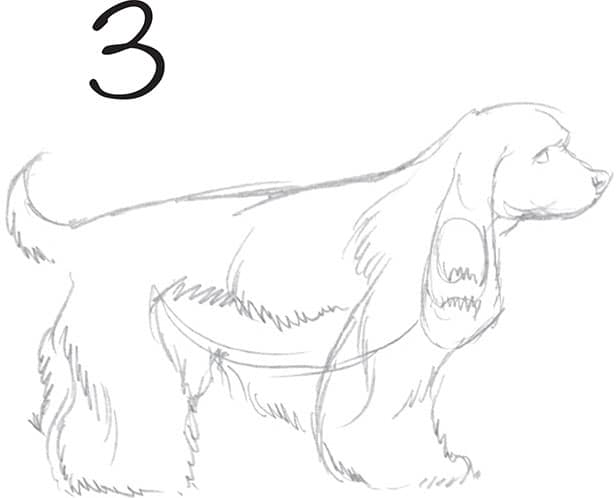
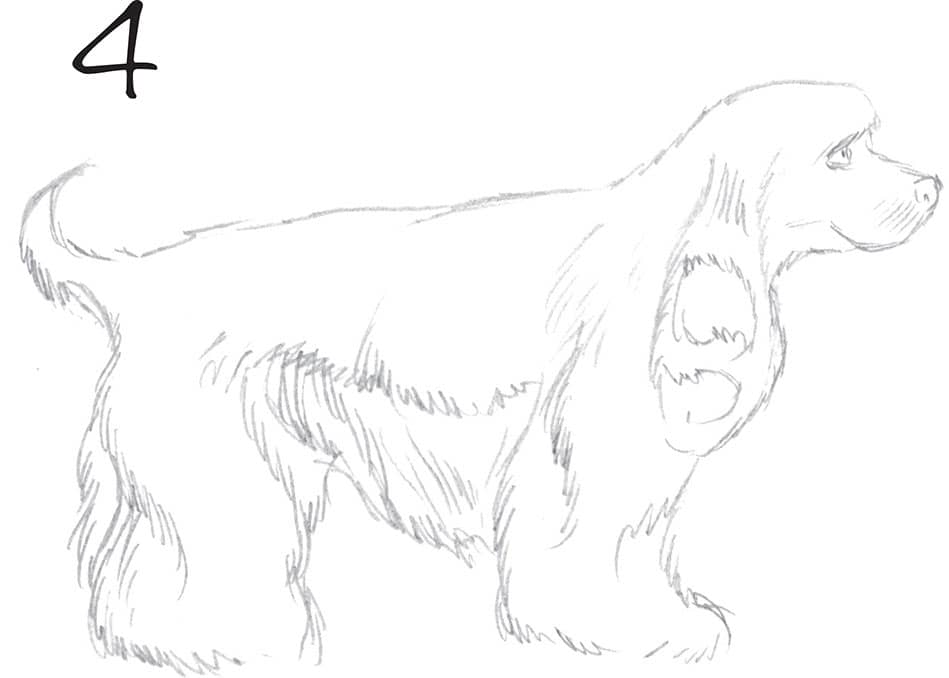
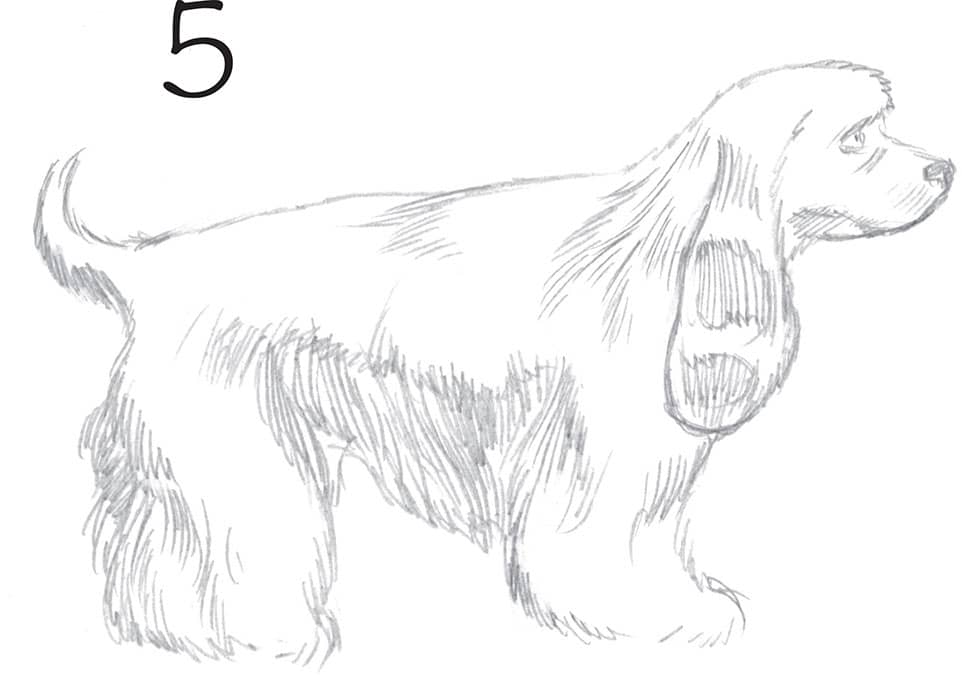
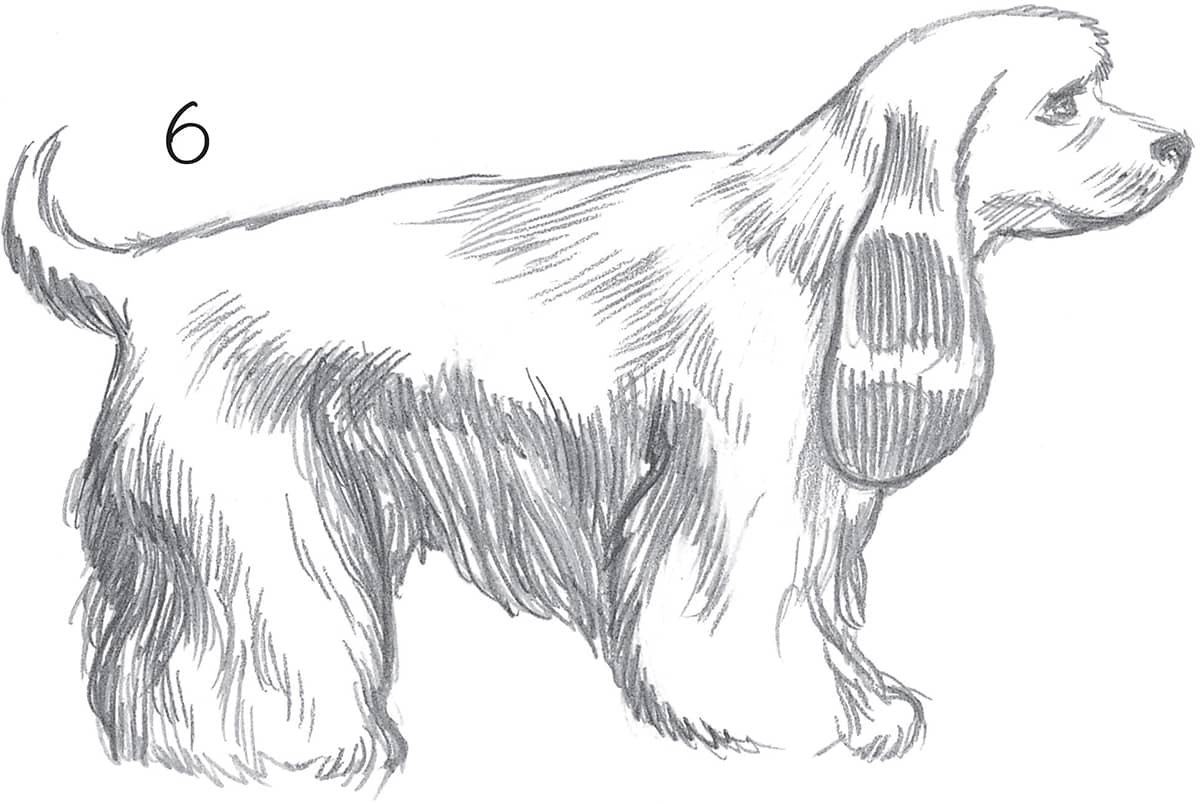
Following the step instructions on the previous pages, draw this dachshund and cocker spaniel.


Cocker Spaniel